Pale Leaves on Aloe Vera: Causes, Checks & Fixes
Quick answer
Pale leaves on Aloe vera look washed-out light green or yellow-green instead of the firm gray-green rosette this succulent is known for—usually from too little light, the low-light watering trap, sun bleach, or salt buildup. First step: decide whether the whole rosette is dull with a window lean or only the sun-facing side looks bleached, squeeze a leaf for mush vs firm, and adjust placement before you water or fertilize.
Pale Leaves on Aloe Vera: Causes, Checks & Fixes
This guide covers pale leaves on Aloe Vera. See also the general Pale Leaves guide, watering, and light pages for this plant.
Pale Leaves on Aloe Vera: Causes, Checks & Fixes
Quick answer
Pale leaves on Aloe Vera (Aloe vera) look washed-out, light green, or yellow-green across the rosette instead of the firm gray-green color healthy plants carry. For general chlorosis mechanics, see our pale leaves guide. On aloe, pallor usually means photosynthesis is falling behind while the gel-filled leaves still feel firm—not yet the soft yellow stage of rot.
First step: decide whether blades look uniformly dull with a window lean or bleached on the sun-facing side only, then squeeze a lower leaf and probe soil two inches down. Uniform washout with stretch toward glass → move to brighter light before you change water. One-sided bleach after a sudden sun move → filter or pull back from harsh direct rays. Firm pale leaves on wet soil in a dim room → stop watering—that is the low-light watering trap, not thirst.
Make one correction at a time and watch the next center leaf for proof. Old pale tissue rarely re-greens; a darker, tighter new leaf within two to four weeks means you fixed the right problem.
When to use this page vs other Aloe Vera guides
| Pattern | Read next |
|---|---|
| Washed-out light green across the rosette, weak gray tone | Pale leaves (this page) |
| Long stem, wide gaps between new leaf pairs, lean toward window | Leggy growth or not enough light |
| Fully yellow or mushy lower leaves on wet soil | Yellow leaves or overwatering |
| Green-vein yellowing on the newest center leaf only | Iron deficiency |
| Oldest lower blades fading uniformly while center stays dark | Nitrogen deficiency |
| Bleached tan patches on sun-facing leaf surfaces only | Sun scorch—see brown tips and light guide |
| Fine stippling with webbing on undersides | Spider mites |
What pale leaves look like on Aloe Vera
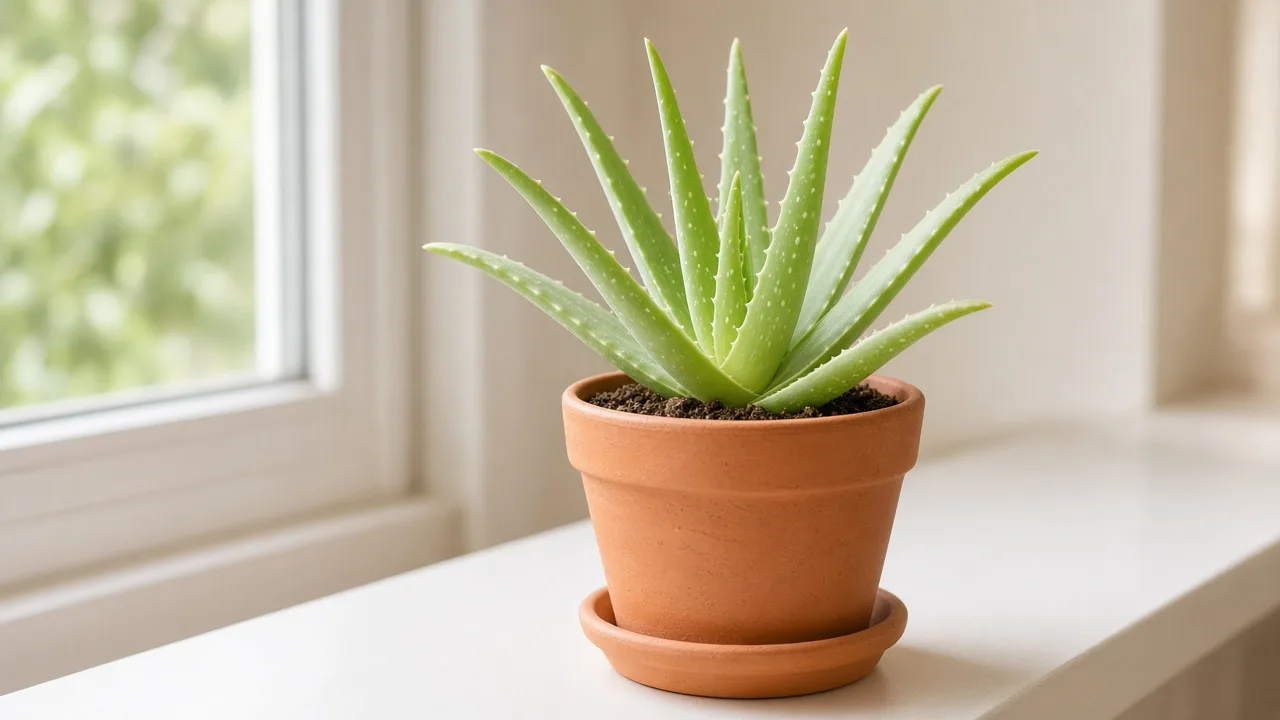
Healthy Aloe vera forms a compact rosette of thick, firm, gray-green leaves with a slight upward arch and serrated margins. Pale stress breaks that color before full yellowing or mush sets in.
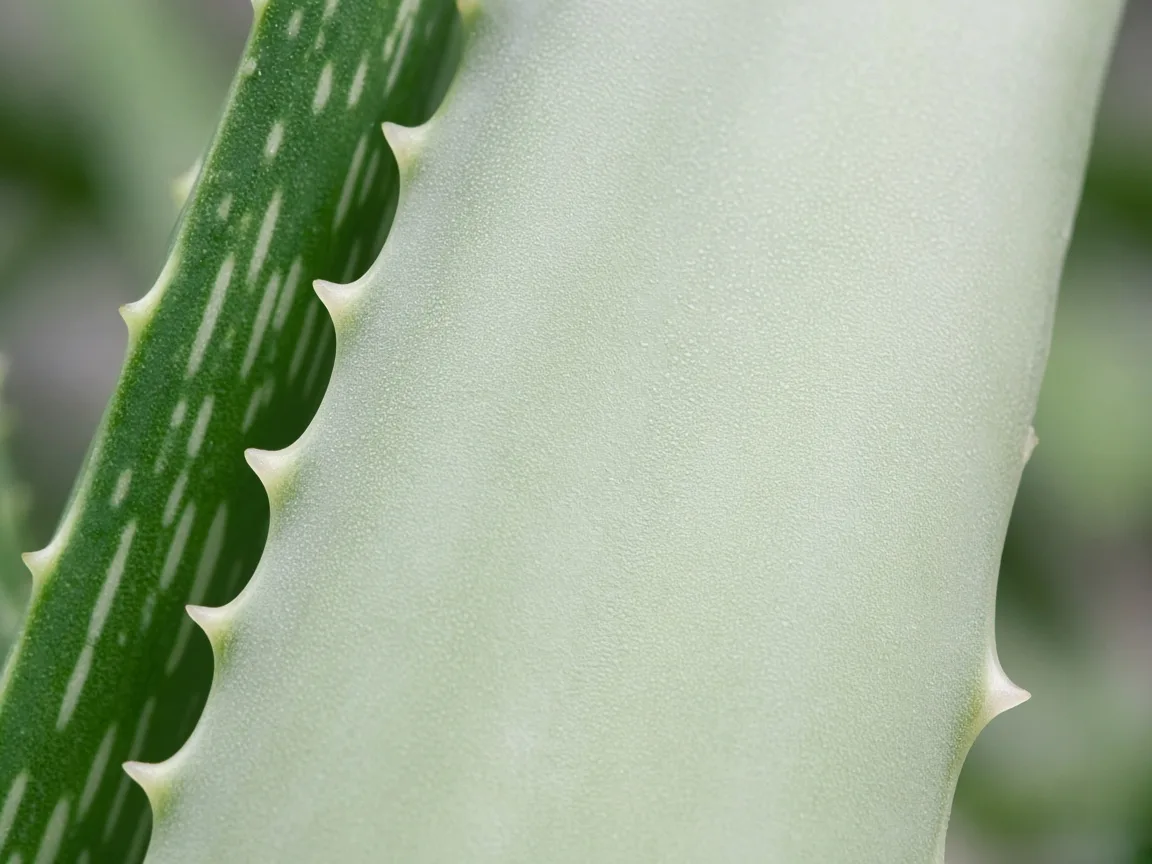
Pale wash on aloe leaf tissue—the healthy gray-green tone fades to light green or yellow-green while the leaf may still feel firm and plump.
Typical pale-leaf signs:
- Uniform washed-out light green or yellow-green across several leaves—not isolated spots at first
- Loss of the characteristic gray-green depth—blades read flat and pastel instead of silvery green
- Smaller or thinner new center leaves compared with mature outer blades
- Rosette leaning toward the brightest corner when dim light is the driver
- Soil that dries slowly at the surface because transpiration dropped in weak light
- Firm leaf texture—pale from chlorosis, not yet the soft translucent stage of rot
Not pale leaves:
- One soft yellow lowest leaf on wet soil — overwatering or early root rot
- Fully yellow papery outer leaves dropping slowly with firm center — normal senescence; see yellow leaves
- Bleached white or tan patches on leaves facing hot glass only — direct sun burn, not dim-room chlorosis
- Thin concave outer leaves with bone-dry soil throughout — underwatering
- Green veins with yellow tissue between on the newest unfurl only — iron deficiency
Reading aloe’s gray-green baseline when color washes out
Aloe’s normal color is gray-green with a slight blue cast, not the deep emerald of tropical foliage plants. Owners often miss early pallor because the plant still looks “green enough” from across the room.
Dim-room washout dulls the whole rosette to light green or yellow-green while leaves stay firm and gel-filled. You can still squeeze the leaf and feel resistance—unlike mushy overwatered tissue. Veins do not show the interveinal pattern of iron deficiency; the whole blade fades evenly.
Sun bleach fades the sun-facing half of a blade to pale green or tan while the shaded half stays darker gray-green. This pattern appears after a sudden move to a south sill, outdoor summer sun without acclimation, or reflected heat from glass. It is easy to misread as “needs more light” when the fix is less direct intensity.
Salt and fluoride washout shows uniform pale color on firm leaves with white crust on the pot rim or soil surface while the soil dries on your normal schedule. The base stays hard; this differs from rot because soil is not soggy for weeks.
Why Aloe Vera gets pale leaves
Aloe evolved across dry, high-light regions of the Arabian Peninsula and North Africa. Indoors it needs bright light—several hours of direct sun at a window or strong supplemental light—to maintain compact gray-green foliage. Pallor almost always traces to light-water rhythm before rare nutrient issues.
Insufficient light (most common)
Succulents like aloe become lanky and pale in insufficient light. Chlorophyll production drops when photons are too weak, so leaves lose the gray-green depth and turn washed-out yellow-green. Light intensity falls sharply with distance from glass—a pot six feet into a room may be low light even when the window looks sunny.
On aloe, pallor often pairs with wider gaps between new leaf pairs and a lean toward the window. The plant is not dying yet; it is rationing energy. Full etiolation mechanics live on not enough light and leggy growth pages.
The low-light watering trap
Dim light slows photosynthesis, so the plant uses less water while many owners keep a summer watering calendar. Soil stays damp for weeks in a north room or office desk—roots suffocate while leaves look pale and slightly floppy, not yet fully yellow. Overwatering should be avoided on aloe because wet mix in cool dim rooms is a common pallor trigger before rot spreads.
This stack is plant-specific to succulents in dim interiors: a fern in the same spot would show different symptoms. Fix light and dry-down together—not water hoping to green pale leaves on already wet soil.
Too much direct sun (bleaching)
Aloe needs bright light but can bleach when moved abruptly from a dim corner to harsh afternoon sun. Pale or whitish patches on sun-exposed surfaces differ from whole-rosette dim-room washout. Acclimate over one to two weeks or filter with a sheer curtain.
Seasonal light drop
The same window delivers fewer hours from October through February. A plant that looked gray-green in July may wash out by January without any care change. Reduce watering in winter when growth slows—continuing summer drinks in December keeps soil wet while light is weakest, compounding pallor.
Salt buildup and over-fertilization
Heavy feeding or hard tap water leaves mineral salts in the mix. Fluoride and salts can pale whole leaves on an otherwise correct soak-and-dry schedule, sometimes with brown margin tips. This is a late suspect after light and water are ruled out.
Nutrient deficiency (uncommon indoors)
Iron or nitrogen stress can pale leaves on some houseplants. On aloe, deficiency is rare when plants sit in fresh cactus mix. Green-vein yellowing on the newest center leaf only points to iron deficiency; oldest lower blades fading first suggests nitrogen deficiency. Uniform rosette washout with a window lean is almost always light, not feed.
How to confirm the cause
Work through this checklist in order—each step narrows the list without stacking treatments:
- Light compass — Note window direction, pot distance from glass, and whether the rosette leans. Uniform dull color with lean = low light. One-sided bleach = too much direct sun.
- Leaf squeeze — Press a lower outer leaf. Firm and plump with pale color = chlorosis or salt, not rot. Soft and squishy on wet soil = overwatering—see overwatering.
- Soil moisture at depth — Push a skewer two to three inches into the mix. Soggy for a week in a dim room confirms the low-light watering trap. Dry throughout with thin concave leaves = drought, not pale chlorosis.
- Which leaves are affected — Whole rosette uniformly washed out = light or salt. Newest center leaf with vein pattern = iron. Oldest lowers only = nitrogen or senescence.
- Recent changes — Move to a brighter window, outdoor summer sun, repot into heavy peat, or winter calendar watering? Timing that matches pallor is diagnostic.
- Pot rim and soil surface — White crust with firm pale leaves on dry schedule = flush salts before fertilizing.
If the center rosette is firm, soil dries on your normal schedule, and only one or two bottom leaves look slightly lighter over months, that may be normal outer-leaf aging—not an emergency.
Lookalike symptoms
| What you see | Likely cause | How to tell apart |
|---|---|---|
| Uniform light green rosette, window lean, firm leaves | Low light | Move test—next leaf should darken within weeks |
| Bleached patches on sun-facing side only | Sun scorch | Shaded half stays gray-green; sudden onset after light increase |
| Pale floppy leaves, wet soil two inches down, heavy pot | Overwatering / root stress | Squeeze fails—tissue softens; see root rot if base mushy |
| Pale uniform color, white pot crust, soil dry on schedule | Salt / fertilizer burn | Base hard; flush before feeding |
| Green veins, yellow between on newest center leaf | Iron deficiency | Rest of rosette may look normal; see iron guide |
| Fine stippling, webbing on undersides | Spider mites | Tap test over white paper—not a light problem |
First fix for Aloe Vera — read the light, then squeeze the leaf
Before you fertilize, repot, mist, or soak, decide whether pallor is uniform with a lean or bleached on one side, then press a lower leaf and check soil two inches down.
That single pause prevents the two most common mistakes: watering pale leaves that are already drowning in a dim room, and moving a bleached plant closer to harsh afternoon sun when it needs filtered light instead. If the whole rosette is washed out and leaning, move to the brightest spot you have—within a few feet of east, south, or west glass or under a grow light—before any other change.
If only the sun-facing side is pale, pull back or filter light first. If leaves are pale and soft on wet soil, stop watering—do not add light alone while roots sit in damp mix.
Only after this check should you unpot for root inspection—when soil stayed wet for weeks, the base is softening, or pallor spread to many leaves within days on soggy mix.
Step-by-step recovery by cause
After the first check, follow the path that matches your diagnosis—one at a time:
If low light is the cause
- Move the pot to the brightest available spot—several hours of direct sun at a window or a full-spectrum grow light 6–12 inches above the rosette for 12–16 hours daily.
- Hold fertilizer until new growth looks normal; light is the fix, not feed.
- Reduce watering frequency if the brighter spot was also warmer—the plant will use more water in strong light, but a plant coming from a dim wet room may still need soil to dry fully first.
- Do not jump from a dim corner to harsh afternoon sun in one day—acclimate over one to two weeks to avoid bleach.
If the low-light watering trap is the cause
- Stop watering until the mix is completely dry two inches down—may take two to four weeks in winter.
- Improve light at the same time so the plant can use water when you resume.
- Empty saucers; confirm drainage holes are open.
- If the base stays mushy after the mix dries, unpot and inspect per root rot guidance.
If sun bleach is the cause
- Move to bright indirect light or filter direct afternoon rays with a sheer curtain.
- Do not remove bleached patches unless tissue turns fully brown and crispy—firm pale areas may stay cosmetic.
- Acclimate gradually if you need more total light for compact growth.
If salt buildup is the cause
- Stop fertilizing immediately.
- Flush the soil by running plain water through the pot two to three times until it runs clear, draining fully between passes.
- Switch to rainwater, distilled, or filtered water if white crust keeps returning.
- Resume light feeding only in spring when new growth is vigorous—half-strength at most per the fertilizer guide.
Recovery timeline — what success looks like
Low light (caught early): Existing pale leaves stay pale—they rarely re-green. Expect darker, more compact new center leaves within three to six weeks after a brighter move. Wider leaf spacing on old stem sections will not shorten; judge by the next leaf pair sitting closer together.
Low-light watering trap: After soil dries and light improves, firmness returns within one to two weeks; new green-gray leaves may take four to eight weeks in cool winter light.
Sun bleach: New leaves emerging after filtered light should show even gray-green color within three to six weeks. Old bleached patches remain until shed.
Salt flush: Uniform color on new growth within four to six weeks after flushing; old pale leaves may persist until trimmed.
When to worry: Crown softening, black mushy roots, sour smell, or pallor spreading to every new leaf while soil stays wet—treat as urgent rot per root rot guidance. Many leaves paling at once on wet soil within days is not normal aging.
What not to do
- Do not fertilize a pale aloe on day one to “green it up”—salts worsen stress on weak tissue and feed pests.
- Do not increase watering when leaves are pale and soil is already wet—overwatering is the most common aloe killer, not drought.
- Do not mist leaves hoping to fix pallor—aloe tolerates dry indoor air and wet crowns in cool rooms invite rot.
- Do not repot on day one unless roots are mushy or soil has failed—many pale cases resolve with light and watering correction only.
- Do not stack repotting, heavy pruning, fertilizer, and a new window position the same week—you will not know which change helped.
- Do not assume every pale leaf needs emergency surgery—one slightly lighter bottom leaf on a firm compact rosette may be normal turnover.
How to prevent pale leaves next time
- Give bright light year-round — Place aloe near sunny windows or run grow lights in dark rooms; weak light is the leading pallor trigger indoors.
- Water by soil, not calendar — Allow soil to dry between waterings, then soak deeply; reduce frequency in dim winter rooms per the watering guide.
- Match winter to summer rhythm — Water less frequently in winter when growth slows; pale floppy leaves on wet December soil are preventable.
- Use fast-draining mix and pots with holes — Terracotta dries faster than glazed ceramic; see the soil guide.
- Acclimate to sun changes — Move gradually when increasing light to avoid bleach that mimics pallor.
- Flush salts in spring if you fertilize—prevents uniform washout on an otherwise correct schedule.
Related Aloe Vera guides
- Aloe Vera overview
- Aloe Vera watering
- Aloe Vera light
- Aloe Vera soil
- Not enough light on Aloe Vera
- Yellow leaves on Aloe Vera
- Overwatering on Aloe Vera
- Iron deficiency on Aloe Vera
- Aloe Vera problems
Most aloes recover from pale leaves once light and water match this succulent’s rhythm. Washed-out outer tissue is gone for good; a firm center rosette and darker new leaves mean you corrected the right problem.