Brown Leaves on Hoya: Causes, Checks & Fixes
Quick answer
Brown leaves on Hoya are a symptom, not a diagnosis. First lift the pot and check the top half of the mix before watering: a light pot with dry soil points toward a dry root ball, while a heavy pot that stays wet raises concern about root trouble. Then use the location and texture of the brown area to distinguish old-leaf loss, sun exposure, and spot-shaped damage.
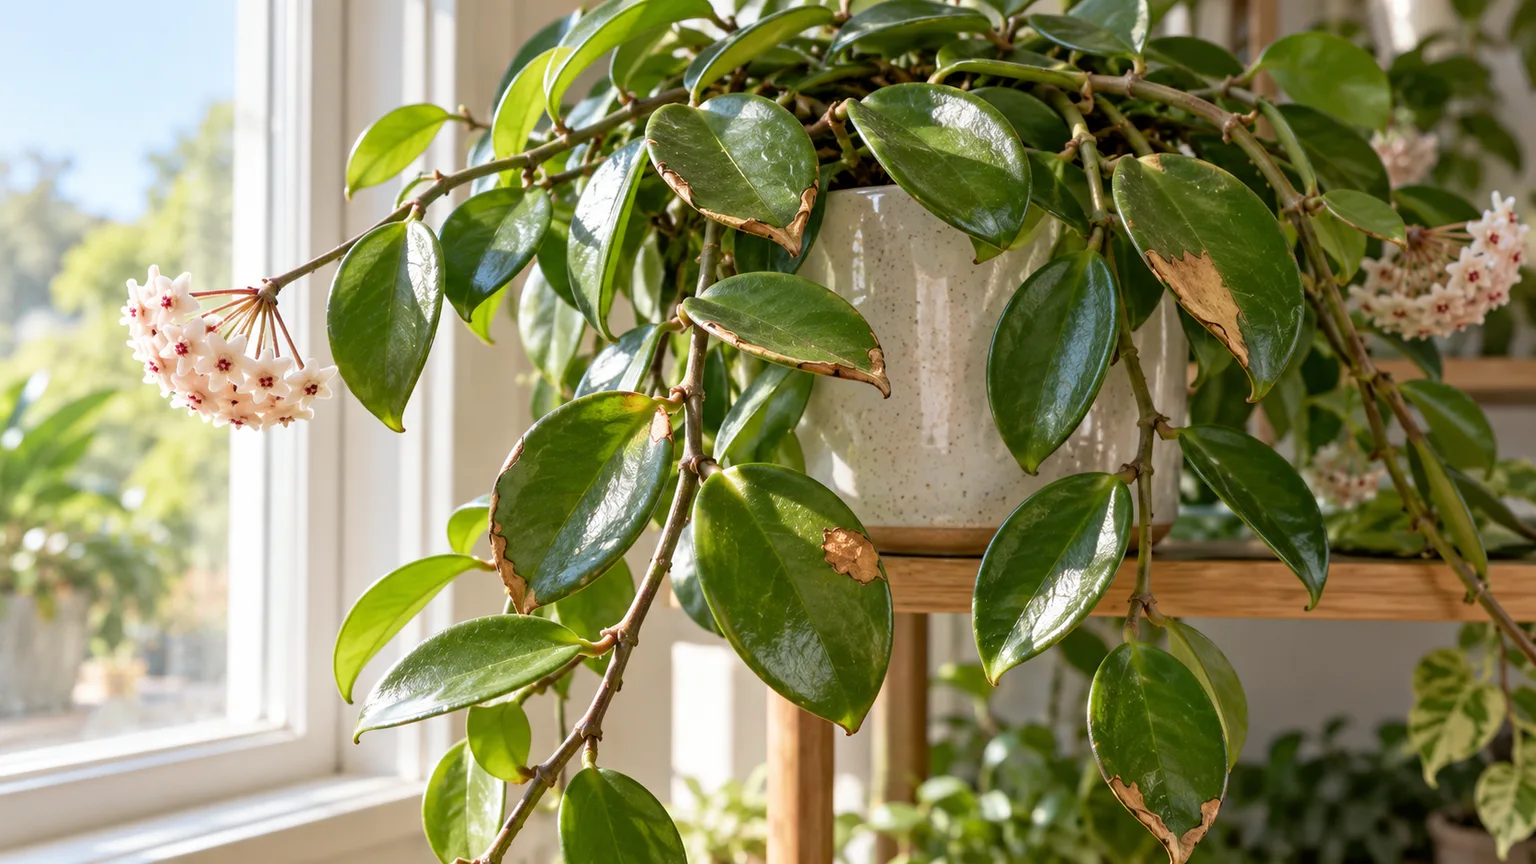
Brown Leaves on Hoya: Causes, Checks & Fixes
This guide covers brown leaves on Hoya. See also the general Brown Leaves guide, watering, and light pages for this plant.
Brown Leaves on Hoya: Causes, Checks & Fixes
Quick answer
Brown leaves on a Hoya do not identify a single cause. Before watering, lift the pot and check the mix through its upper half. If the pot is light and the mix is dry at depth, a dry root ball is plausible; if it is heavy and still wet, adding water may worsen root stress. Then look at where the brown tissue starts: tips and margins, the center of a leaf, one sun-facing side, or one isolated spot each point to a different investigation.
First action: check pot weight and moisture at depth, and do not water until you know whether the root zone is dry or wet. Hoya’s thick leaves can hold water, so a few brown marks should not prompt an automatic soak. For the broader houseplant symptom overview, see the brown-leaves guide; this page focuses on how to narrow the cause on a Hoya.
What brown leaves look like on Hoya
Hoya leaves are typically firm, waxy, and fleshy, but their exact thickness, shape, and markings vary by species and cultivar. A common Hoya carnosa has oval leaves along a trailing or climbing vine; rope forms have folded, contorted leaves that make small changes harder to read. NC State describes Hoya carnosa as a waxy-leaved vine with a preference for bright indirect light and a free-draining medium, while RHS notes that many hoyas have semi-succulent leaves that store water. That is useful context, not a guarantee that every Hoya species responds identically (NC State Extension; RHS Hoya growing guide; Epic Gardening’s Hoya overview).
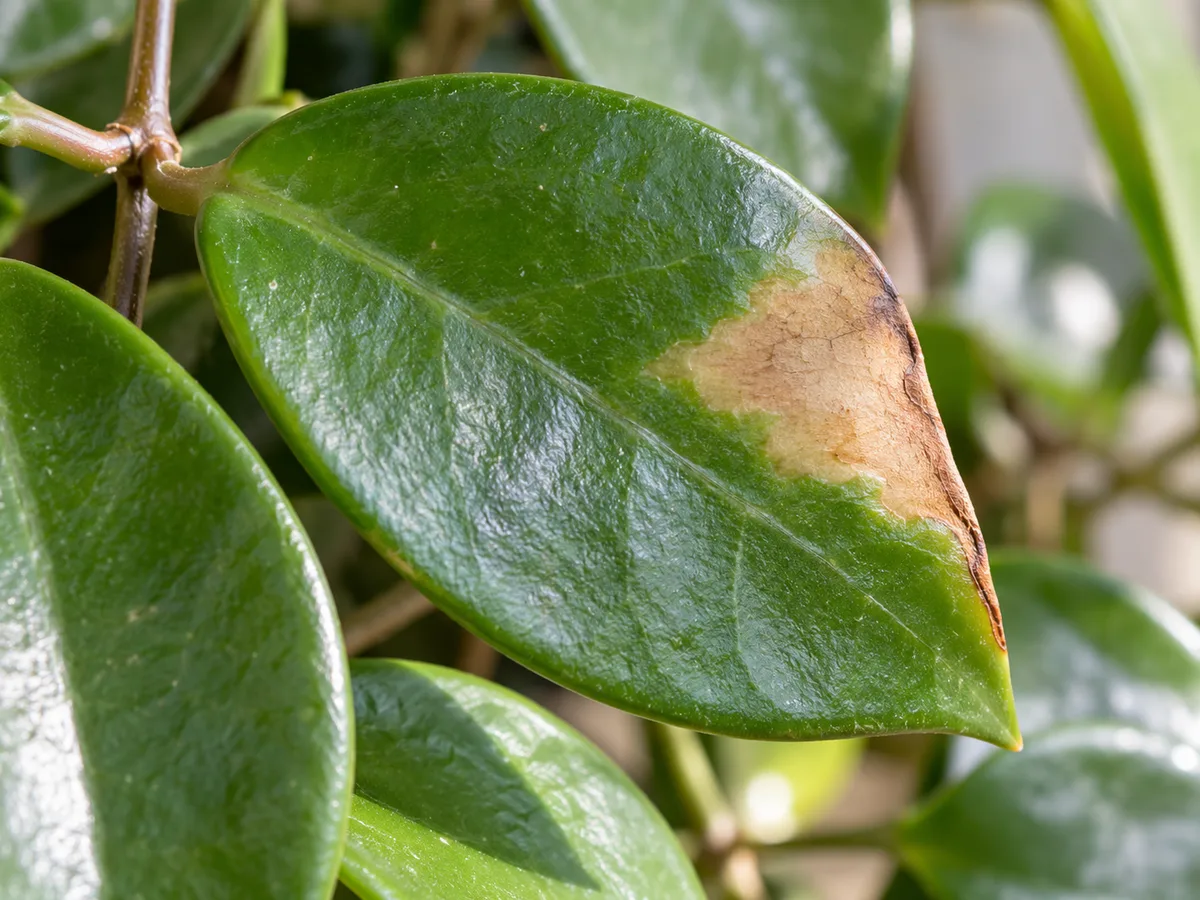
Compare a brown area with healthy leaves on the same vine; its position, texture, and spread help narrow the cause.
Start by separating the visible patterns rather than naming a cause from color alone:
| Pattern on the Hoya | What to check next |
|---|---|
| Dry, crisp tips or edges on several leaves | Is the root ball becoming very dry, is water bypassing the center, or has the plant spent a long time in hot dry air? Compare with the Hoya brown-tips guide. |
| Brown areas beginning in the middle of leaves while the pot stays heavy | Check drainage, cachepot water, soil odor, and roots before watering again; compare overwatering on Hoya if the mix remains wet. |
| Tan or bleached patches on the window-facing side | Review recent movement into direct sun, glass heat, or a grow light placed too close. |
| A few discrete dark spots, especially with a yellow margin | Inspect nearby leaves and avoid splashing foliage; a spot pattern can be disease-related, but marks alone do not confirm it. |
| One old lower leaf browns while the rest of the plant and new growth remain firm | Monitor rather than changing care immediately; an occasional older leaf can senesce naturally. |
RHS describes several different causes behind brown leaves, margins, and spots, including water extremes, excess heat or light, and occasional natural ageing. It also notes that dark spots with yellow margins may fit a fungal leaf-spot pattern, whereas pale or straw-colored rings can follow cold-water splashes or other surface injury (RHS leaf-damage guide). The visible pattern gives you a direction to inspect; it is not a diagnosis by itself.
Why Hoya’s waxy leaves change the diagnosis
Hoya is not a thin-leaved plant that needs frequent small drinks. Many species evolved as climbers or epiphytes, and the fleshy, leathery leaves store some water between root-zone moisture cycles. That storage can buffer a short dry interval, but it can also delay visible signs of a problem. A Hoya may look acceptable while the pot is already dry, then show wrinkling or brown margins later; conversely, a leaf can look limp or damaged while the mix is wet because injured roots are not taking up moisture well. RHS specifically describes water-storing leaves and a preference for bright light and moderately watered, free-draining conditions (RHS Hoya growing guide).
The practical implication is to treat the leaves as a record of what happened, not as a watering gauge. A firm waxy leaf does not prove the entire root ball is moist. A brown margin does not prove the plant needs a drink now. Check moisture and drainage in the pot itself, then compare the damaged leaves with healthy ones on the same vine. If you want to recalibrate that routine, use the Hoya watering guide alongside the plant’s current pot and mix rather than copying a calendar interval.
Dry root ball, dry pockets, or roots that cannot reach moisture
A Hoya can brown after a prolonged dry spell, particularly when the root ball is small, the room is warm and bright, or water runs down the gap between old mix and the pot wall. The clue is not just a brown leaf: the pot feels unusually light, the upper mix is dry well below the surface, and affected tissue is dry or papery rather than soft. A grower’s account of Hoya obovata recommends using pot weight and checking the mix rather than relying on a fixed interval; its exact schedule applies to that plant and home, not every Hoya (Ohio Tropics Hoya obovata care).
If the mix is dry through the upper half and the plant is otherwise firm, water the root zone thoroughly once and let excess drain away. Do not give repeated spoonfuls to the surface: small splashes can wet only the top while leaving dry pockets lower down. Ohio Tropics explains how dry pockets and incomplete watering can leave roots without reliable access to water, while NC State advises allowing Hoya soil to dry between waterings rather than keeping it continuously wet (Ohio Tropics on brown and crispy leaves; NC State Extension).
After watering, check that water exits the drainage holes and empty the saucer or decorative cachepot. If the mix repels water and the center remains dry, a slow, thorough rewetting may help; if that does not work, or if the mix has become compacted, consider repotting in spring into a modestly sized pot and airy mix. Do not jump to a much larger container simply because a few leaves are brown. A larger mass of wet mix can dry more slowly around Hoya roots. The Hoya soil guide covers the role of drainage, and the repotting guide is the next step only when the mix or root fit gives you a reason to repot.
Wet mix and failing Hoya roots
Brown patches can also appear when the root zone stays wet for too long. Hoya is often grown in an airy mix because many species climb or grow epiphytically; roots in a dense, slow-drying pot can remain wet even while the room is bright. If the pot stays heavy for many days, the surface remains cool and damp, or the mix smells sour, pause watering. Check whether a cachepot is holding runoff and whether drainage holes are open before unpotting the plant.
Brown leaf tissue with wet mix is especially easy to misread. A plant with root damage can lose leaf quality because the roots are not functioning normally, even though water is present. RHS recommends checking root condition when a houseplant shows widespread browning and adjusting care to what the roots and environment show, rather than treating the leaf symptom alone (RHS poorly-houseplant guidance). If you do inspect roots, healthy roots should feel firm; roots that are dark, soft, or breaking down need attention. Do not remove healthy roots just because they are tan from the potting medium.
If roots remain mostly firm and the stem bases are sound, stop adding water and let the mix dry toward the Hoya’s usual dry-down point. If roots are mushy, the stem base is soft or dark, or the smell is strongly sour, move to the Hoya root-rot guide for the salvage steps. For the broader difference between wet and dry stress, see overwatering on Hoya and underwatering on Hoya. Those are separate diagnoses; do not treat a wet pot as thirsty because the leaves look wrinkled.
Bright light, direct sun, and heat against the leaf
Hoya generally benefits from bright conditions, but a move from dimmer indoor light to several hours of strong, direct midday sun can expose leaves to more heat and light than they had acclimated to. Scorch usually appears as tan, bleached, or dry areas on the surface facing the window or lamp, while shaded leaves remain less marked. The timing matters: if the spot appeared soon after moving the pot, raising a grow light, or placing the plant against hot glass, review that change before changing the watering routine. RHS Hoya guidance recommends bright light while protecting plants from hot summer sun, and its general leaf-damage guide also lists excess sunlight as a possible source of pale spots or scorch (RHS Hoya guide; RHS leaf-damage guide).
Do not hide a Hoya in a dark corner to protect it from every brown mark. Instead, give it bright indirect light or gentle morning sun, and acclimate it gradually if it needs a brighter position. Keep the leaf surface from touching hot glass and avoid placing a grow lamp so close that the leaf itself warms. If the Hoya is in a low-light spot, read the Hoya light guide before making a move; low light also slows growth and changes how quickly the pot dries, so the watering interval may need to change with it.
Spot-shaped marks, pests, and other lookalikes
A brown patch with a clear edge, a series of tiny speckles, and a broad dry margin are not interchangeable symptoms. If spots are discrete and expanding, look closely at both leaf surfaces and nearby leaves. RHS describes dark spots with yellow margins as a possible fungal leaf-spot pattern, while the horticultural extension reference on Hoya notes that mealybugs, fungus gnats, and spider mites can occur on the plant (RHS leaf damage; NC State Extension). Neither source makes every brown spot on a Hoya a disease or pest problem. A spot with no spread and a known bump, splash, or exposure event may simply be old injury.
Look for pests before treating: inspect leaf undersides, the midrib, stem joints, and the point where leaves meet the vine. Fine stippling and webbing are useful spider-mite clues; UC IPM recommends checking the undersides when those marks appear and confirming mites before treatment (UC IPM spider-mite guide). Visible insects or unexplained residue are a reason to investigate a pest diagnosis, but a single brown leaf alone is not enough to identify one. If you find signs of mites or mealybugs, follow the Hoya-specific spider-mites guide or mealybugs guide and isolate the plant while you confirm what is present. Do not spray oils, soaps, or other pesticides on a guess; product labels and plant tolerance matter, and the symptom here has not established a pest.
For a spot pattern that expands from leaf to leaf, separate the Hoya from nearby plants, keep water off the foliage, and remove only leaves that are badly damaged or actively decaying. If a mark appeared after cold water hit the leaves, an aerosol was used nearby, or a leaf touched a cold window, correct that exposure and watch the next leaves. Gardening Know How’s general leaf-spot overview also emphasizes that spots can have different causes, so shape, spread, and growing conditions need to be considered together (Gardening Know How leaf spots). If dark spots are the main issue rather than broad browning, the Hoya black-spots page is currently not indexable; use this article’s differential and your plant’s care records instead of linking to that stub.
A careful Hoya check you can do today
Use this sequence to avoid changing several conditions at once:
- Map the damage. Note whether the affected leaves are old or new, high or low on the vine, on the window-facing side, or scattered. Take a dated photo before trimming anything.
- Lift the pot. Compare its weight with how it feels after a thorough watering and after a normal dry-down. Pot weight is a useful clue, not a replacement for checking the mix.
- Check moisture below the surface. Probe the upper half of the root zone with a clean wooden skewer or finger near the pot edge. Dry at the top and dry at depth is different from a damp surface over a dry core.
- Look for water that cannot drain. Check the drainage holes, saucer, cachepot, and whether the container is too large for the root mass. A decorative outer pot can hide standing runoff.
- Review recent changes. Think back to a new window, direct sun, air-conditioning or heating vent, cold transport, repot, or change in watering rhythm. A symptom that follows a change is more informative than a generic care list.
- Inspect leaves and stems. Turn over the affected leaves and check the vine joints for insects, webbing, sticky residue, or a spreading spot pattern. Check the stem base for softening only if wet soil or rapid decline makes root trouble plausible.
Choose one correction based on what the check shows. Dry root zone: water thoroughly and drain it. Wet root zone: hold water and improve drainage or inspect roots if there are signs of decay. One-sided scorch: move the plant out of the harshest direct exposure. A spreading spot or pests: isolate and identify the cause before applying any treatment. This diagnosis-first approach matches RHS guidance to combine the leaf pattern with root condition and growing conditions rather than changing care blindly (RHS poorly-houseplant guidance).
What recovery looks like and what cannot be repaired
Brown tissue does not become healthy green tissue again. If the cause was corrected, the older mark should stop expanding and the rest of the leaf should remain firm; the more useful signal is clean new growth on the vine. New growth may take time, especially after a stressful change, so do not use the absence of a new leaf within a few days as proof that the fix failed. Keep the plant stable and compare its condition over several weeks rather than moving it repeatedly or adding fertilizer to force a response.
A small amount of cosmetic browning does not require pruning the whole vine. Remove a leaf only when most of it is dead, loose, or likely to conceal an active problem. If brown tissue follows a broad decline, roots are collapsing, or the base of the vine softens, salvage a healthy stem section only if it remains firm and unmarked; a completely soft or rotted base may not recover. The Hoya overview provides the plant’s baseline care context, and the Hoya problems hub can route you to a different diagnosis when the main sign is yellowing, drooping, or pest activity instead of browning.
What not to do when Hoya leaves turn brown
- Do not water by a weekly calendar when the pot is still heavy. Hoya’s dry-down changes with temperature, light, container, and mix.
- Do not compensate for wet soil by misting or increasing humidity. This does not repair failing roots or make a poorly draining mix safer.
- Do not expose a stressed vine to harsher sun suddenly in an attempt to improve growth. Brightness should be adjusted gradually.
- Do not repot automatically. A Hoya that is otherwise firm and drying normally may need no disturbance; repot only when drainage, compaction, or root fit is a real issue.
- Do not cut back healthy vines or flower spurs because one leaf is brown. Remove only clearly dead tissue and avoid sacrificing sound growth.
- Do not apply fungicide or insecticide just because a brown area looks suspicious. Confirm a disease or pest pattern first and follow the label if a product is needed.
- Do not fertilize to reverse brown tissue. Fertilizer cannot restore a dead leaf margin and may add stress if roots are damaged.
Preventing brown leaves on a Hoya
Keep Hoya in bright indirect light, with gradual acclimation before stronger sun. Use a container with open drainage and a mix that does not stay sodden; many growers use bark or other coarse components to keep the root zone airy, but exact blends vary by species and home. Water when checks show that the upper part of the mix has dried, then water evenly and let the pot drain. Do not copy an interval from another grower without considering your pot size, room temperature, season, and window exposure.
Make seasonal checks more deliberate. In a cool, dim room the mix may dry more slowly, while a warm bright window can increase water use. Move the plant away from cold drafts, hot glass, and direct midday sun; avoid abrupt swings between positions. A stable place and an occasional pot-weight check are usually more informative than frequent handling. For linked care adjustments, refer to the Hoya soil guide, light guide, and watering guide as separate parts of the same routine.
When to use this page vs other Hoya guides
Use this guide when brown areas are the main change and you need to decide whether to inspect moisture, roots, light, or a localized spot. If the damage is limited to dry-looking tips and margins, the more focused brown-tips guide compares edge damage and its causes. If leaves are yellowing first, use yellow leaves on Hoya. If the plant is limp or dropping leaves, compare drooping leaves and wilting on Hoya after checking root-zone moisture.
Use overwatering on Hoya for prolonged wet mix or soft roots, underwatering on Hoya for a confirmed dry root ball, and root rot on Hoya when roots or stems show decay. If low indoor humidity appears to be part of a wider care problem, the Hoya low-humidity guide covers that narrower question. The Hoya problems hub lists other plant-specific guides. Those pages are routes for distinct signs; do not assume one cause because two symptoms occur together.
Related Hoya guides
- Hoya overview — baseline for the genus and its range of leaf forms.
- Hoya watering — use to set a dry-down routine for this pot and season.
- Hoya light — use if brown areas follow a move into stronger sun or a darker position.
- Hoya soil — use when the mix stays wet, compacts, or fails to rewet evenly.
- Hoya repotting — use only when roots outgrow the container or the medium is failing.
- Hoya problems — use to compare a different primary symptom.
Related tool
Use the Plant Problem Diagnosis Tool to organize the signs you observed on this Hoya before changing multiple care variables.