Scindapsus Exotica Repotting Guide: When and How
Scindapsus Exotica Repotting Guide: When and How
Scindapsus Exotica Repotting Guide: When and How
Scindapsus Exotica (Scindapsus pictus ‘Exotica’) — the large-leaf satin pothos with broad silver splashes across dark green foliage — tolerates tight quarters longer than many aroids. That patience creates a common trap. Growers repot too late, after peat has collapsed and roots circle hard, or too aggressively, jumping two pot sizes and leaving wet mix around a modest root system. Repotting is not a calendar ritual. It is a root-zone reset: fresh airy substrate, slightly more room, and a chance to inspect what normal watering never reveals.
This guide covers when Scindapsus Exotica actually needs repotting, how its larger leaves change timing compared to smaller-leaf Scindapsus pictus cultivars, pot size and soil choices, a full step-by-step workflow, and what recovery should look like in the weeks after the move.
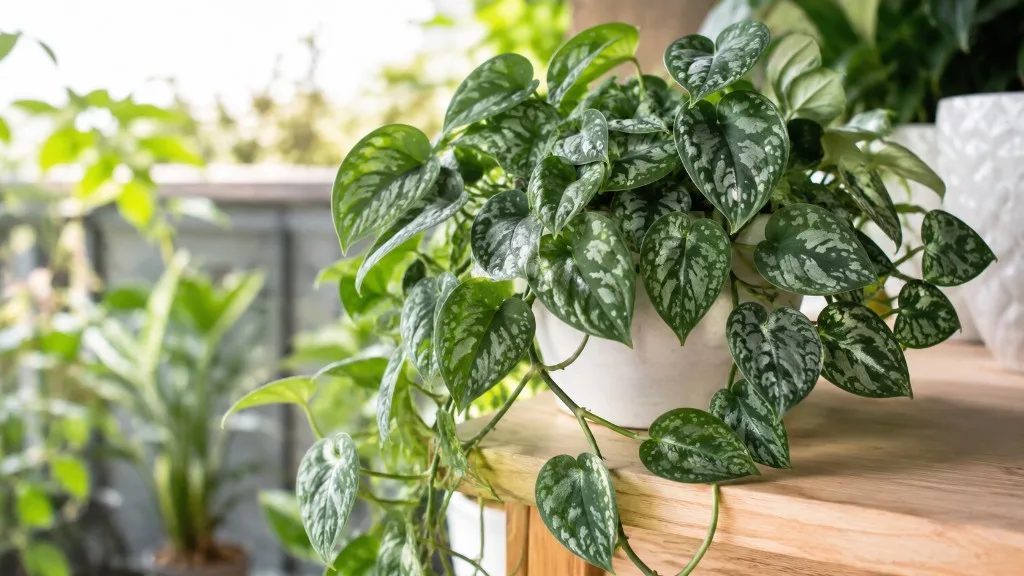
Cultivar note: Scindapsus Exotica (Scindapsus pictus ‘Exotica’) — large heart-shaped leaves with expansive silver patches on dark green. Place in medium to bright indirect light for large silver blotches; water when top half dry; larger leaves transpire more in bright light.
Why repotting matters for large-leaf satin pothos
In its native range across Southeast Asia — Bangladesh, Borneo, Java, Malaysia, the Philippines, Sulawesi, Sumatra, and Thailand — Scindapsus pictus climbs tree trunks as an epiphyte, anchoring with aerial rootlets while drawing moisture from leaf litter and bark crevices. Indoors, those roots live in a closed pot where soil structure degrades, salts accumulate, and oxygen gets squeezed out as roots multiply. Repotting addresses physical crowding, substrate exhaustion, and hidden damage — rot, pest eggs, or fertilizer salt crust you only see when the plant comes out.
Skipping repotting for too long does not always kill Scindapsus Exotica quickly. The plant keeps producing leaves while roots quietly degrade, which means the first visible symptom is often rapid drying or water running straight through — both signs the root-to-soil ratio has tipped past healthy. A timely repot restores balance before chronic stress shows up as yellow leaves, washed-out silver on new growth, or rot.
What happens when Exotica outgrows its pot
Healthy Scindapsus Exotica roots are white to pale tan and firm. As the plant fills the pot, fine roots mat together and circle the outer edge. Circling alone is not an emergency, but when circling combines with compacted soil, moisture channels along the pot wall while the center stays dry or stays wet without drying. Exotica’s larger leaves pull more water in bright light than smaller pictus forms, so a root-bound plant in the same room may dry in two to three days where it once took a week — a signal easy to misread as “it just needs more water” rather than “it needs more root room.”
Signs your Scindapsus Exotica needs a new pot
Most Scindapsus Exotica plants in active indoor conditions need a full repot every one to two years — see the Scindapsus Exotica light guide for placement context and the watering guide for dry-down rhythm. Clemson HGIC notes slow-growing houseplants may go two to three years between repots if drainage remains good. Treat the interval as a guide, not a rule.
Repot when two or more of the following appear together:
Root-bound and soil breakdown signals
- Roots emerging from multiple drainage holes or circling visibly when you slip the plant out.
- Water runs straight through within seconds while the root ball still feels dry inside — hydrophobic or root-displaced mix.
- The pot dries much faster than before, often within two to three days in the same room.
- Growth stalls despite good light — new leaves small, internodes stretch, or leaves only at vine tips.
- Soil surface crusts, sinks, or smells sour when you probe beneath.
- The plant wobbles because the root ball is a solid mass with almost no loose mix.
A long trailing Scindapsus Exotica can look like it needs a bigger pot because the vine is enormous while the root ball stays modest. Vine length above soil does not dictate pot size. Base your decision on roots and mix condition.
How Exotica timing differs from Argyraeus
All Scindapsus pictus cultivars share the same repotting logic, but leaf size changes how fast you hit root-bound status. ‘Argyraeus’ — the standard satin pothos with smaller silver-edged leaves — is described by RHS as slow-growing with leaves to about 10 cm. ‘Exotica’ pushes larger foliage with broader silver patches and moderate growth, so roots often fill a pot closer to the one-year end of the one-to-two-year window in bright, warm rooms. Slower low-light setups can stretch toward two to three years if drainage stays good.
Best timing for repotting
The best window to repot Scindapsus Exotica is spring through early summer, when daylight lengthens and the plant enters active growth. NC State Extension lists spring and summer as the primary growing season for satin pothos. Clemson HGIC recommends repotting only during spring and summer while plants are actively growing, and avoiding repot of ailing or dormant specimens.
Avoid routine repotting in late fall and winter unless you have an urgent problem like active root rot or severe root-bound decline.
Spring vs winter trade-offs
Spring repotting aligns with the plant’s rhythm: warmer temperatures (ideally 65–85°F), brighter days, and new leaf production support root recovery. You can return to a normal Scindapsus Exotica watering rhythm within two to three weeks and resume feeding after four to six weeks.
Winter repotting is a calculated risk. Roots disturbed in cooler, dimmer conditions sit in wet mix without strong growth to pull water, extending recovery. The exception is emergency intervention: black mushy roots, sour-smelling soil, or severe root-bound stress with chronic wilting. Repot, trim damaged roots, and treat it as triage.
Choosing pot size and type
The single most important decision is size: go up one pot size only, roughly 2–5 cm (1–2 inches) wider in diameter. Clemson HGIC advises selecting a pot 1 or 2 inches larger than the current container. RHS recommends for containers under 25 cm aiming for 2.5–5 cm deeper and wider — not more. Oversized pots hold excess mix that stays wet around a small root system, the most common post-repot failure for aroids and a direct path to root rot in poorly drained soils.
Drainage holes are non-negotiable. If you use a decorative cachepot, keep the plant in a nursery pot with holes and lift it out to water.
Plastic nursery pots are lightweight and easy to inspect. Terracotta breathes and dries mix faster — useful if you tend to overwater. Ceramic glazed pots with holes behave like plastic; without holes they are display-only wrappers.
Hanging baskets and heavy trailing vines
Many Scindapsus Exotica plants live in hanging baskets for years. When repotting, choose a basket only one size up and verify hanger hardware balances the weight of wet soil plus a heavier vine. Repotting is the right time to untangle stems wrapped around chains and redirect growth so weight distributes evenly. Large Exotica leaves add noticeable mass — a wet basket that felt fine at purchase may need sturdier hardware after a year of growth.
Soil mix for repotting Scindapsus Exotica
Scindapsus Exotica is an Araceae aroid with epiphytic tendencies. NC State recommends moist, well-drained potting soil with good drainage and acidic pH near 6.0 for indoor culture. It wants a mix that holds some moisture, drains within minutes, and stays open enough for oxygen to reach roots. Heavy all-peat mixes compact after a year or two and become the reason repotting was necessary.
Do not repot into garden soil or reuse old mix from another plant. For full mix science, see the Scindapsus Exotica soil guide.
A simple DIY aroid blend
A reliable Scindapsus Exotica repotting mix:
- 50–60% peat- or coco-based indoor potting mix
- 20–30% perlite or pumice
- 10–20% orchid bark or coconut husk chips
Optional: a small handful of worm castings (5–10% of volume). Target pH near 6.0–6.5, which standard indoor mixes approximate. When you water thoroughly, water should exit drainage holes within a minute or two, and the top half of the mix should approach dryness within roughly a week in average indoor conditions — matching the dry-down rhythm in the watering guide.
Prep checklist before you unpot
Gather materials, water at the right time, and clear a workspace. Scindapsus Exotica contains insoluble calcium oxalate crystals, so wear gloves if you have sensitive skin and keep trimmings off counters where pets might chew them.
Water the plant 24 hours before repotting, not immediately before and not from a fully dry state. A lightly moist root ball holds together and slides out cleanly. Soggy soil from watering five minutes ago is harder to work with; bone-dry soil crumbles and snaps roots.
On repot day, assemble:
- New pot 2–5 cm wider, with drainage holes
- Fresh mix (enough to fill with room to settle)
- Clean scissors or pruning shears
- A chopstick or pencil for settling mix
- Newspaper or a tray — long Exotica vines make a mess
Choose bright indirect light for the post-repot rest period. Plan to skip fertilizer for four to six weeks. The ASPCA lists Scindapsus pictus (satin pothos) as toxic to dogs, cats, and horses due to insoluble calcium oxalates causing oral irritation, drooling, vomiting, and difficulty swallowing if chewed. Bag trimmings immediately and wash hands after handling sap.
Step-by-step: how to repot Scindapsus Exotica
Once prep is done, the physical repot takes 15–30 minutes for most plants. Work gently; Exotica recovers faster from careful handling than from aggressive bare-rooting.
Step 1 — Remove the plant. Tip the pot and support the base of stems with one hand. Squeeze flexible nursery pots to loosen. For rigid pots, run a knife around the inner edge if the root ball sticks. Pull by the root ball, not by the vines — trailing stems snap under tension.
Step 2 — Inspect the roots. Healthy roots are white or light tan and firm. Dark brown, mushy, or hollow roots are rot and need trimming.
Step 3 — Loosen or trim as needed. Tease circling roots at the bottom and outer edge. Keep 30–50% of old mix attached to fine roots to reduce shock. If severely root-bound, slice 1–2 cm off the bottom or make vertical slashes 2–3 cm deep at four points to redirect growth outward.
Step 4 — Prepare the new pot. Add enough fresh mix to the bottom so the root ball sits with its top 1–2 cm below the pot rim.
Step 5 — Position and fill. Center the plant. Fill around sides with fresh mix, tapping gently and using a chopstick to work mix into gaps without packing concrete-tight. The plant should sit at the same depth as before — burying the crown invites stem rot.
Step 6 — Water lightly. Water until a small amount drains, then stop. The goal is to settle mix, not saturate a potentially stressed root system on day one.
Step 7 — Rest and observe. Place in bright indirect light. Expect some leaves to soften or curl slightly for a few days. New growth within two to four weeks is the positive signal.
Working with a dense or circling root ball
Bare-rooting — washing every particle of old soil away — strips fine root hairs and can set recovery back weeks. Leaving a hard circling mat intact means new roots continue circling. The middle path works best: break up the outer 2–3 cm, trim the bottom if it is a dense pad, and leave the interior core intact. Untangle stems before lifting the root ball so you are not yanking vines after the plant is out.
Aftercare and recovery timeline
Transplant shock on Scindapsus Exotica is usually mild — slight softening, brief curling, or a pause in new growth — and clears within one to two weeks if pot size and soil are appropriate. Sustained wilting, widespread yellowing, or mushy stems beyond three weeks point to rot, oversize pot, or buried stem tissue.
Week 1: Bright indirect light, no direct sun. Water lightly when the top 3–5 cm of mix feels dry. No fertilizer.
Weeks 2–4: Resume normal watering as roots explore new mix. You may see the first new leaf with firm silver variegation.
Weeks 4–6: If new growth looks normal, resume feeding at half strength once, then return to your usual fertilizer schedule.
Damaged leaves from pre-repot stress do not heal; only new leaves tell you the plant is back on track.
Water, light, and fertilizer after the move
The most common aftercare error is overwatering a plant in fresh airy mix inside an oversized pot. Re-learn the pot’s weight rather than watering on the old schedule. Exotica’s large leaves transpire more in bright light, so a freshly repotted plant in a south-facing room may dry faster than expected — check soil depth, not the calendar.
Hold fertilizer for four to six weeks minimum. Fresh mix often contains nutrients, and injured root tips are sensitive to salt burn.
Keep Scindapsus Exotica out of direct sun for 7–10 days after repotting. UV stress on a plant allocating energy to root repair shows up as bleached patches on silver-marked leaves.
Common repotting mistakes to avoid
Jumping two pot sizes because the vine is long. The root system sets pot size, not trail length.
Repotting into dry dusty mix without settling it, leaving air voids that flood unevenly when you water.
Fertilizing immediately to “help the plant bounce back” — it burns tender root tips.
Burying the stem deeper to stabilize a wobbly plant. Stake or add mix around the base without covering previously exposed nodes.
Repotting on schedule when the plant is stressed from recent light or water changes — fix the trigger first.
Using a pot with no drainage because it matches the decor.
Bare-rooting without cause. Reserve full washing for rot or pest cases, not routine upgrades.
Repotting a new purchase on day one unless mix is clearly failing — quarantine and learn dry-down speed first, per the overview.
Emergency repot for root rot
Root rot repotting is triage. Signs include persistent wilting despite moist soil, black mushy roots, sour smell, and soft stems at the base. Remove the plant, wash away all old mix, and cut every soft root back to firm white tissue. Repot into fresh airy mix in a pot sized to the remaining root mass — often the same pot or one size smaller. Water once lightly, then let mix approach dry before watering again. Recovery takes longer than a routine repot; new growth in four to eight weeks is realistic if rot was caught early. If the base is lost, take healthy cuttings per the propagation guide — NC State notes satin pothos propagates readily from stem cuttings.
Conclusion
Scindapsus Exotica repotting comes down to a short list: repot when roots and soil — not vine length — tell you to, do it in spring if you have the choice, move up only 2–5 cm in diameter, use a chunky aroid mix that drains fast, and handle the root ball firmly but not brutally. Exotica’s larger leaves mean faster drying in bright light and slightly quicker root fill than smaller pictus cultivars, so check the root ball annually even when the plant looks fine. Water the day before, skip fertilizer for a month after, and judge success by new leaves with vivid silver splashes — not by whether old foliage perks up overnight.
When to use this page vs other Scindapsus Exotica guides
- Scindapsus Exotica overview — Start here for whole-plant context before deep-diving this topic.
- Scindapsus Exotica soil — Use when you need mix ratios and drainage science without a full repot walkthrough.
- Scindapsus Exotica problems — Jump to symptom-specific fix guides when repotting alone does not resolve the issue.