Pilea Glauca Care: Light, Water, Soil & Propagation
Growing pilea glauca indoors? Find a simple care routine, step-by-step soil and water propagation, and practical fixes for legginess, leaf drop, and root rot.
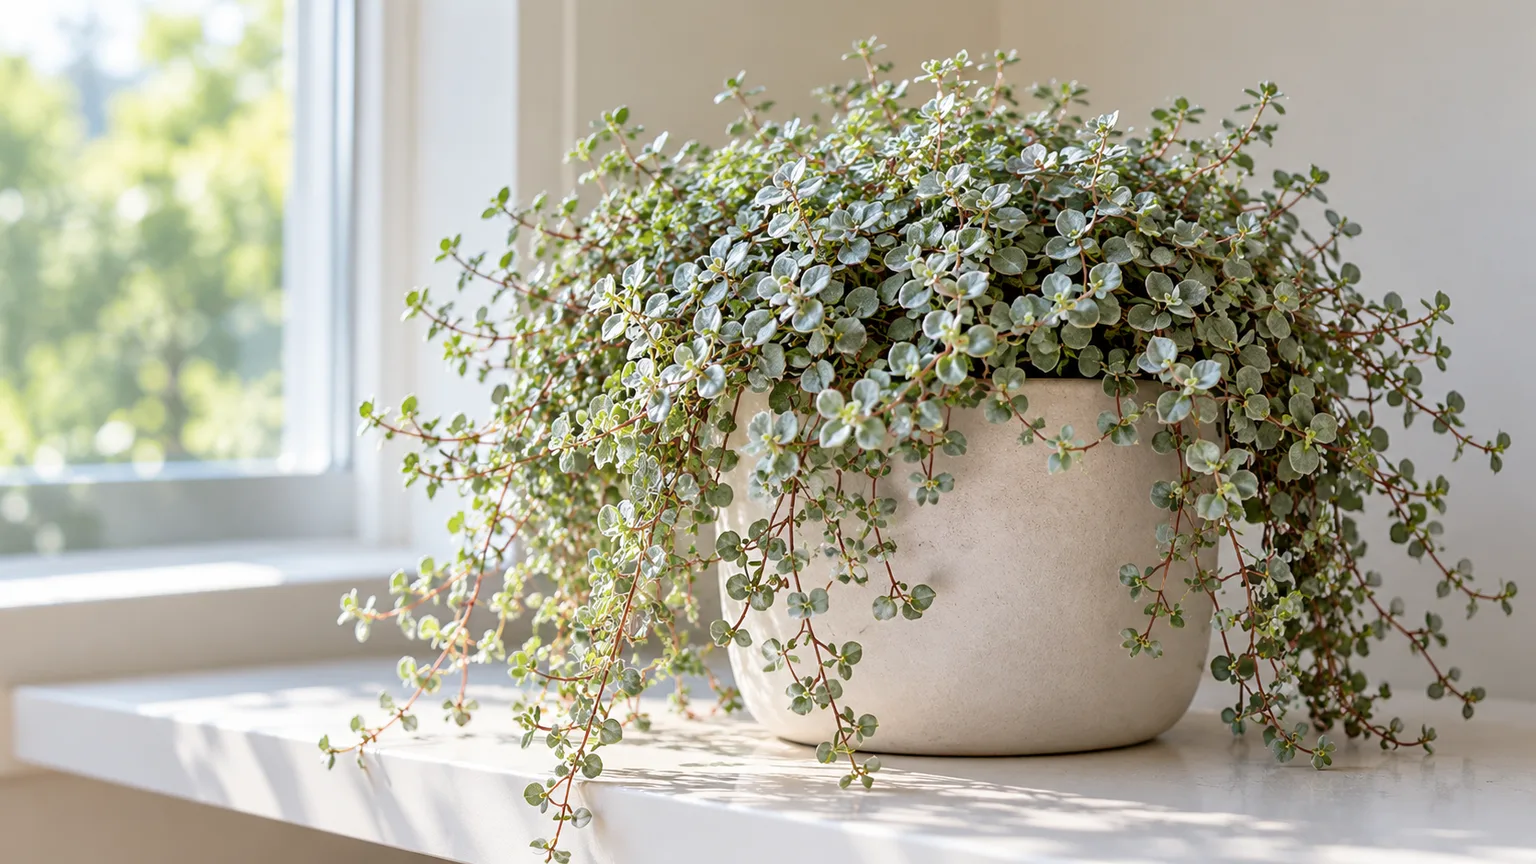
Pilea glauca is sold for its tiny, blue-silver leaves and fine reddish stems, which spill over a shelf or fill the rim of a shallow pot. Its care is less about a strict watering calendar than about keeping enough light on the foliage and enough air around the roots. Give it a bright spot out of hot direct sun, use a loose mix in a pot with drainage, and water when the surface has begun to dry while the lower mix is still slightly moist.
That balance matters: a small pot can dry quickly, while dense mix can stay wet long after the surface dries. A cue-based routine hydrates the fine roots without keeping them waterlogged.
Meet Silver Sparkle: Names, Appearance, and Growth
The plant most often sold as Pilea glauca or Silver Sparkle Pilea has a low, spreading habit and fine trailing stems carrying small rounded leaves. Depending on the light and the plant sold under that label, foliage can read as green, blue-gray, or silvery; newer stems often have a pink or red cast. Those traits make it a good fit for a shelf, hanging pot, or the edge of a mixed indoor planter, where trailing stems can hang freely rather than tangle against a wall.
What does the name Pilea glauca mean?
Horticultural references use names such as Pilea glauca, Silver Sparkle, Aquamarine, and Pilea libanensis in overlapping ways. Kew’s Plants of the World Online records Pilea libanensis as an accepted species native to Cuba, but does not establish that every plant sold as “Pilea glauca” is that species. Treat the label as a useful shopping name, not proof of exact botanical identity; seek a specialist identification for a wild plant or formal collection record. The care advice here is for the small-leaved trailing houseplant commonly sold as Silver Sparkle Pilea. Kew’s taxon record and Gardenia’s profile show why it helps to keep those names distinct.
Outside frost-free climates, grow it indoors. A porch can work in warm weather, but acclimate it to brighter light and bring it inside before cold nights. Trailing stems are natural; sparse leaves spaced far apart usually point to low light.
Pilea Glauca Care at a Glance
| Care factor | Useful starting point | What to check |
|---|---|---|
| Light | Bright, indirect light; filtered morning sun can work | Compact new growth without bleached or crisp patches |
| Water | Water after the surface dries slightly | Lower mix is lightly moist, not muddy or bone-dry |
| Mix and pot | Airy indoor mix in a pot with drainage holes | Water exits freely and the root ball is not oversized for the pot |
| Temperature | Comfortable, stable room conditions | Keep away from cold glass, drafts, heaters, and air-conditioning vents |
| Humidity | Average indoor air is often workable | Raise humidity only if dry air is confirmed as the cause of crisp edges |
| Feeding | Diluted, balanced houseplant fertilizer during active growth | Skip feeding when growth has slowed or the plant is stressed |
These are starting points, not a fixed recipe. A small nursery pot on a bright windowsill may dry quickly, while the same plant in a large decorative cachepot with dense soil can remain wet for days. Indoor-plant guidance from Purdue Extension and University of Wisconsin–Madison Extension likewise emphasizes matching light, water, temperature, and container conditions to the plant and its location.
Light: Bright, Filtered, and Close Enough
Set the pot where daylight is bright for much of the day but the leaves are not pressed against hot afternoon glass. An east-facing window is often a convenient starting point. A bright south- or west-facing window can also work if a sheer curtain softens direct sun or the plant sits several feet back; a north-facing window may be too dim in winter or in a room shaded by trees or neighboring buildings. Window direction alone does not tell you how much light reaches the leaves, so pay attention to how far the plant is from the glass and whether a nearby wall or curtain blocks the view of the sky.
The plant will show you when the spot is wrong. Low light tends to lengthen the spaces between leaves, pull stems toward the window, and leave the center of the pot thin. Direct sun can fade or crisp the parts of leaves that face the window, particularly after a sudden move from a dim shop to a sunny sill. If the plant has been in shade, move it brighter over several days rather than placing it in strong sun all at once. Turn the pot a quarter-turn every week or two if growth leans in one direction; rotation evens the shape but cannot replace light.
In winter, shorter days can slow growth beside the same window. If stems keep stretching, move the pot closer to filtered light or add a grow light. Indoor light drops quickly with distance from a window, so avoid leaving foliage against cold glass overnight.
Watering: Check the Mix, Not the Calendar
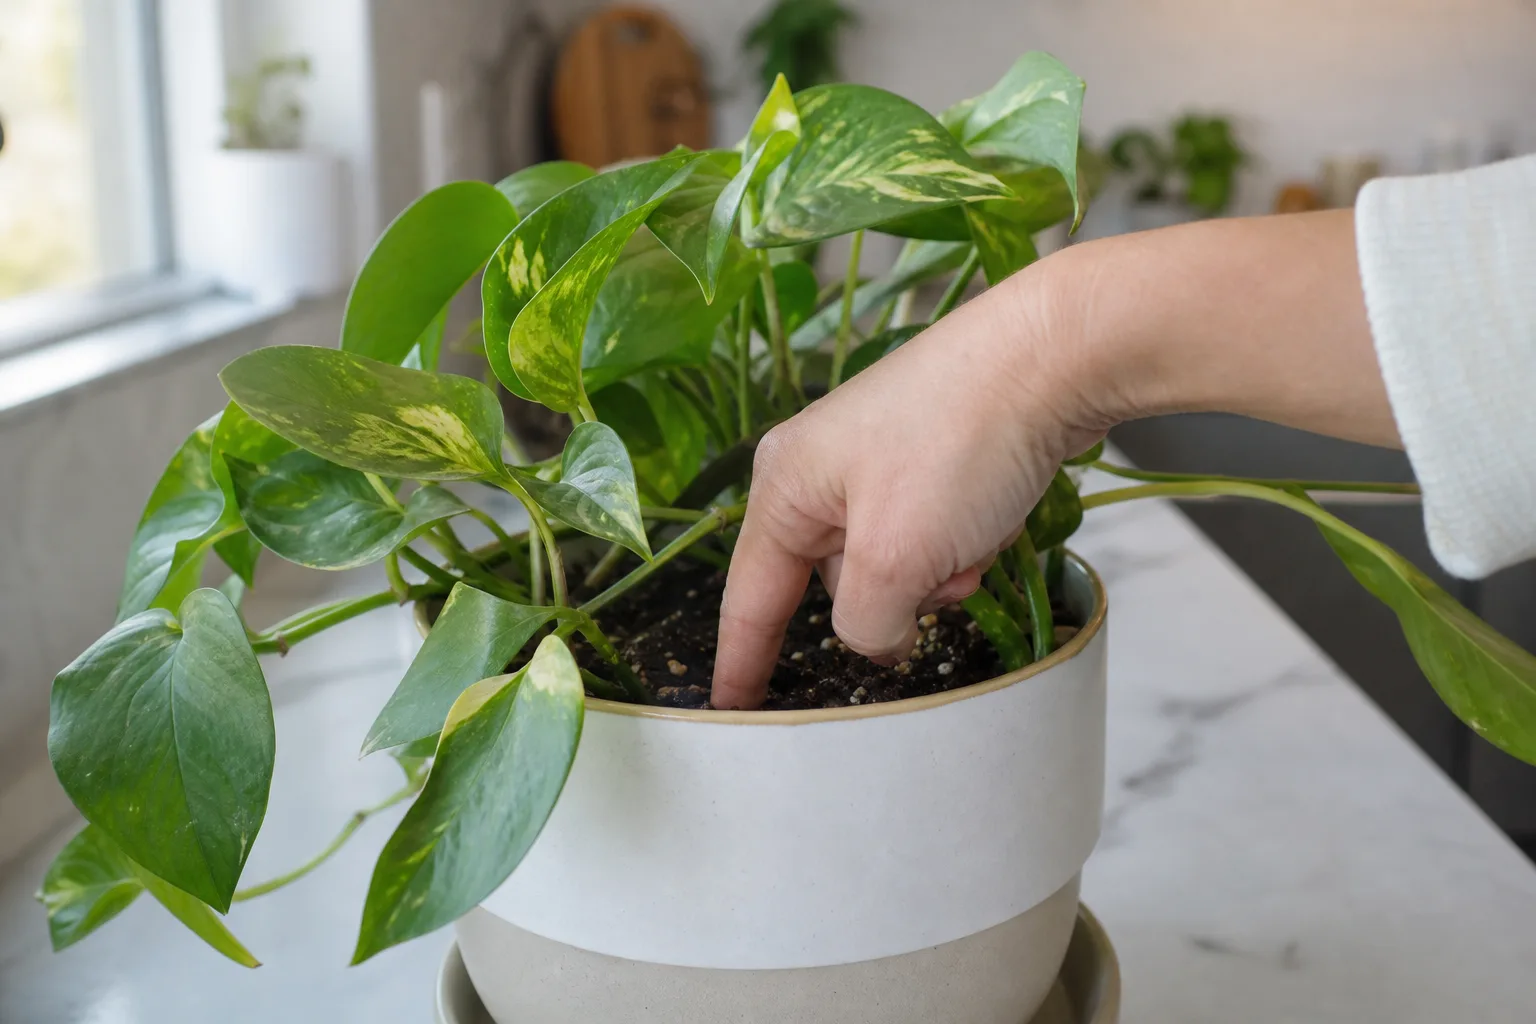
Water when the top layer of mix has begun to dry, but before the root ball dries all the way through. For a small pot, check about half an inch to an inch below the surface with a finger or wooden skewer; if that layer feels dry while deeper mix still feels faintly cool, it is usually time to water. If the mix clings wetly to the skewer or feels heavy, wait and check again later. The right interval changes with pot size, season, light, indoor temperature, and the mix itself, so “once a week” can be too frequent in a cool room and too slow in a bright, warm one.
When it is time, water evenly until it runs from the drainage holes. Let the pot finish draining and empty its saucer; roots need both moisture and air. Small sips can leave dry pockets and concentrate salts near the surface. If very dry mix sheds water down the sides, briefly set the nursery pot in a few inches of water, then lift it out and drain thoroughly.
A two-part moisture check
Use both the surface and the pot’s weight. Touching the top inch helps you estimate moisture near the roots, while lifting the pot gives you a practical comparison between freshly watered and nearly dry. A light pot plus a dry root zone means water; a heavy pot with cool, wet mix means wait, even if one exposed stem looks limp. Over time, you will recognize the weight at which this particular plant needs another soak.
Do not respond to yellow leaves by watering automatically. Yellowing can follow prolonged wet soil and damaged roots, but a plant left bone-dry can also shed or yellow leaves. Check the mix first, then look for the pattern across the plant and for other clues, such as soft stems or a pot that has stayed heavy for several days. The RHS guide to growing Pilea recommends moist but well-drained conditions for Pilea generally; for this fine-rooted trailing plant, that means a damp-to-dry cycle rather than either constant saturation or repeated drought.
Potting Mix and Container: Drainage Without a Drought
Choose a potting mix that holds a little moisture but does not pack tightly around the roots. A practical starting blend is two parts general indoor potting mix to one part perlite or pumice. If your room is very warm and the pot dries before you can keep up, use a little more potting mix; if the mix stays wet and compact, add more coarse aeration or replace it with a fresher, lighter blend. Do not use pure garden soil, which can compact in containers, and do not assume cactus mix alone is better simply because it drains quickly: an overly gritty mix may dry before the plant can use the water.
The container matters as much as the recipe. Use a pot with an open drainage hole, and if you like a decorative cachepot, keep the plant in a removable nursery pot inside it so you can drain runoff after watering. A pot only modestly wider than the root ball dries more predictably than a much larger one. Terracotta can help a careful grower who tends to overwater, but it dries faster and may make frequent checking necessary in a hot or very bright room; plastic retains moisture longer. Choose the material that suits your habits and environment rather than treating one pot type as universally correct.
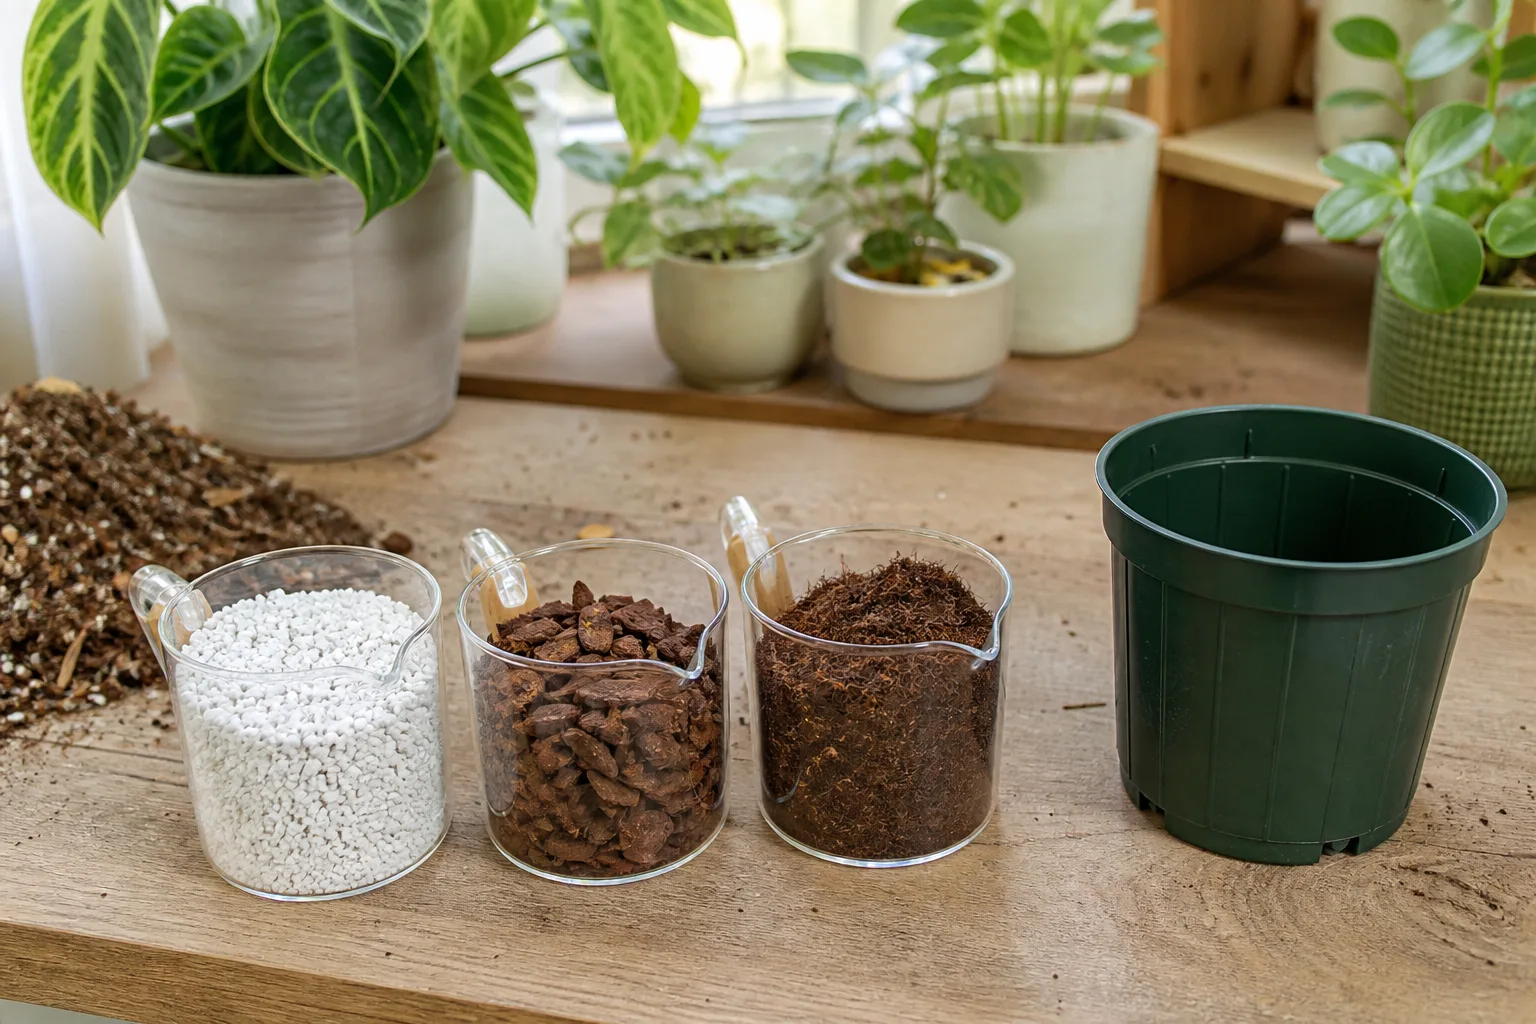
When the mix breaks down into a dense, water-repellent mass, or stays wet long after watering, refresh it rather than trying to correct the problem with more frequent small sips. A healthy pilea should not need a specialty soil pH formula; drainage, root aeration, and consistent access to modest moisture are more useful priorities for most home growers.
Temperature, Humidity, and Airflow
Pilea glauca generally fits ordinary comfortable indoor temperatures. Keep it away from cold drafts, a winter-opened window, and heating or air-conditioning outlets that blow directly across the pot. Sudden temperature swings can stress foliage and dry the root zone unevenly, while prolonged cold slows growth and makes soil take longer to dry. If you move it outdoors for summer, wait until nights are reliably mild and acclimate it to brighter light gradually.
Average household humidity is often adequate. Higher humidity can help in a very dry, heated room, but it is not a substitute for watering correctly or giving the roots fresh air. If tips become crisp while the soil moisture and light are otherwise suitable, measure room humidity before buying equipment. A small humidifier nearby can raise humidity more reliably than misting, which only wets leaves briefly and can leave foliage damp without changing the room’s overall moisture. Leave some space around a dense plant so stems dry after watering and are easier to inspect.
Fertilizer: Feed Only When Growth Is Active
During spring and summer, when the plant is producing new stems and leaves, use a balanced liquid houseplant fertilizer at the lower end of its label rate. Apply it to already-moist mix rather than to a dry root ball, and do not feed more often than the label allows. The small pot and fine roots do not need heavy doses; fertilizer is not a shortcut for poor light or a failing root system.
Reduce or stop feeding when growth slows in darker, cooler months. If the plant is dropping leaves, has root damage, has just been repotted, or is not taking up water normally, fix that stress before adding nutrients. A pale crust on the mix or pot rim can be a sign of mineral or fertilizer-salt buildup. Flush the mix with plain water until it drains freely, then let it dry to the normal point before watering again. Purdue Extension notes that soluble salts can accumulate in containers and that thorough watering helps carry them out through the drainage holes.
Pruning and Keeping the Pot Full
Prune to shape the plant, remove damaged growth, or make cuttings—not because it needs a scheduled haircut. Use clean scissors and trim a stem just above a leaf node, the small point where a leaf pair attaches. A cut below that point leaves a node on the parent stem, where new growth may emerge. Shorten the longest runners a little at a time rather than taking a large amount off a small plant at once.
If the pot has a sparse center and long outer stems, light is usually the first thing to correct. Move it brighter, rotate it periodically, and wait for new growth to show whether the change helped. Pruning can tidy old stems but will not make the existing bare section fill in. To make the pot look fuller, root a few healthy cuttings and tuck them into open spots once they have begun growing; this uses propagation to solve a shape problem rather than repeatedly cutting back a plant that still lacks light.
When to Repot Pilea Glauca
Repot when the plant gives you a reason: roots circle densely around the root ball, water rushes through because the pot is nearly all roots, growth stalls despite suitable light and feeding, or the mix has collapsed and remains wet. A few roots at a drainage hole alone do not always mean the plant needs a larger container. This pilea has fine, shallow roots and can be comfortable slightly snug; moving it too early may replace a stable watering pattern with a larger volume of wet soil.
When repotting, choose a container one modest size larger, use fresh airy mix, and keep the crown at its previous depth. Spring or early summer is convenient, but fix a broken-down mix or rotting root ball when discovered. Loosen only roots that are tightly circling or matted. Water through, drain fully, and keep the plant in bright indirect light while it settles.
Do not repot a new purchase just because it is in a nursery pot. Let it adjust, then check drainage and roots. Repot sooner if the mix stays saturated, the pot has no drainage, or roots are damaged. After a move, keep conditions steady and check moisture before watering; extra water cannot repair transplant stress.
Propagating Pilea Glauca From Cuttings
The easiest way to make another plant or fill a thin pot is to root stem cuttings. Choose spring or summer, when the parent plant is actively growing, and take several small cuttings from healthy stems rather than one long piece from a weak plant. Each cutting should include a few leaves and at least one node; roots form from nodes, not from a leaf blade alone. Use clean scissors, and avoid propagating stems with pests, yellowing, or soft spots.
Pilea glauca’s thin stems can be awkward to handle. Lay short sections where a node can stay in contact with the rooting medium, and keep the mix lightly moist while roots form. You can root cuttings directly in soil or start them in water; soil avoids a later transition from water-grown roots, while water lets you see whether roots are developing. Neither method is guaranteed, and light, warmth, and steady moisture matter more than rooting hormone.
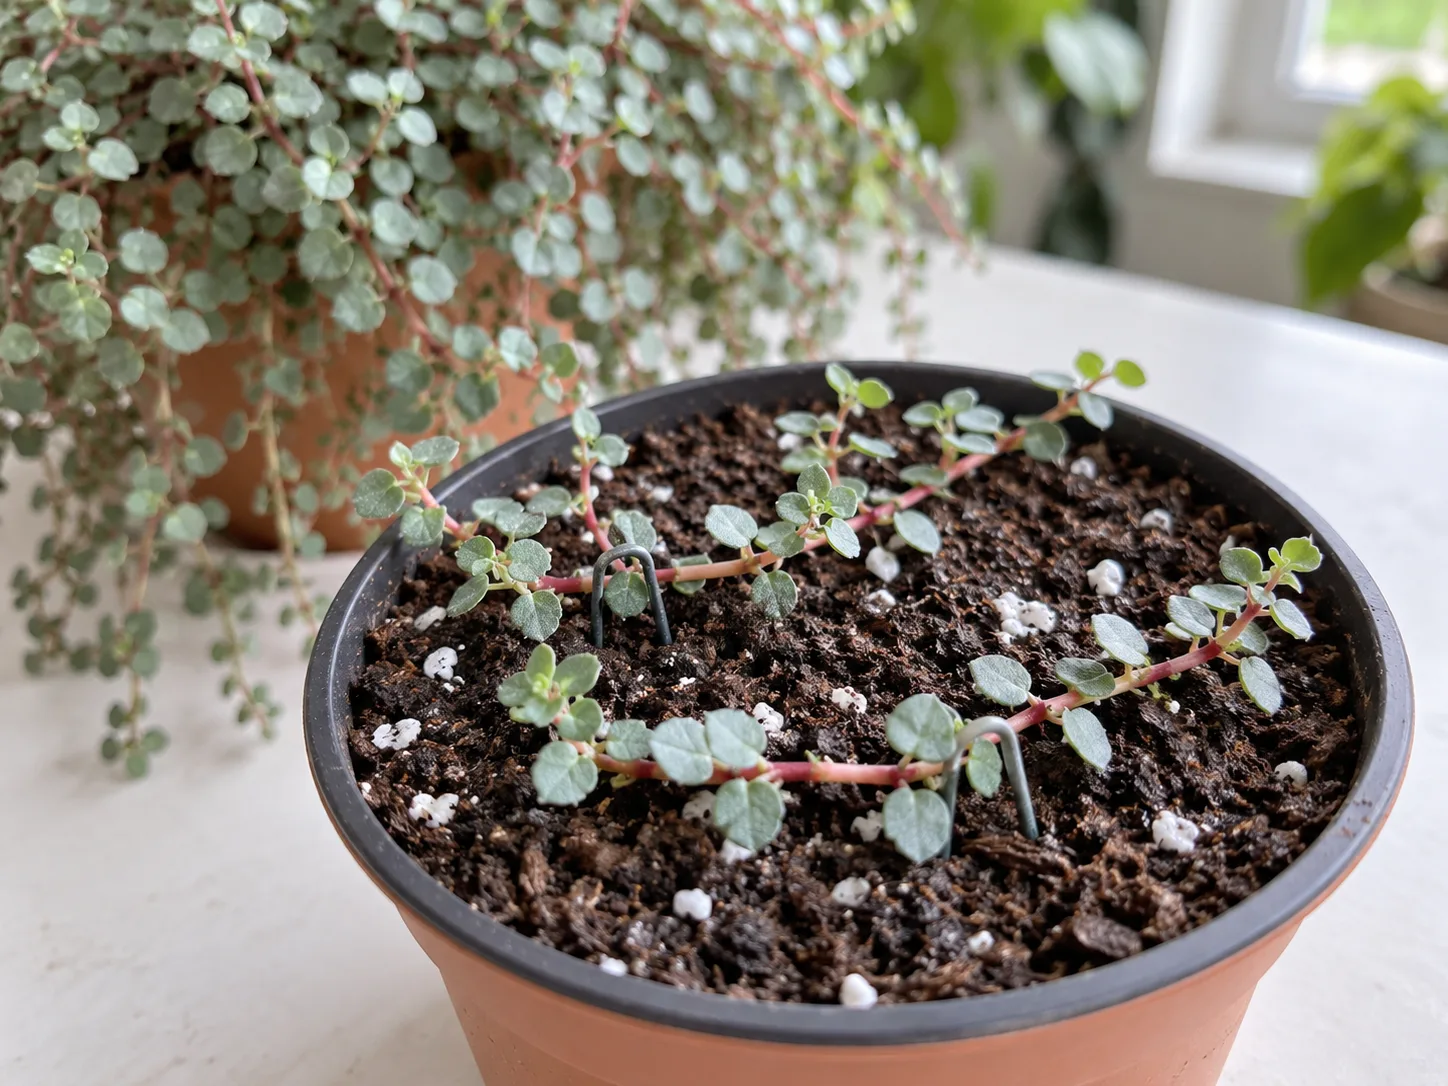
Root cuttings directly in soil
Use a small pot or shallow propagation tray filled with fresh, airy mix, pre-moistened so it feels like a wrung-out sponge rather than mud. Lay the cuttings across the surface and press each node gently against the mix; a bent paper clip or propagation pin can hold a stem in place without burying its leaves. If a node sits just under the surface, keep the surrounding mix loose so air still reaches it. Group several cuttings in one tray, but leave enough space for air to move.
Cover the tray loosely with a clear dome or bag if your room is dry, then open it daily to exchange air. A sealed, dripping-wet cover encourages mold and rot, so remove it if condensation is heavy or leaves remain wet. Put the tray in bright indirect light and warmth, not direct sun; a small covered tray heats quickly in a sunny window. Check the mix with a fingertip and add a little water only when the surface starts to dry.
New roots may appear within a few weeks, but timing depends on growing conditions. Resist tugging on every cutting to test it. Once you see new leaves or gentle resistance at a node, begin airing the cover longer and then remove it. If you started cuttings in the same pot as the parent, leave them in place as they establish. If you used a tray, move rooted pieces carefully into the mother pot or their own small container, and keep the root ball intact.
Root cuttings in water
Water rooting is useful when you want to watch root development, but the tiny leaves and delicate stems make it easy to submerge more plant than necessary. Put only the lowest node in clean water and keep all leaves above the surface. A narrow glass or small propagation vessel helps prevent a short cutting from disappearing under the water. Set it in bright indirect light and refresh the water if it becomes cloudy; do not leave a cutting in a hot sunny window.
When several roots have formed and are roughly an inch long, pot the cutting into lightly moist, well-drained mix. Water-grown roots can be more delicate when moved to soil, so handle them gently and keep the mix evenly moist while the cutting adjusts, without leaving the pot standing in water. If water cuttings repeatedly turn soft before rooting, switch to the soil method; contact with constantly wet water is not automatically the gentler choice for this plant.
Troubleshooting Yellow Leaves, Leaf Drop, and Leggy Stems
Start with the whole plant and the pot, not a single leaf. One older yellow leaf near the base can be normal as growth renews, but several yellow leaves appearing together point to a change in roots, water, light, or temperature. Compare the soil’s moisture and weight with your recent watering, then look for secondary clues. Gardenia’s Pilea glauca profile and Smart Garden Guide’s care notes also describe overlapping symptoms, which is why the soil check should come before a diagnosis based on color alone.
| What you see | Check first | First response |
|---|---|---|
| Several yellow leaves and a heavy, wet pot | Mix that stays wet; water trapped in an outer pot | Pause watering, empty runoff, and confirm drainage |
| Limp stems with dry, shrunken mix | Root ball dried too far | Water thoroughly, drain, then monitor more closely |
| Pale or crisp patches on the window side | Direct sun or heat against glass | Move to filtered light and protect from hot afternoon sun |
| Long stems with wide gaps between leaves | Low light or uneven light | Move brighter and rotate; prune only after new growth responds |
| Sudden leaf drop after a move | Cold draft, abrupt light change, or moisture swing | Stabilize conditions and correct only the confirmed stress |
For yellow leaves, a heavy pot and sour or soggy mix suggest excess water or poor drainage. Stop watering until the mix begins to dry; if the plant continues to decline, slip it out of the pot and look at the roots. Healthy roots are firm, while dead or rotting roots are soft, dark, or unpleasant-smelling. Trim damaged roots with clean scissors, discard waterlogged old mix, and repot into a clean pot with open drainage and fresh airy mix. If only a few lower leaves yellow and the plant otherwise produces healthy new growth, remove those leaves and keep watching rather than disturbing the roots unnecessarily.
If leaves curl, crisp, or drop while the root ball is very dry, water evenly and drain it fully. Then adjust the checking interval; do not jump from drought to keeping the pot constantly wet. If the top looks wet but deeper mix is dry, water may be bypassing a compact root ball, in which case a brief bottom soak followed by thorough draining can help rewet it. If yellowing is concentrated on sun-facing leaves, move the plant out of direct rays and watch the next leaves, because damaged tissue will not turn green again.
Leggy stems with widely spaced leaves usually mean the plant is not getting enough usable light. Bring it closer to a bright window, add a sheer curtain if necessary, and judge the result by the next few weeks of growth. Existing stems will not shorten; prune them back only after the new placement is working, then root healthy pieces to fill the pot. If leggy growth continues in a brighter spot, check whether an overgrown neighboring plant, screen, or deep sill is blocking light.
Pests and Root Problems
Inspect the undersides of leaves, stem joints, and the center of dense growth when you bring a plant home and whenever leaves begin stippling or declining. Spider mites may leave pale pinpricks and fine webbing; mealybugs look like small cottony clusters; scale resembles fixed bumps; aphids gather around tender growth. Sticky residue can signal sap-feeding insects. Because the foliage is small, a hand lens and a sheet of white paper under the stems can make tiny moving pests easier to spot.
Isolate an affected plant from others while you confirm the pest. Rinse or wipe reachable insects away, remove heavily infested stems, and check again over the following weeks; one cleaning rarely removes every egg or hidden insect. If you use a pesticide, choose a product labeled for the pest and indoor ornamental plants, follow its label, and test it on a small area first. Avoid homemade detergent mixtures that can damage delicate leaves. West Virginia University Extension’s houseplant guidance recommends scouting plants and keeping new arrivals separate before adding them to a collection.

Root rot is a root-zone problem, not a diagnosis based on yellow foliage alone. It becomes likely when mix remains wet for too long and roots lose access to air, especially in an oversized pot, a blocked drain hole, or a dense mix. If the stems at soil level turn soft or the plant wilts while the pot stays wet, inspect the roots promptly. Remove damaged roots and failed mix, clean the pot, and take healthy stem cuttings as insurance if much of the root system is gone. After repotting, resume watering only when the mix reaches its normal dry-top cue.
Conclusion
For a Pilea glauca, build the routine around three observations: how much light reaches the leaves, how quickly the mix dries, and whether water drains away after each soak. Bright filtered light helps keep stems closer together; a small draining pot and an airy mix make watering easier to judge; and light feeding during active growth supports new foliage without forcing it. Adjust those conditions one at a time so you can see which change helps.
When the plant grows long, prune it only after checking light, then use healthy node-bearing stems to thicken the pot. When leaves yellow or fall, test the soil before adding water or fertilizer. That simple order—observe, verify, adjust—keeps the plant manageable and makes most setbacks easier to diagnose.



