Dracaena Warneckii Repotting: When, How, and Mistakes
Dracaena Warneckii Repotting: When, How, and Mistakes
Dracaena Warneckii Repotting: When, How, and Mistakes
About this guide: Dracaena deremensis ‘Warneckii’ is the classic white-striped dracaena with gray-green leaves banded in cream or white. It is one of the most common office dracaenas because it tolerates moderate light and irregular watering better than fussy tropicals — but chronic overwatering and fluoridated tap water still produce the familiar brown-tip pattern. Match care to other deremensis forms: airy mix, dry-down between drinks, filtered water when tips burn.
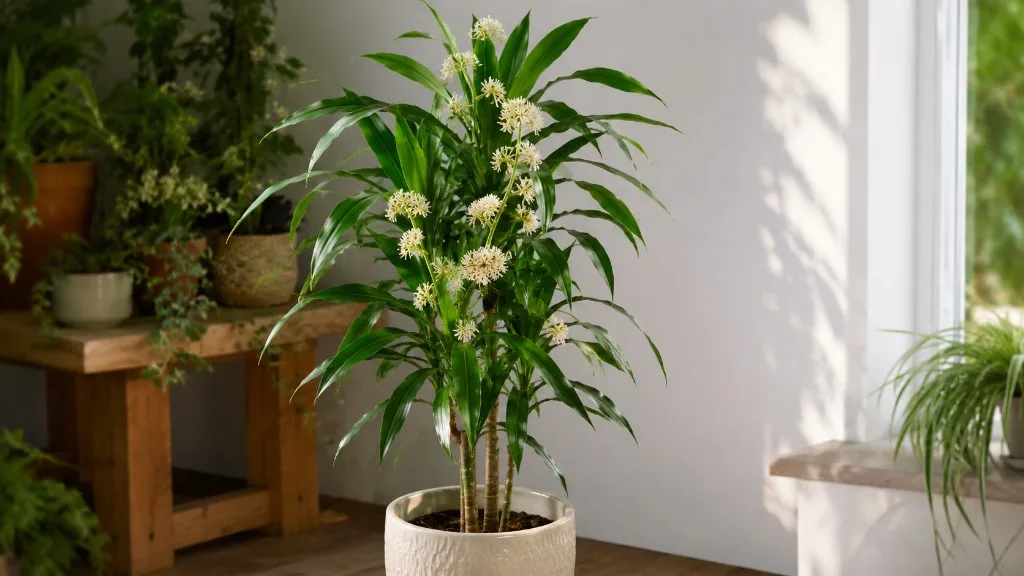
Dracaena Warneckii repotting is the moment you refresh the root zone that keeps those white-edged strap leaves stable — without turning a routine soil upgrade into weeks of yellow lower leaves and mushy cane tissue. Dracaena deremensis ‘Warneckii’ grows as a sparsely branched shrub with arching, sword-shaped leaves in upright rosettes, commonly reaching 3–5 ft indoors on a slow to moderate schedule. Unlike a single thick corn-plant cane, Warneckii often carries its visual weight in a bushy crown of striped foliage above a relatively modest root ball. That shape still tips over in light plastic pots, still suffocates in compacted peat, and still punishes oversized containers with chronic wet soil at the bottom.
Done on a two-year check-in in spring, with a one-size-up pot and the same airy mix you would choose on the Dracaena Warneckii soil guide, a Warneckii repot is usually quiet: a day of careful handling, a week of slight adjustment, then steady new growth. Done in the wrong season, in a pot that is far too large, or with a heavy hand on tap water right after the move, the same operation leaves you with drooping striped leaves, sour-smelling mix, and a watering rhythm that no longer matches the pot. This guide covers when to repot Warneckii specifically, how to do it step by step, and the mistakes that turn a soil refresh into a rescue project.
Why Repotting Matters for Dracaena Warneckii
Repotting solves three problems that eventually show up as leaf symptoms if you ignore them long enough. First, roots slowly fill the available soil volume and begin circling the pot wall, reducing the mix’s ability to hold air and water evenly. Second, even good potting media breaks down — peat and coir compress, perlite crumbles, and the pore spaces that keep dracaena roots breathing disappear over 18–36 months of regular watering. Third, salts from tap water and fertilizer accumulate at the root zone, which can worsen the fluoride-driven brown tips Warneckii is famous for, even when you believe you are watering conservatively.
Dracaena Warneckii belongs to Asparagaceae, and like other dracaenas it is sensitive to roots sitting in stagnant, airless wet soil. Clemson HGIC states that root rot usually results from a soil mix that does not drain quickly or from overly frequent watering. Jumping to a pot that is much too large creates exactly that environment. Repotting is your chance to rebuild balance before decline shows in the striped canopy — especially on plants that have lived for years in the same office corner with only occasional attention.
What Fresh Soil and Modest Root Room Fix
Fresh mix restores structure: the air pockets, organic matter, and drainage speed that compacted old soil lost months ago. Extra root room — modest, not extravagant — lets new white root tips spread outward instead of spiraling tightly against the pot wall, which improves the plant’s ability to take up water and nutrients after each watering cycle. You will notice the difference in how the pot behaves. A root-bound Warneckii often dries out faster than it used to, then wilts slightly between waterings, not because you changed your habits but because the root mat is so dense that water runs through channels without wetting the whole mass evenly.
A repot also gives you the only easy moment to inspect roots for root rot on Dracaena Warneckii — brown, mushy, sour-smelling tissue that needs trimming before it spreads. Catching rot during repotting is far simpler than trying to diagnose it from yellow lower leaves alone on a plant whose white margins can mask early stress. If roots are mostly pale and firm, you are upgrading space and soil. If they are not, repotting becomes a rescue operation, and the steps below still apply with more aggressive trimming and a lighter watering hand afterward.
Why Warneckii Repots on a Two-Year Rhythm
Dracaena Warneckii grows at a slow to moderate pace indoors, which is why it does not demand annual repotting the way a fast pothos might. Most healthy indoor Warneckii benefit from a full repot every two to three years, as the RHS recommends for dracaenas when roots become overcrowded, with a lighter top-dressing — replacing the top few centimeters of mix without disturbing roots — in intervening springs if the soil surface has crusted or salts have built up. That interval is a check-in, not a command. A young plant in a generous nursery pot may sit comfortably for three years, while a mature specimen in a 25 cm container that dries within a day of watering may need attention sooner.
Warneckii also tolerates being slightly root-bound better than many houseplants. Tight roots can even help stabilize a tall rosette in an appropriately weighted pot. The goal is not to maximize pot volume; it is to refresh soil and add just enough diameter that roots and canopy stay in proportion. Think of the two-year window as the point where mix decomposition and salt buildup usually outweigh the benefits of snug roots — not as a rigid calendar date you must hit regardless of what you see at the root ball.
Signs Your Dracaena Warneckii Needs Repotting
The clearest sign is visual: roots emerging from drainage holes or circling the surface when you lift the plant partway out of its pot. Less obvious but equally reliable signals include water that runs straight through without absorbing, a plant that wilts shortly after a thorough watering despite previously stable habits, and growth that stalls even though light and feeding have not changed. When two or more of these appear together during the active growing season, repotting is usually the right move.
Do not repot simply because a lower leaf turned yellow or a tip browned. Yellowing can mean overwatering, cold drafts, fluoride in tap water, low light, or natural aging on older strap leaves. Repot only when the root zone or soil structure is clearly the bottleneck.
Root-Bound and Fast-Drying Signals
Lift the pot and inspect the bottom first. Roots peeking through holes mean the plant has used the volume it was given. Slide the Warneckii out gently — if the root ball holds a perfect pot-shaped mold with little visible mix on the sides, you are looking at a classic root-bound situation. Circling roots at the bottom are not automatically an emergency on dracaena, but they tell you the plant has been asking for space and fresh media for a while.
Fast drainage after years of normal behavior sounds efficient until you realize water is bypassing the root mass because the center is hydrophobic or channels have opened along the pot wall. If you water thoroughly and the pot feels light again within a few hours, the mix may be spent rather than the plant thirsty. Slow drainage combined with sour smell or soft stem tissue at the soil line points to rot that requires immediate attention regardless of season. Salt crust on the soil surface or browned leaf tips despite careful watering suggest mineral buildup that a full repot or aggressive top-dressing should address — especially on fluoride-sensitive Warneckii.
Top-Heavy Instability on Striped Dracaena
On Warneckii, top-heavy wobble is not only a cosmetic issue — it is a safety and health signal. A tall rosette with full arching leaves can outweigh a small or narrow root ball, especially when the plant has been in the same pot for years while stems have thickened above. If the pot tips when you brush past it, if the plant rocks when you water, or if you have already knocked it over once, stability and root space are both in question.
Instability usually means one of three things: the pot is too small in diameter relative to canopy spread, the pot is too light for the plant’s height (common with tall plastic growers in decorative cache pots), or roots are so bound that they no longer anchor the mix firmly. Repotting addresses all three when you move to a one-size-up container with a wider, heavier base and fresh mix packed carefully around the root ball. For very tall specimens, plan to stake the stem loosely after repotting until new roots grip the soil — soft ties to a bamboo stake, never wire that cuts stem tissue.
Best Time of Year to Repot Dracaena Warneckii
Timing matters because dracaena recovers fastest when it is already geared for growth. Spring through early summer is the safest window for most indoor growers. Rising temperatures and lengthening days trigger active root and shoot development, so the plant can colonize fresh mix quickly and re-establish its watering rhythm before winter slowdown arrives. If your Warneckii has been on a two-year schedule, plan the check for mid-spring — roughly March through May in the Northern Hemisphere — when you can inspect roots and still have months of growth ahead.
Repot on a mild day when possible, and avoid extreme heat or cold snaps that add environmental stress on top of root disturbance. Morning repotting gives the plant a full day of stable indoor conditions before overnight temperature drops. You do not need greenhouse conditions — ordinary indoor warmth and medium to bright indirect light are enough, provided you keep the plant out of direct sun for the first week after the move.
Spring and Early Summer Windows
During active growth, Warneckii can resume pushing new striped leaves within two to four weeks after a well-executed repot. Roots begin exploring fresh mix almost immediately if temperatures stay above roughly 18°C (65°F) and the soil remains evenly moist but not soggy, as the RHS genus guide notes for dracaena warmth requirements. Spring is also the best time to combine repotting with pruning lower discolored leaves or shortening an over-tall stem, because the plant has the energy to seal wounds cleanly after the move.
If you missed early spring, early summer is still workable. Avoid repotting during the hottest week of the year if your home lacks air conditioning and the plant sits near a sun-facing window. Heat plus transplant stress can produce more leaf drop than the same repot in moderate conditions. Shade the plant slightly for the first seven to ten days after a summer repot, then return it to its normal bright indirect location.
When Winter Repotting Is Still Justified
Winter repotting is a backup plan, not a default. Growth slows, days are short, and a disturbed root system sits in wet mix longer because the plant is not pulling water actively. That combination increases rot risk on a species that already dislikes cold, wet roots. Skip winter repotting if the plant is merely slightly tight but still watering normally and holding leaves well.
Repot in winter only when delay would clearly harm the plant: severe root-binding with repeated wilting, active root rot that requires trimming and fresh mix, a fallen or cracked pot, or dangerous instability that risks snapping the stem. If you must repot then, use a modest size increase, keep indoor temperatures warm, provide bright indirect light, and water more cautiously than you would in spring — let the top 2–3 cm of mix dry slightly further between waterings until new growth appears.
Choosing the Right Pot Size, Shape, and Weight
The single most important pot decision is diameter, not decoration. Dracaena Warneckii wants one step up, not a mansion. Jumping from a 20 cm pot to a 35 cm pot feels generous, but the unused soil volume stays wet for days while the shallow root system catches up. That wet zone is where Asparagaceae roots struggle most, and overpotting is the fastest route to yellow lower leaves that look like a feeding problem but are really an oxygen problem at the root zone.
Measure the current inner diameter and choose a new pot 2–5 cm (about 1–2 inches) wider, with a profile that is moderately deep but not excessively tall. Warneckii roots are relatively shallow; a pot that is much deeper than the root ball creates a lower zone that may stay wet while the upper mix dries, especially before roots colonize the new volume. For a Warneckii in a 20 cm pot, a 22–25 cm pot is appropriate. From 28 cm, move to 30–33 cm. Repeat the one-size-up rule each repot across the plant’s life rather than skipping sizes to save effort later.
The One-Size-Up Rule for Shallow Roots
Nursery and extension guidance consistently recommends increasing dracaena pot diameter by only 1–2 inches per repot. That principle matches root biology. Roots grow into soil progressively; until they do, excess mix is essentially a water reservoir with limited uptake capacity. Dracaenas even perform well when slightly snug, which is why the one-size-up rule is a ceiling, not a minimum — you are refreshing soil and adding modest room, not maximizing container volume.
The one-size-up rule also keeps watering rhythm predictable after repotting. A modest increase in soil volume means you water slightly less often than before, but not so much less that the mix stays saturated at the bottom for a week. If you repot and find yourself waiting twelve to fourteen days before the top dries, the pot is probably too large, too deep, or filled with mix that is too heavy. All three are easier to prevent upfront than to fix after leaf loss.
Matching Pot Weight to a Leafy Canopy
For a desk-sized Warneckii under 60 cm, a lightweight plastic nursery pot may be fine. For a 4–5 ft specimen with a full crown of arching striped leaves, pot weight becomes part of the care plan. Glazed ceramic, terracotta, and thick-walled concrete planters add mass at the base that helps counterbalance canopy weight. Choose a pot that is wider at the base than at the rim when possible — a slight taper is normal, but a tall, narrow cylinder is the worst shape for a heavy-headed dracaena.
Terracotta dries faster, which helps overwaterers but demands more checks in bright, dry rooms. Glazed ceramic adds stability and is often the best choice for larger Warneckii in living rooms. Plastic works for smaller plants or inside a heavy cache pot, but tall specimens in light plastic on smooth floors tip easily — add a heavy saucer, surface ballast stones, or a lockable plant caddy. Every pot still needs drainage holes.
Best Soil Mix for Repotting Dracaena Warneckii
Dracaena Warneckii wants well-draining potting mix with enough organic matter to hold moisture without staying soggy. The Missouri Botanical Garden describes related dracaenas as preferring consistently moist, well-drained, organically rich soil indoors. Target pH 6.0–6.5; standard peat- or coir-based indoor mixes land close enough that hobbyists rarely need to adjust unless tap water is extremely alkaline.
A reliable DIY blend for repotting Warneckii:
- 60% quality peat- or coir-based potting mix
- 20% perlite, pumice, or coarse horticultural grit
- 20% orchid bark or coarse coco chips for long-term structure
The RHS suggests a similar ericaceous blend — three parts peat-free ericaceous compost, one part perlite, one part medium orchid bark — for dracaena repots. That ratio drains within seconds of watering while holding enough moisture that Warneckii does not dry to dust between checks. Adjust upward on perlite or bark if your home is cool or you tend to water heavily; reduce chunk fraction slightly if the plant dries too fast in bright, dry air and you are repotting a smaller specimen.
DIY Blend for Deremensis Cultivars
Mix ingredients in a tub before you repot rather than layering them in the pot. Dry blending distributes perlite and bark evenly and prevents the “all drainage at the bottom” mistake, which does not work the way folklore suggests — water moves through the whole column according to pore structure, not separate layers.
Orchid bark keeps the mix open for years as peat compresses; Warneckii benefits from that longevity because repot intervals stretch to two or three years. Avoid garden soil, which compacts and introduces pathogens. Avoid pure cactus mix unless you amend it heavily with organic potting base; dracaena is not a desert succulent. Avoid heavy, all-peat blends without amendment — they work for a season, then collapse into a dense block that mimics overwatering even when you are careful.
Full repot — removing the plant, loosening outer circling roots, and replacing essentially all old mix — is appropriate when roots are bound, mix is compacted or sour, or you are correcting rot. Top-dressing — scraping out the top 3–5 cm of old mix and replacing it with fresh blend without disturbing roots — is a gentler option between full repots when drainage is still acceptable but salts have built up. Top-dressing in early spring can buy another year if the plant is not yet root-bound at the bottom, but it will not solve circling roots or a tipping canopy. Never reuse old mix from a rot case; fresh media is simpler and safer.
Fluoride-Sensitive Mix Choices at Repot Time
Warneckii is notably sensitive to fluoride, and repotting is a high-risk moment for tip burn if you pair fresh mix with the wrong water and fertilizer habits. Clemson HGIC advises avoiding potting soils with a very high percentage of perlite, keeping soil pH between 6.0 and 6.5, and skipping fertilizers with superphosphate because of elevated fluorine. That does not mean zero perlite — moderate perlite at 20% balances drainage with mineral sensitivity better than a half-perlite succulent mix used straight.
After repotting, water with rainwater, distilled water, or reverse-osmosis water for the first month if brown tips have been a recurring issue. Hard tap water is alkaline and can neutralize the slightly acidic mix Warneckii prefers, while fluoride accumulates in leaf margins over time. Hold fertilizer for at least four weeks after repot anyway — fresh mix already contains nutrients, and tender new root tips burn easily if you feed too soon.
Step-by-Step: How to Repot Dracaena Warneckii Without Shock
Repotting Warneckii is straightforward if you prepare materials first and minimize root exposure time. Gather the new pot, pre-mixed soil, clean scissors or pruners, a chopstick or pencil, optional stake and soft ties, and a watering can. Work at a comfortable height — a sturdy table saves your back on heavy plants — and clear space so a tall stem does not have to lean against a wall during the process.
Step 1: Water the plant 24 hours before repotting. A lightly moist root ball holds together and slips out of the old pot more cleanly than a bone-dry or soggy one.
Step 2: Add enough fresh mix to the bottom of the new pot so the root ball will sit with the previous soil line about 2–3 cm below the rim. Do not create a thick gravel drainage layer; it does not improve drainage and can create a perched water table.
Step 3: Turn the Warneckii on its side with help if it is tall, and slide it out while supporting the base of the stem. If it resists, squeeze flexible nursery pots or run a knife around the inside edge of rigid pots.
Step 4: Inspect roots. Trim brown, mushy tissue with clean scissors. Tease circling roots at the bottom and sides gently so they point outward. Avoid washing away the entire root ball unless rot forces full cleaning.
Step 5: Set the plant in the new pot so the previous soil line matches its old position. Warneckii stems should not be buried deeper than they were growing; burying the stem invites rot at the base.
Step 6: Backfill with fresh mix, working soil between roots with a chopstick while holding the plant centered. Firm lightly — enough to remove large air gaps, not enough to compress mix into a brick.
Step 7: Water thoroughly until excess runs from drainage holes. Empty the saucer. Place the plant in bright indirect light, out of direct sun, for 7–14 days.
Step 8: Install a stake if the plant wobbles. Secure with soft ties in two places along the stem. Hold fertilizer for at least four weeks while roots settle.
Root Inspection, Trimming, and Backfill
The goal of root teasing is to redirect growth, not to destroy the root ball. Warneckii relies on fine root hairs for water uptake; bare-rooting by washing every particle of old soil away strips those hairs and extends recovery time unnecessarily. Keep most of the original root mass intact while freeing the outer circling layer.
If roots are densely matted at the bottom, you may slice 1–2 cm off the bottom of the root ball with a clean knife to stimulate new white tips — a standard nursery technique adapted for houseplants. Avoid removing more than one-third of total root mass unless you are rescuing rot. For large, heavy Warneckii, use a wheeled caddy or enlist a second person so you are not yanking the stem to free the pot. Lift with your legs, support the stem base, and never pull the plant by its leaves.
Post-Repot Watering and Recovery Timeline
Center the plant so it stands without wobbling before you stake. A wobbly repot usually means insufficient backfill beneath the root ball, a pot that is too tall relative to root depth, or a base that is too narrow for the canopy. Add mix under the ball, not just around the sides, until the plant sits firmly. On tile or hardwood, verify stability by gently pushing the stem from several angles.
The first watering settles mix and closes small air pockets. If the soil level drops noticeably, top up before roots grow into empty space. For the first two weeks, water when the top 2–3 cm feels dry — similar to pre-repot checks on the watering guide, but expect the interval to lengthen slightly as soil volume increases. Mild wilting or one or two yellow lower leaves in the first week is common on larger specimens. Recoverable stress improves with a careful drink and stable light. Wilting that worsens daily despite correct moisture usually means rot, oversized pot, or buried stem tissue — inspect accordingly.
Knowing what normal recovery looks like keeps you from overcorrecting. Mild transplant shock on Warneckii usually shows as slight leaf droop, a pause in new leaves, or one to three dropped lower leaves for one to two weeks. Full root re-establishment typically takes four to six weeks in warm, bright conditions — longer in winter or on very large specimens. New growth is the clearest success signal: firm upright stem tissue, normal leaf size, and clean white margins on fresh foliage mean roots have found the new mix.
Common Dracaena Warneckii Repotting Mistakes
Oversized pots top the list. More soil without more roots means chronic bottom wetness and yellow lower leaves that look like nutrient problems but are really oxygen problems. Stick to one size up even if you imagine the plant will grow into the space soon. On Warneckii, patience is cheaper than leaf loss.
Bare-rooting or over-washing removes the fine hairs that absorb water. Tease outer circling roots; do not scrub the ball clean unless rot forces it. Recovery from aggressive washing on a slow-growing Warneckii can take six to eight weeks instead of three or four.
Immediate fertilizing after repot burns tender new root tips in fresh, already nutrient-containing mix. Wait until you see new growth that matches the plant’s normal size and color, then resume half-strength feeding per the fertilizer guide if your routine includes fertilizer. Warneckii is not a heavy feeder; the first month after repot needs stability, not a nutrient push.
Repotting on day one after purchase adds stress when the plant is already adjusting to your home’s light and humidity. Quarantine new Warneckii, learn how fast the pot dries, and repot only when roots or mix clearly need attention — unless the nursery soil is sour or pests are obvious.
Choosing a narrow, lightweight pot for a tall specimen trades short-term aesthetics for long-term tipping and root damage every time the plant falls. Match base width and pot weight to canopy size. A wider one-size-up pot beats a dramatically larger narrow cylinder every time.
Using a pot without drainage holes turns repotting into a long-term rot trap. If you love a decorative container, keep the plant in a nursery pot that drains freely and lift it out to empty the saucer.
Repotting for the wrong reason — moving a plant that is yellowing from fluoride-heavy tap water or cold drafts — adds stress without fixing the trigger. Diagnose first; repot when roots or mix are clearly the issue.
Ignoring pet safety during the messy phase: the ASPCA lists Dracaena as toxic to cats and dogs due to saponins, with ingestion causing vomiting, anorexia, and depression. Keep fallen leaves and discarded soil out of reach while you work.
When to use this page vs other Dracaena Warneckii guides
- Dracaena Warneckii overview — Start here for whole-plant context before deep-diving this topic.
- Dracaena Warneckii soil — Use when mix composition and drainage are the main question, not pot timing.
- Dracaena Warneckii watering — Use after repot to recalibrate dry-down rhythm and fluoride-safe water.
- Root rot on Dracaena Warneckii — Escalate here when repot inspection finds mushy roots or decline continues after the move.
Related Dracaena Warneckii guides
- Dracaena Warneckii overview
- Dracaena Warneckii soil
- Dracaena Warneckii watering
- Dracaena Warneckii light
- Dracaena Warneckii propagation
- Dracaena Warneckii fertilizer
- Dracaena Warneckii pruning
- Root rot on Dracaena Warneckii
- Overwatering on Dracaena Warneckii
Conclusion
Dracaena Warneckii repotting comes down to reading the roots and the base, checking in every two to three years, choosing spring or early summer when you can, moving the plant one pot size up with fresh, well-draining mix, and matching pot weight and width to a leafy striped canopy so it stays upright while roots settle. The plant grows slowly enough that a calendar reminder is useful, but never repot on autopilot when the real problem is fluoride in tap water, light, or temperature.
Get pot size, soil, and stability right and Warneckii rewards you with a quiet recovery and years before the next move. Oversize the container, pick a narrow lightweight pot, fertilize too soon, or bare-root without cause and the same plant will look punished for weeks. Watch roots and base stability, not just leaves, and treat repotting as a targeted fix — not a reflex — and you will rarely set back a healthy striped dracaena with a routine upgrade.