Hawaiian Pothos Repotting Guide: When, How, and Mistakes
Hawaiian Pothos Repotting Guide: When, How, and Mistakes to Avoid
Hawaiian Pothos Repotting Guide: When, How, and Mistakes to Avoid
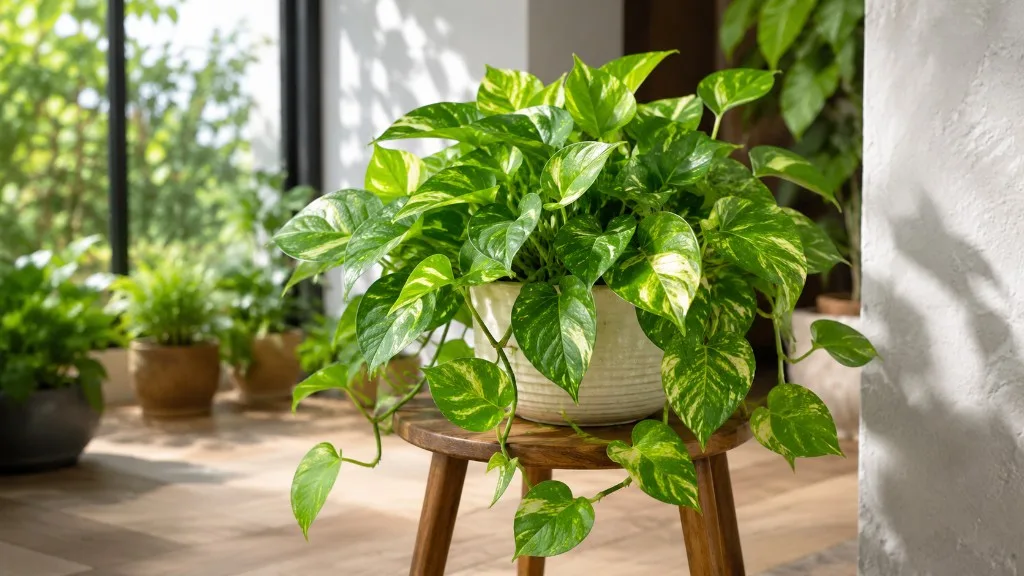
Hawaiian Pothos (Epipremnum aureum ‘Hawaiian’) is sold for its large heart-shaped leaves splashed in golden-yellow and green — a bolder look than standard golden pothos. That extra leaf area is not just cosmetic. In bright indirect light, a mature Hawaiian vine transpires more water through those broad blades, which means the root system works harder and can fill a container sooner than you expect from the thin stems above the soil line. Repotting is how you restore drainage, refresh depleted mix, and give those roots room to support the variegation you bought the plant for in the first place.
Done in spring with a modest pot increase and a fresh aroid mix, a Hawaiian pothos repot is usually quiet work: an hour at the bench, a week of slight adjustment, then new leaves with restored golden color along the vines. Done in an oversized decorative pot, with roots stripped bare, or while the plant is already struggling from unrelated stress, the same job can leave you with limp stems and washed-out new growth for weeks. This guide covers when to repot this cultivar, how to do it step by step, and the mistakes that turn a routine upgrade into a recovery project.
Why Repotting Matters for Hawaiian Pothos
Repotting solves three problems that eventually show up as leaf symptoms if you ignore them. First, roots circle the pot wall into a dense mat that cannot absorb water or oxygen efficiently. Second, peat and coir compress over time — perlite crumbles, bark breaks down, and the pore spaces that keep aroid roots breathing disappear. Third, salts from tap water and fertilizer accumulate at the root zone, which can burn fine root hairs and appear as brown tips or pale new growth even when your Hawaiian Pothos watering routine looks careful.
Hawaiian pothos belongs to Araceae, the arum family. NC State Extension notes that pothos climbs by aerial roots and, with adequate light and support, begins producing large mature leaves — exactly what the Hawaiian cultivar is selected for. Aroids share a low tolerance for roots sitting in stagnant, airless wet soil. The most common repotting failure — jumping to a pot that is much too large — creates exactly that environment. Above ground the plant looks tough; below ground it wants evenly moist, well-aerated mix, not a swamp.
What fresh soil and extra root room fix
Fresh mix restores structure: air pockets, organic matter, and drainage speed that compacted old soil lost months ago. Extra root room lets white root tips spread outward instead of spiraling, which improves water and nutrient uptake after each watering cycle. A root-bound Hawaiian pothos often dries out in hours and then wilts dramatically between sessions — not because you are underwatering on Hawaiian Pothos on purpose, but because water runs through channels without wetting the dense root mass evenly.
A repot is also the easiest moment to inspect roots for root rot on Hawaiian Pothos — brown, mushy, sour-smelling tissue that needs trimming before it spreads. Catching rot during repotting is simpler than diagnosing from yellow leaves alone, especially when lower foliage naturally senesces on long trailing vines. If roots are mostly white and firm, you are upgrading space and soil. If they are not, repotting becomes a rescue operation with more aggressive trimming and a lighter watering hand afterward.
How large-leaf Hawaiian cultivars outgrow pots faster
Most indoor Hawaiian pothos reaches roughly 2–3 m of trailing vine at maturity, with individual stems longer when trained on a moss pole. Growth is fast in warm, bright conditions and slows sharply in cool, dim winter months. The Hawaiian cultivar’s larger leaf surface can push a vigorous specimen into root-bound territory within a single growing season in a small nursery pot — faster than a compact golden pothos in the same light.
As a working baseline, plan on a full repot every 1–2 years for an actively growing indoor Hawaiian pothos, or sooner when multiple root-bound signals appear together. Clemson HGIC recommends repotting when roots emerge from drainage holes or growth slows. The RHS advises repotting in spring when roots become crowded, moving to a container one size larger and avoiding overpotting. The calendar is a reminder to check roots, not a command to repot regardless of what you find.
Signs Your Hawaiian Pothos Needs Repotting
The clearest sign is visual: roots emerging from drainage holes or circling the surface when you slip the plant partway out of the pot. Equally reliable signals include water that runs straight through without absorbing, wilting hours after a thorough watering, and growth that stalls even though light and feeding have not changed. When two or more appear during the active growing season, repotting is usually the right move.
Do not repot simply because a leaf turned yellow. Yellowing can mean overwatering on Hawaiian Pothos, cold drafts, low light, or natural aging of lower leaves on a long vine. Repotting a plant already stressed for unrelated reasons adds another variable. Confirm that the root zone is the bottleneck before you commit to the work.
Root-bound and drainage signals
Lift the pot and inspect the bottom first. Roots peeking through holes mean the plant has used the volume it was given. Slide the plant out gently — if the root ball holds a perfect pot-shaped mold with little visible mix on the sides, you have a classic root-bound situation. On Hawaiian pothos, the root mass can look surprisingly dense relative to thin stems above ground, which is why checking the bottom matters more than judging by vine length alone.
Fast drainage sounds positive until you realize water is bypassing a hydrophobic root center. If the pot feels light again within an hour after watering, the mix may be spent. Slow drainage combined with sour smell or mushy stems points to rot that requires immediate attention.
Leaf and variegation clues tied to root stress
Stunted new growth is a late-stage root-bound signal. Hawaiian pothos normally pushes fresh leaves regularly in adequate light, often every one to two weeks on active vines. When new leaves arrive smaller, thinner, or with reduced golden variegation, depleted or compacted soil is a prime suspect — though low light alone can also fade color, so pair leaf checks with a root inspection rather than assuming repotting fixes a placement problem.
Top-heavy wobble — foliage mass outweighing the root anchor — is another clue, especially on moss-pole specimens with large leaves at the top. Pale or yellow lower leaves can indicate nutrient exhaustion in old mix. Brown, crispy tips can reflect salt buildup; flushing helps short term, but fresh mix during repot is the durable fix.
Best Time of Year to Repot Hawaiian Pothos
Hawaiian pothos recovers fastest when it is already geared for growth. Spring through early summer is the safest window for most indoor growers. Rising temperatures and lengthening days trigger active shoot and root development, so the plant can colonize fresh mix quickly. Clemson HGIC recommends repotting during active growth when temperatures are warm and days are longer. Keep indoor temperatures in the 18–29°C (65–85°F) range the plant already prefers — Wisconsin Extension lists 70–90°F (21–32°C) as ideal for active pothos growth.
Spring and early summer windows
During active growth, Hawaiian pothos can show new turgid leaves within two to four weeks after a well-executed repot. Roots explore fresh mix almost immediately if temperatures are warm and soil stays evenly moist but not soggy. Spring is the best time to combine repotting with pruning for a fuller plant, or to install a moss pole so the base is stable and aerial roots can attach as leaves enlarge — the growth habit this cultivar is often grown for.
If you missed spring, early summer still works. Avoid repotting during the hottest week if your home lacks air conditioning. Shade slightly for the first week after summer repotting, then return to bright indirect light.
When winter repotting is still justified
Winter repotting is a backup plan, not a default. Growth slows, days are short, and disturbed roots sit in wet mix longer because the plant is not pulling water actively — a combination that increases rot risk for any aroid. Skip winter repotting if the plant is merely slightly tight but still growing a little.
Repot in winter only when delay would clearly harm the plant: severe root-binding with repeated wilting, active root rot requiring trimming and fresh mix, or a broken pot. Use a modest size increase, keep temperatures above roughly 18°C, provide bright indirect light, and water more cautiously than in spring until new growth returns.
Choosing the Right Pot Size and Material
The most important pot decision is diameter, not aesthetics. Hawaiian pothos wants one step up, not a mansion. Jumping from a 12 cm pot to a 20 cm pot leaves unused soil wet for days while roots catch up — and yellow lower leaves that look like a feeding issue are often an oxygen issue at the root level.
Measure the current inner diameter and choose a new pot 2–5 cm (about 1–2 inches) wider, with similar depth or slightly deeper if the plant is top-heavy or you are adding a moss pole. From a 10 cm nursery pot, 12–13 cm is appropriate. From 15 cm, move to 17–18 cm. Repeat the one-size-up rule each repot rather than skipping sizes.
The one-size-up rule
Roots grow into soil progressively; until they do, excess mix is a water reservoir with no uptake capacity. Clemson HGIC recommends a pot only 1–2 inches wider with drainage holes. The RHS warns against overpotting, where compost stays wet too long relative to root mass. More soil without more roots means the lower half stays saturated while the surface looks dry — confusing watering checks and encouraging rot.
The one-size-up rule also keeps Hawaiian Pothos watering predictable after repotting. A modest soil-volume increase means you water slightly less often than before, but not so much less that the bottom stays saturated for a week.
Drainage holes and pot materials
Every Hawaiian pothos pot needs drainage holes for long-term indoor care. Decorative cache pots without holes work only if the plant remains in a draining nursery pot and you empty the saucer after every watering. Clemson HGIC notes that plastic pots hold moisture longer than terracotta — useful context when choosing material after repotting.
Terracotta dries faster, helpful if you tend to overwater. Plastic retains moisture longer, which can help in dry, bright rooms where large leaves dry the mix quickly. Glazed ceramic sits between the two; weight adds stability for top-heavy pole-trained plants. Hanging baskets work but dry quickly after repotting until roots fill the new volume.
Best Soil Mix for Repotting Hawaiian Pothos
Hawaiian pothos wants well-draining standard potting mix that stays airy after repeated watering. The Missouri Botanical Garden describes Epipremnum as preferring moist, well-drained soils — the tension every good houseplant mix balances. Target pH 6.0–6.5; standard peat- or coir-based indoor mixes land close enough unless tap water is extremely alkaline.
A reliable DIY blend for repotting:
- 60% quality peat- or coir-based potting mix
- 20% perlite or pumice for aeration
- 20% orchid bark or coarse coco chips for chunk and long-term structure
That ratio drains within seconds of watering while holding enough moisture that Hawaiian pothos does not wilt hourly. Clemson HGIC recommends fresh indoor mix with perlite or orchid bark to keep aroid roots breathing. Add extra perlite if your home is cool or you water heavily; add bark if the plant dries too fast in bright, dry air where large leaves pull moisture quickly.
DIY blend ratios that stay airy
Mix ingredients in a tub before repotting rather than layering in the pot. Dry blending distributes perlite and bark evenly and avoids the folklore mistake of a thick gravel “drainage layer” at the bottom, which can create a perched water table. Avoid garden soil, which compacts and introduces pathogens. Avoid pure cactus mix unless you amend heavily with potting mix and bark.
Full repot — removing the plant, loosening roots, replacing essentially all old mix — fits root-bound plants, compacted or sour mix, or rot correction. Top-dressing — replacing only the top 3–5 cm — is gentler when drainage is still acceptable but salts have built up. Top-dressing will not solve circling roots at the bottom. Never reuse old mix from a rot case; fresh mix is simpler and safer.
Step-by-Step: How to Repot Hawaiian Pothos Without Shock
Gather the new pot, pre-mixed soil, clean scissors, a chopstick or pencil, and a watering can. Work on a wipeable surface — pothos stems are tough, but rough handling snaps brittle older vines. If the plant hangs from a high hook, repot at a table and reroute vines carefully.
Step 1: Water the plant 24 hours before repotting. A lightly moist root ball holds together and slips out more cleanly than a bone-dry or soggy one.
Step 2: Add a small mound of fresh mix to the bottom of the new pot. Do not create a thick gravel drainage layer.
Step 3: Turn the Hawaiian pothos on its side and slide it out, supporting the stem bases. Squeeze flexible nursery pots or run a knife around rigid pots if needed.
Step 4: Inspect roots. Trim brown, mushy tissue with clean scissors. Tease circling roots gently so they point outward.
Step 5: Set the plant so the previous soil line sits about 1–2 cm below the rim. Do not bury stems deeper than they were growing; buried nodes invite stem rot.
Step 6: Backfill with fresh mix, working soil between roots with a chopstick. Firm lightly — enough to remove large air gaps, not enough to compress mix into concrete.
Step 7: Water thoroughly until excess runs from drainage holes. Empty the saucer. Place in bright, indirect light, out of direct sun, for 7–10 days.
Step 8: Hold fertilizer for at least four to six weeks while roots settle. Resume normal watering checks rather than a calendar schedule.
Preparing the plant and teasing circling roots
The goal is to redirect growth, not destroy the root ball. Hawaiian pothos relies on fine root hairs for uptake; bare-rooting by washing every particle away strips those hairs and extends recovery unnecessarily. Keep most of the original root mass intact while freeing the outer circling layer. If repotting a pot with multiple stems, you can divide at this stage with a clean knife, provided each division has roots and a growing tip.
If roots are densely matted, you may slice 1–2 cm off the bottom to stimulate new white tips. Avoid removing more than one-third of total root mass unless rescuing rot. Trim vine length lightly only if you removed roots aggressively so foliage mass matches root capacity.
Placement, backfill, and the first watering
Center the plant so it stands without wobbling. If adding a moss pole, install it during backfill so the pole base is stable and soft ties hold the main stem without cutting into it. RHS guidance notes that keeping moss or coir damp helps aerial roots attach — relevant when repotting pole-trained Hawaiian specimens grown for large leaves.
The first watering settles mix and closes small air pockets. For the first week, water when the top half of the mix feels dry — similar to normal Hawaiian pothos care, but expect the interval to lengthen slightly as soil volume increases. Clemson HGIC recommends letting the top 1–2 inches dry before watering again after repotting. Mild wilting in the first 48 hours is common; wilting that worsens daily despite careful moisture usually means rot, oversized pot, or buried stems.
Common Hawaiian Pothos Repotting Mistakes and Recovery
Oversized pots top the list. More soil without more roots means chronic bottom wetness and yellow lower leaves. Stick to one size up even if you imagine the plant will grow into the pot soon — Hawaiian pothos is fast, but it still fills soil volume over weeks, not overnight.
Bare-rooting or over-washing removes fine hairs that absorb water. Tease, do not scrub. Immediate fertilizing after repot burns tender new root tips in fresh, already nutrient-rich mix. Clemson HGIC recommends skipping fertilizer while roots re-establish. Wait until new growth matches normal leaf size and golden variegation before resuming diluted feeding.
Repotting a sick plant for the wrong reason — yellow leaves from cold drafts, direct sun scorch, or recent overwatering — adds stress without fixing the trigger. Pots without drainage holes turn repotting into a long-term rot trap. Disturbing roots during peak stress — right after shipment, pest treatment, or a major move — compounds shock unless rot forces your hand.
Ignoring pet safety during messy work: the ASPCA lists pothos as toxic to cats and dogs because of calcium oxalate crystals, which cause oral irritation, drooling, vomiting, and difficulty swallowing if chewed. Keep repotting debris, trimmings, and loose leaves out of reach while you work, especially if pets treat trailing vines as toys.
Mild transplant shock usually shows as slight wilting, a pause in new leaves, or one or two dropped lower leaves for one to two weeks. Full root re-establishment typically takes four to six weeks in warm, bright conditions. New firm leaves with restored golden variegation are the clearest success signal. Place the plant in bright, indirect light during recovery. Humidity of 30–50% is fine. If wilting persists beyond three weeks, inspect for rot, buried stems, or an oversized pot.
Conclusion
Hawaiian pothos repotting comes down to reading the roots, choosing spring or early summer when you can, moving the plant one pot size up with fresh, well-draining aroid mix, and giving it a quiet week in bright indirect light while roots settle. This cultivar’s large leaves and fast growth mean checking every twelve to eighteen months is smarter than waiting for obvious distress — but never repot on autopilot when the real problem is light, water, or temperature.
Get pot size and soil right and Hawaiian pothos rewards you with quick recovery and a fresh burst of golden-variegated growth. Oversize the container, fertilize too soon, or bare-root without cause and the same plant will look punished for weeks despite its tough reputation. Watch roots, not just leaves, and treat repotting as a targeted fix rather than a reflex.
When to use this page vs other Hawaiian Pothos guides
- Hawaiian Pothos overview — Start here for whole-plant context before deep-diving this topic.
- Hawaiian Pothos soil — Use when mix composition and drainage are the main question, not pot timing.
- Hawaiian Pothos problems hub — Jump to symptom-specific fix guides when repotting alone does not resolve the issue.
- Root rot on Hawaiian Pothos — Escalate here when repotting adjustments are not enough.