How to Propagate Jessenia Pothos: Stem Cuttings With Nodes
How to Propagate Jessenia Pothos: Stem Cuttings With Nodes
How to Propagate Jessenia Pothos: Stem Cuttings With Nodes
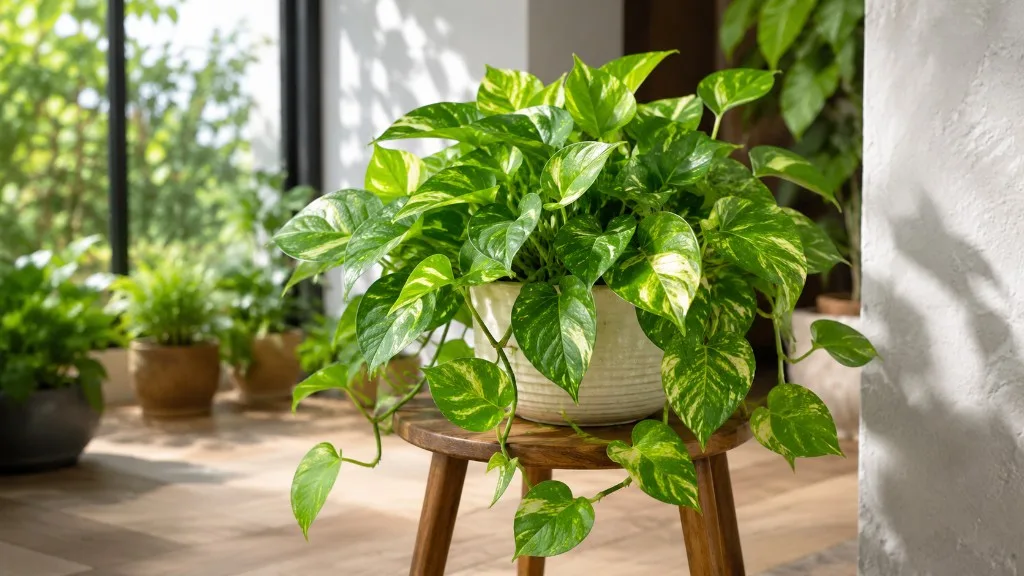
Jessenia pothos propagation is one of the most forgiving projects in indoor gardening — not because Jessenia is a separate species, but because Epipremnum aureum is built for vegetative cloning. A short stem section with a sound node can form adventitious roots in warm, bright conditions within one to two weeks. Clemson Cooperative Extension confirms that pothos stem cuttings placed in water or soil need at least one node to root properly, and NC State Extension notes that vines easily root in water. What makes Jessenia worth its own guide is not the rooting mechanics — those match golden pothos — but what you are cloning: chartreuse-to-lime marbling on a darker green base, often described as a reverse golden pothos. Cuttings duplicate the parent vine’s pattern when you start from healthy, well-lit material and keep new starts in enough light while roots form.
The two dependable home methods are stem cuttings in water and stem cuttings in moist, airy soil or perlite. Both produce vegetative clones — not seedlings — so the lime sectors on new leaves should match the parent if light stays adequate. Seeds are not a practical route for preserving a specific cultivar look. The method you choose comes down to whether you want visible roots and easy monitoring (water) or a smoother path into long-term potting mix (soil). Either way, success depends on clean cuts, submerged nodes, steady warmth, and bright indirect light that holds Jessenia’s contrast through the rooting phase.
Why Jessenia Pothos Roots Reliably From Cuttings
Jessenia pothos (Epipremnum aureum ‘Jessenia’) is a soft-stemmed Araceae vine in the same species as golden pothos and marble queen. Its stems are herbaceous rather than woody, so cells near a cut node can reorganize quickly into root initials when moisture and oxygen are available. A 10–15 cm (4–6 inch) tip cutting carries enough stored energy to support leaf hydration while roots form, provided you do not strip every leaf or leave the jar in harsh direct sun. Mature vines often develop aerial roots along nodes — a head start that water propagation can activate within days.
University of Florida IFAS cites three to four weeks for commercial pothos cuttings with a node to root under production conditions; home growers in warm bright rooms often see visible roots much sooner. Clemson HGIC describes Jessenia as a cultivar with dark green leaves marked by bright green and yellow variegation and more slender leaves than Golden Pothos — traits that carry through on rooted cuttings when the parent was healthy. Propagation solves real display problems: replacing leggy bare vines, filling a second hanger, or turning one long trailing plant into several compact starts without buying another pot.
Jessenia-Specific Propagation Considerations
Jessenia shares golden pothos biology but not identical performance goals. Golden pothos keeps some yellow patterning in moderate light; Jessenia’s lime and chartreuse sectors fade faster when photons are scarce because the plant shifts new leaves toward plain green to photosynthesize efficiently. UF IFAS notes that variegated pothos cultivars lose color when shade exceeds about 80%, and that light levels of 150 foot-candles or more help maintain variegation and leaf size indoors. That matters twice during propagation: when you select parent vines and when you place rooting jars or pots.
Growth after rooting is also slower than on solid-green or golden cultivars. Clemson HGIC notes Jessenia grows more slowly than golden types — plan for a longer fill-in period after transplant, especially if you root a single cutting into a small pot. None of this changes the cut-and-root protocol; it changes which vines you cut and how bright the rooting station stays.
Preserving Lime Marbling on New Starts
Take cuttings from vines showing clear chartreuse marbling on the newest leaves, not from the plain-green runners a dim parent already produced. A cutting rooted in a dark corner often grows — but the first leaves may open solid green even if the parent once showed lime patterning. Place jars and starter pots in bright, indirect light — an east window or a few feet back from a filtered south or west exposure — matching the Jessenia Pothos light guide long-term target. If you are propagating specifically to preserve Jessenia’s look, root two or three cuttings from the most colorful vines rather than betting on one stem from a reverted section.
How Stem Propagation Works on Jessenia Pothos
Stem propagation asks wounded tissue to prevent excessive water loss through leaves while building a new root system from nodes along the stem. A Jessenia cutting without roots still transpires moisture from its leaf surfaces. If it loses water faster than the stem can replace it, it wilts, yellows, or rots at the submerged end. Your setup must close that gap: enough leaf area for light photosynthesis, enough water contact or soil moisture at the stem, and enough oxygen that microbes do not consume the cutting before roots appear.
Adventitious roots form from cells at or near nodes — the joints where leaf petioles attach. On Jessenia, nodes look like slight swellings, sometimes with small brown root nubs already visible. NC State Extension lists stem cutting as the recommended propagation strategy for pothos. Submerging or burying at least one node gives root initials a place to emerge. Internodal stem tissue — the smooth section between nodes — does not reliably produce roots and will soften underwater without a node at that level.
Nodes, Aerial Roots, and What Actually Roots
A node is non-negotiable. A Jessenia leaf detached with no stem segment — or a stem segment with no node — may stay green for weeks but cannot reliably become a full vine. Clemson Cooperative Extension states plainly that cuttings should have at least one node to root properly in water or soil. For a standard tip cutting, aim for two or more nodes on the submerged or buried portion, with at least one node fully underwater or in medium. Keep the top one or two leaves; Jessenia’s slender foliage rarely needs halving unless the cutting is very short. If aerial roots are present, include that node in the submerged zone — those tissues often extend into water roots faster.
Choosing the Best Jessenia Pothos Cuttings
Start with a healthy parent plant that is actively growing — not drought-stressed, pest-ridden, or sitting in soggy mix. Jessenia shows stress through limp leaves, faded lime variegation, and stalled new tips. Weak parent tissue produces weak cuttings; propagation cannot reverse that baseline. If the plant looks tired but you still want to try, take material from the firmest new growth at the vine tip rather than woody lower sections with long bare internodes.
Prefer vines with firm stems, visible chartreuse marbling on recent leaves, and no black mushy spots at the nodes. Stems with sun scorch, mechanical damage, or sticky pest residue should be skipped. When propagating to preserve Jessenia’s pattern, take two or three cuttings from the most colorful vines — redundancy costs only an extra jar.
Take cuttings from terminal shoots or mid-vine sections when dividing a long trailing plant. Arkansas Cooperative Extension advises a healthy 2- to 4-inch terminal cutting with several leaves, cut just below a node; home growers often take 4- to 6-inch (10–15 cm) sections to capture two or three nodes. Reject mushy, blackened, or pest-damaged stems. When refreshing a leggy Jessenia, cut the bare vine into individual node sections with one leaf each rather than rooting a long leafless internode.
The Best Time to Propagate Jessenia Pothos
Jessenia roots fastest during active growth, when temperatures are warm and days are reasonably long. Spring through early fall is ideal in temperate homes. Room temperatures roughly 18–29°C (65–85°F) — the band Penn State Extension cites for pothos — support steady rooting better than a cold windowsill that drops at night. Use plant readiness, not only the calendar: the parent should show firm new tips, normal marbling on the newest leaves, and no active pest outbreak.
You can propagate year-round indoors if light and warmth stay consistent, but most growers see the fastest water roots in late spring and summer when the parent is already pushing new leaves. Avoid taking cuttings immediately after a stressful repot or during a severe wilt episode — wait until new growth looks stable.
Tools, Materials, and Safety Basics
You need little equipment: sharp bypass pruners or scissors, a clean jar or small pots with drainage, fresh water or moist propagation mix, optional clear plastic bag or dome for soil method humidity, labels for multiple batches, and 70% isopropyl alcohol for disinfecting blades. For water propagation, any clear glass works if it supports the cutting without submerging leaves. For soil propagation, use light, airy mix — straight perlite, half perlite and half peat or coco coir, or potting mix amended heavily with perlite per the Jessenia Pothos soil guide.
Keep cuttings away from pets. The ASPCA lists Epipremnum aureum as toxic to dogs and cats, with insoluble calcium oxalate crystals causing oral irritation, vomiting, and difficulty swallowing. Toxicity does not prevent propagation, but it is a reason to place jars out of reach and discard trimmings promptly. Wear gloves if sap irritates your skin.
Preparing Jessenia Pothos Cuttings Step by Step
Step 1: Select and cut. Choose a healthy, well-lit vine and cut 4 to 6 inches (10–15 cm) of stem — or shorter node sections when dividing a long vine — slicing just below a node with a clean single cut.
Step 2: Strip lower leaves. Remove all leaves from the lower half that will sit underwater or underground. Submerged leaves rot and foul the jar within days.
Step 3: Confirm node placement. Identify at least one node on the submerged portion; two or three improve redundancy. Orient any aerial roots into the water or medium.
Step 4: Rooting hormone (optional). Jessenia roots so readily that hormone is optional. A light dip before soil insertion may help marginally in cool rooms; skip it for standard water propagation.
Step 5: Insert immediately. Place the cutting in water or pre-moistened medium within minutes to limit dehydration.
Method 1: Rooting Jessenia Pothos Cuttings in Water
Water propagation lets you watch roots emerge and catch stem rot early. The trade-off is a water-to-soil transition later, because aquatic roots differ structurally from soil roots. Place the cutting so at least one node is fully submerged while all leaves stay above the waterline. Use room-temperature tap water and set the jar in bright, indirect light — not direct midday sun that overheats the water and bleaches lime sectors before roots form.
Setting Up a Clean Water Jar
Change water when it looks cloudy, smells stale, or develops slime — often every three to seven days. Remove any leaf that falls into the water immediately. Expect visible root initials in about one to two weeks under warm, bright conditions, with roots often 2.5–5 cm (1–2 inches) long within two to four weeks, aligning with UF IFAS commercial timelines. Do not fertilize the water until the cutting is potted and growing.
Transplant when roots reach roughly 2.5 cm (1 inch) — some growers pot at 1.3 cm (½ inch) to ease the soil shift. Waiting until water roots grow 10 cm (4 inches) or more often makes the transition harder because long aquatic roots are fragile.
Method 2: Rooting Jessenia Pothos Cuttings Directly in Soil
A soilless propagation medium hides roots but produces them closer to final pot conditions. Fill a small pot with pre-moistened perlite or perlite-heavy mix. Use a pencil to make a planting hole, bury at least one node (two improves redundancy), and firm the medium lightly so the stem stands without packing out air.
Water once to settle, then keep the medium evenly damp like a wrung-out sponge, never saturated mud. Use pots with drainage holes. A clear plastic bag or humidity dome — supported so plastic does not touch leaves — reduces wilting the first week; vent daily to prevent mold. After three to four weeks, a gentle upward tug that meets resistance suggests roots have anchored.
Water Versus Soil: Which Method Should You Choose?
| Factor | Water rooting | Soil or perlite rooting |
|---|---|---|
| Root visibility | Excellent | Limited unless you unwrap |
| Typical speed in warm homes | Often 1–3 weeks | Often 3–5 weeks |
| Rot risk | Stagnant water, submerged leaves | Oversaturated compacted mix |
| Transition step | Required before long-term potting | Usually minimal |
| Best for | Beginners, visual learners | Growers who want direct potting |
Choose water for fast feedback and easy sharing. Choose soil or perlite if you dislike water changes or tend to leave cuttings in jars too long. Many growers root in water, then pot once roots are 1–2.5 cm (½–1 inch) long.
Building the Right Rooting Environment
Roots respond to warmth, light, oxygen, and stable moisture more than additives. A cutting on a bright kitchen counter at 21°C (70°F) usually outperforms a dim shelf with rooting powder but cold nights.
Light, Temperature, and Humidity for Rooting
Place cuttings in bright, indirect light — critical for Jessenia because dim rooting stations produce solid-green new leaves even when roots form successfully. Direct sun through glass can overheat jars and bleach lime variegation. Keep temperatures above about 18°C (65°F) and ideally near 21–27°C (70–80°F). Humidity matters most for soil-rooted cuttings without domes and for jars in very dry air-conditioned rooms.
Transplanting Rooted Jessenia Pothos Cuttings
Moving a water-rooted Jessenia to soil fails most often when the pot stays too wet after transplant. Use a small pot with drainage, roughly 9–10 cm (3.5–4 inches) for a single cutting, filled with moistened well-draining mix. Place roots naturally without cramming; bury the node that was submerged in water.
Water once to settle, then allow the top 2–3 cm to approach dryness before watering again — young plants need a gentler version of mature Jessenia Pothos watering rhythm. Oversized pots stay wet around a small root ball and stall growth. Hold fertilizer until fresh leaves open; salts burn limited roots.
Aftercare During and After Rooting
During rooting, stability beats interference — do not pull cuttings daily to photograph roots. After transplant, treat young Jessenia like a gentler version of the parent: bright indirect light per the light guide, airy mix that dries partially between waterings, and protection from cold drafts. Pinch the tip once rooted if you want a bushier pot. Rooting several cuttings in one container produces a fuller display faster — useful when replacing a leggy parent vine. See the pruning guide if you are combining propagation with reshaping the parent.
Common Jessenia Pothos Propagation Problems
Most failures trace to missing nodes, contaminated water, submerged leaves, cold, dim light, or oversaturated mix — not to Jessenia being difficult.
Black mushy stem base in water means rot. Recut to healthy tissue above the next node, clean the jar, and restart — or switch to perlite with better warmth and light.
Green stem but no roots for weeks usually means the node was not submerged or the cutting lacks a node entirely.
Roots form but new leaves are solid green almost always means insufficient light during rooting — move to brighter filtered light before blaming the cutting.
Wilting with firm stem often indicates low humidity or too much leaf surface for the root system. Mild wilt can recover once roots form.
Roots in water but collapse after potting usually means the pot was too large or kept too wet — repot into a smaller container with appropriately airy mix and water lightly until new growth appears.
Conclusion
Propagating Jessenia pothos from stem cuttings with nodes is straightforward because E. aureum cooperates: take a 4–6 inch section with at least one node (two or three is better), remove lower leaves, and root in clean water or moist perlite-heavy mix in warm bright indirect light. Water gives speed and visibility; soil gives a head start on long-term potting. Transplant when roots are about 1–2.5 cm (½–1 inch) long, keep the first pot small and well drained, and judge success by new leaves showing lime marbling — not just by roots in a jar. Master that chain and Jessenia propagation becomes one of the most reliable ways to multiply a cultivar you actually wanted, not a plain-green reversion you did not.
When to use this page vs other Jessenia Pothos guides
- Jessenia Pothos overview — Whole-plant context, cultivar identity, and when Jessenia fits your home before you take cuttings.
- Jessenia Pothos light — Placement and reversion prevention; critical for keeping lime marbling on propagated starts.
- Jessenia Pothos watering — Post-transplant moisture rhythm once cuttings move from jar to pot.