Pilea Peperomioides Pale Leaves: Causes, Checks & Fixes
Quick answer
First, give Pilea peperomioides steady bright, indirect light, away from harsh sun and a dim corner. Then compare affected leaves by age and pattern and check how the pot dries; wait to fertilize until the evidence points to a nutrient problem.
Pale Leaves on Pilea Peperomioides: Causes, Checks & Fixes
This guide covers pale leaves on Pilea Peperomioides. See also the general Pale Leaves guide, watering, and light pages for this plant.
Pale Leaves on Pilea Peperomioides: Causes, Checks & Fixes
Quick answer
Pale leaves on Pilea peperomioides are a symptom, not a diagnosis. First put the plant in steady bright, indirect light: move it away from hot direct sun if leaves are bleaching there, or closer to a bright window if the room is dim. Then check which leaves changed, what the color pattern looks like, and whether the pot is drying between waterings. Hold fertilizer until those checks make a nutrient problem more plausible; feeding a plant with stressed or water-damaged roots can add another variable without fixing the cause.
What pale leaves look like on a Pilea
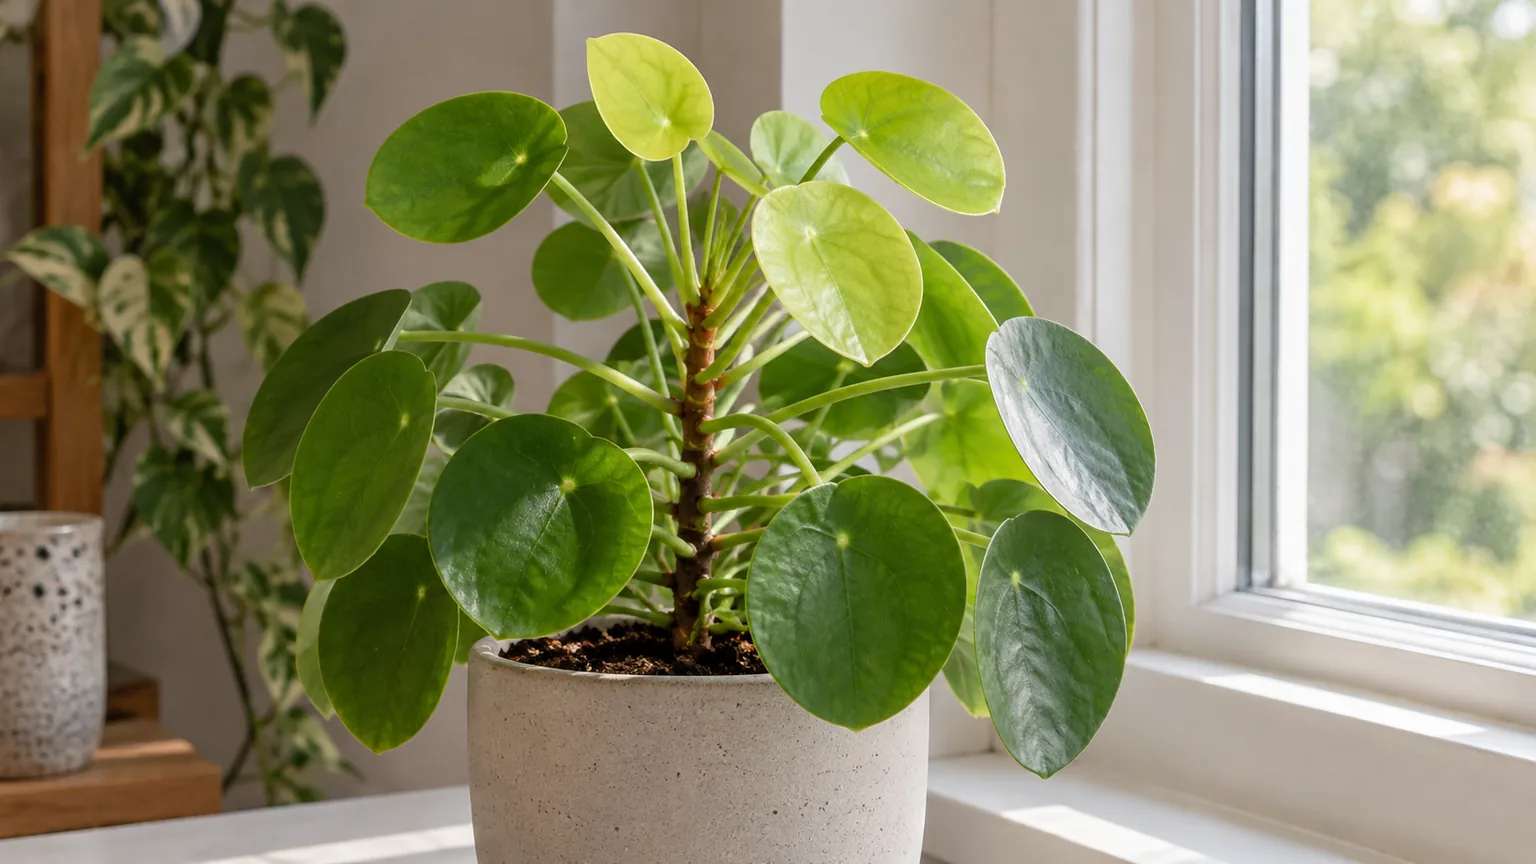
Pilea peperomioides is recognizable by round, coin-like leaves whose petioles meet near the middle of the blade, arranged along an upright central stem (Bob Vila’s Pilea care guide). That makes it easier to compare the same part of the plant over time: note whether the crown’s newest coins are pale, whether older leaves are changing first, or whether only the window-facing side looks washed out. The Pilea overview gives the plant’s normal growth and care context if you are unsure what healthy new growth should look like.
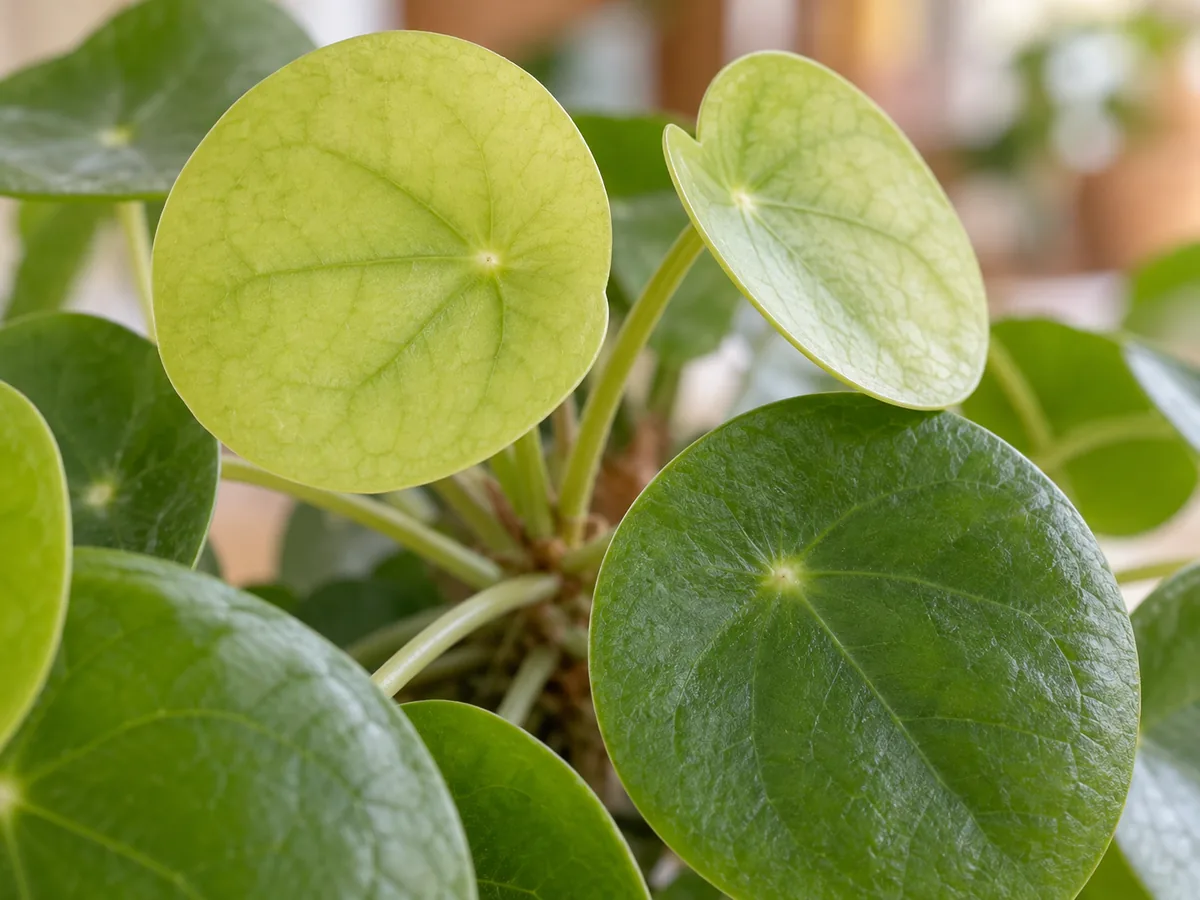
A pale Pilea leaf is a clue, not a diagnosis; compare its age, vein pattern, and the condition of the pot before feeding.
A broad, even fade across several leaves is different from pale tissue between green veins, a few bleached patches on the side facing a window, or fine pale speckles. The first can fit a change in light or root function; the second pattern raises a nutrient-availability question; sharply exposed patches point toward light injury; speckling calls for a careful look for pests. Yellowing itself has many possible causes, including normal aging, nutrient problems, pests, diseases, and growing conditions, so color alone cannot identify the cause (RHS on chlorosis). For the general symptom patterns shared by many houseplants, see the pale-leaves symptom guide; the rest of this page focuses on how to read those clues on a Pilea.
Why the round Pilea leaves fade when light is wrong
Light is a high-value first check because Pilea leaves are held on long petioles and tend to orient toward the brightest side of a room. The plant grows best in bright light that is indirect; the RHS advises keeping pileas out of direct sunshine and turning bushy plants so they do not become lopsided (RHS Pilea growing guide). If a Pilea has spent several weeks in a dim corner, it may become stretched toward the window, produce smaller leaves, or show fading color; low light can also reduce offshoot production (Bob Vila’s Pilea care guide, The Spruce’s Chinese money plant guide).
Look at the whole stem, not just one leaf. Long gaps between leaves, a crown leaning toward the glass, and successive new leaves that are smaller or less green make a light shortage more plausible than a sudden lack of fertilizer. If the plant has recently been moved closer to a hot, unfiltered window, the pattern can reverse: exposed leaves may develop pale or straw-colored patches and then crisp areas. Too much direct sun can scorch or pale leaf surfaces, so a bright room does not automatically mean a suitable spot (RHS leaf-damage guide).
Move the pot to bright, indirect light rather than putting it in full sun to “green it up.” An east-facing window, or a spot set back from stronger afternoon sun, is often easier to manage than a harsh beam across the leaves. Turn the plant gradually as part of ordinary care, not several times a day; the goal is even exposure while the central stem adjusts. Use the Pilea light guide if you need help judging its room placement. If its light has been stable and new leaves are still paling, continue to the root and nutrient checks rather than moving it repeatedly.
What the Pilea pot tells you about wet roots
Pilea’s leaves can look pale when the root zone is not functioning well, and persistently wet compost is especially worth checking because the plant is not adapted to sit in water. The RHS recommends watering when the upper compost begins to dry, using a finger or the pot’s weight as a check; it also warns that overwatering can lead to root rot and that pileas generally need less water in winter when growth slows (RHS Pilea growing guide). A schedule such as “every Sunday” can therefore be too frequent in a cool, dim room and too slow in a warm, bright one.
Before watering again, feel the top few centimetres of mix and lift the pot. A dry surface with a surprisingly heavy pot can mean the lower root ball is still wet. A pot that remains heavy for many days, a sour smell, leaves that feel limp rather than simply light in color, or a softening stem base increases concern about root trouble. Waterlogged roots can be damaged, and impaired roots can make leaf discoloration resemble a nutrient shortage (University of Wisconsin–Madison Extension).
If the mix is drying at a reasonable pace and the stem is firm, do not unpot the plant just because one leaf is pale. Correct the next watering decision: wait until the upper mix has begun to dry, then water thoroughly and let excess drain away. Check that the nursery pot has open drainage holes and that it is not standing in water inside a decorative cachepot. The Pilea watering guide explains how to adjust the check to the season and your pot. If the mix is persistently wet, compacted, sour-smelling, or the lower stem is soft, inspect the roots; remove only clearly dead, mushy roots and use a fresh, free-draining mix in a pot with drainage. The Pilea soil guide covers the mix and container details.
Read the leaf age before you suspect a deficiency
Nutrient problems are possible, but several different deficiencies can produce pale or yellow tissue, and they do not all start in the same place. Interveinal chlorosis means the tissue between the veins pales while the veins stay greener. On many plants, iron deficiency shows first on young leaves, while magnesium deficiency begins on older leaves; nitrogen shortage more often causes more uniform paling of older foliage (RHS chlorosis guide, Washington State University Extension nutrient guide). These are diagnostic clues, not a laboratory diagnosis for a Pilea.
Use this pattern as a reason to investigate, not to buy three supplements. A new Pilea leaf with green veins and pale tissue between them can fit an iron-availability problem, but pale new leaves alone do not prove that the pot lacks iron. Root damage, poor drainage, or a nutrient that is present but unavailable can create overlapping symptoms (Wisconsin Extension). Likewise, an older leaf paling evenly may fit normal aging or a nitrogen-related pattern; it is less persuasive evidence of a deficiency if the crown is growing normally and only one low leaf is involved.
Check the plant’s recent feeding history and the condition of the potting mix. A Pilea that has not been fed during active growth and has been in the same small potting mix for a long time deserves a closer nutrient check, but fertilizer is not a cure for damaged roots or unsuitable light. Do not add iron because a leaf is pale, add nitrogen because it is yellow, or mix a fertilizer dose stronger than the product label. If the pattern is consistent across several new or old leaves and the roots are firm, use a balanced houseplant feed according to its label during active growth, then wait to judge the next leaves. Do not combine that trial with repotting or a major location change unless another clear problem requires it.
A simple soil pH kit can be useful if repeated interveinal paling continues despite sound care, especially if you use a heavily amended or unusual substrate. Alkaline conditions can make some nutrients less available (Washington State University Extension), but the Pilea’s potting mix and root condition must be considered before treating soil pH as the answer. The local evidence may not justify a soil amendment, so avoid adding lime, sulfur, or concentrated chelates without a reliable test or professional diagnosis. For this plant, a conservative balanced feeding trial is safer than trying to engineer a precise pH from leaf color alone.
Separate sun injury, pests, and one aging lower leaf
A Pilea with sun injury often has pale, straw-colored, or brown patches concentrated on leaves most exposed to direct light. This differs from a gradual, fairly even loss of color across the plant. Move the plant back from the beam and keep it in bright, indirect conditions; do not remove every marked leaf immediately, because a partly green leaf can still contribute to the plant while it remains firm. The damaged patch is useful evidence of exposure, but it is not a reason to leave the plant in a dark room.
Pests are more likely when pale areas look like many tiny pinpricks or stipples rather than a smooth fade. Turn over several leaves, especially near the crown and along the stem, and look for fine webbing, moving specks, shed skins, or sticky residue. Pilea is reported to be vulnerable to spider mites, which can leave webbing and spotted or discolored leaves (The Spruce’s Pilea guide). If you find a pest, isolate the Pilea and use the Pilea problems hub to route to the matching next step; feeding will not remove insects.
One older lower leaf that slowly fades while the stem stays firm and the newest leaves look normal can be part of ordinary leaf turnover. The RHS notes that an occasional lower leaf on a mature houseplant may yellow and fall, whereas larger-scale yellowing needs more investigation (RHS leaf-damage guide). If several leaves pale in a short period, the new crown is affected, or the plant loses firmness, treat it as a pattern to diagnose rather than normal aging. If the leaves are distinctly yellow rather than simply lighter green, compare the Pilea-specific yellow-leaves guide.
A Pilea-specific check order before changing care
Use the same sequence each time so you can connect the leaf response to the change you made.
- Mark the affected age group. Is it one of the oldest bottom leaves, several mature coins, or the newest leaves at the crown? A single old leaf with healthy growth above it is a different signal from a pale crown.
- Describe the color pattern. Is the entire blade a lighter green, is the tissue between veins paler, are there distinct bleached patches, or are there fine dots? Take a photo in neutral daylight so a warm lamp does not distort the color.
- Check for direction. Compare the window-facing side with the shaded side. If only exposed leaves have pale or dry patches, review direct-sun exposure; if the plant leans and the newest leaves are small, review the light level and rotation.
- Check the pot before watering. Feel the upper mix and lift the container. If the lower root ball still feels heavy, wait; if the mix is dry through the upper layer and the pot is light, water normally rather than giving a small daily splash.
- Inspect the plant without pulling it apart. Look under leaves and around the petiole joints for pests. Check that the central stem is firm and that the pot drains. Reserve an unpotting check for a wet, sour, unstable, or declining plant.
- Review recent changes. Note a move, a new window, an unusually long dry spell, a repot, a fertilizer application, or a season change. Pilea’s use of water changes with light and growth; a care calendar cannot account for that shift.
Do not run every possible test if one clear pattern already explains the change. For example, if pale patches appeared on the glass-facing leaves right after moving the plant into direct sun, correct that exposure first and observe. If all the leaves are light but the Pilea is compact, has a firm stem, and sits in well-draining mix, check feeding and root history before assuming low light. If both roots and light appear questionable, correct the more urgent root problem first; a plant with a persistently wet, sour mix needs attention sooner than a slowly leaning plant.
The first fix and the next step for each pattern
The first fix is to stabilize the Pilea in bright, indirect light. Use that as the target condition, not a sudden switch from shade to scorching sun. Keep the plant in the new position long enough to see the next leaves develop, and avoid changing its water routine, pot size, and fertilizer at the same time. The exception is a clear emergency: soft, decaying roots or a soft stem base calls for a root inspection rather than waiting for a light trial.
After that first correction, follow only the branch that matches your evidence:
- Dim position plus a leaning stem or smaller new coins: move it closer to bright, filtered daylight and rotate the pot a little at each watering. Keep it out of harsh midday sun.
- Pale leaves plus a pot that stays heavy: postpone watering and check drainage. If the mix smells sour or the stem base softens, inspect the roots and replace failing mix; do not try to dry a waterlogged root ball by placing it in strong sun.
- Interveinal paling on several leaves with firm roots: review whether the plant has been fed during active growth and whether the substrate is unusual. If the pattern still fits, try a balanced houseplant fertilizer at label strength rather than applying an isolated micronutrient.
- Pale stippling, webbing, or insects: isolate the pot and identify the pest before using a treatment. Do not spray a stressed plant with several products at once.
- Only one oldest leaf is changing while the crown is healthy: leave the rest of the routine steady and monitor the plant before taking corrective action.
Do not prune the crown to improve the color. Removing healthy green leaves will not correct light, water, or nutrient conditions, and it removes useful tissue while the plant is stressed. Remove a fully yellow or dried lower leaf only after it detaches easily or is no longer useful; keep healthy leaves in place while the plant responds.
How recovery looks on the central stem
A pale leaf is a snapshot of the conditions it experienced while developing. After you correct the likely cause, judge the next leaves rather than expecting the already pale ones to provide a perfect before-and-after test. The new crown should stop producing progressively paler or smaller leaves, and the central stem should remain firm. If the upper leaves are the only ones affected and they emerge greener after a light or feeding correction, that is stronger evidence that the adjustment helped than a temporary change in one older leaf.
Give a Pilea several weeks of stable conditions before making a second non-urgent change. If the plant is in its slow season, new growth may take longer; keep the mix from staying wet while growth and water use are low. A root problem may take longer to settle than a light adjustment, and a badly damaged root system may not support the original top growth. If the stem collapses or the roots are mostly soft and decayed, saving the original plant may not be realistic; preserve a healthy offset only if it has its own firm roots and can be kept separate from the failing parent.
Keep a simple note with the date, location, last watering, and which leaves were pale. That turns the Pilea’s next flush of round leaves into a useful response signal. If the symptom is still spreading after one careful correction, revisit the checklist instead of stacking more products or cutting away the crown.
Prevent pale leaves as the Pilea grows
Choose a bright position with filtered or indirect light and keep the plant away from a persistent beam of strong direct sun. As days shorten, a spot that worked in summer may become too dim; as the sun angle shifts, a window that was gentle may send a hotter beam across the leaves. Watch the plant’s structure: a central stem leaning strongly in one direction or newer leaves shrinking is a reason to reassess placement before adding fertilizer. Turning the pot periodically helps the coin-shaped canopy receive light more evenly.
Water according to the mix and pot, not the date on a reminder. Let the upper layer begin to dry, then water thoroughly and empty collected water from the saucer or outer pot. Expect the pot to dry more slowly when Pilea growth slows in winter and more quickly in a warm, bright position; check before each watering rather than copying a fixed summer interval. A well-draining mix and a pot with a drainage hole reduce the chance that pale leaves become a symptom of a saturated root ball.
Feed only while the plant is actively growing and keep to the product label. If the Pilea is pale, first ask whether it is receiving usable light and whether its roots are healthy enough to take up water and nutrients. Inspect leaf undersides when a new pattern appears, especially if pale dots are spreading from leaf to leaf. These small checks make it less likely that you will confuse a pest, sun injury, or wet pot with a shortage that needs fertilizer.
When to use this page vs other Pilea guides
Use this page when several leaves look lighter or washed out and you need to decide whether light, roots, nutrients, or pests best fit. If the leaves are turning distinctly yellow, use the yellow-leaves guide to separate yellowing from simple paling. If the main change is a stretched stem or sparse spacing rather than leaf color, the leggy-growth guide is more specific; if the pot remains wet and the stem or roots soften, go directly to root rot on Pilea.
Related Pilea Peperomioides guides
The Pilea overview covers the plant’s normal shape and general care. Use the watering guide for pot-weight and dry-down decisions, the light guide when placement or leaning is the main issue, and the soil guide when the mix stays wet or drains poorly. The Pilea problems hub routes to the relevant symptom guide when the pattern changes.
Related tool
If you are still unsure which condition fits the leaf pattern, try the Plant Problem Diagnosis tool and use its result as a starting point alongside the Pilea-specific checks above.