How to Grow Garlic in Containers
Learn how to grow garlic in containers with the right clove spacing, drainage, seasonal watering, scape harvest, and signs that bulbs are ready.
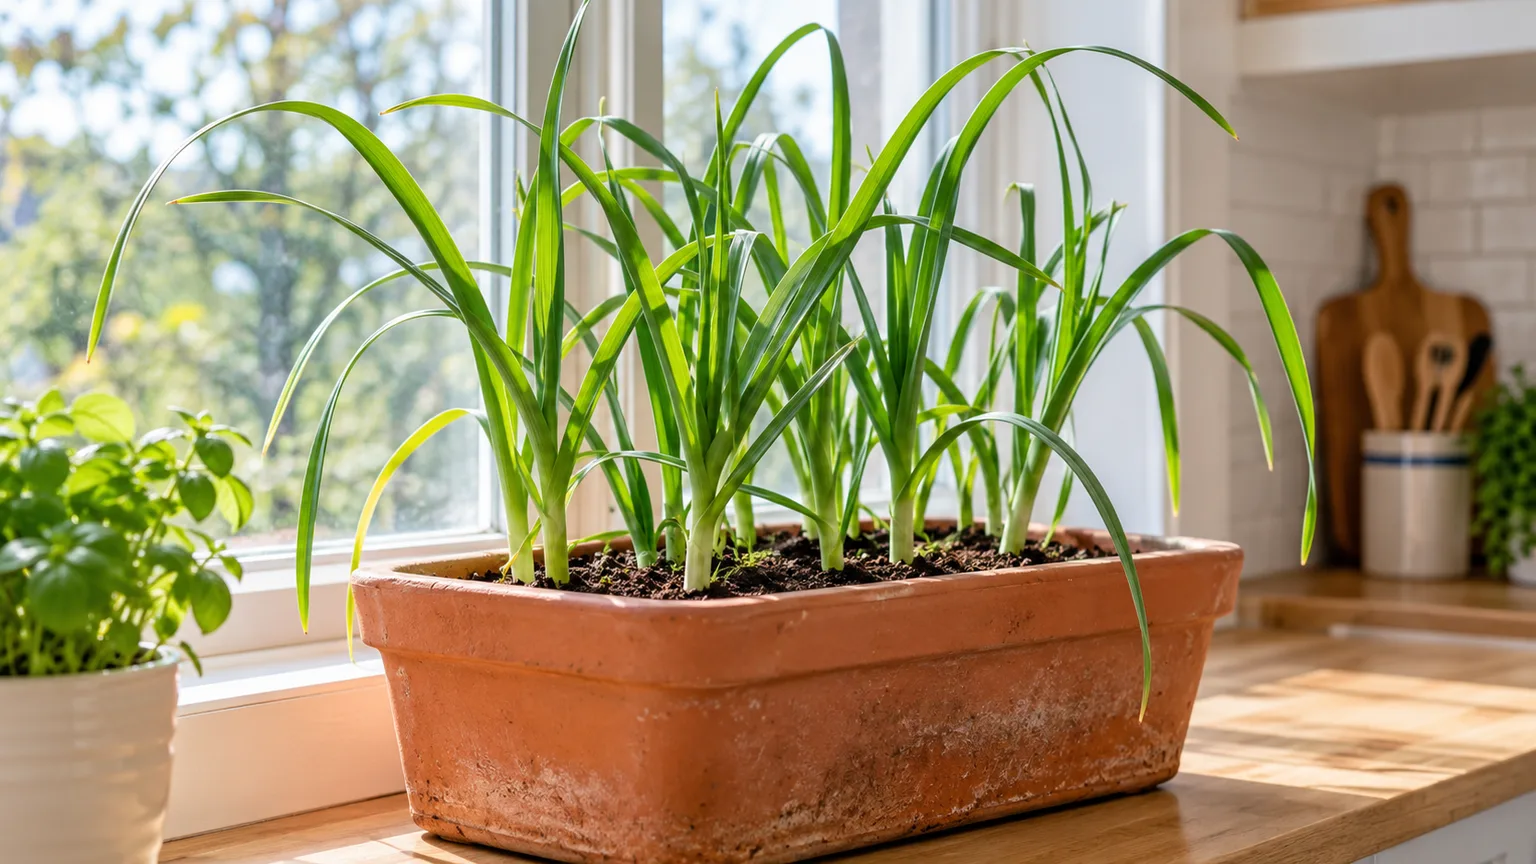
Garlic can produce real bulbs in a pot, but the container has to carry the crop through a long season. A shallow decorative pot may grow leaves and still leave you with a tiny bulb: garlic needs room for roots, dependable drainage, full sun, and the right seasonal temperature pattern for the variety. Those conditions matter more than adding extra fertilizer or planting more cloves.
For a useful first attempt, choose planting garlic from a local nursery or seed supplier, use a planter at least 10 inches deep with large drainage holes, and space cloves about 4 to 6 inches apart. Plant outdoors in fall where winters are cool; in mild-winter climates, choose a locally adapted variety and follow the supplier’s timing. You can also grow a pot for garlic greens, but close spacing and frequent cutting are a different harvest plan from growing storage-size bulbs.
Can a pot produce full-size garlic bulbs?
Yes. Garlic does not need a garden bed if the container holds enough mix to buffer moisture and temperature changes. The constraint is volume: several cloves crammed into a small pot compete for water and nutrients, and their bulbs have less room to swell. A roomy planter with fewer plants often gives a more useful harvest than a dense pot full of small heads.
There is also a difference between producing leaves and producing a mature bulb. A clove can sprout green shoots in a warm room, but most garlic intended for bulbs follows a long seasonal cycle, commonly planted in fall and harvested the following summer. Many cultivars need a substantial cool period to form divided bulbs; warmth, weak light, or an unsuitable variety can leave a plant with foliage but no well-developed head. If you mainly want leaves for cooking, you can plant more closely and cut them young. If you want bulbs that cure and store, give each clove room and let the plant finish its season.
Choose garlic suited to your winter
Start with a cultivar adapted to the winters and growing season where the container will live. Seed garlic sold by a regional nursery or garlic farm is usually a better choice than a random grocery bulb because the variety and growing history are known. Grocery garlic may be treated to delay sprouting or imported from a climate unlike yours; it can be an experiment, but it is less predictable for a full bulb crop.
Garlic is propagated from individual cloves, not seed in the ordinary garden sense. Buy firm, disease-free bulbs, keep them whole until planting day, then separate them and use the largest healthy outer cloves for planting. The University of Georgia Cooperative Extension notes that larger cloves tend to produce larger mature bulbs and advises separating them shortly before planting rather than far in advance (UGA Cooperative Extension).
Hardneck or softneck?
The two main garlic types overlap in some climates, but their traits help narrow your choice. Hardneck garlic grows a stiff central stalk and usually sends up edible scapes; its bulbs often contain fewer, larger cloves and generally keep for less time after harvest. Softneck garlic usually makes more cloves, stores longer, and often performs better in milder regions, though some named softneck cultivars grow well in colder areas too. The University of Maryland Extension describes this trade-off and emphasizes buying disease-free planting garlic from a reputable source (University of Maryland Extension).
| Growing situation | A sensible starting choice | What to expect |
|---|---|---|
| Cold winter with a long spring | A locally recommended hardneck | Scapes and fewer, larger cloves; protect the pot from extreme exposure |
| Mild winter or hot summer | A locally recommended softneck or low-chill cultivar | Often better adaptation and longer storage; scapes are uncommon |
| Unknown variety or grocery clove | A greens crop or small trial | Sprouting is possible, but bulb size and winter response are uncertain |
“Hardneck” does not automatically mean a variety will suit every cold region, and “softneck” does not mean it needs no cool weather. Cultivar and local conditions matter. For a warm climate with only a short mild winter, ask a local extension office or supplier about low-chill garlic instead of putting a cold-climate hardneck through an improvised refrigerator treatment.
Pick a deep, wide container
Use a pot at least 10 inches deep; 12 inches gives more buffer against fast drying and sharp temperature swings. The Royal Horticultural Society recommends container-grown garlic pots at least 25 centimeters (about 10 inches) deep and says container mix can dry quickly (RHS garlic guide). A wider trough is practical because it holds several cloves in a row while still allowing space between them. Plastic, glazed ceramic, or a sturdy grow tub generally loses moisture more slowly than unglazed terracotta, but any material works if it is durable and drains well.
Drainage holes are non-negotiable. Choose a container with several unobstructed openings, raise it slightly on pot feet if it will sit on a patio, and use a saucer only if you empty standing water after the mix drains. Do not add gravel to the bottom as a substitute for holes; it does not fix a blocked outlet and reduces the depth available for roots. In freezing climates, a heavy frost-resistant pot is less likely to crack than thin ceramic.
Estimate how many cloves will fit
For bulb garlic, plan on one clove every 4 to 6 inches in all directions. A 12-inch-wide pot can usually fit only two or three plants across its surface, depending on the pot’s shape; a 12-by-24-inch planter might hold roughly 8 to 12 cloves while keeping the outer row away from the edge. Treat that as a starting estimate, not a guaranteed yield. Smaller cloves need less space, but saving room tends to improve airflow and bulb size.
You can reduce spacing to about 3 inches if you accept smaller bulbs or plan to harvest some plants as green garlic. Avoid filling every gap just because the cloves fit on planting day: the leaves become a dense canopy in spring, and the bulbs are still expanding below it. If you want a lot of garlic, two medium planters are often easier to water and protect than one extremely wide, heavy pot.
Build a free-draining growing mix
Use fresh, high-quality container mix, not soil dug from a garden bed. Garden soil compacts in pots, drains unevenly, and can leave garlic sitting in cold, wet mix over winter. A standard vegetable potting mix is suitable; if it feels heavy or stays saturated, blend in a modest amount of perlite or fine horticultural grit rather than trying to solve poor drainage with a layer of rocks.
Fill the container to about an inch below the rim so watering does not wash mix over the sides. The medium should hold enough water for roots without becoming sludge: when you squeeze a handful, it should feel damp and crumble when released, not drip steadily. A mix with some compost can supply organic matter, but avoid planting into pure compost or adding a heavy dose of manure. Garlic needs fertility, yet excess nutrient salts in a small pot can injure roots and push leaf growth at the expense of a balanced crop.
Time planting to your region, not a fixed month
Garlic timing follows local weather, not a single month on the calendar. In most cool-winter areas, plant after summer heat has eased and before the ground or container mix freezes solid. The goal is for cloves to make roots before winter and then experience the seasonal cold required by the cultivar, without sending up a tall, tender top too early. The planting window can fall in early autumn in colder places and later in autumn in warmer ones.
For U.S. gardeners, state extension calendars are a better guide than a national date. Georgia plants garlic in fall to build leaf growth before spring bulbing, while Iowa’s recommended window is October to early November; those differences reflect climate, not conflicting universal rules. See UGA Cooperative Extension and Iowa State University Extension and Outreach for regional examples. A locally adapted planting stock supplier can also tell you which cultivars are meant for your area.
Cold-winter regions
Plant when the soil has cooled but several weeks remain before sustained hard freezes. If fall is unusually warm, wait for cooler conditions rather than planting into hot mix; if winter is close, plant promptly and protect the surface with a loose layer of clean straw or chopped leaves once the mix has cooled. Do not pack mulch down hard against the cloves, and pull some back when shoots begin active spring growth.
A pot is more exposed than soil in the ground because cold reaches it from the sides as well as from above. Group containers against a sheltered wall, place them on pot feet so drainage stays open, and wrap the outside of a vulnerable planter before a prolonged deep freeze. Keep the mix barely moist during winter, not bone-dry or waterlogged. Illinois Extension’s container-overwintering guidance explains how insulation and a protected location reduce damaging temperature swings in container root zones (Illinois Extension). In severe climates, container garlic may be less reliable than a bed or a large, insulated planter.
Mild-winter regions
If your winter stays mild, choose garlic bred for that pattern and use your local planting recommendations. A cultivar with a high cold requirement may grow leaves but fail to divide into good bulbs even when the pot is sunny and carefully watered. The UGA guide describes a period of cool exposure as part of garlic’s bulbing cycle, while North Carolina State Extension notes that softneck garlic generally has fewer cold requirements than hardneck; these are broad tendencies, so verify the specific cultivar (UGA Cooperative Extension; NC State Extension).
Spring planting can work in some areas, but it usually produces smaller bulbs because plants have less time to establish roots and enough foliage before bulbing starts. If you missed the fall window, plant a locally suitable variety as early as conditions allow and treat the result as a trial. For a more reliable harvest, wait for the next recommended season rather than chilling an unknown grocery bulb without a cultivar plan.
Plant cloves point-up at the right depth
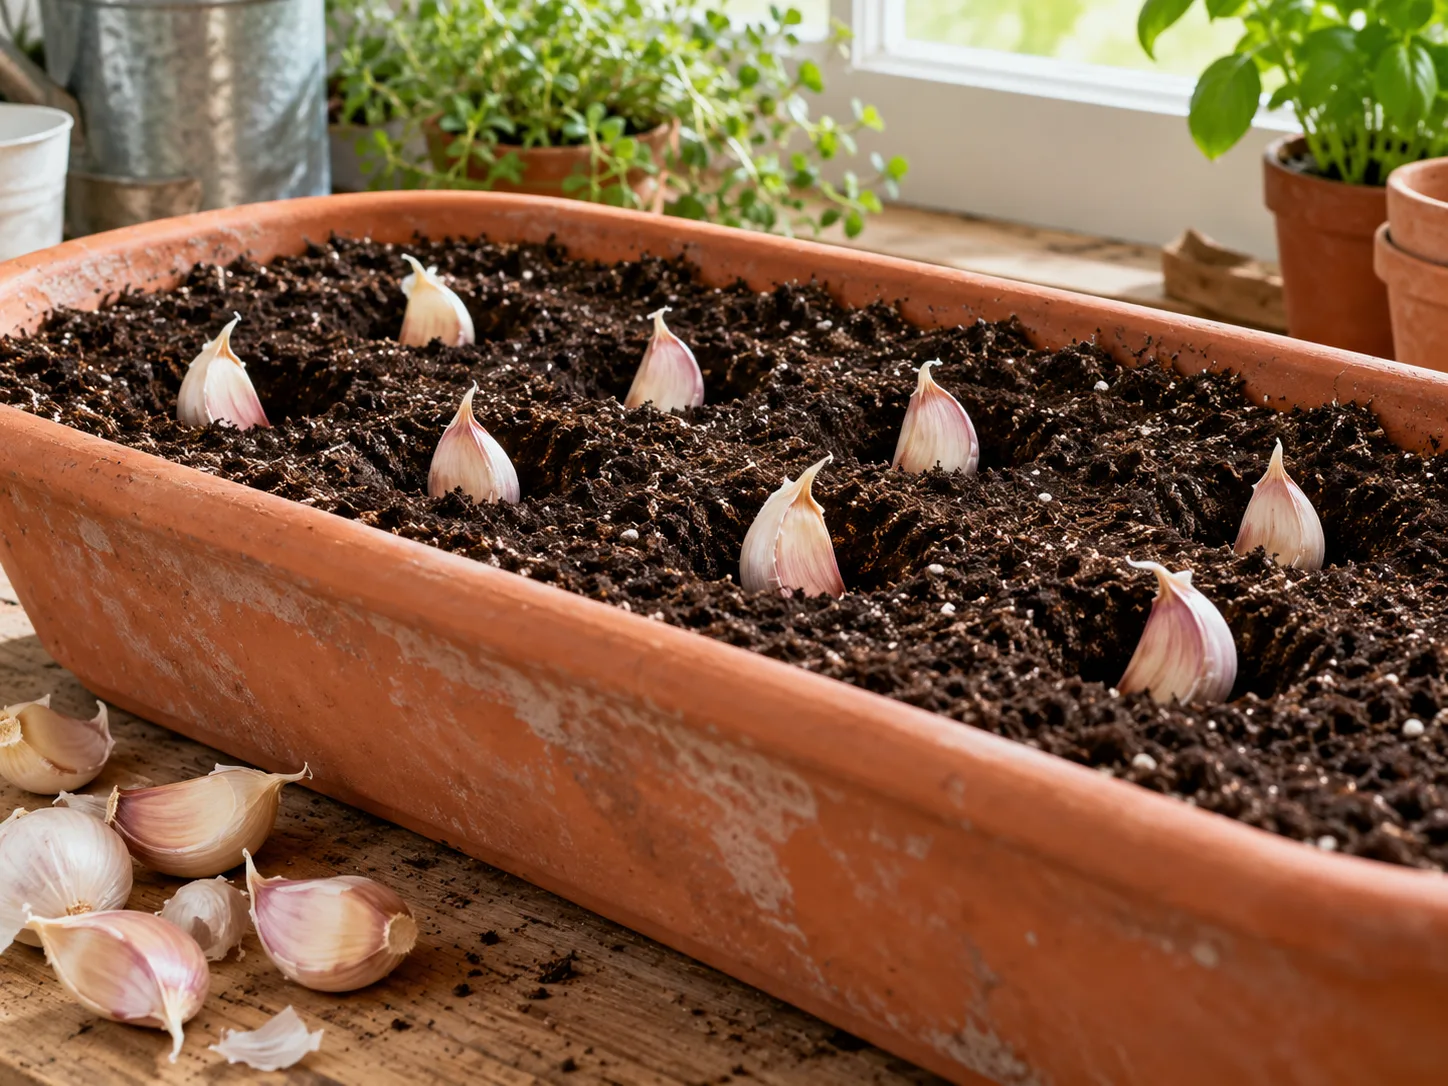
Plant on a day when the mix is workable, not saturated. Separate the bulb carefully; keep the papery skin on each clove, because it protects the clove, and avoid bruising the flat root plate at its base. Position the pointed end upward and the flat basal plate down, then cover with about 1 to 2 inches of mix. In very cold areas, some growers set cloves a little deeper for protection, while the precise depth varies by climate and medium; the RHS advises using the same depth as ground planting and flags shallow planting as a possible cause of green, poorly protected cloves.
Space cloves 4 to 6 inches apart for bulb production. UGA Extension’s home-garden guide gives 1 to 3 inches of depth and 6 inches between cloves, while other extension recommendations use slightly closer spacing. For a container, about 2 inches deep and 4 to 6 inches apart is a practical middle ground in a loose mix. Press soil gently so the clove is surrounded, water once to settle the medium, and let the excess drain away.
Label the variety and planting date. This small step matters months later, when you are trying to interpret scape timing or decide whether a yellowing plant is mature. If you plant more than one cultivar, keep each type in a separate pot or mark its location clearly so you can compare their performance.
Give the container sun and winter protection
Set the pot outdoors in a location that receives at least six hours of direct sun; more is helpful for bulb growth. A balcony railing, sunny patio, or paved courtyard can work as long as the planter is not shaded by a wall for most of the day. Turn or reposition a pot only if one side receives much less light, and avoid repeatedly moving it once the crop is established.
In windy, exposed locations, the container can dry quickly and leaves can be battered. A sheltered spot near a wall can moderate wind, but do not tuck the pot into deep shade or under a roof where rain never reaches it. Check that runoff can escape freely; a pot placed directly on a flat patio may have its holes sealed against the surface. A few pot feet solve this simple but common problem.
Winter protection should buffer extremes without moving the crop into a heated room. Garlic needs seasonal cold, but container mix is more vulnerable to rapid freezing, thawing, and saturation than garden soil. In climates with moderate winters, a thick mulch over the surface and a sheltered position may be sufficient. In colder regions, cluster pots together, insulate the container walls, and keep drainage openings clear. A small pot or fabric bag exposed to prolonged severe cold may not hold enough soil mass to protect roots; use a larger, sturdier container or grow garlic in the ground instead.
Water by feel, then taper near harvest
Water thoroughly after planting, then check the mix instead of following a fixed weekly schedule. During active growth, aim for evenly moist soil: if the top inch feels dry and the pot is lighter, water slowly until moisture reaches the lower root zone and some drains out. If the mix is already damp, wait. Rainfall, wind, temperature, container material, and pot size all change how quickly a container dries.
Garlic is particularly vulnerable to a pot that stays wet for days. Persistent saturation deprives roots of air and makes cloves more likely to rot, especially during cold weather when the plant is using water slowly. On the other hand, letting the pot become bone-dry during spring bulb development can limit growth. Iowa State Extension recommends roughly an inch of weekly water for field-grown garlic during dry weather; a container should be adjusted by its actual moisture and weather, not copied into a rigid one-inch schedule (Iowa State University Extension and Outreach).
As the foliage begins to yellow and bulbs are nearing maturity, reduce watering. Once most lower leaves are dry and harvest is close, stop irrigating so the outer wrappers can dry and the bulbs are less likely to rot in wet mix. Keep rain from saturating the pot late in the season if practical, but do not cover the foliage with plastic or trap moisture around the plants.
Feed only during active leaf growth
Garlic uses its leaves to supply the developing bulb, so steady early growth is useful. Start with a fresh mix that contains modest fertilizer or incorporate a balanced, slow-release vegetable fertilizer at the product’s label rate before planting. Do not double the label dose because the pot is small. If the mix is already enriched, wait and assess growth before adding more.
If spring foliage is pale and growth is slow, first rule out cold, poor drainage, shade, or water stress. Those problems will not be fixed by feeding. Where a supplemental feed is needed, use a balanced liquid fertilizer diluted according to its label while the plant is actively growing, then stop feeding as bulbs mature. Extension schedules for field beds often include preplant and spring fertilizer; a container has a smaller root volume, so follow the fertilizer’s container rate rather than translating a per-row or per-acre rate directly.
Watch for scapes and green-garlic harvests
Hardneck garlic sends up a curling flower stalk called a scape, often in late spring or early summer depending on climate and planting date. If you want larger bulbs and do not plan to save bulbils, cut the scape after it has made a curl but before it straightens and flowers. Use clean snips and cut just above the top leaf; do not tug the stalk, which can disturb the plant. Scapes are edible and work well chopped into a stir-fry, pesto, or a butter sauce. Farmer’s Almanac describes the one-curl timing and notes that the season shifts by region rather than matching one national date (Farmer’s Almanac).
You can leave a scape on one plant if you want to see the flower head and collect bulbils, the small aerial cloves at its tip. The trade-off is that the plant is putting energy into reproduction rather than concentrating it in the underground bulb. This is an experiment, not a shortcut to seed garlic; bulbils usually take more than one season to become full-size bulbs.
Green garlic is a separate, earlier harvest: pull a plant while it is young, before a mature head forms, and use its tender stem and small bulb like a mild scallion. Harvest only one or two plants if you still want bulbs from the rest of the pot. Softneck plants may not produce scapes, so the absence of a curly stalk is not a sign that something is wrong.
Recognize maturity before the tops collapse
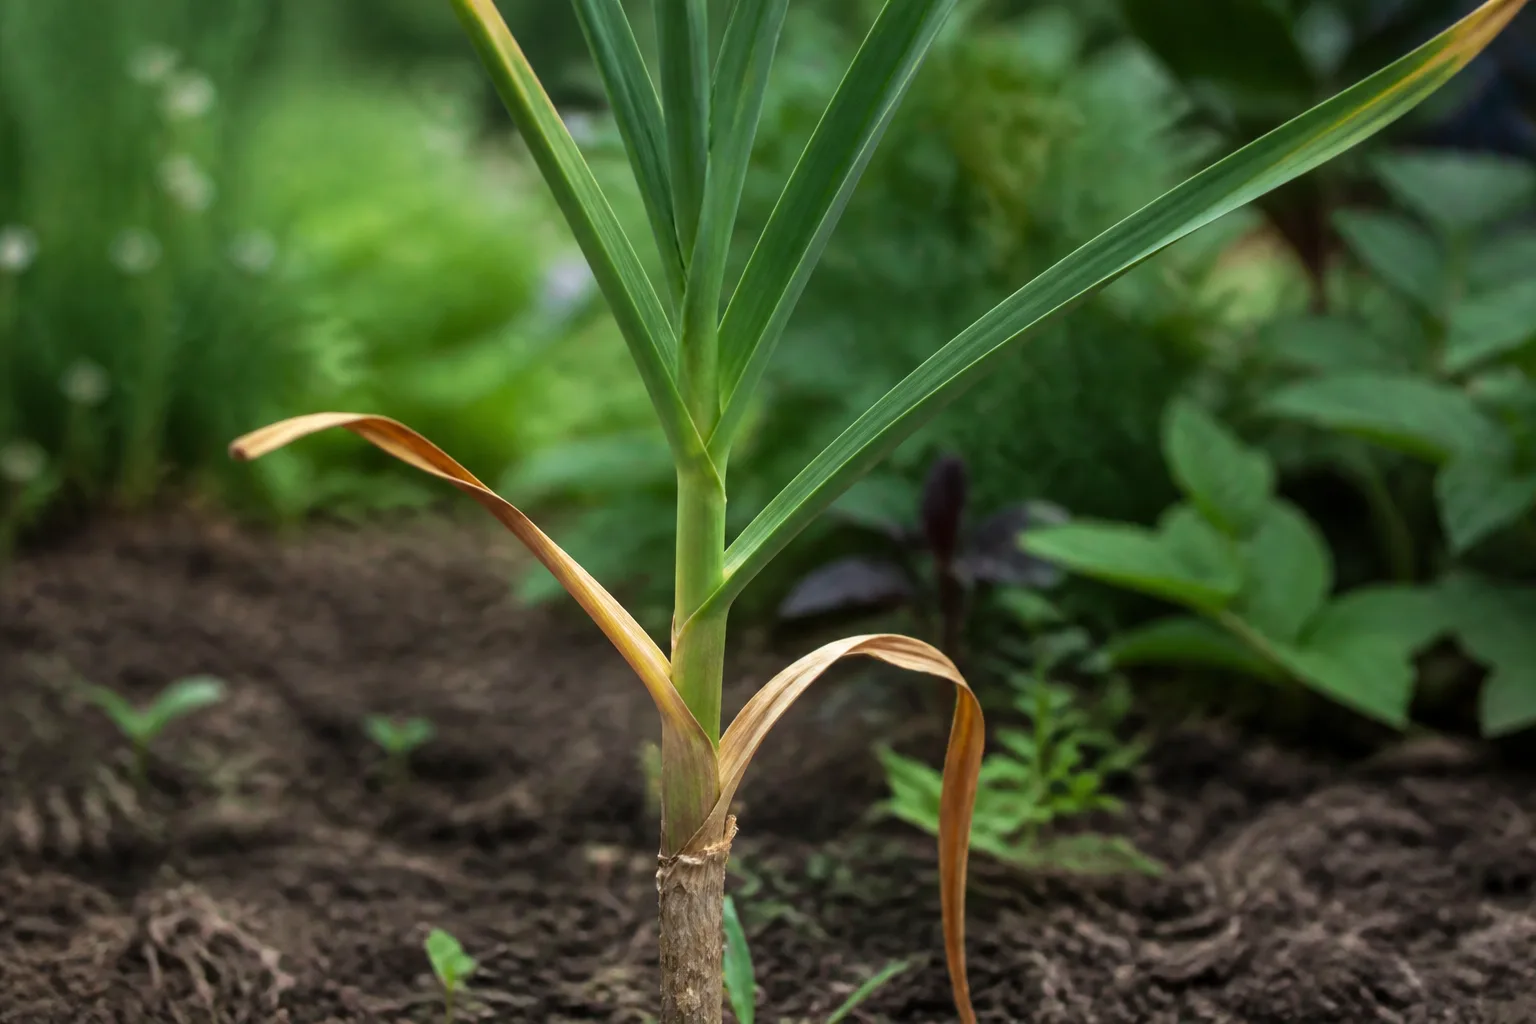
There is no single harvest month that works everywhere. Watch the leaves: when several of the lowest leaves have turned brown while roughly half or more of the upper foliage remains green, the bulb is often close to ready. The exact balance varies by cultivar and weather. Iowa State describes a harvest window when four or five lower leaves are dry and three or four upper leaves remain green; University of Maryland recommends lifting when about half the foliage browns (Iowa State Extension; University of Maryland Extension).
If you wait until every leaf collapses, the bulb wrappers can split and the cloves may separate, reducing storage quality. If you harvest too early, the head can be undersized and its protective wrappers may be thin. When the signs are mixed, stop watering and gently brush away mix beside one plant to inspect a test bulb. If it is full-sized with distinct cloves and intact wrappers, harvest the rest; if it is still small and tightly wrapped, give the pot another week or two while monitoring moisture.
Lift bulbs gently from a container
Do not pull hard on the stem. Garlic roots can grip the mix, and a sharp tug may snap the neck or bruise the bulb. Tip a small pot on its side over a tarp, or use a narrow hand fork to loosen the mix several inches away from each plant. Lift the bulb from below, supporting it by the base rather than squeezing the head.
Brush off loose soil, but do not wash or scrub the bulb you intend to store. Keep the leaves and roots attached through curing; they protect the bulb while it dries. Set damaged, split, or soft bulbs aside for immediate use, because they are poor candidates for long storage. Empty the container once the crop is out, and do not reuse the mix for another garlic crop if you saw rot or disease symptoms.
Cure and store garlic for best keeping quality
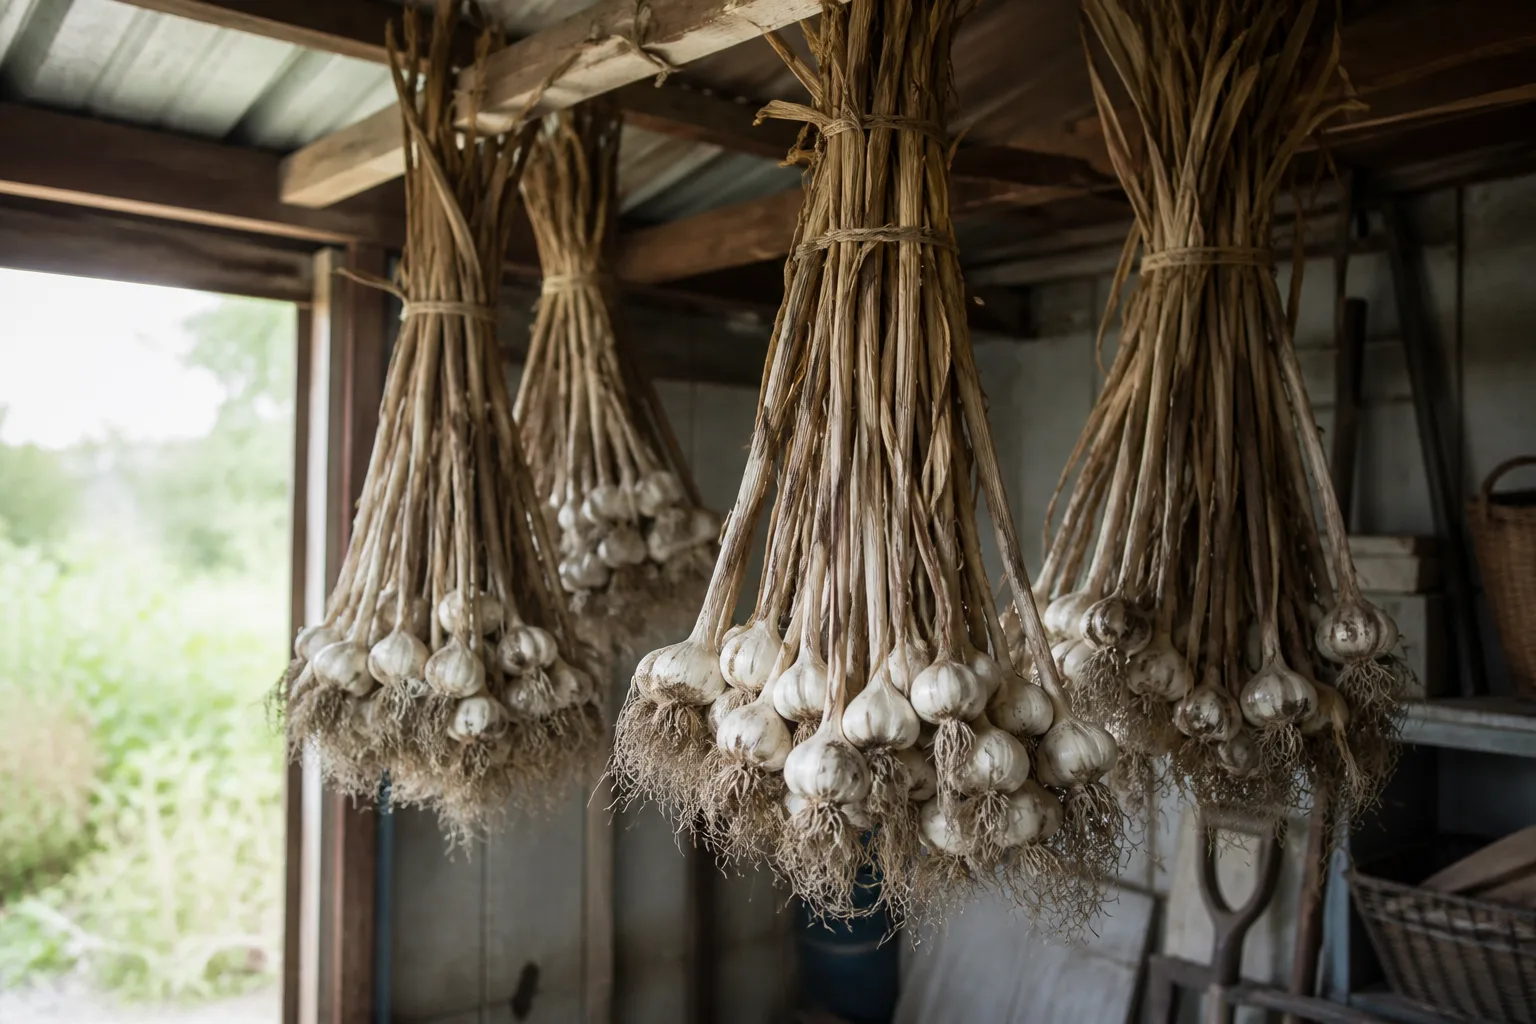
Curing dries the neck and outer wrapper so the bulb keeps better. Lay or hang plants in a single layer in a warm, dry, shaded place with good air movement. Avoid direct sun, a damp basement, or a sealed plastic bin. Depending on humidity and ventilation, drying can take about two to four weeks; check the necks and wrappers rather than relying only on the calendar. They should feel dry, and the wrapper should be papery before trimming.
After curing, cut the stem and roots if you are not braiding the tops, leaving a short neck. Store clean, sound bulbs in a cool, dry, dark, ventilated place, such as a mesh bag or open crate. Do not put storage garlic in an airtight container. Hardneck garlic generally keeps for a shorter time than softneck, but storage life depends on cultivar, maturity, curing, and temperature. Use any bulb with bruising or broken skin first, and inspect stored garlic periodically for soft spots or sprouting.
Troubleshoot small bulbs, yellow leaves, and rot
Many small bulbs usually point to crowding, a short season, poor light, or a cultivar mismatch. Check whether the cloves were planted closer than about 4 inches, whether the pot received direct sun, and whether the variety was intended for your region. A plant that produced leaves but no divided head may not have received enough winter chilling; a large fertilizer dose will not correct that missing seasonal signal.
Soft cloves or a sour smell suggest excess water or weak drainage. Check the holes and whether a saucer or patio surface is holding the container in water. Discard soft, decayed cloves; do not cut away rot and store the rest as cured garlic. Next time, use fresh mix, a pot with open drainage, and less frequent watering in cool weather.
Yellowing is not always a harvest signal. Gradual yellowing of lower leaves late in the crop is normal; sudden yellowing of young leaves can reflect waterlogged roots, drought, nutrient shortage, or heat stress. Check moisture first, then light and drainage, before feeding. If only one plant declines and the clove is mushy at the base, remove it so the problem does not spread through persistently wet mix.
Bulbs that split or have green cloves were often harvested too late or planted too shallowly. The RHS notes that shallow planting can expose cloves and that late harvest can split bulbs. Use the leaf-stage test, plant at a consistent depth next time, and keep mature garlic from sitting in wet soil. A small, intact bulb is still useful fresh; it simply may not store as well as a fully cured, undamaged head.
Conclusion
Growing garlic in a container is a season-long project, not a quick windowsill trick. Use a deep pot with working drainage, plant a variety suited to your local winter, give bulb cloves about 4 to 6 inches of space, and keep the mix evenly moist while leaves and bulbs are developing. Protect the container from severe freeze-thaw exposure without putting the crop in a heated room.
Let foliage and soil conditions guide care: cut hardneck scapes while young if you want to favor bulbs, reduce watering as lower leaves dry, and harvest before every top has collapsed. Cure the bulbs in shade with airflow, then store them somewhere cool and dry. If you only have room for a shallow indoor pot, grow garlic greens; if you want full heads, the right variety, outdoor light, and a long seasonal cycle make all the difference.