How to Grow Potatoes in Your Home Garden
Grow potatoes in a bed, row, or container with clear planting depths, spacing, hilling cues, watering guidance, harvest signs, and troubleshooting.
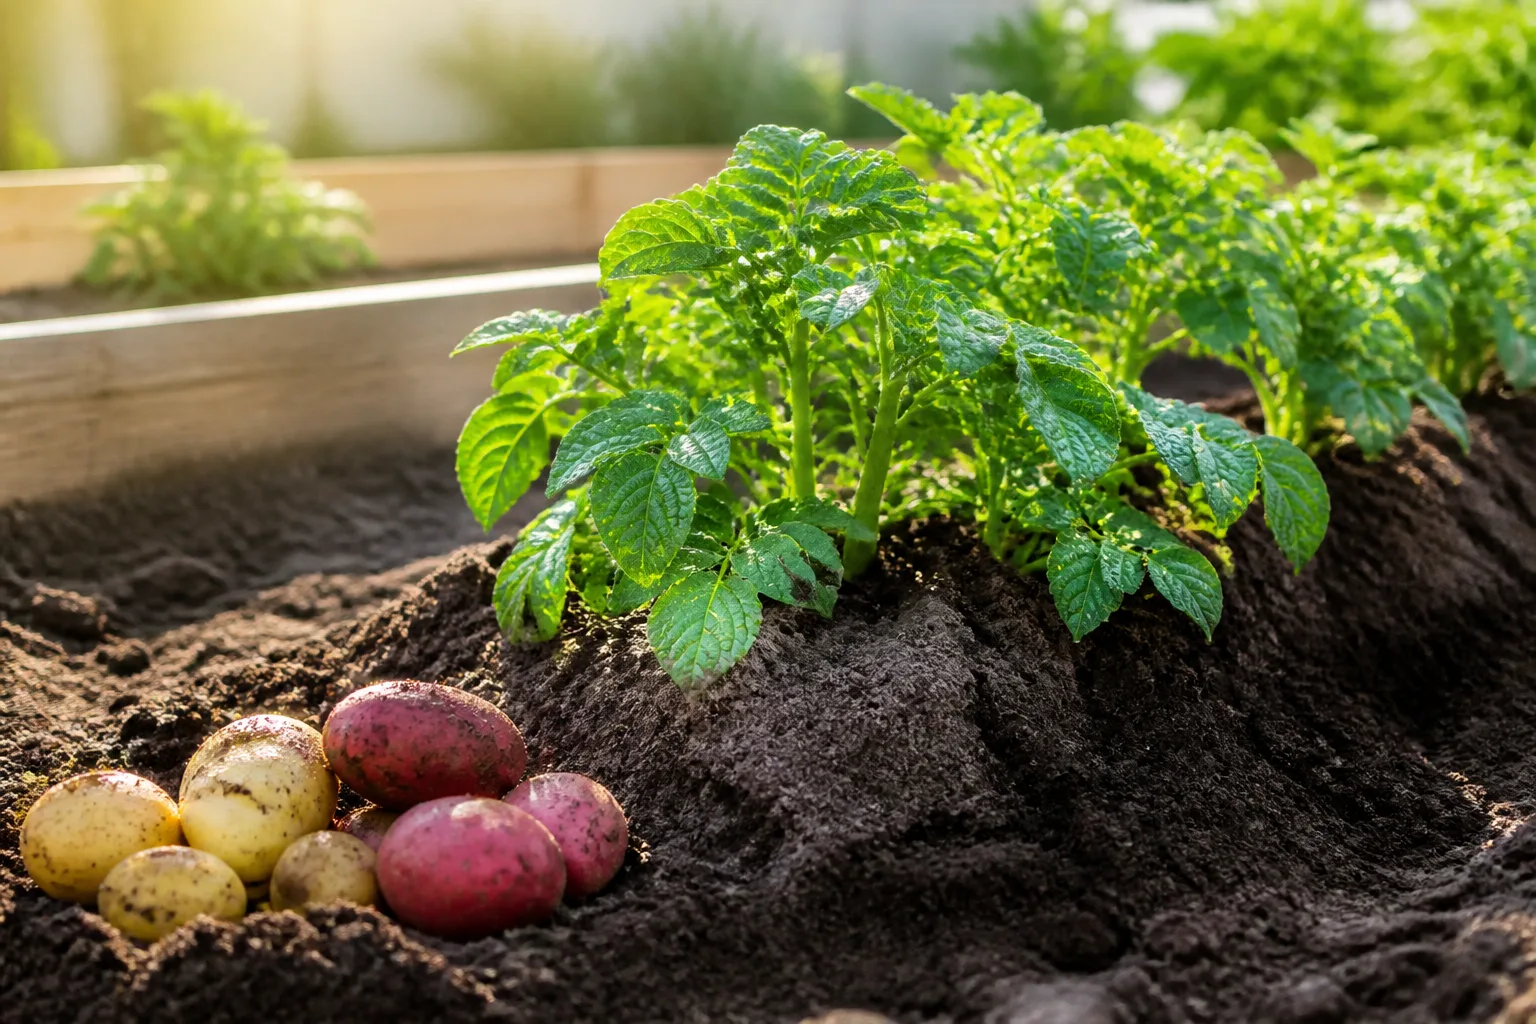
Potatoes are a cool-season crop with a simple underground payoff: plant a healthy seed tuber, keep its leafy growth growing, and give the developing tubers loose soil, regular moisture, and protection from light. The reliable harvest comes less from a fancy “potato tower” than from planting at the right time, choosing a variety suited to your season, and avoiding big swings in water or soil conditions.
Use certified seed potatoes, not grocery potatoes, for a predictable garden crop. Plant them in fertile, well-drained soil when the ground has warmed, cover the plants as they grow, and harvest early varieties young or wait for the vines to die back if you want mature potatoes for storage. The details below adapt that basic method to ground beds, containers, and different harvest goals.
Quick answer: the essentials for growing potatoes
Choose a sunny spot with loose soil that drains after rain. Buy a variety labeled for your region and intended use, then plant certified seed potatoes after the soil has warmed to about 50°F and is workable rather than cold and waterlogged. Set whole small tubers or cut seed pieces about 4 to 6 inches deep, roughly 8 to 12 inches apart in the row, with rows 30 to 36 inches apart.
As the shoots reach about 6 inches, draw loose soil around the base of the plant. Repeat as it grows, leaving the top leaves exposed and keeping developing tubers covered. Water deeply enough to moisten the root zone, then adjust the frequency to rain, heat, soil texture, and whether you are growing in a bed or a pot.
For tender new potatoes, test-dig a few when plants are flowering or when the variety’s early harvest window arrives. For mature tubers, wait until the foliage naturally yellows and dies, allow the skins time to firm, then lift carefully. This is a useful starting sequence; local frost dates, variety descriptions, and actual soil moisture should decide the fine timing.
Choose a variety for your season and meals
Seed catalogs sort potatoes by maturity, texture, skin color, and cooking use. For planning, maturity class matters most. Early varieties produce young potatoes sooner and usually take less space; maincrop varieties stay in the ground longer and are a better fit when you want larger tubers for baking or winter storage. The RHS growing guide describes first and second earlies as faster crops and maincrops as the longer-season choice.
Think about how you cook before choosing a name. Waxy potatoes such as many red-skinned and fingerling types tend to hold their shape in salads and soups; floury or russet types are valued for baking and fluffy mashing; yellow-fleshed varieties often work across several kitchen uses. These are tendencies, not strict rules, so use the supplier’s description for the specific cultivar.
A short-season or heat-prone garden benefits from an early variety that can finish before summer heat peaks. If you have a long, cool growing season and space to leave the plants until fall, a maincrop can give you larger storage tubers. Growing one early and one later variety is a practical way to spread harvests without planting every potato at once.
Pick a sunny site and prepare loose, well-drained soil
Potato foliage needs direct sun to make the energy that supports tuber growth. Choose a spot that gets at least six hours of sunlight; more is useful in a cool climate. In very hot regions, afternoon shade can reduce heat stress, but deep shade usually produces weak stems and a smaller crop.
The ground should be friable enough for tubers to expand and drain well enough that water does not sit around seed pieces after a storm. Heavy clay is not automatically unusable, but it needs better structure and drainage; raised rows or a raised bed can help. Add mature compost to improve soil structure when needed, and avoid working soil while it is wet, because digging wet clay can leave compacted clods that persist all season.
Potatoes tolerate a range of soil pH, but slightly acidic soil is generally preferred. University of Maine Cooperative Extension gives a typical potato pH range around 5.3 to 6.0 and notes that higher pH can favor common scab, a rough, corky blemish on the skin. Test before adding lime, sulfur, or wood ash; guessing at pH can create a new nutrient problem while trying to solve a cosmetic one.
Avoid planting potatoes where tomatoes, peppers, eggplants, or potatoes grew recently. They share pests and diseases, so rotation helps break the carryover cycle. If garden space is tight, use a clean container with fresh growing medium rather than reusing soil from a diseased nightshade bed.
Time planting by soil and weather
In cool climates, plant in spring after the soil is workable and has warmed to about 50°F. Calendar dates differ widely: in one location the right window may be a few weeks before the last expected frost, while in another the soil stays cold and wet until later. A soil thermometer and a glance at the forecast are more useful than copying a planting date from another state.
Potato sprouts can tolerate cool weather better than some vegetables, but seed pieces sitting in cold, saturated soil may rot before they establish. If a wet spell is expected, wait for a dry window or plant into a raised row with better drainage. The University of Maine Cooperative Extension potato guide uses soil temperature near 50°F as a planting cue and warns against planting into conditions that leave seed pieces vulnerable to decay.
In warm-summer climates, the goal is to get tubers growing during the cooler part of the year. Gardeners may plant in late winter or early spring for a spring harvest, or use a fall crop where the local season permits. In mild regions, fall planting can work; where winter soil freezes hard, it generally cannot. Check the maturity range on the seed label and count backward from the point when severe heat or frost usually arrives.
Prepare seed potatoes and decide whether to chit
A seed potato is a small tuber grown and inspected for planting. Its “eyes” are buds that can produce shoots. Certified seed potatoes are a better starting point than grocery potatoes because they are sold for planting and reduce the chance of introducing disease; grocery tubers may also have been treated to slow sprouting. University of Maine Cooperative Extension and Utah State University Extension both recommend certified seed for home gardens.
Small seed potatoes can be planted whole. If a tuber is large, cut it into blocky pieces, making sure each piece has at least one healthy eye and enough flesh to support early growth. Use a clean knife and discard pieces with soft, wet, or rotten areas. Let freshly cut pieces dry in a cool, airy place until the cut surface is no longer wet; avoid leaving them in a sealed bag or in a warm, damp pile.
Chitting, or pre-sprouting, is optional. It can give early varieties a head start in a short season: arrange the seed potatoes eye-side up in a shallow tray and keep them in a bright, cool place until short, sturdy sprouts form. Long, pale, easily broken sprouts are less useful. If your seed potatoes already have small firm sprouts, handle them gently and plant them without rubbing the sprouts off.
Plant at the right depth and spacing
Dig a furrow about 4 to 6 inches deep. Place seed pieces with the eyes or sprouts facing upward, then cover them with about 2 inches of soil at first if you plan to hill during the season. You can also cover the furrow more fully, then add soil later to protect anything exposed; the starting depth and hilling schedule work together.
Leave about 8 to 12 inches between plants in a row and 30 to 36 inches between rows, adjusting for the variety and the room needed to hill and weed. Closer spacing can yield more small tubers per area, while wider spacing gives individual plants room and makes cultivation easier. Savvy Gardening’s seed potato planting guide also recommends a 4- to 5-inch trench and roughly 10- to 12-inch spacing, illustrating how home-garden recommendations vary by method and bed layout. Do not try to maximize the number of seed pieces if the bed is narrow; crowded foliage makes scouting and airflow harder.
Keep fertilizer away from direct contact with the seed piece. A concentrated band of fertilizer can injure the seed or promote decay. If a soil test recommends fertilizer, follow its rate and place it to the side of the planting row or mix it into the top few inches as the label directs. The UMaine potato bulletin describes both row spacing and keeping fertilizer separate from the seed piece.
Hill gradually to cover developing tubers
Hilling means pulling loose soil or another suitable mulch around the lower stems as the plant grows. Start when the shoots are about 6 inches tall, covering part of the lower stem while leaving the upper leaves in the light. Repeat when the plant gains another few inches, building a broad mound rather than a steep, narrow cone that washes away.
Potato tubers form on underground stems called stolons. Hilling creates a loose, dark zone around the plant and helps keep shallow tubers from receiving light. It does not guarantee that each extra layer produces another crop, and it cannot compensate for crowded plants, poor drainage, or a short season. The RHS explains earthing up as a way to cover developing tubers and protect them from greening.
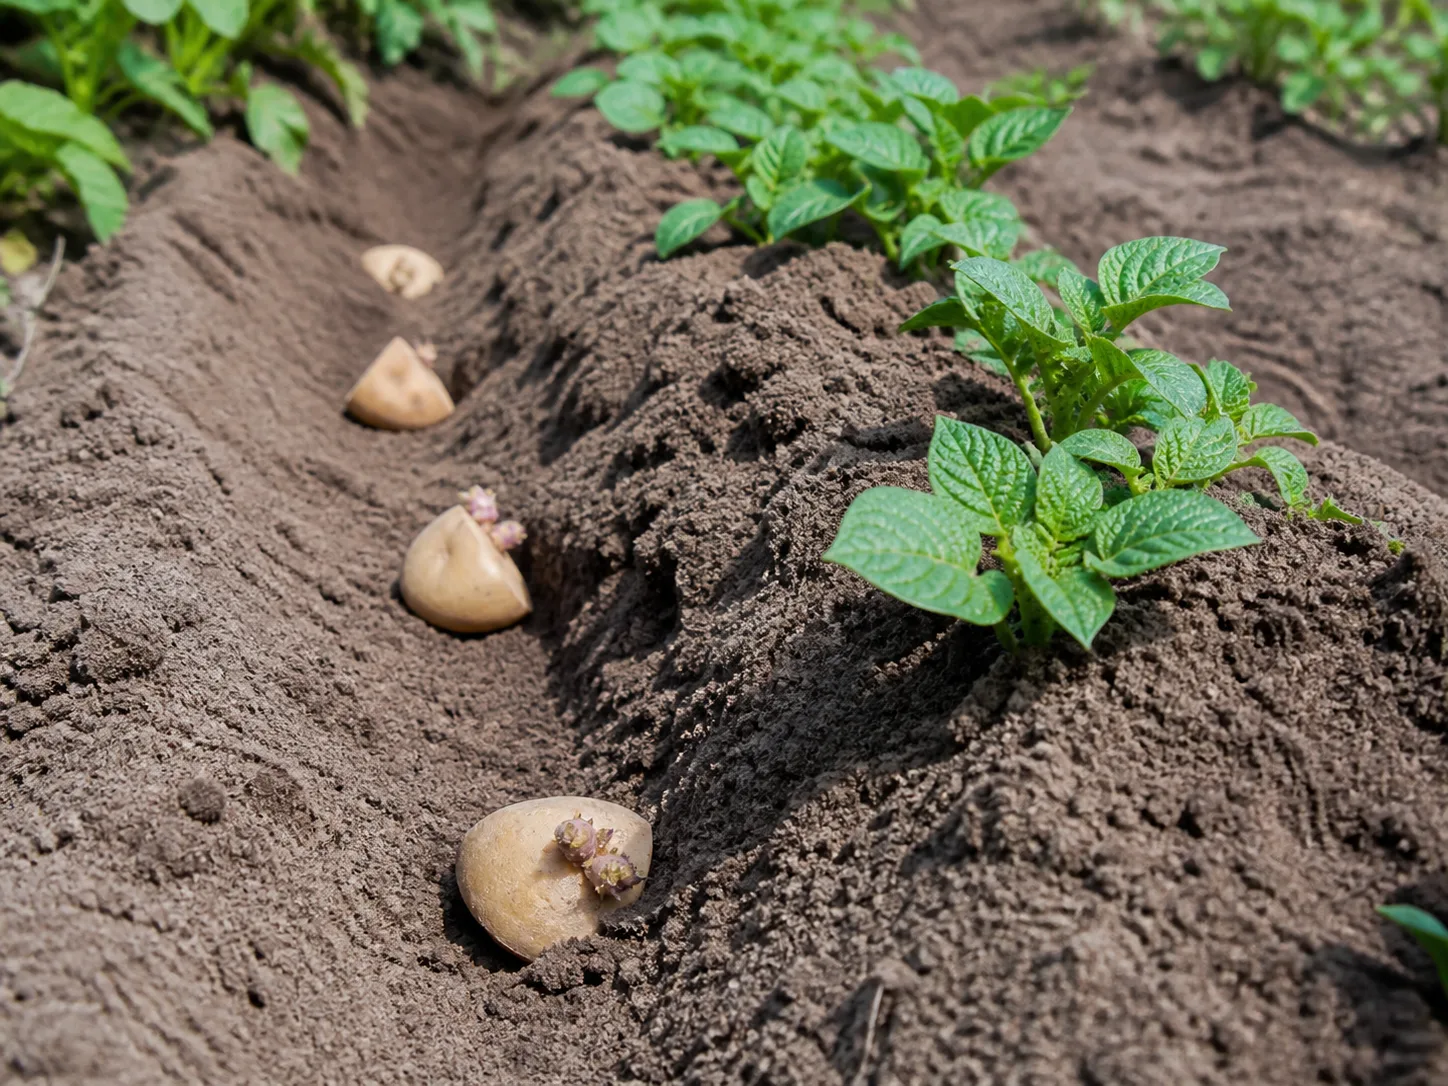
Hill only with soil that is loose enough not to damage stems. Avoid deep cultivation close to the plants once roots and stolons have spread. If you use clean straw or leaf mulch instead of soil, keep it in place and check after wind or heavy rain; tubers should remain fully shaded and covered. Stop adding substantial layers once the plants are flowering and the mound is high enough, unless rain or settling exposes a tuber.
Keep moisture steady through tuber growth
Potatoes need consistent soil moisture, especially while tubers are forming and bulking. Utah State University Extension recommends roughly 1 to 2 inches of water per week as a general garden range, but that is a starting estimate, not a fixed schedule. Sandy soil, hot wind, and containers may need more frequent watering; clay soil and cool rainy weather may need less.
Check the soil instead of watering by habit. Push a finger or trowel into the root zone: if the soil is dry several inches down, water slowly and deeply; if it is damp or sticky, wait. A drip line or soaker hose can make watering more even and keeps foliage drier than overhead irrigation. Mulch reduces evaporation and helps keep soil temperature more stable.
Large moisture swings can cause irregular or cracked tubers. If a dry period is followed by a heavy soak, the tuber may resume growth unevenly. Aim for steady moisture, not waterlogged soil. As vines yellow and mature tubers approach harvest, reduce irrigation; wet conditions close to harvest can increase rot and make lifting muddy, damaged potatoes more likely.
Fertilize without overfeeding the foliage
Start with a soil test where possible. Potatoes need nutrients, but more fertilizer is not automatically a better crop. Excess nitrogen can drive a large, dark canopy while delaying tuber development, and high fertility can also make tubers less suitable for storage. Use a balanced vegetable fertilizer only at the rate recommended for your soil and product, rather than copying a per-plant amount from a different garden.
Work mature compost into the bed if the soil needs organic matter. Avoid placing fertilizer directly against seed potatoes, and do not add fresh manure to a potato bed as a quick nutrient boost. Maine Extension cautions that manure can encourage common scab. This is one reason a soil test and well-finished compost are more useful than a guessed dose.
If plants are pale or stunted, first look at drainage, cold soil, drought, and pest damage before adding fertilizer. If foliage is lush but the harvest is poor, more nitrogen is unlikely to help. Correct the limiting condition you can observe, and do not side-dress late simply because the plants look smaller than a neighbor’s.
Control weeds and rotate the crop
Keep the bed weed-free while potato shoots are small. Weeds compete for light and water early, before the potato canopy fills in. Shallow hoeing between rows works better than deep digging close to the plants, where roots and stolons may be spreading. Hand-pull weeds within the row and avoid pulling hard enough to loosen the potato stems.
Rotation is a straightforward disease-management step. When space allows, give potatoes and other nightshades a multi-year break from the same soil. That break will not eliminate every soil problem, but crop rotation reduces the chance of repeatedly carrying over pests and disease organisms, as Utah State Extension and University of Minnesota Extension recommend in their potato guidance. Move containers too, or empty and clean them if a previous crop had a serious problem.
After harvest, collect small missed tubers and volunteer plants before they sprout the next season. Leftover potatoes may grow as weeds and keep diseases alive between crops. If blight or rot affected the plants, do not put diseased foliage or tubers in a home compost pile unless the compost system is hot and managed to destroy plant pathogens; disposal rules vary by municipality, so follow local guidance.
Scout for pests and disease early
Check the undersides of leaves at least weekly. Colorado potato beetle adults are striped; their orange larvae and yellow egg clusters are easier to control when found early. Hand-pick beetles and remove egg masses in a small garden. Aphids cluster on tender growth and can transmit viruses, so dislodge small colonies with water and monitor whether they return. These pests, along with blights, appear in Utah State Extension’s potato problem guide.
Common scab appears as rough, corky patches or shallow pits on the tuber surface. It may make a potato unattractive without making the flesh unusable, but severe scab and other decay reduce quality. Slightly acidic soil, clean seed, and crop rotation help lower risk; do not try to cure scab by adding acidifying products without a soil test.
Early blight often starts on older lower leaves as brown spots with concentric rings. Late blight can spread rapidly in cool, wet conditions, causing dark water-soaked lesions on leaves or stems and sometimes pale growth beneath the lesion in damp weather. If you suspect late blight, remove affected plant material, avoid moving it through the garden, and seek local Extension identification promptly. Do not apply a pesticide without confirming that it is labeled for the crop and problem, and follow the product label and local regulations.
Grow potatoes in a container or grow bag
A container suits a balcony, patio, or garden with heavy soil, but it trades space for more frequent attention. Choose a sturdy container at least about 12 inches deep with drainage holes; wider and deeper containers give more room for hilling and reduce rapid drying. The RHS container method uses a container at least 30 cm wide and deep and spaces seed potatoes by container diameter. Start conservatively with one seed potato per roughly 12 inches of width.
Use fresh, free-draining potting mix rather than dense garden soil. Add a few inches to the base, lay the seed pieces on top, cover them, and add more mix around the stems as they grow. Leave the leafy tops exposed. Containers are easy to harvest because you can tip the mix onto a tarp, but the small root volume means a pot can dry out quickly on a hot, windy balcony. Epic Gardening’s potato guide also recommends containers with drainage and adding soil or mulch gradually as plants grow.
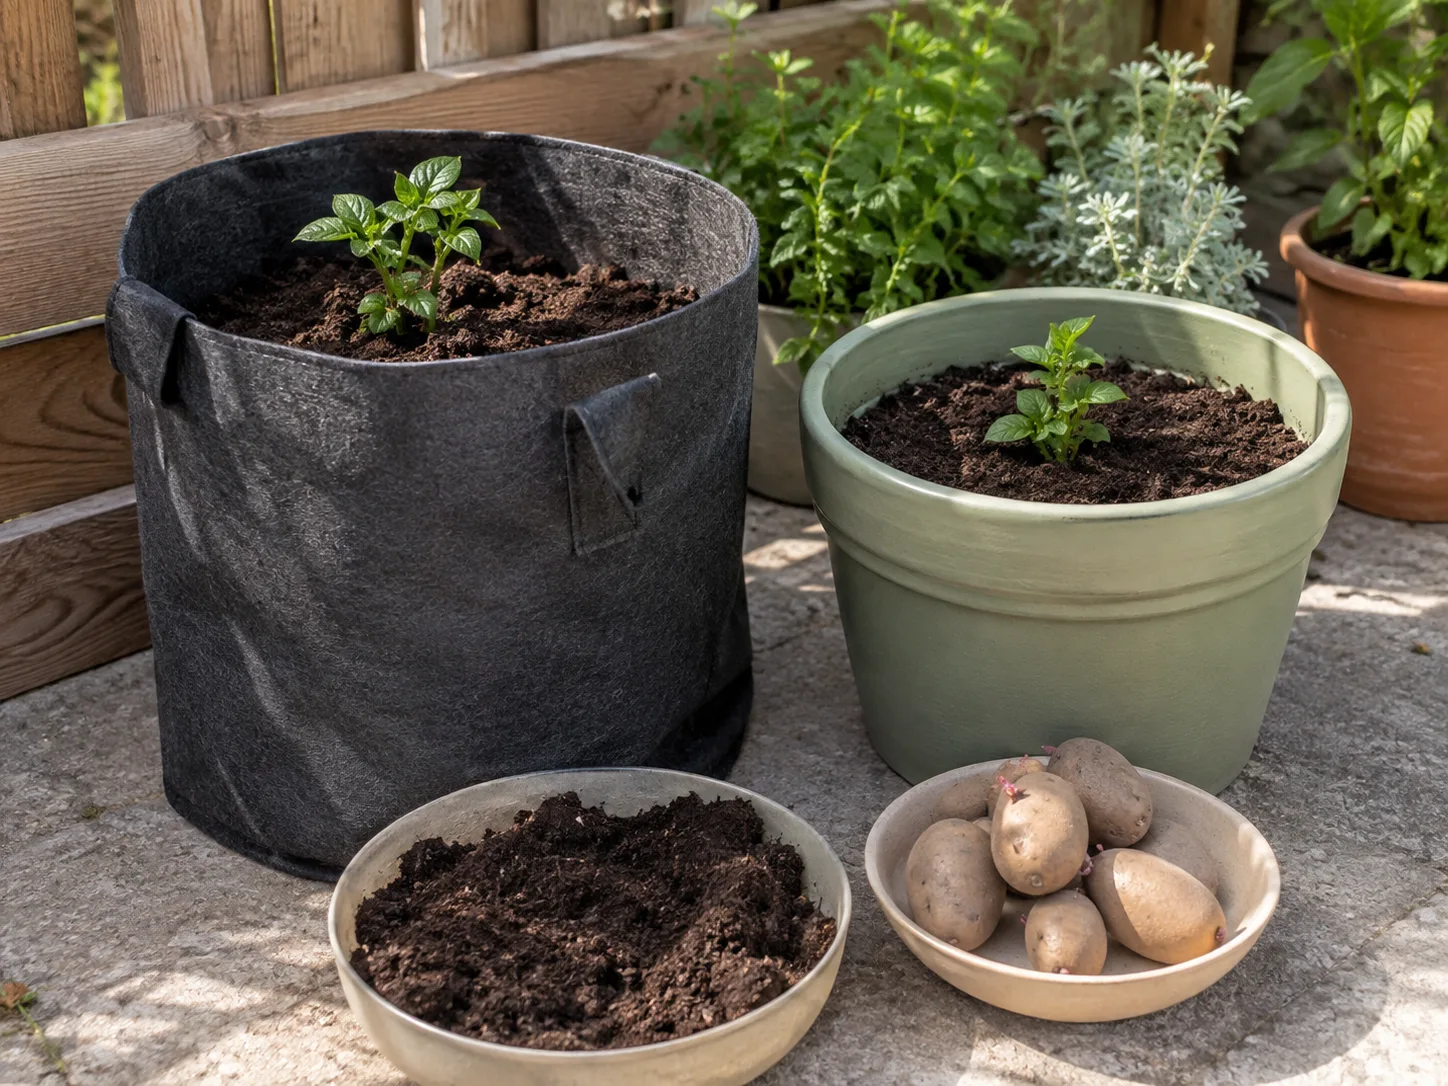
Check container moisture daily during heat, but water only when the mix needs it. Fabric grow bags dry faster than plastic tubs; dark pots on pavement can overheat, so move them away from reflected heat if possible. Do not assume that filling a tall tower with many seed potatoes will multiply the harvest. The available light, water, nutrient reserve, and room for roots still limit what each plant can produce.
Harvest new potatoes or mature storage potatoes
You can harvest at two different stages. New potatoes are young tubers with thin skins, often ready around flowering for early varieties. Gently reach into the side of the hill and take a few, leaving the plant and most of the crop in place. Because flowering differs among varieties and does not always happen on the same schedule, use the variety’s maturity information as well as the plant’s growth.
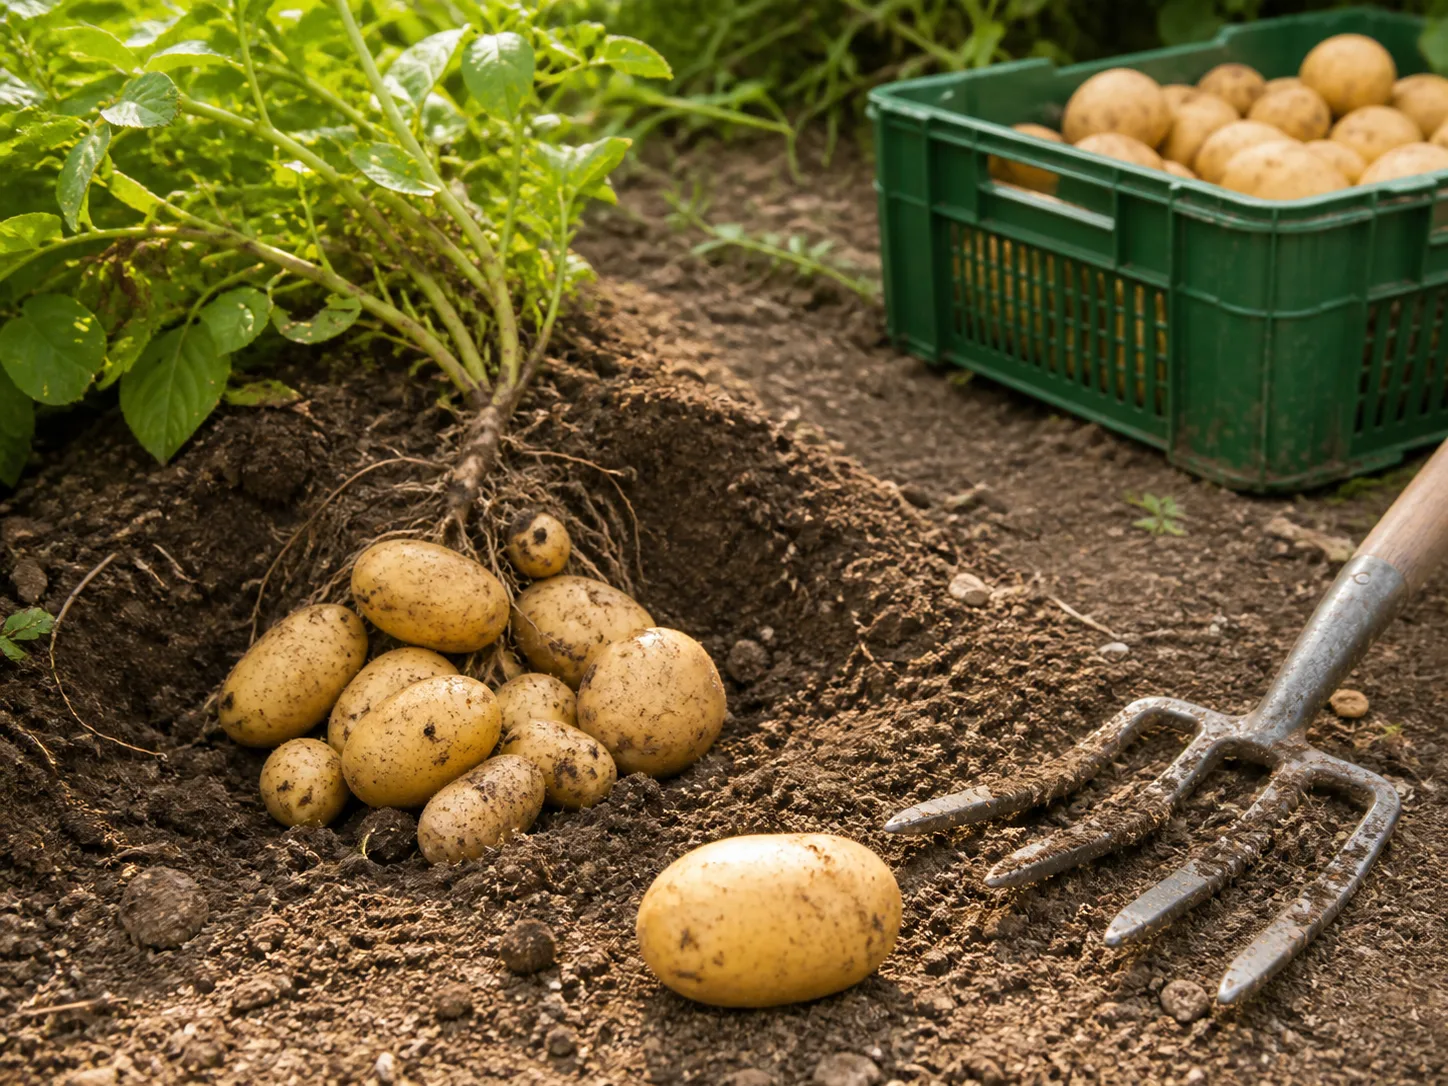
For mature potatoes, wait until the foliage yellows and dies back naturally. If the plant is still green, the tubers may still be filling; harvesting too early gives smaller potatoes and fragile skins. Once the vines have died, wait about one to two weeks in reasonably dry soil for skins to set. If prolonged rain, rot, or a hard freeze threatens, adjust rather than following a rigid wait.
Lift the crop on a dry day if possible. Insert a garden fork outside the planting hill and lift toward the center, or use a hand fork near an individual plant. Keep the tool away from the stems and loosen the soil from the outer edge inward. If you accidentally cut a tuber, use it soon and keep it out of long-term storage. The RHS growing guide likewise distinguishes quicker early potatoes from maincrops left in the ground longer for larger harvests and storage.
Cure, sort, and store the crop
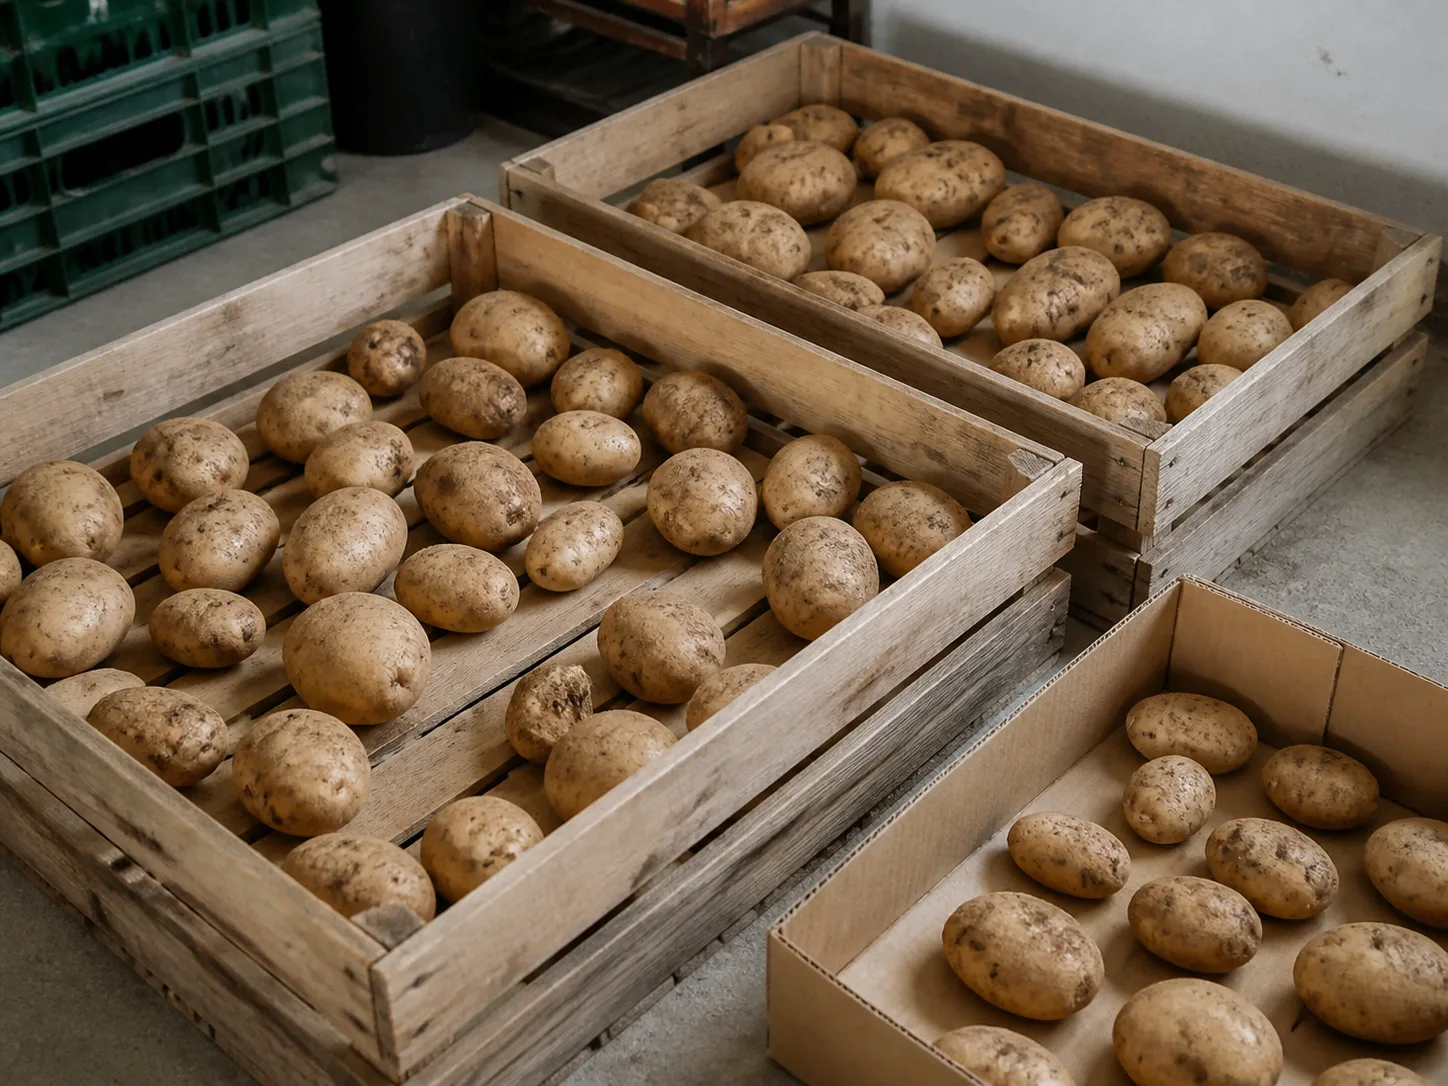
Handle fresh potatoes gently. Brush off loose soil after the surfaces have dried, but do not scrub or wash storage potatoes before putting them away. Separate cut, bruised, soft, or diseased tubers; one rotting potato can spoil neighboring potatoes in a closed box.
For a storage crop, cure the potatoes in a dark, cool, well-ventilated place so minor skin injuries can dry and the skins firm. Keep them out of direct sunlight during this period and do not seal them in plastic. Utah State University Extension recommends curing for two to three weeks and then storing potatoes in darkness around 40 to 45°F. Conditions vary by home, so focus on darkness, cool temperatures, airflow, and regular checks rather than trying to create a damp, sealed cellar.
Do not refrigerate potatoes intended for general cooking unless you follow guidance for a specific use; very cold storage can change their cooking quality. Keep them away from onions and from warm appliances. Check the storage box every week or two and remove any tuber that becomes soft, wet, or moldy. Eat damaged potatoes first if they remain sound, and never store a green or rotting potato with the healthy crop.
Troubleshoot weak growth, small tubers, and green spots
If shoots do not appear, check whether seed pieces were planted into cold, wet soil. Rot, overly deep planting, damaged seed, or long delays after planting can all slow emergence. Wait for the soil to warm before digging up the row; a gentle test at the end of the row is safer than unearthing every seed piece.
If plants make lots of leaves but few potatoes, consider too much nitrogen, shade, overcrowding, heat, or uneven water. Check the fertilizer history first, then review spacing and whether the soil dried out during flowering and tuber bulking. Adding more fertilizer without diagnosing the cause can worsen the leaf-to-tuber imbalance.
Green patches happen when tubers receive light. Hill sooner, restore mulch after rain, and check the edges of containers where soil can pull away. Light-exposed potatoes may become unsafe to eat; the RHS potato guide warns that tubers exposed to light can turn green and become poisonous. Discard potatoes that are extensively green or bitter instead of treating them as normal food. Potato foliage and berries are not edible. If a crop has widespread rot, a rapidly spreading foliar disease, or an unfamiliar symptom, photograph it and ask a local Extension office to identify the cause before using a pesticide.
Plan the next potato planting
Keep a simple note of variety, planting date, first emergence, watering trouble, pest sightings, and harvest date. That record is more useful than comparing yield with a different garden because weather, soil, and variety all change the result. If the crop finished too late, choose an earlier variety next year; if it dried too often, add mulch, use drip irrigation, or move the bed away from a heat-reflecting wall.
At harvest, save the best sound potatoes for eating, but buy certified seed again for planting. Replanting tubers from your own crop can carry disease forward, and variety identity may be uncertain. Remove volunteer potatoes, rotate the next crop away from nightshades, and clean containers and tools that touched diseased material.
Savvy Gardening’s guide to planting seed potatoes compares rows, containers, and straw, showing how the same crop can fit different spaces. Use that principle to plan a sequence: an early crop for summer meals, or a later maincrop if you have the time, space, and cool storage. A manageable first bed is more valuable than a large planting that is difficult to water, hill, and harvest.
Conclusion
Grow potatoes by matching the variety to your season, planting certified seed in warm, well-drained soil, and keeping the root zone evenly moist. Space the plants, hill as they grow so developing tubers stay dark, and avoid excess nitrogen, cold wet soil, and careless watering.
Then harvest by purpose: take a few young potatoes for immediate use or wait for natural dieback and firmer skins if you want a storage crop. With good drainage, regular scouting, careful lifting, and dark storage, even a modest row or container can provide a satisfying homegrown harvest.