Why Do My Leaves Have Holes? Causes & Fixes for Monstera, Philodendron, and More
Holes in plant leaves can mean natural fenestration — or a pest problem that needs fast action. Learn to tell the difference and fix each cause for Monstera, Philodendron, and more.
The Two Kinds of Leaf Holes: What You Need to Know First
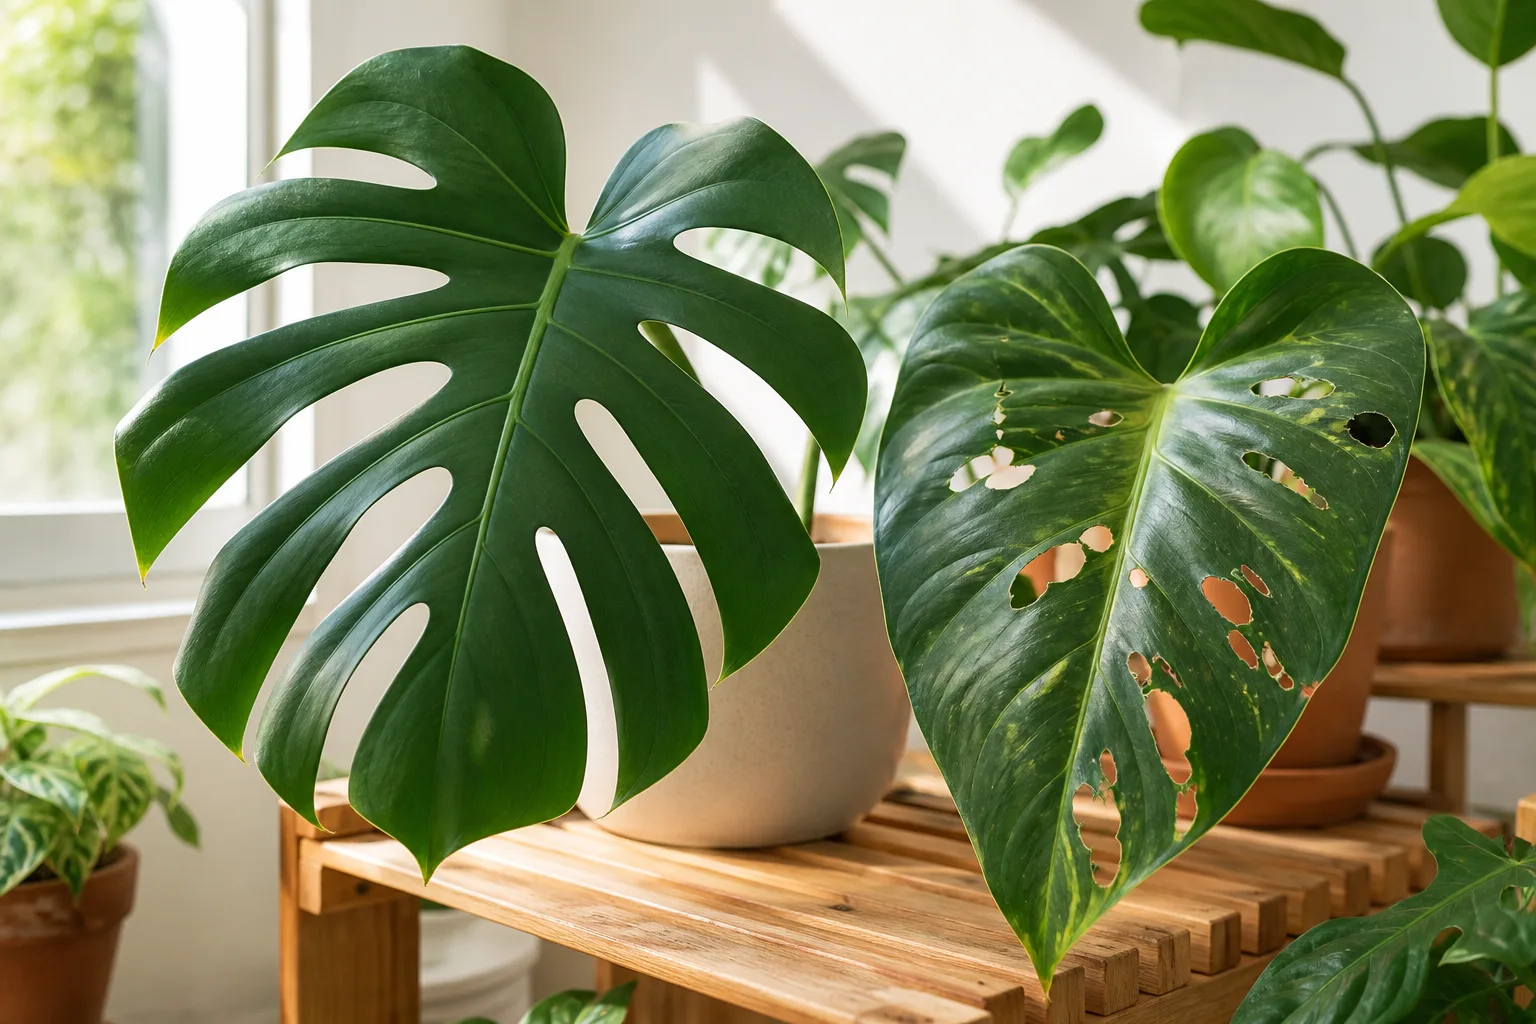
Holes in plant leaves fall into exactly two categories. Either the plant made them on purpose — called fenestration, a sign of health and maturity — or something else made them: an insect, a fungus, your cat, or a watering mistake. The single most important diagnostic rule: fenestration only appears on newly unfurling leaves. If you are staring at a hole on an older leaf, you are looking at a problem that needs action.
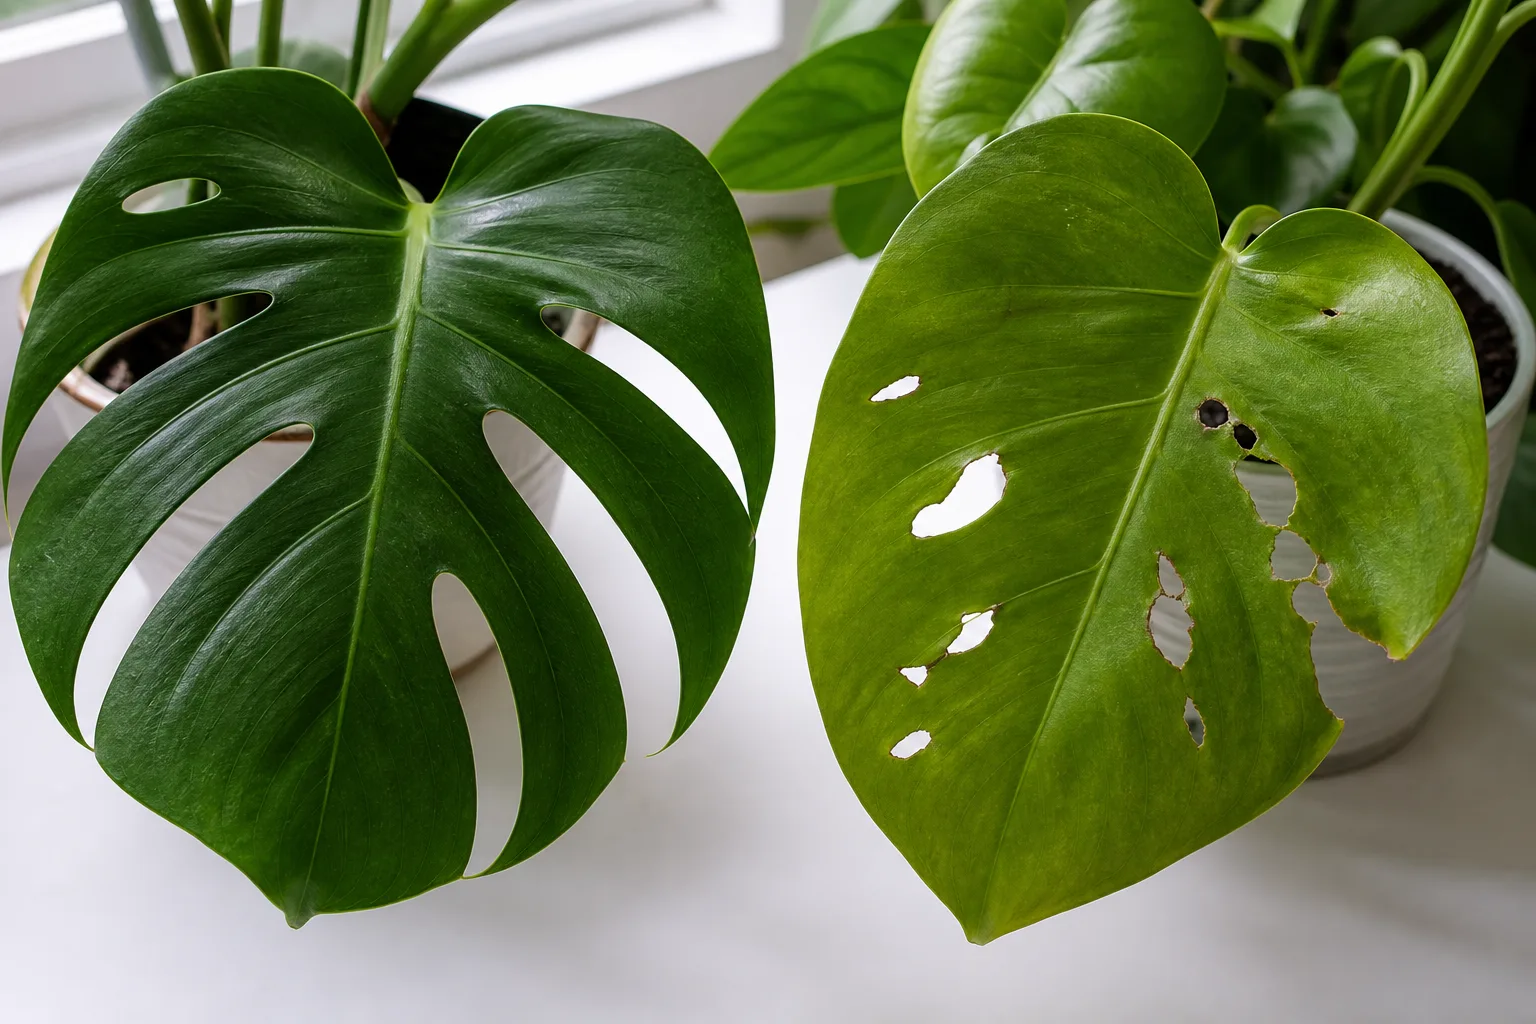
Fenestration is genetically programmed and developmentally timed. Once a leaf hardens, it will never develop new natural holes. Damage holes from pests, disease, or physical trauma appear suddenly on leaves that were previously fine — often overnight. Knowing which one you are dealing with determines whether you do nothing or intervene immediately.
How to Read a Hole in Your Leaf
Before reaching for any treatment, run through four quick visual tests.
The shape test
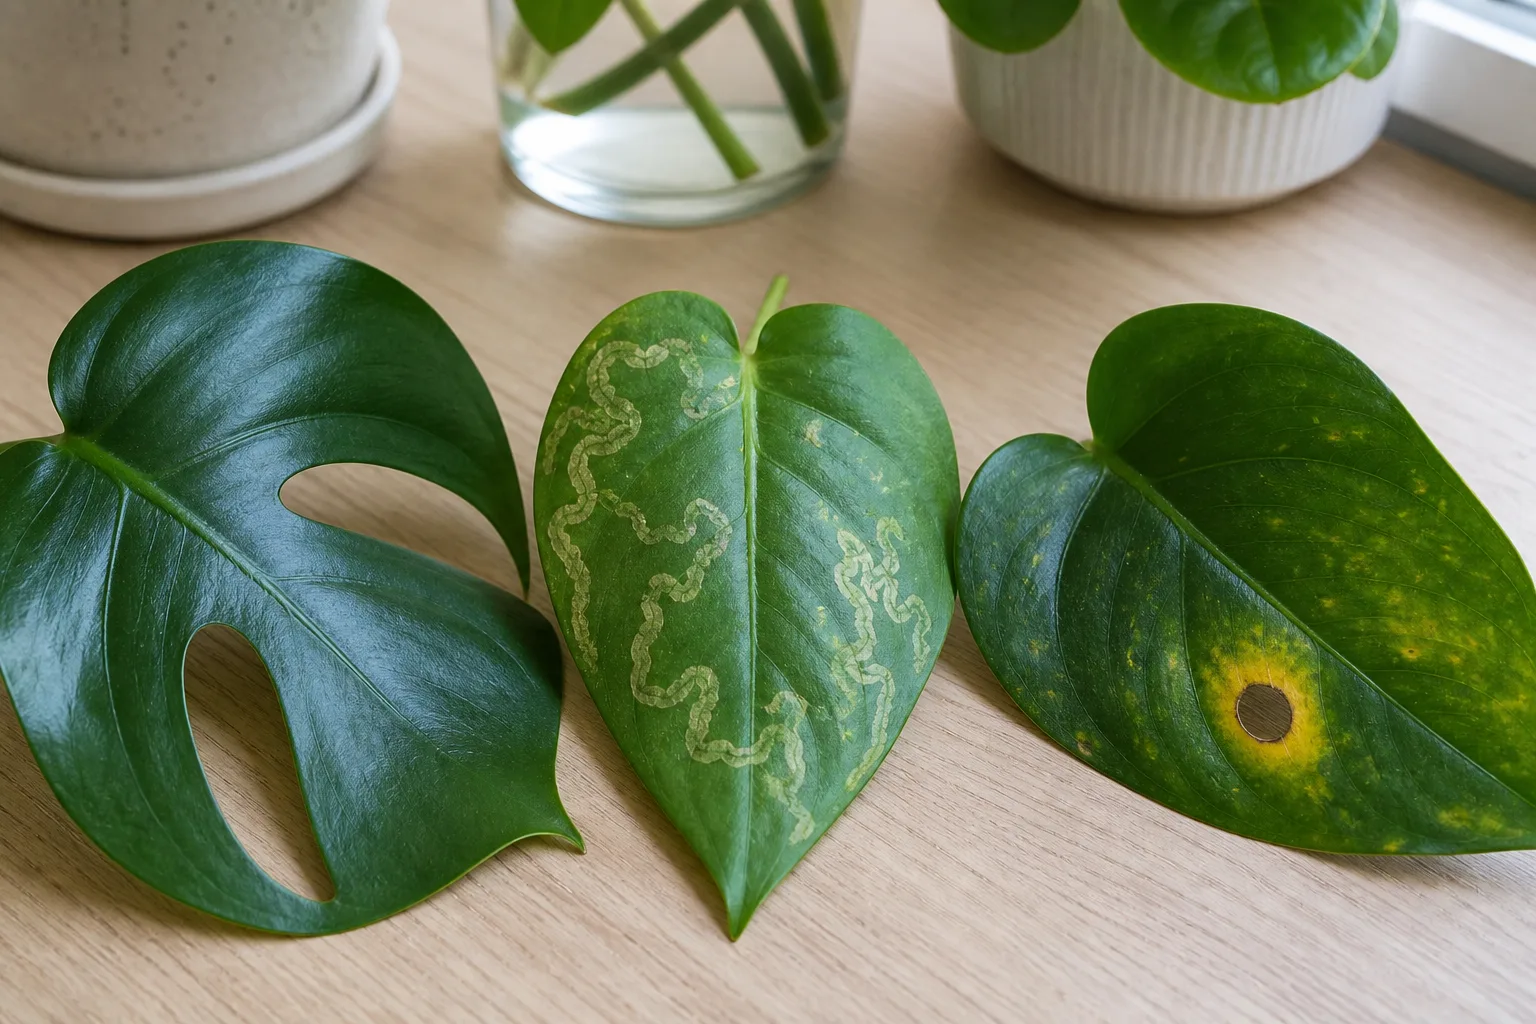
Natural fenestrations are smooth, symmetrical, and oval or slit-shaped. They follow the leaf veins and look like they belong in the leaf’s architecture. Damage holes are irregular, ragged, or perfectly circular in a way that looks punched out. Caterpillars leave chewed, uneven edges while leaf-cutting bees — more common outdoors — leave clean half-circles along leaf margins. Fungal leaf spots begin as small brown dots that expand, then the dead center falls out leaving a round hole with a dark or yellow ring around it.
The location test
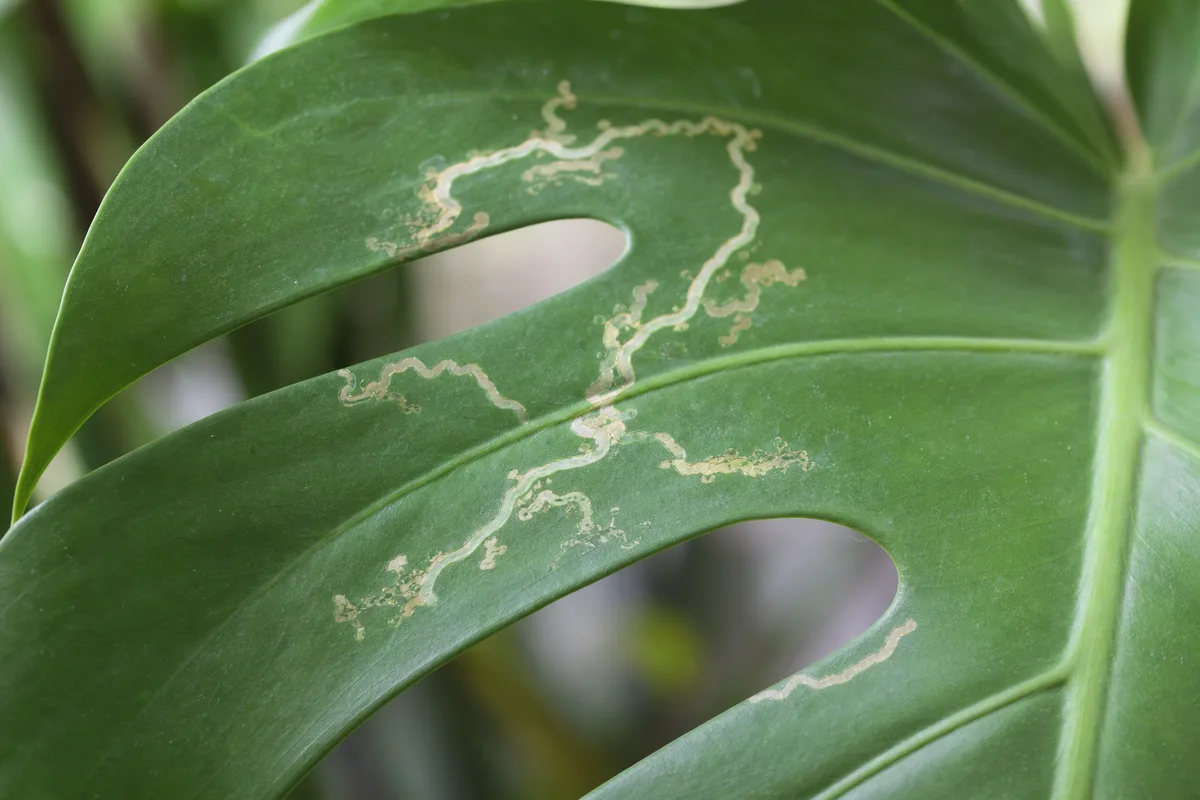
Fenestrations appear in predictable positions relative to the midrib, often mirroring each other on left and right halves of the leaf. Pest damage is random. Caterpillars start at edges and work inward. Leaf miners tunnel inside the tissue, leaving winding translucent trails. Slugs and snails target leaves near the soil. If holes appear on leaves touching the pot rim or soil surface, something is crawling up from below.
The timing test
Natural holes appear as the leaf unfurls and never change after. A Monstera leaf emerges with its splits already formed inside the sheath. Damage holes appear suddenly on leaves that were intact the day before — especially after a warm night when caterpillars and beetles are active. Check your plant in the morning. If new damage appeared overnight, you are dealing with a nocturnal feeder.
The companion clues test
Natural fenestration brings no friends. There is no webbing, no sticky residue, no black specks, no yellow halos. If any of these appear alongside holes, you have a pest or disease. RHS guidance on leaf damage confirms that secondary signs such as webbing, frass, and sticky residues are reliable indicators of active pest presence. (RHS — Leaf Damage on Houseplants)
| Companion Clue | What It Points To |
|---|---|
| Fine webbing on leaf undersides or stem joints | Spider mites |
| Tiny black dots that wipe off (frass) | Caterpillar or beetle droppings |
| Sticky, shiny residue on leaves | Sap-feeding insects (aphids, scale, mealybugs) |
| Yellow or water-soaked halos around holes | Fungal or bacterial infection |
| Silvery trails on soil or pot | Slugs or snails |
| Translucent winding trails inside leaf tissue | Leaf miners |
When Holes Are Completely Normal (Natural Fenestration)
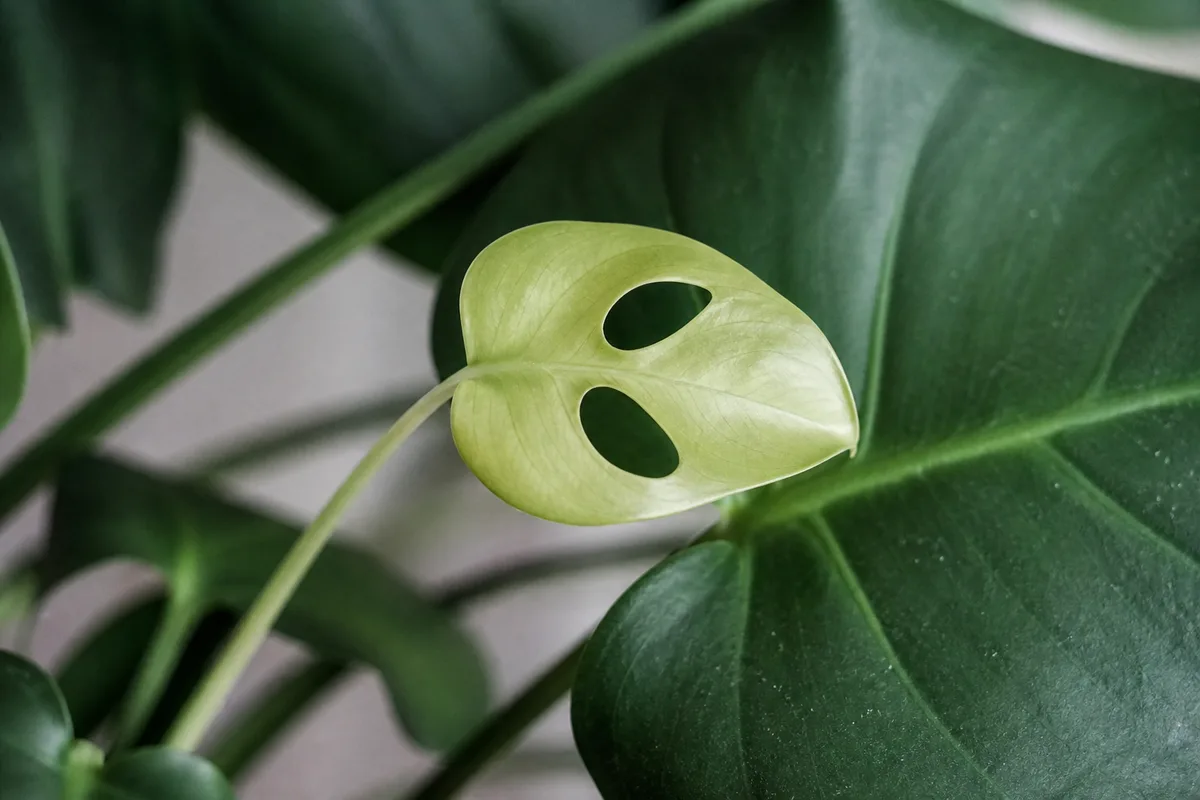
Fenestration is an evolutionary adaptation that lets climbing tropical plants capture light more efficiently by allowing it to pass through to lower leaves, reduce wind resistance on tall vines, and minimize the energy cost of producing solid leaf tissue across a large surface area. It is a sign your plant is mature, healthy, and behaving exactly as it evolved to. If your Monstera is tall but still producing completely solid leaves, the problem is usually insufficient light — see the Monstera not enough light guide for PPFD targets and window placement.
Which plants develop natural holes
Not every houseplant fenestrates. Here are the ones that do and what to expect:
Monstera deliciosa — the classic Swiss cheese plant. Juvenile leaves are solid and heart-shaped. Leaves first develop deep splits along edges, then round to oval inner holes as the plant climbs higher and receives more light. Expect the first fenestrated leaves when the plant reaches roughly 3 to 4 feet tall with 8 to 12 existing leaves.
Monstera adansonii — the Swiss cheese vine. More delicate than M. deliciosa, with abundant circular holes but fewer edge splits. It fenestrates earlier, often by 18 to 24 inches tall, but its thin leaves make it sensitive to dry air. Brown crispy edges around natural holes usually signal humidity below 45%.
Rhaphidophora tetrasperma — often sold as “mini Monstera” though it is not a true Monstera. Develops deep splits at just 12 to 18 inches tall under adequate light. Its thin leaves are prone to spider mites on Monstera — inspect undersides regularly.
Epipremnum pinnatum ‘Cebu Blue’ — a metallic-blue vining aroid. Mature leaves develop deep, irregular edge splits once the vine has a sturdy support to climb. It does not produce round inner holes like Monstera.
Philodendron bipinnatifidum — the lacy tree philodendron, with deeply dissected fern-like leaves. Several climbing Philodendron species also produce mild fenestrations when supported, but most common indoor varieties — heartleaf (P. hederaceum), velvet leaf (P. micans), Brasil, birkin, prince of orange — never fenestrate at any age. If you have a Philodendron brasil with holes, those are always damage — see Philodendron brasil holes in leaves for diagnosis.
Why some Monstera leaves never develop holes
If your Monstera is producing leaf after leaf with no splits, one of three things is missing. First, the plant may simply be too young — juvenile Monsteras produce solid leaves regardless of care. Second, light is inadequate. Monstera needs bright indirect light for at least 6 to 8 hours daily to trigger mature leaf morphology. A north-facing window or a spot more than 6 feet from any window will keep leaves solid indefinitely. Third, the plant lacks climbing support. In the wild, Monstera climbs trees, and the vertical growth triggers the hormonal shifts that produce fenestrated leaves.
How to encourage more fenestration
Give the plant bright indirect light — an east-facing window or a south/west window with a sheer curtain works well. Add a sturdy moss pole or cedar plank for the aerial roots to grip. Feed with a balanced liquid fertilizer every two weeks during spring and summer. Be patient. A Monstera typically needs 2 to 3 years of consistent growth before producing well-fenestrated leaves, and each successive leaf tends to have more splits than the one before it. (University of Florida IFAS — Monstera) Do not cut back the plant expecting it to bush out with holes — the oldest leaves are the foundation for the next fenestrated ones.
Pest Damage: The Most Common Cause of Unwanted Holes
If your plant is not a fenestrating species, or the holes appear on older leaves with irregular shapes, you are looking at pest damage. University of Minnesota Extension notes that chewing insects are among the most noticeable indoor plant pests, leaving visible holes, notched edges, or skeletonized foliage. (University of Minnesota Extension — Insects on Indoor Plants)
Caterpillars and beetles
Caterpillars are the most destructive leaf-chewers and the easiest to miss. They hide in leaf axils, under pot rims, and along stems during daylight and feed at night. Damage appears as large, irregular holes with clean chewed edges on tender new growth. You may find small dark green or black droppings (frass) on leaves or soil.
Beetles create a different pattern. Black vine weevils notch leaf margins in semicircle bites, while leaf beetles skeletonize tissue between veins for a lace-like appearance. Sticky traps placed near foliage catch flying adults and help confirm which beetle species is active.
Fix: Hand-pick visible caterpillars and drop them into soapy water. Inspect at dawn or after dark with a flashlight. For persistent caterpillars, apply Bacillus thuringiensis var. kurstaki (Bt-k), a bacterial insecticide that targets only caterpillars. For beetles, spinosad applied as a soil drench for root-feeding larvae or as a foliar spray for leaf beetles is effective. Yellow sticky traps help catch flying adults.
Leaf miners
Leaf miners are fly or moth larvae that live inside the leaf tissue, eating between the upper and lower surfaces. The damage is unmistakable: winding, whitish translucent trails that widen as the larvae grow, sometimes ending in irregular blotches or holes where consumed tissue collapses. The Pacific Northwest Pest Management Handbooks identify these trails as diagnostic for leaf miner activity. (Pacific Northwest Pest Management Handbooks — Leafminer)
Fix: Remove and dispose of affected leaves immediately — do not compost them. Spray remaining foliage with spinosad every 5 to 7 days for three applications. Avoid broad-spectrum insecticides, which kill parasitoid wasps that naturally control leaf miner populations. For plant-specific identification, see Monstera leaf miners and Philodendron brasil leaf miners.
Thrips
Thrips are tiny, slender insects — barely visible without magnification — that rasp the leaf surface and feed on sap. UC IPM guidance notes that early thrips damage appears as silvery stippling or streaking, with black fecal droplets often visible alongside feeding scars. (UC IPM — Thrips Management Guidelines) As damaged tissue dies and dries, irregular holes can form. Thrips thrive in hot, dry indoor air, so damage often peaks in summer and heated winter homes.
Fix: Blast the entire plant with a strong stream of lukewarm water, focusing on leaf undersides where thrips gather. Repeat daily for three days. Follow with neem oil spray applied at dusk — never in direct sun — and repeat weekly. Use blue or yellow sticky traps to monitor adult populations. If thrips are confirmed, also see the Monstera holes in leaves guide for species-specific recovery steps.
Disease-Caused Holes: Fungal and Bacterial
Clemson Cooperative Extension describes leaf spots as among the most common houseplant diseases, and notes that fungal and bacterial spots often progress from small discolored lesions to dead tissue that crumbles away. (Clemson Cooperative Extension — Houseplant Diseases & Disorders)
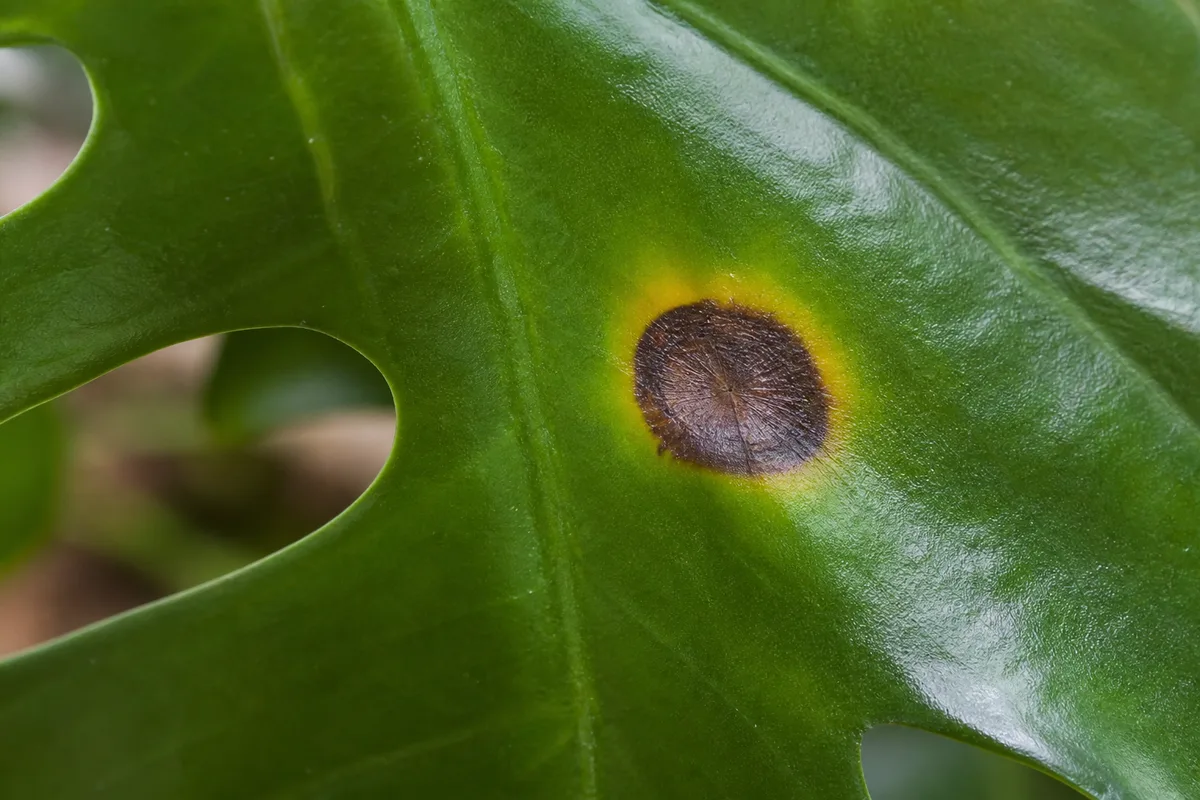
Anthracnose (Colletotrichum spp.) causes tan to dark brown spots with darker borders. As lesions grow and merge, the dead center dries out and falls away, leaving irregular holes. It is most common on plants with leaves that stay wet for more than 6 hours — from overhead watering, poor air circulation, or crowded shelving. University of Illinois Extension notes that fungal leaf spots progress from small discolored lesions to dead tissue that crumbles away, with the center often dropping out entirely. (University of Illinois Extension — Leaf Spot Diseases)
Bacterial leaf spot (Xanthomonas, Pseudomonas) begins as water-soaked, greasy-looking spots that turn brown or black with yellow halos. The dead tissue becomes brittle and drops out, but unlike fungal holes, the edges often follow leaf veins, giving holes an angular shape. University of Illinois Extension confirms Xanthomonas causes small angular to circular brown spots with yellow halos and that bacterial leaf spot is not controlled by fungicides. (University of Illinois Extension — Bacterial Leaf Spot) Bacteria spread through splashing water.
Fix for fungal leaf spot: Remove all affected leaves with sterilized pruners — dip blades in 70% isopropyl alcohol between each cut. Improve air circulation by spacing plants at least 12 inches apart. Apply copper fungicide as a protectant every 7 to 10 days for three applications. Switch to bottom-watering. For species-specific fungal spot treatment and photos, see Monstera leaf spot disease and Philodendron brasil leaf spot disease.
Fix for bacterial leaf spot: Remove all spotted leaves immediately. Disinfect tools with 10% bleach solution. Switch to bottom-watering and stop misting entirely. There is no effective chemical cure for bacterial infections in houseplants. If the plant is badly infected, disposal is the safest option — bacteria persist in soil and on tools.
Mechanical Damage, Pets, and Environmental Stress
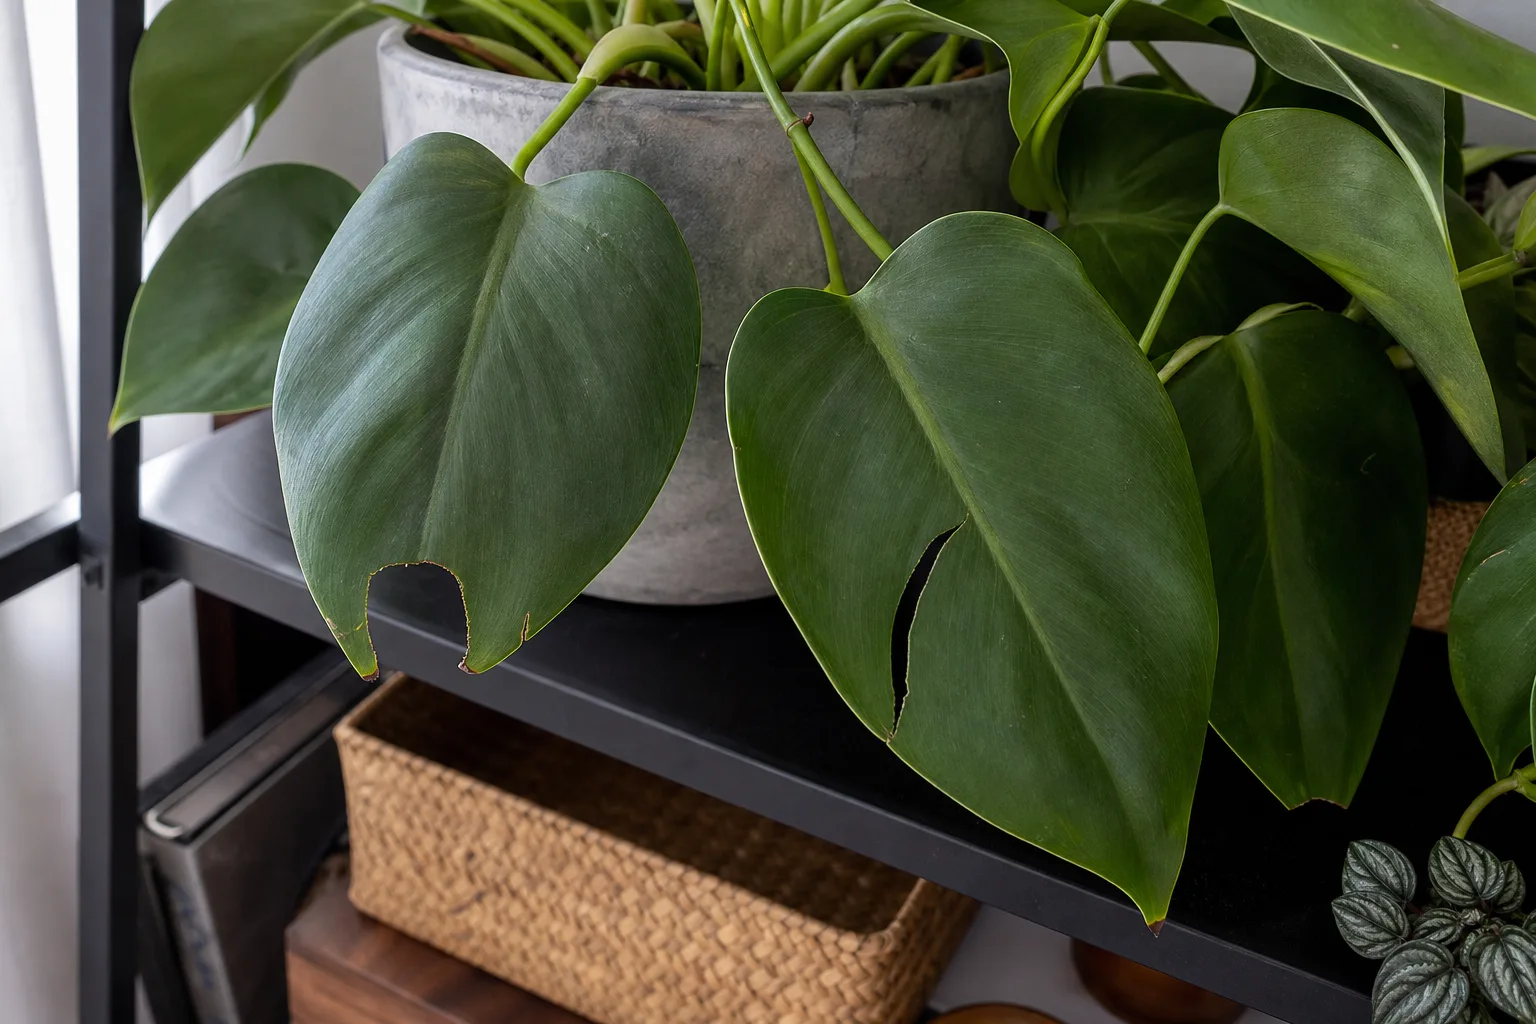
Holes from physical trauma have clean, torn edges with no discoloration, no yellow halo, and no progression over time. A cat bite leaves a distinct U-shaped chunk on accessible lower leaves. A leaf snagged during repotting shows a straight tear along a vein. The fix is location: move the plant out of reach.
Herbicide drift is more insidious. Trace amounts of glyphosate or lawn weedkillers can volatilize and drift through open windows. Symptoms appear 5 to 12 days after exposure on the newest leaves only: distorted, strappy growth with asymmetric holes, cupping, and brittle petioles. There is no antidote. Flush the soil with three times the pot volume of distilled water, prune the damaged growth, and withhold fertilizer for four weeks to reduce metabolic stress. The plant often outgrows the damage in 6 to 8 weeks if exposure was light.
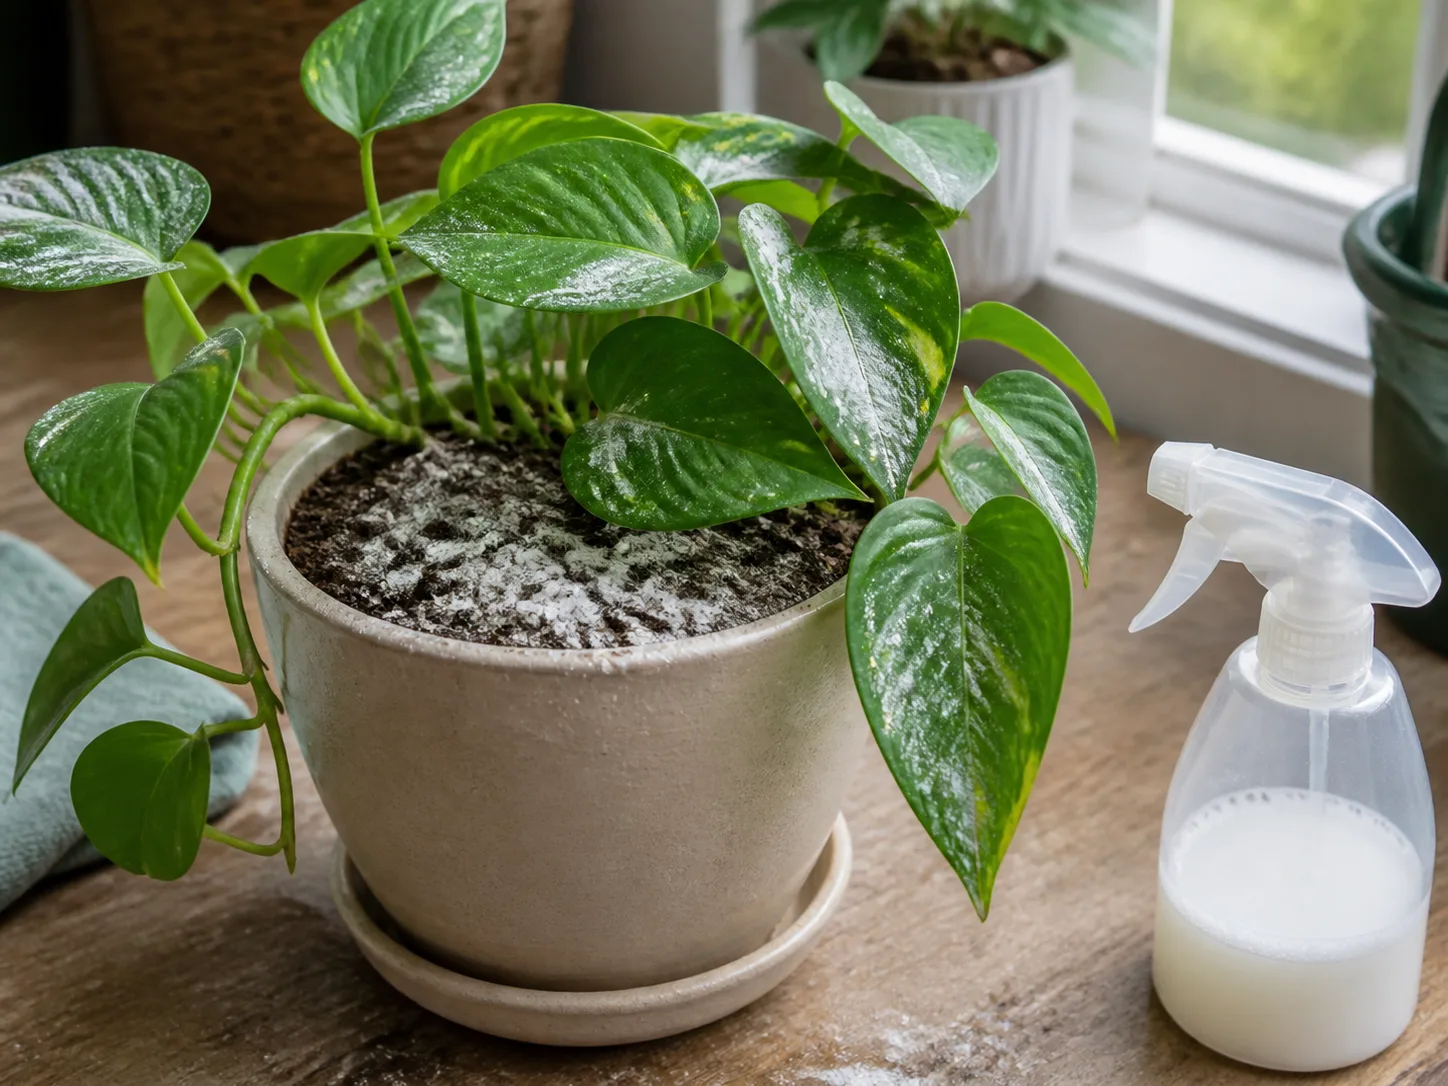
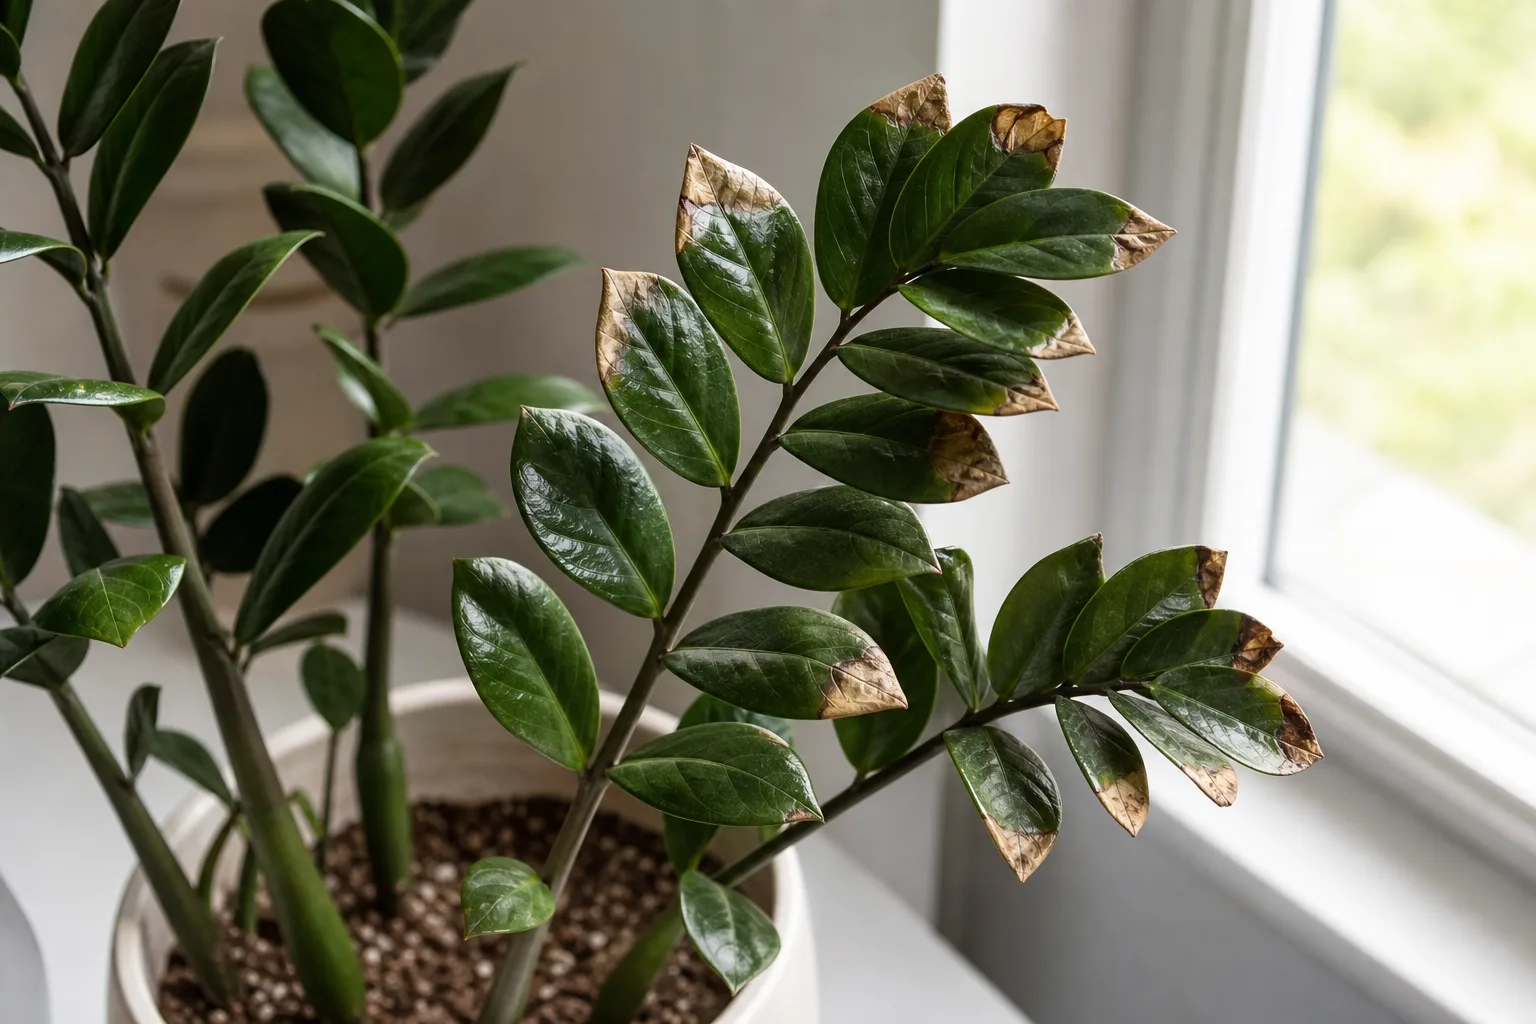
Chemical burns from fertilizer overdose cause necrotic patches along leaf margins that dry and crumble away, leaving angular holes. If you see this alongside a white crust on the soil surface — that is salt buildup. Flush thoroughly with distilled water and switch to half-strength fertilizer.
How to Fix Holes by Cause
| Hole Pattern | Likely Cause | Immediate Action | Follow-Up |
|---|---|---|---|
| Smooth, symmetrical — on new Monstera/Rhaphidophora leaf only | Natural fenestration | Nothing — this is healthy | Provide more light and support for bigger holes next leaf |
| Ragged, irregular — on older leaf, any non-fenestrating plant | Caterpillar or beetle | Hand-pick pests; inspect at night | Bt-k spray for caterpillars; spinosad for beetles |
| Winding translucent trails inside leaf | Leaf miner | Remove and dispose of affected leaves | Spinosad spray every 5–7 days × 3 |
| Silvery stippling + tiny black specks + holes | Thrips | Blast with water; isolate plant | Neem oil weekly at dusk; blue sticky traps |
| Round holes with yellow/brown halos; spots expanding | Fungal leaf spot | Remove affected leaves; sterilize pruners | Copper fungicide; improve airflow; bottom-water |
| Angular holes with water-soaked halos | Bacterial leaf spot | Remove leaves; disinfect tools | Isolate plant; bottom-water only; consider disposal |
| Clean tear or U-shaped chunk; no discoloration | Physical damage or pet | Move plant to safe location | Trim ragged edges with sterile scissors |
| Holes on newest leaves only; strappy, distorted growth | Herbicide drift | Flush soil with distilled water | Prune damage; withhold fertilizer 4 weeks |
| Crumbly holes at leaf margins; white crust on soil | Fertilizer salt buildup | Flush soil thoroughly | Switch to half-strength fertilizer; bottom-water |
What Not to Do
Do not spray neem oil in direct sun. Neem oil combined with sunlight causes phototoxicity — brown, burned patches worse than the original damage. Always apply at dusk.
Do not remove all damaged leaves at once. Each leaf is a photosynthetic engine. Removing more than 30% of foliage at once shocks the plant. Prune only leaves with more than 50% damage or active pest colonies, and limit yourself to two leaves per week.
Do not use broad-spectrum insecticides indoors without cause. Pyrethroids kill predatory mites that keep spider mites in check. A plant treated with broad-spectrum spray often rebounds with a spider mite explosion within 10 days.
Do not mist leaves when holes or spots are present. Moisture on lesion surfaces triggers fungal spore germination. If you see spots or holes, stop misting immediately.
Do not assume all Philodendrons fenestrate. Most common indoor varieties — heartleaf, micans, Brasil, birkin, prince of orange — will never develop natural holes. A hole on these plants is always a problem that needs investigation.
Do not repot into an oversized container. Excess soil holds moisture that promotes root rot and attracts fungus gnats, whose larvae damage roots and weaken the plant’s defenses against leaf pests.
Plant-Specific Troubleshooting
| Plant | Fenestrates Naturally? | Most Common Hole Cause | Key Diagnostic Tip |
|---|---|---|---|
| Monstera deliciosa | Yes — mature leaves only | Too little light (no fenestration) OR thrips (damage holes) | Solid new leaves on a tall plant = not enough light. Holes on older leaves = pest or disease |
| Monstera adansonii | Yes — from ~18 inches tall | Low humidity causing crispy edges around natural holes | Keep humidity above 45% |
| Rhaphidophora tetrasperma | Yes — from ~12 inches tall | Spider mites | Inspect leaf undersides weekly with magnification |
| Philodendron hederaceum (heartleaf) | No — ever | Caterpillars or physical damage | Random chewed holes on accessible leaves; no new damage after isolating |
| Philodendron bipinnatifidum | Yes — mature leaves | Root rot from overwatering showing as leaf trouble | Check roots if holes accompany yellowing or wilting |
| Epipremnum pinnatum ‘Cebu Blue’ | Yes — when climbing | Failure to fenestrate in low light | Provide moss pole and bright indirect light |
| Alocasia (any variety) | No — ever | Spider mites or fungal leaf spot | Thin tissue vulnerable to both; avoid misting |
| Peace lily (Spathiphyllum) | No — ever | Mechanical damage or pet chewing | Thin, soft leaves tear easily; keep out of traffic paths |
Conclusion
Holes in plant leaves are not a single problem with a single fix. They are a visual diagnosis, and the answer is almost always visible in the hole itself — its shape, its edges, where it sits on the plant, and what company it keeps. A smooth oval on a new Monstera leaf is evolution working as intended. A jagged tear with black specks nearby is an insect you need to find. A water-soaked halo around a hole is a pathogen spreading through wet foliage.
The most reliable rule: if the hole appeared as the leaf unfurled and looks architectural, you are looking at fenestration — enjoy it. If the hole appeared on a leaf that was already open, something is actively damaging your plant, and you need to identify and treat the cause before it spreads. Start with shape and timing, cross-reference against the plant’s natural growth pattern, treat the specific cause, and resist the urge to throw every fix at once.