How to Plant Elephant Ear Bulbs: Depth, Timing, and Care
Learn how to plant elephant ear bulbs at the right time and depth, orient the corm, choose soil and spacing, and avoid rot while it sprouts in spring.
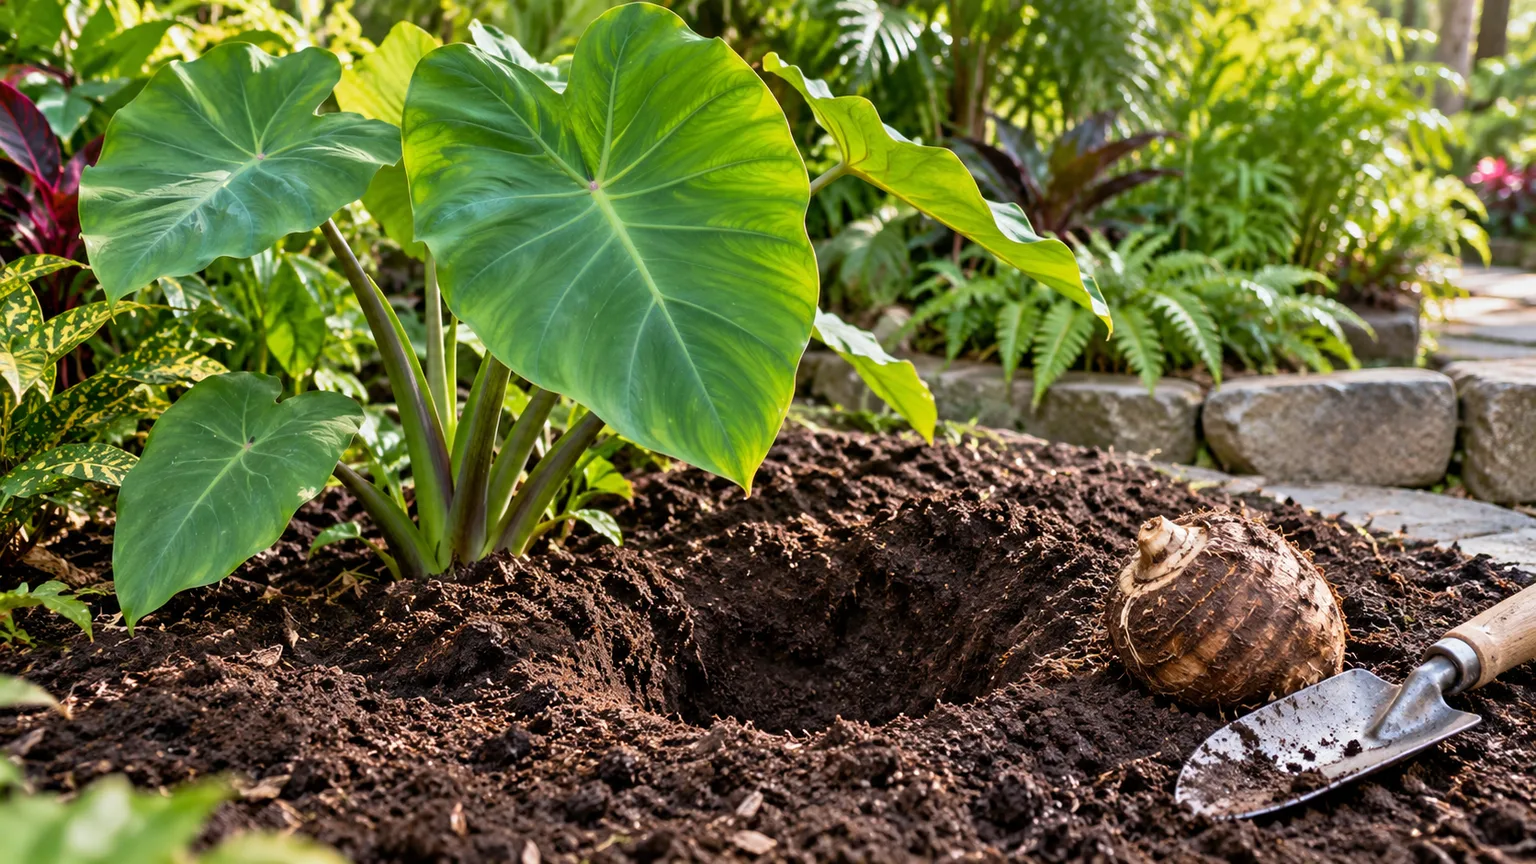
Plant elephant ear bulbs outdoors only after frost risk has passed and the soil has warmed. Set the corm—the plant’s underground storage stem—with its growth point facing up, cover it with a modest layer of soil, and keep the bed consistently moist as growth begins. The right date and water level depend on which plant is sold as an “elephant ear,” because Colocasia, Alocasia, and Xanthosoma do not all want the same conditions.
A practical sequence is: identify the type, pick a warm site with enough room, loosen and enrich the soil, orient the corm, water once to settle it, and then avoid keeping a dormant corm cold and soggy. Use the package’s cultivar-specific directions whenever you have them; a giant Colocasia corm and a small Alocasia corm should not automatically get the same spacing or planting pocket.
The short answer: wait for warmth, then plant shallowly
Choose a planting date by checking two things: the last expected frost for your location and the soil temperature where the corm will sit. Elephant ears are tropical plants. They may remain dormant in chilly ground, and a corm surrounded by cold, wet soil is more vulnerable to rot than one planted after the ground has warmed.
A useful conservative target is soil consistently around 60°F or warmer, measured a few inches below the surface, with frost danger past. Treat that as a practical margin, not a universal switch: published guidance varies, and the cultivar label should take precedence. Epic Gardening’s planting guide gives a lower threshold around 50°F, while Wisconsin Extension says prolonged temperatures below 50°F can make the plants languish; warmer soil generally gives a dormant corm a better start. The planting sequence below works for a bed or a large container, with adjustments for plant type and climate.
Identify the elephant ear before you plant it
“Elephant ear” is a common name for several large-leaved tropical plants, not a single species. A corm label might say Colocasia, Alocasia, or Xanthosoma, or name a cultivar without prominently stating the genus. Read the tag before choosing a wet pond edge, a shaded border, or a spot where the plant could spread.
The storage organ is often sold as a bulb, but a corm is a solid, swollen stem rather than a true layered bulb. That distinction matters when you inspect it: a rough, ringed corm may not have a neat tulip-like point, and its visible eye or old stem scar is a better orientation clue than one simple rule about which side looks smooth.
Colocasia, Alocasia, and Xanthosoma do not grow the same way
Many Colocasia varieties have leaves whose stems attach under the blade and whose tips tend to point down. They favor rich soil with steady moisture; Colocasia esculenta, also called taro or wild taro, can spread aggressively in mild, wet areas. NC State’s Plant Toolbox describes C. esculenta as a corm-forming plant that grows best in moist, rich soil and should not be allowed to dry out. (NC State Extension Plant Toolbox, Elephant Ears)
Alocasia leaves are often held more upright, and many varieties prefer a well-drained site rather than a permanently wet one. Xanthosoma is another genus sold under the same common name. Leaf shape helps you recognize what you have after growth starts, but it is not a substitute for the nursery label. Wisconsin Extension’s overview covers these genera and the differences in growth habit, moisture, and winter handling. (University of Wisconsin–Madison Extension, Elephant Ears)
If the plant is for Florida, check the current local invasive-plant guidance before buying or planting. UF/IFAS advises against planting wild taro (Colocasia esculenta) and Xanthosoma sagittifolium in Florida and warns gardeners not to put elephant ears in or near natural waterways. This is a regional warning rather than a blanket rule for every genus or state. (UF/IFAS Gardening Solutions, Elephant Ears)
Choose a site and prepare soil that stays moist
Elephant ears need room for leaves that can become much wider than the corm suggests. Pick a spot where mature foliage will not cover a walkway, block a smaller sun-loving plant, or lean over a neighbor’s garden bed. Many varieties do well in sun or part shade, but afternoon shade is useful in hot climates, while dark-leaved selections often keep their color better with more direct sun. Check the cultivar description instead of assuming all elephant ears need shade.
Prepare a broad patch rather than a narrow amended hole. Loosen the soil several inches down and mix in finished compost if the bed is poor or compacted. The goal is soil that holds moisture and nutrients while still letting excess water drain away. If the ground is heavy clay, build up a wider raised bed or grow the plant in a large pot; putting a pocket of fluffy potting mix in a clay basin can leave the corm sitting in collected water.
Avoid adding a large dose of fresh manure or strong fertilizer directly under the corm. A young corm has stored energy and does not need a concentrated feed against its base. Compost mixed through the root zone is a gentler way to improve structure; wait until leaves are growing before deciding whether the plant needs regular fertilizer. Wisconsin Extension notes that elephant ears are heavy feeders once actively growing, particularly in containers, but that does not mean a dormant corm needs fertilizer at planting. (University of Wisconsin–Madison Extension, Elephant Ears)
Bed, pond edge, or container?
A garden bed is easiest when you have warm weather, suitable drainage, and enough room for the variety. A pond edge can suit moisture-loving Colocasia, but only where the species is appropriate and local rules allow it. Do not place a potentially spreading plant beside a natural stream, wetland, or drainage ditch just because it likes moisture; use a contained pot or another plant if spread could reach a sensitive area.
A container gives you more control over moisture and spread and makes it easier to bring a tender plant under cover. Choose a wide, sturdy pot with drainage holes and room for the variety’s mature root system. A pot without drainage is not a safer way to keep a corm wet: stale water around the planting organ can cause failure, especially before roots and leaves are using much moisture. Container-grown foliage also dries faster in hot weather once the plant is active, so the watering routine changes as the season progresses.
When to plant elephant ear bulbs outdoors
In most temperate gardens, plant in spring after the last frost rather than on a fixed holiday or calendar week. For a colder region, that may mean waiting until late spring or early summer. Wisconsin Extension recommends starting corms indoors in early spring and moving them outside after warm weather arrives; it notes that elephant ears can languish in cool conditions and grow best when warm temperatures begin. In a warm climate, the safe planting window can come earlier, but use local frost records and actual soil warmth rather than a national planting date. (University of Wisconsin–Madison Extension, Elephant Ears)
Do not rush because the air feels pleasant for one afternoon. Push a soil thermometer into the planting area for several mornings. If the soil is still cool, wet, or warming very slowly, wait or start the corm in a pot indoors. If you cannot measure temperature, use a steady stretch of mild nights and warm days after frost as a rough cue, then keep the soil on the drier side until a shoot appears.
Starting corms indoors for an earlier season
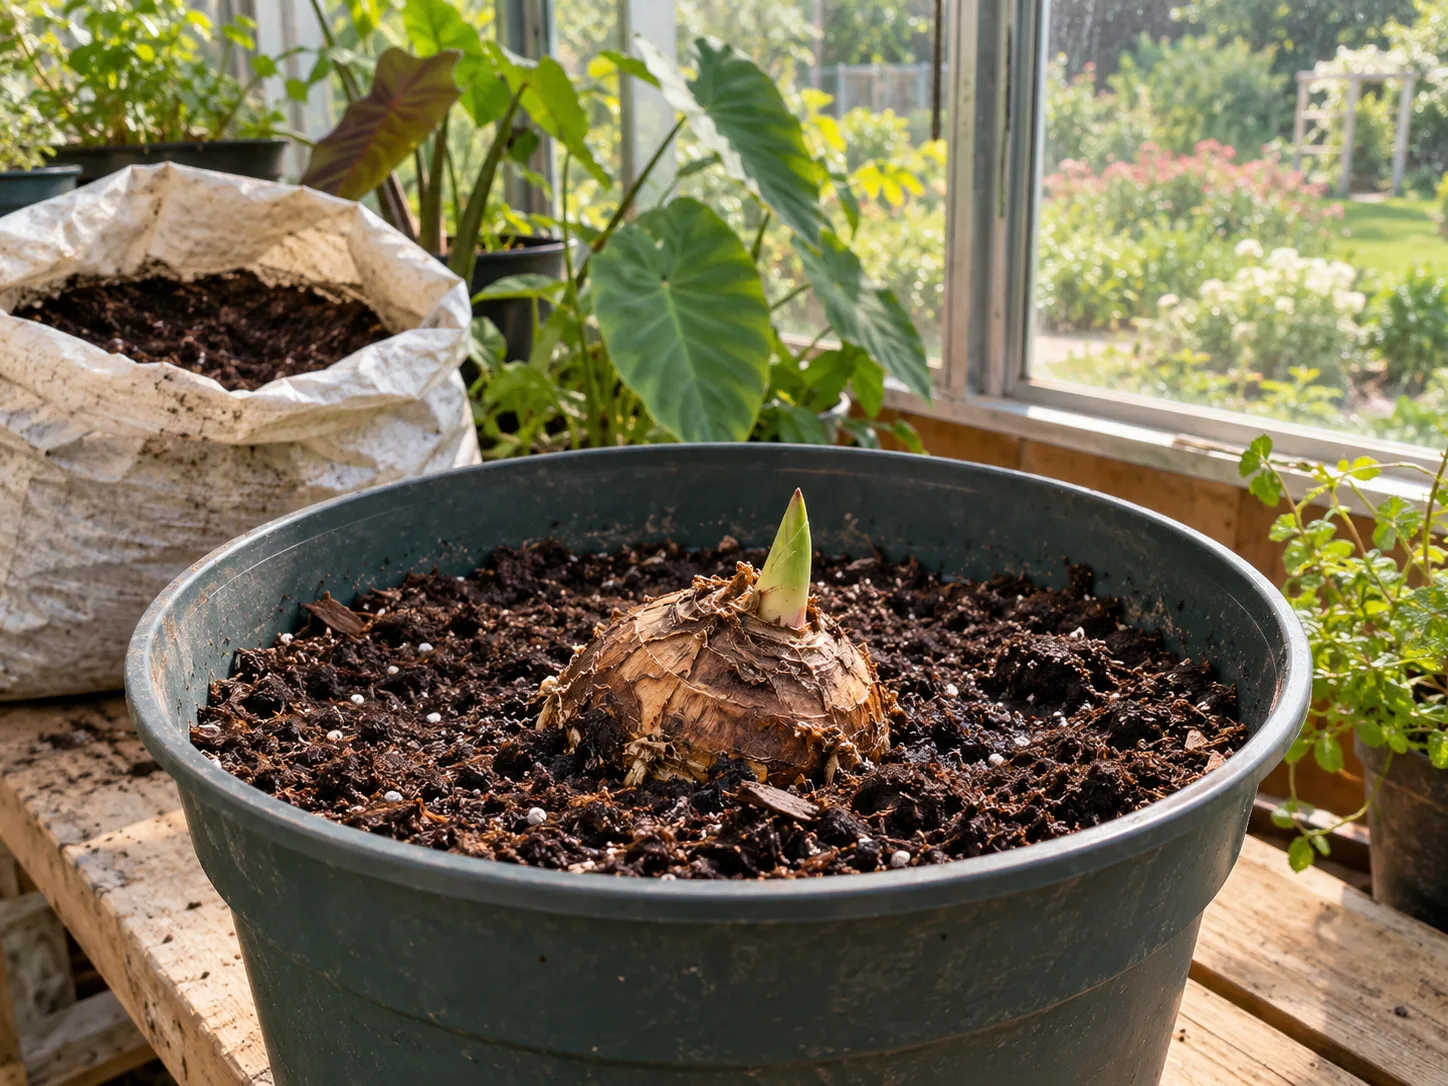
To get an earlier start, pot the corm about four to six weeks before your expected outdoor planting window. Use a container with drainage and fresh potting mix, set the corm with its growth point up, and keep the mix lightly moist in a warm, bright place. Do not keep it in an unheated shed or a chilly garage; the goal is warmth and light, not a deep watering schedule. A corm may take weeks to wake, so a pot with a visible shoot is a better transplant candidate than one you planted yesterday.
When outdoor frost danger is past and the soil is warm, harden off a leafed plant for several days. Set the pot outside in sheltered shade for a short period, extend its time outdoors, then move it toward the light level it will receive in the garden. If leaves are tender from indoor conditions, an abrupt jump to hot midday sun can scorch them. Leave the plant in its pot if you want to control spread or bring it indoors again later; otherwise transplant gently and water the root ball in.
How to orient and plant an elephant ear corm
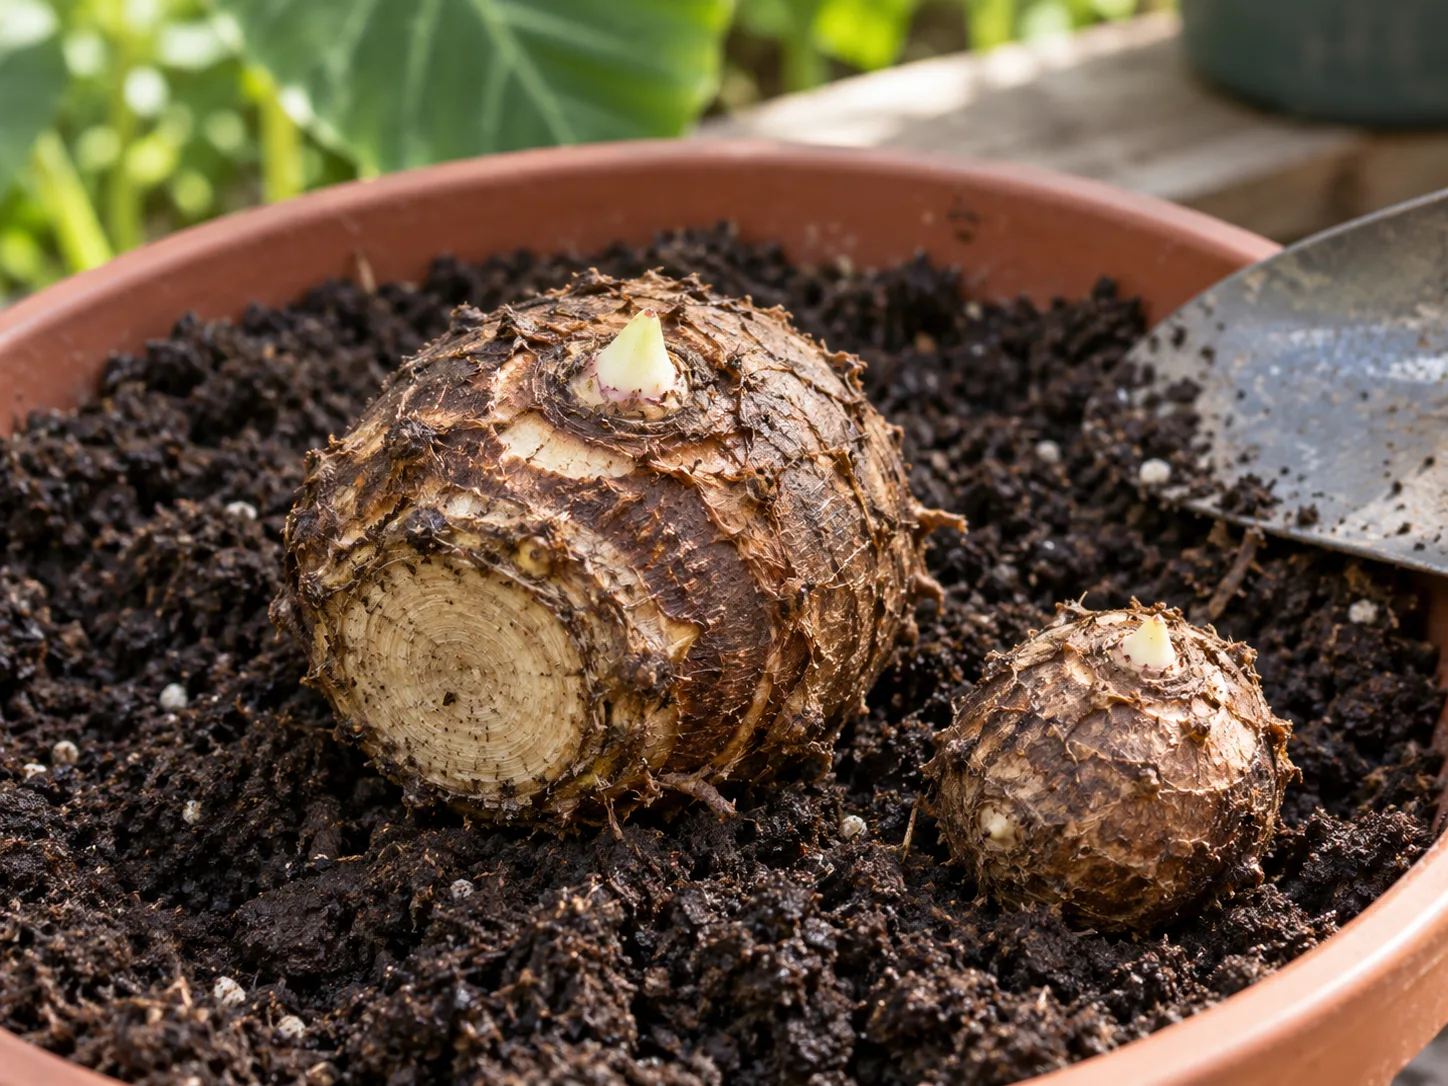
Start with a firm corm. It should feel solid rather than hollow, slimy, or badly shriveled. Remove loose, papery debris, but do not cut into the corm to look for a bud. If it is dusty or dry, do not soak it automatically; plant it into moist soil and water the soil around it. Epic Gardening advises against soaking dormant elephant ear bulbs because excess water can encourage rot. Follow a seller’s instructions if the corm was shipped in a special condition or packaged with specific treatment directions. (Epic Gardening, How to Plant Elephant Ear Bulbs)
Look for the growth eye, a small bud, or the old stem scar, usually on the upper side. The lower side is more likely to show a rough, fibrous root base or dried roots. Put the eye or old stem scar upward and the root-scar side down. Epic Gardening describes the flatter end as the end to face downward. If you cannot confidently tell top from bottom, lay the corm on its side rather than burying it deeply while trying to guess; a viable corm can redirect its shoot, though emergence may take longer.
Use this sequence for an outdoor bed:
- Mark the center of each plant. Space sites according to the variety’s mature width before you dig, not the size of the dormant corm.
- Make a wide planting pocket. Loosen the base and sides so roots can move into surrounding soil; do not compact the amended bed back into a hard plug.
- Set the corm with the eye up. Keep the root end in contact with soil and the crown close enough to the surface that warmth can reach it.
- Backfill loosely. Cover the corm, firm the surface gently, and leave no air pocket under the root end.
- Water once to settle the soil. Give the area a thorough drink, then let excess drain. Mark the site so you do not dig it up while it is still dormant.
Planting depth: separate the hole from the soil cover
Depth instructions often seem to conflict because one writer may mean the depth of the hole and another may mean the soil over the top of the corm. For an ornamental corm without a more specific label, a practical starting point is to cover its top with about 1 to 2 inches of soil, keeping the eye below the surface but not burying the whole planting site under a deep mound. Gardening Know How gives a similar shallow-cover range, and Wisconsin Extension describes keeping the top near the soil surface for indoor-started corms. (Gardening Know How, Elephant Ear Plant Care; University of Wisconsin–Madison Extension, Elephant Ears)
The corm itself can be several inches tall, so a hole may need to be deeper than the amount of soil covering its top. A package may recommend a different depth for a particular cultivar or corm size; follow that direction when present. In cold, heavy soil, do not compensate by setting a corm very deep. Deep placement can delay emergence, and cool, saturated soil stays unfavorable longer than a lightly covered corm in a warm bed.
Give the plant room, then water for the stage it is in
Use mature spread as your spacing guide. A three-foot gap can work for some modest cultivars, but it is not a universal spacing rule: large elephant ears can occupy several feet, and giant selections may need substantially more. Epic Gardening notes that some varieties need around six feet and the largest can require as much as ten. If the label gives a mature width, use it; if not, leave extra space or plant in a container rather than forcing a dense row. (Epic Gardening, How to Plant Elephant Ear Bulbs)
For a dramatic mass planting, measure from corm center to corm center and leave room for the mature leaves to overlap only as much as you intend. If you want each plant’s shape visible, leave roughly its mature width between centers. If you want a fuller screen, use the label’s lower spacing range, but leave enough air movement and a clear path for watering and end-of-season digging. Remember that some Colocasia spread by offsets or runners, so a planting can widen over time.
Water according to growth stage. Immediately after planting, water enough to settle soil around the corm. Before shoots appear, keep the area lightly and evenly moist rather than saturated; a dormant storage organ is not drawing up water like a full canopy. Once several leaves are expanding, water deeply whenever the upper soil begins to dry. In warm weather, large leaves and containers can use water quickly, while a shady clay bed may stay damp for days. Check the soil instead of following a fixed “inches per week” number.
Do not interpret the plant’s tolerance for wet conditions as a requirement for every elephant ear to sit in standing water. Some Colocasia grow well in wet sites, but Alocasia and many container-grown plants are safer in moist, freely draining mix. If the planting area stays puddled after rain, move the corm or raise the bed before planting rather than trying to correct poor drainage by watering less later.
What to expect after planting—and when to check
A dormant corm may look unchanged for several weeks. The first leaf can appear slowly in a cool spring and then expand quickly once the weather turns warm. The exact wait depends on species, corm size, storage condition, soil warmth, and whether the corm was planted dormant or already sprouting. Resist the urge to dig it up every few days: repeated handling can break a new root or shoot before you see it.
Keep the planting mark visible and check the soil with a finger or trowel edge away from the corm. If the surface is drying in sunny weather, add water; if it is still wet and cool, pause. A light mulch can conserve moisture after the soil is warm, but do not heap it over a dormant corm in spring. A thick cold layer can slow the ground’s warming when the plant needs heat to wake.
As leaves unfold, watch for the plant’s full scale before adding nearby plants. Elephant ears can shade smaller neighbors and can make a narrow path uncomfortable. The large leaves also catch wind, so a spot protected from strong gusts helps prevent torn foliage. A temporary gap in growth is normal after transplanting, but a plant that remains wilted in wet soil needs a drainage check rather than another deep watering.
Troubleshoot a corm that is slow or failing
When nothing emerges, start with the conditions instead of assuming the corm is dead. Check whether the soil is warm enough, whether the planting site drains, and whether the corm was planted too deeply. If temperatures have been cool, give it more time. If the bed has been saturated, let it drain and avoid additional watering until the upper soil begins to dry.
Orientation is a possibility, but not the only explanation. A corm planted upside down may still send a shoot around toward the surface, though it can take longer. A small, damaged, or poorly stored corm may never sprout. Do not excavate a firm corm just because the neighboring plant has leaves; elephant ears can emerge at different times even in the same bed.
A firm corm can wait; a soft, sour one cannot
If you need to check, gently brush soil from one edge after several weeks of consistently warm conditions. A firm corm with no foul odor may still be dormant, so cover it again and correct the moisture or temperature issue. A mushy, collapsing, or sour-smelling corm is likely rotting; remove it and the surrounding spoiled material rather than leaving it to break down in a pot or planting pocket.
For a corm planted in a pot, confirm that the drainage holes are open and that the container is not sitting in a saucer of water. If you started it indoors, make sure the room is warm and bright enough for active growth. If it has a shoot but no leaves are opening, do not add fertilizer to force it; restore warmth and steady light first. Fertilizer cannot repair a rotted growing point or reverse a corm that is still dormant in cold soil.
Plan now for the end of the season
Do not assume every elephant ear will survive winter outdoors because one variety did. Many types are tender perennials; Wisconsin Extension notes that most are hardy only around USDA Zone 8a, while microclimate and cultivar can shift the outcome. Use a reliable cultivar description and your local winter pattern. A protected wall or deep mulch may help some plants, but neither guarantees survival through a hard freeze.
If you live where the corm is not reliably hardy, decide before planting whether you will grow it in a container or lift it for storage. For a corm-forming plant, allow foliage to finish after frost or as the season ends, then dig carefully, dry the corm in an airy place, and store it in a breathable container in a frost-free location. Follow cultivar-specific storage directions; do not seal a damp corm in plastic. Inspect stored corms periodically and remove any that become soft or moldy. A potted plant can be moved indoors before cold weather, but the care it needs depends on whether it remains actively growing or goes dormant.
If overwintering sounds like more work than the plant is worth, treat it as a seasonal annual and buy a fresh corm next spring. That choice is often simpler than trying to keep a tender variety alive in a cold basement with too little light or in a warm room that stays wet. The climate and your storage space should determine the plan—not the assumption that every elephant ear returns in every zone.
Handle elephant ear corms with care
Wear gloves if you are cutting or scraping the corm, and wash your hands and tools afterward. Elephant-ear plants contain calcium oxalate crystals that can irritate skin and cause a painful reaction if plant tissue is chewed. Keep dormant corms and cut pieces out of reach of children and pets, and do not eat an ornamental plant or corm based on its resemblance to food taro. NC State lists Colocasia esculenta as poisonous and identifies calcium oxalate crystals as the toxic principle. (NC State Extension Plant Toolbox, Elephant Ears)
Taro is grown as food in some regions, but that does not make a randomly purchased ornamental corm safe to prepare. Cultivar identity, growing conditions, and correct food preparation matter. For a home landscape, use the plant for foliage, avoid tasting or handling sap with bare skin, and follow local guidance if the plant is a restricted or invasive species.
Conclusion
The reliable way to plant elephant ear bulbs is to wait until frost has passed and the ground is truly warm, identify the genus and cultivar, prepare soil that holds moisture without trapping it, and set the corm with its growth point up under a relatively shallow layer of soil. Give the mature plant space, water to the soil’s condition, and let a firm dormant corm have time to sprout before disturbing it.
The most useful check happens before you dig: read the label. A moisture-loving Colocasia beside a contained water garden, a well-drained Alocasia in a pot, and an invasive taro near a Florida waterway are not interchangeable planting decisions. Match the corm to the site and local climate, and it has a much better chance of turning stored energy into a season of large leaves.



