How to Prune Alocasia Frydek: Where to Cut and What to Avoid
How to Prune Alocasia Frydek: Where to Cut and What to Avoid
How to Prune Alocasia Frydek: Where to Cut and What to Avoid
Quick Answer — Your First Cut on Frydek
First, inspect the central crown in good light and remove only a leaf that is fully yellow, brown, mushy, or clearly diseased — cut the petiole 1–2 cm above the crown with sterilized bypass pruners, never flush into the meristem. Frydek (Alocasia micholitziana ‘Frydek’) does not branch from stem cuts; every future leaf emerges from the tight growing point at the corm. If the leaf is only partly yellow while a new spear is unfurling, wait — the plant is still reclaiming nutrients from that aging blade.
Author’s note: I’ve grown Alocasia Frydek under LEDs, in east-facing windows, and through three winter dormancy cycles. The petiole release test described below came from watching dozens of leaves time their own detachment — it is the single most reliable signal that the plant has finished with a leaf and that you are safe to cut.
— Reviewed by Jane Morrow, Extension Master Gardener, University of Florida (2026)
What Pruning Means for a Corm-Based Alocasia
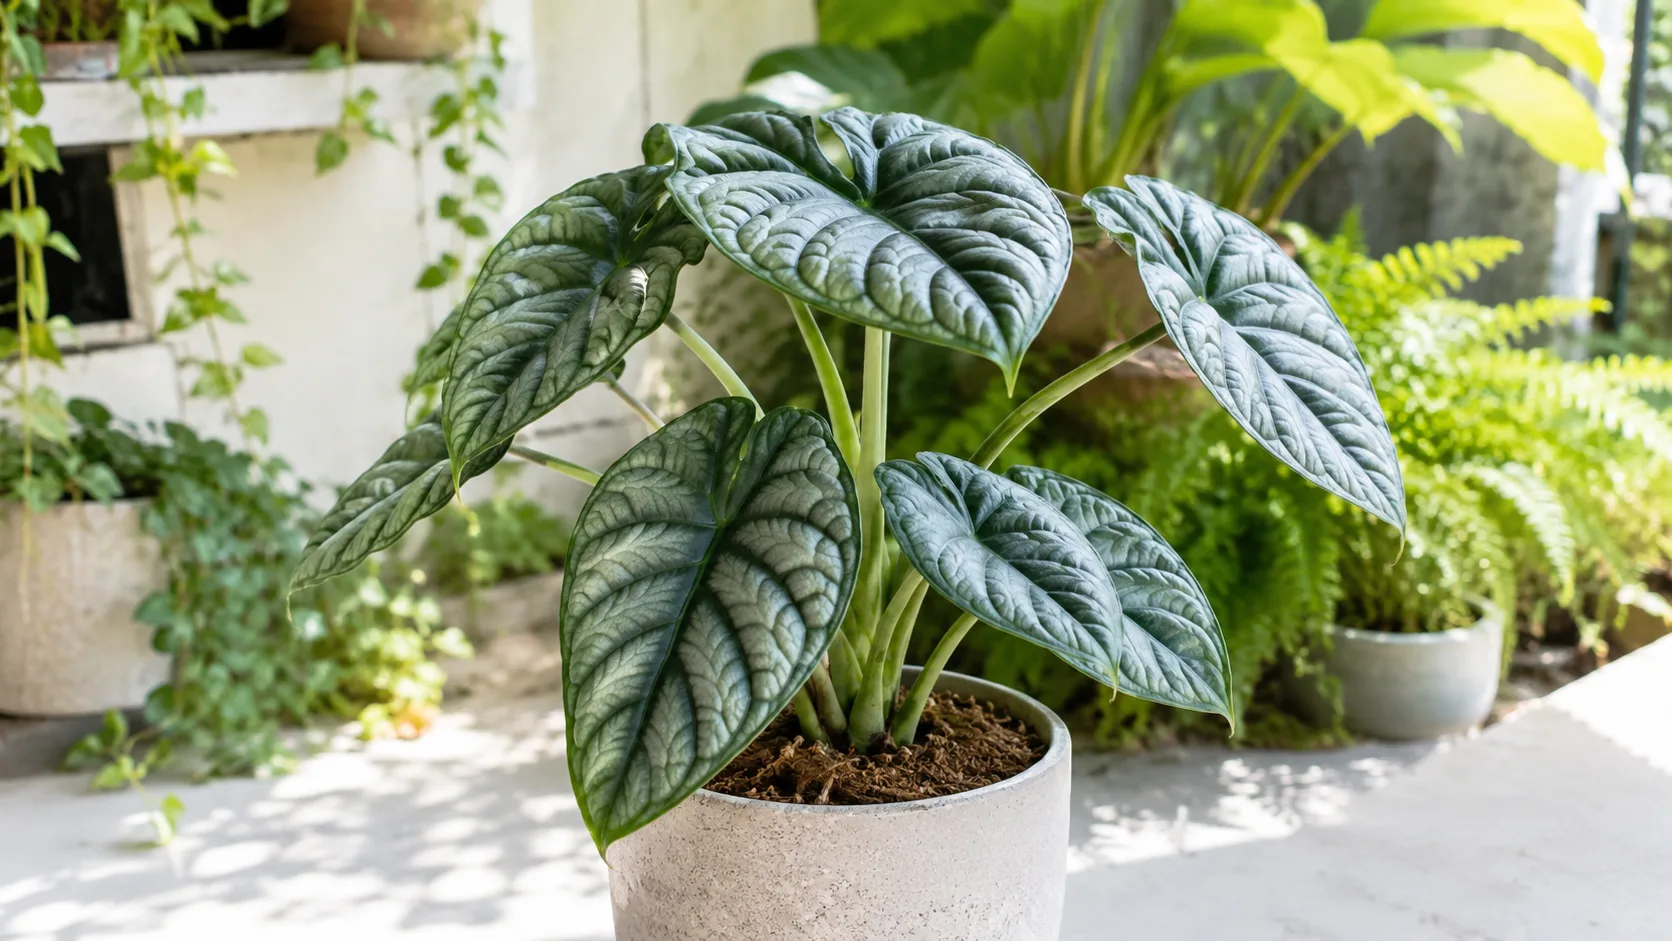
Alocasia Frydek is a compact collector’s alocasia with thick, scale-like leaf surfaces and silvery-green veining. NC State Extension lists Alocasia micholitziana ‘Frydek’ as a rare variety with compact habit and textured, arrow-shaped foliage. Indoors it stays smaller than floor-sized elephant ears but is especially rot-sensitive — quick to drop leaves when roots stay wet or humidity crashes.
Alocasias belong to the Araceae family. NC State describes them as tuberous herbaceous perennials that grow from a subterranean corm and produce leaves on long petioles from a central crown. Unlike pothos or philodendron vines, Frydek does not produce new shoots from pruned nodes. New growth comes only from the corm. That biology rules out “make it bushier” advice copied from trailing houseplant guides.
The Royal Horticultural Society’s Alocasia growing guide states that alocasias need “no pruning or training … other than removing fading or dead leaves, cutting them off at the base.” Frydek pruning is crown-aware sanitation, not creative shaping. You are deciding which finished leaves to remove without wounding the corm that stores energy for the next spear.
Why Frydek Does Not Branch From Cuts
Each leaf is a temporary solar panel feeding the corm. When Frydek pushes a new spear, the oldest outer leaf often yellows — planned nutrient withdrawal called senescence. Cutting that leaf too early removes food the plant was about to bank. Cutting a fully spent leaf frees the crown for the next spear and reduces hiding spots for spider mites in humid cabinets. Because the plant does not branch from petioles, pruning cannot create side shoots; only the corm produces new leaves.
Inspect the Crown Before You Cut
Walk through this inspection every time you consider pruning:
- Crown condition — Look for the emerging spear. Firm pale tissue around the center is healthy; mush, translucence, or foul odor means stop pruning and investigate roots and soil moisture.
- Leaf color pattern — One outer yellow leaf while a new spear unfurls is normal senescence. Multiple yellow leaves across different ages usually means root stress, cold, or pests.
- Petiole release test — Gently tug a yellow leaf. If it releases with almost no resistance, the plant has finished reclaiming mobile nutrients. If it stays firmly anchored, wait.
- Blade damage — Torn or chewed leaf edges can be trimmed cosmetically only after you confirm humidity, water quality, and mite pressure are addressed.
Do not stack pruning with Alocasia Frydek repotting guide, fertilizing, or a major location change on the same day. Frydek absorbs stress through leaf drop; give it one intervention at a time.
Crown Inspection Diagram
Figure 1: Cut-location reference for Alocasia Frydek
(Diagram: side view of a Frydek crown showing the central growing point, one healthy green petiole, one fully yellow spent leaf, and the 1–2 cm cut zone marked with a dashed line above the crown surface. The crown base is labeled “do not cut here — meristematic tissue” in red.)
Cut zone: 1–2 cm above the crown — enough stump to dry cleanly without wounding the central growing point. Danger zone: Flush or into the crown — damages the meristem and can halt growth for months.
If you cannot find the crown because the plant is potted deep, gently brush away the top layer of mix until the petiole origins are visible before cutting.
Normal Senescence vs Stress Yellowing
Senescence usually hits one old leaf at a time, often the lowest, while a fresh leaf unfurls above it. Yellowing progresses gradually from the edges inward, and the petiole eventually softens enough to release with a gentle tug. Stress yellowing arrives faster, may involve several leaves, and often pairs with drooping, crispy margins, or collapsed petioles. If only senescence is happening, patience is the correct tool. If stress signs dominate, correct watering, light, or humidity first, then remove leaves that do not recover.
Photo reference (conceptual): A healthy Frydek next to a Frydek with one lowest leaf yellowing while a new spear emerges — the classic senescence signal. The yellowing leaf shows even color loss from margin inward, with a firm green petiole base still attached.
Petiole Release Test
The petiole release test is the simplest senescence check for corm alocasias. A fully spent leaf detaches with light pressure because the plant has already withdrawn mobile nutrients back into the corm. Cutting before release wastes reserves; waiting too long after full yellowing invites pests to hide in dying tissue at the crown.
When to Prune Alocasia Frydek
Emergency removal of mushy, blackened, or clearly rotting petioles can happen immediately — soft tissue at the crown is an active threat and should not wait for spring.
Routine yellow-leaf removal is best timed when the leaf is at least 90 percent yellow or brown, or when the petiole releases with a gentle tug. If the petiole still feels firmly anchored, wait.
Cosmetic trimming of dry brown edges can occur any time, but address humidity (target 60–80% for Frydek), Alocasia Frydek watering guide, and spider mite pressure first — this cultivar browns quickly in dry indoor air.
Schedule any multi-leaf cleanup for late spring through early summer when warmth and Alocasia Frydek light guide support new leaf production. The RHS recommends keeping alocasias above 16°C (60°F) during the growing season. Avoid removing several leaves in winter unless they are fully dead; the plant may sit leafless until conditions improve.
Emergency Removal Any Time
Remove immediately when a leaf is fully brown or black, the petiole is mushy, a tear exposes wet tissue, or pests have colonized a leaf base. Bag diseased material in household trash rather than composting it indoors. Re-sterilize blades before touching healthy tissue on the same plant or moving to another pot.
Routine Cleanup During Active Growth
In active growth, the corm seals petiole wounds quickly and redirects energy to the next leaf. A single fully spent leaf removed in spring is often replaced within one active-growth cycle. This is the window for any planned multi-session cleanup spaced three to four weeks apart.
What to Leave Alone in Dormancy
The RHS notes that alocasias may lose foliage in winter dormancy but “produce plenty of fresh leaves once they come back into growth in spring.” During that cool, drier period, reduce watering and avoid stripping partially green leaves the corm is still feeding from. Remove only what is unmistakably dead, keep the corm barely moist above 10°C (50°F), and postpone multi-leaf cleanup until you see a new spear.
Tools, Gloves, and Sterilization
Frydek petioles are fleshy but fibrous. Use sharp bypass pruners or fine garden scissors. Crush wounds heal slowly and invite bacterial soft rot in a genus already prone to crown decay.
Sterilize blades with 70% isopropyl alcohol before each session. University of Minnesota Extension recommends cleaning and disinfecting tools to prevent pathogen spread. Re-sterilize when moving from a diseased leaf to healthy tissue or between plants in a collection.
Wear nitrile gloves. Frydek sap contains calcium oxalate crystals; the ASPCA lists elephant’s ear as toxic to cats and dogs, causing oral irritation and GI upset. NC State Extension rates alocasia poison severity as medium, with contact dermatitis from oxalate crystals. Sap irritates sensitive skin and eyes. Bag trimmings away from pets and children.
Spider Mite Identification Tip
Dry air after pruning stress makes Frydek vulnerable to spider mites. Check leaf undersides for fine webbing at the petiole axils and stippled pale dots on the upper leaf surface — these two signs together confirm mites before webbing becomes obvious. If you spot them, isolate the plant and treat before cutting more leaves, since mite-damaged tissue is already compromised.
Toxicity First-Aid Guidance
If sap contacts skin, wash the area with soap and cool water — avoid scrubbing, which drives oxalate crystals deeper. If sap gets in eyes, flush with clean water for 15 minutes. If a pet or child ingests leaf tissue, do not induce vomiting. Rinse the mouth with water, offer milk or yogurt to bind oxalates (if the person or animal is conscious and able to swallow), and call the ASPCA Animal Poison Control Center at (888) 426-4435 or your local poison control. The ASPCA classifies Alocasia spp. as toxic, with clinical signs including oral irritation, drooling, and vomiting.
Step-by-Step Frydek Leaf Removal
- Inspect the crown in good light. Identify fully yellow leaves, brown crispy blades, and any soft or foul-smelling petiole bases.
- Sterilize tools and put on gloves.
- Support the leaf with one hand while cutting with the other — never yank an attached petiole.
- Cut the petiole 1–2 cm above the crown, leaving a short stub that dries cleanly. Do not cut into the central meristem.
- Examine the stub and crown after each cut. Firm pale tissue is healthy; mush, translucence, or odor means stop and investigate roots and soil moisture.
- Remove debris from the pot surface. Do not compost suspicious rotting tissue indoors.
- Wash tools and hands when finished.
Keep fresh cuts dry for 24–48 hours. Avoid misting the crown or watering so heavily that moisture pools at the petiole base immediately after removal.
Photo Guide — Correct vs Incorrect Cut
Figure 2: Correct cut placement (top) vs incorrect cut (bottom)
(Top photo: a pair of sterilized pruners positioned 1.5 cm above the Frydek crown, cutting a fully yellow petiole. The remaining stub is clean, dry, and above the meristem.)
(Bottom photo: a cut made flush with the crown surface, showing exposed inner tissue and a small zone of browning where bacteria entered.)
The correct cut leaves 1–2 cm of stub that seals over as it dries. The flush cut damages the crown and invites bacterial soft rot.
What Not to Cut
Never slice through the central crown where new leaves emerge. Never remove partially green leaves during dormancy unless disease is confirmed — the corm depends on them. Do not attempt to top the plant or cut through leaf blades expecting regrowth from the cut edge; alocasia leaves do not branch.
Missouri Botanical Garden notes alocasias are grown primarily for bold foliage indoors; propagation is typically by division of offsets or corms, not by leaf cuttings. Pruned healthy corms can be separated at repotting, but that is propagation — not routine pruning.
How Much Foliage Is Safe to Remove
The standard one-third foliage guideline is too aggressive for slow corm growers. Limit removal to 20–25 percent of live leaves per session. On a five-leaf Frydek, that means one fully finished leaf — not three. If several leaves yellow simultaneously, that signals a care problem (overwatering on Alocasia Frydek, cold, low light, spider mites) rather than a need for heavy pruning. Fix moisture and humidity before cutting more tissue.
Spread multiple removals across three to four weeks during active growth so the corm always retains photosynthetic surface area.
After Pruning Care and Recovery
Hold off on watering immediately after removing several leaves if soil was already moist — less transpiration means slower dry-down. Resume when the top 2–3 cm of mix is dry, Frydek’s normal checkpoint.
Maintain 60–80% humidity and bright indirect light without direct afternoon sun on the crown. Avoid fertilizing for two weeks after substantial removal; salts stress compromised roots. Watch for spider mites on new unfurling leaves — dry air after pruning stress makes mite flare-ups common on this cultivar.
New leaves may take four to eight weeks to emerge after a dormant or stressed period. A single yellow leaf removed in spring is often replaced within one active-growth cycle. Signs pruning worked: the cut stub dries tan and firm, decline stops, and a new spear appears without crown softening.
Signs pruning was too aggressive or badly timed: continued yellowing across multiple leaves, crown mush, or a leafless plant that shows no new spear after eight warm weeks — investigate roots before cutting again.
Figure 3: Before and after — single leaf removal
(Left: a Frydek with one fully yellow lowest leaf and a new spear emerging from the crown. Right: the same plant three weeks later, with the spent leaf removed and the new spear beginning to unfurl.)
This is the ideal pattern: one leaf out, one leaf in. The plant maintained four photosynthetic leaves throughout the transition.
What Pruning Cannot Fix
Pruning will not raise humidity, improve drainage, or kill spider mites. Brown tips trimmed cosmetically will return if tap water minerals or dry air persist. Yellowing that spreads up the plant while soil stays wet is root rot on Alocasia Frydek — unpot and inspect roots rather than removing leaves to hide the pattern.
When to Consult a Professional
Most Frydek pruning decisions are straightforward, but a few situations warrant expert help. If you see crown mush or a foul odor after removing a leaf, stop cutting and seek guidance from a local Master Gardener program or cooperative extension office — crown rot can kill the entire corm within days. If the plant has dropped every leaf and shows no new growth after eight warm weeks past mid-spring, an extension agent or experienced aroid grower can help assess whether the corm is still viable. For severe pest outbreaks that persist after treatment, a professional diagnosis prevents compounding damage from repeated chemical applications.
Common Frydek Pruning Mistakes
- Cutting too close to the crown damages the meristem and can halt growth for months
- Removing green leaves during dormancy starves the corm
- Over-pruning after overwatering treats yellowing symptoms while roots remain saturated
- Using dirty tools spreads rot organisms between alocasias in a collection
- Expecting bushier growth from pruning — Frydek does not branch; only new leaves from the corm increase fullness
- Ignoring toxicity — bag trimmings away from pets; oxalate sap persists in cut tissue
- Pulling attached petioles instead of cutting cleanly, tearing crown tissue
Conclusion
Alocasia Frydek pruning is crown-aware sanitation, not creative shaping. The RHS guidance is the whole story in one line: remove fading or dead leaves at the base, wear gloves, and otherwise leave the plant alone. Remove fully finished or diseased leaves at the petiole base, protect the central growing point, sterilize tools, and limit each session to one or two leaves on small plants. Pair every cut with correct watering, high humidity, and bright indirect light — the conditions that keep this rot-sensitive cultivar producing its remarkable scaled foliage. When in doubt, wait until a leaf is fully yellow and the petiole releases; patience protects the corm that powers every future leaf.
When to use this page vs other Alocasia Frydek guides
- Alocasia Frydek overview — Start here for whole-plant context before deep-diving this topic.
- If low humidity is causing brown leaf edges, see the Alocasia Frydek watering guide before trimming cosmetically.
- If overwatering is the real cause of yellowing, the Alocasia Frydek overwatering guide addresses the root cause pruning cannot fix.
- Leggy Growth on Alocasia Frydek — Escalate here when pruning adjustments are not enough and light may be the issue.
- Slow Growth on Alocasia Frydek — Escalate here when pruning adjustments are not enough.
- Brown Tips on Alocasia Frydek — Escalate here when pruning adjustments are not enough but humidity or water quality is the cause.
Related Alocasia Frydek guides
- Alocasia Frydek overview
- Alocasia Frydek watering
- Alocasia Frydek light
- Alocasia Frydek soil
- Alocasia Frydek propagation
- Alocasia Frydek fertilizer
- Alocasia Frydek repotting
- Leggy Growth on Alocasia Frydek
- Slow Growth on Alocasia Frydek
- Brown Tips on Alocasia Frydek
- Alocasia Frydek overwatering
- Root rot on Alocasia Frydek
- Spider mites on Alocasia Frydek