Alocasia Melo Fertilizer: NPK, Schedule & Dormancy Rules
Alocasia Melo Fertilizer: NPK, Schedule & Dormancy Rules
Alocasia Melo Fertilizer: NPK, Schedule & Dormancy Rules
Why Alocasia Melo Needs a Different Feeding Approach
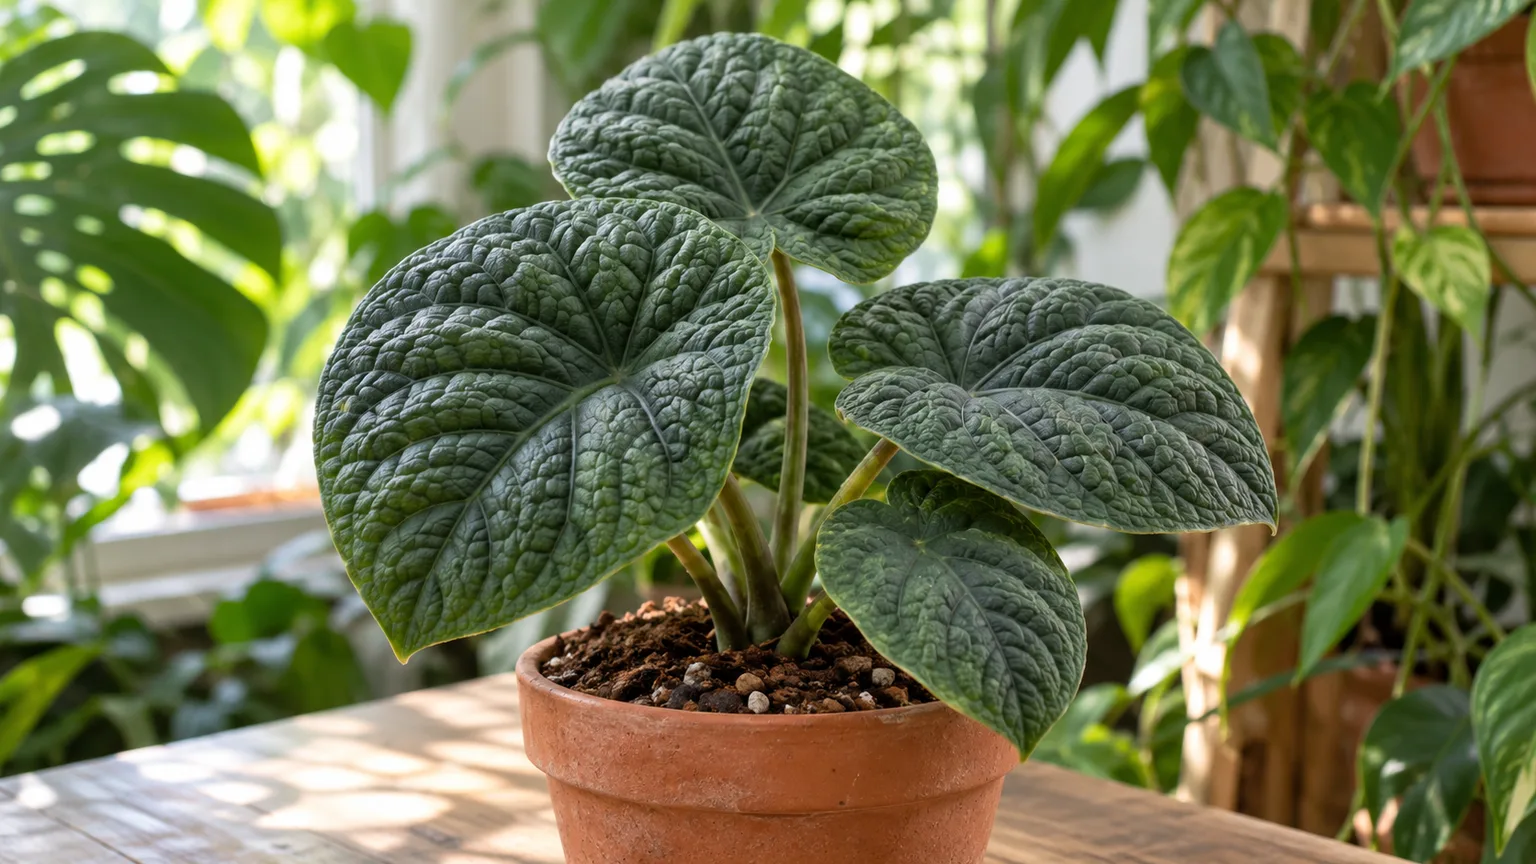
Alocasia Melo (Alocasia melo) is a compact jewel alocasia prized for its quilted, metallic leaves. The same texture and leaf architecture that makes it look sculptural also makes it unusually sensitive to fertilizer. Unlike the bigger, faster-growing Colocasia and many of the larger Alocasia amazonica hybrids, Melo has fine, slow-growing roots, a small corm, and a leaf surface that does not appreciate wet fertilizer sitting on it. That combination means a “more is better” approach backfires fast. Most of the problems that show up as brown leaf tips, crusty soil, or sudden leaf drop trace back to fertilizer choices, not light or water.
The right approach is to match the plant’s natural rhythm: gentle, low-dose feeding during active growth and a complete pause through dormancy. Done correctly, fertilizer becomes a quiet background input rather than a weekly chore. Done wrong, it shows up on the leaves within days.
The Ultramafic-Habitat Background That Shapes Its Nutrient Needs
Alocasia melo is native to Borneo, where Kew’s CATE Araceae records it as obligately associated with ultramafic substrates in eastern Sabah (Telupid). It grows in thin soil layers over mineral-rich rock near streams in a wet tropical biome. That origin matters for two reasons. First, the plant evolved with steady access to magnesium and trace metals from ultramafic parent material, so a fully soft-water or RO-only routine can leave it short on calcium and magnesium, which then shows up as deformed new leaves. Second, these habitats drain quickly and stay biologically active, which means the plant is adapted to nutrients released slowly rather than dumped in a single strong dose. The implication for indoor care is that a complete, balanced fertilizer plus a light calcium source mirrors what the plant expects better than a high-phosphorus “bloom booster” or a constant strong feed.
Why Salt Sensitivity Is the Defining Feature of This Jewel Alocasia
Salt sensitivity is the single most important thing to understand before picking a fertilizer. The University of Maryland Extension describes how soluble salts from fertilizer pull moisture out of root tissues, producing marginal yellowing, leaf scorch, and wilting even when soil moisture is adequate. Jewel alocasias sit at the sensitive end of that spectrum. A full-strength pour-through leaves salt residue behind, and over a few weeks the electrical conductivity of the potting mix climbs high enough to burn root tips. The visible signs — brown, crispy leaf margins, a white crust on the soil surface, and stunted new growth — usually appear before the plant actually wilts, which is why attentive growers catch the problem early.
The good news is that salt sensitivity is easy to manage. Dilute the fertilizer more than the label suggests, water thoroughly between feeds to keep salts mobile, and flush the pot with plain water on a regular cadence. The plant’s job is to push out one beautifully textured leaf at a time; your job is to keep the soil chemistry calm.
If symptoms persist, see the Root Rot on Alocasia Melo guide.
The Best NPK Ratio for Alocasia Melo
NPK refers to the three macronutrients on every fertilizer label: nitrogen (N), phosphorus (P), and potassium (K). For Alocasia Melo, almost every reputable care source lands on the same family of ratios: a balanced 1:1:1 such as 10-10-10 or 20-20-20, or a foliage-leaning 3-1-2 such as 9-3-6 or 12-4-8. Both work. The differences between them are about emphasis, not correctness.
A balanced 1:1:1 delivers nitrogen, phosphorus, and potassium in equal proportion, which suits a plant that is pushing out a steady cadence of mature leaves, holding onto roots, and building corm mass all at the same time. A 3-1-2 ratio puts slightly more weight on nitrogen, the macronutrient that drives chlorophyll production and lamina expansion. For a young Melo that is unfurling small leaves on a tight schedule, that extra nitrogen shows up as faster leaf sizing. For a mature, well-rooted specimen that already produces full-size leaves, the difference is barely visible.
Balanced 20-20-20 vs a 3-1-2 Foliage Ratio
Most jewel-alocasia growers reach for a balanced 20-20-20 liquid because it is widely available, easy to dose, and the micronutrient package that comes with most 20-20-20 formulas (chelated iron, magnesium, and trace boron and zinc) covers the secondary deficiencies that most often appear on indoor aroids. The Royal Horticultural Society recommends a general liquid fertilizer during the growing season for alocasia — a balanced formula fits that guidance well. Melo tolerates a 1:1:1 better than it tolerates a high-phosphorus “bloom” formula, which is fortunate because Melo is grown for its leaves, not its inflorescence.
A 3-1-2 foliage ratio is a perfectly good alternative, especially if you are already feeding aroids like Monstera or Philodendron with the same bottle. The trade-off is that a 3-1-2 carries a slightly higher nitrogen-to-potassium ratio, which can drive fast, soft growth if you also have bright light and warm temperatures. For most indoor conditions, that is a non-issue.
If you are growing Melo in a terrarium or a grow tent with very high humidity and steady warm temperatures in the 75 to 82°F range, the slightly higher nitrogen in a 3-1-2 will be put to work building bigger leaves, and the potassium share is still enough to keep petioles firm. If you are growing Melo in a cooler room that drops into the 60s at night, the higher nitrogen in a 3-1-2 can sit unused in the substrate as salts, so a balanced 1:1:1 is the safer pick. Matching the ratio to your conditions is more important than picking the “best” ratio in the abstract.
Micronutrients That Matter: Calcium, Magnesium, and Iron
The three micronutrients that show up in Melo deficiency pictures are calcium, magnesium, and iron. Calcium matters at the growing point; a chronic shortfall produces torn, cupped, or deformed new leaves. Magnesium sits at the center of the chlorophyll molecule, so a deficiency shows up as interveinal yellowing on older leaves first. Iron deficiency looks similar but appears on the newest growth and is usually a pH issue, not a feeding issue, since iron becomes unavailable above pH 6.5.
A complete 20-20-20 with chelated iron covers most of these. If you water with very soft, reverse-osmosis, or rainwater, add a Cal-Mag supplement at a low dose to compensate for the missing calcium and magnesium. A small amount of dolomitic lime in the aroid mix also buffers pH and adds both calcium and magnesium slowly over months, which suits a plant adapted to mineral-rich substrates.
Ultramafic soils are naturally buffered and mineral-rich. If you keep your potting mix on the acidic side — below pH 5.8 — calcium becomes less available even when it is technically present, and you may see torn new leaves or pinhole necrosis on unfurling foliage. A simple pour-through pH check once or twice a year is enough to confirm your mix is sitting in the right range. Most peat- and coco-based aroid mixes drift toward 5.5 over time, which is one reason growers add a small handful of dolomitic lime or oyster shell to the substrate at potting time.
How to Dilute Fertilizer So It Doesn’t Burn the Roots
Dilution is where most over-fertilization problems start. The University of Maryland Extension emphasizes that fertilizer strength is more important than fertilizer type for preventing salt injury on indoor plants. For a complete 20-20-20 liquid, a quarter-to-half-strength dilution is the safe band for Alocasia Melo. For a 3-1-2 foliage formula, lean toward quarter strength, because the higher nitrogen concentration makes the full-strength dose a real risk to fine roots.
A practical dilution: for a teaspoon-per-gallon label rate, mix half a teaspoon per gallon for a balanced 20-20-20, or a quarter teaspoon per gallon for a 3-1-2. Pour the solution into already-moist soil. Never apply fertilizer to bone-dry media, because concentrated salts then contact dry root hairs directly. Always water the plant the day before a feed, then apply the diluted fertilizer as the next drink, and follow with a plain-water pour-through a few days later to keep salts moving through the pot rather than accumulating near the surface.
A useful rule of thumb is to feed at roughly the dilution you would use for a young seedling, even though Melo is a mature plant. That puts most 20-20-20 liquids well below the “general purpose” dose on many labels. If you use a TDS or EC meter, compare readings before and after feeding rather than chasing fixed targets — a common grower practice without extension-published numbers for jewel alocasias. For growers without a meter, the visual cues — clean leaf margins, no crust, steady leaf cadence — are the practical equivalent.
Alocasia Melo Fertilizing Schedule by Season
A reliable, low-stress feeding rhythm looks like this:
- Late winter to early spring (resumption): Begin feeding only after the plant has pushed at least one new leaf that has fully hardened off. Start at quarter strength for the first feed, then move to half strength on the next round.
- Spring (active growth): Feed every 4 to 6 weeks with a balanced 20-20-20 at half strength, or every third watering at quarter strength if the plant is in a warm, bright window and pushing leaves rapidly.
- Summer (peak growth): Continue the same rhythm. Hot pots concentrate salts faster, so flush with plain water every 6 to 8 weeks regardless of feeding.
- Early fall (slowdown): Drop to a single light feed at half strength in early September, then stop. Do not push a feeding into late October.
- Winter (dormancy): No fertilizer. Resume only when new growth reappears.
The RHS alocasia growing guide recommends feeding from April through October — that window aligns well with Melo’s active season indoors. Houseplant-focused guides often recommend every-two-weeks feeding for Alocasia in general, while aroid-specialist growers recommend every 4 to 6 weeks for slow jewel alocasias like Melo. The honest answer is that the every-two-weeks approach works for fast-growing, well-rooted plants in bright light with heavy watering, and the every-4-to-6-weeks approach is safer for slow-growing specimens in average home conditions. When in doubt, feed less often rather than more.
Another way to think about the schedule is to count leaves instead of weeks. A healthy Melo in active growth pushes a new leaf every 3 to 5 weeks. Feeding once between each new leaf, after the previous one has fully hardened, naturally lands you in the every-4-to-6-weeks range and tracks the plant’s actual energy budget. If the plant is pushing a leaf every 2 weeks because it is in peak summer conditions under a grow light, you can feed at that faster cadence, but you should also flush the pot more often. If the plant is taking 6 to 8 weeks between leaves, feeding on a fixed every-2-weeks schedule will overload the substrate. Letting the leaf cadence drive the schedule is more reliable than any calendar.
Dormancy Feeding: When to Stop and When to Restart
Dormancy is the single most important part of the Alocasia Melo fertilizer plan, and the easiest part to get wrong. The plant does not always lose every leaf the way an Alocasia zebrina does, but it does slow its metabolism dramatically as light intensity drops in autumn. During this slowdown, root function drops with it, and the plant cannot pull nutrients out of the soil efficiently. Any fertilizer applied during dormancy sits in the pot, accumulates as salt, and damages fine roots.
The University of Maryland Extension notes that excessive or mistimed fertilizer applications are a primary cause of high soluble salts in indoor potting media. During dormancy, when the plant is not using nutrients, those salts build up rather than being taken up. Aroid growers consistently recommend stopping all fertilization during dormancy (PDA Exotic Plants).
How to Tell Your Melo Has Gone Dormant
Melo dormancy is subtle. The plant does not always drop every leaf, but the visible signals are easy to read. New leaf production stops entirely. Existing leaves hold their shape but stop getting larger. The newest leaf may stay tightly furled for weeks. The soil stays wet for noticeably longer between waterings because root uptake has slowed. By mid-winter, you may see one or two older leaves yellow from the outer edge inward and drop, which is the plant pulling nutrients back into the corm rather than wasting them. None of this is a sign that anything is wrong; it is the plant doing exactly what it evolved to do.
When you see these signs, stop fertilizing, reduce watering to just enough to keep the corm from desiccating, and leave the plant in bright indirect light. Do not repot. Do not push growth with extra warmth. Patience is the only correct response.
Restarting Fertilizer in Spring Without Burning Fresh Roots
Spring restart is the moment when most growers accidentally burn a recovering Melo. The temptation is to start feeding as soon as a single new leaf tip appears. The safer approach is to wait until the plant has pushed at least one and ideally two fully unfurled, hardened leaves. The root system needs that leaf to signal that it is back online. Feeding before that point sends salts into a root zone that is not yet ready to use them.
When you do restart, lead with quarter strength, then move to half strength on the next round, then settle into the regular every-4-to-6-weeks rhythm. If the plant pushes a new leaf every 2 to 3 weeks through spring and summer, you are on the right schedule. If you see any browning on the new leaf margins after a feed, drop back a step in dilution and flush the pot.
Foliar Feeding Alocasia Melo: Why the Textured Leaves Are Different
Foliar feeding — spraying diluted fertilizer directly onto the leaves — works well on smooth-leaved aroids. Melo is the exception. The deeply textured, almost reptilian surface of Melo leaves does not shed water or sprays evenly. Liquid pools in the ridges, sits there, and either leaves a mineral residue that dulls the leaf’s natural sheen or invites fungal growth along the veins.
If you do need a quick nutrient boost — magnesium for interveinal yellowing, for example — mist very lightly on the underside of the leaf in the early morning, at a very low concentration (under 1 ml per liter), and only when the leaf is already slightly damp. Treat the rest of the feeding plan as a soil-drench job, not a foliar one.
Organic vs Synthetic Fertilizer for Jewel Alocasias
Both approaches work, with different trade-offs. Synthetic balanced liquids like 20-20-20 give you precise, immediate nutrient availability. You know exactly what the plant is getting on the day you feed it, and the dose is repeatable. That precision is valuable for a slow-growing, sensitive plant like Melo, where a miscalculation shows up on the leaves.
Organic options like fish emulsion, seaweed extract, and worm castings work more slowly. They improve the long-term biological health of the potting mix and add trace minerals that synthetic formulas sometimes miss, but they depend on microbial activity to release nutrients. Indoor aroid mixes that are mostly bark, perlite, and sphagnum are microbially lean compared with outdoor garden soil, so organic fertilizers release more slowly and less predictably indoors than they would outside.
A practical hybrid approach works well for Melo: alternate one feed of balanced synthetic 20-20-20 with one feed of a high-quality, deodorized fish emulsion (about 1 tablespoon per gallon) every 4 to 6 weeks during the active season. The synthetic carries the macronutrients reliably, and the organic feeds the soil biology and adds micronutrients. Skip the fish emulsion in winter to avoid odor in a closed-up room and to respect the dormancy rule.
Signs of Over-Fertilization and How to Fix It
The first signs of over-fertilization on Alocasia Melo are usually on the leaves rather than the roots. Watch for:
- Brown, crispy leaf tips and margins that appear within a day or two of a feed.
- A white or yellow crust on the soil surface or along the inside of the pot rim.
- Yellowing or browning of older leaves that is faster than the seasonal yellowing you would expect.
- Stunted or deformed new growth, especially if the new leaf comes in smaller than the previous one and the plant is otherwise healthy.
- Soft, dark, oversized leaves with reduced contrast between the veins and the interveinal surface, which is a sign of excess nitrogen specifically.
If you see any of these, treat it as a salt issue, not a watering issue. Pause all feeding immediately and flush the pot. One subtlety worth knowing: a single late-season feed that goes onto a plant that has already started to slow down can produce these symptoms in late autumn, when growers do not expect them. That is a useful diagnostic clue — if you see salt-burn symptoms appearing in October or November on a plant that has been quietly fed all summer, the issue is usually the last feed of the season rather than the season-long program, and the fix is to flush and then leave the plant alone until spring.
How to Flush Salts Out of the Pot
A proper flush uses three times the pot’s volume of plain, room-temperature water. For a 6-inch pot, that is roughly a gallon and a half. Pour slowly and evenly across the entire soil surface so the water percolates through the entire root ball, not just one side. Let it drain fully. Repeat once more if the runoff water is still visibly tinted. The University of California ANR recommends periodic leaching to prevent soluble salt buildup in houseplant containers. Let the plant dry down to its normal watering weight before the next drink, and do not feed for at least 4 to 6 weeks. Most leaf burn on Melo is permanent — the affected leaves will not heal — but the new leaves that come in afterward will look clean if you have actually dropped the salt load (University of Maryland Extension).
Common Fertilizer Mistakes With Alocasia Melo
The most expensive mistakes are the easiest to avoid. The first is feeding on a calendar instead of a rhythm: many growers feed every two weeks on autopilot, even when the plant is not actively pushing leaves. The second is feeding at full strength because the label says so. The label assumes a vigorous, well-rooted plant in a heated greenhouse; Alocasia Melo on a windowsill is none of those. The third is feeding a freshly repotted plant. Wait at least 4 to 6 weeks after a repotting so the disturbed roots have a chance to recover. The fourth is using slow-release pellets in a small pot. Osmocote and similar products release on a temperature- and moisture-driven schedule that is hard to predict in a 4- to 6-inch pot, and over-release is a real risk. The fifth is feeding in autumn to “tide the plant over” through winter. That is the exact opposite of what the plant needs.
The unifying principle is “less is more.” A Melo that is slightly under-fed will tell you with smaller, paler leaves, and you can correct that in a single feeding cycle. A Melo that is over-fed will show salt burn and may lose roots that take months to regrow. The asymmetry favors the cautious side.
Conclusion
Feeding Alocasia Melo well is mostly about restraint. A balanced 20-20-20 liquid (or a 3-1-2 foliage formula) at quarter to half strength, applied to already-moist soil every 4 to 6 weeks from spring through early fall, is enough to power a full growing season of those signature quilted leaves. Add a small calcium-magnesium supplement if your water is very soft, flush the pot with plain water every 6 to 8 weeks, and stop completely the moment the plant shows signs of dormancy in autumn. Resume only when a new leaf has fully hardened off in spring, and lead with quarter strength on that first feed back.
If you take only one rule from this guide, take this: when in doubt, feed less, dilute more, and never feed a resting plant. The Melo evolved on mineral-rich ultramafic substrates in Borneo on a slow, steady trickle of nutrients — and the closer your indoor routine mirrors that rhythm, the more reliably it will push out the deeply textured leaves that made you bring it home in the first place.
When to use this page vs other Alocasia Melo guides
- Alocasia Melo overview — Start here for whole-plant context before deep-diving this topic.
- Alocasia Melo problems hub — Jump to symptom-specific fix guides when this care topic does not resolve the issue.
- Alocasia Melo watering — Use when soil moisture or brown tips are the main concern rather than feeding schedule.
- Alocasia Melo soil — Check here if salt buildup keeps returning despite lighter feeding.