How to Propagate Philodendron Florida Beauty
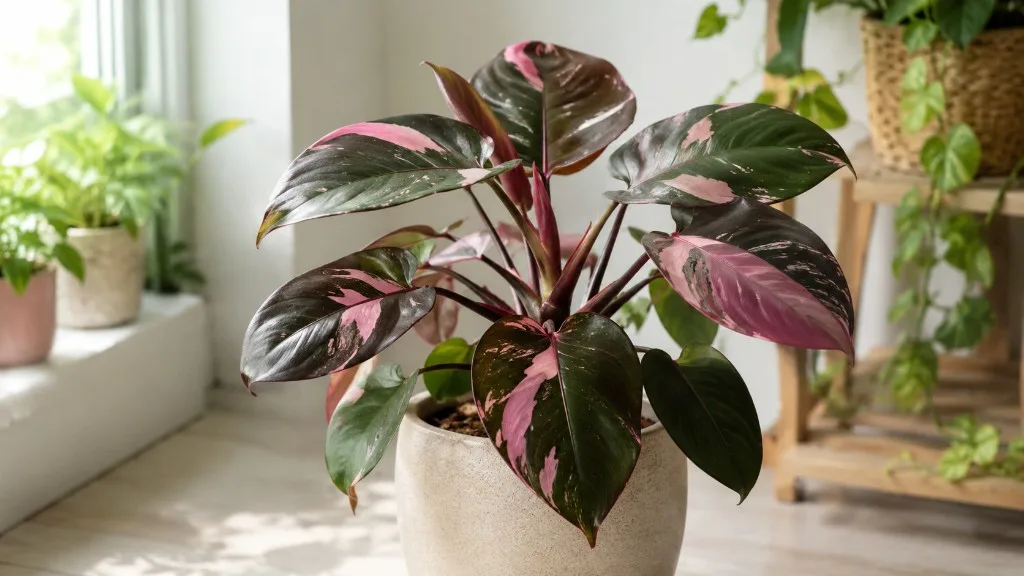
How to Propagate Philodendron Florida Beauty
How to Propagate Philodendron Florida Beauty
Philodendron Florida Beauty propagation at home means stem-tip or leaf-bud cuttings with at least one node — ideally from a stem that still shows cream or yellow splashes in the tissue at the bud — then rooting in water, sphagnum moss, or moist perlite before potting into chunky aroid mix. Philodendron ‘Florida Beauty’ is a climbing hybrid of Philodendron pedatum and Philodendron squamiferum in the Araceae family, with juvenile spear-shaped leaves that mature into deeply lobed, cream-splashed foliage on red petioles. The RHS lists propagation by stem-tip or leaf-bud cuttings for this cultivar — the same nodal format used across vining philodendrons per Clemson HGIC, which notes philodendrons may be propagated at any season from stem cuttings or by air layering.
Unlike a plain green heartleaf philodendron, every Florida Beauty propagation decision is also a variegation decision: the node you cut today largely determines whether the rooted plant keeps cream splashes on lobed leaves or quietly reverts toward solid green. NDSU Extension explains that white or pale leaf tissue contains less chlorophyll and produces less food for the plant, so variegated specimens are often less robust than all-green counterparts — and unstable variegation is maintained through cuttings, not seed.
The reliable home workflow: identify a healthy node with visible cream streaking on the stem, cut with sterile shears, root in bright indirect light at roughly 18–29°C (65–85°F) with humidity near 55–70%, change water before it clouds, and pot up when roots reach 2–5 cm (about 1–2 inches) into the same chunky aroid mix you use for the parent. Trailing philodendrons root readily from 3–6 inch stem sections with lower leaves removed, in water or perlite, with frequent water changes until several-inch roots form before potting — the standard format Iowa State Extension describes for vining philodendrons. Florida Beauty adds one non-negotiable layer: choose stem sections with cream splashes, not only the showiest leaf.
Why Florida Beauty Propagation Is a Variegation Decision
Florida Beauty is not Philodendron erubescens ‘Pink Princess’ with different paint. It is a Florida-series climbing hybrid whose parent species are both vines — a trait the offspring inherits per the RHS Florida Beauty profile. Mature plants develop heavily variegated yellow-and-green lobed leaves on red petioles, but only when bright filtered light supports the pale sectors. Propagation clones the genetic and chimeric balance at the node you cut, not the memory of one spectacular leaf.
That matters because cream and yellow tissue photosynthesizes less efficiently than green tissue. A cutting dominated by pale foliage may root slowly, yellow early, or fail while a marbled leaf above a cream-streaked stem roots faster and produces a more stable offspring. Node selection is the entire variegation game on Florida Beauty — two cuttings six inches apart on the same vine can produce radically different plants.
Propagation also multiplies healthy plants; it does not rescue a drowning parent. If the vine is recovering from chronic overwatering, stabilize watering rhythm and roots first, then take cuttings from firm new growth.
What You Need Before You Cut
Propagation succeeds when the parent plant is healthy, the season supports active growth, and your tools reduce rot and sap exposure. Florida Beauty cuttings are often sold at collector prices — set up like you mean it.
Tools, Sanitation, and Sap Safety
Gather before you cut:
- Sharp bypass pruners or floral snips — dull blades crush philodendron stems and invite infection at the node
- 70% isopropyl alcohol to wipe blades between cuts on the parent and between separate cuttings
- Clear glass jar or vase (water method), long-fiber sphagnum moss plus a clear cup or propagation box (moss method), or moist perlite in a small nursery pot (perlite method)
- Room-temperature filtered or dechlorinated tap water for water propagation and moss hydration
- Optional rooting hormone powder — Clemson HGIC propagation guidance notes dipping cuttings at a node in hormone can support rooting, though many philodendron cuttings root without it
- Nitrile gloves — philodendrons contain insoluble calcium oxalate crystals; the ASPCA lists philodendron as toxic to cats and dogs with oral irritation if chewed
Sterilize blades, work on a wipeable surface, and dispose of trimmings in a closed bin pets cannot raid. Wash hands after handling sap.
Parent Plant Health and Best Timing
Take cuttings only from firm stems with no active rot, pest webs, or widespread yellowing. Best timing is active growth: spring through early fall when bright indirect light and warmth support rooting. NC State Extension’s Philodendron erubescens profile — a close philodendron baseline for indoor climbers — places the species in a 65–85°F comfort band with high humidity and partial shade, conditions that also speed cutting roots. Clemson HGIC adds that philodendrons may be propagated at any season from stem cuttings, but winter propagation in a cold dim room extends timelines and raises rot risk if water stagnates.
Avoid cutting immediately after repotting or a long drought event. Wait until the plant pushes one clean new leaf or shows steady turgor. Collectors often time propagation with pruning reverted green runners — the trimmed variegated section becomes the cutting, and the parent redirects growth from a healthier node.
Understanding Nodes on a Climbing Florida Beauty Vine
A node is the slightly swollen joint on the stem where a leaf petiole attaches, aerial roots may emerge, and an axillary bud sits ready to activate. That bud holds the meristematic tissue that produces the next vine segment and new roots when a cutting is separated from the parent. Clemson HGIC notes philodendrons may be propagated from stem cuttings or by air layering — each requires node tissue, not leaf tissue alone.
On Florida Beauty, nodes sit along a climbing vine that benefits from moss-pole support as lobes mature. Aerial roots often emerge near nodes — bonus rooting tissue when submerged in water or pressed into moss. Leaf-only cuttings will not work. A spectacular cream-splashed leaf floating in a jar without stem node tissue may persist briefly on stored energy, then yellow and decline.
What to look for: a slight ridge or ring where the red petiole meets the stem; a small bud “eye”; white or tan aerial root nubs; and ideally cream flecks in the stem stripe at that junction.
Where to Cut Above and Below the Node
Plan two cuts — one for the cutting, one for the parent:
On the cutting: Cut approximately 1–2 inches (2.5–5 cm) below the node you want to root. That stub protects node tissue and gives stem to submerge without drowning the bud. Remove any leaf that would sit underwater.
On the parent: Cut about ¼ inch (0.5 cm) above the node below your take. The remaining node with its leaf often activates a new growth point, helping the donor recover bushier form when you shorten a leggy vine.
Single-node vs. two-node cuttings: A one-node, one-leaf cutting is standard for water jars. A two-node section carries more energy on long vines but is harder to stabilize in small containers; for most homes, one healthy node with one or two leaves is the sweet spot. Stem sections 3–6 inches long with lower leaves removed match the extension-recommended philodendron cutting format.
Choosing Cuttings That Preserve Cream Variegation
Before you sterilize scissors, walk the vine and evaluate both leaf pattern and stem tissue at every candidate node. The goal is balanced variegation: enough cream for the cultivar’s character, enough green to fuel rooting and early growth.
Reading Cream Splashes on the Stem
Start with the leaf — look for marbled cream and green on the lobed blade, not a pale wash that mimics variegation in dim light. Then drop your eyes to the stem at the node, because experienced propagators trust stem tissue over a single photogenic leaf.
Variegated stem tissue shows cream streaks, flecks, or sectors running through the internode and into the axillary bud junction. A beautifully variegated leaf above a solid green stem at the bud is a poor bet: the leaf may be older output from a previously variegated tip while the bud below has already shifted green. Always propagate from nodes where cream is visible in the stem stripe at the bud, not only on the leaf blade.
Also read the vine above and below your target. If the stem section above has produced two or three consecutive mostly green leaves, that growth point has likely reverted — move down to the last node that still shows cream streaking on the stem, the same logic as pruning reversion. Avoid nearly all-cream leaves as propagation donors when you can: pale tissue contains less chlorophyll than green sections, and those cuttings often root slowly or fail even when they look stunning in photos.
Label cuttings by stem pattern, not leaf drama. “Node 4 — cream stripe through bud, marbled lobes” beats “the pretty one.”
Florida Beauty vs Florida Ghost: Do Not Confuse ID
When buying cuttings, inspect stem variegation, not one pale leaf. Philodendron ‘Florida Ghost’ produces new leaves that emerge white or very pale and age toward green — a different variegation pattern from Florida Beauty, which the RHS describes as bearing heavily variegated yellow-and-green foliage on mature lobed leaves when culture is correct. Florida Beauty keeps cream splashes on mature foliage in adequate light; it is not the same as a Ghost flush that greens out with each new leaf.
If a seller shows one cream mature leaf but green stem at every node, you may be buying a reverting plant or a mislabeled Ghost — a purchase problem, not a propagation failure later. Document stem photos at delivery if you paid collector prices. See the Florida Beauty overview for fuller ID context.
Wet-stick recovery: If a purchased node arrives leafless but firm, treat it as a high-humidity project. Trim any blackened tissue, press the node into damp sphagnum in a vented propagation box at 65–80°F, and wait four to eight weeks for the first leaf — longer than a leafy cutting. Do not submerge a bare stick in standing water; moss or perlite with a humidity dome gives better odds.
Method 1: Water Propagation Step-by-Step
Water propagation is the most visible method: you watch roots form and catch rot early. Trailing philodendrons root readily in water with frequent water changes until several-inch roots develop, then pot in regular potting mix — the workflow Iowa State Extension describes for vining philodendrons.
Steps:
- Select a stem with at least one node showing cream streaking at the bud, plus one or two healthy leaves. Remove any lower leaf that would sit underwater.
- Cut with sterile shears 1–2 inches below the node. Include an aerial root if present.
- Fill a clean glass jar with room-temperature water. Submerge the node and aerial root; keep the leaf and upper stem above the waterline.
- Place in bright indirect light — not direct sun, which heats the jar, grows algae, and scorches pale leaf tissue first.
- Change water when it becomes cloudy, or on a weekly schedule as preventive maintenance. Rinse the jar if biofilm builds.
- Wait until roots are roughly 2–5 cm (1–2 inches) long and firm white or cream, then pot up. Do not transplant at the first tiny nub.
Pros: Easy monitoring, minimal supplies, ideal for learning node anatomy on a climbing Florida-series stem.
Cons: Weaker root structure than moss for some growers, rot risk if water stagnates, top-heavy lobed leaves may tip small jars — use a heavier vase or soft tie to a stake.
Target 55–70% relative humidity if your room is dry. The priority is clean water at the node, not constant leaf misting that invites fungal spots on variegated tissue.
Method 2: Sphagnum Moss Propagation
Sphagnum moss suits Florida Beauty when you want stronger roots before soil, when a cutting is too short to stabilize in a jar, or when you prefer not to leave valuable variegated tissue in stagnant water. Moss mimics how aerial roots grip bark on a climbing philodendron stem — moist, airy, and oxygenated at the node.
Steps:
- Hydrate long-fiber sphagnum moss in water, then squeeze until damp — not dripping.
- Place moss in a clear cup, propagation box, or vented zip bag with the cutting node pressed into the moss. Aerial roots should contact moss.
- Seal partially for humidity — vents prevent mold while keeping the node moist. Clemson HGIC recommends a plastic bag over cuttings to maintain humidity during rooting.
- Keep in bright indirect light at 65–85°F (18–29°C).
- Open weekly to check moisture. Remist moss if it lightens; never let it stay soggy and anaerobic.
- Transplant when roots weave through moss and reach 2–5 cm — gently tease moss away rather than ripping.
Moss propagation shines for heavily variegated cuttings you want to watch closely, and for wet sticks (node-only segments) that need high humidity until the first lobed leaf unfolds.
Method 3: Perlite and Airy Mix Propagation
Perlite — or a moist 50/50 perlite and potting mix — gives faster transition to soil because roots form in a solid medium from the start. Iowa State Extension recommends perlite or well-drained potting soil for philodendron stem sections, with optional rooting hormone to accelerate rooting in perlite.
Steps:
- Fill a small pot with drainage holes with moist perlite or airy aroid mix (see soil guide).
- Dip the cut end lightly in powdered rooting hormone (optional) — tap off excess; hormone is most useful on slow or leafless cuttings per Clemson cutting guidance.
- Insert the cutting so the node sits just below the surface — bury the node, not the leaf petiole.
- Cover with a clear bag or propagation dome vented daily to maintain high humidity without cooking the cutting.
- Keep medium evenly moist — never waterlogged. Water when the top layer lightens.
- Check for resistance after three to four weeks by giving a gentle tug; firm anchoring means roots formed per standard cutting checks.
- Leave in place until roots reach 2–5 cm, then pot up if needed.
This method reduces water-to-soil shock but requires attention to moisture balance — wet perlite packs anaerobic quickly in a cold room.
Rooting Timeline: What to Expect Weeks 1–8
Timelines vary with temperature, light, season, cutting vigor, and variegation balance. Use ranges, not guarantees — these are indoor home estimates.
| Method | First root nubs | Roots ready for soil | First new leaf after pot-up |
|---|---|---|---|
| Water | 7–14 days | 2–6 weeks | 4–10+ weeks |
| Sphagnum moss | 10–21 days | 3–6 weeks | 4–10+ weeks |
| Perlite/airy mix | 14–21 days | 3–7 weeks | 4–10+ weeks |
Cuttings with existing aerial roots often root on the faster end. Nearly all-cream leaf cuttings may root slower or fail — another reason to favor marbled leaves with cream stem streaks. Cool winter rooms below 18°C (65°F) can double these ranges; warmth and consistent bright light are the cheapest accelerators.
In a typical 22°C east-window setup, a marbled one-node cutting with an aerial root often shows first white nubs in 10–14 days in clean water during spring — while an all-cream cutting from the same vine may still be leaf-yellowing at week three with no roots.
When and How to Pot Up Rooted Cuttings
Pot up when roots are creamy white, firm, and roughly 2–5 cm (1–2 inches) long with some secondary branching — not merely a single translucent stub. Extension guidance describes potting after several-inch roots form in water; for Florida Beauty, the 2–5 cm threshold balances transplant shock against leaving cuttings in jars too long.
Pot-up steps:
- Choose a 10–12 cm (4–5 inch) pot with drainage — oversized pots hold water the young root system cannot use.
- Fill with chunky aroid mix — potting soil plus perlite and orchid bark, matching the moist, well-drained structure climbing philodendrons need indoors per NC State Extension.
- Plant the node just below the surface; do not bury the leaf petiole.
- Install a moss pole or bamboo stake early — Florida Beauty is a climbing hybrid whose lobed leaves mature best with vertical support.
- Water thoroughly once, let drain, then follow the moist-first-weeks rhythm below.
If transitioning from water, plant directly into moist mix. Move before roots become only adapted to submerged life — long, unbranched water roots without secondary growth are a signal to pot up or refresh the cut.
Aftercare for New Rooted Florida Beauty Plants
Newly potted Florida Beauty cuttings need stability, not fertilizer pushes or repeated repotting.
Weeks 1–2: Keep mix evenly moist but not waterlogged — water in the sink until excess drains. No fertilizer yet. Maintain bright indirect light and 55–70% humidity if possible. Clemson HGIC stresses philodendrons should never stand in water, which applies equally to fresh transplants.
Weeks 3–4: Allow the top 2–3 cm of mix to dry between waterings as roots explore the pot. Follow the parent plant’s watering rhythm once turgor stabilizes — typically letting the top 3–5 cm dry between soaks.
Weeks 4–8: Shift toward normal care. First new leaf may appear smaller and less lobed than mature foliage — juvenile spear-shaped leaves deepening into lobes is normal per the RHS cultivar description. Judge stem stripe at the new node, not panic over one greener leaf if light and stem pattern still look balanced.
Do not repot again immediately, do not move between rooms weekly, and do not fertilize until you see active new growth and roots have had four to six weeks in soil.
Stop hoping and restart clean when you see a black or mushy node, sour-smelling water, stem shriveling in wet medium, or no roots after 8+ weeks in warm bright conditions with a verified node included.
When to Use This Page vs Other Florida Beauty Guides
Use this propagation guide when you are ready to divide or clone a healthy climbing vine — taking stem cuttings, rooting them, and potting offspring. It does not replace day-to-day culture on an established plant.
- Overview — identity, growth habit, and whether Florida Beauty fits your home before you buy or propagate
- Light — bright filtered placement that keeps cream splashes stable on new growth after rooting
- Watering — dry-down checks for parent and rooted cuttings after week three
- Soil — chunky mix recipe for pot-up and long-term roots
- Pruning — when propagation pairs with trimming reverted green runners on the parent
- Repotting — upsizing rooted plants after the first stable growth flush, not during initial rooting
Related Philodendron Florida Beauty Guides
Continue building a complete culture picture after your cuttings root:
- Watering guide — moisture checks that prevent rot on variegated lobed foliage
- Light guide — window placement to preserve cream splashes on new leaves
- Soil guide — drainage-forward mix for climbing roots on a moss pole
- Fertilizer guide — when to feed young plants after the first month in soil
- Pruning guide — redirecting growth after you remove cuttings from the parent vine
Conclusion
Philodendron Florida Beauty propagates reliably from stem-tip or leaf-bud cuttings with at least one node — the method the RHS lists for this pedatum × squamiferum hybrid. Success is less about exotic technique than node health, cream streaking on the stem at the bud, and clean water or airy moss in bright indirect warmth. Root in water, moss, or perlite; pot when roots reach 2–5 cm into chunky aroid mix; stake early on a moss pole; and judge variegation on new stem stripes, not one perfect leaf. Propagation clones what the node already carries — choose that node carefully, and the rest is patience.