Spider Mites on Spider Plant: Causes, Checks & Fixes
Quick answer
Spider mites on Spider Plant show as yellow stippling and fine webbing on arching leaves, especially in dry heated rooms. First step: isolate the plant and rinse all foliage thoroughly-undersides of leaves and stolon tips-before applying any spray.
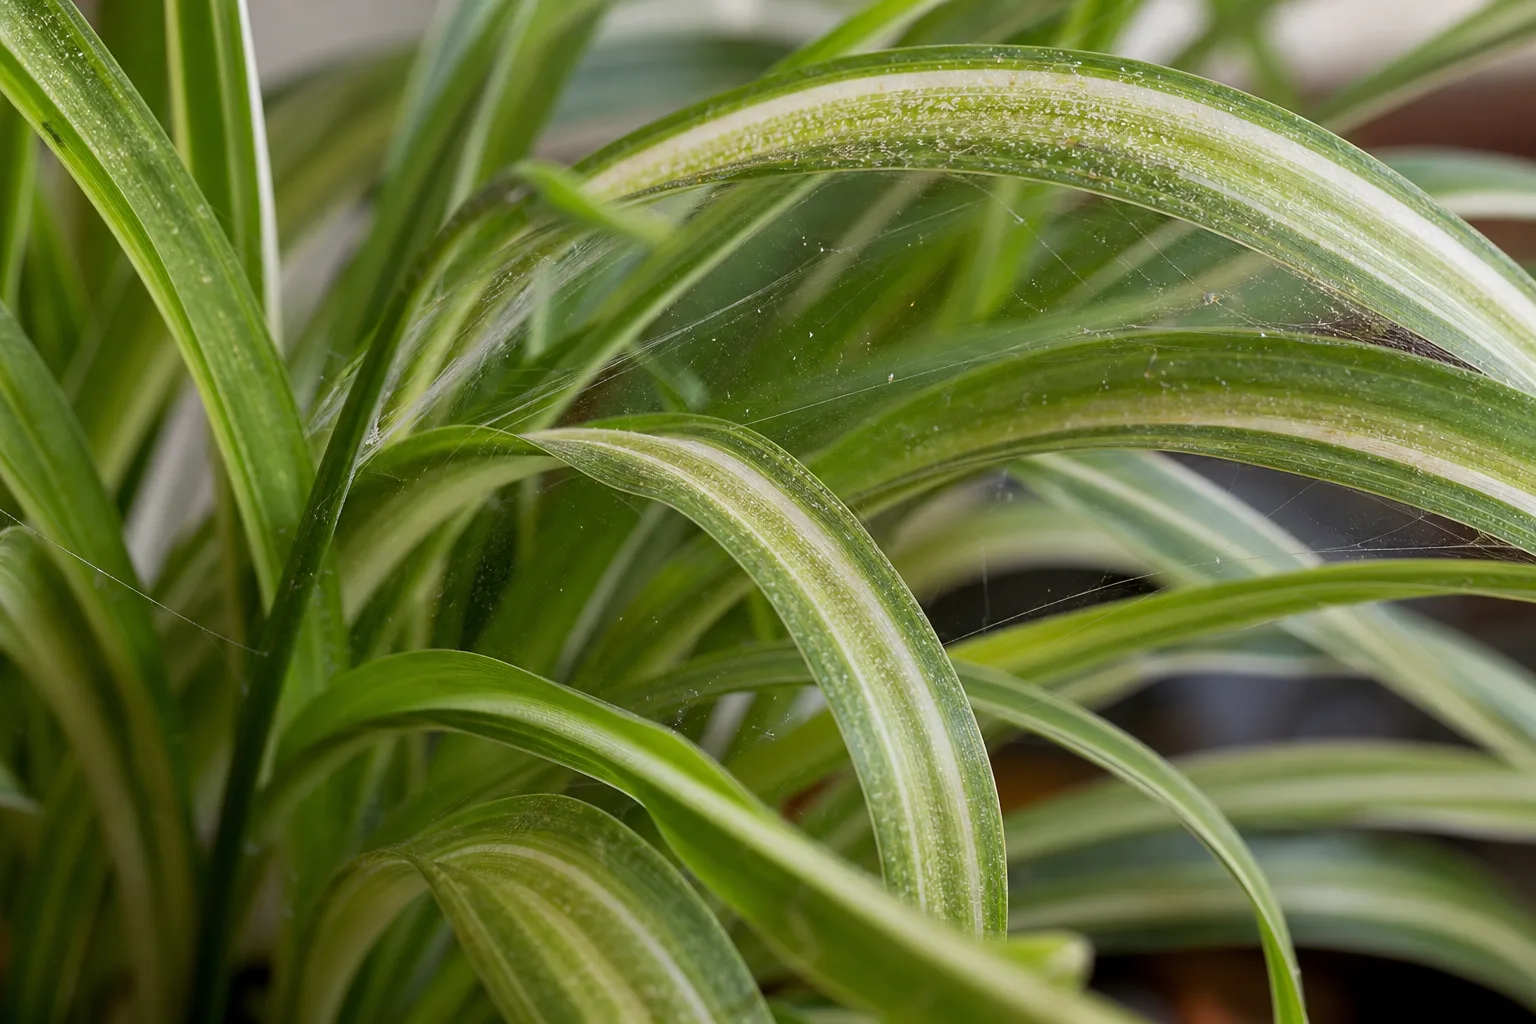
Spider Mites on Spider Plant: Causes, Checks & Fixes
This guide covers spider mites on Spider Plant. See also the general Spider Mites guide, watering, and light pages for this plant.
Spider Mites on Spider Plant: Causes, Checks & Fixes
Quick answer
Spider mites are microscopic sap feeders that multiply fast in warm, dry indoor air. On Spider Plant (Chlorophytum comosum), they show up as yellow or white stippling on long arching leaves, a dull dusty look, and eventually fine silk webbing near the crown and along stolons. Clemson HGIC lists spider mites among the most common insect pests on spider plants, especially when winter heating drops humidity below what Spider Plant overview prefers.
First step: isolate the plant and rinse all foliage thoroughly-undersides of every arching leaf and along stolon tips-before you reach for spray. Mites hide on the backs of strappy blades where hanging baskets make them easy to miss. A strong lukewarm shower in a sink or tub knocks down adults and webbing so you can confirm the pest and see how far it spread.
Do not repot, fertilize, or move the plant to a new window on day one. Confirm mites first, then treat in order.
Why Spider Plant gets spider mites
Spider plants are not uniquely prone to mites, but their typical indoor setup often is. Most growers keep them in hanging baskets near sunny windows or above radiators-both create warm, dry microclimates where twospotted spider mites reproduce quickly. Missouri Extension notes that hot, dry conditions favor rapid mite development, while cooler temperatures and higher humidity slow them down.
Spider Plant’s long grassy leaves give mites plenty of feeding surface. The arching habit means undersides face inward and downward, so stippling on upper blades is what you notice first-by then colonies may already cover hidden undersides. Dense baskets with many overlapping leaves trap heat and reduce airflow, which lets populations build before webbing becomes obvious.
Winter is the danger window for most homes. Spider Plant grows best around 40–60% humidity, but heated rooms often fall to 20–30% for months. The same dry air that contributes to brown leaf tips on this fluoride-sensitive species also weakens leaves and invites mites. Plants moved indoors in fall sometimes carry low-level infestations that explode once furnace heat starts.
Spiderettes on trailing stolons are a second entry point. Mites colonize small plantlets at stolon tips while the parent crown still looks only lightly speckled. If you root infested babies in water or soil, you spread the pest to new pots and back to the parent display.
Stressed spider plants attract damage faster. Chronic overwatering rots tuberous roots and yellows leaves-mite stippling on already-yellow tissue is harder to spot. Underwatering crisps tips and slows new growth, leaving the plant less able to outgrow feeding damage. Fix obvious water stress, but do not mistake cultural yellowing for a pest-free plant without an underside check.
What spider mites look like on Spider Plant
Early feeding:
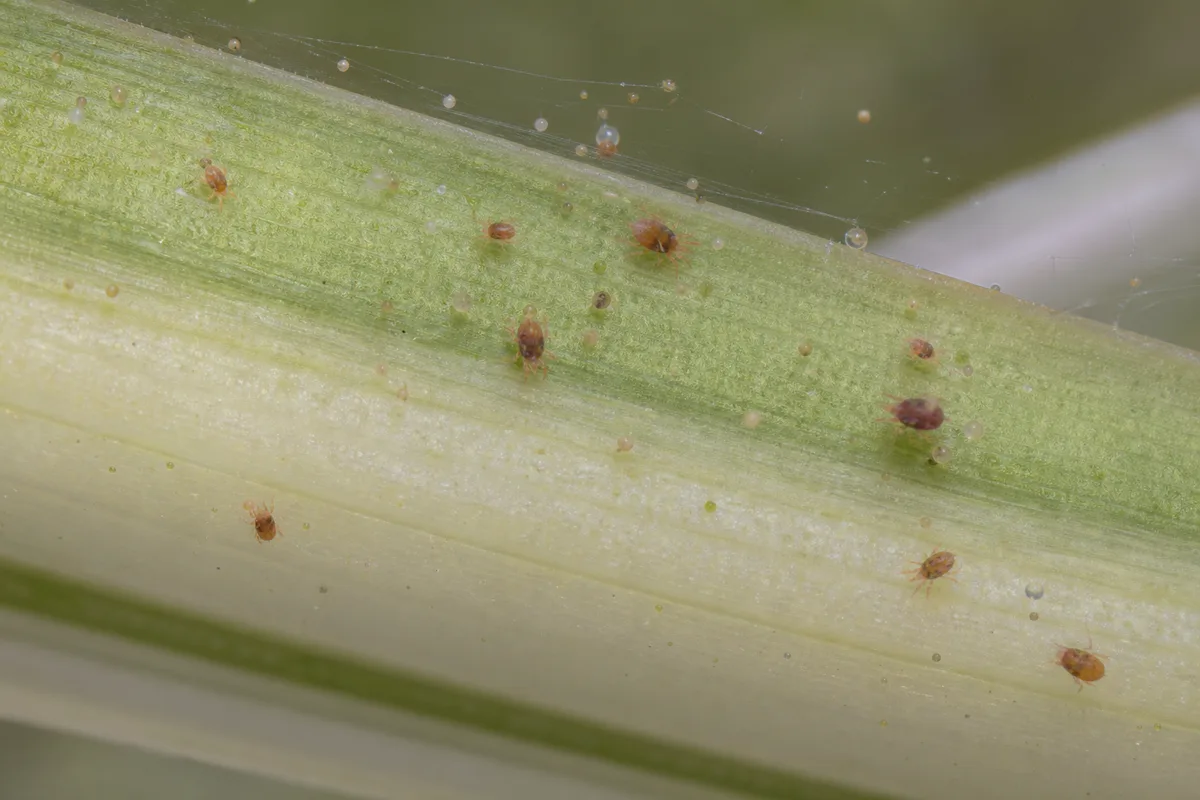
Spider Mites symptoms on Spider Plant - compare with healthy tissue on the same plant.
- Tiny yellow or white dots scattered across upper leaf surfaces-stippling from sap removal
- Leaves look dusty, dull, or slightly bronzed before webbing appears
- Fine pale specks visible on leaf undersides with a hand lens
- Slight curling or limpness on arching blades when feeding is heavy
Established infestation:
- Fine silk webbing at the base of leaves, between overlapping arching blades, or along stolons
- Yellowing that spreads along individual leaves while veins may stay greener briefly
- Brown or tan bronzing on heavily fed blades
- Stippling on small plantlets at stolon tips
- Overall loss of gloss on variegated cultivars-pale stripes show damage sooner than solid green leaves
The paper-tap test: Hold white paper under an arching leaf and tap the blade firmly. Spider mites appear as tiny moving specks on the paper-often described as pepper or dust that crawls. No movement means look for other causes before treating.
Damaged leaf tissue does not recover its green color. Old stippled blades remain marked even after mites are gone. Recovery shows in new crown growth and clean plantlets-not in healed old leaves.
How to confirm the cause
Work through these checks in order:
- Stippling pattern - Mite damage shows as many small dots across the leaf blade. Brown tips limited to the last centimeter of arching leaves point to fluoride, salt buildup, or dry air-not a pest.
- Underside inspection - Lift trailing stems and check backs of upper leaves. Mites, eggs, cast skins, and early webbing concentrate there.
- Paper-tap test - Confirm moving specks on white paper under a tapped leaf.
- Webbing check - Fine silk at leaf bases or stolons confirms established colonies, not just early stippling.
- Stolon and plantlet scan - Examine baby plantlets on trailing stems. Mites often appear here first on hanging baskets.
- Environment check - Note proximity to heating vents, radiators, or hot south- and west-facing glass. Dry warm placement supports mite outbreaks.
- Soil and root check - Press a finger into the mix. Soggy soil and soft tuberous roots suggest overwatering stress layered on top of possible pests. Bone-dry soil and crispy tips suggest drought-still inspect for mites, but do not assume pests if stippling is absent.
If stippling, movement on paper, or webbing are present, treat as spider mites. If none appear and only brown tips show on an otherwise firm plant, see the brown-tips guide instead.
First fix for Spider Plant
Isolate the plant and rinse every leaf surface thoroughly with lukewarm water-especially undersides of arching blades and stolon tips.
Move the basket away from other plants immediately. Spider mites spread on hands, tools, and touching foliage, and dense hanging displays let them walk from stolon to stolon.
Place the pot in a sink or shower. Support arching leaves with one hand and spray from below so undersides get direct water pressure. Pay extra attention to the crown where leaves overlap and to small plantlets on trailing stems. Let water run until webbing loosens and the plant drips clean.
Protect tuberous roots from staying waterlogged. Spider plants have thick fleshy roots that rot easily in chronically wet mix. Cover the pot with plastic or tip it slightly so rinse water does not soak the soil repeatedly. If soil does get saturated, skip watering until the top 2 inches of mix dry-the usual spider plant checkpoint.
Do not apply insecticidal soap or oil on day one before this rinse. You need to see how much damage exists and reduce live mite count mechanically first. Do not fertilize a mite-stressed plant hoping to push new growth-that produces tender tissue mites prefer.
Step-by-step recovery
After the initial isolation and rinse:
- Repeat water rinses every three to five days for two weeks. Mississippi State Extension recommends washing mites off at 3- to 5-day intervals on small plants when practical. Continue until paper-tap tests show no movement.
- Apply insecticidal soap or horticultural oil if colonies persist after several rinses. Cover tops and undersides of all arching leaves and stolon stems. Clemson HGIC notes soap kills by contact only-repeat every four to seven days per label until mites are gone.
- Treat nearby plants on the same shelf or window. Mites travel before webbing is obvious on neighbors.
- Raise humidity around the basket without soaking leaves overnight. A pebble tray or humidifier helps hit the 40–60% range spider plants prefer and makes conditions less favorable for new mite cycles-humidity supports prevention, not cure alone.
- Prune only heavily bronzed leaves that block spray coverage on inner crown growth. Do not strip the whole plant-remaining blades still photosynthesize while new growth emerges.
- Hold off on rooting plantlets until stolons and parent leaves pass clean inspections for two weeks. Rooting infested spiderettes spreads mites to new pots.
- Avoid broad-spectrum insecticides aimed at other pests. Products that kill predatory mites can worsen spider mite flare-ups on indoor collections.
Keep treated plants out of direct hot sun for a few days after oil or soap sprays-arching variegated leaves scorch easily on bright windows.
Recovery timeline
Mechanical rinsing shows results within a few days when populations are still moderate-you should see less fresh stippling on new crown leaves. A full soap or oil course typically takes two to three weeks with label-interval repeats because eggs hatch on a rolling schedule.
Expect old stippled and bronzed arching leaves to remain discolored. Judge success by clean new strappy growth from the center and unstippled plantlets on stolons. Two consecutive paper-tap tests with no movement, one week apart, suggest control is holding.
Severely defoliated baskets may need four to six weeks before they look full again. Spider plants recover from crown damage well if tuberous roots stayed firm throughout-weak roots from concurrent overwatering slow comeback.
Lookalike symptoms to rule out
Brown leaf tips from fluoride or salts affect only the leaf margin, not stippling across the blade. Common on spider plants given straight tap water in dry rooms. No webbing, no moving specks on paper.
Mealybugs leave white cottony clusters in crown crevices and along stolons, plus sticky honeydew-not fine stippling. Individual insects are visible without magnification.
Aphids cluster as soft-bodied groups on new growth and stolon tips with sticky residue. They are larger than mites and do not produce silk webbing.
Dust or hard-water spots wipe off with a damp cloth. Mite stippling is in the leaf tissue and does not wipe away.
Overwatering yellowing often starts from older inner leaves with soft tuberous roots and sour-smelling soil-not speckled upper blades with firm roots.
Mistakes to avoid
Do not spray only the tops of arching leaves. Mites concentrate on undersides and at the crown.
Do not stop after one rinse or one soap application. Eggs survive single treatments-schedule repeats before you declare victory.
Do not soak the pot every time you shower foliage. Waterlogged mix rots spider plant tubers and creates yellow leaves that mimic ongoing mite stress.
Do not root plantlets while parent plants still show stippling or webbing.
Do not move the plant to harsh direct sun to “help it recover.” Midday sun scorches variegated spider plant leaves; mites are the immediate problem.
Do not use homemade dish soap sprays. Commercial insecticidal soap is formulated to reduce leaf burn risk.
How to prevent spider mites next time
Inspect arching leaf undersides monthly-weekly in winter when furnaces run. Hanging baskets hide damage until it is advanced.
Keep baskets away from heating vents and hot window glass that bake dry air into the foliage canopy.
Rinse leaves with plain water during dry months. This dislodges early mites and raises short-term leaf-surface humidity without encouraging fungal issues if leaves dry the same day.
Quarantine new spider plants and other houseplants for several weeks before hanging them near established baskets. Missouri Extension recommends treating new plants before mixing them into collections.
Maintain the 40–60% humidity range spider plants prefer when possible. You do not need a greenhouse-moving baskets off vent blast paths and using a room humidifier in winter often helps.
Check spiderettes before propagating. Clean plantlets root faster and keep the parent display pest-free.
Avoid letting soil stay soggy or bone dry for long stretches. Even moisture supports steady growth that tolerates minor pest pressure better than stressed crowns.
When to worry
Treat as urgent when webbing covers most of the crown, plantlets on multiple stolons show bronzing, or yellowing spreads across a dense basket within a week despite rinsing. Mites on heavily stressed plants with mushy tuberous roots and sour soil need pest control plus watering correction-not rinsing alone.
Consider replacing and discarding a severely defoliated basket in a large mixed display rather than fighting endless reinfestation that spreads to neighboring plants. Spider plants are easy to propagate from clean plantlets-starting fresh from a mite-free offset is often faster than saving a web-choked parent.
A few isolated stippled dots on one lower leaf with no webbing and no spread after your first rinse is worth monitoring-but not ignoring through a dry winter heating season.
Conclusion
Spider mites on Spider Plant announce themselves as stippled arching leaves and fine webbing in dry, warm indoor air-especially on hanging baskets where undersides hide from casual glances. Isolate, rinse thoroughly before you spray, repeat treatments through the mite life cycle, and judge recovery by clean new crown growth rather than old bronzed blades. That path protects your stolons and plantlets while keeping tuberous roots out of waterlogged soil.
When to use this page vs other Spider Plant guides
- Spider Plant watering guide - Use for routine moisture checks before assuming spider mites is the main issue.
- Spider Plant problems hub - Browse all 4 common issues on this species.