Thin Stems on Tillandsia: Normal Shape or a Care Problem?
Quick answer
Thinness alone is not a diagnosis for Tillandsia. Many air plants naturally have narrow leaves and a short stem beneath a rosette; a long stalk may be a flower spike. Compare new growth with the same plant’s earlier shape, then check firmness, color, light, watering, and whether the center dries after watering.
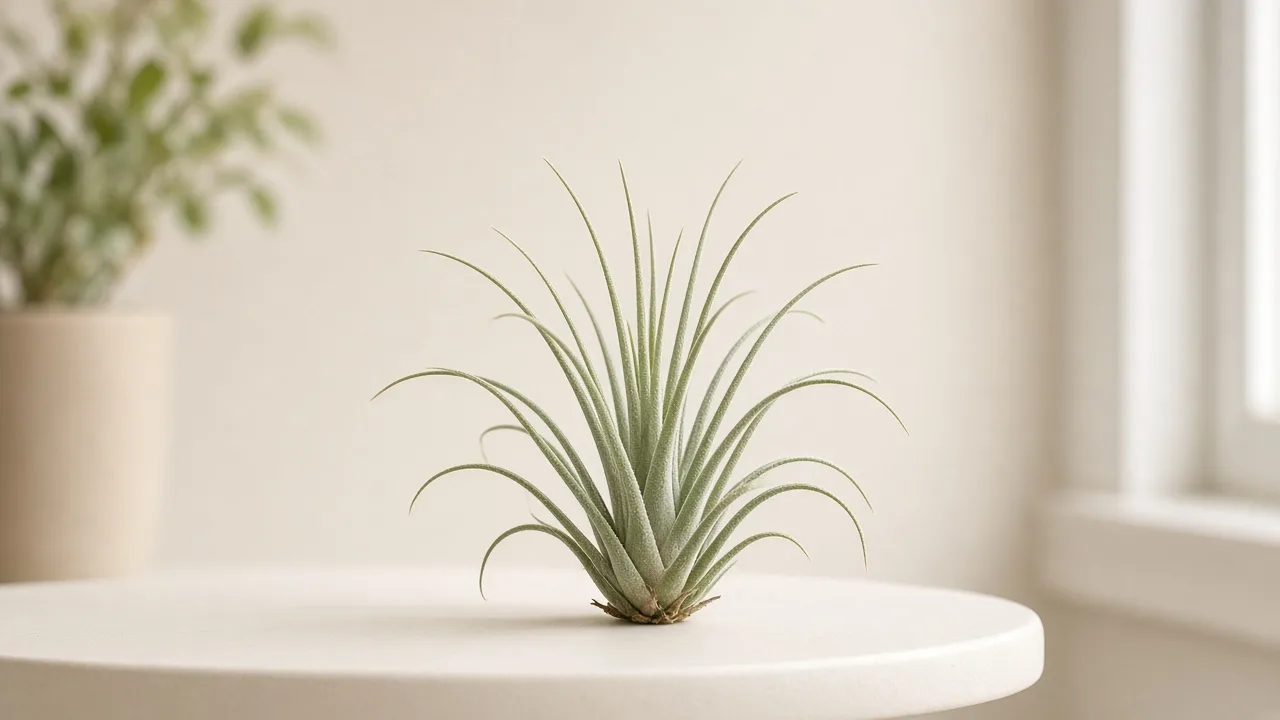
Thin Stems on Tillandsia: Normal Shape or a Care Problem?
This guide covers thin stems on Tillandsia. See also the general Thin Stems guide, watering, and light pages for this plant.
Thin Stems on Tillandsia: Normal Shape or a Care Problem?
Quick answer
“Thin stems” is not a reliable diagnosis for an air plant. Most Tillandsia have a short stem and a rosette of leaves, and many species naturally grow narrow, stiff blades. A long, narrow structure rising from the center may be a flower stalk rather than a weak stem. Start by identifying what part looks thin. If the newest leaves are unusually pale, loose, or stretched compared with the same plant’s earlier growth, review its light and watering; if the base is soft or dark, check for rot.
For shared symptoms across plants, see the thin-stems symptom guide. For plant-specific checks, compare with the Tillandsia overview and the Tillandsia problems hub.
Why “thin stems” can be a misleading label
Tillandsia is a large, varied genus. North Carolina Extension describes more than 600 species, typically growing as rosette bromeliads with different leaf shapes and sizes; it also describes the stem as usually short and simple. UF/IFAS notes that many air plants have thin, stiff, scale-covered leaves. Those traits can look spindly if you expect every plant to make a thick, upright trunk, but they are not symptoms by themselves.
The better question is whether this particular plant has changed. Compare the most recent leaves with older leaves on the same rosette. Are new leaves much narrower, longer, paler, or less firm? Is the center still producing leaves? Is the plant stable at its base? A healthy species-specific form can be narrow, curved, hanging, or asymmetrical; Arkansas Extension describes Tillandsia forms ranging from a few slender leaves to many-leaved rosettes. A sudden change in new growth deserves a closer check.
First identify the structure
Look from the base outward before changing care. A typical rosette has leaves emerging around a central growing point, with the stem tucked low between their overlapping bases. Some Tillandsia have a more visible or elongating stem, while others make compact star-shaped clusters. UF/IFAS Extension’s profile of Bartram’s air plant describes thin gray leaves clustered densely around the plant, a useful example of a narrow-leaved form that is normal for that species.
A central stalk that rises above the leaves may be an inflorescence. Tillandsia flower stalks can be slender, tall, or branched, and colorful bracts may appear before the flowers. North Carolina Extension notes that some species flower among the leaves while others produce long inflorescences. Do not cut a firm stalk simply because it looks thin; first check for bracts, buds, or flowers.
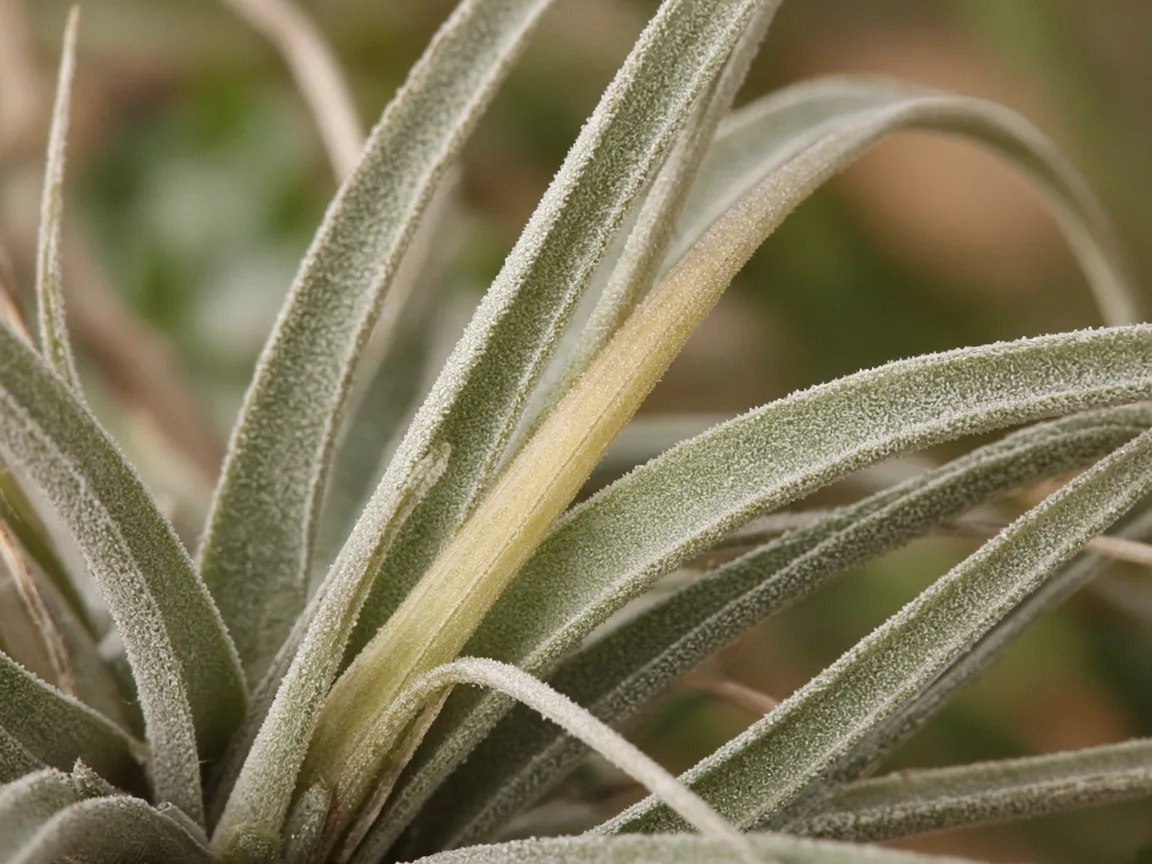
Tillandsia leaves emerge in overlapping layers from the rosette center; their narrow shape and silvery scales are often normal.
Normal narrow leaves versus weak new growth
| What you notice | What it may mean | What to check |
|---|---|---|
| Narrow, firm leaves with an even silver or gray-green surface | Normal species form | Compare the rosette with the same species or cultivar, not with a broad-leaved Tillandsia |
| A slender stalk with bracts or flowers at its tip | Flowering | Let the flowering cycle finish; watch for pups near the base |
| New leaves becoming longer, paler, or more widely spaced than earlier leaves | Possible light or growth-condition mismatch | Review light direction and recent changes; compare several new leaves |
| Curled or rolled leaves that look dull or dry | Possible dehydration | Check the watering method, frequency, and whether the plant is drying too fast |
| A soft, dark, or mushy base, especially with loose inner leaves | Possible basal rot | Remove trapped water, improve drying, and isolate the plant while assessing damage |
No single leaf-width measurement separates a healthy Tillandsia from an unhealthy one. UF/IFAS describes thin, stiff leaves as typical of many species, while Arkansas Extension documents naturally narrow-leaved forms. Judge a suspected change from the plant’s own earlier growth, the condition of the base, and whether several signs occur together.
Why new growth may become unusually thin
Light may be too weak for the species
Light tolerance varies among Tillandsia. A rosette that steadily turns toward a window, with newer leaves becoming longer or more open than older ones, may be responding to its placement. The University of Wisconsin–Madison Extension notes that many bromeliads form more compact growth and better color under brighter light, while also recommending gradual acclimation because species differ in how much light they tolerate.
Check whether the plant is several feet from a bright window, shaded by a shelf, or kept in a dim enclosed display. Compare its position with the plant’s normal growth direction. Move it closer to bright, filtered light in small steps; do not place a shade-grown plant into strong midday sun all at once. Use the Tillandsia light guide to review placement before making a larger change.
Water may not be reaching the leaves consistently
Tillandsia absorb much of their water through leaf scales rather than through soil-feeding roots, while roots mainly help the plant attach to a support, as UVM Extension explains. If the plant receives only a light surface mist, dries extremely quickly, or is left in a very dry room, new growth can be affected. University of Illinois Extension lists curled or rolled leaves and dull color among signs of a dry air plant. That pattern is more informative than narrow leaves alone.
Watering approaches vary by species and room. UF/IFAS describes a thorough weekly misting that wets the leaves and then allows the plant to dry between waterings; University of Vermont Extension describes soaking as another option and stresses draining the plant so water does not remain trapped. Follow the method that fits your plant and environment, and adjust only after checking how long it takes to dry. The Tillandsia watering guide explains the routine in more detail.
Water may be staying trapped in the center
Thin leaves do not indicate rot, but a soft base or inner leaves that loosen easily are warning signs. Water can collect between overlapping leaf bases, especially if the plant is placed back in a closed container while wet. After rinsing or soaking, shake out excess water and leave the plant in an airy position until the center is dry. Avoid mounting it on a surface that holds a puddle or placing it in a sealed globe. UF/IFAS and UVM Extension both advise allowing air plants to dry between waterings and preventing water from remaining in the plant.
If the base is firm and the leaves are intact, do not assume the plant has rot just because its silhouette looks delicate. If the base is mushy, dark, or smells sour, isolate it, stop leaving water in the center, and inspect carefully. UVM Extension advises draining soaked Tillandsia and preventing water from remaining in leaf crevices. A plant with spreading basal decay may not recover, so judge it by the firmness of the central growth rather than by leaf width.
Flowering or an older parent may change the silhouette
Tillandsia often produce a flower stalk from the center, and many species make offsets, or pups, around the base. After flowering, the mother rosette gradually declines while pups continue growing. UF/IFAS and Illinois Extension describe this as a normal life-cycle pattern. A slender stalk near flowering or a fading older rosette beside healthy pups does not mean the plant is becoming weak from poor care.
Check whether the apparent “stem” began growing from the center and carries bracts, or whether small rosettes are forming at the base. Keep caring for the plant while the flowering cycle finishes. Do not cut away a healthy flower stalk or remove pups prematurely just to make the plant look fuller.
How to check your Tillandsia
- Identify the part that looks thin. Follow the structure to its origin. Leaves radiate from the rosette; a flower stalk rises from the center and may have bracts or buds.
- Compare new and old growth. Look at several leaves that emerged recently. Note whether they are consistently narrower, paler, softer, or more spread out than previous leaves.
- Feel the base gently. Support the plant rather than pulling on it. A firm center is reassuring; a soft, dark, or easily collapsing base warrants closer attention.
- Review light history. Note whether the plant has been moved farther from a window, shaded by another object, or placed in a darker display. Change light gradually.
- Review watering and drying. Record whether you mist, rinse, or soak, how often, and whether water remains between the leaves afterward. Compare the pattern with the watering guide.
- Check the display. Tillandsia roots mainly anchor the plant to a support; they do not need potting soil to make a thicker stem. Use a mount that holds the plant securely without covering its base or trapping water. See the soil and mounting guide.
What to do first
If the plant is firm and the leaves match its species form, leave its structure alone. Confirm its name or cultivar and keep the care stable. Thin leaves that have already grown will not become broader, so judge any improvement by the next leaves.
If the new growth is stretching toward one side, move the plant gradually to brighter filtered light. If leaves are curled or dull, adjust watering so the foliage is thoroughly wetted, then drain and dry the plant well. If the center is soft or waterlogged, remove it from any closed holder and let it dry in moving air while you inspect the affected leaves. Make one change at a time so you can tell whether new growth improves.
Do not add fertilizer as a quick fix. University of Vermont Extension says air plants do not require fertilizer; if a grower chooses to use it, the product should be formulated for air plants and applied according to its label. Extra feeding will not thicken older leaves and may add stress when the plant is dehydrated or rotting.
What recovery looks like
Existing leaves do not widen after they have matured. Better signs are a firm center, healthy color for the species, and new leaves that follow the plant’s usual shape. Tillandsia grow at different rates, so do not expect an immediate change after moving the plant or adjusting watering. Keep the conditions steady and compare later growth with the same rosette.
If the plant is flowering, the parent may slowly fade as pups develop. If the base remains firm and the pups are growing, this can be a normal transition rather than a failed recovery. If you see continuing softness, spreading dark tissue, or repeated collapse of inner leaves, review the Tillandsia stem-rot guide or ask a local extension office to assess a clear photo.
What not to do
- Do not cut healthy narrow leaves or a developing flower stalk just to make the plant look thicker.
- Do not bury the base in potting soil; Tillandsia are epiphytes and their roots mainly attach them to a support.
- Do not force a shade-grown plant into hot direct sun. Increase light gradually and watch for bleaching or scorch.
- Do not mist repeatedly while water remains trapped in the rosette.
- Do not diagnose a disease from leaf width alone; compare new growth, light, hydration, and base firmness together.
Preventing weak-looking growth
Choose a Tillandsia suited to the display and the light you can provide. Keep it in bright filtered light that matches the species, water thoroughly using a method that suits your room, and let it drain and dry before returning it to a holder. Leave open space around the rosette so air can move through it. During warm or dry periods, check the plant more often; during cooler or darker periods, make sure it still dries fully before repeating a soak.
Keep a simple record when growth changes: date, placement, watering method, and whether the center dried. That makes it easier to separate a natural species shape, flowering stalk, or post-bloom cycle from a care change. Browse the Tillandsia problems hub if other symptoms appear, or use the Plant Problem Diagnosis Tool to compare causes before changing several conditions at once.
Conclusion
Many Tillandsia have naturally thin leaves and short stems; some produce long, slender flower stalks. Treat a change in new growth as a prompt to check the plant, not as a diagnosis by itself. Compare the rosette with its own earlier growth, review light and water, and make sure the base stays firm and dries well. Correct the condition you can confirm, then judge the next growth rather than trying to thicken mature leaves.
Related Tillandsia guides
- Tillandsia overview
- Tillandsia watering
- Tillandsia light
- Tillandsia soil and mounting
- Leggy growth on Tillandsia
- Plant leaning on Tillandsia
- Tillandsia problems hub
Related tool
Use the Plant Problem Diagnosis Tool to compare visible signs and care history before changing multiple variables.