Blood Lily Care: Growing *Scadoxus multiflorus*
Learn blood lily care for *Scadoxus multiflorus*: light, potting depth, seasonal watering, dormancy, propagation, winter protection, and safe handling.
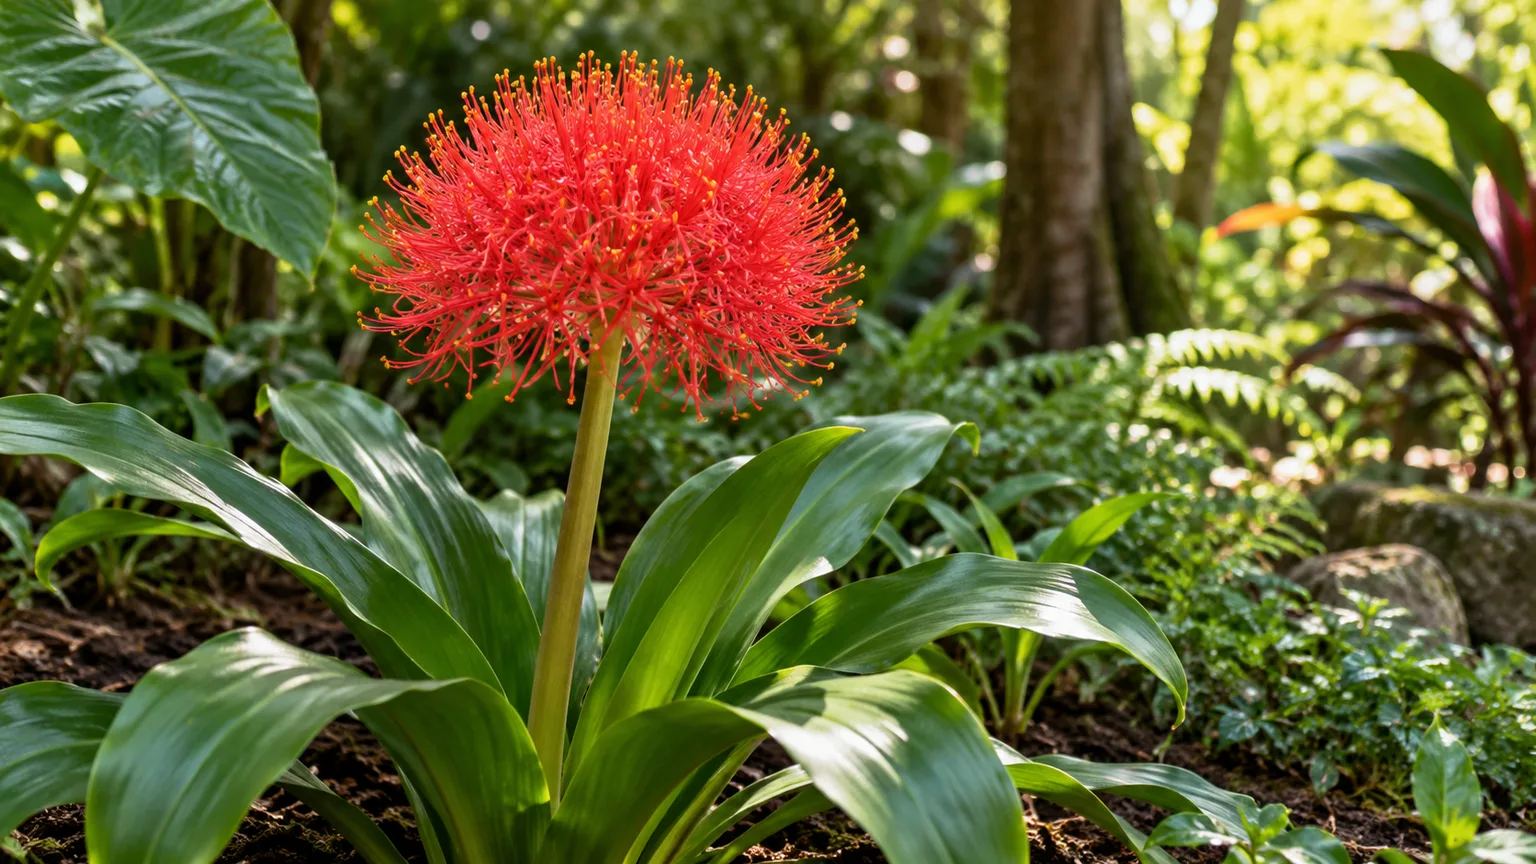
The blood lily (Scadoxus multiflorus) is a tender bulbous perennial grown for a spectacular globe of scarlet florets with long, yellow-tipped stamens. Its seasonal rhythm is the key to keeping it: give the bulb bright light, warmth, and steady moisture while it is growing, then taper water when growth stops. A leafless or quiet bulb is not automatically dead, but keeping it wet through its resting period can rot it.
This African ornamental can live outdoors year-round only in reliably warm regions; gardeners in colder climates usually grow it in a pot they can move before chilly nights. It is also toxic if eaten, especially the bulb, so choose a place children and pets cannot reach. The guidance below focuses on S. multiflorus, rather than every plant sold under the broad common name “blood lily.”
Know Which “Blood Lily” You Have
“Blood lily” is a common name used for more than one plant. This guide covers Scadoxus multiflorus, formerly called Haemanthus multiflorus, in the amaryllis family. It is not a true lily (Lilium). A nursery tag with the botanical name is useful because another species or hybrid sold under a similar name may differ in size, bloom timing, and cold tolerance.
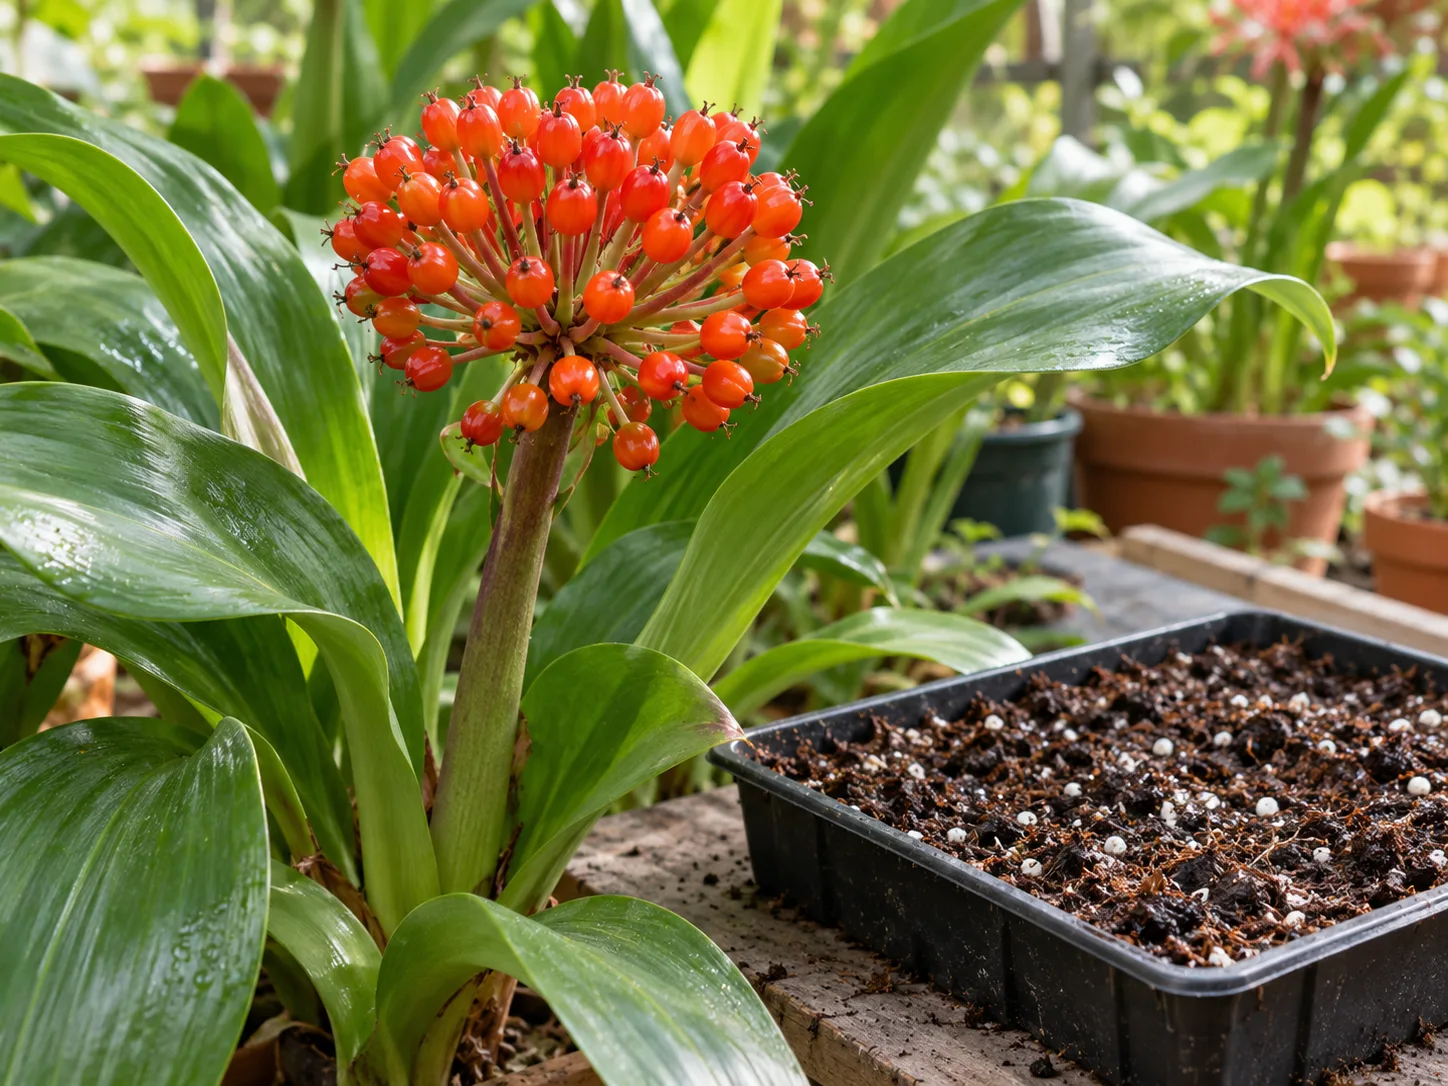
The flower is a terminal umbel: many small, narrow-petaled florets form one rounded head, often several inches across. A bulb typically makes one flower head in a season and a fan or rosette of broad green leaves; small orange-red berries may follow pollination. The flower stalk and foliage do not always emerge together, so the plant may look different from month to month even when healthy.
NC State Extension and the Missouri Botanical Garden describe the species as an African and Arabian bulbous perennial with showy red umbels and fruit.
The National Gardening Association’s broad guide to blood lilies discusses several species in Scadoxus, reinforcing why a common name alone is not enough to select care details. Here, the target is specifically S. multiflorus.
Blood Lily Care at a Glance
| Growing need | Practical starting point |
|---|---|
| Light | Bright indirect light indoors; morning sun or partial shade outdoors |
| Temperature | Warm growing conditions; move a pot indoors before nights approach 50°F (10°C) |
| Soil | Moisture-retentive but sharply draining potting mix with added grit or perlite |
| Planting | Bulb upright, with its neck at or just above the mix; never leave it in a water-filled cachepot |
| Active-season water | Water thoroughly when the surface begins to dry; empty the saucer |
| Resting-season water | Reduce sharply; keep a potted dormant bulb barely moist rather than continuously wet |
| Fertilizer | Dilute balanced feed about monthly while leaves are actively growing |
| Repotting | Infrequent; move it only for crowding, a failing mix, or a damaged pot |
| Safety | Ornamental plant, not edible; keep bulb, berries, and clippings away from pets and children |
These are starting points, not a calendar. A plant in a small clay pot in a sunny, warm room dries faster than the same bulb in a large glazed pot in a cool room. Check the mix and the plant’s growth stage before watering or feeding, and use the coldest local forecast to decide when to move a container.
Choose Warmth and Filtered Light
Give a blood lily bright light without a long stretch of scorching midday or late-afternoon sun. Outdoors, morning sun followed by light shade is a reliable choice in hot climates; partial shade is also suitable. Indoors, place the pot near a bright east- or west-facing window, or set it back from a harsh south-facing window where leaves would be exposed to strong glass-amplified heat.
Low light can produce leaves without a strong flowering display, especially if the bulb has not built enough reserves. But more sun is not always better: sudden exposure to full summer sun can scorch foliage. If a plant has been indoors, acclimate it gradually over a week or two before leaving it outside, beginning in shade and increasing morning light while watching for bleached or crisp patches.
Warmth matters just as much. NC State Extension classifies the species as tender and warns that outdoor temperatures below about 50°F (10°C) can injure it. USDA zones 9–11 are a broad indication of where it may be grown in the ground, not a guarantee for an exposed yard; a cold pocket, prolonged wet winter, or surprise frost can still damage a bulb. A movable container offers the safest option if autumn nights cool early.
Plant the Bulb at the Right Depth
Use a container with open drainage holes and a potting mix that holds some moisture but does not stay saturated. A loam-based mix amended with horticultural grit or perlite provides more air around the bulb than dense garden soil. A pot only modestly wider than the bulb is easier to manage than an oversized container, which holds more wet mix around roots that are not yet using it.
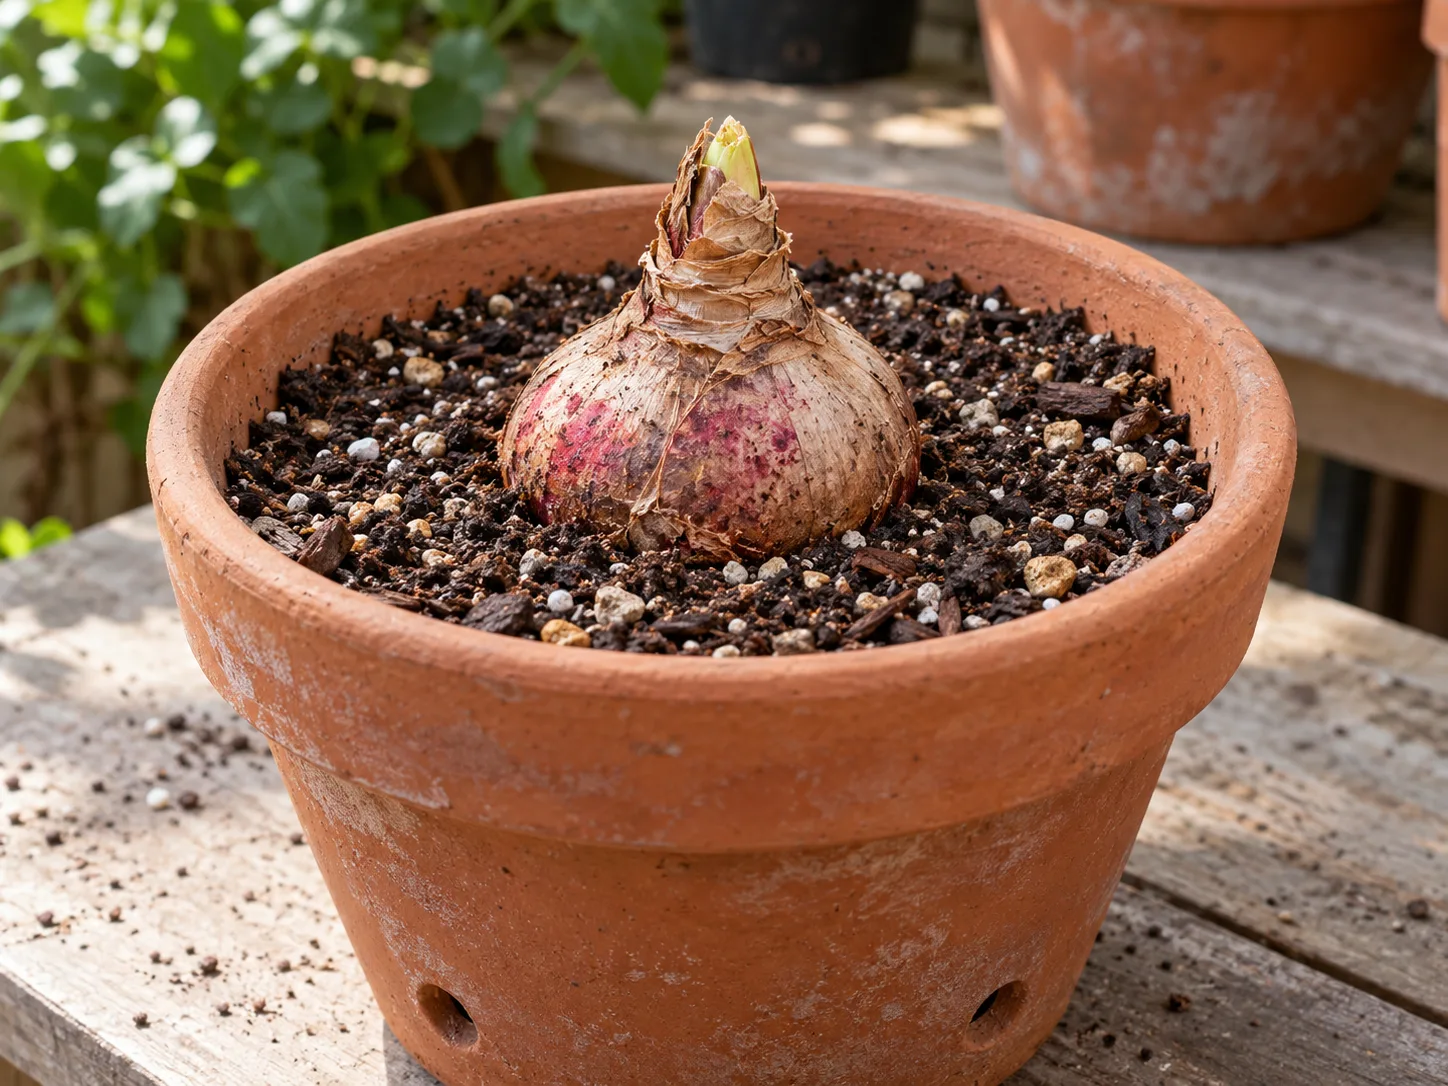
Set the bulb upright, with the root end down and neck at or just above the soil surface; cover the lower portion without burying the neck deeply. Recommendations vary with bulb size and growing situation, so use the bulb’s visible neck as your reference instead of forcing every bulb to a fixed depth. Water once to settle the mix, let it drain completely, and then wait for growth before returning to a regular active-season watering routine.
Set Up a Container
Container growing is the most practical choice where winter temperatures fall below the plant’s comfort range. It also makes it easier to keep a toxic bulb away from children or pets and to move the plant into bright shelter without lifting it from the ground. A heavy pot can be awkward to relocate, so choose a manageable size and set it on a wheeled base if needed.
Do not use a decorative cachepot as the only vessel unless the nursery pot drains freely and you remove standing water after irrigation. A layer of stones at the bottom does not fix a pot without drainage; water needs an unobstructed exit. When the soil drains slowly, use a coarser mix or a container with more drainage rather than watering less often and hoping the problem disappears.
Plant Outdoors Only Where Winters Stay Mild
In a warm, frost-free garden, plant after the soil warms in spring in a sheltered bed with organic matter and sharp drainage. NC State Extension lists planting outdoors after the last frost and describes a roughly 1-inch planting depth; the RHS recommends placing dormant bulbs with their necks at soil level. In practice, follow the size and shape of the bulb and leave the neck at or slightly above grade rather than burying it deeply.
Avoid a low spot where rainwater collects, especially during cool weather. If your soil is heavy clay, growing in a pot or raised bed is generally safer than trying to turn a poorly drained patch into a bulb bed with a small amount of sand. In the coldest parts of the plant’s range, leave room to lift bulbs before the first frost or choose container culture from the start.
Water by Growth Stage
During active leaf and flower growth, keep the root zone evenly moist but never waterlogged. Check the upper inch of mix; when it begins to dry, water slowly until excess runs from the drainage holes, then empty the saucer.
In a garden bed, rain may do part of the work, so feel the soil before adding more water. Heat, wind, pot material, and plant size all change how quickly the mix dries. This stage-based approach matches the practical guidance in Gardener’s Path’s blood lily growing guide, which recommends even moisture during growth and less water as foliage dies.
The bulb’s resting period calls for a different response. As leaves naturally yellow and die back, reduce irrigation; do not continue the active-season schedule just because the surface appears dry. A potted dormant bulb needs far less water and should not sit in wet compost.
Keeping the mix barely moist in a warm indoor setting can prevent the bulb from shriveling. A lifted bulb stored cool and dry follows a different storage routine, described below.
If the plant is soft at the base or the bulb smells sour, stop watering and inspect drainage promptly. A dry-looking surface can conceal saturated mix at the bottom of a tall pot. Use a finger or wooden skewer deeper in the root zone, and do not add water until the medium has begun to dry and the bulb is still firm.
Read the Flower and Leaf Cycle
Blood lilies are often described as flowering before their leaves, but the timing can vary with the plant, growing conditions, and the phase in which you bought it. A flower stalk may rise from a quiet bulb, leaves may follow, or foliage and flowers may overlap. That variation is a reason to observe the bulb rather than diagnose health from a single calendar date.
After bloom, the green leaves are doing important work: they replenish the bulb for the next cycle. Do not cut healthy foliage simply because the flower has faded or because the plant looks less dramatic.
Remove the spent flower stalk only if you do not want berries; leave it if you want seed, and remember the fruits are not food. Once the leaves yellow naturally, remove them with clean snips and begin reducing water.
A new pot or recently divided offset may need time to mature before it flowers. The flowering display is a stored-energy result, not a direct reward for a heavy dose of fertilizer. Keep the bulb warm and healthy through its leaf stage, then let its growth slow naturally rather than forcing a dry rest while the leaves are still green.
Feed While Leaves Are Active
A modest, balanced liquid fertilizer is enough for a container blood lily. Apply a dilute dose roughly once a month while the plant is actively growing, following the product label, and stop when leaves begin to die back. The RHS recommends a dilute balanced feed during growth; its species profile also cautions that a plant in a congested pot is not helped by routine repotting.
Do not treat a high-phosphorus “bloom booster” as a shortcut to flowers. A weak display can reflect insufficient light, a young offset, cold stress, waterlogged roots, or a bulb that has not yet recovered from its last flowering. Correct the condition first, since excess fertilizer can leave salts in the potting mix and damage roots, particularly when the plant is dormant and not taking up much water.
If the mix is old but the bulb is healthy, a light top-dressing of fresh compost or a gentle repot in spring may be more useful than repeated feeding. Keep fertilizer granules away from direct contact with the bulb and never apply a concentrated solution to dry roots.
Protect the Bulb Through Winter
The plant’s tender nature makes winter planning essential, even for growers who live in a nominally suitable hardiness zone. Decide early whether you will keep the bulb in a portable pot or lift it from a garden bed. Move a container before nights approach 50°F (10°C), rather than waiting for visible cold injury; protect it from drafts and do not leave it in a cold garage that can freeze.
Keep a Potted Plant Through a Cool Season
When growth slows, move the pot to a frost-free place with bright indirect light or the light level appropriate to its remaining foliage. Reduce water as leaves fade and give little to none while the bulb is fully dormant, adjusting only enough to prevent the pot from becoming bone dry in a warm indoor space.
Do not fertilize during rest. Resume more regular water only when a new shoot or leaf growth is visible.
A warm house can blur the plant’s seasonal cues; that does not mean it needs a weekly drench. If the pot remains warm and the bulb keeps growing, continue restrained active-season care.
If the foliage has died back and the bulb is resting, keep the mix much drier. Do not force dormancy by cutting green leaves or placing the plant in a cold, dark spot.
Lift and Store an In-Ground Bulb
In climates with frost, let foliage yellow naturally, then lift the bulb before freezing weather. Wear gloves, loosen the soil around the root area, and lift carefully to avoid slicing or bruising the bulb. Brush off loose soil and allow the bulb to dry in a ventilated, shaded place; do not store it wet in a sealed plastic bag.
NC State Extension and the Missouri Botanical Garden describe overwintering lifted bulbs in a dry, cool area around 50–60°F (10–16°C), packed in peat or similar dry storage material. A paper bag or ventilated box with dry packing medium prevents condensation better than an airtight container. Check the bulb occasionally: firm is good; soft, wet, or foul-smelling tissue signals rot and should be separated from healthy bulbs.
Repot Only When the Plant Needs It
Blood lilies can flower well when slightly congested, so do not repot on a rigid annual schedule. Move the plant when offsets are pressing hard against the pot, roots are crowding through the drainage holes, the mix has broken down and drains poorly, or the container is cracked. Spring, as growth resumes, is generally less disruptive than repotting during flowering or while a dormant bulb is being stored.
Choose a clean pot only a little larger than the root-and-bulb mass. Ease the plant out while supporting the bulb and roots; do not pull it up by a leaf or flower stem. Replant at the same depth, use fresh draining mix, water once to settle it, and then avoid repeated disturbance while it re-establishes.
If the plant has a small offset, you do not need to separate it immediately. Leaving a young offset attached gives it time to build size and reduces the chance of damaging the mother bulb during an unnecessary division. Repotting is a maintenance decision, not a way to make an otherwise healthy plant bloom sooner.
Propagate With Offsets or Fresh Seed
Offsets are the straightforward way to make another plant with the same traits as the parent. Seed is slower and may not reproduce a named cultivar exactly, but it is useful when a plant has set fruit. Either method requires patience; a new bulb may take multiple seasons to reach flowering size.
For offsets, work in early spring as growth starts or while the plant is being repotted for a real reason. Wear gloves, expose the connection gently, and separate only an offset with its own base and roots using a clean, sharp blade.
Pot it at the correct depth in a small container with drainage and keep the mix lightly moist as it establishes. Avoid making several tiny wounds by tearing immature offsets apart.
For seed, wait for berries to turn orange-red and become ripe enough to detach easily. Wear gloves, remove the pulp, and sow fresh seed on the surface of a moist, airy mix; press it gently into contact rather than burying it deeply. Keep the tray warm and in bright indirect light, maintaining moisture without saturating it.
RHS propagation guidance recommends sowing seed as soon as it is ripe and germinating it at 19–24°C (66–75°F). Seedlings develop slowly, so plan on several years rather than expecting an immediate flowering bulb. Do not save or eat berries as if they were culinary fruit.
Troubleshoot Poor Growth and Missing Flowers
Start with the bulb and the season, not a fertilizer bottle. A firm bulb with no leaves may be resting or warming up; give it time and do not keep it wet to “wake it.” A soft, collapsing bulb or sour smell is more consistent with rot, while a bulb that has become very light and shriveled may have been stored too dry or warm for too long.
If foliage appears but there are no flowers, check the likely causes in this order: the bulb may be an immature offset; the plant may receive too little bright light; the previous season’s leaves may have been cut too early; or the bulb may have been stressed by cold, excessive water, or root disturbance. Improve the condition that fits what you see, then let a full growing cycle pass. A bulb cannot necessarily replace lost energy within a few weeks.
Pests are not usually the main challenge, but indoor plants can attract mealybugs or spider mites, and outdoor leaves may be chewed by slugs or snails. Look under leaves and around the base, isolate a container with a spreading infestation, and remove small pest populations manually or with a rinse. If you use any pesticide, identify the pest first and follow the product label; never apply a treatment to a flowering plant without checking pollinator directions.
Yellowing has different meanings at different times. One or two aging leaves during a natural seasonal slowdown may be normal, while sudden widespread yellowing in wet mix points toward root stress. Inspect soil moisture, drainage, and bulb firmness before removing foliage or changing the fertilizer routine.
Handle Blood Lily Safely
Treat blood lily as an ornamental, not an edible plant. NC State Extension says the bulb contains lycorine and other alkaloids and lists salivation, nausea, vomiting, and diarrhea among possible effects after ingestion. The Royal Horticultural Society warns that ornamental bulbs must not be eaten and advises protective equipment when handling them. Toxicity can vary by plant part and exposure, so do not assume that berries or leaves are safe because a source emphasizes the bulb.
Place the pot where children and pets cannot chew leaves, berries, or the bulb. Wear gloves when lifting or dividing it, wash tools and hands afterward, and discard clippings securely. If a child or animal may have eaten any part, contact a medical professional or veterinarian promptly and provide the botanical name Scadoxus multiflorus; do not wait for symptoms or attempt a home remedy.
Conclusion
Blood lily care becomes simpler once you match water to the plant’s growth stage and plan for its limited cold tolerance. Start with Scadoxus multiflorus on the label, choose bright filtered light and a draining mix, and keep an active plant evenly moist without leaving its bulb in soggy soil. Let green leaves finish their work after bloom, reduce water when they fade, and bring the pot indoors before cool nights can injure it.
In colder regions, a container is usually easier to protect than an in-ground bulb. In warm gardens, drainage and a frost-aware location still matter. Keep the toxic bulb and berries away from children and pets, and you can enjoy the plant’s striking seasonal flowers without treating its unusual cycle as a mystery.



