When to Prune Clematis: A Clear Guide to All Three Groups
A clear clematis pruning guide for groups 1, 2, and 3, with seasonal timing, cut heights, dead-stem checks, and a low-risk plan when the label is missing.

The right time to prune a clematis depends on when it flowers and whether those flowers form on last year’s stems or this year’s growth. Cut a spring-flowering vine too early and you may remove its flower buds; leave a late-flowering vine untouched for years and flowers can accumulate high above a bare, tangled base.
You do not need to memorize a long list of cultivar names before making a safe decision. First look for the plant label or cultivar name. If it is missing, use the flowering time as a guide, remove only growth that is clearly dead or broken, and wait to see how the vine blooms before making a major cut.
The rule that prevents lost flowers
Clematis pruning groups describe two related things: when a plant flowers and what age of stem carries the flowers. “Old wood” means stems produced during the previous growing season. It does not mean that every stem must be thick, brown, or several years old. “New wood” is growth made during the current season.
That distinction explains most clematis pruning advice. A plant that blooms on old stems needs those stems kept through winter. A plant that flowers on new growth can be cut back before it starts growing, because it will make flowering shoots after pruning. Some clematis do both, so a light, selective approach protects the early flowers while allowing a later flush.
The Royal Horticultural Society’s clematis pruning guide and University of Illinois Extension both organize pruning by these flowering habits. Use the group as the starting point, then adjust the month to your weather and the vine’s actual stage of growth.
Identify the vine before you cut
If you know the cultivar, finding its pruning group is usually the simplest route. The plant tag may give a group number, and a reliable nursery or botanical reference can confirm the cultivar’s typical flowering period. Keep that information with a garden map or photo; a phone picture of the label can save guesswork years later.
If you cannot find the cultivar, note when the vine first flowers, whether its flowers appear on stems that overwintered, and whether it produces another flush on fresh shoots. Those observations are more useful than flower size or a generic “clematis” label. The RHS growing guide describes the three groups by their flowering season and the growth on which flowers form.
Find the cultivar and confirm its group
Look near the base and along the support for a nursery tag, then check purchase records, garden notes, or an old photo. Names such as Clematis montana and Clematis alpina are commonly in Group 1; large-flowered hybrids often belong to Group 2; Clematis jackmanii and many Clematis viticella selections are typical Group 3 plants. These are useful clues, not a substitute for confirming a named cultivar, because a genus contains many forms and some varieties have unusual or extended bloom periods.
When a plant label lists a letter instead of a number, the common equivalents are A or 1, B or 2, and C or 3. Sources and regional references can differ in how they classify particular hybrids, especially plants with a long or double flowering season. If two reliable references disagree, preserve the stems that could carry the earlier flowers and prune selectively rather than forcing the vine into a group based on one date.
Use bloom timing if the label is gone
Watch the plant through one full season before doing anything more than sanitation pruning. A vine that flowers very early in spring on stems that survived winter is likely an old-wood bloomer. A large-flowered vine that begins in late spring or early summer and may bloom again later is often Group 2. A vine whose main display begins in mid- or late summer on fresh shoots is usually Group 3.
Timing is a clue, not an infallible identification test. Local climate can move flowering by several weeks, and a late spring can make a plant seem to belong to a later group than it does. Take a photo when buds open and again when new shoots appear; compare those dates with the vine’s structure rather than relying on one month printed in a general guide.
The three clematis pruning groups
The table gives the practical difference between the groups. The calendar dates assume a temperate Northern Hemisphere garden; the underlying rule is to prune after old-wood flowering or before new-wood growth begins.
| Group | Typical flowering and flowering wood | Routine pruning |
|---|---|---|
| 1 | Late winter or spring; flowers on last season’s stems | Little or none. Shape or thin after flowering. |
| 2 | Late spring or early summer; flowers on short shoots from old stems, often with a later flush | Remove dead tips before growth; lightly trim spent flowers after the first flush. |
| 3 | Mid- to late summer; flowers near the ends of current-season shoots | Cut back hard in late winter or early spring, leaving a low framework with live buds. |
These definitions align with the RHS pruning guide and Fine Gardening’s practical overview. A plant’s cultivar remains the best confirmation when the bloom period is unusual.
Group 1: spring flowers on old wood
Group 1 clematis, including many alpine and mountain types, make flower buds on stems that grew the previous year. Routine hard pruning in late winter removes those buds before they open. If the vine fits its space and looks healthy, leave the framework alone; cut out only stems that are clearly dead or broken.
When the plant has finished flowering, you can shorten or thin it to control its size. Make cuts just above a healthy pair of buds or a suitable side shoot, and spread the work through the framework instead of shearing the entire outside. If the vine is severely overgrown, a harder post-flowering renovation may be possible, but it will reduce the next display while new stems mature. The RHS notes that renovation can affect flowering and should not be repeated frequently.
Group 2: early-summer flowers on old and new wood
Group 2 includes many large-flowered hybrids. Their main early display grows from buds on last year’s stems; some also flower later on shoots made in the current season. That is why the useful rule is light pruning, not an automatic annual cut to the ground.
Before spring growth begins, remove stems that are definitely dead and trim dead ends back to a healthy bud. Leave sound canes in place, even if they look bare. After the first flowering flush fades, remove spent flowers and the short shoot below them to a strong pair of buds. This can tidy the plant and encourage fresh growth without erasing its remaining framework.
A hard cut may restart an overgrown Group 2 vine, but expect to sacrifice some or all early flowers while it rebuilds. Illinois Extension recommends going slowly with this group; the RHS guide also allows these vines to be left largely unpruned apart from dead shoot ends. That makes cautious maintenance a sound choice if your main goal is preserving the early bloom.
Group 3: summer flowers on current-year growth
Group 3 clematis flower on shoots made in the current growing season. In late winter or early spring, cut the previous season’s stems back to about 8 to 12 inches (20 to 30 centimeters), or to the lowest strong pair of live buds if that is higher. The live buds matter more than an exact ruler measurement: the aim is to leave a low starting point from which several new flowering shoots can emerge.
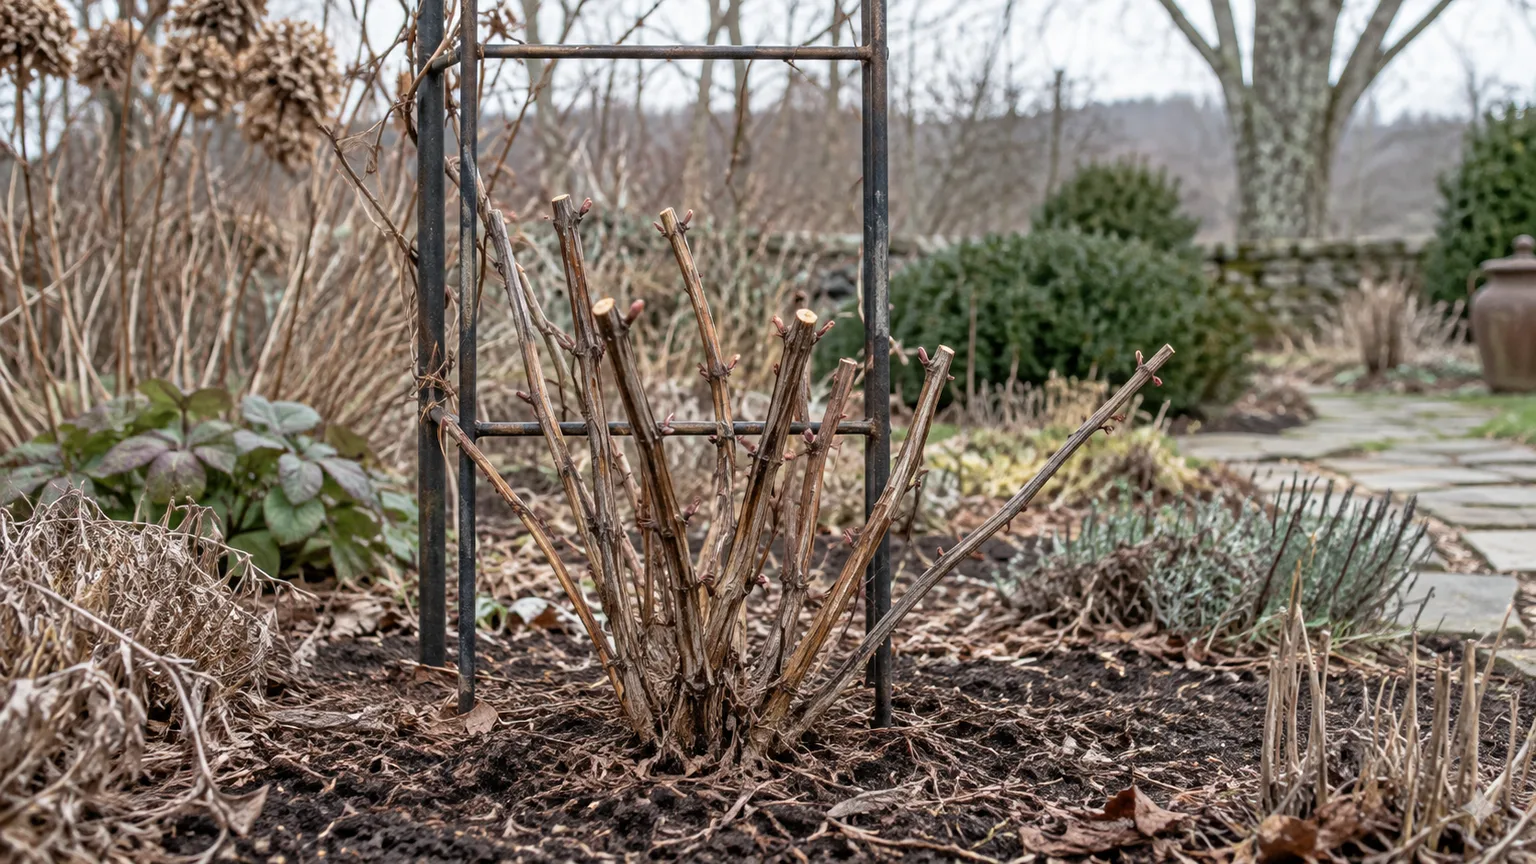
Many gardeners hesitate at this cut because the remaining vine looks drastically shortened. For a true Group 3 plant, the annual cut helps keep new growth and flowers within reach instead of allowing the framework to become a tall, bare tangle. University of Illinois Extension and Fine Gardening both describe severe late-winter pruning for this group.
If you prefer more height or want to keep a permanent framework on a support, you can leave a few stronger stems and shorten them to live buds rather than taking everything low. That is a shaping choice, not a requirement for bloom. For herbaceous clematis that die back naturally, remove the dead top growth near the ground when the stems are dormant; do not confuse a nonclimbing perennial form with a woody climber.
If the group is unknown, choose the low-risk cut
If you have one season to observe, do not hard-prune an unidentified clematis just because the top looks untidy. Remove snapped stems, and cut back only portions that are unmistakably dead. Leave healthy canes until you see where the flowers form. The RHS fallback rule is conservative: if the vine flowers before early summer, avoid routine pruning; if its main bloom begins later, prune in late winter.
To test an apparently dead stem, first look for swelling buds and flexible sections. If you still cannot tell, gently scratch a very small spot of bark near the base with a fingernail; green tissue just beneath the surface suggests the stem is alive, while uniformly dry, brittle brown tissue is more likely dead. Do not scratch several stems or cut all the way down simply because a vine is leafless in winter.
A useful compromise for a vine that is genuinely unmanageable is to remove one or two clearly old, damaged, or badly misplaced stems after the plant flowers, while retaining the rest for identification. Make a note of the bloom date and which stems carried flowers. One year of observation can turn an anxious guess into a reliable pruning plan.
Set timing for your climate
Use the plant’s growth stage as the clock. Group 1 vines are shaped after their spring flowering finishes, with enough of the growing season left for new shoots to mature. Group 2 vines get only a light cleanup before buds open, followed by a small post-bloom trim if you want to tidy spent flowers. Group 3 vines are cut before their new season’s shoots stretch, generally in late winter or early spring.
In a cold climate, wait until the worst hard freezes are past before shaping old-wood stems, because stems and buds that look lifeless may still be viable. Group 3 canes are less precious because the plant flowers on new growth, but leaving a short framework through winter gives you something to locate and inspect. In a mild climate, pruning may need to happen earlier if buds begin swelling sooner.
Calendar advice from one country does not transfer exactly to another. February in the UK is winter; a gardener in the Southern Hemisphere should use the equivalent late-winter period in their own cycle, often around August, while gardeners in hot or tropical regions should follow local growth and flowering patterns. University of Vermont Extension notes that clematis species span a wide range of climates, so a local extension or horticultural reference can help where seasons are unusually mild or long.
Make clean cuts without stripping the framework
Start by deciding what you want the plant to do: flower at a reachable height, cover a trellis, or remain within an arch. Then remove only the stems that conflict with that goal. For a light cut, follow a stem to a healthy bud or side branch and cut just above it. For a Group 3 reset, shorten stems low enough to create a fresh, branching framework rather than clipping only the vine’s outer shell.
Use sharp bypass pruners on stems they can cut cleanly. Support a cane with your free hand before cutting so it does not whip, pull other shoots down, or break at the crown. For thicker woody stems, use loppers rather than forcing hand pruners; avoid crushing, twisting, or sawing at the plant’s base.
Do not clip every stem to the same arbitrary height if the vine is a Group 1 or 2. That can remove all the flower-bearing wood at once. Instead, follow individual stems through the framework and make selective cuts. If two clematis are growing together, trace each cane back before cutting; intertwined vines can belong to different groups and need different timing.
Handle dead, damaged, or tangled stems
Dead and broken stems can be removed when you notice them, but avoid treating every brown cane as dead during winter. Some clematis are deciduous, and old stems can look dry while buds remain dormant. Wait until the buds begin to swell or growth starts, then cut confirmed dead wood back to where the stem meets live tissue or to the base if the entire cane is dead.
A damaged section can be cut back to the next healthy pair of buds or a sound side shoot. If only one stem collapses, remove that stem without automatically cutting the rest of the plant down. Sudden wilt or blackened stems may have more than one cause; if the damage is spreading, seek local diagnostic advice rather than assuming a major structural prune will solve it.
For a tangled vine, untwist only flexible stems and work from the outside toward the base. Do not pull dry canes through the trellis; they may be attached by leaf stalks or wrapped around live growth. If a dead cane will not release cleanly, cut it into shorter pieces and remove them section by section. This reduces the chance of snapping a healthy stem that is hidden behind it.
Newly planted clematis needs a different first cut
A young plant often arrives with one or two long stems rather than a full, branching framework. A one-time cutback after planting can encourage shoots from lower buds, helping the vine cover its support from nearer the base. The right moment depends on planting season and the cultivar: RHS growing guidance advises pruning autumn-planted clematis in the following February or March and spring-planted clematis immediately after planting.
This initial shaping is different from the annual routine for an established Group 1 or 2 vine. If you cut a spring-flowering plant hard, you may give up some early flowers while it builds a stronger framework. That is a choice, not a universal requirement. Follow a reliable nursery’s instructions for the named cultivar, and if you would rather keep the first display, train the longest stems gently and postpone the hard reset.
When new shoots appear, spread them across the support instead of letting all of them climb from one point. Pinching a very long young shoot above a lower pair of leaves can encourage branching, but do not pinch every shoot; the plant still needs stems to reach and cover the trellis. University of Arkansas Extension also emphasizes early branching on young plants and treats a weak first-year vine differently from a mature plant.
Rejuvenate an overgrown vine in stages
An old clematis may have bare lower stems, crowded growth at the top, and several years of dead canes woven through its support. The temptation is to shear everything at once. Before doing that, identify the group and decide whether losing a season of flowers is acceptable. A hard reset is easiest to justify for Group 3, whose flowers form on new growth; it is a larger trade-off for Groups 1 and 2.
For Group 1, wait until flowering finishes, then renovate if necessary. A very hard cut may produce new stems but can reduce the next year’s early bloom. For Group 2, thin the oldest or most tangled stems over two or three seasons, removing a portion at the base after flowering rather than sacrificing every old cane in one year. Keep the healthiest stems that can form a future framework.
For Group 3, the normal late-winter cutback also serves as routine renovation. If thick old stems have become congested, remove them at the base while retaining a few younger, well-placed canes as a guide for the new growth. The RHS notes that many clematis can tolerate renovation, but the suitability and timing depend on the pruning group; do not transfer Group 3’s annual hard cut to an early-flowering vine.
Train remaining stems across their support
Pruning controls length; training determines where flowers will appear. Clematis climb by wrapping leaf stalks around narrow supports, so a broad smooth wall alone is not enough. Use a trellis, wires, or an arbor with openings the leaf stalks can reach. A support placed a little away from a wall also leaves room to access stems for tying and inspection.
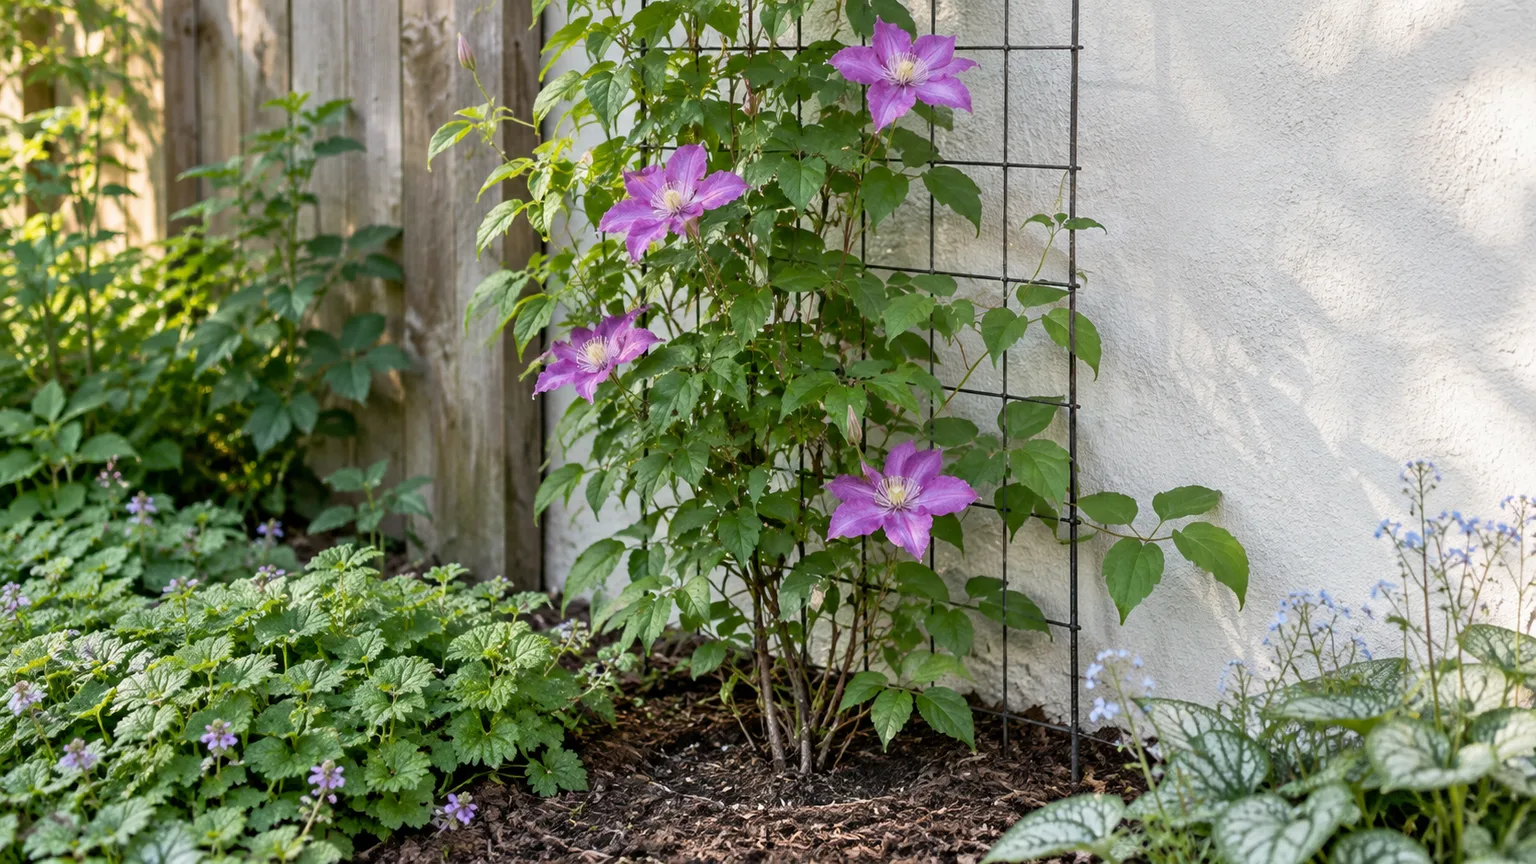
After pruning, fan several stems out rather than sending them straight up in a tight bundle. More evenly spaced stems give the vine coverage across the support and make it easier to see which cane is dead, flowering, or crossing another. Use soft ties loosely where the leaf stalk cannot grasp the structure; do not bind stems tightly enough to pinch them as they thicken.
When pruning a large arch or arbor, think about what you can reach safely before encouraging more height. A vine covered in flowers above the point where you can inspect it is harder to maintain, and inaccessible stems can fall or become tangled with nearby branches. It is reasonable to limit the plant to the support you can safely manage or ask an experienced gardener to handle high growth.
Deadhead only when it serves a purpose
Deadheading is optional for most clematis. Remove spent flowers if you want a tidier look or want to limit seed formation, but leave the decorative seedheads if you enjoy them. Cutting the spent flower does not replace correct pruning; it cannot restore a flower bud removed from a Group 1 or Group 2 cane earlier in the season.
On a Group 2 plant, trimming the spent first flush back to a strong bud is useful because it removes the old flower and may encourage later growth. For Group 1, wait until flowering is over before making any shaping cuts. Group 3 plants usually get their main structural cut before spring growth, so deadheading their late flowers is mostly a matter of appearance and seed management.
Do not confuse deadheading with removing healthy stems. Follow the flower stalk down to its nearest suitable bud or side shoot and make a small cut. If the vine is still flowering and you are unsure what it is, leave the framework intact until you can identify the group.
Pruning tools and safe working positions
For most clematis, sharp bypass pruners and a clean pair of gloves are enough. Loppers help with older, woody stems. Before starting, check that the tool cuts cleanly, clear loose canes from the ground, and keep your free hand away from the blade. Clean tools after working on a plant with visible disease, and avoid carrying sap from a damaged vine onto your skin or eyes.
Clematis sap can irritate skin, and University of Vermont Extension advises caution around crushed or damaged plant material. Wear gloves, avoid rubbing your face while pruning, and wash your hands and tools afterward. Keep cuttings away from children and pets who might handle or chew them.
Do not balance on an unstable chair or lean sideways from a ladder to reach a vine. Prune from the ground when possible; for higher growth, use a properly positioned ladder on firm, level ground and have another adult nearby. If the cut requires climbing into a tree, reaching over a roof, or working above a safe standing height, leave it to a qualified professional rather than making a risky cut.
What happens if you prune at the wrong time?
Most clematis are tougher than their pruning reputation suggests, but a badly timed cut can cost flowers. Pruning a Group 1 vine before spring bloom removes old-wood buds. Cutting a Group 2 vine low in winter can remove its early flush, even if some new growth blooms later. Cutting a Group 3 vine after new shoots have already grown is still possible, but it wastes growth and can delay the display.
If you made the wrong cut, do not keep cutting to make the plant look symmetrical. Remove only torn or broken ends, protect remaining stems from being pulled off the support, and allow the vine to regrow. A Group 1 or Group 2 plant may flower less that year but usually needs time, not another drastic intervention. A Group 3 clematis will generally make new shoots from low buds if the crown and roots remain healthy.
Use the result as information for next year. Record the date and severity of the cut, the stems that flowered, and when the first flowers opened. This simple note is more reliable than trying to reconstruct the vine’s growth pattern months later, and it reduces the odds of repeating the same mistake.
Conclusion
Prune clematis according to its flowering group: leave most spring-flowering Group 1 stems intact until bloom ends, prune Group 2 lightly to keep old wood and encourage a later flush, and cut Group 3 back low before new shoots begin. These are starting rules, not a reason to ignore the cultivar or your local climate.
If the group is unknown, remove only clearly dead or broken stems, observe a full bloom cycle, and postpone a hard cut. Once you know which growth carries the flowers, make a few deliberate cuts to a live bud, keep the remaining stems spread across a reachable support, and let the plant show you what it can do.