17 DIY Landscaping Ideas for a Better Yard
Improve your yard with 17 DIY landscaping ideas. Compare quick refreshes with weekend builds, plan for drainage, and avoid common installation mistakes.
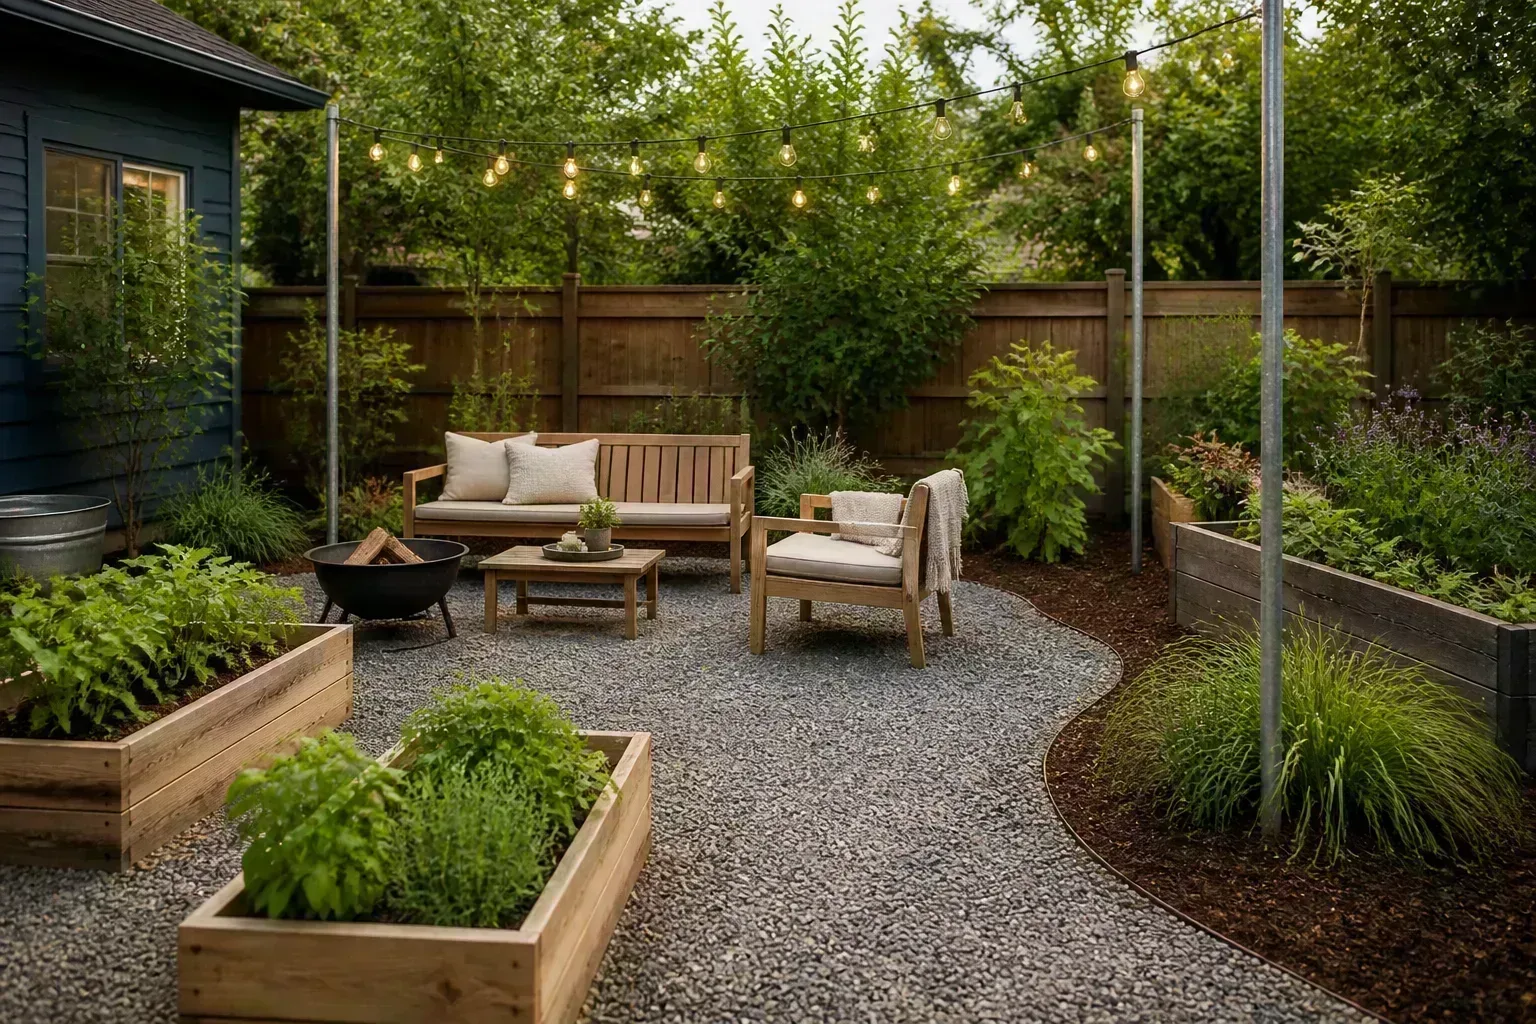
A useful landscape project starts with a job the yard actually needs: a clearer route to the door, a place to sit, a bed that is easier to maintain, or a way to slow runoff. The best first project is usually modest enough to finish, but specific enough to solve one daily annoyance. That can be a crisp edge and fresh mulch, not a new patio, pergola, retaining wall, and lighting plan all at once.
The ideas below range from reversible weekend refreshes to projects that involve excavation, masonry, or overhead loads. Each one includes a good-fit test and a practical caution so you can decide whether to build it yourself, simplify it, or bring in a professional.
Before You Start: Map Paths, Sun, Water, and Utilities
Walk the yard after rain and note where water comes from, where it stands, and where it exits. Watch how people already move between the driveway, door, garden, and seating area; a path that follows the natural route is more useful than a decorative curve that nobody takes. Mark sunny and shaded areas at the time of day you plan to use them, because a dinner patio and a flower bed need different conditions.
Before any digging, request utility marking through the local 811 service in the United States, and follow the waiting period and safe-digging rules for your area. Marking services generally locate participating utility-owned lines; private irrigation, lighting, and other owner-installed lines may need a separate locator. A shallow trench for edging or a post can still reach a buried cable or pipe. The Call 811 state information explains how to find the local process and timing.
Sketch the project and measure it before buying stone or lumber. Check local rules, property boundaries, homeowners-association requirements, and permit needs for fences, attached structures, fire features, and electrical work. Keep finished grades and water paths away from the house and neighboring property; if the project changes a slope, holds back soil, or redirects significant runoff, pause for professional advice rather than improvising a retaining wall or drain.
1. Frame the front walk with a layered entry bed
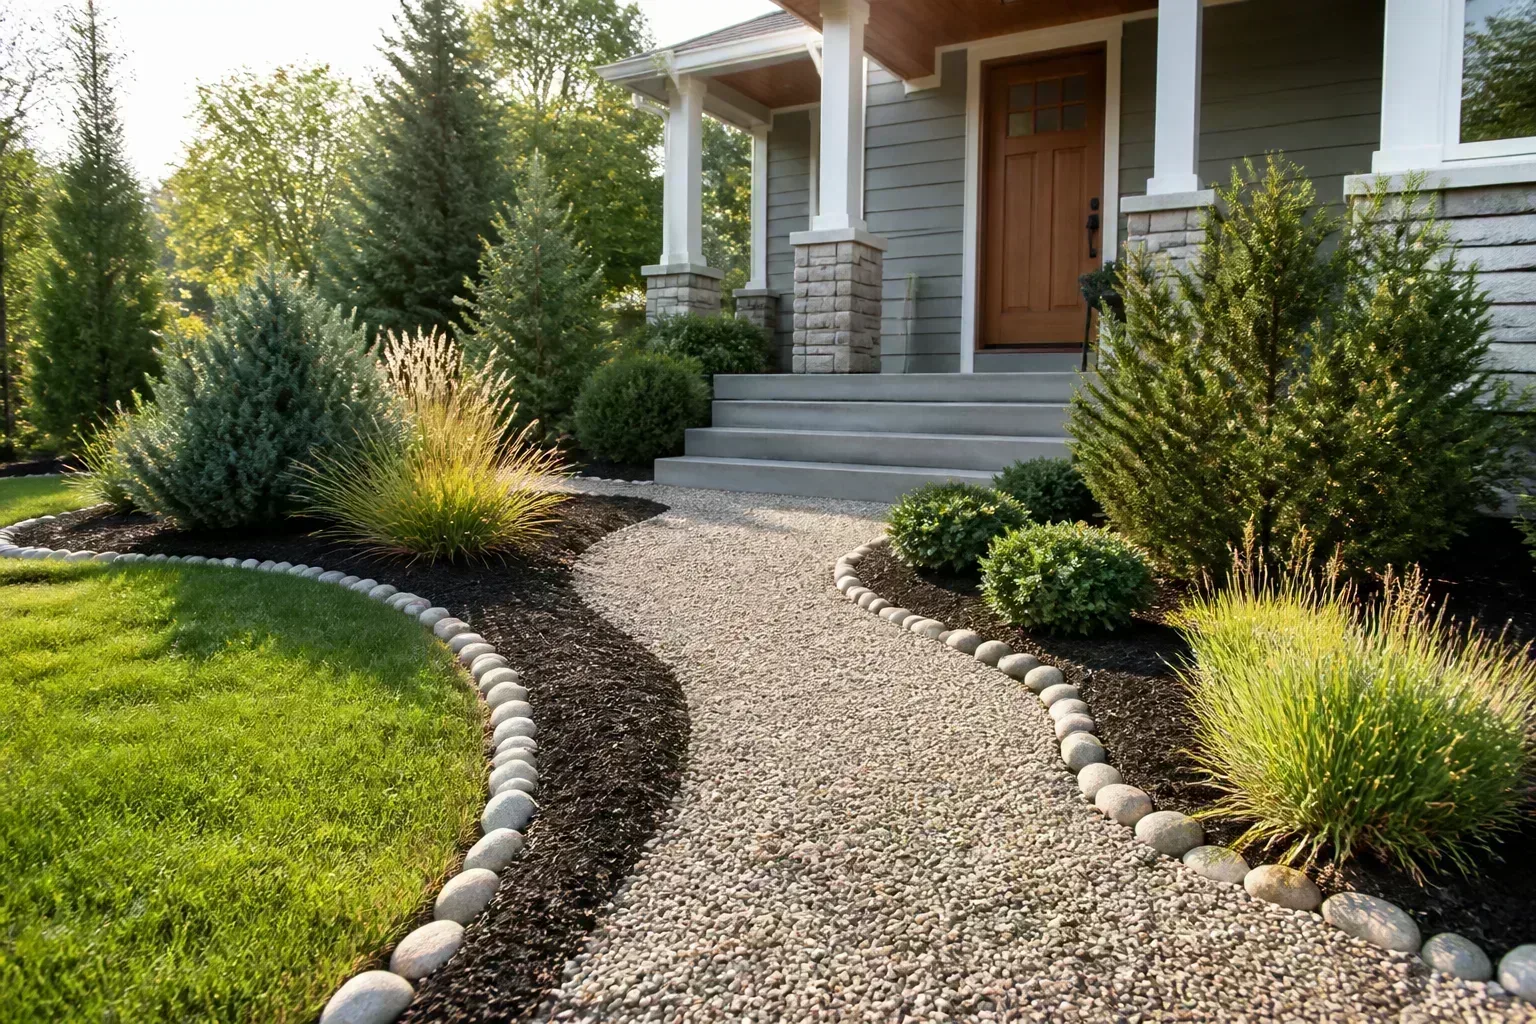
A narrow planting bed can make a plain entrance feel intentional without asking you to landscape the whole front yard. Start by tracing the path people use, then widen the bed where it can frame the door or soften a blank wall. Use a hose to test curves before cutting turf. A gently curved edge can look natural, while a straight walk often suits a formal or modern facade better.
Choose plants only after checking mature size, sun, soil moisture, and your local climate. A simple structure is one small evergreen or large perennial as an anchor, a repeated group of mid-height plants, and a low groundcover or seasonal accent at the edge. Repeating a few plants usually looks calmer and costs less than buying one of everything. Keep shrubs and tall flowers from narrowing the walk, covering windows, or blocking the house number. The RHS border-planning guide recommends using the site’s growing conditions to filter plant choices; the same rule prevents many expensive replacements in a new bed.
2. Build a safe fire-pit sitting circle
A fire pit becomes a landscape feature when the ground around it is comfortable and stable. Define a circle or compact square with a noncombustible surface such as gravel or pavers, then place movable chairs where people can sit without stepping over the pit. A clear route from the house and a spot to set down a drink matter more than an elaborate stone ring. If the yard is small, a listed, purpose-made portable fire pit may be simpler than building a permanent masonry structure.
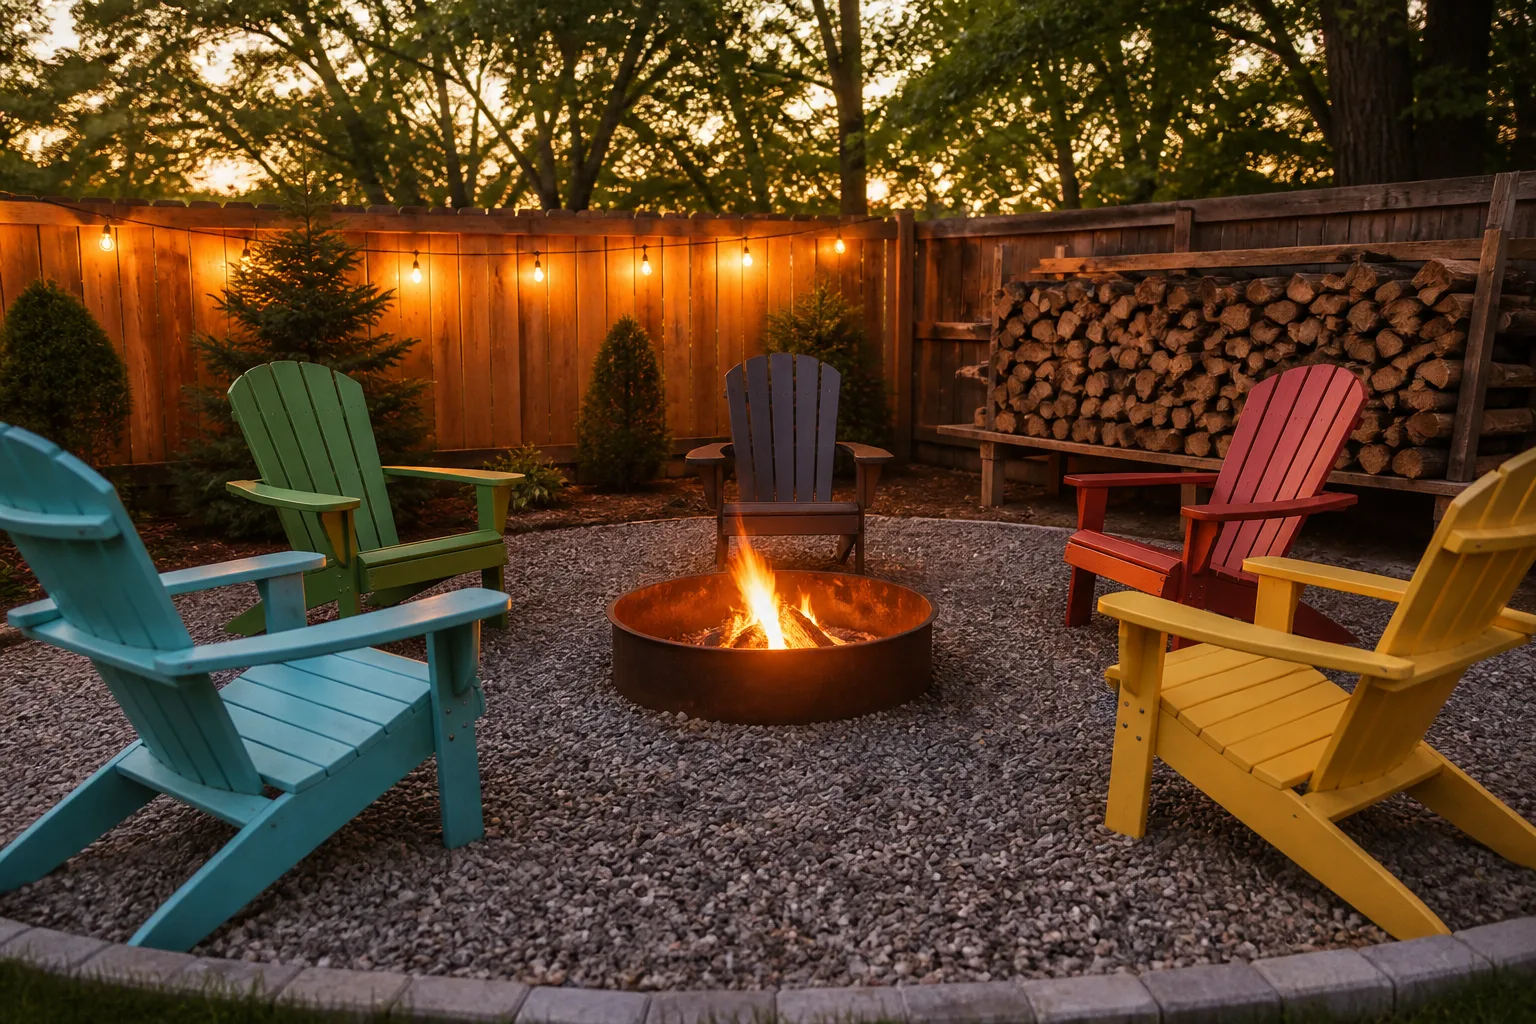
Before buying materials, check local burn restrictions, required clearances, and any fire-ban notices. Keep flames away from structures, overhanging branches, dry vegetation, and combustible furnishings; have water or an appropriate extinguisher ready, and never use gasoline to start or revive a fire. The Consumer Product Safety Commission’s fire-pit guidance warns against liquid fuel and advises keeping fire-control equipment nearby. The CPSC has also warned against certain alcohol-burning fire pits; skip tabletop liquid-fuel products that fall within that warning. Do not use a fire feature during high wildfire risk or when local rules prohibit it.
3. Refresh an existing patio before rebuilding it
If you already have a concrete pad, deck, or sound paver area, try a layout refresh before starting a major construction job. Pull furniture into a conversational arrangement, leave enough room to walk around it, and make one edge feel finished with large containers or a narrow planting bed. Outdoor rugs can visually group a seating area, but choose a material that dries quickly and lift it occasionally so damp debris does not sit against wood or trap moisture on the surface.
This project is especially useful when a patio feels empty rather than physically broken. Add shade with a market umbrella, movable screen, or properly anchored shade sail; test the afternoon sun before choosing a permanent location. Use pots with drainage holes and saucers only where runoff will not stain or pool. If the existing surface pitches water toward the home, cracks are widening, or slabs rock underfoot, decorative upgrades will not fix the underlying drainage or base problem.
4. Make a patterned paver or tiled landing
A small landing outside a back door can turn a patch of grass into a place for a chair, grill, or pair of planters. For a ground-level paver pad, the important work is below the visible stones: excavation to a consistent depth, a compacted aggregate base, a level setting layer, and edge restraint to resist sideways movement. The exact depth and materials depend on soil, climate, paver thickness, and intended loads. Fine Gardening’s weekend patio instructions show why a stable compacted base and secure perimeter are central to a durable installation.
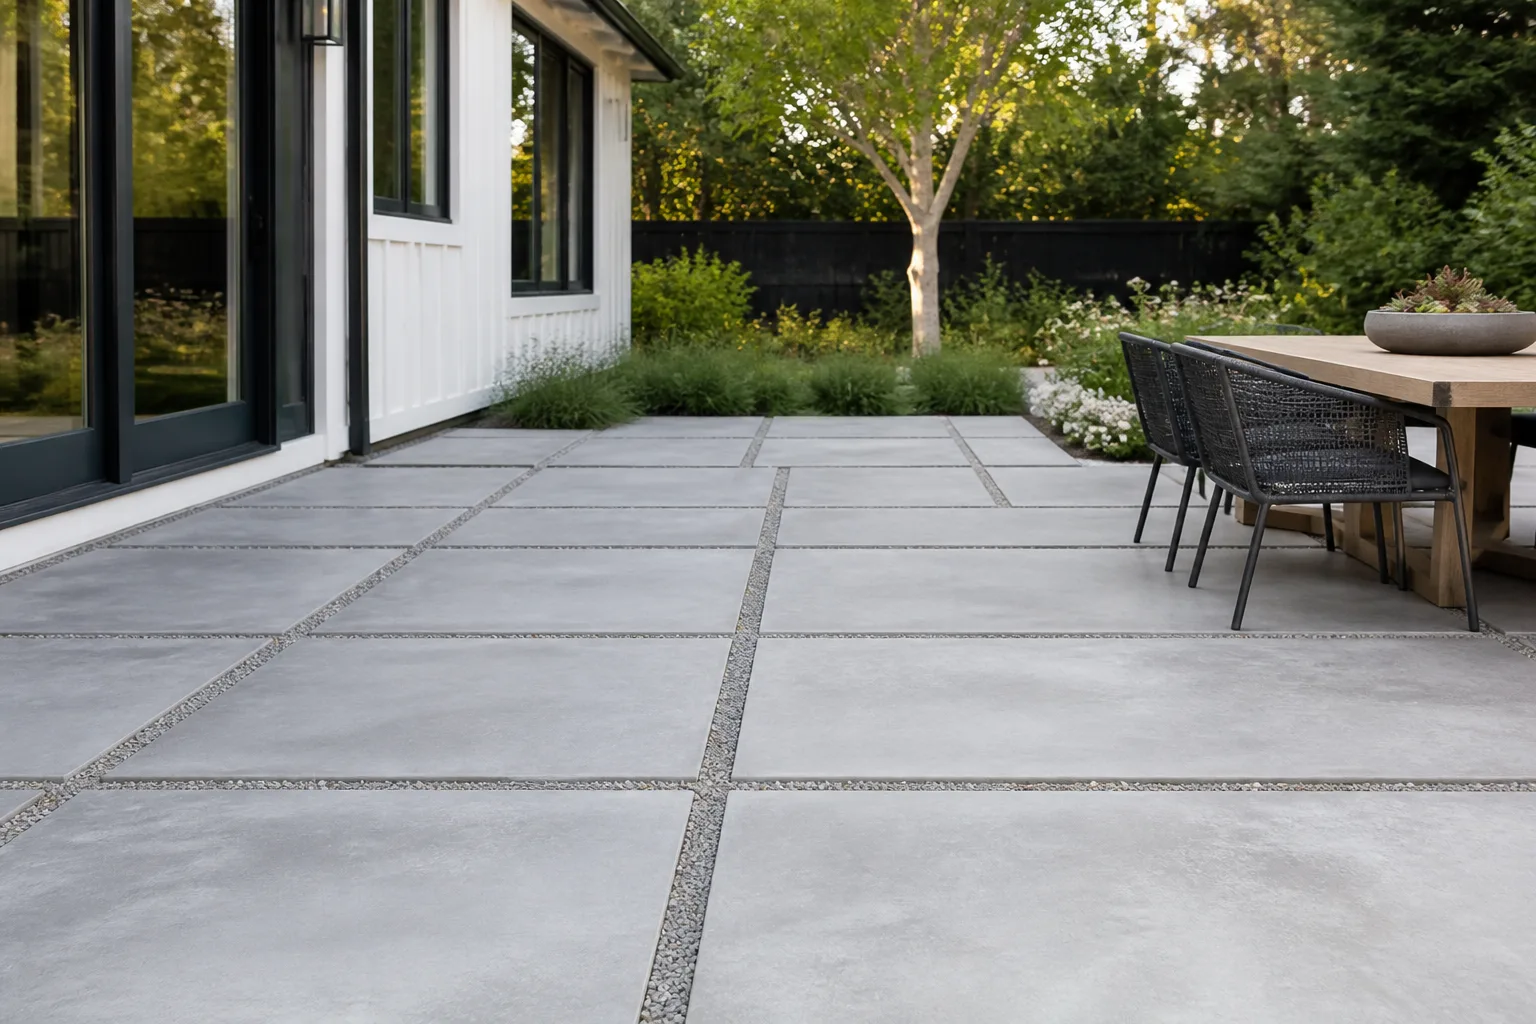
Use products intended for outdoor exposure. If you want a tile look, select exterior-rated pavers or tile with appropriate slip resistance and freeze-thaw performance for your region; ordinary indoor tile can become slick or crack outside. Maintain a gentle fall that sends water away from the building, and do not assume permeable joints make the entire installation drain correctly. For a large area, steep slope, frost-prone site, or surface that will support a vehicle or heavy structure, get specifications from a qualified installer.
5. Give house numbers a planted frame
Readable house numbers are a small upgrade that improves both arrival and wayfinding. Choose a size and contrast that can be seen from the street, mount them where branches and porch decorations will not hide them, and use an outdoor-rated finish. If you install numbers on a freestanding post or masonry, verify the fasteners suit the material and avoid placing the sign where a delivery driver has to cross a planting bed to read it.
To make the number feel integrated into the landscape, set a compact container or low bed beside it rather than covering the post in vines. Use plants that stay below the digits, tolerate the spot’s sun, and do not require constant trimming. Solar illumination can help, but confirm it charges in that location and remains legible in winter or cloudy weather. Check local addressing or building requirements before changing an official number’s placement or style.
6. Cut a clean edge around a garden bed
A crisp edge is among the quickest ways to make a landscape look maintained because it gives lawn and planting a deliberate boundary. For a simple natural edge, mark the line with a hose, cut a vertical trench with a spade or half-moon edger, and lift out the strip of sod. A shallow channel can define the bed without buying edging; manufactured metal, plastic, brick, or stone can be worthwhile where grass repeatedly creeps in or a mower needs a hard boundary.
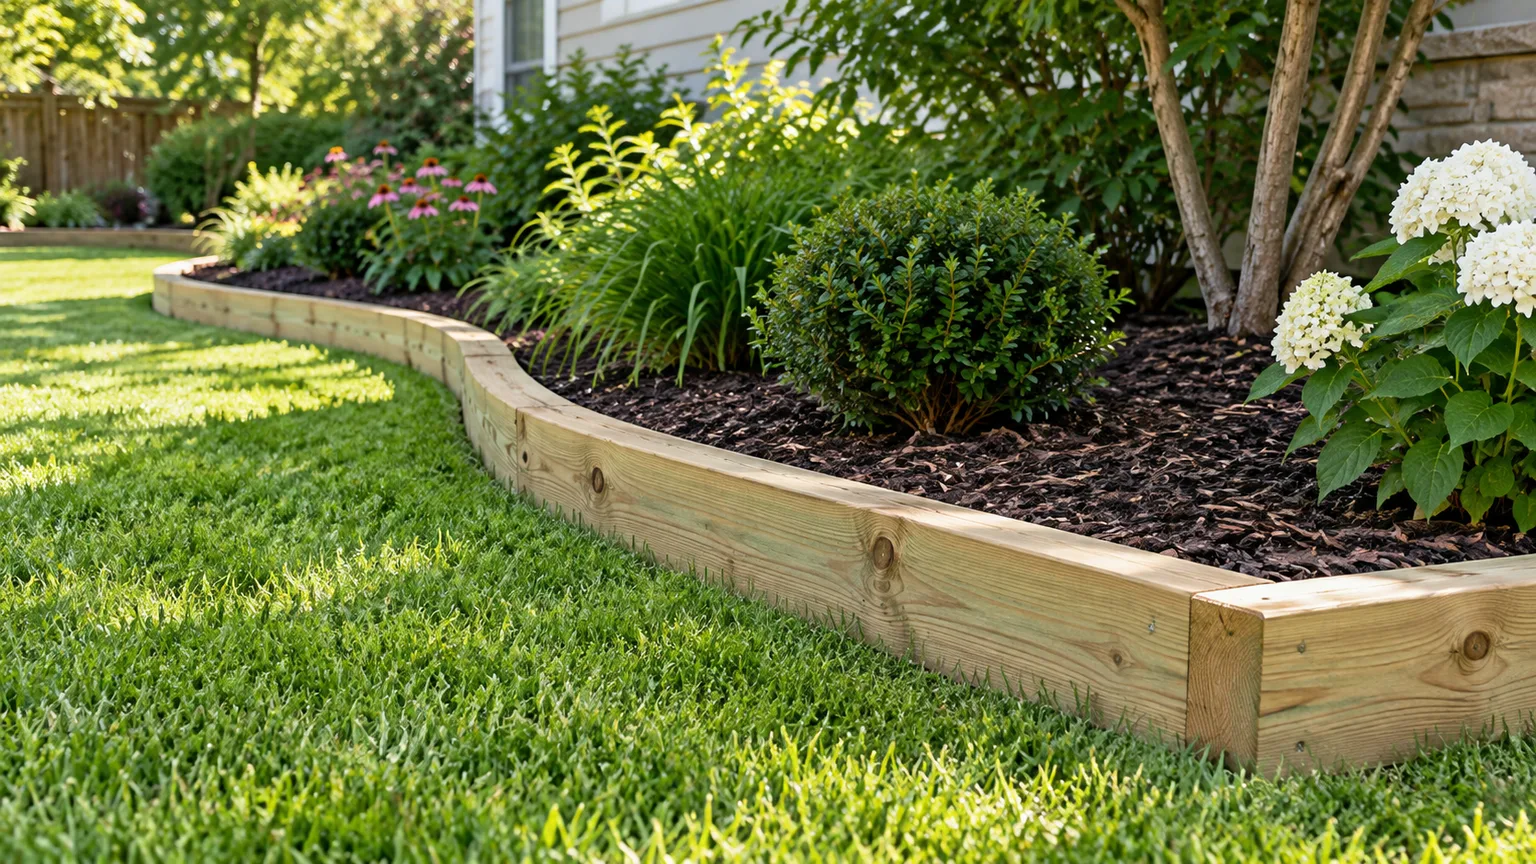
Do not choose an edge material only for its appearance. Metal can be sharp during installation, plastic can heave or shift, and masonry needs a stable base. Keep mulch a few inches below siding and away from trunks and stems rather than piling it against them. Fine Gardening’s bed-edging overview compares hand tools and powered edgers, while its step-by-step edge guide emphasizes removing turf and refreshing the cut as needed. A simple trench edge is the lowest-commitment place to start.
7. Add a pergola for filtered shade
A pergola can mark a dining or lounge area while still letting air and light through. Before choosing a kit, check its footprint against the actual table or seating arrangement; a structure that is too small feels cramped, and one that is too large can overwhelm a compact yard. Place it where shade is useful during the hours you use the space, not just where the ground is easiest to reach.
The posts and their connections are the real project. Follow the manufacturer’s foundation and anchoring specifications, account for local wind and snow loads, and confirm permit rules, especially for an attached pergola or one with a roof, screens, or electrical wiring. Never rely on decorative planter boxes or loose pavers to keep a tall frame upright. If the design attaches to the house, involves a retaining wall, or requires concrete footings near buried services, ask a qualified builder to verify the connection and site conditions.
8. Create a renter-friendly pallet patio
A renter can make a defined sitting nook without pouring a slab by laying a removable outdoor rug over an existing patio or a firm, level surface, then adding movable seating and containers. If clean, sound pallets are available, they can serve as a low platform for lightweight furniture only when the assembly is stable, protected from wet soil, and not used as a raised deck or stair. Ask the owner before placing anything that could stain a surface, obstruct drainage, or damage a lawn.
Pallet condition matters more than the word “reclaimed.” Reject broken, visibly contaminated, oily, or musty pallets; unknown treatment and prior cargo are reasons to choose a safer material. Do not assume a pallet is suitable for furniture simply because it has a stamp, and do not use improvised pallets as a load-bearing platform for people above grade. A modular arrangement that lifts away for cleaning is more useful to a renter than a permanent-looking build that traps moisture or violates a lease.
9. Screen a deck without trapping moisture
Deck skirting can hide exposed framing and reduce the visual gap beneath a raised deck, but the enclosure still needs ventilation and access. Use spaced slats or a purpose-made ventilated panel rather than sealing the perimeter with solid boards. Leave a removable access section for plumbing, wiring, and pest inspection, and keep soil, mulch, and stored firewood from accumulating against the frame.
Measure the deck’s posts and joists before purchasing material, then choose exterior-rated boards and fasteners compatible with one another. Confirm that the deck structure is sound before adding anything that could conceal rot or insect damage. A skirt is not a retaining wall, animal-proof foundation, or fix for water pooling under the deck. Where the ground slopes or the deck is high above grade, local guard, fire, and setback rules may affect the design; a building official or deck professional can clarify them.
10. Make two small lounging zones
A yard does not need one large patio to support different activities. Place a pair of chairs by a morning-sun border, then create a separate reading spot under existing shade or near the garden. Two compact destinations can make a large lawn feel less empty, while a small yard can gain a sense of sequence without adding a wall. Keep the primary route clear enough to carry a tray or garden tools.
Use a stable existing surface first: a deck, concrete step, compacted gravel, or a few widely spaced stepping stones placed level with the surrounding grade. If a chair leg sinks into soil, a single paving slab or broad pad under the legs may be enough. Avoid placing seats where irrigation sprays them, roof runoff splashes the cushions, or traffic crosses through the conversation area. A quick cardboard or chair-layout test helps you confirm scale before moving heavy furniture or ordering materials.
11. Hang string lights from stable freestanding posts
String lights can make a patio usable after sunset, but the support system must withstand both the cable tension and local weather. Purpose-built posts secured in heavy planters can work for a light, temporary run in a sheltered yard, while permanent posts may require footings sized for wind and soil conditions. Keep the wire high enough to avoid head strikes without stretching it so tightly that the post or fixture is pulled over.
Use outdoor-rated lights, cords, and connectors, and follow the manufacturer’s limits on connecting strands. Keep electrical connections out of puddles and use a properly protected outdoor outlet; hire a licensed electrician for new wiring, buried cable, or a hardwired lighting circuit. For a renter, battery or solar string lights attached to existing permitted structures are easier to remove. Do not attach a taut line to a tree in a way that constricts growth or damages bark.
12. Turn a rocky corner into a purposeful bed
Rock is useful when it solves a site problem or creates a clean transition, not when it is spread everywhere as a substitute for design. A gravel strip beside a path can reduce mud, a dry creek bed can visually trace an existing runoff route, and a small rock garden can suit a naturally sunny, sharply drained corner. First identify whether the area is dry, wet, compacted, or eroding; then choose plants and stone size for those conditions.
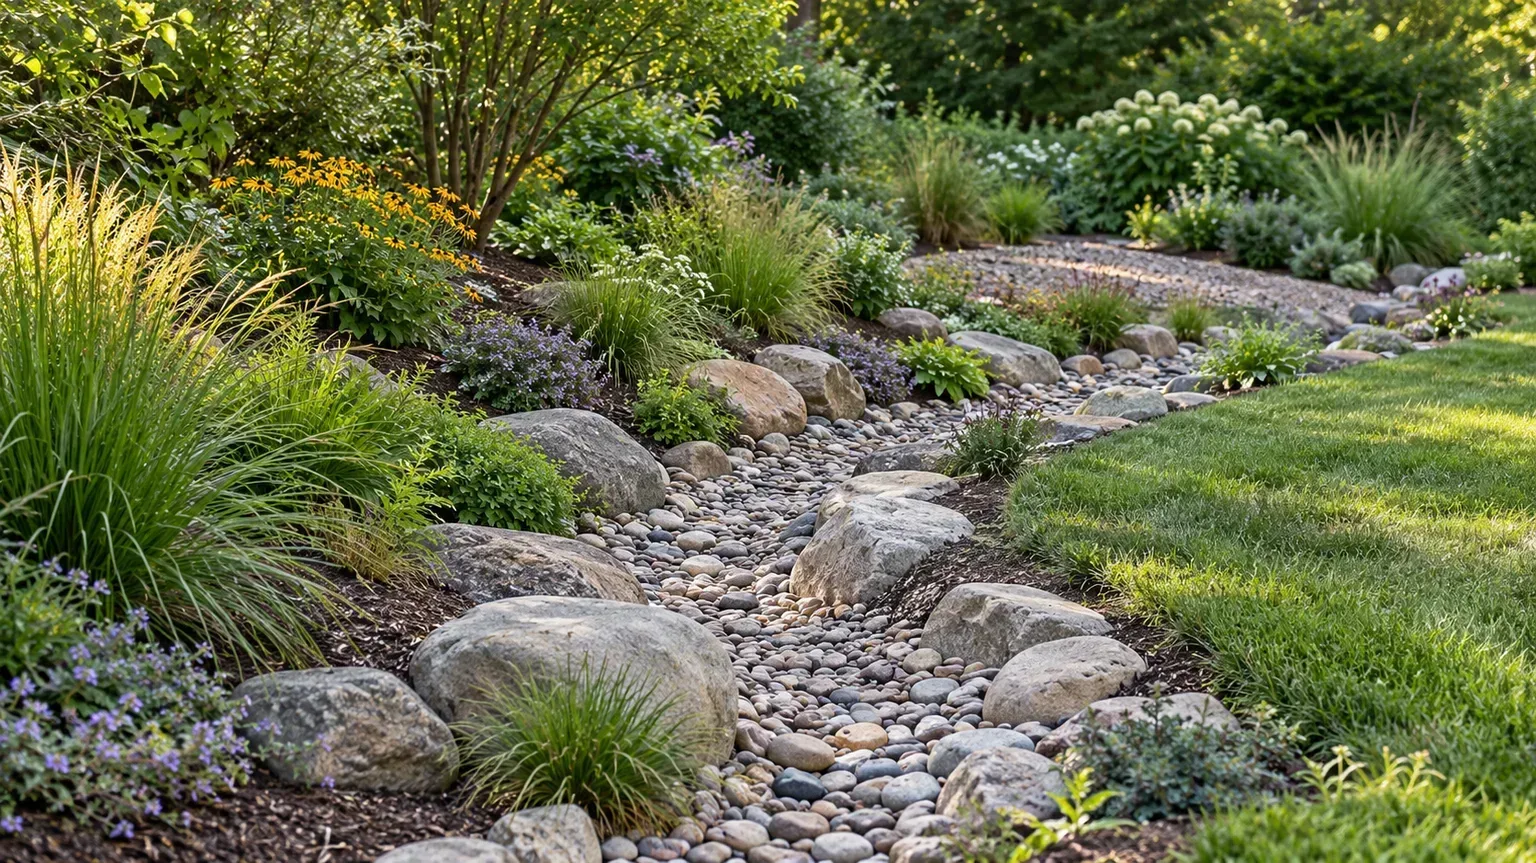
Do not channel water onto a neighbor’s lot, across a public path, or toward the foundation. If runoff is the issue, the EPA’s landscaping guidance describes rain gardens and permeable areas as ways to hold water on site, while its rain-garden overview explains how a planted depression collects and infiltrates water. A rain garden needs suitable soil, location, and overflow planning; it is not a universal fix for a wet basement or fast-moving floodwater. For a small decorative rock bed, remove perennial weeds, retain a clear edge, and place stones so they do not roll onto a walkway.
13. Build an outdoor bench and gabion side table
A simple bench gives a path or planting area a reason to be enjoyed rather than only viewed. Choose an outdoor-rated plan or ready-made kit with clear load and fastener specifications, then set it on a stable surface. A small gabion-style side table can be made by filling a purpose-built wire basket with clean, similarly sized stones and capping it with a broad, stable slab. The stones add weight, so locate the table where it will remain rather than planning to drag it across a deck.
Check the basket’s finish and wire gauge for outdoor use, cover sharp cut ends, and make sure the top cannot slide off when someone leans on it. A DIY bench should not be built from scrap whose load capacity or decay resistance is unknown. Use exterior-rated lumber and corrosion-resistant fasteners specified for the material, and seal only with products labeled for outdoor furniture. Keep seating away from the fire-pit clearance zone and do not position heavy stone furniture where it blocks an exit or narrow path.
14. Add a recirculating rock fountain
A compact recirculating fountain brings sound and movement to a quiet corner without requiring a large pond. The simplest version uses a watertight basin, a pump rated for the intended flow, tubing, and a stable top stone or stack of stones with a concealed return path. Choose a location near a suitable power source and where splash will not wet a foundation, siding, or frequently used walkway.

Follow the pump instructions, use equipment intended for outdoor water features, and have an electrician install a protected outlet if needed. Keep the reservoir accessible for cleaning and topping up; evaporation, splash, debris, and dry spells can lower the water level enough to affect pump operation. Secure stacked stones so they cannot topple, and consider children, pets, mosquitoes, and winter freezing when you choose the basin depth and placement. If the feature becomes a chore to empty and clean, a small bowl fountain may be the better project.
15. Hang a porch swing only from verified structure
A swing is a delightful addition only when the support is designed to carry repeated movement, not just a static seat. A decorative ceiling, fascia board, pergola crosspiece, or tree branch that looks thick may not be strong enough. Locate the structural beam or joist, verify its condition and load path, and use the swing maker’s specified hardware, spacing, and installation method.
If you cannot identify the supporting structure, or if the porch framing is old, damaged, or concealed, hire a qualified carpenter or contractor to assess it. A freestanding swing frame is an alternative when it is installed on level ground and anchored according to its instructions. Test the swing with no one aboard, then increase load cautiously while keeping the route beneath and around it clear. Never place a swing where its arc reaches a railing, wall, glass door, or pedestrian path.
16. Separate spaces with a low picket fence or gate
A short fence can define a vegetable plot, keep a path from cutting through a bed, or make a front garden feel finished without creating a visual barrier. Use a hose or stakes to mark the line and check the property survey or boundary before setting posts. Decide where the gate belongs based on how people, wheelbarrows, and lawn equipment will enter; a gate that is too narrow quickly becomes a nuisance.
Before post holes, contact 811 and check local fence height, setback, and visibility rules near driveways or corners. Choose material for the climate and maintenance you can provide: painted wood needs periodic upkeep, while vinyl and metal have their own repair and appearance trade-offs. A low fence should not hold back soil unless it is specifically engineered for that purpose. If a slope, retaining function, shared boundary, or neighborhood restriction complicates the layout, settle those constraints before buying lumber.
17. Use solar lights to clarify a path
Solar path lights are a low-commitment way to make a walkway easier to read at dusk. Put them where a path changes direction, meets steps, or passes an edge that is hard to see, rather than spacing many lights at identical intervals just because a package contains them. A few well-positioned fixtures often look calmer and are easier to maintain than a runway of bright points.

Check that the panel receives several hours of useful sun and is not shaded by a shrub, wall, or winter leaf canopy. Solar fixtures typically provide accent or wayfinding light; they may not supply enough consistent illumination for stairs, older eyes, or a frequently used entrance. Choose weather-resistant products with replaceable batteries when possible, and angle the light toward the walking surface rather than a neighbor’s window. If reliable stair or entrance light is essential, compare product output and battery replacement before depending on an accent fixture; have new outdoor wiring installed under applicable electrical rules.
Conclusion
Choose the project by starting with the problem you notice most often, then match it to the work you are prepared to do. A bed edge, container grouping, or patio layout can be tested and revised quickly; excavation, fire, water, overhead structures, and retaining work carry bigger consequences if the site or installation is wrong.
Measure first, check water flow and utility locations, and set a finish point that fits one weekend or a defined budget. A successful DIY landscape is not the yard with the most features. It is the one where a path works, a sitting spot gets used, plants suit the site, and the new materials are safe and maintainable.



