24 Driveway Landscaping Ideas for Any Front Yard
Explore 24 driveway landscaping ideas for small and large yards, with practical advice on plants, paving, gravel, lighting, drainage, and upkeep.
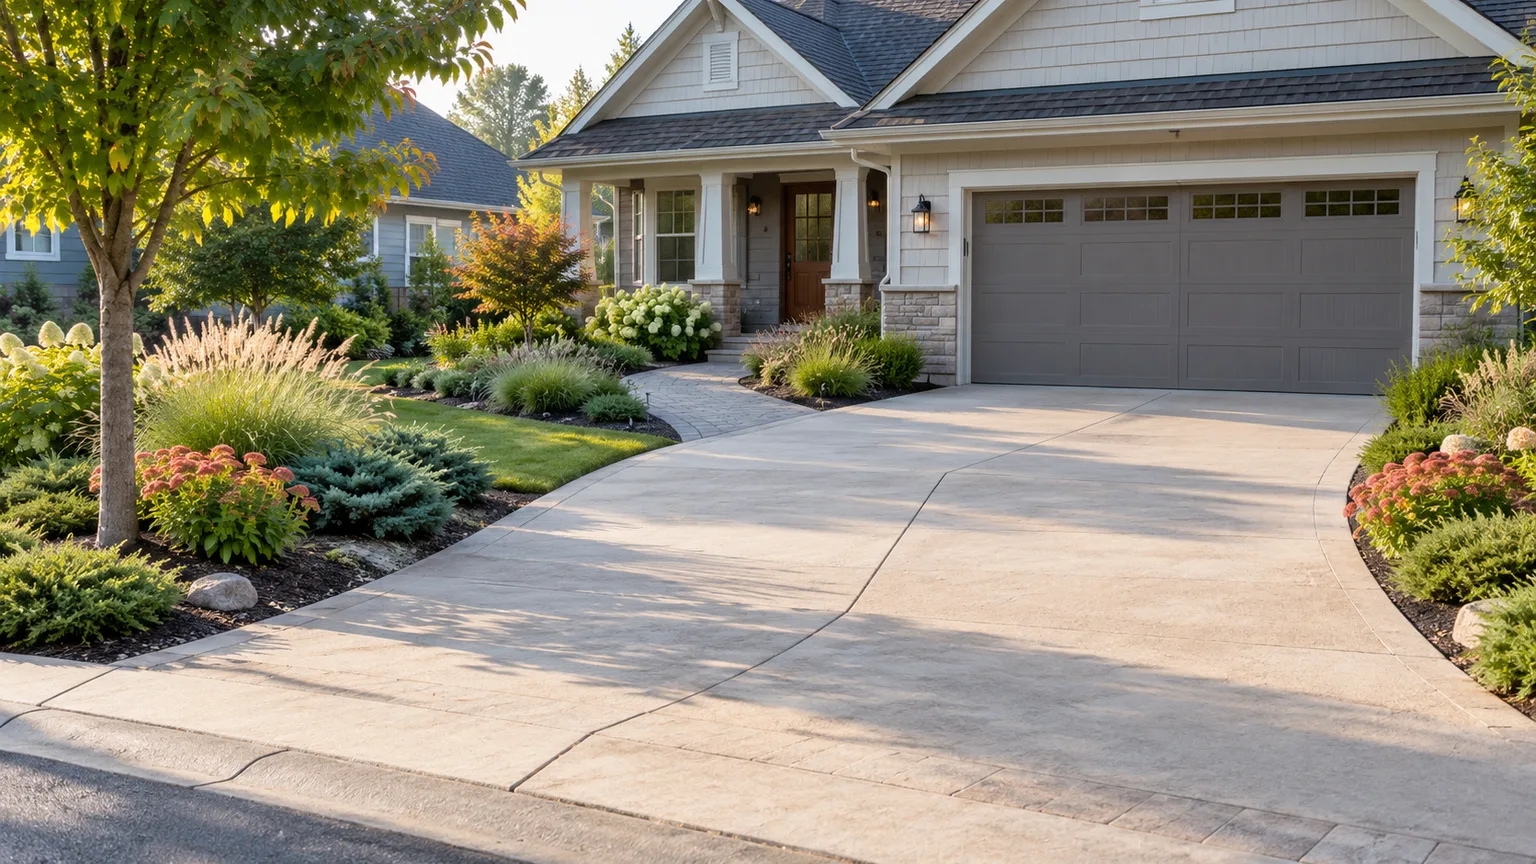
Driveway landscaping is the planting, edging, paving, and lighting that connects a home’s parking area to its front door. The best design makes that route feel intentional while leaving enough room to park, open car doors, see traffic, move snow, and keep water flowing where it belongs. A few carefully chosen elements can make a larger difference than filling every edge with plants.
Before choosing a look, decide what the driveway needs to do. A narrow suburban drive might need one clear pedestrian path and a simple planted border; a long rural approach may benefit from repeated low planting; a compact city lot may have room only for a pair of containers. Use the ideas below as building blocks, then adapt them to your actual site rather than copying a photo wholesale.
Plan around the site before choosing a look
Take a short site inventory before buying plants or pavers. Measure the driveway and the strip beside it, mark where cars turn and where doors swing open, note the hours of sun, and watch where water runs during rain. In colder regions, note where plowed snow lands and where de-icing salt or grit accumulates; in hot regions, the surface can reflect heat and dry out soil close to the pavement.
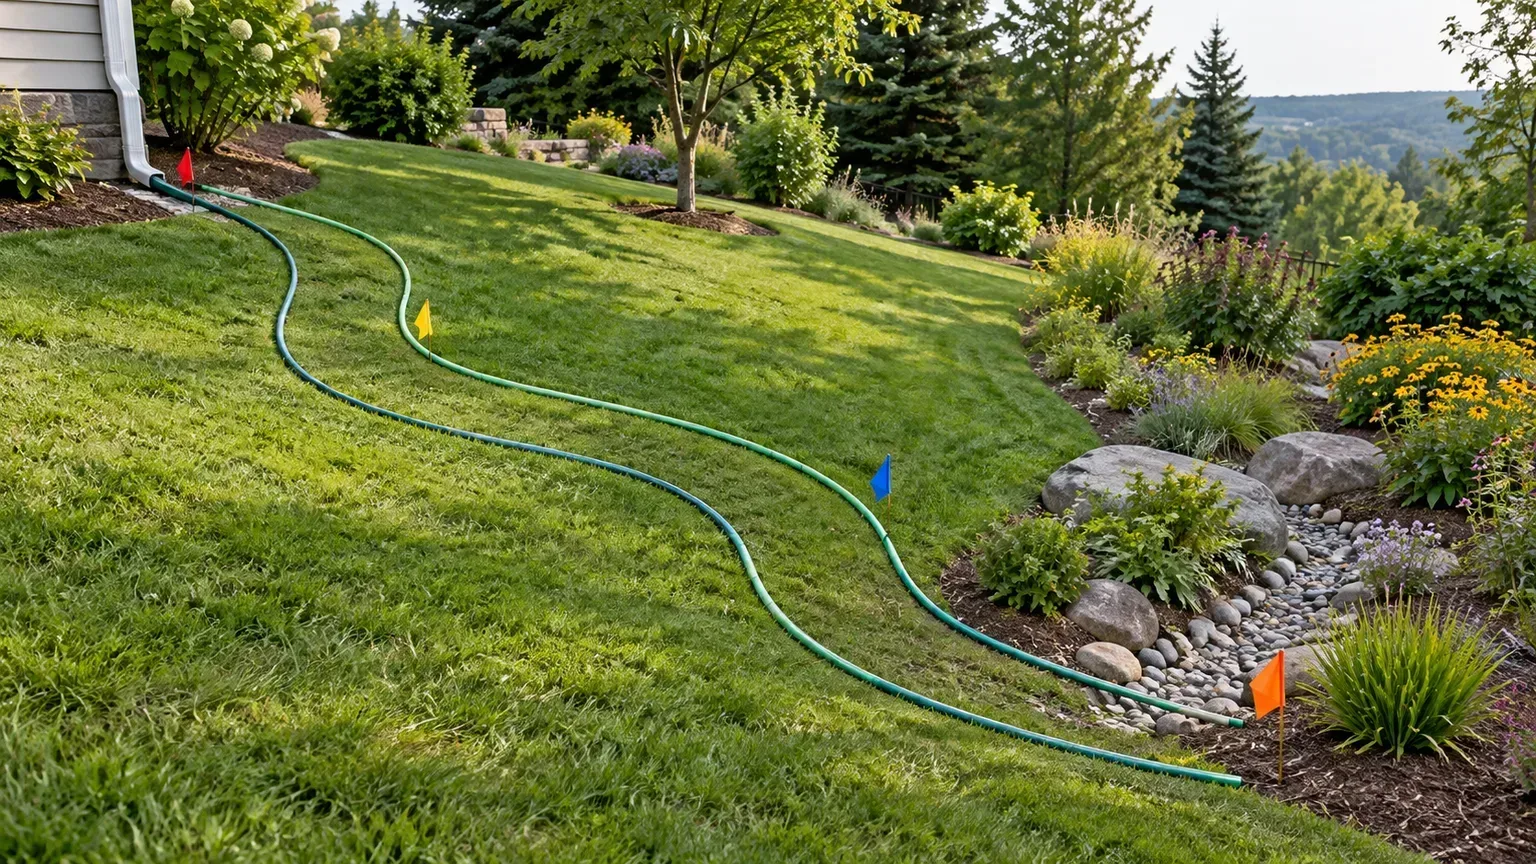
Colorado State University Extension’s landscape-design process begins with site analysis, including soil, slope, drainage, sunlight, and how the space will be used. NC State Extension also emphasizes scale and mature plant size: a shrub or tree that looks small in a nursery pot may eventually overwhelm a narrow border. Use those principles before selecting an idea, and check local rules if you are changing drainage, building near the street, or adding a gate.
Sketch the everyday route from the street to the parking spot, from the car door to the front walk, and from the drive to the garage. Keep planting outside the car’s turning and door-clearance zones, preserve a clear view where vehicles meet the street, and avoid creating a low spot that sends water onto a neighbor’s property. If digging is involved, arrange for underground utilities to be marked before work starts; the service and timing vary by location.
Shape a clear path from the driveway to the door
Idea 1: Give pedestrians a real path. A paved strip that branches from the driveway toward the front door prevents the drive from doing double duty as the only walking route. Choose a width that feels comfortable for daily use, keep it direct enough for groceries, and make its surface firm and even for strollers, rolling bins, or mobility aids.
The path does not need to be elaborate. A row of larger stepping stones set in groundcover can distinguish the walking route from the vehicle surface, while a straight concrete walk may fit a formal or modern home. Whichever material you choose, leave enough clearance for open car doors and keep plants from leaning over the walking line.
Idea 2: Repeat the walkway material near the entry. Carry the path’s brick, stone, or paver color into a small landing by the front door, then use it again as a narrow border or step. This repetition ties separate surfaces together without requiring the entire driveway to be rebuilt; keep the pattern simple so the entry still reads clearly from the road.
A practical material transition matters as much as the color. A smooth paver path that meets loose gravel can collect stones at the joint, so use a stable edge or a short hard-surface connector. Homes & Gardens’ path-planning advice distinguishes the main route from secondary paths; use the car-to-door walk as the direct, firm route and let decorative surfaces play a supporting role. Better Homes & Gardens’ landscape coverage also shows how defined paths and grouped planting can make a gravel garden feel purposeful.
Idea 3: Add a compact arrival landing. If the front door sits close to the garage or driveway, a small paved landing can create a useful pause between parking and entering the house. It might hold a bench, parcel box, or a single pot, but it should not narrow the path or become a place where car doors hit furniture.
Use the landing to clarify the route, not to build an unused outdoor room. On a tight lot, even a few feet of matching pavers can distinguish the entry from the parking pad; on a wider frontage, the same idea might become a modest seating nook screened by low shrubs. Check that the new surface will not trap runoff against the foundation or change how water leaves the property.
Curve beds and define the pavement edge
Idea 4: Let a curved bed soften a straight pavement edge. A shallow arc adds movement beside a rectangular driveway without reducing the usable driving width. Start the curve at a natural point such as the walk or porch, then repeat it once rather than weaving in and out several times; one legible line looks intentional and is easier to mow around.
Keep the curve broad enough to maintain. A narrow, wavy bed is hard to weed, mulch, or water, and it often becomes a strip of bare soil. If space is limited, use a clean crescent at the driveway entrance rather than curving the entire length.
Idea 5: Separate bed from pavement with a reliable edge. Brick, stone, metal, or a clean-cut planting edge can stop mulch and loose soil from washing onto the driveway and make mowing easier. Choose a material that suits the house and does not create a sharp lip where someone steps out of a car.
The edge has a practical job, so detail its height and base for the material, snow-removal method, and site slope. A loose row of stones may shift when a mower wheel or shovel hits it, while a properly set paver band can stay aligned. For a gravel driveway, edge containment is especially helpful because traffic and rain can push aggregate into nearby beds.
Repeat planting for year-round structure and color
Idea 6: Use repeated grass clumps to guide the eye. A sequence of compact ornamental grasses creates rhythm along a long or visually plain driveway. Space the clumps according to their mature spread, repeat a small number of varieties, and leave gaps where people walk, snow is stored, or sightlines need to stay open.
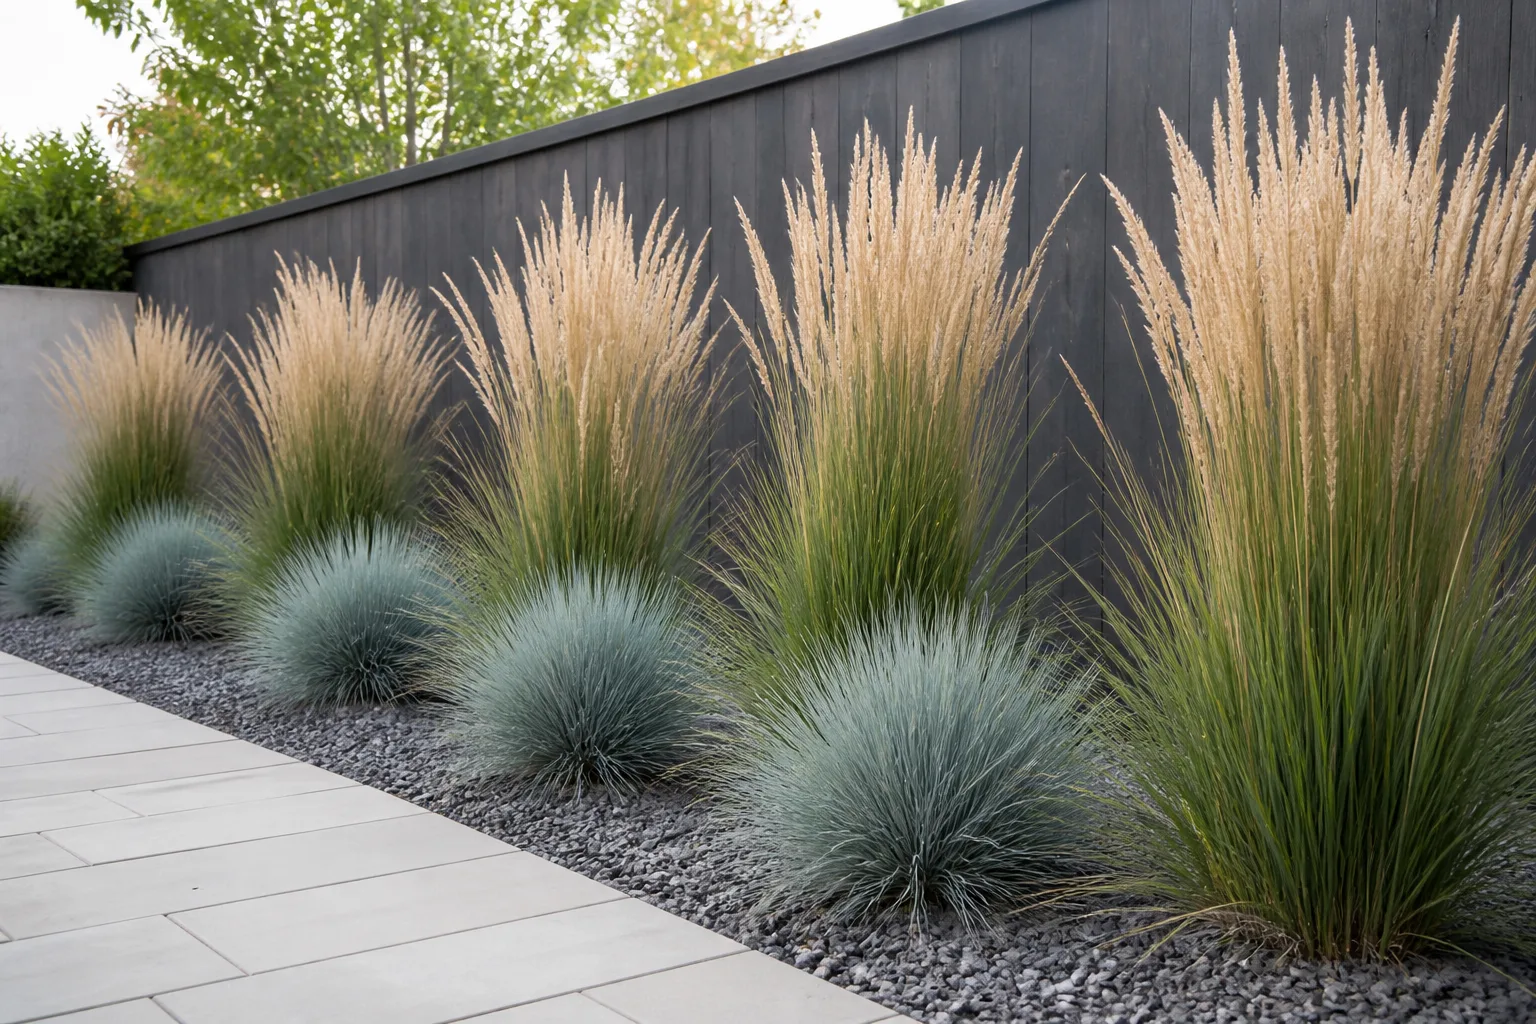
This can feel modern when the plants are repeated in an even pattern, or more relaxed when they are grouped in loose drifts. Select a species that fits the local climate and remains manageable at its mature size; some grasses spread aggressively or flop over a narrow drive. Decide whether the seed heads and winter stems will be left standing or cut back, since either choice affects seasonal appearance and cleanup.
Idea 7: Give a flowering border an evergreen backbone. A low hedge or a few compact evergreen mounds keep the bed readable after perennials finish blooming. Place the structural plants where they have room to reach mature width, then use flowering perennials in smaller groups toward the front or between them.
A repeated evergreen shape also helps an irregular planting palette look cohesive. For a small bed, choose one or two evergreen forms instead of collecting many unrelated shrubs; for a wide bed, use the same anchor plant at intervals and allow seasonal flowers to change around it. Confirm the plant’s mature height and whether it tolerates reflected heat, road salt, drought, and the soil at the driveway edge.
Idea 8: Use regionally native flowers in broad, repeated groups. Native perennials can bring seasonal color and support local wildlife when the plants suit the site and region. Instead of one of everything, repeat a few species in drifts so the planting reads as a composition from the street and is easier to maintain.
Choose for the actual conditions, not a broad label such as “native.” A sun-loving prairie perennial will struggle in dry shade, and a species that is native to a distant part of the continent may not be adapted to your local rainfall or soil. Use a regional plant list or local extension guidance, and leave room for mature spread so plants do not spill across the pavement.
Idea 9: Place a flowering shrub at a natural stopping point. One well-scaled shrub near a gate, bend, or front walk can mark the arrival without lining the whole driveway with blooms. Choose a form and flowering season that complement the house, then check whether fallen flowers, fruit, or leaves will land where cars park or where the surface is difficult to clean.
A shrub does not need to sit at the road edge to be visible. Placing it farther up the drive near the walk can keep the street exit open and protect it from plowed snow. Where deer, salt spray, or reflected heat are common, ask a local nursery or extension service for suitable options rather than assuming one popular shrub will work everywhere.
Idea 10: Build a layered bed that changes through the year. Put the lowest plants nearest the pavement, medium-height perennials behind them, and taller flowers toward the house or a fence. Combine foliage and bloom times so the bed still has texture after one flush of flowers fades; this is more reliable than depending on a single peak-bloom moment.
Avoid planting tall flowers or dense shrubs where they can hide a child, cyclist, or approaching vehicle near the street. The front edge can stay low and tidy, with the taller color placed farther inside the property. If the bed is narrow, use two layers instead of squeezing in three rows that will crowd each other as they grow.
Choose focal points that fit the actual site size
Idea 11: Use a small ornamental tree as a focal point. A compact tree can balance a broad window, soften a large area of pavement, and add shade where the driveway meets the house. Check the mature canopy width, root behavior, fruit or seed drop, and clearance from overhead lines, foundations, garage doors, and parked cars before choosing a species.
A tree planted too close to the pavement can lift edging, spread branches over a vehicle, or create a recurring mess on the surface. NC State Extension’s residential design guidance uses mature size and visual scale as core selection criteria, which is particularly useful in a small front yard. If there is no room for the tree at full size, use a tall shrub or a container-scale focal plant instead.
Idea 12: Frame the garage or entry with two substantial containers. Matching pots add color where a driveway meets a porch or garage, and they can be moved if the layout changes. Use a stable, frost-appropriate container with drainage, select plants for the light at that spot, and leave the car door and walking route unobstructed.
A pair works best when the architecture has a clear center or strong doorway. If the house is asymmetrical, two identical pots may look forced; one larger container balanced by a low planted bed can create a more natural composition. Containers dry faster than in-ground beds and need a plan for watering, overwintering, and seasonal replanting, so they are a design shortcut but not a zero-maintenance one.
Idea 13: Use a built-in planter to define a compact edge. A low masonry or timber planter can separate a short driveway from a lawn or small front patio when there is no room for a broad bed. Keep the wall low enough to preserve sightlines and keep it far enough from parking spaces that doors, bumpers, and snow shovels will not strike it.
Raised beds can dry more quickly than ground-level planting and may need careful irrigation in hot weather. Do not assume the wall will solve a slope or drainage problem: retaining soil against paving changes water movement, and taller retaining structures may need a designed base or local approval. For a small footprint, one clean planter with a few well-chosen plants usually looks better than several small boxes.
Use gravel and rocks where site conditions fit
Idea 14: Turn an unused strip into a gravel garden. A planted gravel bed can suit a sunny, well-drained strip that is awkward to mow. Keep the gravel inside an edge that separates it from pavement and lawn, use stones whose color relates to the home, and group plants rather than dotting single specimens across a bare field.
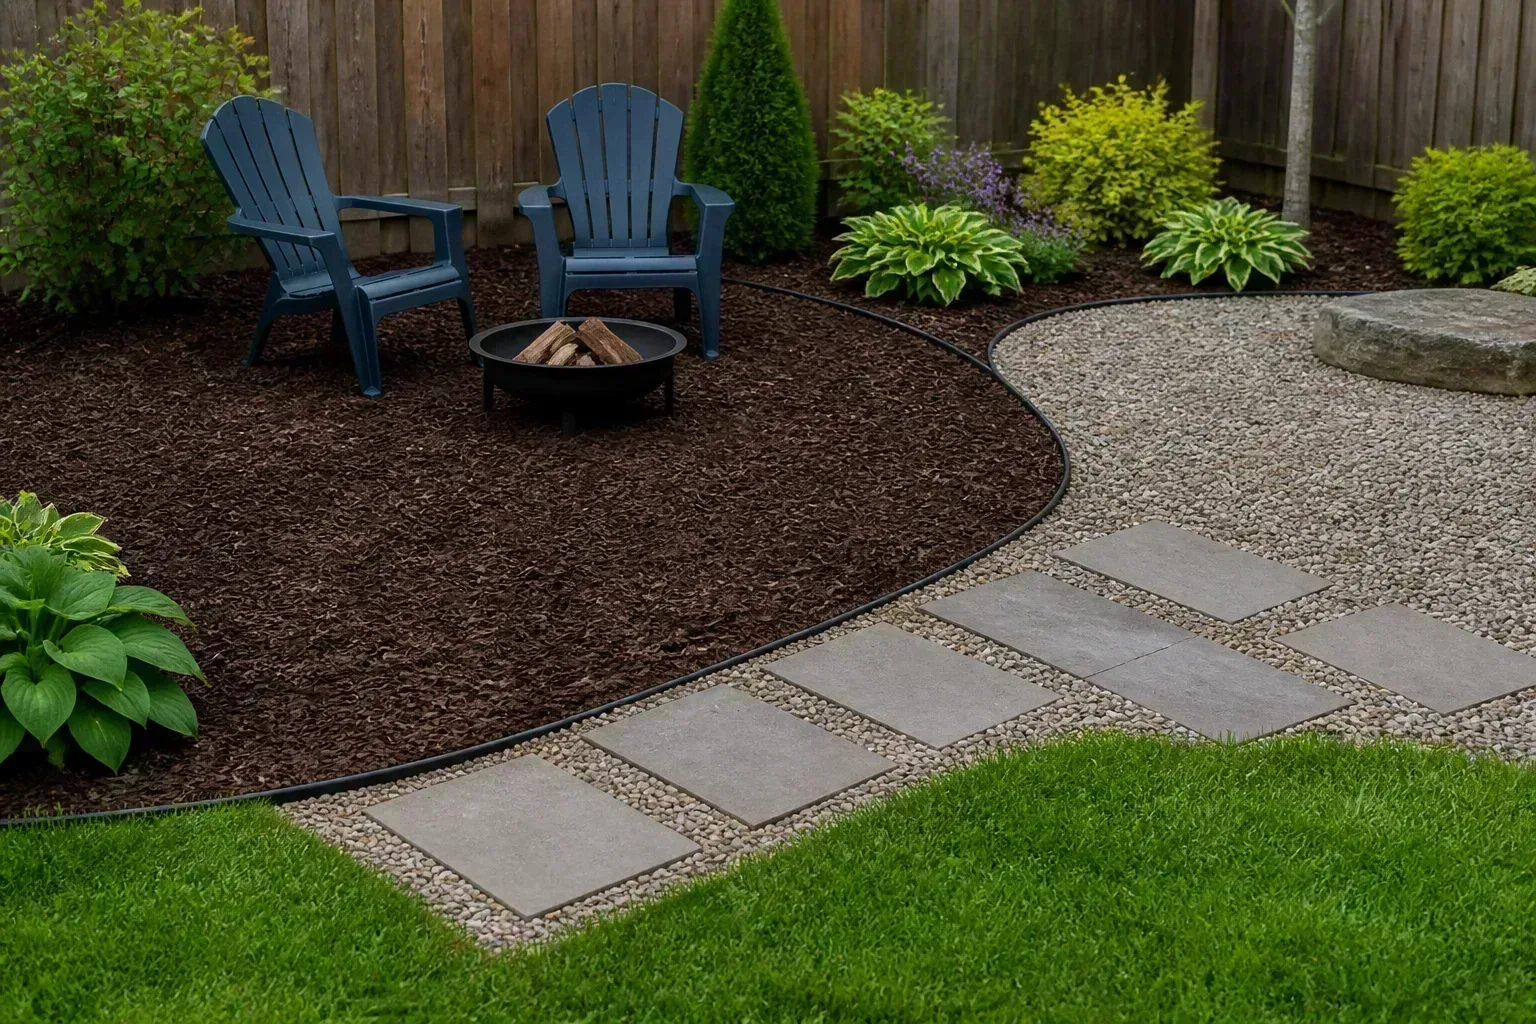
Do not treat all gravel gardens as the same construction system. Garden designers and editors describe different approaches to stone depth, weed barriers, and soil preparation; the right assembly depends on the plants, soil, drainage, and how the area will be used. Gardens Illustrated recommends considering local gravel and plant form as part of the design, while BHG highlights grouped, layered planting; ask a qualified installer or local horticulturist to specify the build-up rather than burying a generic fabric layer under every planting bed.
Idea 15: Combine a few stones with drought-adapted plants. In a hot, dry border, several well-placed rocks can make the planting feel intentional and help bridge the visual gap between pavement and garden. Choose plants for local winter lows, humidity, rainfall, and soil drainage; lavender, sedums, and other dry-site plants are options only where their needs match the climate.
A convincing rock garden uses stones with a consistent local character and plants that can eventually soften the gaps. Avoid scattering many small decorative rocks across a bed, where leaves and weeds become hard to remove. A few larger stones placed partly into the soil often look more settled and are less likely to migrate onto a walking surface.
Design for shade and dry soil near a house
Idea 16: Plant a shade border where the drive sits under trees or roof cover. Ferns, sedges, and shade-tolerant ground covers can soften a shaded driveway edge, but first check whether the soil stays moist or becomes dry under tree roots. Planting choices that match shade and moisture will last longer than a sun garden forced into a darker exposure.
Idea 17: Use evergreen foliage for winter structure in the same border. A low evergreen ground cover, compact shrub, or broad-leaf evergreen suited to your climate can prevent the bed from disappearing in winter. Combine it with a restrained number of deciduous shade plants so the border still has texture, and leave a clear margin for snow shoveling or leaf cleanup.
Add pavement details or a permeable surface
Idea 18: Add a contrasting paver band to a plain surface. A narrow strip of brick, stone, or darker pavers along one edge can visually finish an existing concrete driveway without replacing it. The band looks intentional when its color relates to the house, front path, or porch; if the driveway is already patterned, use fewer materials rather than introducing another competing motif.
Idea 19: Use one geometric inlay as a focal point. A small compass-like motif, circle, or contrasting rectangle can break up a broad paved surface, especially near an arrival court. Keep the accent outside the main tire tracks and at a scale that suits the drive; a delicate pattern can disappear on a large driveway, while an oversized medallion can dominate a modest home.
A decorative inlay is a masonry project, not a surface sticker. It needs compatible base preparation, accurate cuts, and joints that can tolerate weather and vehicle loads. If the existing drive has settled or cracks are moving, address that condition before investing in a design feature that may shift with it.
Idea 20: Explore permeable pavers when drainage and site conditions support them. Permeable paving is designed to let water move through openings into an aggregate base, but performance depends on the system, soil, slope, maintenance, and what drains toward it. It is not simply a matter of laying ordinary pavers with wide joints, and it will not solve every drainage problem.
Ask an installer to explain the full system, where overflow goes, and how the surface will be maintained in your climate. The cost and upkeep may be greater than a conventional driveway, and fine sediment can reduce infiltration if the area is poorly managed. Colorado State Extension recommends evaluating the site’s slope and drainage as part of landscape planning; that same check should come before selecting any new driveway surface.
Choose a planted ribbon only for the right driveway
Idea 21: Add a green ribbon between tire tracks on a low-traffic drive. A planted center strip can soften a wide driveway or a lightly used entrance, but it is a poor fit where cars routinely turn, heavy deliveries arrive, or winter plows cross the surface. If you want the look, use a designed load-bearing grid or planting system and choose a low, durable cover suited to the climate rather than relying on ordinary lawn grass between tire paths.
Plan for how the strip will be mowed, watered, and crossed. A ribbon that stays muddy, rutted, or patchy can look less finished than a simple gravel or paved drive. Keep it out of the path of garage drainage and avoid watering that regularly sprays the vehicle surface.
Frame the entrance with a gate or fence
Idea 22: Use a simple gate as an architectural focal point. A metal gate with restrained detail can mark the entrance and echo window frames, house trim, or other hardware. Keep posts and planting low enough for drivers to see oncoming traffic, check local rules and access needs, and allow a clear opening for vehicles and emergency access.
Idea 23: Warm the entrance with a timber gate or short fence. Wood can soften a brick or stone house and create a visual transition from the street to the property. Use durable materials and finishes appropriate for the exposure, and plan for regular inspection; untreated wood may weather unevenly, while some coatings need periodic renewal.
A gate should serve the property, not create a bottleneck. Measure the widest vehicle that needs access, include space for the gate to swing or slide, and consider snow and wind before fixing the layout. If a fence runs along a road corner, preserve the locally required sight area rather than allowing shrubs or panels to create a blind exit.
Design an arrival court and light the route
Idea 24: Mark the arrival with a compact forecourt and light the route. A slightly wider paved area near the front walk gives visitors a clear place to pause and can visually separate parking from the garden. Use a different paver pattern or a planting island at the inner end, not in the turning path, and make sure the result still accommodates the vehicles you actually own. Low, shielded path lights can make the walk from the car to the door easier to read after dark. Place them along the pedestrian route or at changes in grade, aim them toward the ground, and avoid bright beams that shine toward drivers or neighboring windows.
An arrival court need not be large to work. For a short driveway, a distinct walkway and one planted corner may be enough; on a wider drive, a modest apron can become the transition between parking and porch. Test the geometry with parked vehicles before construction so the design does not look elegant on paper but leave nowhere to open a door.
Low, shielded path lights can make the walk from the car to the door easier to read after dark. Place lights along the pedestrian route or at changes in grade rather than spacing bright fixtures down both sides of the driveway; aim them toward the ground so they do not shine into a driver’s eyes or neighboring windows. A few well-positioned fixtures usually create a calmer result than a runway of equally bright points.
Solar lights are simple to place but depend on sun exposure and battery upkeep. Low-voltage systems provide more control over placement and brightness, while new mains-powered outdoor wiring should follow applicable electrical rules and be handled by a qualified professional where required. Keep cords, fixtures, and vegetation clear of the plow path, turning area, and places where tires can hit them.
Match ideas to budget, space, and maintenance
For a small front yard, prioritize a direct walking route, one defined bed, and a focal point sized to the house. Containers can deliver quick color, while a single paver band or a crisp edge can improve the driveway without a full rebuild. Choose just one repeatable plant palette so the limited space does not feel crowded.
For a long or wide driveway, repetition creates order: repeat grass clumps, low shrubs, or lights at measured intervals, then vary the planting near the entrance where visitors slow down. A gravel garden may soften an unused side strip, while a more formal home may benefit from matching paving details and symmetrical planters. On a rural gravel lane, focus first on drainage, erosion, and maintenance access before adding decorative plants.
Colorado State University Extension’s water-wise design advice groups plants by water needs and treats maintenance as part of the plan. In practice, place plants with similar irrigation needs together, and do not run one sprinkler zone across a thirsty container and a dry-site shrub border. New plantings still need establishment care; “low maintenance” means fewer recurring jobs after plants settle, not no watering or pruning.
Avoid the mistakes that make driveways harder to use
The most common design problem is choosing plants by the size they are today rather than by mature spread. A plant that grows over pavement creates extra pruning, can hide people stepping out of cars, and may catch snow or leaves; read the full plant tag and leave the space it will need. A narrow bed is usually better served by a compact form than by repeatedly shearing an oversized shrub.
Another mistake is using one visual idea everywhere. A continuous high hedge can feel like a wall, a mix of too many small decorative features can compete with the house, and a mass of flowering plants can create a seasonal maintenance peak. Use repetition for unity, then reserve a distinct focal point for the entrance or front door.
Avoid changing grades, blocking drainage paths, or placing loose material where it will wash onto public pavement. Do not plant tall shrubs at the driveway exit, bury light fixtures under growth, or choose prickly plants where people need to open car doors. Check local requirements for visibility, fences, paving, stormwater, and excavation before work begins because rules differ by municipality and property.
Build the landscape in practical phases
You can get a cohesive result without doing everything at once. First correct the route and any water-flow problem, then define bed edges, install major hardscape, and plant long-lived structural shrubs or trees. Add perennials, containers, and lighting after you have watched the site through a season and know where water, shade, and snow actually collect.
For a low-cost refresh, clean the pavement, repair loose edging, add a clear walkway if it is missing, and repeat a few plants in the most visible bed. If you are replacing the driveway anyway, decide on its width, slope, runoff path, and surface before investing in adjacent landscaping; changing the hardscape later can damage established plants. Save the final plant list until the driving geometry and site conditions are settled.
Conclusion
The strongest driveway landscape ideas make the space easier to use as well as better to look at. Start with the approach to the door, preserve vehicle and sightline clearance, then choose a small set of materials and plants that suit the light, water, climate, and maintenance you can provide.
You do not need all 24 ideas. One clear path, a disciplined planting edge, and a focal point near the entrance may be enough to transform the arrival; larger properties can repeat those same elements along a longer drive. Measure first, choose plants for their mature size, and phase the work so every change solves a real problem on your site.