25 Midcentury Modern Landscaping Ideas for Your Home
Explore 25 midcentury modern landscaping ideas for paths, patios, planting, privacy, and small yards, with practical notes on climate, drainage, and upkeep.
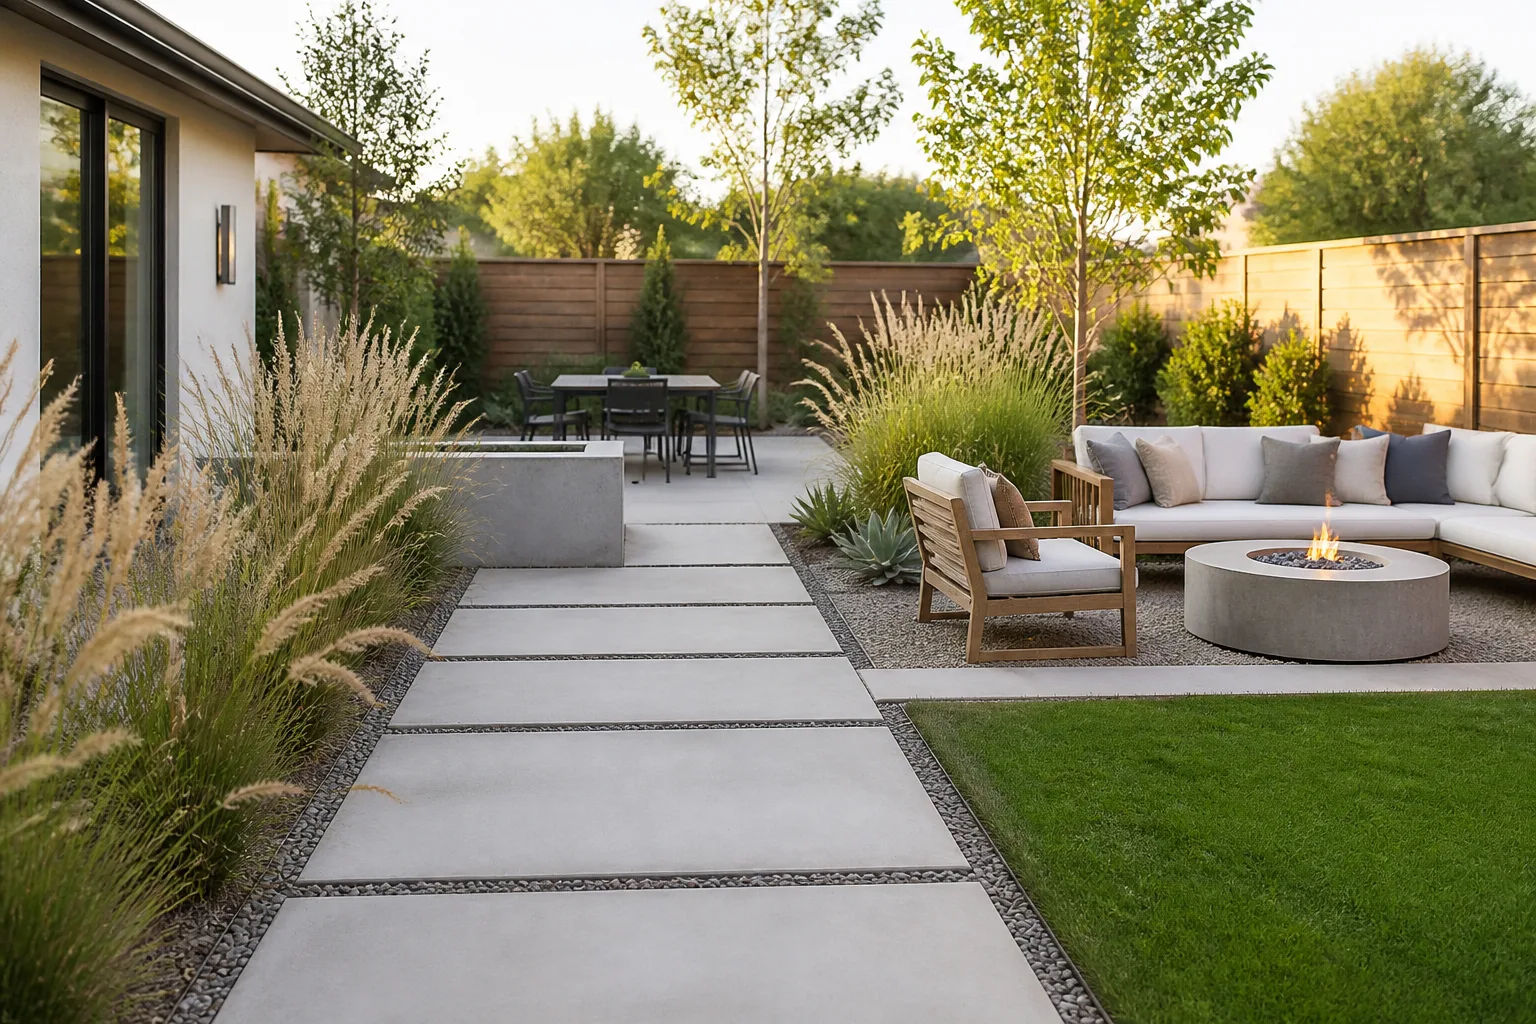
A midcentury modern yard works best when it responds to the house instead of dressing it in retro props. Start by noticing what the architecture already gives you: long rooflines, a carport, a courtyard, wide windows, or a sliding door that faces a view. Then choose a few strong lines and materials, and let plants soften them without hiding the house.
The most convincing landscapes are also shaped by ordinary constraints: the climate, mature tree roots, a sloped lot, children or pets, and how much pruning or watering you are willing to do. Use these 25 ideas as options to combine, not a recipe to copy. A gravel-and-agave scheme that suits a sunny Southwest yard may be wrong for a cool, wet, shaded garden; the same geometric layout can work in both if the materials and plants change.
Let the House Set the Geometry
Views, entries, and atriums
1. Let the strongest view lead the plan. Stand in the rooms where you spend time and look outward before choosing new planting. A garden seen through a broad window can be composed like a picture: a small tree, a sculptural boulder, or a single basin can anchor the view, while low or finely textured plants keep the middle distance open. The focal point does not have to be centered on the glass; it should feel intentional from the main seats inside and from the patio outside.
Do not screen a borrowed view just to create privacy if a lighter solution will work. A selectively placed tree, slatted panel, or tall planting group at the property edge may block a neighbor’s window while keeping the distant tree canopy or hillside visible.
2. Extend one architectural line into the garden. A straight entry walk, roof eave, carport edge, or line between sliding doors can become the organizing axis for beds and paving. Continue that line only where it helps with movement or visual order; repeating every angle in the yard can make the result feel like a diagram.
Align a path with the door people actually use, not only the center of the façade. If visitors must cross a lawn or squeeze between a hedge and a wall, the formal axis is not doing its job. Use a practical route first, then reinforce it with a paving edge, low wall, or repeated plants.
3. Turn an existing atrium into a small outdoor room. Many midcentury homes have a protected entry court or a walled garden visible from the center of the house. Treat it as a room with one primary experience: filtered shade, a view of foliage, a small water sound, or a place to pause near the entry. A single focal element and a restrained plant palette will usually read more clearly than mixing several decorative styles.
Before adding a pond or heavy planter, check access, waterproofing, drainage, and maintenance. Enclosed courts can be hotter, shadier, or windier than the open yard; a Japanese maple, fern, or other shade plant belongs only where its light and water needs can be met. Use a specimen suited to the actual microclimate rather than selecting it solely because it appears in midcentury-inspired imagery.
Small yards and clear circulation
4. Give a small front yard one clear job. Decide whether the entry should feel welcoming, private, or easy to maintain, then make the path, focal point, and planting serve that choice. A narrow planting bed with a few repeated forms can frame the door without hiding windows or the original façade.
Avoid filling every corner with a different specimen. Too many unrelated shrubs, lawn ornaments, edging styles, and path materials compete with the clean lines of a compact home. If you want color, choose one seasonal accent or a planter that can change, rather than scattering bright flowers through every bed.
5. Use a direct, comfortable path rather than a decorative obstacle course. A path can make a small lot look more spacious when its width, surface, and direction make sense for how people walk. Give the main route a continuous, stable surface from the sidewalk or driveway to the door, and reserve stepping stones for secondary routes where they will not become a trip hazard. Leave room for carrying groceries or a stroller, and consider mobility needs before committing to narrow gaps or uneven stone.
Choose a Few Hardscape Moves
Pavers, joints, and gravel
6. Lay large-format pavers in a simple grid. Square or rectangular concrete pavers echo the modular logic of many midcentury homes and create a calm surface for dining or lounging. Set the module from the space rather than automatically choosing oversized slabs: very large pieces can be difficult to handle, expensive to replace, and visually clumsy in a tiny court. A grid is easiest to read when its edges align with the house, seating, or a major path.
Check the product’s surface texture, thickness, and local freeze-thaw requirements before buying. A smooth tile may be slippery when wet or unsuitable for a driveway. Compare samples beside the home’s wood and trim in natural light.
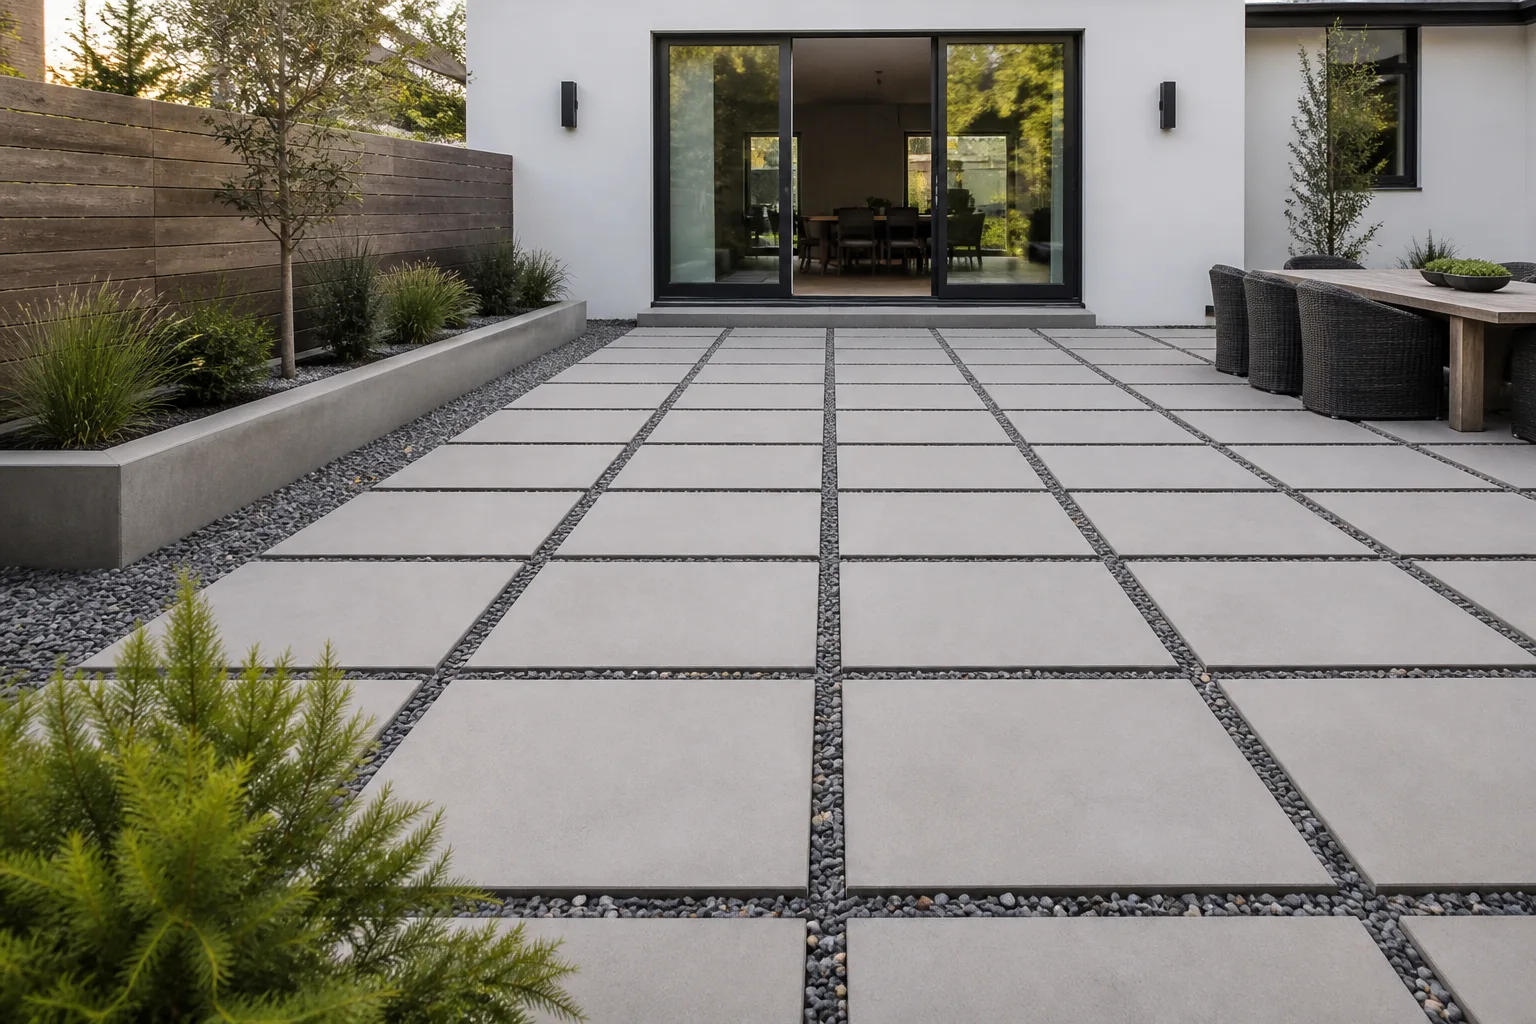
7. Let a narrow gravel joint break up a broad paved area. Gravel between slabs can visually lighten a patio and allow some rain to pass through the joints, depending on the full base and site design. It also brings a second texture without adding a new color family. Keep the gap consistent and choose stone that stays in place under foot traffic; small loose gravel can migrate onto the pavers and into the house.
A gravel joint does not make an otherwise impermeable patio a complete stormwater solution. Water can still run off the slabs, and the base layers determine whether it infiltrates or drains elsewhere. Plan slope, overflow, and discharge before installation rather than assuming the joints will absorb a downpour.
8. Use gravel as a deliberate ground plane, not a leftover fill. A bounded area of pea gravel or angular stone can create a clean contrast with broad leaves, fine grasses, or a concrete path. Define its edge with a metal strip, concrete curb, or stable paver line so it does not spill into lawn or planting beds. Choose stone color in daylight beside the house’s siding and trim; warm, pale gravel can look very different from cool gray gravel once the sun drops.
Think about how the area will be used. Loose stone is less comfortable for dining chairs, wheeled bins, mobility aids, and children’s play than a firm patio surface.
Walls, reuse, and grade changes
9. Add a patterned concrete-block screen where it solves a privacy problem. A screen wall with a repeating opening can recall postwar materials while filtering views and casting a changing shadow. Use it as a short entry divider, a backdrop behind a planter, or a boundary between seating and service areas. Its pattern becomes a strong visual feature, so repeat it sparingly and pair it with simple planting.
A freestanding wall needs a stable base and suitable reinforcement for its height, exposure, and local conditions. Do not use an ornamental screen to retain soil unless the assembly is engineered for that load. It is often safer and cheaper to keep a privacy screen separate from a retaining structure.
10. Keep and repurpose sound existing material. Before demolishing a concrete walk or patio, check whether the slab is stable, properly drained, and located where it is useful. Sound sections may be cut into stepping pads or reused as simple bands beside gravel; old brick can become a small landing if it fits the house. Reuse saves disposal and replacement material, but it is not worth preserving a surface that directs water toward the foundation or has widespread settlement.
Set a limit on how much of the old layout you carry forward. A mismatched patchwork of new and salvaged paving can look accidental. A consistent joint width, edge, or repeated module helps old and new sections read as one plan.
11. Use terraces to make a slope usable, but design water and access first. A sloped yard can hold a flat seating area, a short run of steps, and planted bands rather than one difficult bank. Short, well-placed changes in level can echo the house’s horizontal lines while making separate outdoor zones feel connected. A photographed midcentury yard makeover on Houzz shows how outdoor zones and slope conditions influence the finished plan.
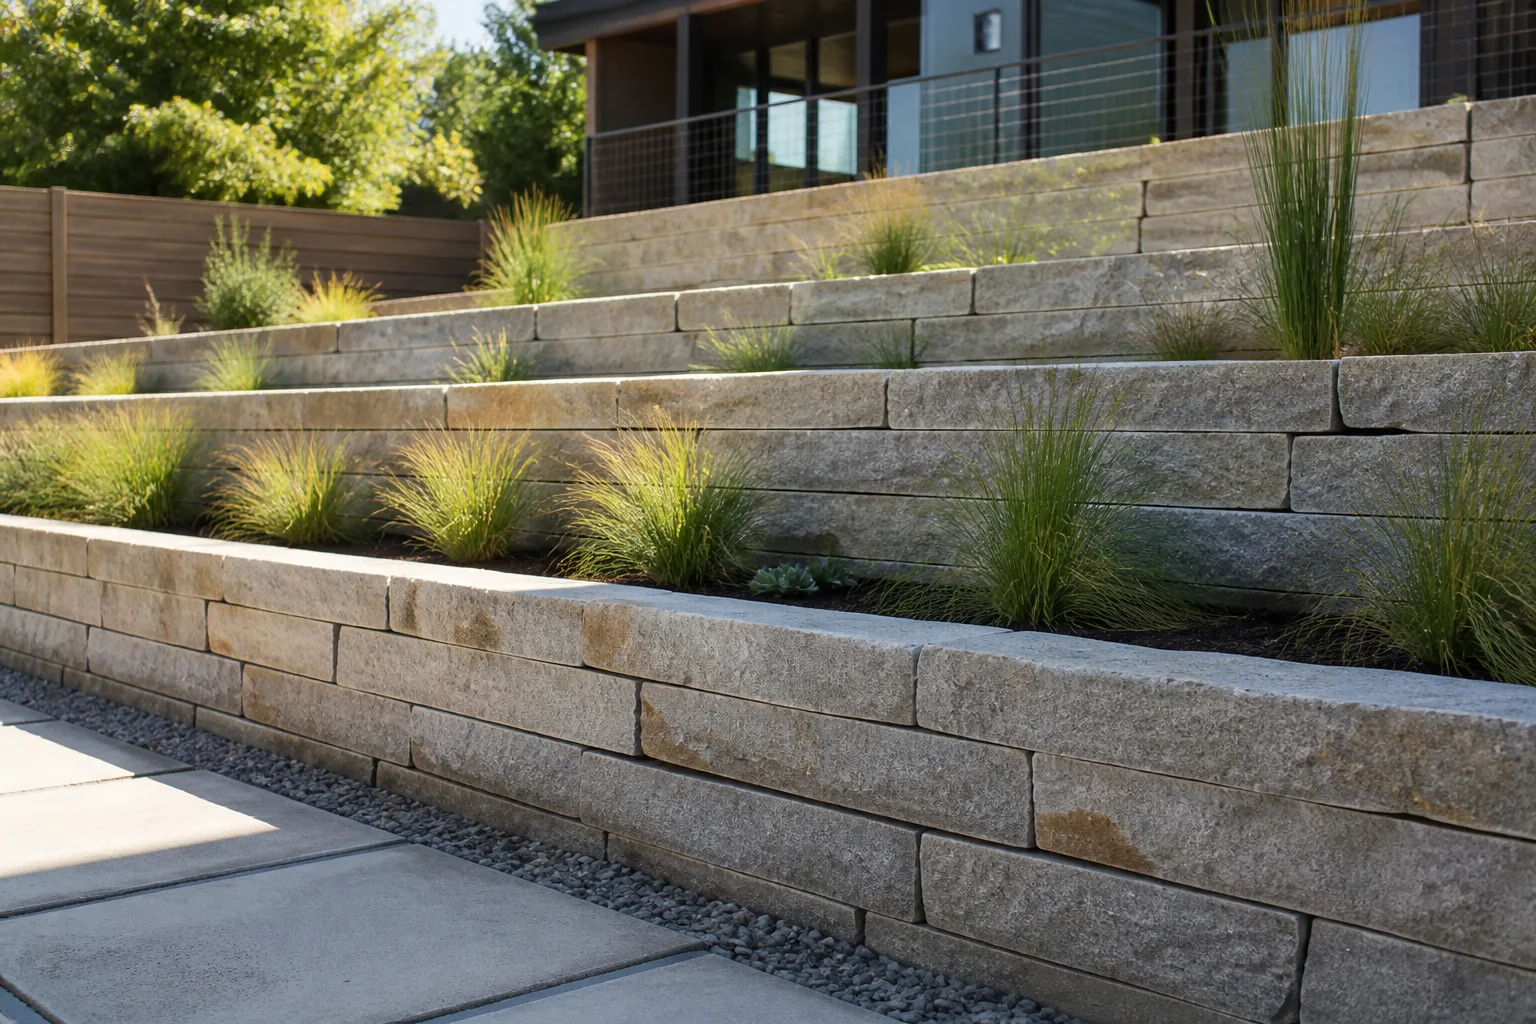
Retaining walls change where water and soil move. For a substantial grade change, unstable soil, drainage outlet, or wall near a structure, ask a qualified local professional to assess the site before construction. Make stairs comfortable and visible, include a safer route where needed, and do not solve an erosion problem by simply hiding it behind a taller wall.
Plant for Shape and Site
Repetition, massing, and focal points
12. Keep a lawn only where it earns its space. A small, clean-edged patch of turf can provide play space, a cool place to sit, or a simple green plane that sets off concrete and planting. It is easier to maintain than many narrow fragments surrounded by curves and edging. If nobody uses it, replace it with a groundcover, planting bed, or permeable patio matched to the site.
A water-wise yard does not need to look like a rock garden, and removing a lawn does not automatically remove irrigation or maintenance. Groundcovers vary in water needs, spread, and seasonal appearance. Colorado State University Extension describes their potential to add texture, help reduce erosion, and transition between landscape spaces, while noting that site preparation, exposure, and ongoing maintenance still matter (groundcover guidance).
13. Repeat a short list of plants in deliberate groups. Repetition gives a restrained design its rhythm: repeat the same grass clump along a path, use a low groundcover in several beds, or echo one rounded shrub at the entry and patio. Plant in meaningful groups rather than one of everything. Larger masses feel calm and are easier to understand from inside the home, while a few differences in height and texture keep them from looking monotonous.
A useful starting palette is one small tree or tall focal form, one or two medium shrubs, a low groundcover, and one grass or perennial accent. Adjust the list for shade, soil, water, wildlife pressure, and maintenance. In a Sunset case study of a modern garden, a limited range of plants grouped in larger masses helped retain a streamlined feel without making the garden austere (the Marin landscape story).
14. Plant repeated forms, not a collection of unrelated colors. A sculptural rosette, upright grass, rounded shrub, or small tree can provide a distinct silhouette against a strong wall or window. Repeating one form at different distances ties the front and back yards together. If you prefer flowers, use a limited color range and let bloom season add change while the foliage maintains the overall structure.
Keep contrast intentional. Silver foliage beside dark concrete or a warm-leaved tree against a pale wall can be enough; several high-contrast colors can make the yard feel busier than the home. Plant leaves and bark should complement the building from both outdoors and through the windows, where they are part of the interior view.
15. Use one well-scaled tree as a canopy anchor. A small or medium tree can give an exposed patio shade, frame a view, and add seasonal shape without creating a wall of foliage. Japanese maples suit some sheltered gardens, while other regions may call for a local native tree or a species adapted to heat, wind, or cold. Check the mature canopy width and height, root behavior, water needs, and distance from utilities before planting.
Do not put a large tree directly under eaves or choose one that will have to be repeatedly topped to fit. A correctly sized tree is usually more graceful and cheaper to maintain than a too-large tree pruned into a permanent conflict with the house.
Climate fit, groundcovers, and mature size
16. Choose plants for the site you have, not the region in the photograph. “Drought-tolerant” is not a universal plant category: a plant adapted to a dry inland summer can struggle in humid heat, waterlogged soil, or a cold winter. Start with your hardiness zone, seasonal rainfall, sun exposure, soil drainage, and any local water rules, then check mature size. UC IPM’s plant-selection guidance recommends matching plants to soil, climate, water limitations, heat, cold, and sunlight, and considering whether a plant will fit its space when mature.
Native plants can support regional ecological goals, but “native” does not mean every species belongs in every bed. A wetland plant may be wrong for a hot, dry bank; a local species that grows too tall may hide a window or spill over a walk. Choose the right species for the specific microclimate, not just the broad region.
17. Group plants by water needs. Put thirstier plants together where irrigation is practical and keep plants adapted to drier conditions in a separate zone. This makes watering easier to manage and reduces the risk of overwatering drought-adapted plants to satisfy nearby species that need more moisture. When changing an old lawn to beds, phase the conversion so you can observe how sun, runoff, and soil moisture vary across the yard.
A mixed bed of plants with very different water needs may look attractive when newly installed but demand constant adjustment. A simple drip system or separate irrigation zones can help, though it still needs inspection and seasonal changes. In the first year or two after planting, even adapted plants may need establishment water; follow local horticulture guidance for the species rather than assuming the mature landscape is immediately hands-off.
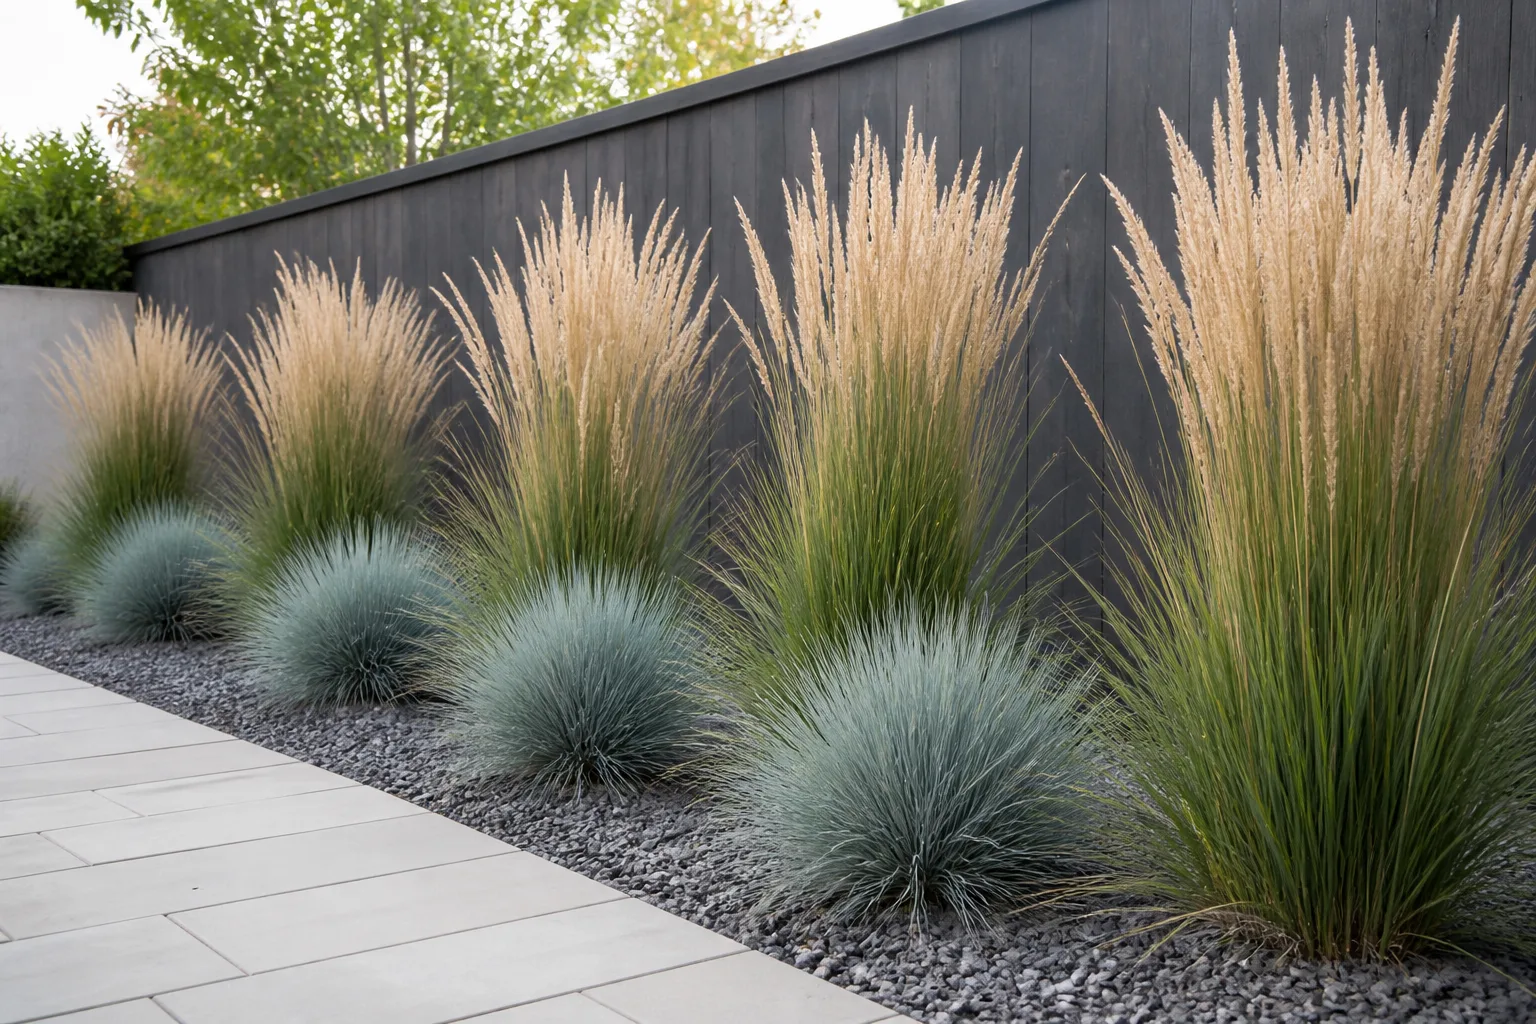
18. Use ornamental grasses to soften hard edges. A repeated line of compact grasses can make a concrete walk or low retaining wall feel less severe and add movement when the breeze shifts the leaves. Choose a species and mature width that will not flop across the path, and check whether it remains attractive through winter or should be cut back. A few distinct clumps usually look more deliberate than a mix of every grass at the nursery.
Climate matters more than the label “ornamental.” Some grasses are invasive or poorly suited to local conditions; others need more water, sun, or space than a small bed can provide. Ask a local extension office or native plant nursery for species that remain manageable in your area.
19. Use containers to add height without making permanent beds. A small run of matching or related planters can establish a threshold, frame a patio, or hold plants that need different soil or watering from the surrounding garden. Containers are useful when the yard is mostly paving or when a homeowner wants to test a plant’s scale before committing to a bed. They also give you a controlled place for a vigorous plant that should not spread through the ground.
Use frost- and sun-appropriate containers with drainage holes, and choose a size large enough to keep roots from drying rapidly. A row of unrelated pots can read as clutter, so repeat a shape, material, or color.
20. Keep planting low around important windows and doors. Low beds preserve the characteristic connection between inside and out and allow the façade to remain visible. Put taller screening plants at the lot edge or beside an exposed seating area instead of directly in front of every window. Under a broad picture window, a low layer of grasses, groundcover, or carefully sized shrubs can soften the foundation without blocking the view.
“Low” should be judged at mature size and after pruning, not from the nursery pot. Leave clearance for siding, windows, maintenance access, and pathways, and avoid planting where leaves will clog drains. If privacy is the goal, place the screen across the sightline that needs privacy rather than turning the whole perimeter into a hedge.
Make the Garden Work Like an Extra Room
Patios and activity zones
21. Make the patio feel connected to the interior threshold. A patio aligned with a large opening can function as an extension of the living room when the walking route is direct and the surface is comfortable underfoot. Echo one interior material or color outdoors, but use finishes designed for weather and traction. Where a flush transition is possible, coordinate the threshold, waterproofing, and slope with the home’s construction details.
Do not raise paving against a door or foundation simply to make it look level with the floor. Exterior surfaces must shed water away from the building and comply with local accessibility and construction requirements. If the existing grade cannot support a near-level transition, a short, well-designed step or landing is safer than creating a drainage trap.
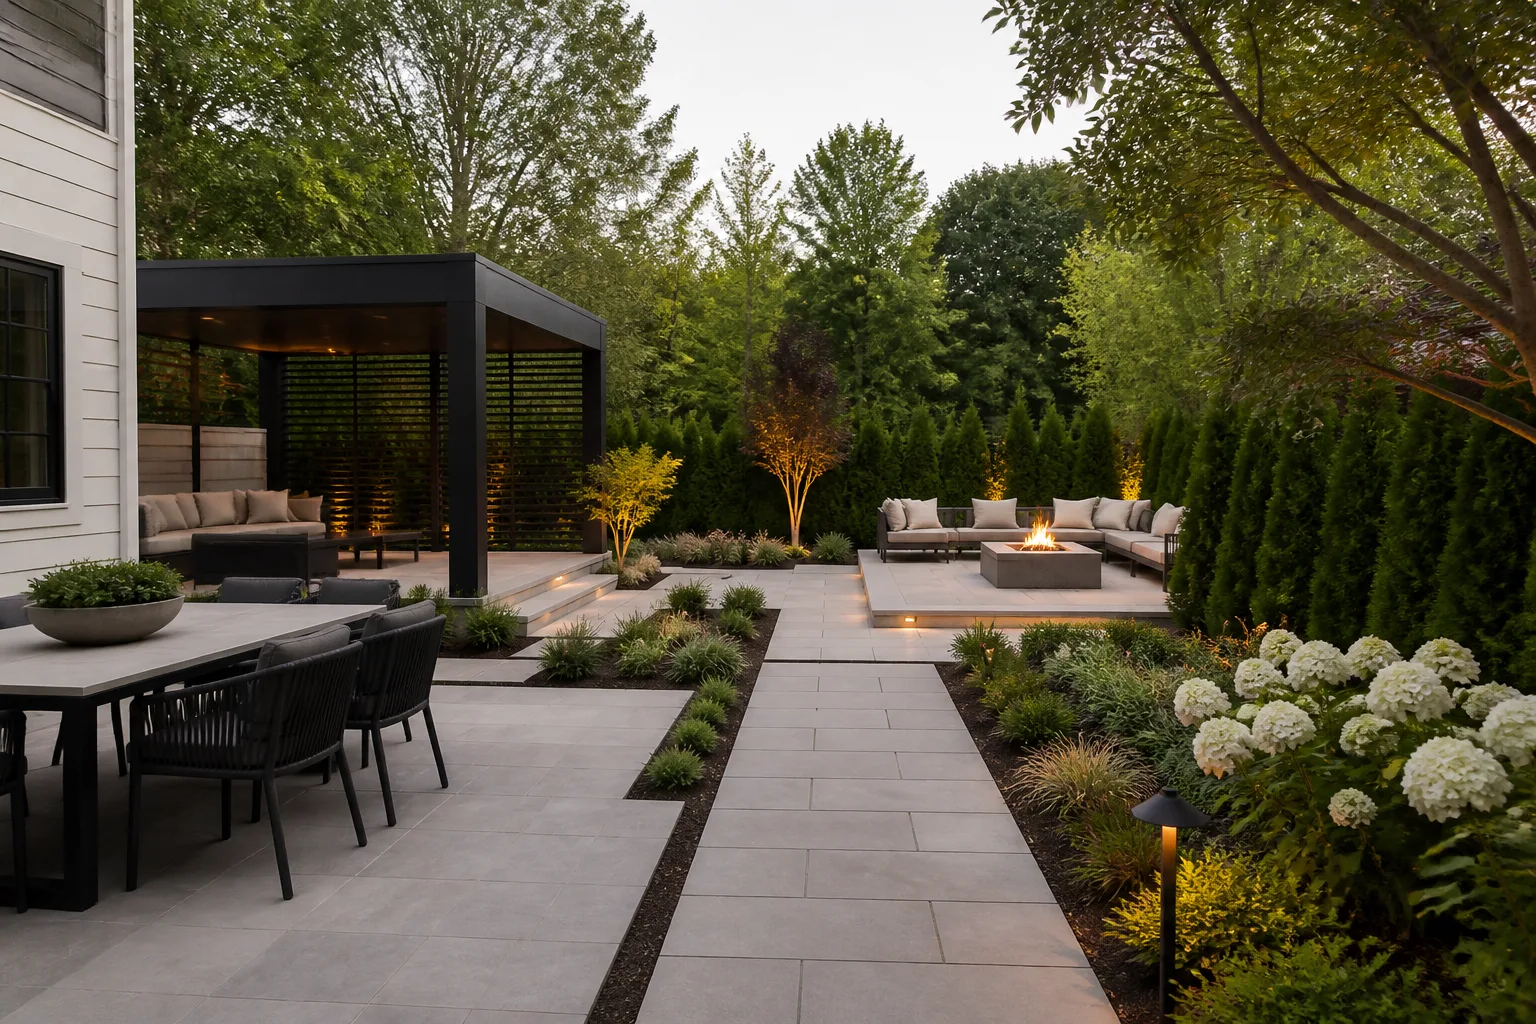
22. Divide the yard into a few useful zones. A patio can hold a dining table near the kitchen, a quieter lounge beside a view, and a clear passage between them. Use changes in paving direction, gravel bands, a planter, or a low seat to show where one activity ends and another begins. An editorial Houzz landscape case study describes a family yard arranged around dining, lounging, and play; the useful lesson is to plan for the people and routes, not to copy the square footage or feature list.
Leave open space between zones so furniture does not block movement and the yard does not become a series of tiny rooms. A family with children or a dog may value flexible play space more than a second seating area; someone who gardens may need a direct service path to a shed or hose. Draw furniture to scale before paving so the patio is not oversized or too cramped.
Privacy, water, and evening light
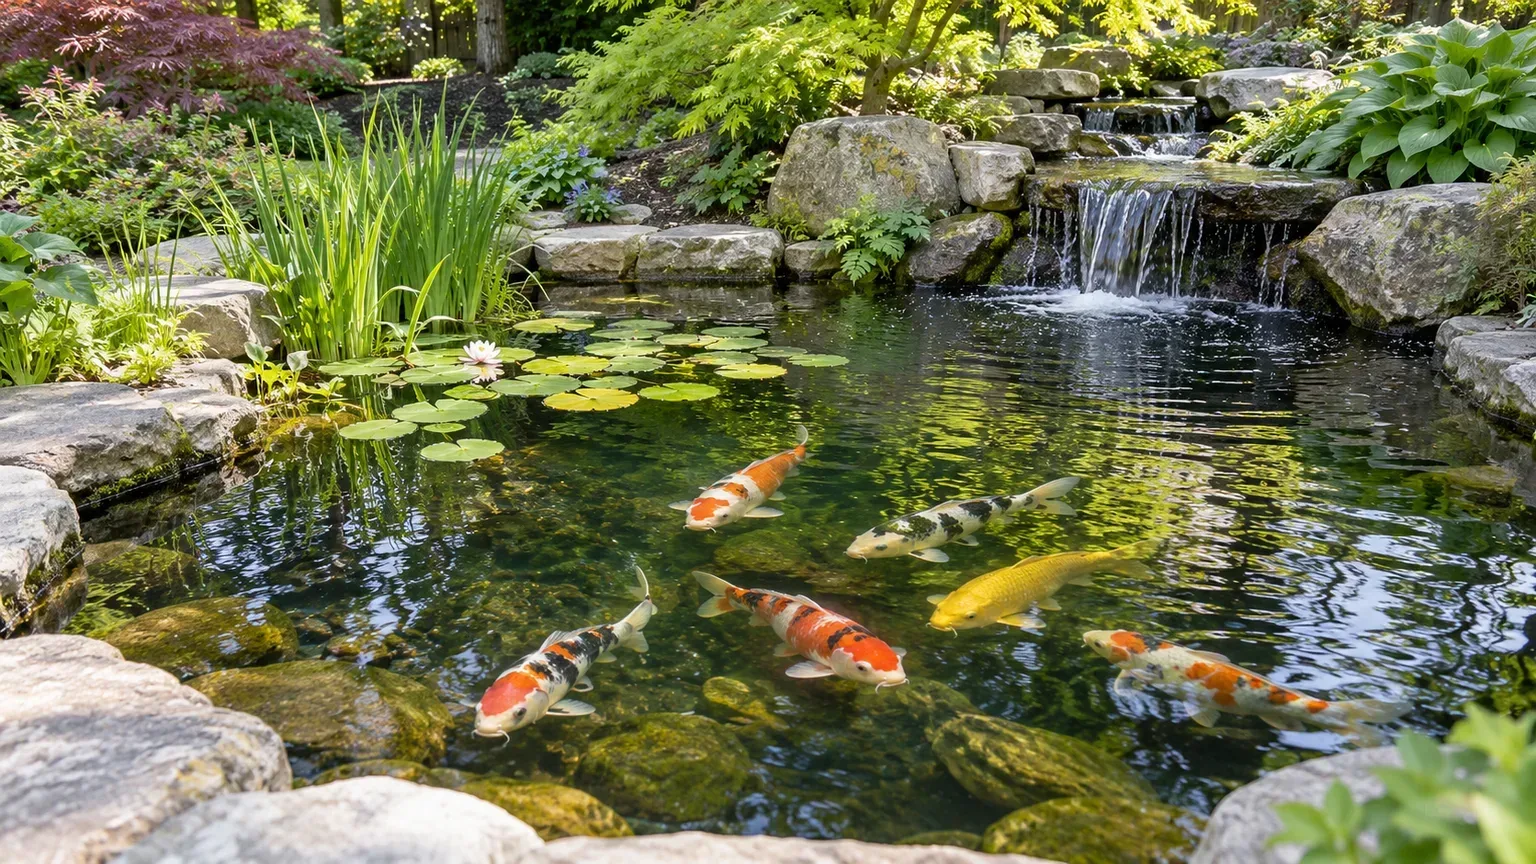
23. Add one quiet water feature only if you want its sound and upkeep. A shallow basin, narrow rill, or recirculating fountain can make an atrium or patio feel restful and provide a visual focal point. Place it where it can be seen from the house and reached for cleaning. In a compact courtyard, a modest feature with a simple outline often fits better than a large pond.
Water features need a reliable power source when they use a pump, regular cleaning, and a plan for evaporation, splashing, and winter conditions. Avoid placing water where runoff could wet a foundation, where it creates a hazard for small children, or where local restrictions make replenishment impractical. If you mainly want movement or sound, a wind-responsive grass bed may require less infrastructure.
24. Use a screen where privacy is needed, and leave the rest open. A slatted fence, patterned block panel, trellis, or small group of tall plants can shield a dining seat from a neighbor without enclosing the whole garden. Put the screen close to the activity it protects and keep view corridors open from the main rooms. This gives privacy a purpose and avoids the visual heaviness of a tall, uninterrupted fence.
Check local rules for fence height, property lines, and visibility at driveways before building. Screens also change sun, airflow, and shadows; a solid panel that blocks a neighbor may shade a bed or make a narrow side yard feel darker. A short panel combined with layered planting can filter a view without making a rigid wall.
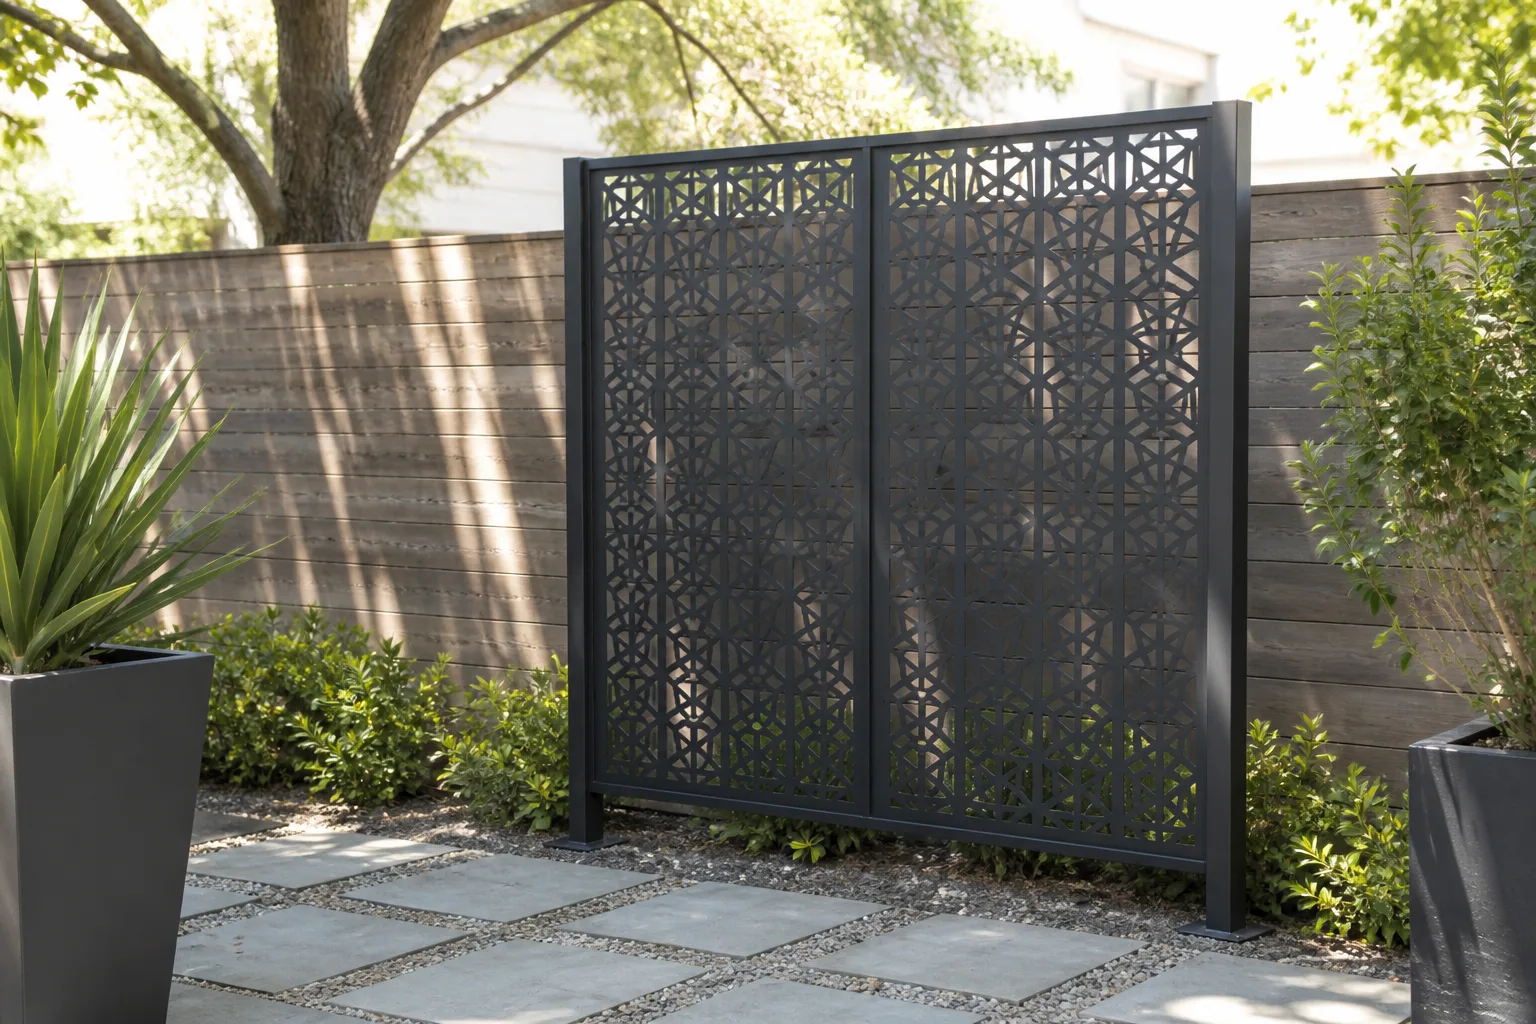
25. Light paths and focal points with restraint. Shielded fixtures can make an entry safer to navigate and let the garden remain visible after dark without turning it into a brightly lit stage. Use a low, warm light near steps and changes of level, and highlight one tree, wall, or water feature rather than uplighting every plant. Hide fixtures where possible so the source is not the main object in the daytime.
Avoid glare into the house or neighboring windows, and use outdoor-rated equipment installed according to local electrical requirements. A few carefully placed lights usually work better than many evenly spaced stakes. If a path is adequately lit by existing house fixtures, landscape lighting may not add enough value to justify wiring and upkeep.
Check Drainage, Lawn, and Long-Term Care
Match the design to the site
Before sketching shapes, watch where water moves during or after a strong rain. Check downspouts, low spots, and the ground near doors; a new slab or compacted gravel area can redirect runoff even when the original yard drained well. Plan where water should go before selecting a wall, patio edge, or planting berm, and consult a qualified local professional if drainage, slope stability, or a retaining wall is uncertain.
Treat lawn as one possible surface, not a default. Keep a neat, useful panel if people will play or sit there; otherwise, compare regionally appropriate groundcovers, planted beds, or permeable paving. Each choice has costs: groundcovers may need weeding while they establish, gravel can move and heat up, and planting beds need seasonal care. A surface is only low-maintenance when its installation and upkeep match the household.
Keep the maintenance promise realistic
Write down what you will actually maintain: mowing, pruning, irrigation checks, leaf cleanup, sweeping gravel, or caring for a fountain. Then edit out features that require a routine you will not follow. A simple landscape with one water feature you love is more sustainable in practice than an elaborate drought-themed yard with plants that need constant replacement.
Plant spacing is another maintenance choice. Planting too close for an instant full look can create pruning, crowding, and airflow problems later; leaving the correct mature space may look sparse for a season or two. Use temporary mulch and small repeated groups to bridge that establishment period rather than filling every gap with plants that will eventually have to be removed.
Build in an Order That Prevents Rework
Start with a measured sketch that shows the house, doors, windows, existing trees, utilities, slopes, and the route water follows. Mark the paths people use and the activities the yard must support before drawing the decorative beds. For a small refresh, this can be a simple scaled drawing; for major grading, drainage, retaining walls, or extensive paving, get the right local design and construction advice before ordering materials.
Next, decide which existing features to keep, repair, or remove, and select the main hardscape module and edge detail. Do disruptive work first: drainage and grading, utilities, wall foundations, and patio base preparation. Then install paving and irrigation, plant the larger structural plants, fill out groundcovers and grasses, and finish with furniture and lighting. Confirm utility locations and permits before digging; local rules can apply to walls, tree removal, electrical work, and water features.
Buy plants only after the hardscape locations and mature dimensions are clear. A paper cutout of a mature canopy or chair footprint helps reveal conflicts while they are still easy to fix. Build in stages if budget is limited, but make the stages follow one plan: an entry walk and a single bed can be complete without committing to a full-yard renovation, while still leaving space and access for future work.
Conclusion
The most adaptable midcentury modern landscaping ideas use the house as a guide, then adjust the materials and planting to the actual climate, slope, and household. Begin with views and circulation, choose a small set of paving and plant forms, and give each outdoor area a clear job. Before building, check mature plant size, runoff, maintenance, and the practical details around doors and grade changes. That is how a clean-lined yard becomes comfortable to live in, not just a look to photograph.