How to Build an Inexpensive Garden Arbor
Build a garden arbor on a budget with a dimensioned cut list, footing decisions, treated-wood guidance, bolt connections, and a clear step-by-step sequence.
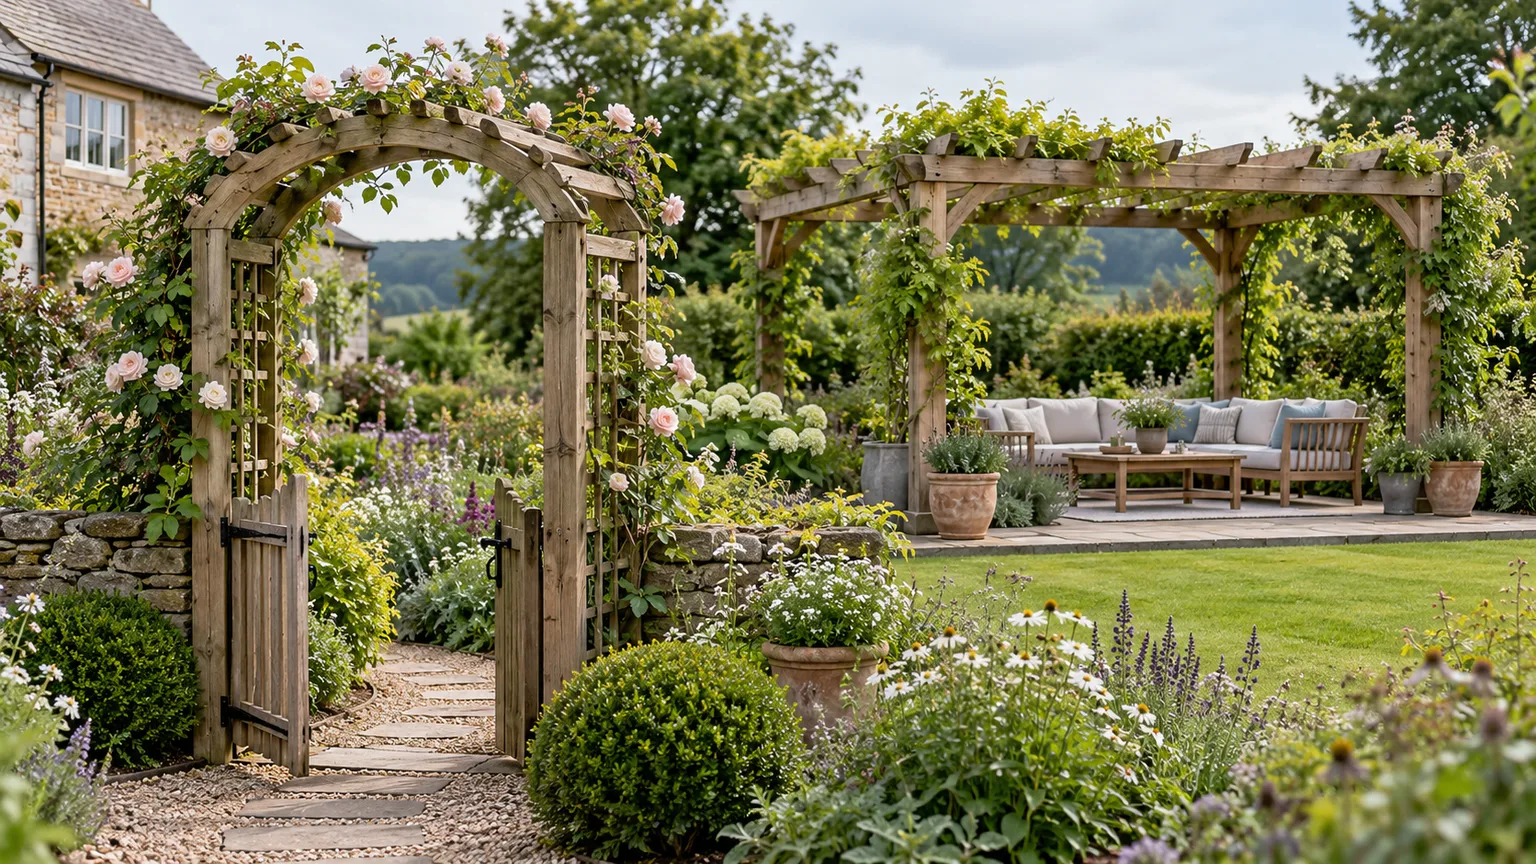
A garden arbor can frame a path, mark the entrance to a planting bed, or give a climbing rose a place to grow without the cost of a large pergola. The economical route is to keep the structure small, use common lumber sizes, make the roof open, and spend money where it matters: footings, connections, and bracing. A simple arbor is still a freestanding structure exposed to weather, so its dimensions and anchoring must suit the actual site.
The plan below is a planning example for a small, open garden-entry arbor, not a stamped structural design. It assumes a modest vine load and no swing, hammock, roof, shade sail, or heavy hanging pots. Soil, frost depth, wind, local rules, and lumber treatment can change footing and member sizes, so check them before cutting posts.
Choose a Design That Fits the Route
An arbor is a relatively compact overhead frame, often placed over a path or entrance and sometimes used to support a climbing plant. A trellis is a climbing grid; it can be attached to an arbor, but it does not replace the posts, beams, and anchoring that make a freestanding frame stable. A pergola is generally a larger outdoor structure intended to define a sitting area, and it may carry more roof area or heavier loads than the small example here.
For a low-cost first build, use four square posts, two paired side beams, a row of rafters, and only as much lattice as you need. An open top uses fewer boards and lets more sun through than a solid roof. It also avoids the extra snow, water, and wind forces that a roof, fabric canopy, or dense side panel can introduce.
Choose the location before the style. Put the arbor where people naturally enter a garden or where a path needs a visual endpoint, but avoid blocking a gate swing, a walkway, a mower route, or access to a meter or drain cleanout. If a vine will be planted, leave space at the post base for its mature root zone and for pruning access; a plant squeezed against the post can make inspections harder.
Size the Opening Before You Price Lumber
Measure the actual walking route, then decide how much clear passage you need between the inside faces of the posts. The example dimensions below use post centers about 43½ inches apart across the path and 72 inches apart along it. With nominal 4-by-4 posts that measure 3½ inches square, that leaves about 40 inches of clear width and 68½ inches of clear length between the post faces.
Think in three measurements, because they are not interchangeable: the clear opening, post center-to-center spacing, and the outside dimension after beams and overhangs are added. A tape measure across the inside faces answers whether a person, garden cart, or mower can pass; center spacing controls the layout; and the roof footprint determines how much lumber projects beyond the supports. Mark all three on a quick sketch before buying anything.
For headroom, pick a target clear height that works for the tallest person who regularly uses the path, then add the depth of the beam to find the top-of-post height. For example, a 7-foot-6-inch clear opening with a 5½-inch beam means the top of the beam sits around 8 feet above grade. The post length must then include the required below-ground or pier connection depth, so do not buy posts until you know what the local footing detail requires.
Check Local Rules, Utilities, and Wind Exposure
Before digging, ask your local building department about permits, setbacks, easements, height limits, and footings near a property line. Exemptions differ by jurisdiction, and a rule for a small shed may not apply to an arbor. Confirm boundaries and access near fences, public rights-of-way, septic fields, and drains rather than relying on an online dimension.
In the United States, contact 811 or use the local one-call system before any post-hole excavation. The locate service marks participating buried utilities, and the waiting period and ticket rules vary by state; do not assume that a mark request is immediate or that private lines are included. A homeowner may need a separate locator for lines installed beyond the utility company’s responsibility, such as irrigation, lighting, or a private gas line. Start only after you understand what has and has not been marked. Call 811
Wind exposure matters as much as appearance. A free-standing frame in an open, windy yard, a coastal setting, or a spot that funnels gusts between buildings needs a more conservative foundation and connection design than the same arbor tucked into a sheltered courtyard. Trellises, thick evergreen vines, shade cloth, and solid panels add wind-catching area; they can turn a light decorative frame into a much more demanding structure. The American Wood Council’s residential deck construction guide illustrates why posts, beams, connections, and footings must work as a continuous load path, but a deck guide is not an arbor design or a substitute for local requirements.
This example is not engineered to hold a swing or hammock. Do not hang a person, swing, heavy planter, or other dynamic load from it; those uses need a structure specifically designed and fastened for the load, with suitable foundations. If you want a seating canopy or a frame covered by dense vines, take the plan to a qualified builder or engineer before construction.
Pick Wood and Hardware That Last Outdoors
The most affordable option is often pressure-treated pine, especially for posts, but “treated” is not a single exposure rating. Read the end tag and choose lumber intended for its actual location: boards exposed above ground are different from posts in soil or concrete. The AWPA Use Category System explains how treated-wood categories correspond to exposure, and treated-wood guidance describes UC4A as ground contact, general use. For a post that will be buried, buy a product labeled for ground contact rather than assuming an above-ground board is adequate.
Cedar and redwood cost more at the lumber rack but can be attractive for visible parts and have natural decay resistance. They are not maintenance-free, and their availability, grade, and longevity vary by region and exposure. A practical cost compromise is to use correctly rated treated posts and use cedar for a visible cap or trim only if that detail matters to you. Buying straight, dry, sound boards can save time and offcuts; sight down each length and reject pieces with severe bow, twist, splits, or large loose knots where bolts or screws will go.
Hardware is not the place to use the cheapest box of screws. Pressure-treated lumber preservatives and outdoor moisture can corrode incompatible metal, so match bolts, screws, washers, and any metal connector to the lumber tag and the connector maker’s compatibility instructions. Simpson Strong-Tie’s corrosion guidance explains why coatings and base metals matter in treated-wood connections. Use exterior-rated structural screws for structural wood connections where the design allows them; ordinary drywall screws and light interior screws are brittle or insufficiently protected for this job. Never mix incompatible metals in a wet connection.
Use This Budget Cut List for a 4-by-6-Foot Arbor
This cut list translates the example footprint into common stock lengths. The 4-by-6-foot description refers to approximate post-center spacing, not the outside roof dimensions: posts are about 43½ inches across the path and 72 inches along it. With paired 2-by-6 side beams on the outside faces of each post row, the outside beam width is about 50 inches; a 58-inch rafter gives roughly 4 inches of overhang on each side. Verify actual lumber dimensions and your final sketch before cutting.
| Material | Planning quantity | Use and cut logic |
|---|---|---|
| 4-by-4 posts, ground-contact rated if buried | 4 | Above-grade height plus footing depth; choose length after local depth is known |
| 2-by-6-by-8-foot boards | 4 | Two boards sandwich each pair of posts; cut each to about 84 inches for 6-inch beam overhangs at both ends |
| 2-by-4-by-10-foot boards | 4 | Cut two 58-inch rafters from each; use seven rafters and keep the eighth as a spare |
| 2-by-4-by-10-foot boards | 2 | Cut eight approximately 24-inch knee braces, two at each post; dry-fit and adjust angle |
| 1-by-2-by-8-foot boards, optional | 3 | Cut to about 72 inches for three open slats running along the arbor |
| ⅜-inch through-bolts, washers, and nuts | 8 | Two bolts at each post through the paired beams; confirm length and spacing for actual stock |
| Exterior-rated structural screws and compatible connectors | As specified | Attach braces, rafters, and optional slats using the selected hardware’s instructions |
| Concrete or approved post bases; drainage aggregate if required | Site-specific | Quantity and footing dimensions depend on soil, frost, wind, and local requirements |
An 84-inch side beam leaves 6 inches beyond each post center; 58-inch rafters span the roughly 50-inch beam faces with 4 inches of overhang on each side. Space seven rafters about 12 inches apart along the 72-inch length, centering the end rafters over the posts. Test one cut before batch-cutting.
Treat the table as a shopping framework, not a structural plan. Member sizes and connections must suit your site, lumber grade, wind, and local code; a wider or taller arbor may need larger parts. Price lumber, hardware, concrete, and bases separately. Open framing and standard cuts save money; decorative ends, lattice, stain, and custom brackets can wait. Fine Gardening’s arbor build and YellaWood’s DIY arbor plan use different dimensions and framing details, which is why cut lists cannot be mixed casually. Compare their examples for ideas, but keep each set of spans and connections together.
Gather Tools and Set Up Safely
For a basic build, gather a tape measure, framing square, string line, stakes, level, post-hole digger or approved digging tool, shovel, wheelbarrow or mixing tub, saw, drill and long bits, socket wrench, clamps, temporary 2-by-4 braces, and a stable ladder. Wear safety glasses and hearing protection when cutting or drilling; use the dust-control and handling precautions stated on the treated-lumber label. Keep hands clear of the blade, clamp small pieces before cutting, and never balance a long board on an unstable stack.
Plan to lift and assemble with at least one capable helper. A 10-foot post or a partially assembled roof can be awkward even when each individual board is manageable, and an arbor frame can catch wind while being raised. Stage all pieces near the build site, label the matching beams and braces, and cut decorative ends on the ground before installation. A circular saw or miter saw makes repeat cuts easier, but use the guard and the tool manufacturer’s instructions; a hand saw is slower, not inherently unsafe.
Lay Out Four Posts Square
Start with the path centerline and mark a rectangle with post centers about 43½ by 72 inches. Drive stakes outside the corners so the string lines can remain in place while you dig. Check that the two long sides are parallel, the short sides are parallel, and both diagonals match; equal diagonals are a reliable field check that a rectangle is square. If one diagonal is longer, nudge the corner stakes and measure again before drilling holes.
The 3-4-5 method is another useful square check: measure 3 feet along one side and 4 feet along the adjacent side; the diagonal between those marks should be 5 feet. Scale the same ratio up when you have room. Do not use a tape measure from a crooked fence or house wall as your only reference, because boundaries and existing structures are not always square to the path.
Record each post center, planned grade line, top-of-post elevation, beam overhang, and rafter spacing on the sketch. That little drawing prevents a common budget mistake: discovering after the holes are dug that the opening is too narrow or that the beam length does not match the cut list. Recheck the clear width at the ground and the intended headroom before committing to footings.
Dig and Build Footings for the Site
After the layout is confirmed and utilities are marked, excavate each footing to the dimensions required for your locality and site. Frost depth, soil bearing, drainage, wind, and the size of the structure can all change the required depth and diameter. Do not treat a generic “two feet deep” rule as universal: it may be too shallow in a freezing climate or a poor fit for loose, saturated, or expansive soil. If your building department publishes an accessory-structure detail, use the current local version.
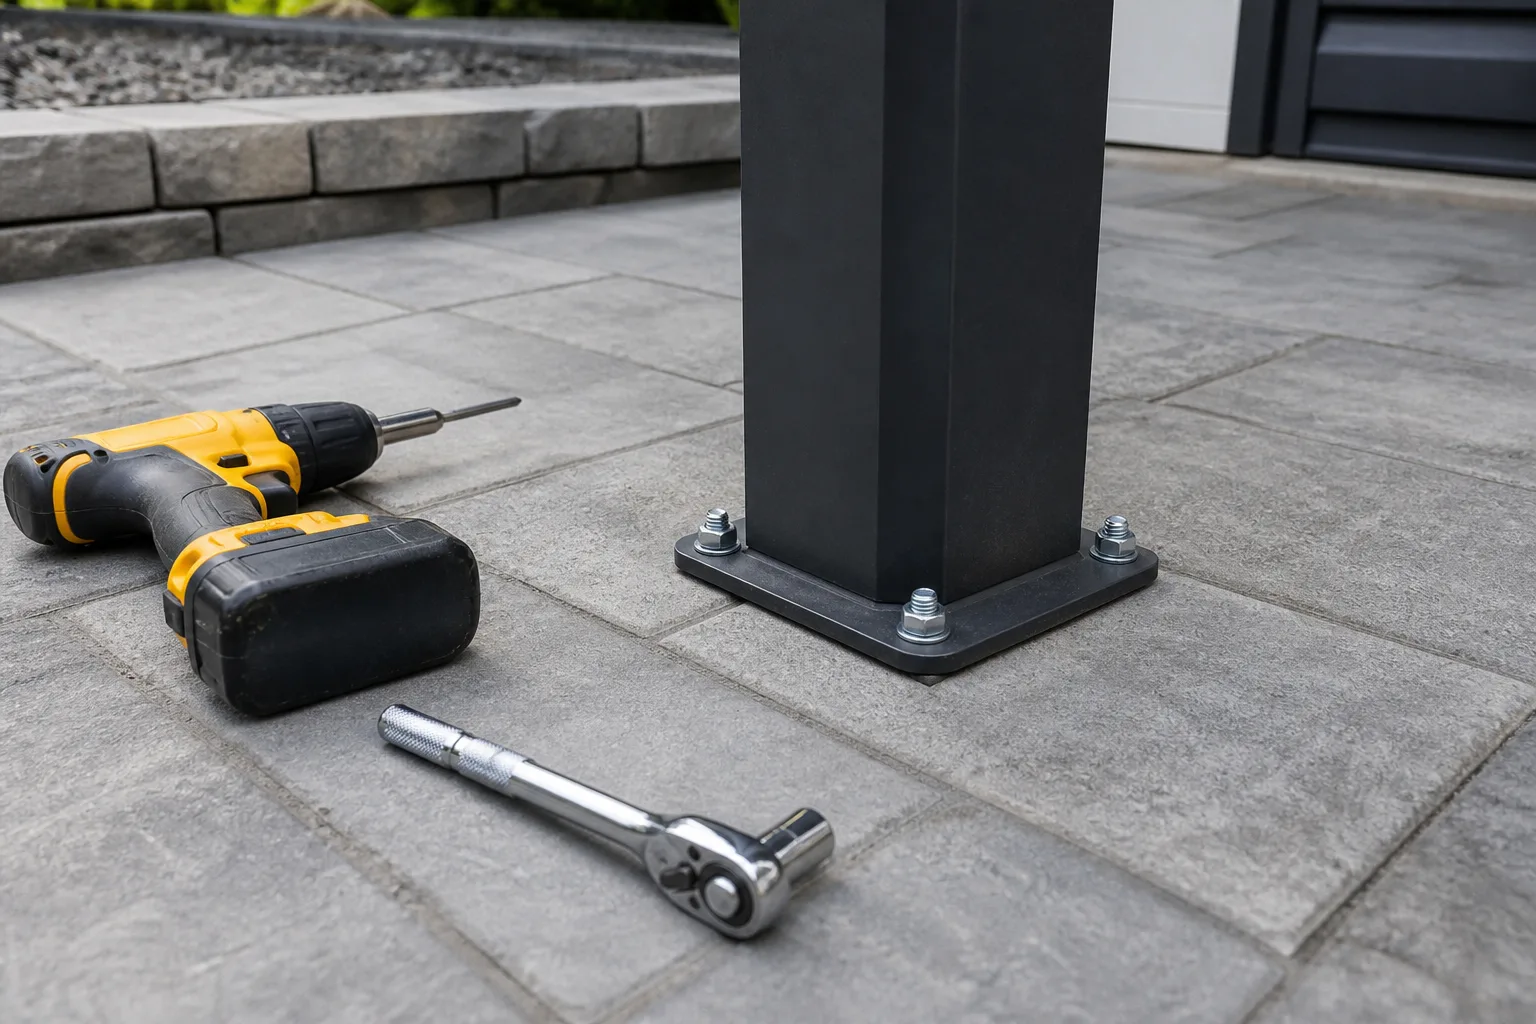
This illustrates a post base on a concrete surface; use a base and anchors rated for the actual structure and substrate.
There are two common approaches. A ground-contact-rated post can be embedded in a concrete footing, which is straightforward and avoids a separate metal base; the top of the concrete should shed water away from the post instead of forming a cup. Alternatively, pour a concrete pier and attach the post above grade with a compatible, rated base and anchors. That can keep the wood end from sitting in wet soil, but the base and anchor still have to resist the side force and uplift the arbor will experience. A decorative fence spike or light-duty bracket is not automatically a suitable arbor anchor.
If the footing detail calls for gravel beneath concrete or around a post, use the specified material and depth. Gravel alone is not a substitute for a properly sized footing, and adding it without understanding drainage can redirect water toward a building or neighbor. Use the concrete maker’s water ratio and curing instructions; soupy concrete is not stronger, and adding water to make it easier to shovel can weaken the mix.
Set, Plumb, and Brace the Posts
Place the first post in its hole and temporarily brace it in two directions with scrap 2-by-4s. Check plumb on two adjacent faces, then add concrete or the specified footing material without disturbing the post. Repeat for the other three posts, but keep checking center spacing and alignment as you work; wet concrete can move a post, and one post that leans slightly can make the beam assembly frustrating later.
Use a straight board or taut string along the row to keep matching post faces in the same plane. Measure between the posts at the top as well as at grade, then compare the diagonals again. Adjust with the temporary braces while the mix is still workable, and leave the braces in place for the curing period listed on the concrete product. Do not start loading the posts or bolt on long beams while the footing is still green.
Trim the tops only after you know the finished beam elevation. If one post is slightly high, mark all four from a level reference and cut them consistently; do not use a crooked ground line as the height datum. Protect exposed cuts on treated lumber with a compatible end-cut preservative when the product label calls for it, and do not burn treated offcuts or sawdust.
Fit and Bolt the Side Beams
The paired side beams capture each post between two 2-by-6 boards. Mark a common beam height on all four posts, then clamp one pair in place on one side of the arbor. The beam ends should project the same distance beyond the two posts; on the example layout, an 84-inch beam spans 72 inches between post centers with 6 inches of overhang at each end. Check that both boards are level with each other and aligned with the post faces before drilling.
Use a long bit to drill each bolt hole straight through the first beam, post, and second beam. Keep the two bolts at each post separated vertically, away from board ends and edges, and positioned according to the connection guidance for the hardware you choose; do not crowd holes or split a knot. Fit washers and nuts, tighten until snug, and avoid crushing the wood fibers. Use compatible corrosion-resistant bolts, washers, and nuts when the beams are treated lumber or exposed to weather.
Repeat on the opposite side. Before tightening everything fully, measure diagonals across the post-and-beam rectangle and sight along the beams to catch a twist. A pair of helpers makes this stage safer: one can hold and align the boards while another drills. If the joint cannot be made with the beam sizes, spacing, and hardware you have, stop and revise the design rather than substituting more deck screws for through-bolts.
Add Knee Braces to Limit Sway
An open roof can still rack sideways. Short diagonal knee braces connect a post to a beam and help the frame resist that movement, particularly while vines grow. A simple starting piece is a 2-by-4 about 24 inches long, cut at matching angles after you hold it in the corner; the exact angle and fastener schedule should match the selected plan and connector instructions.
Install braces at the corners where they will not narrow the walking opening or snag a person entering the arbor. On this example, each post gets one brace along the path to its side-beam assembly and another toward the nearest end rafter across the path. That makes eight braces and stiffens both directions; the end rafters and their connections must be suitable brace attachment points. Clamp each brace in place, predrill near the ends to reduce splitting, and use exterior structural screws or bolts appropriate for the joint. Follow the maker’s edge and end-distance instructions; one short screw near a brace tip is not an adequate connection.
Braces do not make an undersized or poorly anchored frame engineered. Have the connection and footing design checked for an exposed site, unusual height, full lattice walls, heavy vine canopy, or overhead fabric. Reducing the size or removing wind-catching panels may be safer and cheaper than adding hardware.
Install Rafters and Optional Open Slats
Lay out seven rafters across the length of the two side beams, starting near each end and spacing the rest about 12 inches apart. With a roughly 50-inch outside beam width, 58-inch rafters provide about 4 inches of overhang on each side. Cut one test piece first, set it across the beams, and check the projection; lumber dimensions and the position of the paired beams can shift the actual measurement by an inch or two.
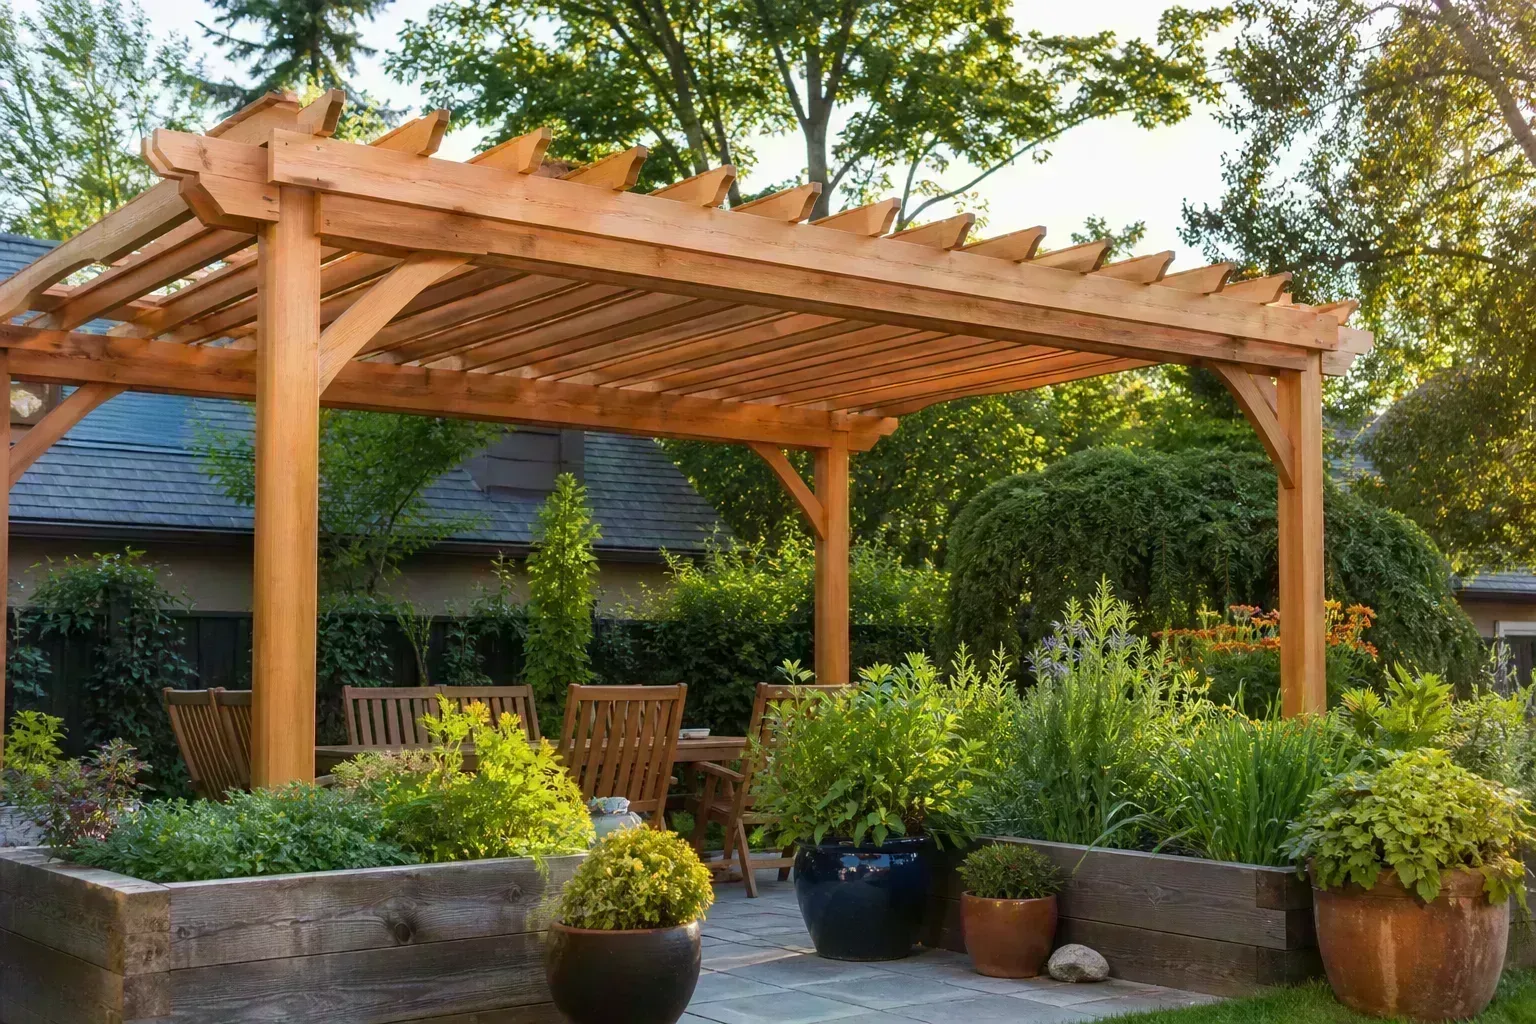
The pictured pergola is larger than the example arbor; its open framing shows how posts, beams, braces, and rafters relate.
Secure each rafter to both beam assemblies with exterior structural screws or rated connectors designed for the lumber and exposure. Predrill when the fastener manufacturer recommends it or when the board is near an end, and use a stop block or marked story stick to keep the overhang consistent. Before fastening the last few rafters, verify that they are square to the beams and evenly spaced; a small error at the first rafter repeats across the entire roof.
The open rafter grid can stand on its own. For a finer trellis, add three 1-by-2 slats running lengthwise, spaced evenly across the rafters. The slats add visual detail and more places for tendrils to catch, but they also create more wind-catching surface and require more fasteners. Leave generous openings rather than covering the top with plywood, roofing, or shade cloth unless the frame was designed for those loads.
Add Lattice Without Making a Wind Sail
Side lattice can guide a vine and soften the posts, but a full panel also behaves more like a screen in gusts. If you want the lowest-cost, lowest-risk option, attach a narrow premade lattice panel only where a plant needs support, or run a few tensioned wires between posts with appropriate hardware. Keep the panel’s bottom clear of soil and mulch so it is easier to inspect and does not stay wet.
Before fastening a panel, confirm that it does not block the walkway, cover a utility mark, interfere with a gate, or make the arbor hard to inspect. Use fasteners compatible with the frame and choose open lattice rather than a solid board wall. If the panel must be rigid or broad, ask whether its added wind load changes the post and footing requirements. The visual difference between “some trellis” and a nearly solid wall can be structurally significant.
Finish the Wood and Plant for the Structure
Let the lumber and any concrete cure or dry according to their labels before applying a finish. Pressure-treated wood may arrive wet, so use the stain or paint manufacturer’s moisture test and product instructions rather than relying on a fixed waiting period. Cedar and redwood can weather naturally, but an exterior finish may help preserve a chosen color; no coating eliminates the need to inspect joints and post bases.
Plant a vine that suits your climate, sun, and maintenance tolerance, and guide it onto the arbor gradually. A light deciduous climber is usually easier to manage than a fast-growing evergreen that quickly covers every opening. Prune out excess growth before it turns into a dense canopy, keep stems away from the post-to-beam joints, and do not let mature branches hide corrosion or rot. If you want a particular climber, look up its mature weight and vigor instead of choosing by flower color alone.
Water should run off the beam tops and post caps rather than sit in flat pockets. Sand sharp edges, cap or bevel exposed end grain where practical, and keep soil and mulch from burying the bottom of the posts. Inspect the arbor after its first storm and at least once each season for loose bolts, rust, cracked wood, soft areas at grade, or posts that have shifted. Tighten or repair a connection early; a small wobble is a reason to investigate, not to hide it under another layer of lattice.
Avoid the Mistakes That Make an Arbor Cost More
The first avoidable expense is buying before the footprint is settled. A sketch, equal-diagonal check, and cut list usually cost nothing; replacing four posts or adding mismatched lumber after the holes are dug is expensive. Price the boards by the cuts you need and use stock lengths that leave useful offcuts for braces or test cuts, not a pile of short unusable scraps.
A second mistake is treating every outdoor fastener as interchangeable. Shiny zinc-plated screws may look fine in the package but can be a poor match for treated wood and wet weather. Keep the lumber tag, choose connectors and fasteners from the manufacturer’s compatibility tables, and avoid mixing metals in the same exposed joint. Paying a little more for the correct bolt or structural screw is cheaper than rebuilding a failed connection.
The third mistake is adding features without reconsidering the load. A vine, side screen, hanging basket, lights, shade cloth, or swing changes what the frame must resist. String lights are not a swing load, but they still need suitable attachments and outdoor-rated electrical equipment. If you cannot verify the connection or footing capacity, leave the add-on off and ask a qualified professional.
Conclusion
An inexpensive garden arbor is a small, carefully planned frame: four correctly sized posts, paired side beams, an open roof, sound connections, and footings chosen for the site. The sample 4-by-6-foot layout gives you a way to price common lumber and check the opening, but it does not replace local footing rules or a structural design for extra loads. Measure first, call 811 before digging, use outdoor-rated lumber and compatible hardware, and brace the posts until the concrete has cured.
Keep the roof open and the details simple if your goal is an entryway for a modest vine. That choice saves lumber and reduces wind-catching area while keeping the structure easy to inspect. If you want a swing, solid canopy, heavy vine cover, or broad privacy wall, redesign the arbor for those loads before construction instead of asking a decorative garden frame to do a different job.