How to Propagate Aloe Vera From Pups
Learn how to propagate aloe vera from pups, when to separate them, how to pot rooted and rootless offsets, and what to do if a pup wilts or rots later.
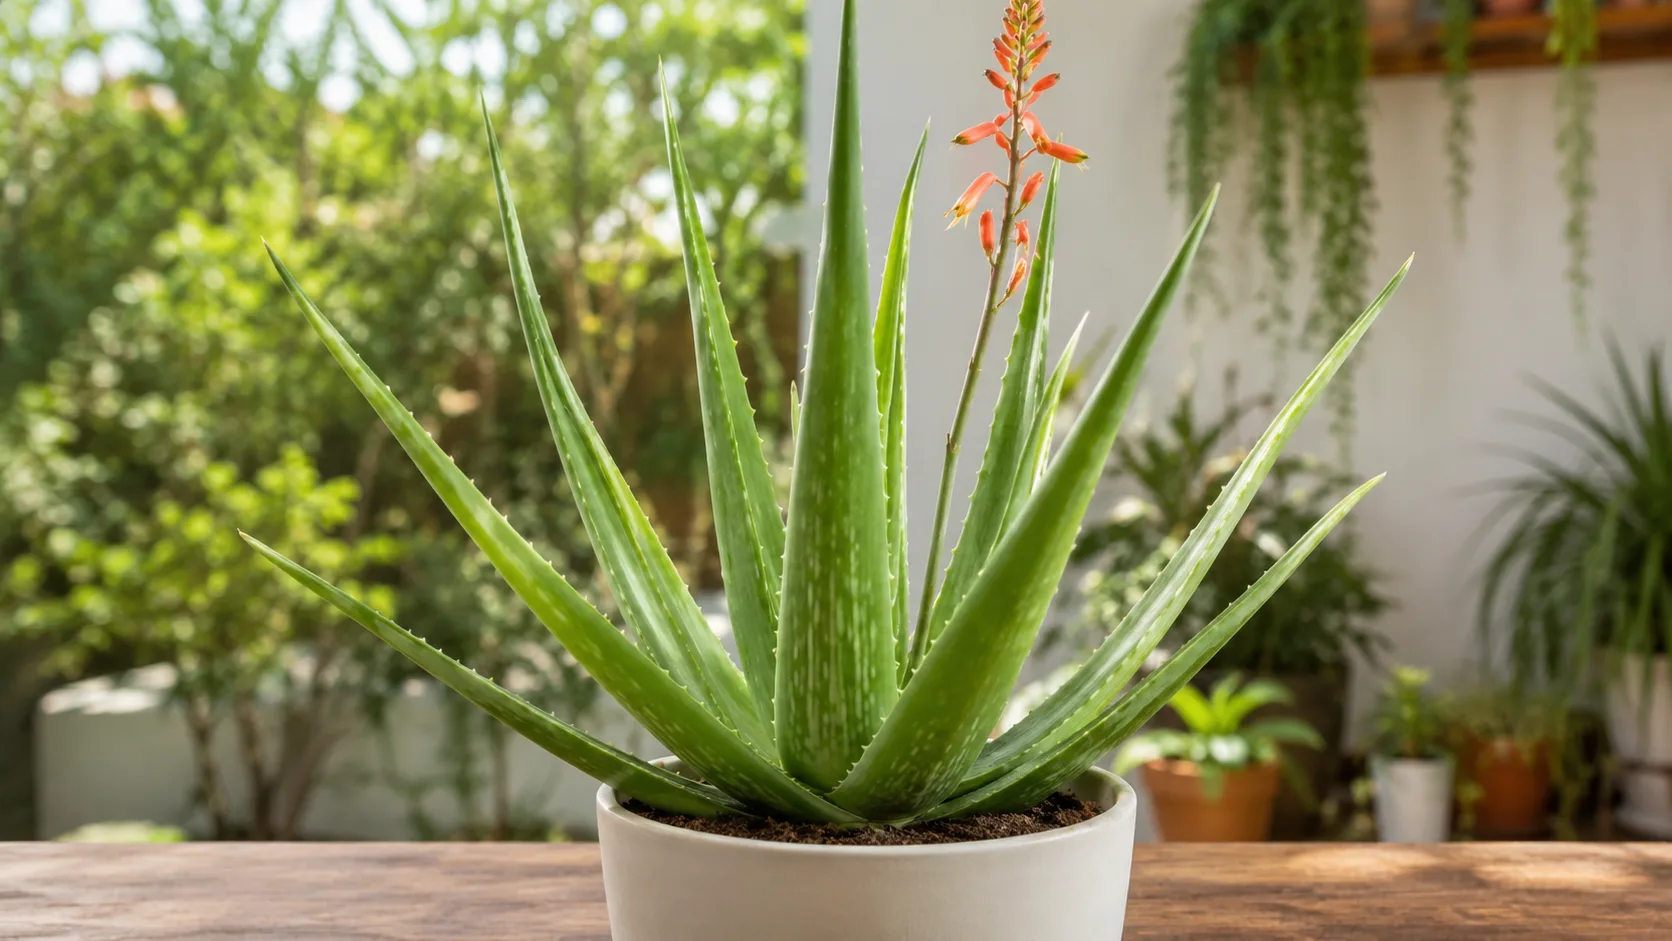
The most reliable way to propagate aloe vera at home is to separate a pup, also called an offset, from a healthy mother plant. A pup is a small rosette growing at the base of the parent. It may already have roots of its own, so you are starting with a tiny plant rather than asking a detached leaf to build an entire one.
The useful decision is not simply “Is there a pup?” It is “Is this pup large enough to handle separation, and can I keep its base dry while it settles?” Wait for a firm offset with several leaves and preferably visible roots, then use a small pot with a drainage hole and a gritty mix. North Carolina State Extension lists division as the recommended propagation strategy for Aloe vera, while the Royal Horticultural Society recommends separating offsets in spring or early summer and rooting them in cactus compost (NC State Extension; RHS).
Quick answer: Propagate aloe vera from pups
Choose a healthy, established aloe with a pup that is several inches tall, has a few firm leaves, and is not just a tiny nub pressed against the mother. Slide the plant from its pot or brush away enough soil to see where the pup joins the parent. Ease the roots apart; if tissue is firmly attached, use a clean knife to make one controlled cut rather than tugging until the leaves tear.
If the pup comes away with roots and the separation point is clean, plant it in a small draining pot with dry cactus or succulent mix. A fresh, larger wound or a rootless offset needs time in a dry, airy place for the cut to seal before planting. Keep the crown above the soil, give the new plant bright indirect light while it settles, and delay watering until the mix is dry and the wound is no longer fresh. Aloe stores water in its leaves, so a dry interval is usually safer than keeping an unrooted pup damp.
Choose the right method for your goal
Aloe vera can be raised from seed, and mature plants make offsets, but those routes suit different goals. A pup is the practical choice when you want a new plant with the same traits as the parent; seed is useful when you want to grow many plants or enjoy the slower process. A leaf cutting is an experiment, not the method to depend on for a replacement plant.
| Method | Best reason to choose it | What to expect |
|---|---|---|
| Pup or offset | You want a manageable new plant that resembles the parent | Usually the simplest home method; roots may already be present |
| Seed | You have viable seed and want to raise plants from the start | Slower, with seedlings that may differ from the parent |
| Single leaf | You want to test an uncertain technique | Results are inconsistent; a leaf may shrivel or rot without making a new rosette |
Why pups are the reliable choice
An offset forms as a daughter rosette at the base of the mother plant. As it grows, it can develop its own root system; once separated, it is already a small plant with leaves and a growing point. Thrive’s practical guide to succulent offsets includes aloe vera among suitable plants and advises protecting the offset’s roots during removal, then letting the wound dry so a callus can form (Thrive).
The best pup is not necessarily the largest one, but it should be substantial enough to handle. Look for a cluster with several leaves that stand upright and feel firm, plus a base wide enough to grip without squeezing the leaves. If the pup is still tiny, tightly attached, or hidden under the mother’s lower leaves, leaving it in place gives it more time to build roots and reduces the chance that it dries before it can support itself. BBC Gardeners’ World also presents separating aloe offsets as the practical propagation route, in line with the species-specific recommendations from NC State and the RHS (BBC Gardeners’ World).
When seeds make sense
Growing aloe vera from seed takes patience and a reliable source of fresh seed. The RHS recommends sowing seed as soon as it is ripe; it also lists offsets as the alternative for spring or early summer. Seedlings begin as small plants and need time to reach a size that can be handled, so this route makes more sense when you enjoy starting plants or want several specimens than when you need a quick replacement for a crowded parent.
Seed-grown plants may not match the parent exactly, especially if the flower was pollinated by another aloe. That variation is part of the point for breeders, but it can surprise someone who expects an identical copy. If you do sow seed, use a shallow, clean container and a fine, free-draining seed-starting medium, keep it evenly but lightly moist rather than waterlogged, and provide warmth and bright light. Move seedlings only when they have enough leaves and roots to survive handling; tiny seedlings are easy to damage by lifting or overwatering.
Why leaf cuttings disappoint
Many plants root from a leaf, which makes the idea sound straightforward: cut a leaf, let the end dry, and plant it. Aloe vera is different enough that a detached leaf is not a dependable route to a new rosette. Species-specific references from NC State and the RHS recommend division or offsets and seed; they do not present a single leaf as the normal propagation method. That supports a practical conclusion rather than an absolute claim that a leaf can never root: if you need a reliable plant, use a pup.
A leaf can sometimes stay alive or form roots without producing the new crown needed for a complete aloe plant. Its thick tissue also holds water, so a fresh cut placed in damp mix can decay before roots appear. Do not cut up a healthy aloe just to multiply it. If you want to test a leaf, keep it separate from your main propagation batch, allow the cut end to dry, and accept that it may never become a plant you can pot up. Avoid putting aloe leaves in a jar of water; the fleshy cut end can stay wet and soften, while the species is normally propagated by division rather than grown as a water-rooting cutting.
Gather supplies and choose a good time
You need the mother plant, a clean sharp knife or narrow trowel, a pot with an open drainage hole, and a fast-draining cactus or succulent mix. A small terracotta pot is convenient because it dries quickly, but plastic can work if you are careful not to overwater. Choose a container just large enough for the pup’s roots; a pot that is much wider holds extra mix around a small root system and can remain wet longer than the plant can use.
Use a commercial cactus mix as a starting point. If it feels dense or stays damp for days, loosen it with pumice, perlite, or coarse horticultural grit so water drains and air can reach the roots. Penn State Extension describes aloe as drought-tolerant and susceptible to root rot, and advises using pots with large drainage holes; the RHS likewise recommends cactus compost or a gritty compost for container-grown aloe (Penn State Extension; RHS). Do not add a gravel layer to the bottom of a pot without a drainage hole and assume it fixes poor drainage; the pot still needs somewhere for excess water to leave.
Spring or early summer is a useful window because the plant is entering active growth and the offset has more light and warmth for root development. The RHS specifically recommends separating aloe offsets in spring or early summer. If your plant is indoors in a warm, bright room, a different month is not an automatic stop, but avoid separating during a cold, dim stretch or when the mother plant is already stressed, recently watered into wet soil, or showing signs of rot.
Before starting, water the mother plant only if its mix is dry and it is due for a drink. A recently watered root ball is heavier and harder to loosen cleanly; a very dry plant may be more brittle. You do not need to water it on a fixed schedule for the sake of propagation. Check that the parent is firm, the crown is healthy, and the pup is not emerging from a soft or collapsing base.
Separate and pot an aloe pup
The main goal is to keep as much of the pup’s own root system as possible and make a clean separation where it joins the parent. Do the work over a tray or sheet of paper so loose soil can be reused if it is healthy, and put the new pot and mix within reach before lifting the plant. If several pups are crowded around one mother, remove only the offsets you can separate without tearing the root ball apart.
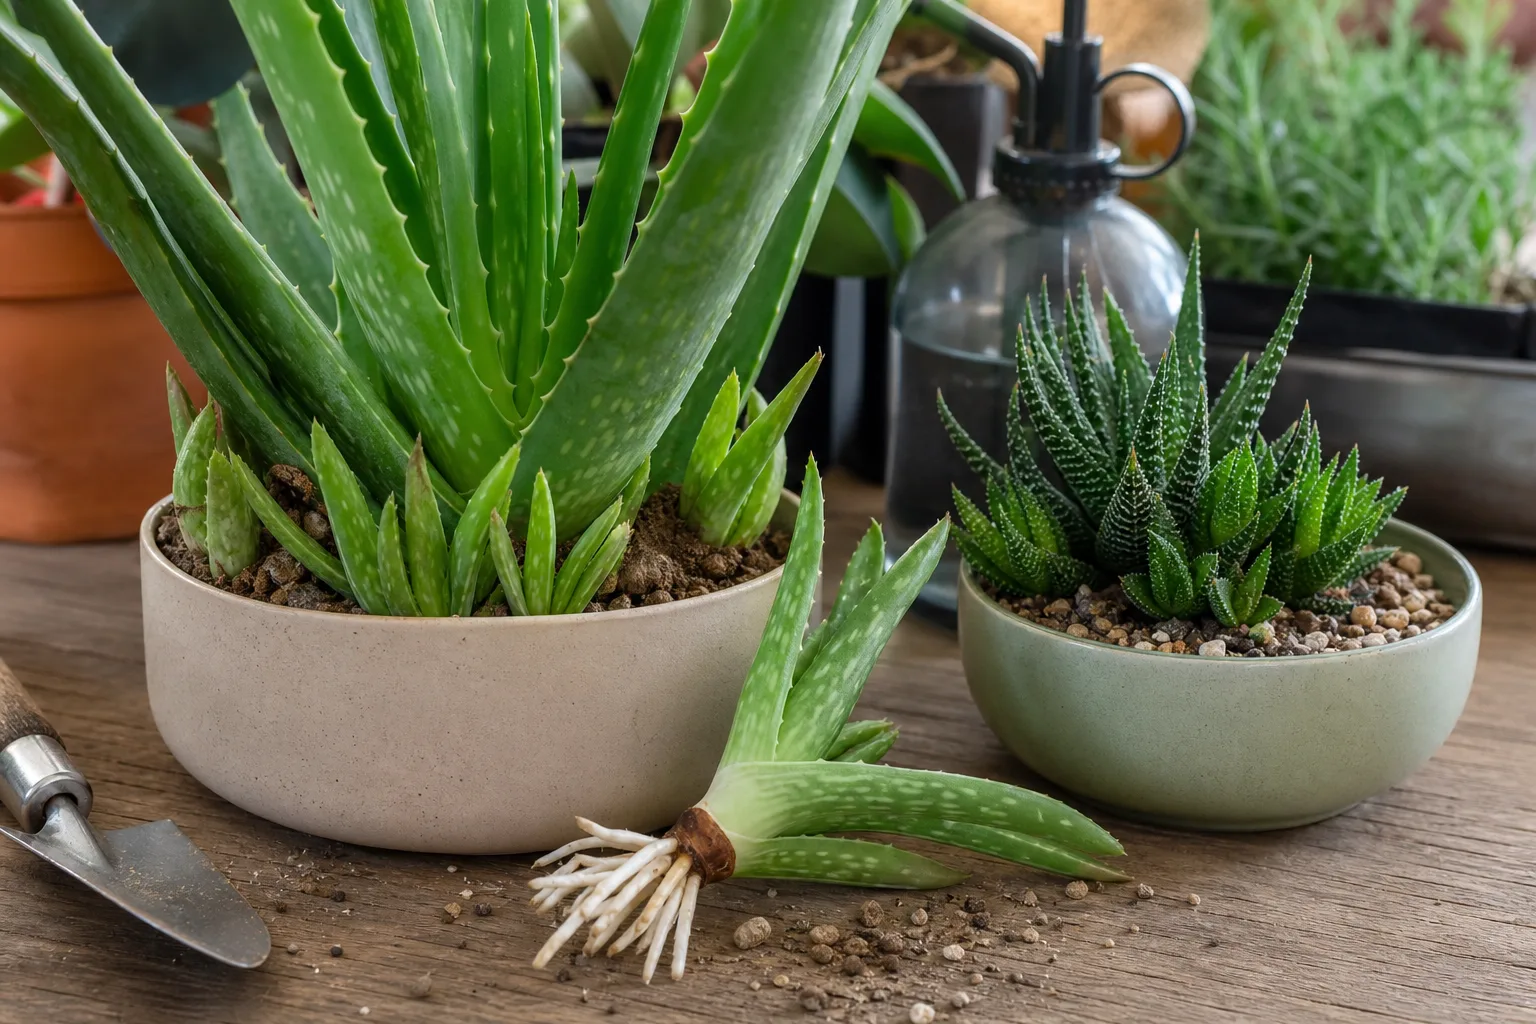
1. Select a well-sized pup
Choose an offset with several healthy leaves and a noticeable base, ideally with pale root tips or a small root ball of its own. There is no dependable leaf count or height that fits every aloe; a plant grown in strong light may form a compact pup, while one kept in lower light can stretch and look larger before it has a sturdy base. Use firmness and root development as well as size, not a single measurement.
Leave a pup attached if it is barely larger than a few leaves, has no clear base to grip, or would require you to cut through the mother’s central crown to remove it. A small pup can continue growing beside the parent until it can support itself. If the mother plant has many offsets, removing the largest one or two may make room without stripping every new rosette at once.
2. Unpot and free the offset
Put a hand over the soil surface around the mother plant without gripping the leaves, tip the pot sideways, and ease the root ball out. If it is stuck, squeeze a flexible pot or run a blunt tool around the inside edge to loosen it. Avoid yanking on the rosette; aloe leaves snap more easily than the root ball looks like it should.
Brush away soil around the pup’s base until you can see its connection to the parent and any roots that cross between them. Gently tease apart roots that are merely tangled. When the pup is attached by a narrow connection, a clean knife or sterilized pruners can sever it with one cut. Wipe soil and sap from the blade between cuts, and do not cut blindly beneath the crown where you could damage the mother’s growing point.
If the offset already separates with gentle pressure and keeps its roots, no blade is needed. A little resistance is normal; a sharp pull that bends or splits the pup is not. Set the pup aside and inspect the base. Firm cream, tan, or light brown roots are usually intact; black, hollow, or mushy roots are damaged and should not be buried in fresh mix.
3. Let cuts dry only when needed
A rooted pup with a small, clean separation can usually be planted without a long drying delay. If the base has a fresh cut, torn roots, or a broad wound where it was attached, let it rest in a dry place with good airflow and bright indirect light until the surface looks dry and sealed. Thrive notes that offset wounds may take from one to seven days to callus; the useful signal is the wound’s condition, not the longest possible wait (Thrive).
A rootless pup needs more care because it cannot take up water until new roots form. Let a wet or ragged cut dry first, then set the offset on dry paper or a clean plate rather than laying it on damp soil. Keep it out of direct sun and away from a humid bathroom or closed plastic bag. In a humid home, give it extra airflow; in a very dry room, check the base daily so you do not mistake severe shrinking for a normal callus.
Do not bury a wet cut to “hold it in place.” Moisture trapped against the base encourages decay, and burying the lower leaves makes it harder to see early softening. If the pup is cleanly separated and already rooted, callusing is not a ritual that must delay planting; focus on wound size and keep the first watering conservative.
4. Set the pup at the right depth
Fill the pot loosely with dry, gritty mix and make a shallow opening for the roots. Place the roots into the opening without bending them sharply, then tuck mix around them until the pup stands upright. Cover roots and the lower stem, but keep the leaf bases and crown above the soil line; aloe leaves buried in damp compost can soften and rot.
A rootless pup can still be anchored in the mix, but do not push it so deeply that the lower leaves disappear. Set the base just into the mix and use a few small stones or a temporary support to keep it steady if it tips. The goal is contact between the base and medium, not a deep planting that keeps the crown wet. A loose pup that wobbles slightly is often better than one packed so tightly that its base is bruised.
Use a pot only a little wider than the root spread, with drainage open and no water sitting in the saucer. The plant may look top-heavy at first; a small pot and a stable, coarse mix can support it better than a large decorative container full of moisture-retaining soil. If you removed the mother from its pot, replant it at the same depth in fresh mix and leave its crown uncovered.
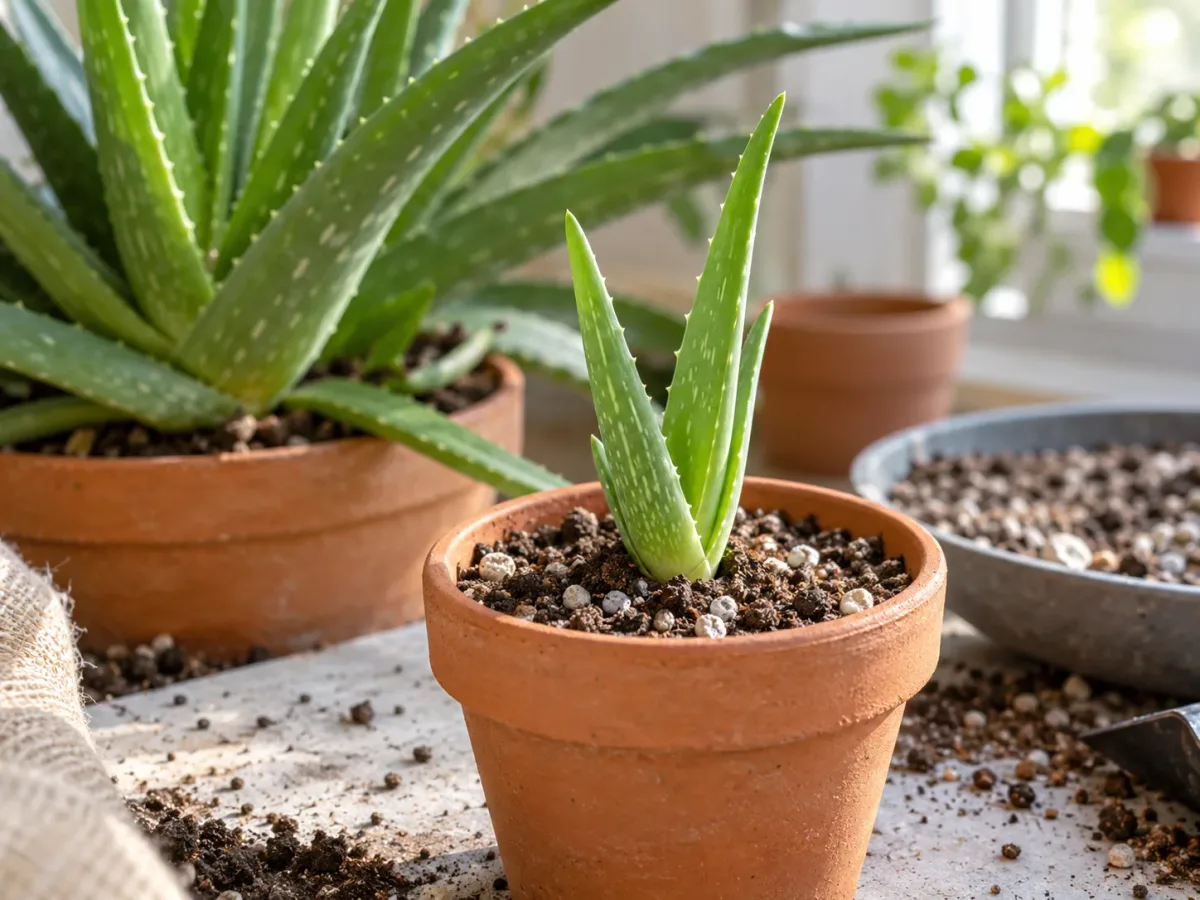
Make aftercare about roots, not the calendar
A freshly separated pup is not ready for the same watering rhythm as a mature aloe with a full root system. The first question is whether the roots are intact and the cut has sealed; the second is whether the mix has dried. Give the plant bright indirect light while it settles, then gradually return it to the stronger light its species needs. NC State Extension recommends very well-drained soil and letting the soil dry completely between waterings for aloe vera (NC State Extension).
The first week
After planting a fresh cut, wait several days before watering so the wound can dry and the plant is not sitting against wet mix. If the pup is rootless, a longer dry interval is safer than repeated misting; misting the surface does not create roots and can keep the base damp. Once the wound is sealed and the mix is dry, water lightly around the root zone, let excess drain, and empty the saucer.
Do not interpret a tiny amount of leaf movement in the first few days as proof that the pup is dying. A separated offset may pause while it repairs tissue and starts new roots, especially in a cool room or outside its active season. Keep it stable, avoid repeated unpotting to check for roots, and do not fertilize a plant that has not resumed growth.
Weeks two through eight
Keep the pot in bright light without sudden hot afternoon sun. A pup that came from a shaded interior may scorch if moved immediately to a sunny windowsill or patio; increase stronger sun over several days after it is growing again. Aloe will eventually want ample light, but the first priority is a dry, aerated root zone and a pup that stays firm.
Water only when the mix has dried through the small pot. Check below the surface with a finger or wooden skewer, and lift the pot to learn how light it feels when dry. A rootless offset may use very little water at first; a rooted pup in warm bright conditions may begin growing sooner. Neither needs a fixed weekly schedule. Once new center leaves appear or a gentle tug meets resistance, the pup is beginning to establish; resume ordinary aloe care gradually.
Rooting time varies with pup size, season, temperature, light, and how many roots survived separation. Some offsets resume quickly, while others sit without visible growth for several weeks. Do not tug on the leaves to test progress every few days. The plant’s firmness, the absence of soft rot, and eventual new growth are better indicators than a calendar deadline.
Troubleshoot before you try again
Change one condition at a time. If a new pup looks weak, first check whether its base is firm and whether the mix is still wet; then assess the light and temperature. More water is not the default fix for a wrinkled aloe because a rootless plant cannot use much moisture, and wet soil can rot the base before roots form.
The pup shrivels, wobbles, or stays still
A small amount of wrinkling can happen as the offset uses stored water before it has working roots. If the base remains firm, the plant is planted shallowly in dry mix, and no leaves are turning translucent, leave it alone and give it bright indirect light. A loose pup may not have rooted yet; use a small support to hold it upright rather than burying the crown or watering repeatedly.
If the leaves continue collapsing and the base is dry and papery, the pup may have lost too much water or been separated too early. A slightly larger rooted offset has better reserves, so if the mother is still healthy and the pup has no roots at all, it may be reasonable to reattach it only if the connection was not badly damaged; otherwise, keep the current pup in dry mix and allow more time. Avoid repeated handling, which creates new wounds.
A pup that shows no visible growth is not necessarily failing. Aloe roots and leaves can take weeks to restart after division, particularly in winter or low light. Confirm that the container drains, move it to a brighter spot if it is dim, and wait until the soil is dry before the next drink. Do not add fertilizer to force a response.
The base turns soft or dark
A soft, translucent, or blackening base points to rot more than thirst. Remove the pup from the pot, brush away wet mix, and inspect the tissue. If only a small section is damaged and there is firm healthy tissue above it, cut back to clean tissue with a sterile blade and let the wound dry before trying again. If rot reaches the crown or the whole base is mushy, recovery is unlikely; discard the affected piece and keep it away from healthy plants.
Check the cause before repotting: dense soil, a pot without drainage, a saucer left full of water, planting too deeply, or watering before a large cut sealed can all keep the base wet. Correct the mix and container before starting over. Penn State Extension warns that aloes are susceptible to root rot and should not sit in water; drainage and dry-down matter more than a fungicide or a new watering calendar (Penn State Extension).
If the mother plant’s crown is soft or its roots smell sour, do not take pups from it as if the offsets are automatically healthy. Separate only firm, unaffected pups, inspect their bases, and discard any tissue that is mushy or discolored. Stabilize the parent plant’s conditions first; propagation cannot rescue a rotting crown by itself.
Conclusion
For a new aloe vera plant with the least guesswork, wait for a firm pup with several leaves and preferably its own roots. Separate it gently, let a substantial fresh wound dry, plant it shallowly in a draining pot, and water only after the cut has sealed and the mix is dry. Spring or early summer gives an offset a helpful growth window, but readiness and root condition matter more than forcing a date.
Use seed when you want the longer process and do not need an exact copy. Treat a detached leaf as an experiment, not a dependable propagation plan. If the new pup stays firm, the soil drains, and you resist checking it with extra water or repeated unpotting, it has the conditions it needs to settle in.