Fluffing Roses: What the Viral Trick Really Changes
Wondering whether to fluff roses? Compare palm-twirling with petal reflexing, protect guard petals, and see a careful method plus lower-risk alternatives.

Fluffing roses can make a cut bloom look wider in a few seconds, but the effect is visual: you are changing the position of petals the flower already has. That can be worthwhile for one sturdy, well-hydrated rose in a display that needs a dramatic focal point. It is a poor trade for a delicate, freshly purchased bouquet that you want to keep looking good for as long as possible.
The phrase “fluffing” also covers more than one action. Social clips often show a rose turned upside down and rolled between the palms; florists may instead reflex individual petals, gently bending them outward one by one. Those methods do not offer the same control. If you decide to experiment, choose a bloom you can afford to lose, prepare it first, and stop the moment the petal resists.
What “fluffing” means in floral design
In everyday use, fluffing means coaxing a rose into a more open, rounded shape so it appears fuller or more expensive. The flower has not produced new petals, and the trick does not speed up its development. It simply changes the angle and overlap of the outer petals, exposing more of their inner surfaces and spreading the bloom across a wider area.
Florists use a more specific term for the controlled version: reflexing. A designer selects a hydrated rose, removes guard petals that are no longer needed for protection, and selectively turns individual petals outward. The technique can create a fuller silhouette and reveal stronger color on the inner face of some petals, but it is a design choice rather than a care requirement. Florists’ Review’s rose-design guidance describes reflexing as one option for arranging roses, alongside careful sourcing, conditioning, and composition.
Palm-twirling and petal reflexing are not the same
Palm-twirling moves the bloom as a whole. The stem is inverted and rotated or rolled between the hands, which may loosen the petals, but it gives you little ability to control which petal moves or how far. If the head is fragile, pressure can be distributed across petals that you did not intend to adjust.
Petal reflexing is slower and more deliberate. You work on one outer petal at a time, support the bloom, and decide how much to turn it. That control is the main reason a professional technique should not be reduced to “spin each stem until it opens.” A rose that opens freely with a light touch may be a candidate; one that needs force is telling you to leave it alone.
Why guard petals are worth understanding
The outermost petals on many roses are called guard petals. They can look less polished than the petals inside, with creases or darkened edges, but they help protect the inner bloom while the flower develops and moves through harvest, packing, and transport. A florist may remove an unattractive guard petal when preparing a flower for same-day display, while a grower or shipper may leave those petals in place to shield the bloom on its journey.
That distinction matters because a brown edge is not always a sign that the whole rose is failing. Sometimes the outer layer has taken the wear that would otherwise reach the central petals. Rose grower and Master Rosarian Stan V. Griep explains the protective role of guard petals in GardenSMART’s overview; the practical choice is to remove only an outer petal that is visibly damaged or in the way, rather than stripping a ring of healthy petals just to make the bloom look cleaner.
A guard petal is not the same thing as an inner petal you have forcibly folded. Removing a damaged outer petal can improve the appearance of a bloom without reshaping the rest. Reflexing goes further: it deliberately alters the position of living flower tissue. If a rose already looks attractive, there is no horticultural reason to remove protective petals or manipulate the flower.
Why one rose opens into a fuller bloom than another
The final shape of a rose depends on its variety, the number and arrangement of its petals, and how far the flower has developed. Some roses naturally open into broad, many-petaled cups; others keep a tighter, more pointed silhouette. A technique that works on one stem may not make a second cultivar look similar, even if both roses arrived in the same bouquet.
The bloom also changes as it opens. A bud that is too tight may not have developed enough to unfold fully after cutting, while a very open rose may already be near its broadest natural shape. Reflexing cannot compensate for a young bud, create missing petals, or return firmness to a bloom that has started to wilt. That is why the most useful question is not “Can I make every rose fluffy?” but “Is this flower both ready and resilient enough for a small styling adjustment?”
Variety and flower form
Large, full blooms with substantial petals generally give a designer more visible material to work with than a small, delicate rose. But size alone is not a guarantee: petal texture, head shape, and the way the flower was handled before you bought it also matter. If you want a peony-like effect, it is more predictable to select a rose variety with a naturally many-petaled form than to force a narrow, tight bloom into a different silhouette.
When shopping, look at the shape of the rose you are actually buying rather than relying on a name or a promise that it will “open huge.” Choose stems with firm heads and petals that are not translucent, limp, or already crumpled. If an event depends on a particular look, ask a florist to recommend a rose that opens into that shape and to condition or reflex the stems professionally. The flower should be selected for the outcome before it is manipulated.
Hydration and maturity
A hydrated bloom is easier to handle than one that has just come out of a dry sleeve or a warm car. Flower designers condition roses in clean water before arranging so the stems can take up water and the blooms have time to recover from transport. The Royal Horticultural Society’s cut-flower conditioning guide recommends clean cuts, removal of foliage below the waterline, and a cool period in water; for woody stems such as roses, it also describes an additional vertical cut at the stem base.
Hydration does not make petals invulnerable. It simply gives you a firmer starting point than working on a dehydrated flower. Let a new bunch rest in clean water for a few hours before judging its shape, keep the blooms out of direct heat, and avoid touching petals while they are wet. Once the flower has recovered, assess its firmness again; if the head still feels soft or the petals collapse under minimal contact, skip the technique.
What fluffing changes—and what it cannot change
The immediate result is a wider-looking bloom. Reflexing changes the angle of the petals, which can make the flower read as rounder from across the room and reveal color that was hidden on the outside of each petal. In a centerpiece or photograph, one carefully opened focal rose can help create a deliberate shape without changing every stem in the arrangement.
What it cannot do is increase the rose’s actual size, add petals, restore hydration, or make an immature bud open. A full-looking bloom after manipulation is still the same cut flower at the same stage of life. It may also return toward its natural shape as the petals relax, especially if the rose is handled again or displayed in conditions that dry it out.
This is why fluffing is best judged as a temporary styling technique. If your problem is a bouquet that looks sparse, changing stem placement or vase scale is usually a better fix. If your problem is a tight, unopened rose, give it time in clean water and a cool location rather than trying to pry it open.
The trade-off: a larger-looking bloom versus a more fragile one
Every time you press, pull, or bend a petal, you add a chance of leaving a crease, tearing the edge, loosening a petal that would otherwise stay attached, or transferring handling marks to a pale surface. The damage may be easy to miss while the flower is in your hands and more noticeable later, when the petals dry or the arrangement catches bright light. A bloom that is already soft or old has less margin for that extra handling.
There is a real visual payoff when reflexing is done well: a tight cup can look more open, the color pattern may become more dramatic, and a single focal rose may occupy more space. But the payoff is not automatic and it does not come with a guaranteed vase-life benefit. For a bouquet you bought to enjoy for several days, preserving the natural petals is often more valuable than forcing the fullest possible shape on the first afternoon.
Visible petal damage is not the same as measured vase-life loss
A bruised or torn petal is a visible quality problem. It does not, by itself, prove that the entire rose will die a specific number of days sooner. Cut-flower longevity depends on the flower’s starting condition, variety, harvest stage, hydration, stem condition, water quality, and display environment. A technique-specific, universal “days lost” figure would be false precision.
The careful conclusion is narrower: fluffing adds handling risk to the petals, and it can make a bloom look worse if it leaves marks or causes petals to loosen. Keep that separate from the well-established basics that support cut-flower condition: clean tools and containers, a fresh cut, water below the leaves, and a cool display away from heat. The RHS gives those steps as general cut-flower conditioning guidance, but it does not promise that reflexing improves vase life. Treat the technique as optional styling, not preservation.
Which roses are reasonable candidates
A reasonable candidate is fully hydrated, firm through the head, partially open enough that its petals already move, and not so precious that a blemish would ruin the arrangement. It should have clean, dry petals and no existing signs of collapse, browning through the inner layers, or a bent neck. Even then, test one bloom rather than assuming every stem in the bunch will respond the same way.
Skip a rose that is tightly closed, freshly unwrapped and dry, soft, slimy, brittle, badly bruised, or close to the end of its display life. Also skip flowers with sentimental or event value if you have not practiced the technique before. Wedding flowers, a gift bouquet you want to keep intact, and expensive specialty roses are poor practice material; if a specific shape matters, ask the florist to prepare it.
| Rose condition | Better choice |
|---|---|
| Firm, hydrated, partly open, ordinary display bloom | Optional one-flower trial |
| Tight bud or petals that resist a light touch | Let it open naturally |
| Soft head, limp petals, or drooping neck | Rehydrate and assess; do not reflex |
| Valuable event or keepsake flower | Ask a florist or leave it untouched |
| One damaged guard petal, healthy center | Remove only that damaged outer petal |
These are decision cues, not guarantees. Rose varieties differ, and no checklist can make a petal impossible to bruise. If the visual gain is small, the sensible choice is to stop before the flower has been altered.
How to reflex one rose with less risk
If you still want to try, make the goal modest: open the bloom slightly, not force it into a peony. Work on one rose at a time, ideally a stem from an ordinary mixed bouquet rather than the most perfect flower. Keep the rest of the arrangement in water while you experiment so that the test does not turn into a long session with all the stems out of the vase.
A flower designer’s approach is selective. The technique described in Florists’ Review begins with a hydrated rose and uses deliberate, individual petal movement; the publication notes that a petal can be tucked under itself to help hold its reflexed shape. That is a design option, not a step everyone needs to copy. If a gentle movement does not produce the result you want, do not increase the force.
Prepare the flower before touching its petals
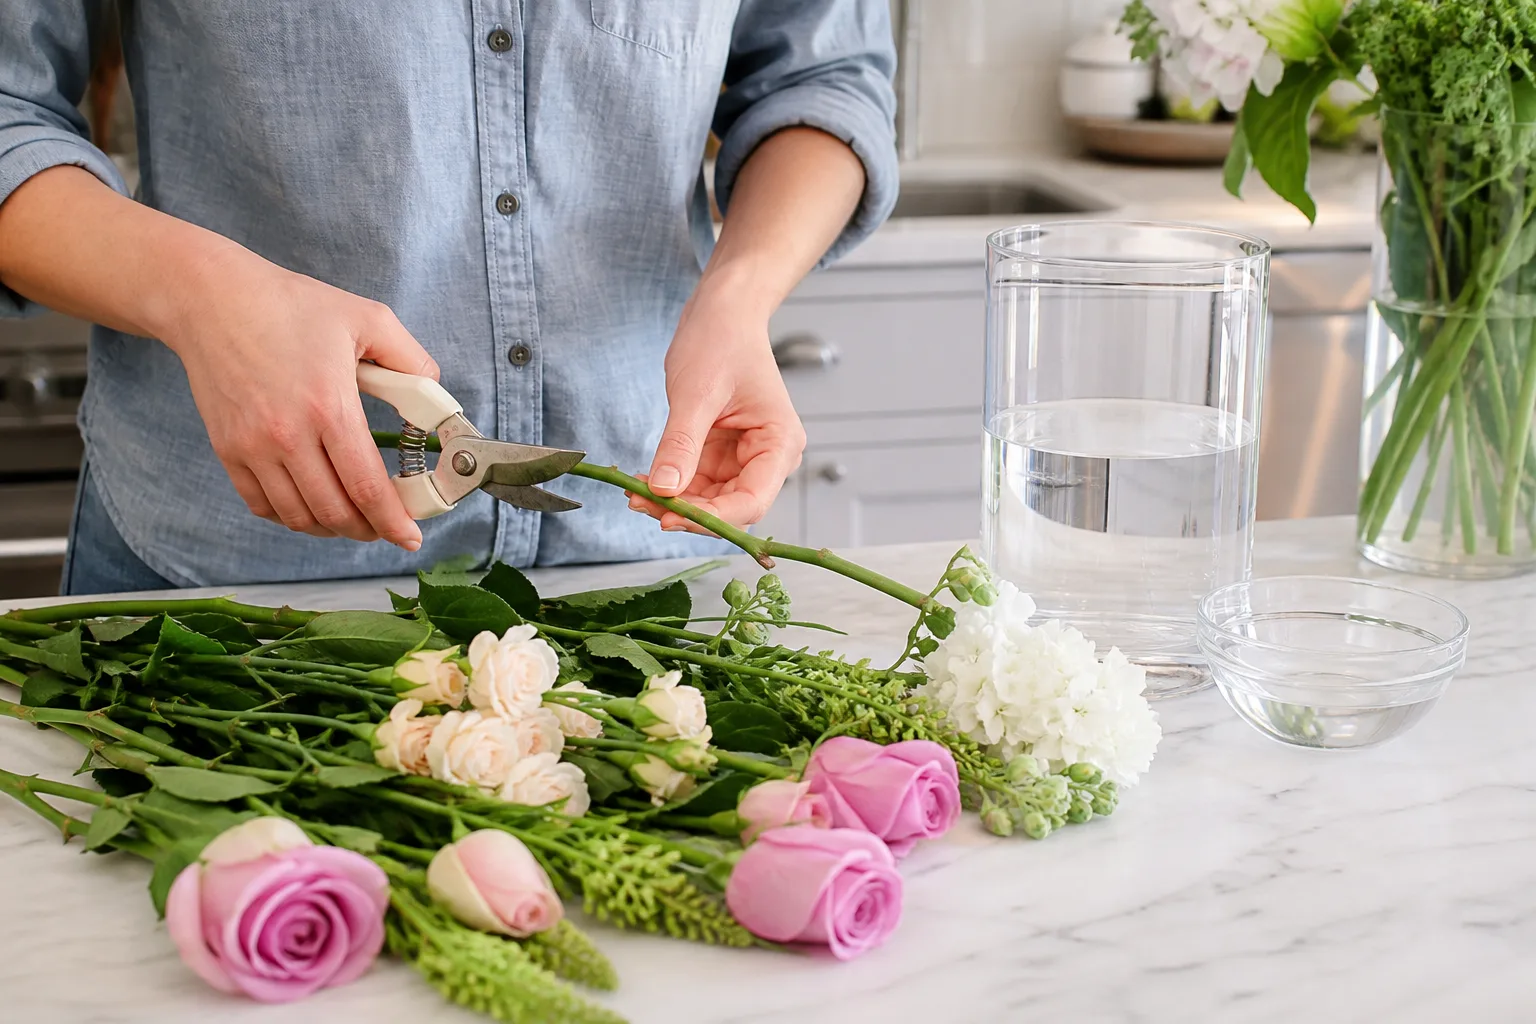
Set the rose in clean water after a fresh cut and allow time for it to hydrate in a cool place. Remove leaves that would sit under water, but do not strip healthy foliage or remove all the outer petals by default. If one guard petal is browned or badly creased, lift it away carefully from its base; leave sound guard petals in place when they are still protecting an attractive center.
Bring the bloom to room temperature before manipulating it and dry any moisture sitting on the petals. Wash and dry your hands, clear a soft, clean work surface, and keep the stem supported without gripping the head. These steps do not make the flower immune to damage; they reduce avoidable stress and give you a better chance to see exactly what your fingers are doing.
Work from the outside in
Begin with a single outer petal that already has enough movement to bend without force. Place a finger pad near its base and guide the petal outward in a small arc; avoid pinching the thin edge, scraping it against another petal, or pulling it away from the receptacle. The aim is a gentle change in angle, not a sharp fold.
Move around the bloom only if the first petal responds cleanly. Leaving the central petals close together preserves the natural center and avoids turning the whole flower into a flattened disk. You can stop after one or two petals and reassess from several feet away; many people overwork the bloom because they judge it only from inches away, where the petal detail looks more dramatic than it will in a vase.
Stop as soon as a petal resists
Resistance is a useful stop signal. If the petal feels stiff, crackles, begins to crease sharply, pulls at its base, or makes the whole head wobble, stop and return the stem to water. Do not squeeze the flower, tug the stem, or keep twisting the bloom between your palms to force it open.
If the petal moves but springs back, you have two choices: accept the natural shape or leave a small reflex in place only if the petal holds without a sharp crease. A tucked edge can help hold a petal’s position in professional design, but making that tuck too tight can leave a visible mark. The rose does not need to be symmetrical; a few petals in a natural, staggered pattern usually look more believable than every petal forced into the same angle.
Fuller-looking roses without manual fluffing
A rose bouquet often looks fuller because of how it is composed, not because each individual flower has been altered. Use blooms at more than one stage of opening: a partly open rose contributes shape and color immediately, while a tighter bloom can continue to develop. Keep enough space between heads that they are visible rather than pressing them together until petals become crowded.
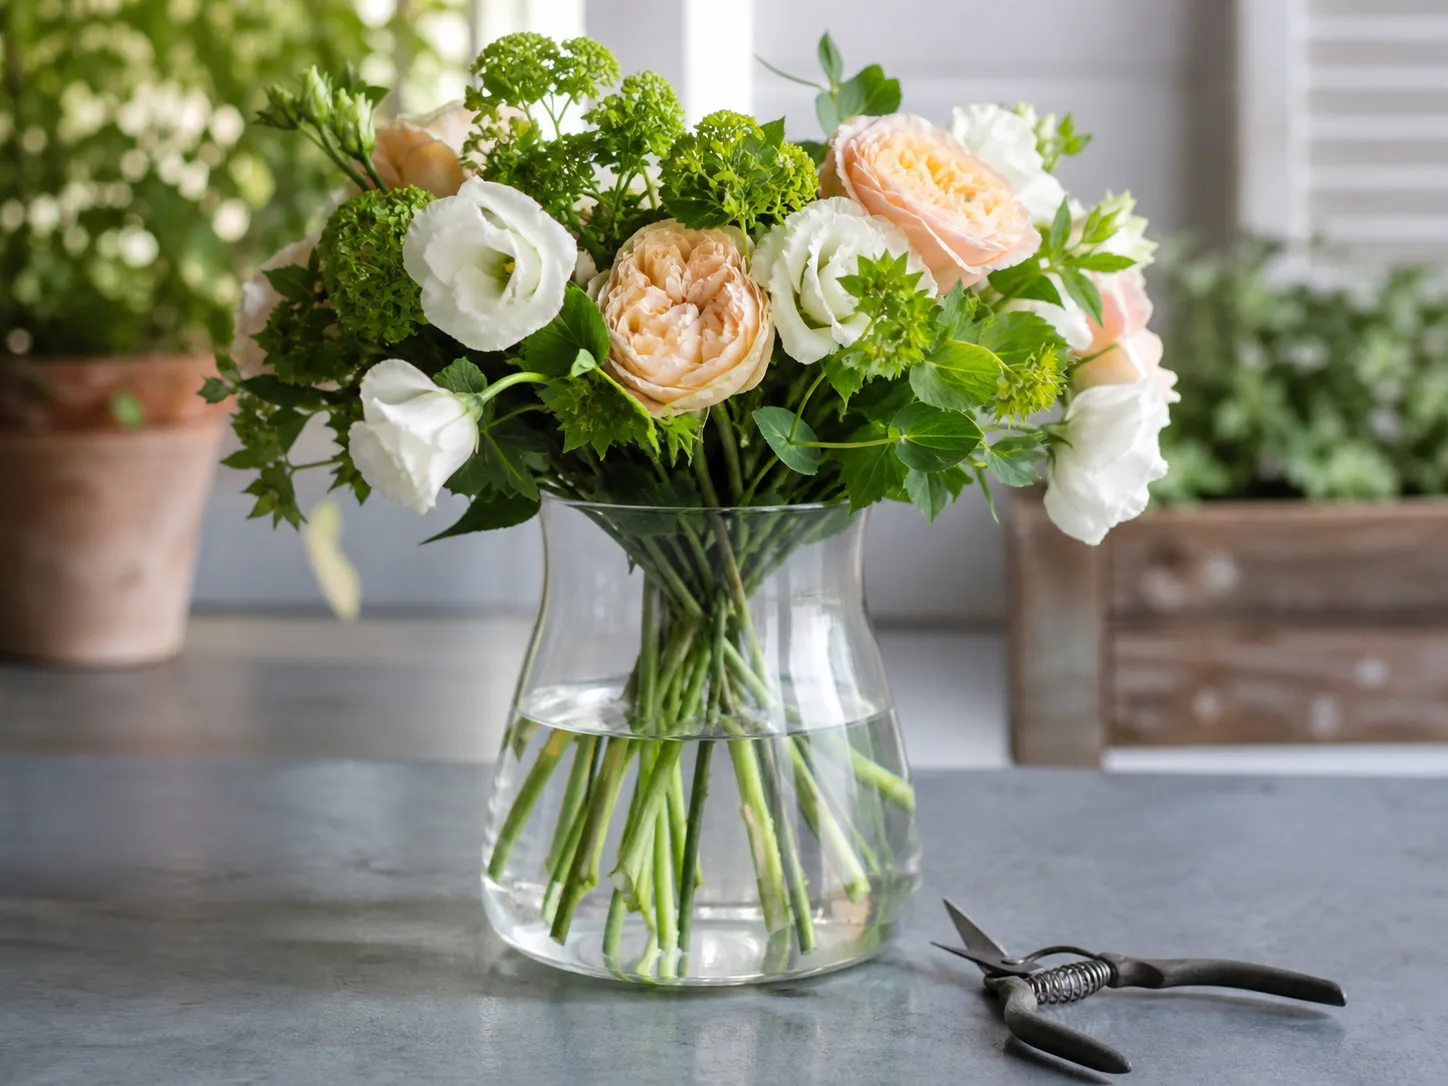
Choose a vase that supports the stems and suits the number of flowers. A very wide opening lets stems splay outward and can make a small bunch look scattered; a narrower neck can bring the heads together, while a heavy, crowded vase may crush them. The best fit is one that holds the stems in a loose group without compressing the flower heads.
Arrange for width and lift
After conditioning, trim stems to create a gentle variation in height instead of cutting every bloom level with its neighbors. Place the largest or most open roses slightly above or forward of smaller buds, then rotate the vase and check the arrangement from the angle where it will be seen. A little difference in height gives the eye more depth, so the bouquet can read as fuller without every rose being widened by hand.
Use greenery or a few complementary flowers to make the arrangement feel finished, but do not pack filler tightly against rose petals. Leave clear space around the blooms, and angle the stems so the rose faces are visible rather than hidden behind foliage. If the bouquet is still visually sparse, add more flowers or choose a smaller vase; those are more reliable ways to increase volume than repeatedly bending the same petals.
If a bloom bruises, droops, or will not open
If you see a crease or a torn outer petal, remove only the damaged petal if it comes away cleanly. Do not strip the entire outside of the rose to hide one blemish. Move the bloom back into the arrangement and check it from its intended viewing distance; small marks are often less noticeable in the bouquet than they appear while you are inspecting the flower up close.
A drooping rose needs a water-uptake check, not more petal manipulation. If the vase is low or cloudy, replace the water, wash the vase, and recut the stem with clean sharp shears. The RHS notes that a clean cut helps avoid crushing stems and recommends conditioning rose stems in water; if a flower stays limp after reconditioning, it may have been damaged before purchase or be nearing the end of its natural display.
A tight rose that has not opened may simply need time, provided it is mature enough to develop after cutting. Keep it hydrated and away from hot sun or a heater, and watch for natural movement over the next day rather than prying the petals apart. If the flower remains closed while the stem or petals become soft, more force is unlikely to rescue it.
Conclusion: let most roses open naturally
Fluffing roses is an optional styling trick, not a required florist-care step. Controlled petal reflexing can make a suitable, hydrated bloom look wider, but it does not add petals, mature a tight bud, or guarantee a longer-lasting flower. Palm-twirling and individual petal reflexing are not interchangeable, and neither technique is worth forcing on a fragile or important rose.
For most bouquets, let the blooms open naturally and make the arrangement feel generous through stem placement, vase fit, and a mix of flower stages. If you want to experiment, choose one firm, ordinary rose, work gently from the outer petals inward, and stop at the first sign of resistance. The most polished bouquet is the one that looks intentional and still lets the roses remain roses.



