How to Turn a Kiddie Pool Into a Garden Planter
Turn a rigid kiddie pool into a useful garden planter with safe material checks, reliable drainage, a supported base, the right growing mix, and crops that fit.
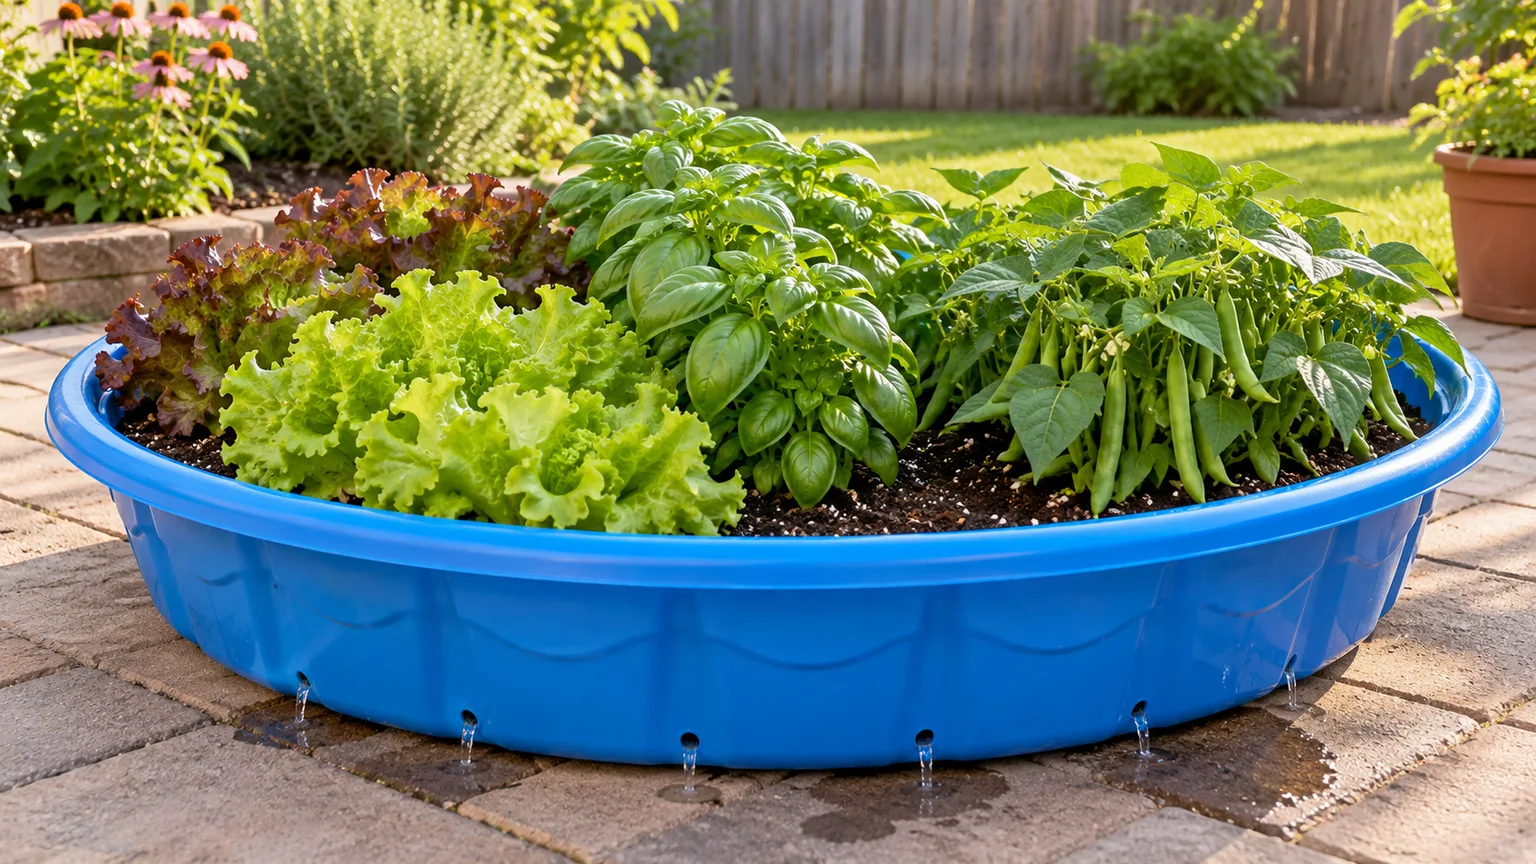
A rigid plastic kiddie pool can become a wide, low-cost planter for lettuce, herbs, radishes, and other compact crops. The conversion is straightforward, but two choices matter before you reach for a drill: whether the pool is a sensible vessel for the plants you want to eat, and whether its base can safely support several cubic feet of wet growing mix.
A shallow basin also behaves differently from a raised bed. It may hold a broad planting area, but it gives roots less depth and can dry or overheat faster than a deeper container. Use the pool for the right job, build in free drainage, and treat the finished planter as a permanent fixture for the growing season.
Check the Pool Before Growing Food
For flowers, a sound, clean rigid pool can be a useful reuse project. For vegetables and herbs, first look for the manufacturer’s material information and any statement that the plastic is suitable for food contact. If the pool is unmarked and its material or intended use cannot be verified, the cautious choice is to grow ornamentals in it and use a container sold for food gardening for edible crops.
That caution does not mean every plastic pool is known to be harmful. It means a pool designed for splashing is not automatically certified for prolonged contact with edible soil. The FDA’s food-contact listings identify substances by intended use and conditions of use; that is a reason to check a product’s intended use rather than infer safety from color or a recycling symbol alone (FDA food-contact substance inventory). A resin number identifies a broad plastic category, not a blanket approval for every gardening use.
Do not use a pool that is brittle, cracked, flaking, heavily sun-damaged, painted with an unknown coating, or previously used to hold chemicals, fuel, or pesticide concentrate. Avoid lining it with an unidentified sheet as a quick fix: the liner itself would need suitable food-contact information, and it must not trap water around the roots. Wash a pool that passes inspection with mild soap and water, rinse it thoroughly, and let it dry before drilling or filling.
Choose the Pool and Its Permanent Location
Use a rigid, one-piece wading pool with a flat bottom and intact sidewall. An inflatable pool is not a planter: its flexible walls cannot reliably contain wet mix, and puncturing it defeats the structure. A pool that already flexes badly when empty, has seams separating, or has sharp cracks is also a poor candidate.
Choose the location before adding anything. Put the planter on firm, level ground or a stable patio where the drainage water can disperse without running into a building, pooling on a walkway, or staining a surface. A lawn is an option if you accept that the grass underneath will be smothered. On a deck, balcony, roof, or other elevated structure, do not assume that a shallow-looking pool is light: filled containers become heavy, and the structure’s load limit is not obvious. GrowVeg advises balcony gardeners to account for wet container weight and err on the side of caution (GrowVeg’s balcony garden guide).
Keep enough room to reach the middle from every side if you can. A wide pool can tempt you to plant the whole surface, but if you have to lean across seedlings or stand on the soil to harvest, the layout is too large for comfortable care. Access also makes it easier to inspect the sidewall, clear drainage, and water evenly.
Estimate Soil Volume and the Load
Measure the pool’s inside diameter and decide how deep the soil will be. For a roughly circular basin, estimate volume in cubic feet with: 3.14 × (inside radius in feet) × (inside radius in feet) × soil depth in feet. For example, a four-foot-wide pool filled eight inches deep needs about 8.4 cubic feet of mix, before allowing for settling. A three-foot-wide pool at the same depth takes about 4.7 cubic feet.
Use that estimate to buy enough container mix and to understand the scale of the project. Eight cubic feet is several large bags, and the mix becomes much heavier when wet. The exact weight depends on the ingredients, moisture, pool shape, and fill depth, so bag weights alone do not describe the full saturated load. Place the empty pool at its final location and do not plan to move it once filled; the soil, water, and plants can flex or crack the plastic if the planter is lifted or dragged.
Do not try to make the pool lighter by balancing it on a few small blocks. That concentrates weight at a few points and can make the bottom sag between supports. The base should be supported across its footprint, which is why a level, load-bearing surface is part of the planter design rather than a finishing detail.
Choose Crops That Fit the Depth
Measure usable soil depth after allowing for the pool’s curved bottom and the space below the rim. Very shallow pools are best for baby greens, lettuce, arugula, radishes, chives, basil, cilantro, and other compact herbs. Some vegetable-container guidance lists about four to five inches of soil for chives, lettuce, radishes, salad greens, basil, and coriander; crops such as bush beans, onions, and peas need more depth, commonly around six to seven inches (Gardeners’ Supply Company’s container depth guide). Treat those figures as starting points, then follow the variety’s seed packet or transplant label.
The width is useful for succession planting: sow a small area of lettuce or radishes, then refill that space with another short-season crop after harvest. Leafy crops also let you harvest outer leaves while the center continues to grow, so you do not need to plant the entire pool at once. Leave room for mature plants instead of packing in seedlings that look small on planting day.
RHS container advice includes salad leaves, salad onions, herbs, radishes, and other vegetables, while emphasizing that the correct container must suit the crop (RHS guide to vegetables in containers). A kiddie pool’s advantage is surface area, not depth. Check the seed packet’s spacing and depth, and choose compact or dwarf varieties if the pool’s soil layer is modest.
Know What to Skip or Grow Elsewhere
Do not assume that a broad pool can support every crop. Tomatoes, potatoes, carrots, cucumbers, squash, corn, and large peppers need more root depth, anchoring, or sustained moisture than a very shallow basin usually provides. Some compact varieties can grow in containers, but a pool only makes sense if its actual depth meets the crop’s needs and the sidewall can stay stable under the added weight.
For example, a compact determinate tomato may succeed in a deep, sturdy pot with a support of its own. That does not make it an ideal pool crop: its root zone needs more depth than lettuce, and a tall plant or cage catches wind. Put a large fruiting plant in a suitably deep container beside the pool rather than staking a heavy trellis into the pool wall or relying on the pool as a structural anchor.
Plants with different water preferences can share a pool only when their spacing and maintenance still make sense. Rosemary likes a drier growing pattern than thirsty salad greens, so placing them together can make watering a compromise. For a first planting, group crops with similar light and moisture needs in separate sections or keep the pool to one crop family.
Make Drainage Without Weakening the Basin
Gather the pool, drill and a small bit, safety glasses, a marker, breathable fiberglass window screen or similar mesh, sharp scissors, container mix, and plants or seeds. Read the pool label and inspect the bottom before drilling; avoid a pool whose plastic is brittle or whose underside has molded features that would split under a hole. Wear eye protection, put the empty pool on a fully supported work surface, and drill slowly so the plastic does not flex.
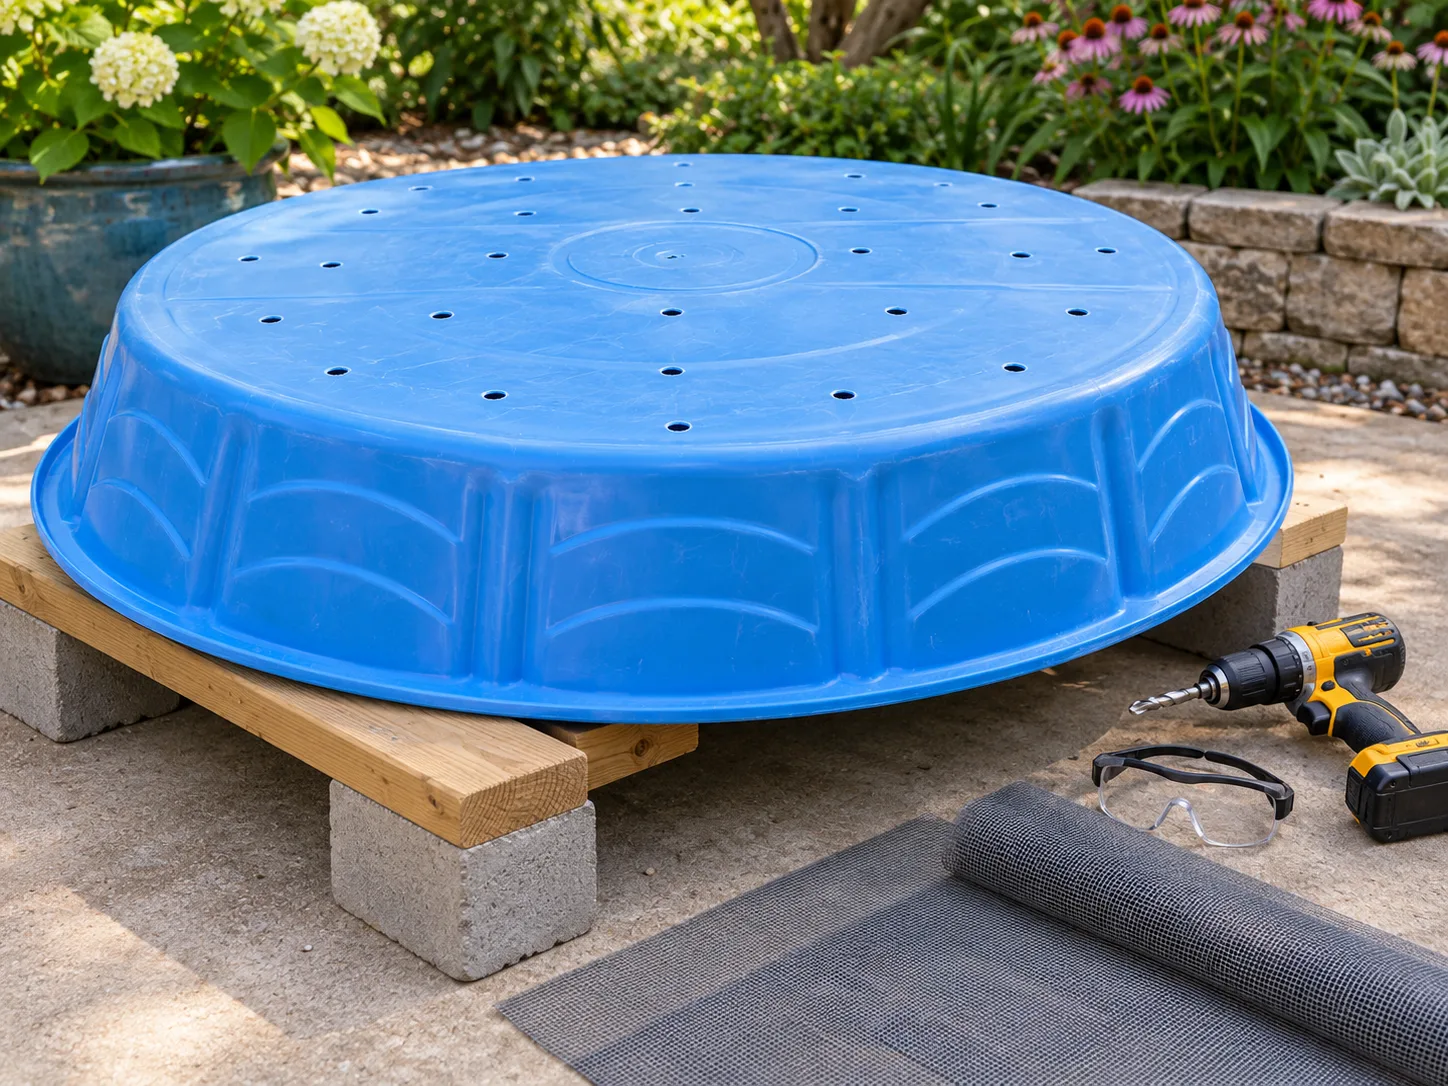
Mark several small holes across the lowest parts of the base, spreading them evenly rather than clustering them in the center. A quarter-inch to three-eighths-inch bit is a reasonable starting size for a rigid basin; use the smallest hole that lets water drain freely, and test one hole before making the pattern. If water still cannot escape after the test, add more openings gradually. A single oversized cut can start a tear and weaken a thin pool floor.
Bottom drainage is essential. Side holes near the rim are not a substitute because they can leave a saturated layer sitting below them. After drilling, set the empty pool in its intended place and pour in a small amount of water to confirm it exits instead of collecting in a low pocket. Correct the surface or hole placement before adding soil.
Cover the Holes Without Blocking Them
Lay a breathable screen over the inside bottom so the mix does not wash through the openings. Trim it to the basin, allowing a small overlap up the sides, and keep it flat without sealing the holes. The screen is a particle barrier, not a waterproof liner; water still needs a clear route out.
Do not add a layer of stones, broken pots, or bottles over the bottom as a drainage layer. Water does not drain faster simply because a coarse layer sits underneath the mix, and those materials take away the limited root depth this shallow planter provides. Penn State Extension’s container guidance stresses that the vessel must let excess water drain; its soil guidance also recommends container media rather than dense yard soil (Penn State Extension on container gardening, Penn State Extension on container soil).
Support the Entire Base
Set the pool on compacted, level ground, a firm bed of fine gravel, or a patio surface that supports the whole bottom. If the patio has a slope, make sure runoff still leaves the planting area and does not collect beneath the pool. The drainage holes should open to an area where water can escape; do not seal the base against a flat board or place it inside a decorative container that holds drainage water.
Avoid propping the pool on bricks or narrow pieces of lumber once it is filled. Point supports can leave unsupported spans, and wet mix pushes down over the entire bottom. A pool on a deck can also leak onto the wood or add a load the framing was not designed to carry. If the only available spot is elevated, choose a purpose-built raised planter with a known load rating, or ask a qualified building professional about the structure before using it.
The low sides of a pool are not a substitute for a raised bed built to a specific working height. They do make weeding and picking easier than planting directly in the lawn, but the basin should remain close to grade, supported, and stable. Do not stand, kneel, or sit on the edge; even an apparently sturdy rim can deform.
Fill With Container Mix, Not Garden Soil
Use a quality potting or container mix made for outdoor growing. Penn State Extension explains that yard soil in containers can restrict drainage and aeration; a lighter container medium is better suited to a confined planter (Penn State’s container soil guidance). A shallow pool is especially unforgiving of dense soil because its drainage depends on a relatively thin layer staying open and crumbly.
Moisten dry mix in a clean tub or wheelbarrow before adding it, following the bag directions. Fill gradually to a depth that leaves the rim clear and lets you water without spilling soil over the side. Avoid compressing the mix hard; settle it with a gentle watering, then top up if it sinks. Do not use the pool as a place to dump excavated garden soil, construction debris, fresh manure, or unknown compost.
Check whether the mix already contains fertilizer. If it does, do not add a second full dose at planting. If not, choose an edible-garden fertilizer and apply it according to its label and the needs of the crop; overfeeding seedlings in a confined volume can harm roots and waste nutrients. Penn State and RHS both describe the need to use suitable container media and provide ongoing nutrients, but fertilizer timing depends on the product and crop rather than a single universal schedule (RHS container vegetable advice).
Plan the Layout Before Planting
Sketch the pool from above and divide it into small zones. Put taller herbs or compact bush crops toward the north side, where they are less likely to shade shorter greens; keep the easiest-to-harvest leaves near the outside edge. A simple layout is more useful than a crowded mix: one section of lettuce, one of quick radishes, and one of herbs with similar watering needs is manageable and easy to thin.
Follow the spacing on seed packets rather than trying to maximize the number of plants. A pool planter offers a lot of surface, but too many roots competing in a shallow soil layer will dry the mix faster and leave plants undersized. If you want to stretch the harvest, sow a short row every week or two instead of filling the whole pool with one batch that matures at once.
Leave an open strip or a few gaps so you can reach the middle and inspect the mix. Avoid installing a large cage or trellis until you know the pool’s structure can handle the wind load. Support stakes should go into the ground outside the basin or into a separate sturdy support, not into a thin plastic wall.
Sow Seeds and Set Transplants Carefully
For direct sowing, read the packet for depth and spacing, then make shallow furrows in the prepared mix. Water the surface first if it is dry, sow the seed, cover it with the specified depth of mix, and water with a gentle rose or fine spray. A hard stream can expose seeds or wash them to one side of a low basin.
For purchased transplants, water the nursery pot before planting so the root ball holds together. Set each plant at the same depth it was growing in its pot unless its label says otherwise, then firm the mix gently around it. Keep the crown of leafy greens above the soil surface and leave enough space for airflow as leaves expand.
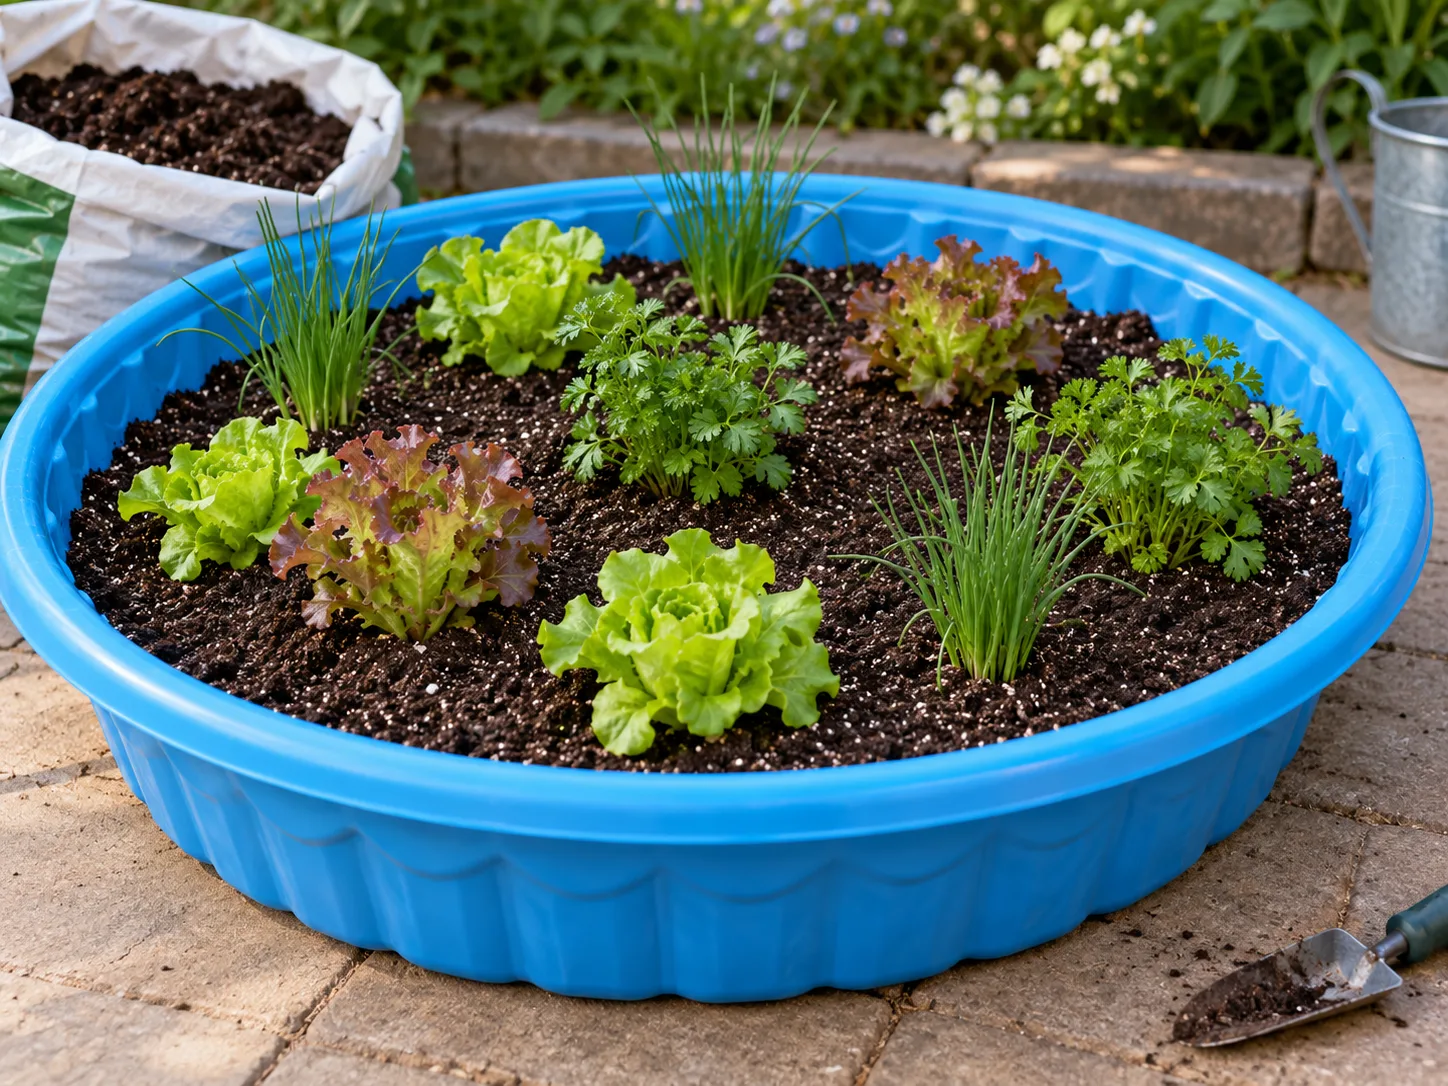
Water thoroughly after planting until you see drainage from the base. That first watering settles the mix around the roots and reveals whether any holes are blocked. If the pool is in an area where runoff could damage a surface, fix that drainage route now; do not wait until the plants are established and the pool is difficult to empty.
Water and Feed for Steady Growth
A broad, shallow planter can lose moisture quickly because the root zone is close to the sun-warmed surface and the pool wall exposes much of its perimeter. Check the mix daily during hot, dry, or windy periods, especially while seedlings are small. Water when the top layer is drying and the root zone is no longer evenly moist; water slowly enough to wet the full depth, then confirm the excess can leave.
Do not water by calendar alone. Rain may wet the leaves without soaking the soil, while a cloudy day can still be windy enough to dry a shallow bed. The RHS lists drying out and limited root space among common container vegetable problems and recommends regular water while avoiding prolonged waterlogging (RHS container vegetable advice). A finger check at several points is a better guide than a single rigid “one inch per week” rule for every mix, crop, and climate.
Feed according to the potting mix, crop, and fertilizer label. If the mix was pre-fertilized, wait until its stated feeding window ends. If it was not, use an edible-crop fertilizer at the label rate and avoid adding extra because growth looks slow before checking light, moisture, temperature, and crowding. A stressed plant can have several causes, and more fertilizer will not fix blocked drainage or roots that have run out of depth.
Manage Sun, Heat, and Wind
Put fruiting vegetables where they receive the amount of sun their labels require; many need a long, bright day. Leafy greens and some herbs tolerate less direct sun, and may last longer in a spot with morning sun and light afternoon shade during hot weather. Gardeners’ Supply Company’s container guide notes that many vegetables need at least six hours of sunlight, while salad greens and herbs can often get by with less (container gardening guide). Track the actual sun across the location before filling the pool, because nearby fences and buildings can cast more shade than expected.
The pool’s shallow soil warms and dries faster than a deeper planter. If the edge gets very hot in afternoon sun, add light shade over the hottest hours or position the pool where it gets some afternoon protection, while still meeting the crop’s light needs. Keep mulch thin around seedlings so it does not bury stems, block emergence, or hide the soil surface when you are checking moisture.
Wind can dry leaves, tip lightweight covers, and stress tall plants. A sheltered ground-level location is more forgiving than an exposed balcony or roof. Do not attach shade cloth or trellis to the pool rim; anchor those supports independently so a gust does not pull or twist the planter.
Protect the Planter and Clean It Between Crops
Inspect new growth for slugs, chewing insects, and seedlings that have been clipped or disturbed. A mesh cover can protect young plants from birds and some pests, but lift or secure it so it does not rub leaves and so the crop can still be watered and harvested. For pesticide use, follow the product label and local guidance; do not apply a chemical around edible crops unless the label allows that crop and use.
Remove spent plants and diseased debris rather than letting it decay in the shallow bed. At the end of a crop, loosen the top layer, remove large roots, and check whether the pool floor or holes have cracked or clogged. Do not reuse a pool that has become brittle or structurally weak for another heavy planting season.
If the pool is not suitable for food crops, flowers can still make use of the wide surface, provided the plastic is intact and clean. Avoid leaving standing water in the basin after the season: it can attract mosquitoes, freeze and expand in cold weather, or add unnecessary stress to the pool. Store the empty pool out of direct sun if you want to inspect and reuse it next year.
Troubleshoot Three Common Pool-Planter Problems
A pool planter that is failing usually points to one of three issues: water cannot escape, the shallow mix is drying before roots can use it, or the basin is flexing under the load. Fix the cause before adding fertilizer or more plants. Adding more material to the top does not correct drainage underneath.
Water Is Sitting on the Soil
First check whether water is still pooled several minutes after irrigation. If it is, stop watering and inspect the lowest holes from the outside; roots, screen, or compacted mix may be blocking them. Clear debris without pushing a tool far into the soil, and check that the pool is level enough for water to reach its openings.
If holes are clear but water remains, the base may be sealed against a board, liner, or hard surface that prevents runoff. Emptying a planted pool is difficult, so the better fix is to establish an open drainage path before planting. If the plastic has sagged into a dish-shaped low spot, unload the planter and replace the basin rather than drilling large cuts into a stressed floor.
The Mix Dries Out Too Quickly
Check the depth first. A pool filled with only a few inches of soil dries faster than one with a deeper root zone, and large gaps between watering can stress seedlings. Water thoroughly in the morning, add a thin organic mulch after seedlings are established, and use a shade cloth during severe afternoon heat if the crop still gets enough light.
Thin overcrowded plants so the remaining roots have room, and avoid choosing crops that outgrow the depth. If your climate requires repeated daily watering, switch to quick greens and herbs or use a deeper, purpose-built container. A kiddie pool’s surface area cannot compensate for inadequate root volume.
The Pool Is Bowing or Cracking
Stop adding water and do not move a loaded pool. A bowed side or new crack means the basin is under strain or has deteriorated. Keep people away from the weak side, then remove the plants and mix carefully only if the pool can be emptied without lifting or twisting the damaged shell.
Do not brace a bulging wall with stakes driven through the plastic or conceal a crack under a liner. The safer repair is to transfer the mix to a sturdier planter and retire the pool from heavy use. Prevent the problem next time by using an intact rigid pool, supporting its full base, leaving it at ground level, and choosing a soil depth that suits the basin.
Conclusion
A rigid kiddie pool can work as a seasonal planter when the plastic is sound, the location supports the finished load, the base drains freely, and the crop fits the available soil depth. For food crops, verify the pool’s intended material use; if you cannot, choose ornamentals or a container specifically identified for edible gardening.
Set the pool in its permanent place before filling, drill and test drainage, cover the holes with breathable mesh, and use container mix rather than yard soil. Start with compact greens and herbs, keep watering consistent, and inspect the basin as the mix settles. Those choices turn an improvised container into a useful garden without asking the pool to do more than it can safely handle.