Inexpensive Bokashi Bucket: How to Make One at Home
Turn two spare buckets into a bokashi bin that drains well and seals tightly. Follow a practical scrap routine and learn where the fermented material goes next.
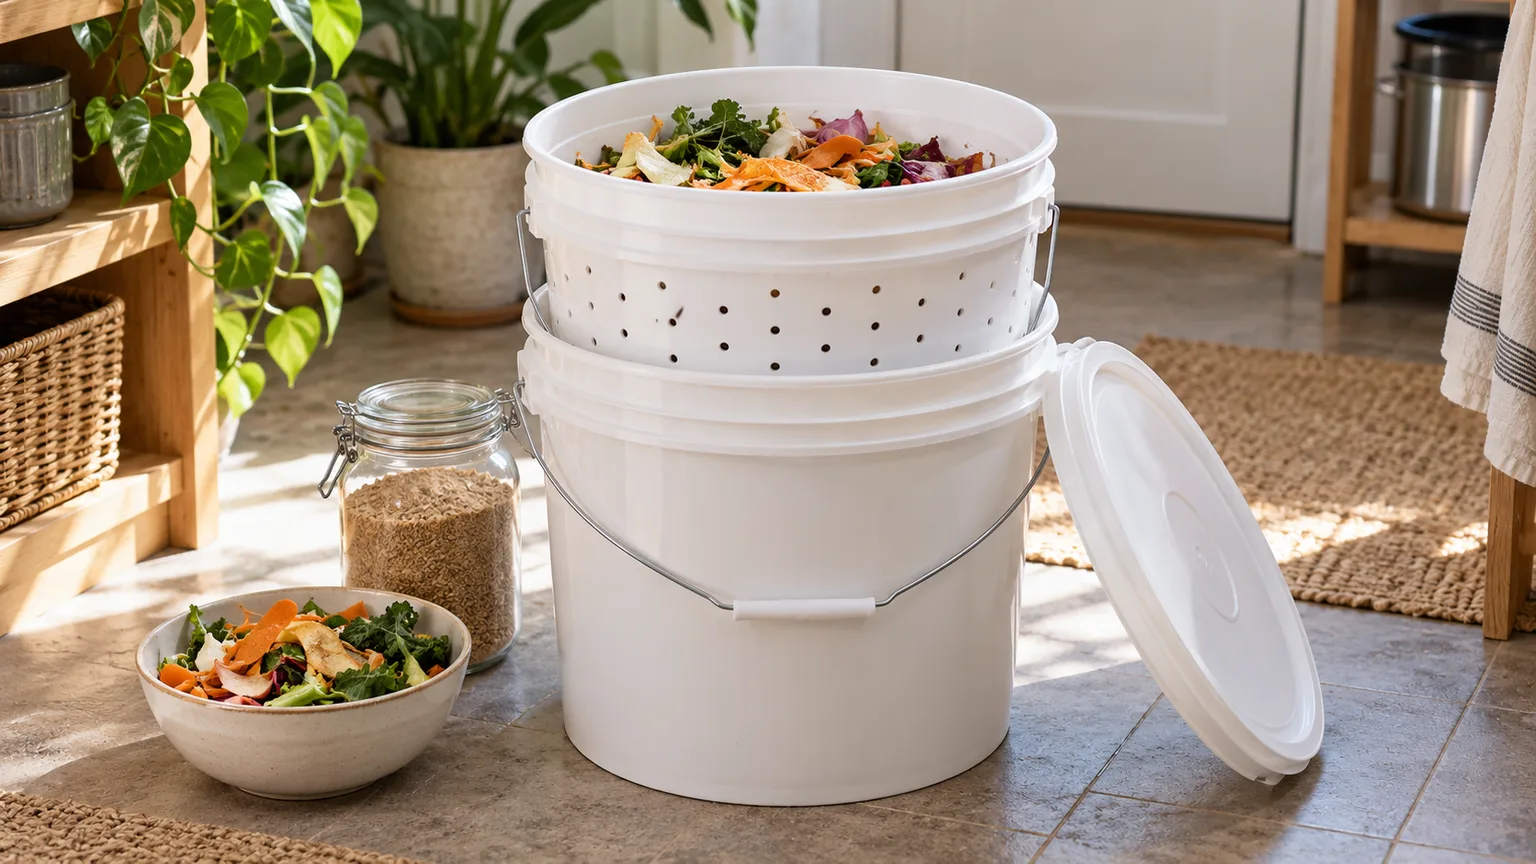
A simple bokashi bucket can be made from two clean, food-safe 5-gallon pails, one tight-fitting lid, and a drill. The upper pail holds scraps and bran; holes in its base let excess liquid collect in the solid lower pail. The bucket is the easy part. You also need inoculated bran, a lid that seals, and somewhere for the fermented scraps to finish breaking down.
That last distinction prevents most first-batch frustration: bokashi fermentation does not produce finished compost. It pickles and preserves food waste in a low-oxygen container. After fermentation, the material still needs contact with soil or an established compost pile, where ordinary decomposition continues.
What a bokashi bucket does—and what it does not finish
Bokashi is an anaerobic fermentation method for kitchen scraps. You layer food waste with a dry carrier such as wheat bran or rice hulls inoculated with beneficial microbes, press out excess air, and keep the container closed. University of Saskatchewan describes the resulting material as fermented waste that must be mixed into soil, buried, or added to a compost pile before it becomes finished compost. Its indoor bokashi guide is useful because it lays out both the kitchen-stage routine and the second, soil-based stage.
A small sealed bucket can accept many foods that a typical backyard pile handles poorly, including cooked food, dairy, meat, and small bones. That does not mean every item disappears during the bucket stage. Bones, large peels, and dense chunks may remain recognizable after fermentation; the goal is to ferment them, not turn them into dark, crumbly humus in ten days.
Think of the system as two linked processes. First, the bucket keeps scraps in a sealed, inoculated environment and collects liquid. Then soil organisms or an active compost pile complete decomposition. Washington State University Extension’s Kitsap County bokashi guide stresses that the fermented material is acidic pre-compost, not a finished soil amendment to spread on the surface.
This method suits a small kitchen, apartment, or household that wants to collect a broad range of food scraps indoors. It is less convenient if you do not have access to a garden bed, soil-holding tote, community garden, or compost drop-off that accepts fermented scraps. Decide on that finishing destination before drilling; otherwise, a cheap bucket can become a full container with nowhere to go.
Materials and tools for a low-cost build
Gather the pieces before you drill:
- Two matching, clean 5-gallon plastic buckets that nest together
- One tight-fitting lid for the inner bucket
- A drill with a 1/8- to 1/4-inch bit
- Safety glasses and a scrap board to support the bucket while drilling
- Bokashi bran or another specifically labeled bokashi inoculant
- A flat plate or a clean, food-safe disk that fits inside the bucket to press scraps down
Matching buckets matter more than color or brand. The upper bucket needs to sit steadily inside the lower one while leaving a small collection space beneath its base. Before buying anything, test the fit: if one pail wedges so tightly into the other that you cannot lift it back out, choose a different pair.
Use buckets that held food or were sold for food storage. Do not repurpose pails that held paint, solvents, pesticides, fuel, or other chemicals, even if they look clean. A previously used food-service bucket is a budget option only if its former contents are known and it has no cracks, lingering odors, or grease film.
A spigot is optional. The lower bucket can act as the reservoir; you lift out the inner bucket to pour the collected liquid into a separate vessel. A tap makes draining less awkward, but it adds parts, a drilled side opening, and a leak point. The DIY bucket walkthrough from Epic Gardening likewise describes a two-pail build without requiring a spigot.
Bokashi bran is a repeat cost, not a one-time tool. If your budget is tight, first check whether local food businesses, community gardens, or a neighborhood compost group have clean food-grade pails or bran to share. Saving money on the bucket will not help if the setup cannot seal, drain, or be emptied safely.
Choose a drainage design before drilling
The drilled double-bucket setup is a useful default because it makes liquid visible and easy to remove without a special bin. It is not the only workable design, though. Choose between a drainable inner pail and a single bucket with absorbent material based on your scraps and how much maintenance you can tolerate.
Two nested buckets: the cleanest budget build
This version follows the same basic logic as a commercial bin: a perforated upper bucket holds the food, while a solid lower bucket catches drainage. Drill about 20 to 30 small holes across the bottom of the upper pail with a 1/8- to 1/4-inch bit. Treat that as a starting layout, not a precision formula; the holes should let liquid pass while leaving enough plastic between them to keep the base strong.
Do not drill ventilation holes in the side walls. Bokashi needs limited oxygen, and side vents turn the fermenting chamber into a different, leakier system. Keep every hole in the inner bucket’s bottom and keep the lid on the food chamber snugly closed.
One bucket with an absorbent base: when to keep it simple
If you do not have a drill, a single bucket can work with a false floor or a few inches of dry sawdust at the bottom to absorb excess liquid. The University of Saskatchewan guide recommends a false bottom or roughly two to three inches of dry sawdust for this style. It is simpler to assemble, but the absorbent layer cannot be drained and reused as easily as a separate reservoir.
Choose this option for modest volumes of moist scraps and check for sogginess as you add material. If the bucket regularly pools liquid, produces a putrid smell, or becomes too heavy to handle, the nested design is a better fit. Do not place a layer of absorbent material in the inner pail and assume it removes the need to control free liquids.
Build the nested bucket in five steps
First, wash and dry both pails. Set the upper bucket upside down on a stable board, put on safety glasses, and drill the holes in its base. Use steady pressure rather than forcing the bit through the plastic; forcing it can crack the base or leave a ragged hole.
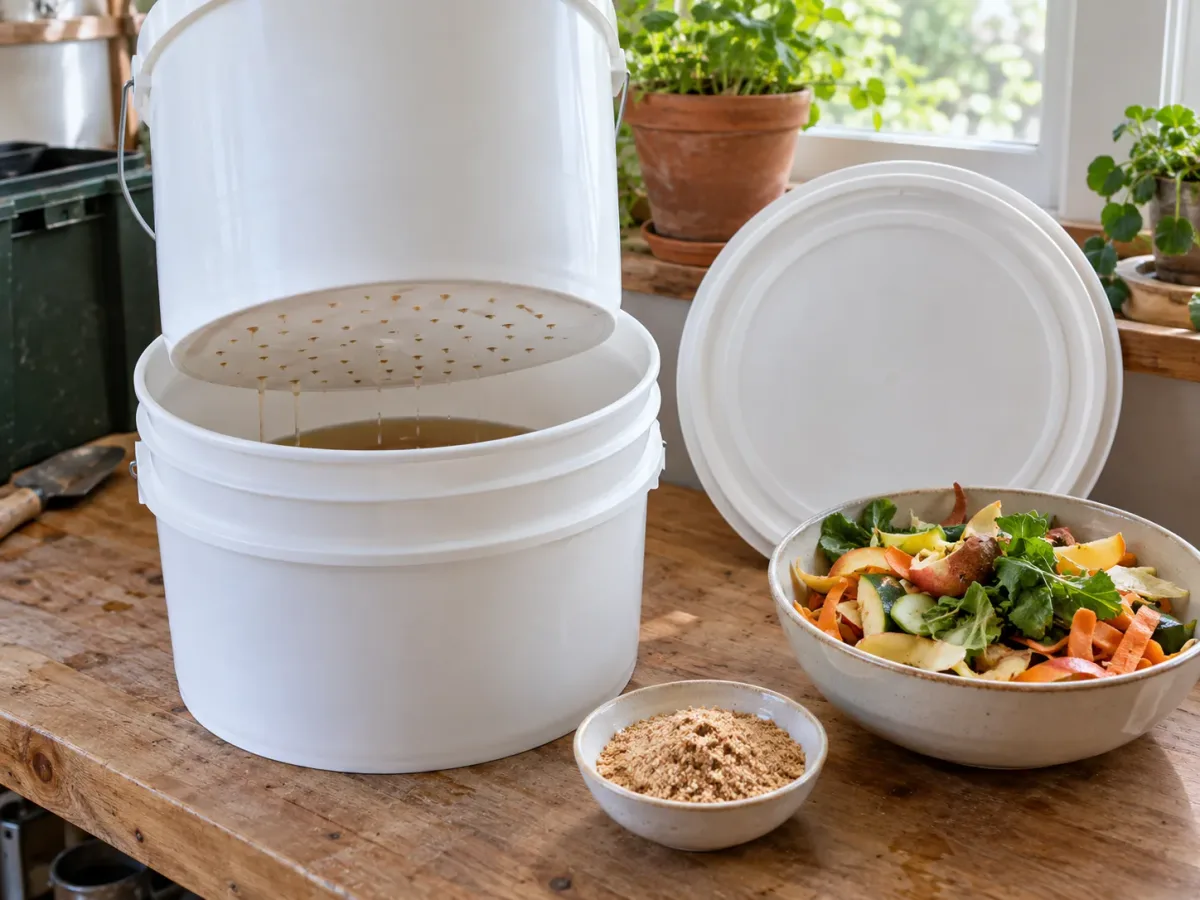
Next, remove loose plastic burrs around the holes with a file or sandpaper so scraps and cloth do not catch on sharp edges. Rinse away plastic shavings. If you want to prevent very small scraps from falling through, lay a removable, coarse, food-safe mesh or perforated disk across the bottom; avoid a fine fabric layer that can clog with wet food.
Set the drilled pail inside the unmodified pail. Confirm that it rests above the bottom rather than sealing itself flat against it; liquid needs somewhere to collect beneath the drain holes. Add the lid to the upper bucket and check that you can press it down evenly around the rim.
The lid must seal the food chamber, not necessarily both pails together as one unit. A snap lid is often the least expensive option and can work if it is undamaged and closes all the way around. If the lid flexes, rocks, or pops up at one edge, try another lid before you add food; a cloth tucked under a loose rim can absorb moisture, but it is not a substitute for a dependable seal.
Test the seal and drainage before adding food
Test the empty bucket before using it. Pour a cup or two of water into the drilled inner pail, check that it drains into the bottom bucket, and look for leaks along the lower pail’s side and base. Pour that test water out and dry the parts completely before beginning a batch.
Close the lid and run your fingers around the rim. If one section feels loose, inspect the rim for dents, dried food, or a mismatched lid. A clean gasket or a better-fitting lid is a better repair than wrapping the entire bucket in tape, which can hide a poor fit and make daily opening messier.
If the inner pail rests too close to the bottom of the outer one, add a stable spacer or choose a more compatible pair of buckets. Do not use a loose stack of rocks or a wobbly insert that could tip when you lift the inner pail. Check that you can lift the full inner pail safely; five gallons of wet scraps can be heavy, and the handle should be sound.
Set the finished bucket on a washable, level surface away from direct sun and heat. A tray underneath provides an extra safeguard against spills during the first few days, when you are learning how much liquid your household’s scraps release.
Choose the inoculant before you start
Bokashi bran is a dry carrier—often wheat bran, rice hulls, or a similar material—that has been inoculated with a microbial culture. Washington State University Extension identifies lactic acid bacteria and yeasts among the groups used in bokashi bran. The starter organisms help the scraps ferment in the low-oxygen bucket; ordinary dry bran by itself is not a substitute.
For a first batch, use a product labeled for bokashi and follow its directions. Different products can have different carrier materials, moisture levels, and recommended amounts, so a single scoop size cannot be universal. University of Saskatchewan’s guide uses about one to two tablespoons over a thin food-waste layer, and Planet Natural’s practical bokashi guide also describes distributing bran as scraps are layered. Treat those as references, then adjust to the product label rather than stretching a starter too far.
Store bran in a cool, dry, sealed container. If it has been exposed to moisture, has an unusual musty odor, or has clumped into a damp mass, replace it instead of relying on a weakened inoculant. Some gardeners make bran from a liquid culture and a grain carrier, but the extra ingredients and fermentation controls do not always make a dependable first batch cheaper. Buy or borrow a known starter first; consider a homemade recipe only when you can follow a reliable supplier’s instructions for that exact culture.
Load scraps in layers, not as a loose pile
Add a small layer of scraps, sprinkle bran evenly over it, and press the layer down with a clean plate or disk. Repeat as you collect food waste. The goal is to spread inoculant across the scraps and reduce pockets of air, not to grind everything into a paste.
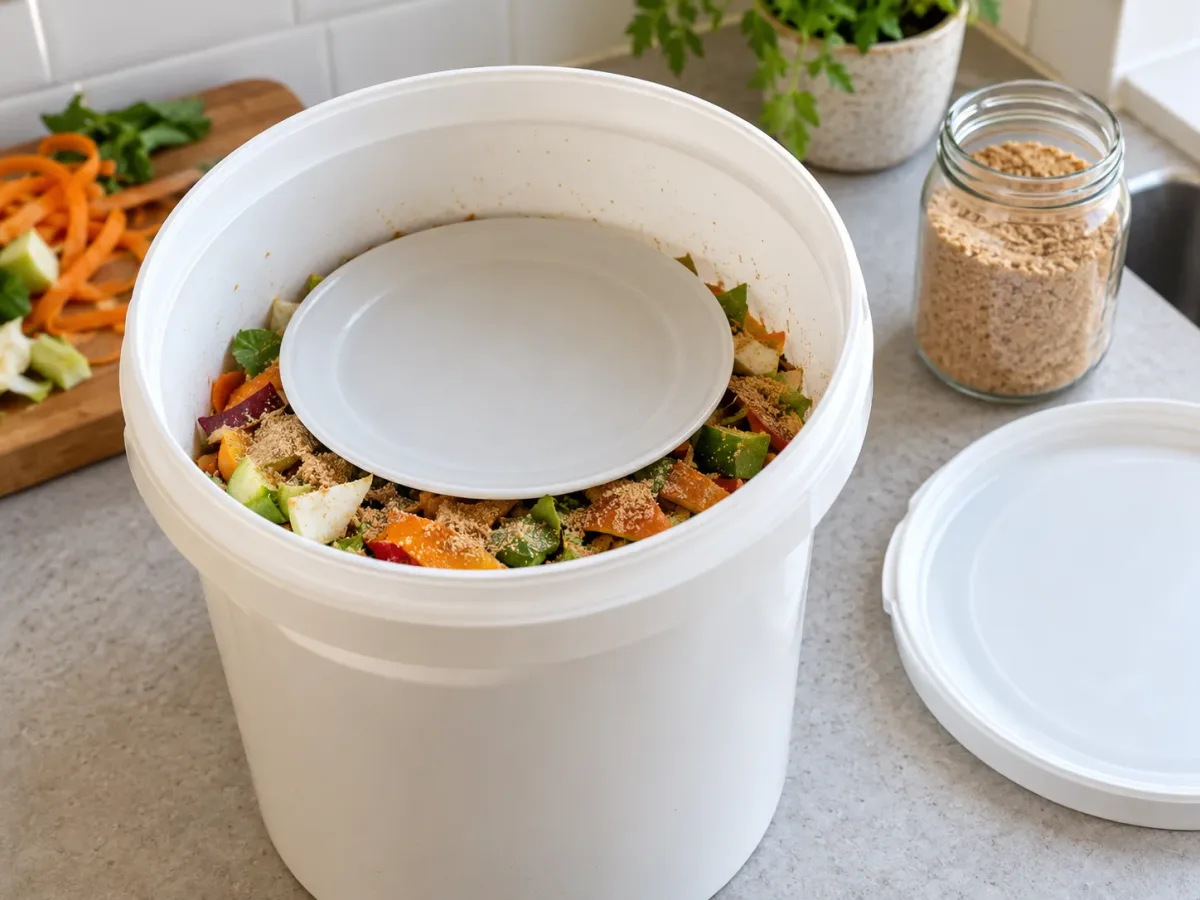
Chop large scraps into pieces a few inches across so they pack closer together and ferment more evenly. Thin scraps, coffee grounds, tea leaves, cooked rice, bread, vegetables, fruit, small amounts of meat, and dairy can go in a properly inoculated bokashi bucket. Drain soups, sauces, milk, and oily liquids from plates first; excess free liquid can pool faster than the bottom bucket can comfortably hold.
Keep plastic wrap, stickers, twist ties, foil, glass, and packaging out of the pail. Avoid filling it with a large quantity of already-rotten, putrid food: established spoilage can compete with the starter culture. Small amounts of normal plate residue are different from a container of forgotten food that has been decomposing for days.
Open the lid only long enough to add scraps and bran. Press the new layer, wipe food bits from the rim, and close the lid firmly. A tight routine takes seconds, but leaving the lid off while you prep dinner or repeatedly opening the bin to inspect the contents defeats the low-oxygen setup.
Manage drainage without overpromising the liquid
Lift the inner pail and check the bottom reservoir every few days. Pour off collected liquid before it reaches the perforated base. How often you need to drain depends on how wet your food scraps are; watery fruit, cooked food, and large batches of vegetables can release more than dry bread or coffee grounds.
The drainage liquid is leachate from food scraps, not the same thing as finished-compost extract or a standardized fertilizer. It may be acidic, and its contents vary with the food and inoculant. Some gardening references suggest diluted use, but that does not make one dilution safe for every plant or household batch. If you want to test it on plants, follow the inoculant maker’s directions, use a conservative dilution as a soil drench on one established plant, and do not apply it to seedlings or directly to edible leaves. If you do not want to use it, follow local wastewater guidance; do not pour it onto pavement, into a storm drain, or where it can run into a creek.
Drainage is a way to prevent liquid from saturating the fermenting scraps, not proof that the bucket is balanced. If the inner pail is constantly standing in liquid, add less watery food at once, chop and press layers evenly, and empty the lower reservoir more often. A missing trickle is not automatically a problem; a drier batch can ferment with little liquid.
Seal the full bucket and let it ferment
When the inner pail is nearly full, finish the last layer with bran, press it down, clean the rim, and snap the lid shut. Stop adding food to that bucket and label it with the date. Start a second bucket if you want to keep collecting scraps while the first one rests.
Let the closed bucket sit for about two weeks after it is full in a stable, sheltered place. A cool basement may slow the process, but direct sun or a hot shed can overheat the contents and soften plastic. Avoid opening the bucket to check progress; the best indicator is what you observe when the rest period is over.
Successful material often smells sour, tangy, or pickle-like when opened, and it may still look like recognizable food. A light white growth can appear. Neither the familiar shapes nor a little white mold means the method failed. Conversely, a sour odor is not a laboratory test for safety, and bokashi fermentation is not a validated pathogen-kill step. Keep the bucket closed around children and pets, wash hands and tools after handling scraps, and continue to treat meat- and dairy-containing material as unfinished until it has completed its soil or compost stage.
Finish the pre-compost away from living roots
The next step is to mix the fermented scraps into soil or an established compost pile. Do not spread them on the soil surface as mulch or tuck them against stems. Washington State University Extension’s bokashi guidance recommends mixing the material thoroughly with soil and allowing time before planting; cooler or compacted soil takes longer.
Bury it in a trench or garden bed
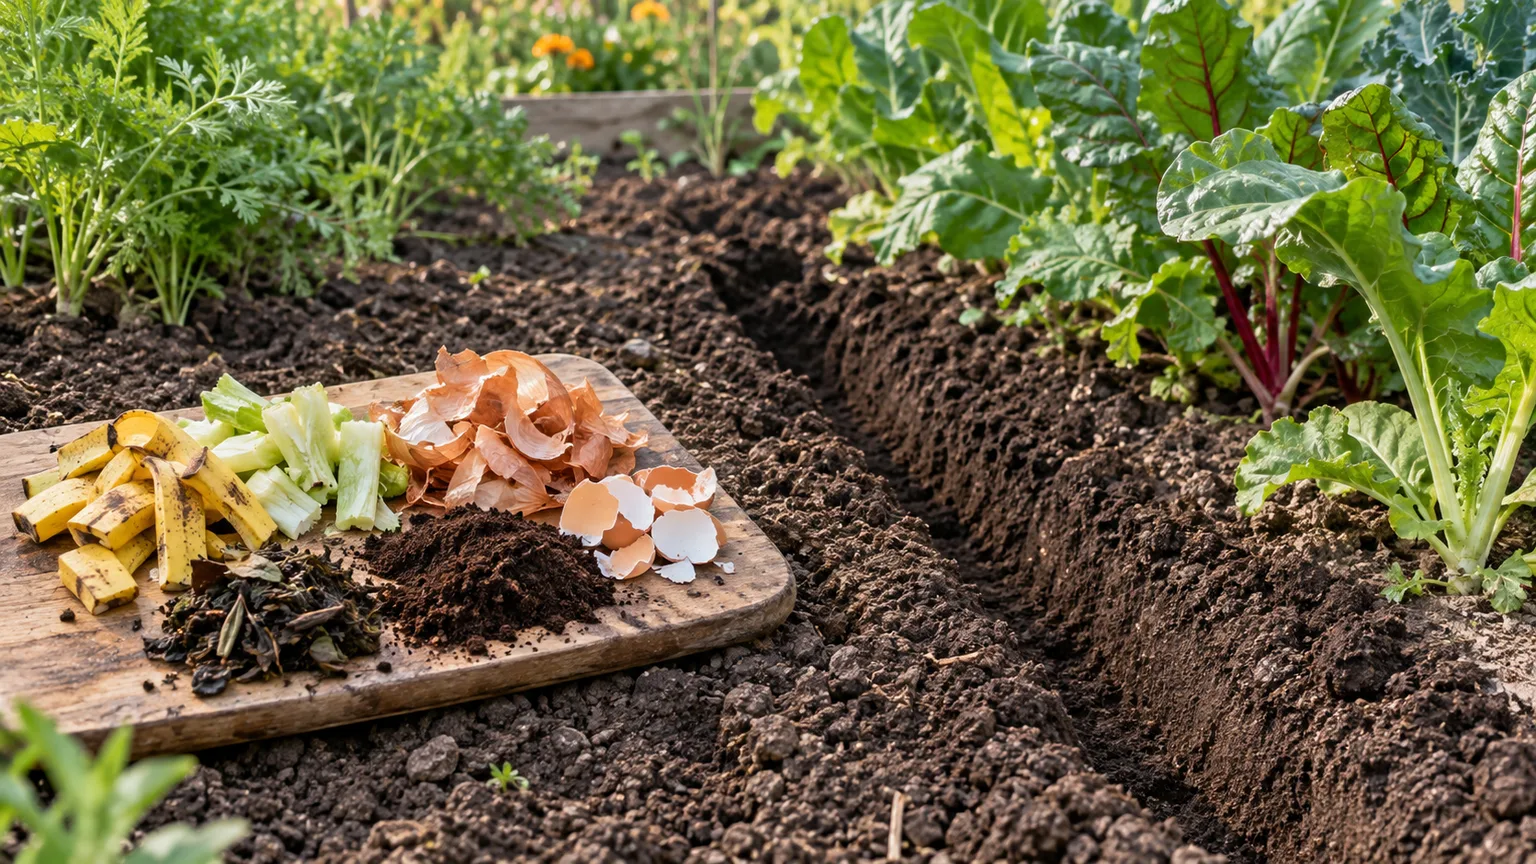
Choose an empty patch or a space between rows where you will not need to dig soon. Dig a trench or hole roughly 8 to 12 inches deep, spread the pre-compost in a thin layer, and mix it with at least two to three times its volume of soil. Cover it fully and mark the spot so you do not plant over it by mistake.
Keep the ferment away from active roots. Extension recommendations differ on minimum wait times because soil warmth, texture, moisture, and the amount buried all change the pace. WSU lists two weeks as a minimum in warm, active soil and three to four weeks as a better target; its guide calls for longer in cool or compacted ground. University of Saskatchewan gives a more conservative six-to-eight-week interval for outdoor garden soil. When you are unsure, wait longer—especially before planting seedlings or root crops directly above the burial zone.
Use a soil factory or an established compost pile
No garden bed? Mix one part fermented material with about three parts soil or finished compost in a sturdy tote with drainage. Keep the mix lightly moist, not waterlogged, and leave the lid loose or vented enough for the soil stage to proceed aerobically. Check after several weeks; scraps should soften and lose their distinct sour smell before you use the blend near plants.
If you already manage a compost pile, bury the pre-compost in the center and cover it with brown material such as leaves or shredded cardboard. That gives the fermented food a place to finish while protecting the pile surface from odors and pests. North Carolina Cooperative Extension’s bokashi overview likewise distinguishes the short fermentation stage from the later soil or compost breakdown.
Troubleshoot odor, wetness, and mold
A clean, fermented, slightly sour smell is expected. A sewage-like, putrid, or rancid odor is a reason to troubleshoot rather than a sign that you should simply keep adding scraps. First inspect the lid and rim for food preventing a seal, then empty the reservoir, reduce free liquid in future additions, and use enough bran on each new layer.
If the bucket is very wet, drain it more often and avoid adding watery food in bulk. A dry, compacted load may produce little liquid; that alone is not a failure. Do not add water by default to make the bucket “active.” The inoculant and ordinary moist food scraps usually supply the moisture the fermentation needs.
White mold can show up on the surface. The University of Saskatchewan guide describes it as compatible with a working ferment. A large amount of green or black growth, an ongoing foul smell, or a fly problem points to air leaks or a spoiled batch. Do not handle mold with bare hands or spread a suspect batch on the garden surface. If a batch remains putrid after you improve drainage and seal, transfer it into the center of an active compost pile and cover it with browns if your compost system accepts it; otherwise dispose of it under local waste rules. Wash the pails and let them dry before starting over.
If liquid leaks between the buckets, check for cracks in the lower reservoir and inspect the rims for warping. If liquid does not drain despite a wet load, lift the inner pail and clear blocked base holes. These are small mechanical problems; avoid cutting a spigot into the bucket until the basic double-pail system has passed a leak test.
Decide if the DIY savings fit your household
A homemade bucket saves most when you can get two clean, matching food pails cheaply and already own a drill. It does not remove the recurring cost of bran, the need to drain leachate, or the work of finding soil or a compost pile for every full batch. A branded bin may be worth the extra cost if it has a reliable gasket, a sturdy false floor, and a spigot that makes handling liquid easier.
For a one-person household that produces scraps slowly, a smaller container may be more practical than a five-gallon pail that takes months to fill. For a busy kitchen, two buckets in rotation keep one batch fermenting while the other receives new scraps. If you lack a yard, plan on a soil factory tote or an agreed community-garden destination before you start collecting meat and dairy scraps.
Compare the whole process, not just the plastic. A DIY bucket is a good fit if you value a low entry price and are willing to manage the details; it is a poor bargain if it sits full, leaks, smells bad, or leaves you storing finished ferments without a finishing route.
Conclusion
Two clean buckets can make a useful, inexpensive bokashi system: drill small holes only in the upper pail, let the solid lower pail collect liquid, and use a snug lid to keep air out. Layer scraps with inoculated bran, press each addition, drain the reservoir regularly, and allow a full bucket about two weeks to ferment.
Then finish the material in soil or an established compost pile. It will still look like food when fermentation ends, and that is expected; bokashi is pre-compost, not finished compost. The system works best when the bucket, bran, drainage, and final soil step are planned together.



