How to Grow and Care for Melampodium
Learn how to grow melampodium from seed or nursery plants, choose the right sun and soil, water without overdoing it, and prevent flopping and mildew.
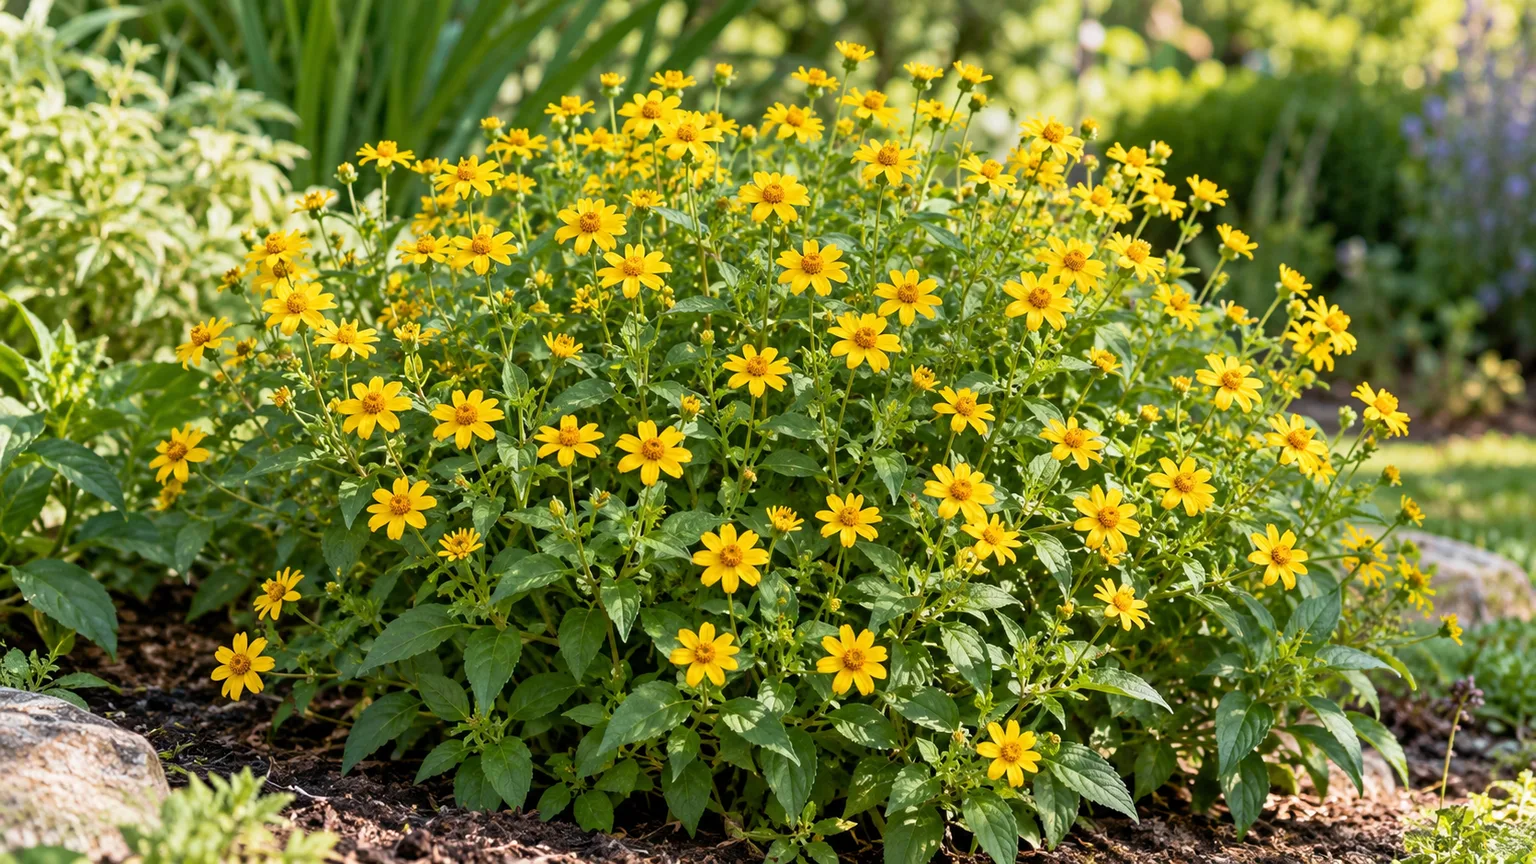
For a sunny bed that needs reliable summer color, the plant most gardeners mean by melampodium is butter daisy, Melampodium divaricatum. It forms a leafy mound covered in small yellow, daisy-like flowers and usually keeps blooming into cool fall weather. Give it warmth, direct sun, and soil that drains; keep young plants evenly moist, then let the surface of the soil dry a little between waterings.
One naming detail changes the care advice: butter daisy is a tender annual, while blackfoot daisy, Melampodium leucanthum, is a different white-flowered perennial. Seed packets and plant labels can use overlapping common names, so check the botanical name before you sow or buy. The care below focuses on the yellow annual butter daisy unless a section says otherwise.
Identify the Melampodium You Are Growing
Melampodium is a genus in the daisy family, Asteraceae. Garden references and older nursery listings do not always use the same botanical name for the yellow bedding annual: the Arkansas Extension account describes the horticultural shift toward M. divaricatum, while some catalogs still use M. paludosum. A reliable label may show one or both names. In practice, identify the annual by its compact, branching habit and yellow flowers, then confirm the botanical name when the distinction affects how you overwinter or prune it. (University of Arkansas System Division of Agriculture Cooperative Extension; Missouri Botanical Garden Plant Finder)
Butter Daisy and Blackfoot Daisy Are Different
The yellow butter daisy grown as a summer annual is usually sold as M. divaricatum or under the older trade name M. paludosum. Its yellow ray flowers and warm-season growth make it a bedding and container plant. M. leucanthum, by contrast, is the Plains or blackfoot daisy: a low, white-flowered perennial native to the Sonoran region, with a different root system and longer-term role in the garden. The North Carolina Extension Plant Toolbox describes blackfoot daisy as a perennial with white flowers, narrow gray-green foliage, drought tolerance, and a taproot. (North Carolina State Extension Plant Toolbox)
If your “melampodium” has white flowers and survives winter as a woody or persistent clump, do not treat it like a frost-tender bedding annual. Conversely, do not expect yellow butter daisy to return from the same roots after winter. The common-name overlap is not a minor labeling quirk: it can lead to a wrong hardiness expectation, a poorly timed cutback, or the mistaken belief that a spring seedling is the same plant as last year’s perennial.
Choose a Cultivar That Fits Its Job
Most compact garden selections are roughly 10 to 18 inches tall and about as wide, though the species can grow taller and less neatly than the named selections. Cultivars such as ‘Derby’ and ‘Jackpot Gold’ are sold as compact yellow forms; ‘Lemon Delight’ is lighter yellow, while larger selections may suit the middle of a border better than an edging. Catalog dimensions differ, so use the tag on the exact plant you buy instead of assuming every butter daisy stays at one height. (Harvest to Table; University of Arkansas System Division of Agriculture Cooperative Extension)
Choose a short, rounded cultivar where you want a tidy front edge or a dense container filler. A taller selection can work in the foreground of a mixed border, but it needs more elbow room and may show its natural tendency to spread or lean in high summer heat. When buying a nursery plant, look for even branching and several buds rather than one lanky stem with a mass of open flowers; a compact plant has less transplant shock and is easier to space evenly.
Give Melampodium Warm Weather and Full Sun
Plant butter daisy after your local frost danger has passed and the soil has warmed. It is a warm-season annual, not a cold-hardy perennial, even though broad nursery zone ranges may make it sound as if it can overwinter everywhere. In a short-summer climate, starting seed indoors can bring flowering forward. In a long, hot season, direct sowing or planting a young nursery start after frost is often simpler than keeping an indoor seedling healthy for months. (Missouri Botanical Garden Plant Finder; Gardening Channel)
Aim for at least six hours of direct sun. Good light helps the plant branch into a rounded mound and set flowers along its stems; in too much shade, it tends to stretch toward light and produces fewer blooms. In a region with punishing afternoons, a little late-day shade can reduce heat stress, but do not trade away most of the plant’s sun exposure. If the site is shaded for much of the day, choose a shade-tolerant annual instead of expecting fertilizer to compensate.
Prepare Soil That Drains
Melampodium is adaptable to ordinary garden soil and does not need a specially formulated bed. The important condition is drainage: roots should receive water, then air, rather than sit for long periods in saturated soil. The Missouri Botanical Garden recommends evenly moist, well-drained soil while also noting that plants prefer conditions on the slightly dry side once established. That combination explains why the plant can handle summer heat yet struggle in a low spot that stays wet after rain. (Missouri Botanical Garden Plant Finder)
Before planting a large group, check the bed after a substantial rain. If water pools or the soil remains sticky and airless, move the planting to a raised area or improve the bed’s structure broadly; a small handful of sand in a planting hole will not reliably fix heavy clay. In a fast-draining sandy bed, mix in a modest amount of finished compost to improve water retention, but do not turn the planting pocket into a rich, soggy reservoir. The target is a bed that moistens evenly and then drains.
Start Seeds or Buy Transplants
You can grow melampodium from seed or set out nursery plants. Seed is economical for a mass planting and gives you more control over timing, while nursery starts are useful when you want immediate color or only need a few plants. In either case, wait until the frost window and soil temperature suit a warm-season annual. A small seedling planted into cold, wet soil may stall even when the calendar says spring has arrived.
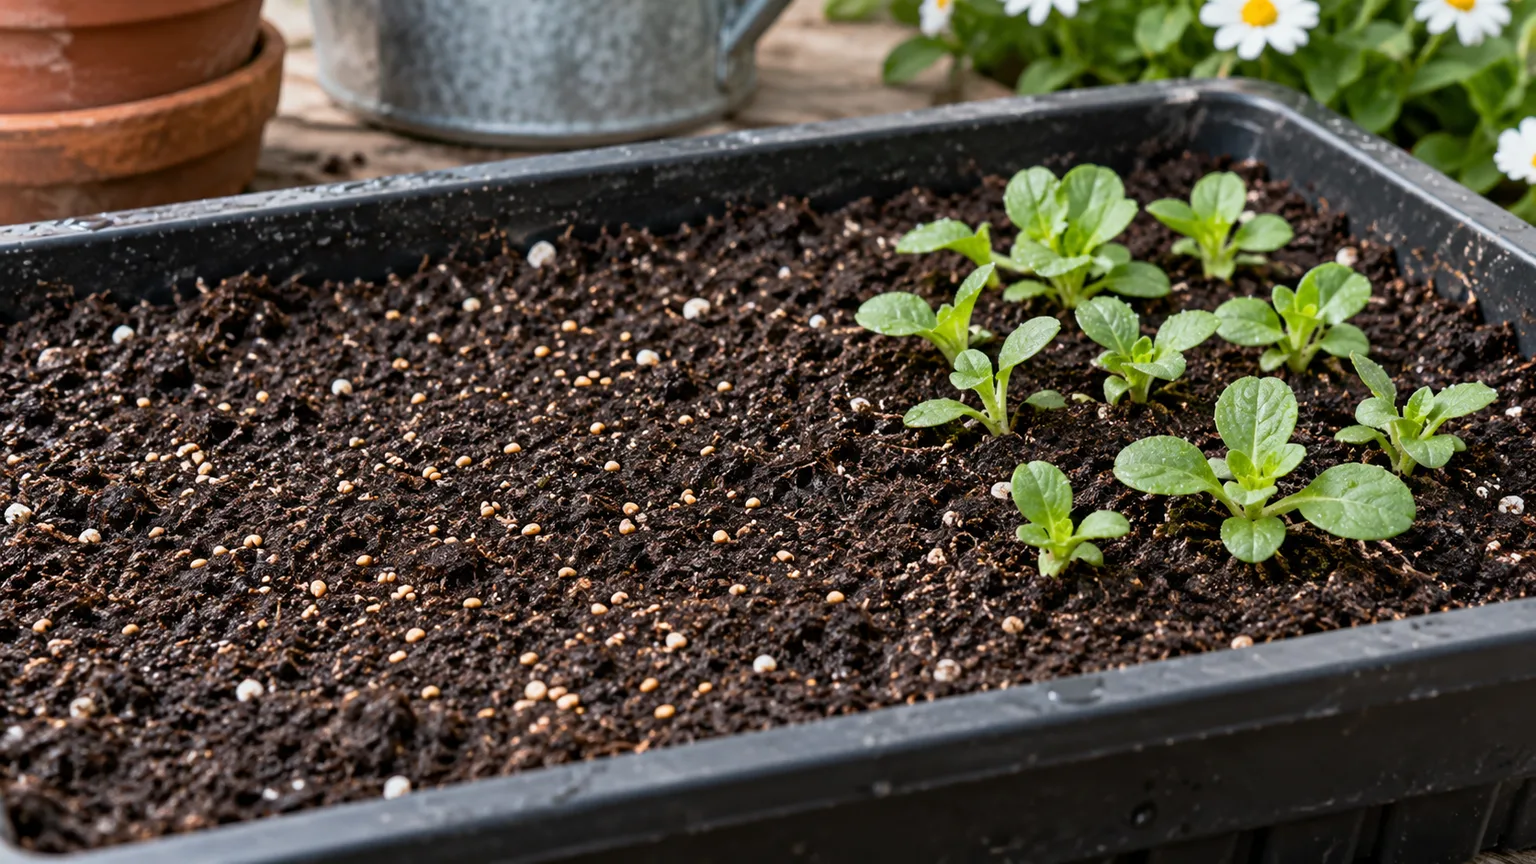
Starting Seeds Indoors
For an earlier display, sow indoors about six to eight weeks before the expected last frost, a timing also recommended for earlier bloom by the Missouri Botanical Garden. Use a clean seed-starting mix in cells or a shallow tray, moisten it first, and press seeds into the surface or cover them only lightly according to the seed packet. Keep the mix warm and consistently damp, not waterlogged; a clear cover can reduce drying until germination, but remove it once seedlings emerge so trapped humidity does not encourage fungal problems. (Missouri Botanical Garden Plant Finder)
After sprouting, move seedlings into bright light or under a grow light close enough to prevent long, weak stems. If several seedlings emerge in one cell, keep the strongest and snip the rest at soil level rather than tugging their roots. Before planting outside, harden them off over about a week: start in sheltered shade, add a little more sun and outdoor time each day, and bring them in if nights turn cold. A gradual transition limits sun scorch and wind damage.
Direct Sowing After Frost
Direct sowing skips indoor lights and transplant shock. Once frost danger has passed and the ground has warmed, prepare a fine, weed-free surface, sow shallowly, and keep the seed zone from drying until seedlings establish. Follow the packet for the specific cultivar’s sowing depth; tiny seed should not be buried deeply. If you scatter seed for a natural-looking drift, expect to thin the seedlings later so each plant has room to branch rather than leaving every sprout in a tight clump.
In a long season, sowing outdoors can be the most forgiving option because plants begin in the conditions where they will grow. In cooler regions, an indoor start buys time, but sowing much earlier than six to eight weeks before outdoor planting can leave you with crowded seedlings that outgrow their cells. The right choice is the one that lets you transplant only after cold nights have eased, rather than the earliest date you can put a seed into a pot.
Plant With Room to Branch
Space compact selections roughly 10 to 14 inches apart as a starting point, then adjust for the cultivar’s mature width and the look you want. Close spacing creates a fuller mass more quickly, but plants that touch tightly stay damp longer and are harder to inspect. Give larger selections more room. For a small bed, mark the mature spacing with the pots before planting; that simple layout shows whether the final mass will cover the ground or leave intentional gaps. (Harvest to Table)
Set transplants at the same depth they were growing in their nursery cells and firm the surrounding soil gently. Water them in so the root ball and nearby soil make contact, then check them during the first week rather than assuming one initial soaking is enough. If seedlings are tall and crowded, handle them by their leaves or root plug, not by pulling the stem. A plant that is bent or buried too deeply may survive, but it will lose time recovering instead of putting energy into fresh roots and buds.
Water for Establishment, Then Ease Off
A newly planted seedling needs steady moisture while its small root system expands. Water near the soil line, thoroughly enough to wet the root zone, and check again before repeating. Once the plant is established, do not keep the bed constantly wet: wait until the upper layer begins to dry, then water deeply if rain has not done the job. Soil type, heat, wind, plant size, and rainfall change the interval, so a fixed weekly schedule is less useful than checking the soil itself.
Drought tolerance does not mean a container or young plant can be ignored. A mature plant in open ground may recover from a brief dry spell, but repeated wilting can interrupt bud production and make stems look tired. Conversely, wilting in wet soil is a warning to inspect drainage rather than add water automatically. Lift the mulch or feel the soil an inch below the surface; if it is damp, wait and improve drainage before reaching for the hose. This moisture check helps distinguish thirst from root stress.
Grow Butter Daisy in Containers
Choose a pot with open drainage holes and a quality outdoor potting mix; do not use garden soil in a container, where it can compact and slow drainage. A compact cultivar is easier to manage in a medium-to-large pot than the full-size species form. Leave enough space for the plant to widen, and keep the container in a position with several hours of direct sun. Avoid pairing it with plants that demand constant saturation or deep shade, because the container shares one soil volume and one watering decision.
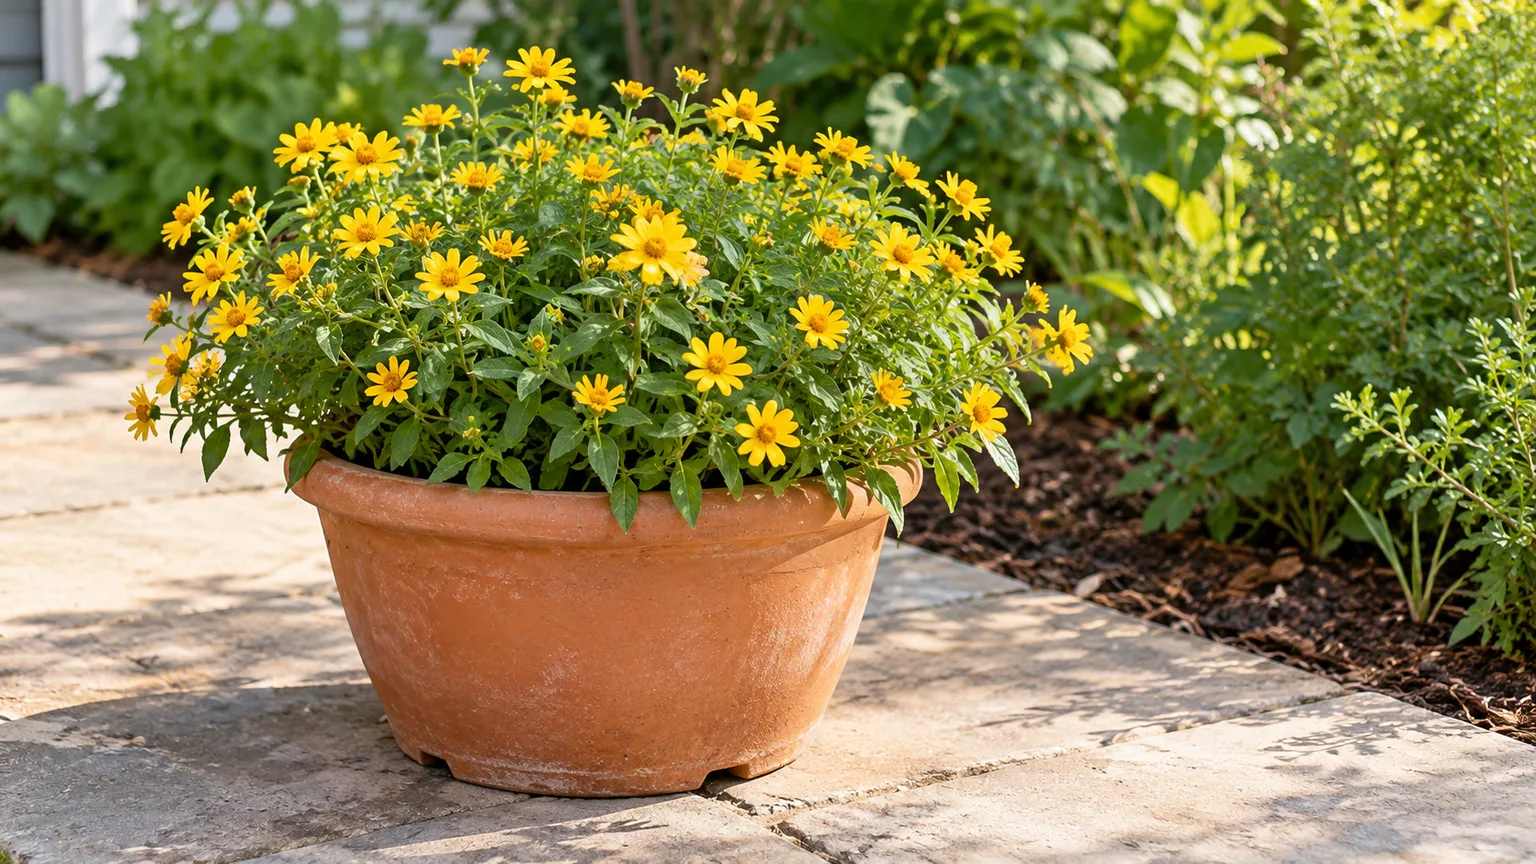
Containers dry more quickly than beds, especially in wind and strong summer sun. Check the mix with a finger or wooden skewer and water when the upper layer is dry, letting excess drain from the base; do not leave the pot standing in a full saucer. Unglazed terracotta can dry faster than glazed ceramic or plastic, so the container material changes how often you check, not the plant’s need for drainage. If the pot wilts by midday but the soil is still wet, give it temporary relief from reflected heat and inspect the roots and drainage instead of watering again.
Fertilize Only When the Site Calls for It
In a typical garden bed, melampodium often needs little or no supplemental fertilizer. If the soil is already fertile, adding frequent high-nitrogen feed can encourage leafy growth without improving the compact flower-covered form you chose the plant for. Start with a soil test if the entire bed performs poorly; that gives you a reason to add nutrients rather than using fertilizer as a general cure for weak flowering.
Containers lose nutrients more quickly through repeated watering, so a light, balanced slow-release fertilizer at planting may be reasonable if the potting mix contains none. Follow the label rate and do not combine several feeds by guesswork. If the plant is green and branching but not blooming, first check sunlight and planting date. Feeding again will not fix a shaded location or cold-stalled annual, and excess fertilizer can make the stems softer and more prone to leaning.
Let Flowers Self-Clean or Stop Self-Sowing
You do not need to deadhead melampodium to keep it flowering. The spent flower heads tend to dry and drop, and branching stems continue to produce buds, a self-cleaning habit described by both the Missouri Botanical Garden and Arkansas Extension. That makes the plant useful where you want continuous color without daily trimming. Leave the flowers alone unless you have a specific reason to keep the bed tidy or reduce volunteer seedlings. (Missouri Botanical Garden Plant Finder; University of Arkansas System Division of Agriculture Cooperative Extension)
If you do not want the plant to self-sow, snip off flower heads before they mature seed, especially late in the season. You can also pull unwanted volunteers while they are small; young annual seedlings are easier to remove before their roots mingle with neighboring plants. Where you want a loose, naturalized drift, leave some late flowers to set seed but do not assume every seed will germinate or survive winter. A self-sown plant is a bonus, not a dependable replacement schedule.
Diagnose Flopping, Few Flowers, or Mildew
When a plant looks poor, start by checking light and soil moisture, then consider crowding and fertilizer. A leggy plant with sparse blooms usually needs more direct light; a drooping plant in dry soil needs a deep drink, while one drooping in wet soil needs air at its roots. Powdery mildew is the most commonly noted disease issue for this annual. It is more likely to become troublesome when foliage stays crowded and humid, so correcting the site and spacing is often more useful than treating every blemish.
Correct Flopping Before It Starts
Some tall forms can lean in summer heat, but persistent flopping often signals one of three problems: shade-driven stretch, overly rich feeding, or soil that is too dry or too wet to support steady growth. Compare the plant’s daily light to the six-hour target, feel the soil rather than watering by habit, and stop adding fertilizer until you know it is needed. If a healthy plant is simply taller than expected, a small stake or loose ring can support it without pulling stems upright so tightly that air stops moving through the foliage. (Missouri Botanical Garden Plant Finder; Gardening Channel)
Avoid a severe late-season haircut to rescue a plant that has already begun flowering. Cutting back can remove buds and delay the display; instead, support a few stems, thin crowded neighbors, or accept a more relaxed outline. Next time, choose a compact cultivar and give it stronger light from the beginning. If you moved a container to full sun after growing it in shade, increase exposure over several days so leaves acclimate instead of scorching.
Reduce Powdery Mildew Pressure
Powdery mildew can appear as a pale, dusty coating on leaves, particularly in humid weather or crowded plantings. Make sure you are looking at a spreading surface growth rather than dust or spray residue, and check several leaves before taking action. The Missouri Botanical Garden and Gardening Channel both flag mildew susceptibility; the practical prevention is spacing, airflow, and watering the soil rather than repeatedly wetting foliage late in the day. (Missouri Botanical Garden Plant Finder; Gardening Channel)
Remove badly affected leaves if the problem is limited, clean your pruners afterward, and dispose of diseased material rather than leaving it in the planting. Do not strip a plant bare; it still needs healthy leaves to support flowers. If symptoms keep spreading, improve airflow and avoid overwatering before considering a fungicide, and use any product only according to its label. For the following season, leave more space and avoid placing the plant where air sits still against a wall or dense hedge.
Plan for Frost, Reseeding, and Next Season
The butter daisy grown as an annual is finished when frost damages it; roots are not a reliable overwintering strategy in cold climates. At season’s end, you can pull the plant for a tidy bed or leave a few seed heads briefly if you want birds to forage and volunteers to emerge. Arkansas Extension notes that melampodium can reseed during the growing season in suitable conditions, but seedling survival and timing depend on climate, soil, and winter conditions. Do not count on a volunteer to appear exactly where the original plant grew. (University of Arkansas System Division of Agriculture Cooperative Extension)
If seedlings do appear, wait until you can identify their leaves and compare them with nearby weeds before keeping them. Thin the strongest ones after they have several true leaves, and transplant only while they are small enough to move without tearing roots. In a cold region, sow fresh seed or buy new starts next spring; in a long warm season, a self-sown plant may fill a gap. Treat overwintering as optional luck, not a care plan.
Use Melampodium Where It Can Shine
Butter daisy works well as a sunny border edge, a repeated low mound in front of taller flowers, or a mass that fills a warm-season gap. Its yellow flowers combine easily with other plants that accept full sun and moderate moisture; in pots, compact varieties can act as the central filler rather than a trailing spiller. It also attracts visiting bees and butterflies, and seed heads can provide food for birds. Those wildlife benefits are useful additions, but a single annual planting is not a substitute for a diverse, season-long habitat. (Harvest to Table; University of Arkansas System Division of Agriculture Cooperative Extension)
The plant is often described as deer-resistant, but “resistant” does not mean untouched in a hungry garden. If browsing is heavy, use a physical barrier or select plants with a track record in your own area rather than relying on one flower to deter deer. Melampodium is most satisfying where its actual strengths count: reliable color in heat, a flower that does not demand deadheading, and a rounded form that can soften hard bed edges without needing rich soil or constant care.
Conclusion
For yellow butter daisy, plant after frost in warm, well-drained soil and give it at least six hours of sun. Water new plants consistently, then check the soil and water deeply when the surface begins to dry; avoid routine fertilizer unless the soil or container mix calls for it. Choose a compact cultivar if you want a neat edge or pot, space it for airflow, and deadhead only when you want to limit self-sowing. Confirm the botanical name first: white perennial blackfoot daisy is a different plant with different winter expectations.



