15 Pergola Lighting Ideas for Your Outdoor Space
Explore 15 pergola lighting ideas, from string lights and lanterns to LEDs and path lights, with tips for power sources, brightness, weather exposure, and safety.
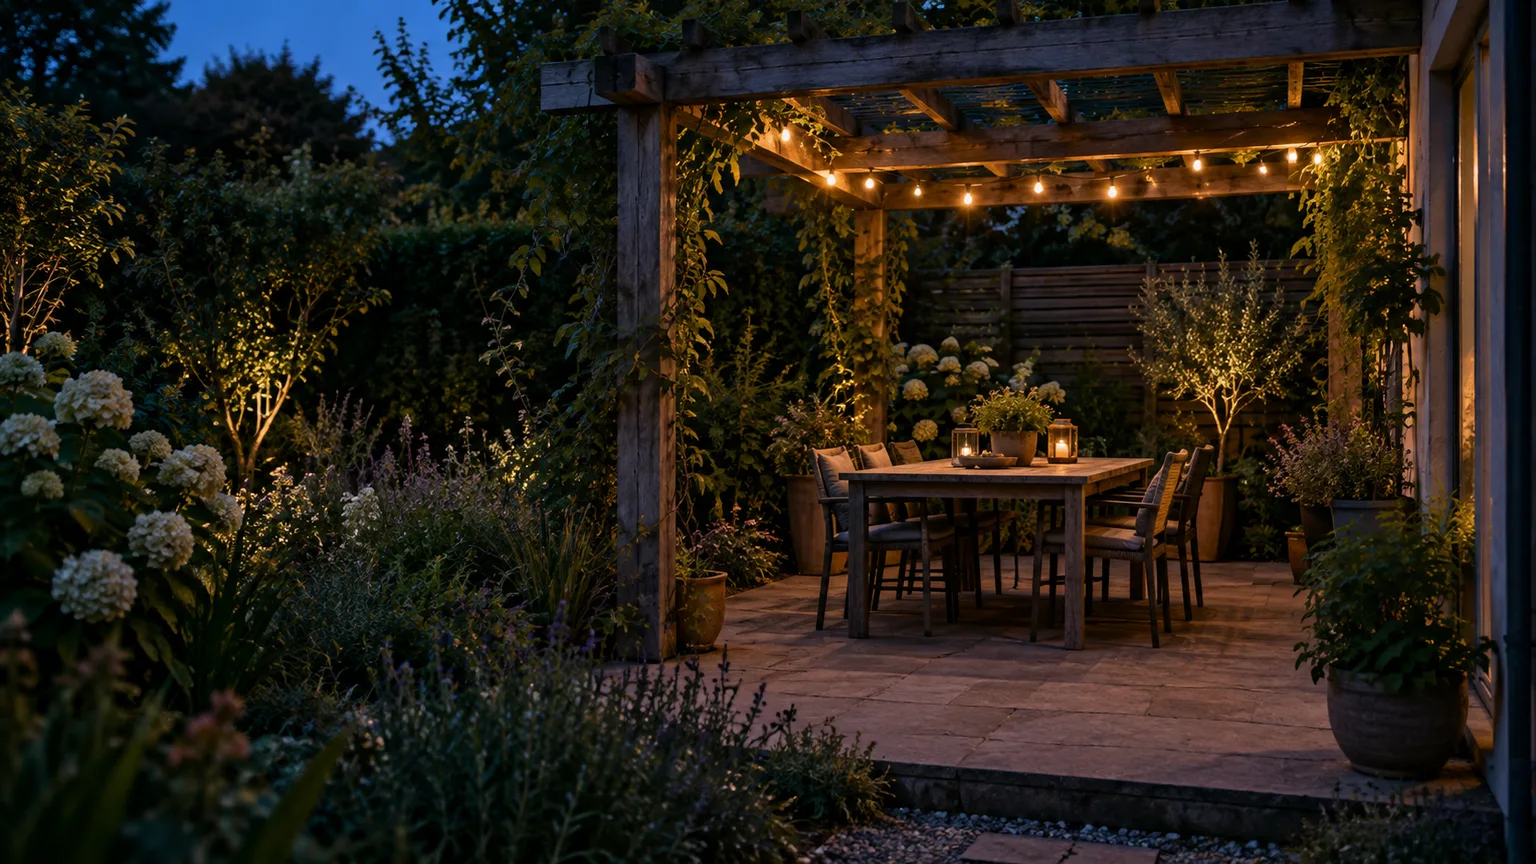
A pergola can look inviting at dusk and still become a dark, awkward place to eat once the sun drops. The fix is rarely “add more lights” everywhere; it is choosing the right light for the table, the seating, and the route back to the house, then keeping each source at a comfortable brightness.
Use the ideas below as a menu, not a shopping list. First map how you use the structure, then choose one main source and add only the supporting light that solves a real problem.
Plan the light around how you use the pergola
Map the activity zones before you choose fixtures
Start with the activities that will happen after sunset. A dining table needs enough even light to see food and faces; a lounge corner usually feels better with softer light at eye level or below; the steps and path need clear edges, not a spotlight in someone’s eyes. If you use the pergola for more than one purpose, draw those zones on a quick plan before deciding where bulbs or lanterns belong.
Look at the structure in daylight as well as after dark. Note the beam direction, the locations of posts, the nearest outdoor receptacle, where rain blows in, and whether a solar panel could get several hours of direct sun. A roof that shades the sitting area can shade a solar panel too, so put the panel where it can collect sun and run only the manufacturer-approved lead to the light.
Also check what happens around the pergola: a bright window behind the table changes how faces look, a pale wall reflects more light than dark fencing, and overhead vines can hide or snag a strand as they grow. If the structure has louvers or a retractable canopy, mark every moving part and keep cords, pendants, and lanterns out of its travel path.
Layer task, ambient, and orientation light
Think in three roles. Task light helps you eat or read; ambient light makes the seating area feel settled; orientation light helps people find a step, gate, or path without washing the whole garden in brightness. One row of string lights may provide atmosphere, but it may not light a dinner plate or a walkway well enough on its own.
You do not have to use three separate fixture types. A pendant over the table can provide task light, a dimmable string can fill in the roof plane, and a few low path lights can carry the route outside. The important thing is to avoid asking one very bright fixture to perform all three jobs.
Use this quick test when you are unsure which layer is missing: if you can see faces but cannot see what is on the table, improve task light; if the table is bright but the surrounding yard disappears, add a low-level orientation light; if the whole area feels exposed, dim or shield the overhead source before adding more fixtures. You want enough contrast to give the space depth, not a uniformly lit ceiling and patio.
Keep brightness, color, and controls comfortable
For most patios, warm-white light looks more relaxed than a stark blue-white source. Brightness matters as much as color: bare bulbs at eye height can be uncomfortable even when the overall light output is modest, while a shaded fixture aimed toward a tabletop can feel gentler. The responsible-lighting principles published jointly by DarkSky International and the Illuminating Engineering Society recommend using light only when it is useful, directing it where needed, keeping it no brighter than necessary, controlling its operating time, and choosing warmer color where possible. (DarkSky International)
That guidance also gives you a practical editing rule: when a bulb is visible from every seat, shield it, lower its output, move it higher, or choose a frosted diffuser. Add a timer, dimmer, or switch you can reach from the house so the patio does not stay lit all night simply because nobody wants to walk back out and turn it off.
Color temperature labels can help you narrow the choice, but compare actual products in person if you can: two bulbs with similar labels may still look different because of their diffuser and surrounding materials. A warm source reflected off cedar or brick may feel much stronger than the same bulb over dark paving, so put up one sample strand first and judge it from the seats rather than from the lawn.
15 pergola lighting ideas
String lights: three layouts that suit different pergolas
1. Run globe string lights along the outer beams. A single perimeter run outlines the pergola without filling the whole roof with dots of light. It is a good starting point for a small structure or a seating area where conversation matters more than bright dining light; add a separate table lamp or pendant if you need more light on a meal.
2. Zigzag one strand across the rafters. A shallow zigzag spreads the bulbs over a larger area than one perimeter line and gives a rectangular pergola a finished canopy. Measure the route rather than the pergola’s outside dimensions, leave enough slack for the strand’s specified hanging curve, and keep the cable from drooping into head space. If the dining table sits in the middle, make sure the brightest portion does not hang directly in diners’ eyes.
For a narrow structure, run the zigzag across the shorter dimension so the cable does not need to span a long unsupported distance. If the pergola is very wide, one strand along each side can look cleaner than an intricate grid; several crossing runs often create a dense ceiling of competing points rather than a more useful light level.
3. Use solar starburst or fine-wire lights as a small accent. The many tiny points give a softer, more decorative sparkle than exposed large bulbs, so they work well around one beam or at the back of a lounge area. They are accent lighting, not a substitute for safe step or dining illumination, and their battery performance depends on the panel receiving useful sun. Homes & Gardens also recommends checking panel placement in shaded courtyards and using layered sources when one string alone is not enough. (Homes & Gardens)
Pendants and lanterns: define a dining or lounge zone
4. Hang a pendant above the dining table. A single weather-suitable pendant makes the table the visual center and puts light where plates, cards, or a book need it. Center it over the table rather than the pergola; if the table moves, choose a light that can be repositioned or use a portable option instead of installing a fixed fixture in the wrong spot.
5. Cluster two or three small pendants over a long table. Multiple lower-output fixtures can distribute light more evenly from end to end than one bright point. Keep the group visually simple—similar shades or a shared finish—and check the hanging height from seated eye level so the fixtures do not block conversation across the table.
Plan this option around the actual table position and the pergola’s beams, not just a centered roof bay. The attachment must support the fixture’s weight, and a long table may need two smaller sources spaced over the surface rather than a heavy cluster concentrated at its midpoint.
6. Suspend a weather-rated woven lantern. Rattan-look or woven shades soften the light and add texture to a plain timber or metal frame. Choose a fixture explicitly intended for its exposure, not just a decorative indoor lantern that happens to look suitable; moisture, sun, and wind can loosen or damage untreated materials.
The weave can also create patterned shadows, which is attractive on an empty wall but distracting across a tabletop or book. If the shade is large, consider it as the main decorative focal point and keep other hanging fixtures minimal; several oversized shapes can make a small pergola feel crowded even before the chairs are added.
7. Dress the rafters with temporary paper lanterns for a dry-weather gathering. Paper lanterns add volume and color when the pergola is hosting a party, but many are not weatherproof and should not be treated as permanent outdoor fixtures. Use battery LEDs rather than hot bulbs, keep them out of wind and rain, and take them down after the event; if the area cannot stay dry, use outdoor-rated fabric or plastic lanterns instead.
Portable lights: add glow without permanent wiring
8. Hang camping-style rechargeable lanterns from a hook. Portable lanterns are useful when you rent, want a seasonal arrangement, or need light only for occasional dinners. Put them where the body is not likely to bump them, select a model made for outdoor use, and bring it inside for charging and storage according to its instructions.
9. Place an outdoor table lamp on a side table. A portable lamp gives a local pool of light for reading or conversation without putting bulbs across the whole ceiling. A rechargeable model is simplest where there is no outlet; a corded lamp needs a safe outdoor power plan, and its cord must not cross a doorway or become a trip line.
This is especially useful when the pergola serves two different modes: use a lamp at the lounge end for a quiet evening, then switch on the brighter table pendant only when people are eating. Choose a broad, stable base so a light breeze or a bumped table does not send the lamp toward the edge.
10. Use LED candle lanterns for flicker without an open flame. A few battery-powered candles inside stable, vented lanterns give a dining table a softer focal point than another overhead string. They are easier to manage around curtains, climbing vines, children, and pets than a live flame; if you choose real candles anyway, keep them away from beams, fabric, foliage, and gusts, never leave them unattended, and follow local fire guidance.
Built-in lighting: keep the structure’s lines clean
11. Conceal an outdoor-rated LED strip beneath a beam. A strip tucked along the inside edge can wash the tabletop or seating area with an even line of light while keeping the fixture itself out of sight. Choose a product and power supply rated for the exposure, use the maker’s clips or channel, and avoid bending, cutting, or enclosing the strip except where its installation instructions allow.
12. Add compact downlights to selected rafters or posts. A few shielded downlights can make a permanent pergola easier to use for cooking or dining without turning every beam into a row of visible bulbs. Aim them at the useful surface, use dimming if supported, and do not assume that a roof makes an indoor-rated fitting safe outdoors; the fixture label must match the actual damp or wet exposure.
This built-in look is easiest to plan while constructing or renovating the pergola, when cables can be routed neatly and the frame can be checked for attachment points. Retrofitting a finished structure may require surface-mounted conduit or another approved route; choose a tidy, serviceable route over hiding a splice where it will be hard to inspect later.
Extend light beyond the roof and use flame carefully
13. Mark the approach with low path or in-ground lights. Lights near the pergola’s steps, changes in paving, and table legs help guests move through the yard without adding glare at face height. In-ground fixtures can disappear into the paving edge or planting, while low path lights are simpler to service; either way, space them to make the route legible rather than lining every inch with bright points.

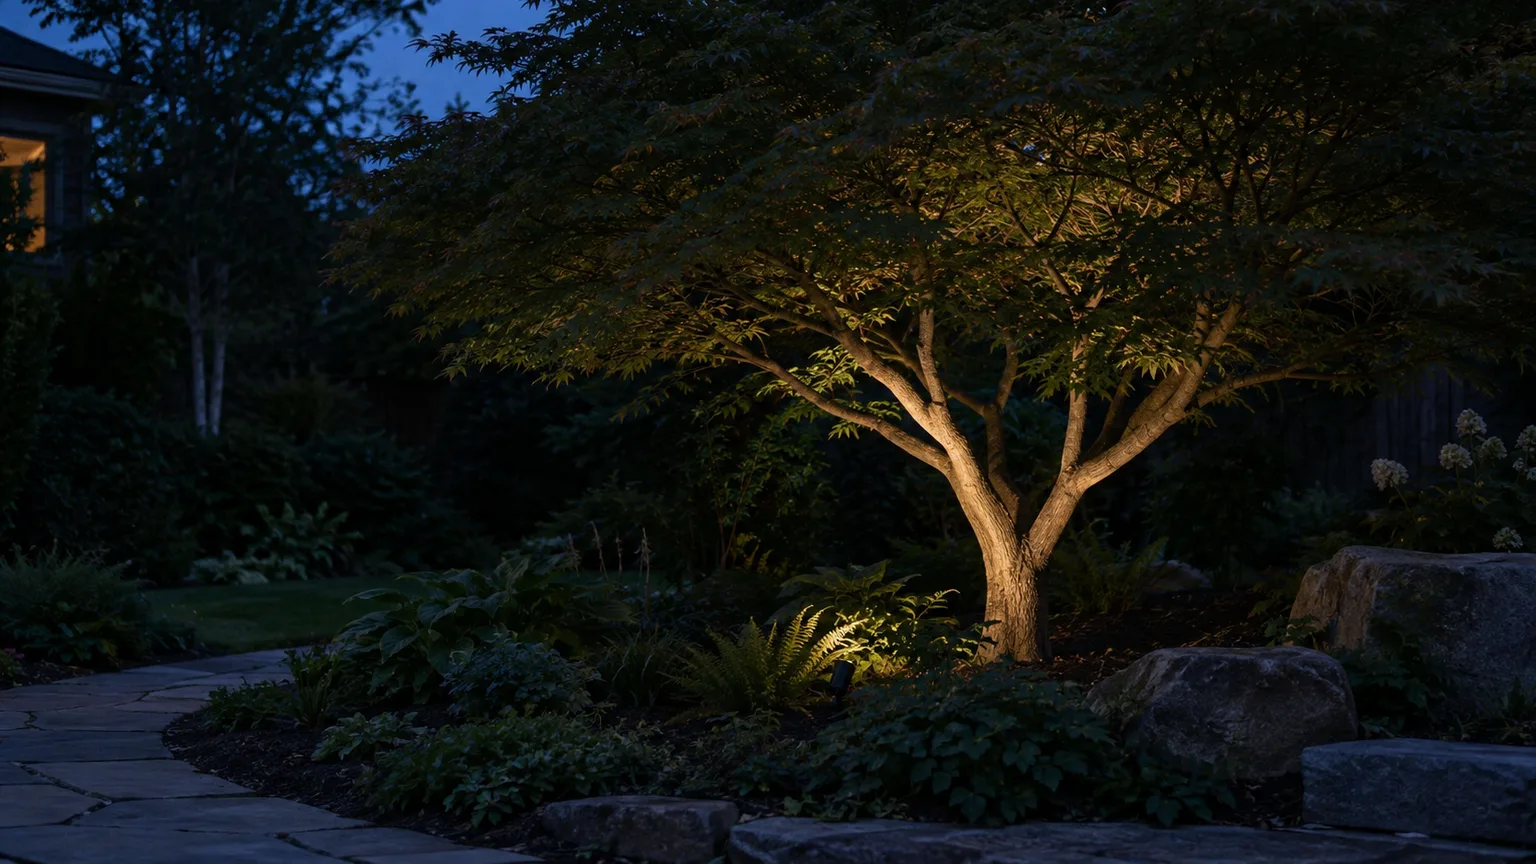
14. Highlight one tree beyond the pergola with a shielded accent light. A narrowly aimed, low-output fixture can reveal a trunk or branch silhouette and make the seating area feel connected to the rest of the garden. Keep the beam on that feature, add a timer, and avoid lighting the entire canopy or sending an unshielded beam into the sky or a neighbor’s window.
15. Make a fire table a separate focal point, not the pergola’s only light. If a fire feature is permitted and appropriate for the site, its glow can anchor a conversation area on cool evenings. Place it only at the clearances specified by its manufacturer and local fire rules, keep combustible roofing and hanging decorations outside those clearances, and provide separate safe light for walking; when those conditions are difficult to meet, use a flame-effect LED lantern instead.
Match the idea to its power source and exposure
Solar, rechargeable, low-voltage, and mains power
Solar and rechargeable fixtures are the easiest way to add movable decorative light when no outdoor outlet is nearby. They avoid a new mains run, but have limits: a shaded panel may not charge fully, batteries need periodic replacement or charging, and a tiny panel or lantern may provide atmosphere rather than dependable task lighting. Test a solar fixture in the actual panel location for several evenings before relying on it for a dinner or stairway.
Low-voltage systems use a compatible transformer and outdoor-rated cable to power path, post, or accent lights. They are a different class of project from hardwiring a 120-volt pendant, but they still need correct components, load planning, weather-appropriate connections, and installation that follows the system’s instructions and local requirements. Keep the transformer accessible and protected as its label requires; do not bury a power supply, splice, or connector just because the cable itself is suitable for burial.
Mains-powered fixtures include permanent pendants, sconces, outlets, and other line-voltage work. Installing a new circuit, extending a circuit, or hardwiring a pergola light is not the same as plugging in a listed decorative string; local electrical code and permits may apply, and a qualified electrician should handle permanent wiring. In the United States, ESFI advises that outdoor electrical decorations be marked for outdoor use and plugged into GFCI-protected circuits; inspect cords and lights for damage and keep them clear of standing water. (ESFI outdoor decoration safety)
An extension cord is for temporary use, not a permanent substitute for an exterior outlet. If one is needed for a short event, use a cord marked for outdoor use, match the load, inspect it, keep it away from water and walkways, and unplug it after use; ESFI specifically cautions against substituting extension cords for permanent wiring or chaining power strips. (ESFI extension cord guidance)
Choose outdoor ratings and attachment points
Before buying, read the product’s label and instructions for the exact weather exposure. A covered pergola can still receive wind-driven rain, spray from irrigation, condensation, and full sun, so “under the roof” does not automatically mean an indoor or dry-location product is suitable. When an item must tolerate direct rain, look for an appropriate wet-location rating; if the label or local requirements are unclear, ask the manufacturer or a qualified electrician rather than guessing from its appearance.
Plan the mechanical support too. Use a structural beam or an approved hook/clip and the fixture maker’s mounting method; do not use staples or fasteners that can pierce cord insulation. Secure the cable against wind, leave enough slack for its designed catenary but not so much that it swings into heads, and account for vines, retractable shades, and moving louvers that could snag the strand.
Mock up the layout before you install it
You can test the design before drilling or ordering a long strand. After dark, hang temporary battery lights or lay out a safe, outdoor-rated setup for a short trial, then sit in every chair and walk the route your guests will use. Check whether faces are visible, the tabletop is usable, bulbs shine into windows, and the path remains easy to read from the house.
Measure the actual cable route along beams and around corners, not just the pergola’s length. Check the fixture’s strand-to-strand connection limit and total electrical load before connecting multiple sets, and decide how the cable reaches its power source without crossing a door, pinch point, puddle, or walkway. Homes & Gardens notes that poles can replace trees as supports in an open yard; on a pergola, the posts and beams do that job only if they are suitable support points and the cable is installed without damaging the cord.
Once the mock-up works, install one lighting layer at a time: the main table or seating source first, then the low path light, then any decorative accent. Turn each group on separately and together; if the combined result feels busy, dim or remove a layer rather than compensating with even brighter fixtures.
Before committing, save the product instructions and note the strand length, input voltage, connection limit, replacement bulb type, and weather marking. Keep those details with the switch or transformer location so that replacing a failed bulb or troubleshooting a connection does not require guessing which compatible part to buy. If an electrician is installing a permanent fixture, share the mock-up and the intended switching zones so the wiring plan reflects how you will actually use the space.
Common pergola lighting mistakes to avoid
The first common mistake is buying by style alone. An attractive bare bulb can be too bright for a small pergola; a lantern can be indoor-only; a solar panel can sit under the same roof it is meant to illuminate. Check the task, scale, outdoor rating, actual light output, and replacement parts before choosing a look.
The second is treating a strand as a structural cable. Do not pull it drum-tight between posts or use the electrical wire to carry a heavy fixture; wind movement and tension can stress the cord and its sockets. Support the cord with hardware designed for its installation, follow the specified span and connection limits, and avoid damaging the insulation when fastening it. ESFI also recommends securing outdoor decorations against wind without attaching them in a way that damages their cords. (ESFI outdoor decoration safety)
The third is running too much light at once. A fully lit roof, bright path markers, uplights, lanterns, and a fire feature can flatten the yard into glare and send light into neighbors’ windows or the night sky. Turn on only the zones you are using, point light down or toward the intended surface, choose a warmer tone, and add a timer or dimmer so the space is pleasant without being the brightest part of the block.
Finally, avoid improvising electrical work. Never use a damaged cord, run one through a door or window, leave a temporary cord in service as permanent wiring, or assume that solar and low-voltage products are weatherproof without checking their instructions. For mains-powered installation or any uncertainty about local code, have the work planned and completed by a qualified electrician.
One more issue appears after the garden fills in: vines, hanging baskets, shade cloth, and seasonal decorations can cover bulbs, trap moisture, or pull on a cable. Leave a little service access, inspect the route at the start of the outdoor season and after severe weather, and take down any loose or damaged piece promptly rather than waiting for the next party.
Conclusion
The best pergola lighting usually combines a comfortable overhead or table source with a small amount of lower-level guidance outside the seating area. Start with the activity, test brightness and sightlines after dark, then choose a fixture and power source that suit the pergola’s actual exposure and structure.
If you want a quick, reversible update, begin with outdoor-rated warm string lights or a rechargeable lantern and add a few path lights only where people need them. For permanent hardwired fixtures, plan the layout with a qualified electrician and keep the final scheme targeted, controlled, and no brighter than the space needs.