Black Spots on Alocasia Polly: Causes, Checks & Fixes
Quick answer
Black spots on Alocasia Polly are usually fungal leaf spot on misted foliage, sooty mold from sap feeders, cold-water or draft damage on glossy arrowhead blades, or wet-root necrosis—not normal aging on the upper rosette. First step: wipe one spot with a damp cloth and press into the top inch of mix; smearing black means treat pests, fixed lesions on a heavy wet pot mean stop watering before you spray fungicide.
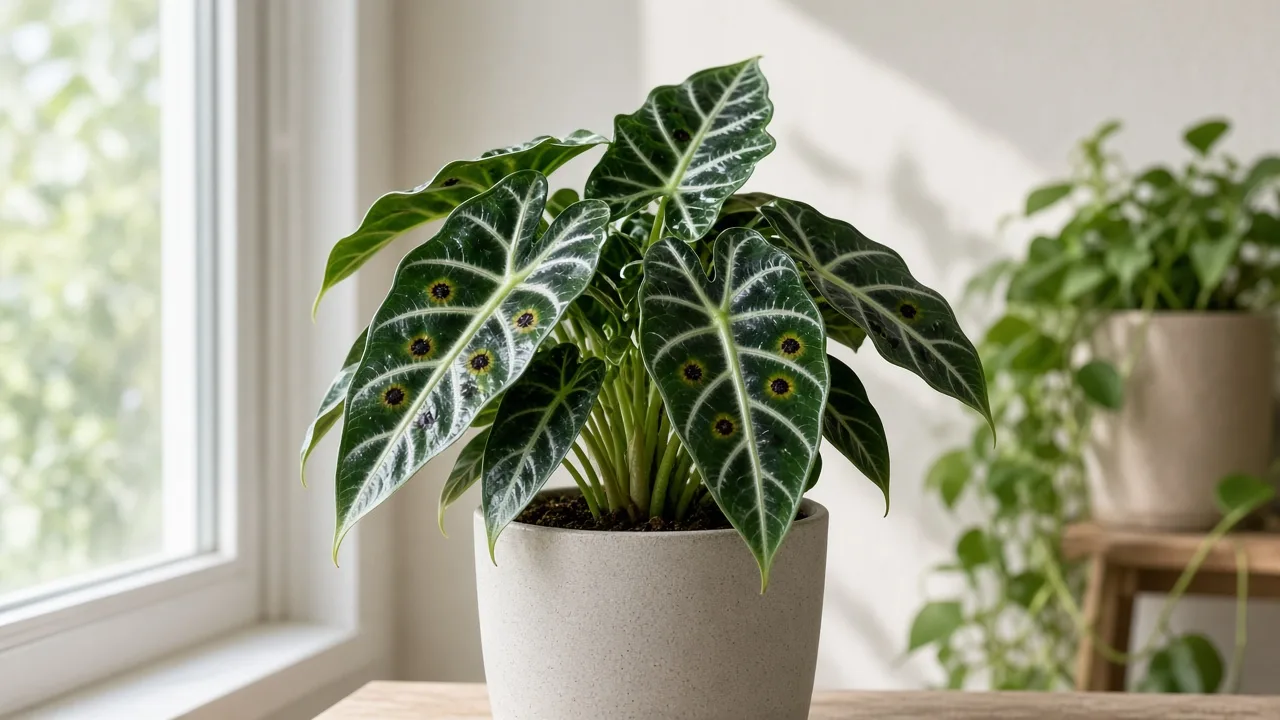
Black Spots on Alocasia Polly: Causes, Checks & Fixes
This guide covers black spots on Alocasia Polly. See also the general Black Spots guide, watering, and light pages for this plant.
Black Spots on Alocasia Polly: Causes, Checks & Fixes
Quick answer
Black spots on Alocasia Polly (Alocasia × amazonica ‘Polly’) are localized tissue death or surface mold on compact arrowhead leaves with bold silver veining—and the pattern usually splits four ways. Small dark circles with yellow halos on several mature blades after misting or splash watering point to fungal leaf spot. Black coating that wipes off with a damp cloth is sooty mold on honeydew from aphids, scale insects, or whiteflies. Tiny brown freckles on pale unfurling crown leaves often track edema from inconsistent watering. Fixed dark patches on a heavy wet pot with limp arrowheads overlap overwatering and advancing root rot. For general spot-disease mechanics, see our black spots guide. On Polly, the wipe test plus corm firmness at the soil line separates pest mold, wet-root necrosis, and true leaf-spot disease faster than treating every dark mark as fungus.
A single dry black edge on one lowest aging leaf is cosmetic. Spreading wet-looking spots on multiple new arrowhead blades, black smear across glossy foliage, or soft black tissue at the petiole base on sour wet mix need action the same week.
First step: wipe one spot with a damp cloth, then press into the top inch of mix. If the spot smears, inspect stems and leaf undersides for sap feeders before fungicide. If soil is wet and heavy with fixed lesions, stop watering and empty cachepot runoff before you change anything else.
When to use this page vs other Alocasia Polly guides
| Your question | Best page |
|---|---|
| Dark spots or smears on arrowhead leaves | This page |
| Dark spots with limp leaves on chronically wet soil | Root rot |
| Whole leaves yellowing on heavy wet mix | Overwatering |
| Tan bumps along petioles and corm | Scale insects |
| Uniform brown crispy edges, not round spots | Brown tips |
| Fine stippling and webbing on dark glossy blades | Spider mites |
| Entire blades turning brown, not spotted | Brown leaves |
What black spots look like on Alocasia Polly
Healthy Polly leaves are stiff, glossy, and arrowhead-shaped—dark green with prominent silver-white veins that make any lesion easy to spot once you look closely. Black spotting breaks that pattern in recognizable ways:
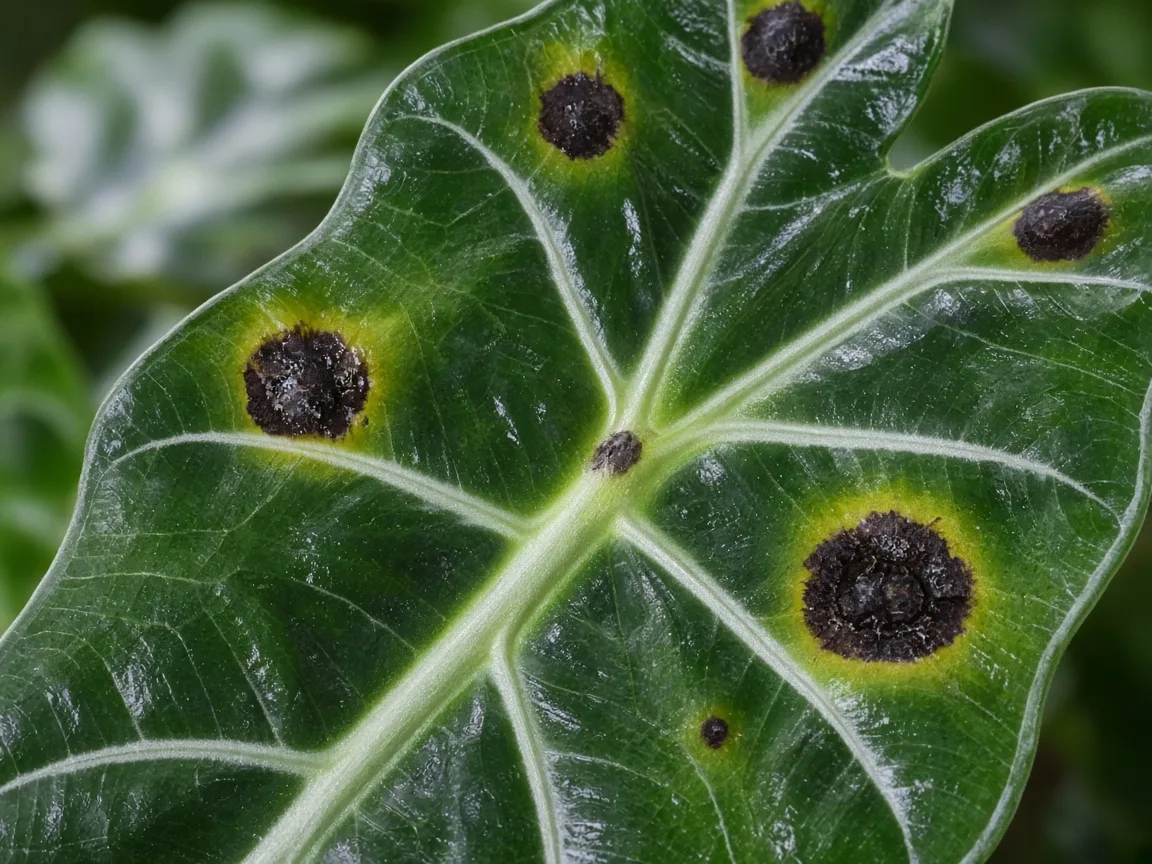
Dark lesions on a Polly arrowhead blade—compare yellow-haloed fungal circles, wipe-off sooty mold, and edema freckles on pale new growth.
- Small dark circles with yellow halos — RHS notes dark spots with yellow margins may be fungal leaf spot on persistently wet foliage. Often on several mature blades after misting.
- Black coating that wipes off — Sooty mold on sticky honeydew from aphids, scale, or whiteflies. The glossy green blade underneath is usually still healthy.
- Tiny reddish-brown dots on pale unfurling crown leaves — Edema from excess water uptake when mix stays wet during active growth. Clusters on the newest arrowhead before it fully expands and darkens.
- Fixed dark brown to black patches mid-blade on a heavy wet pot — Wet-root stress or early rot pathway. Often paired with limp petioles despite damp soil—not the crisp dry edges of underwatering.
- Irregular black patches after a cold night or chilled delivery — Tropical corms and blades are cold-sensitive; RHS warns low temperatures can damage or kill alocasias during transport. Fixed necrosis, not spreading infection.
- Single dry black mark on the lowest leaf, no halo, no spread — Natural senescence, bumping a stiff blade, or a healed wound. Polly routinely sheds one outer leaf while the crown stays active.
- Soft black tissue at the petiole base on wet mix — Corm or stem failure, not superficial spotting. See root rot.
Spots on new leaves still unfurling at the crown are more urgent than one old mark on the lowest blade.
Why silver-veined arrowhead blades show spots so clearly
Polly’s dark glossy foliage with bold pale veining is a diagnostic advantage: fungal circles, edema freckles, and sooty mold all contrast sharply against the silver pattern. That also means owners often panic at the first visible dot—when the real fork is whether the mark wipes off, spreads with yellow halos, or sits on a heavy wet root zone.
Unlike broad fiddle-leaf blades where mid-leaf necrosis dominates, Polly’s compact rosette concentrates new growth at the crown. Infection on several mature arrowheads while the center still pushes clean leaves suggests localized leaf-spot culture. Spots on the newest pale unfurling blade plus a soggy pot points to edema or wet-root stress instead. Always compare the spot pattern to how you have been watering and whether foliage has stayed wet overnight.
The misting trap on a humidity-loving aroid
Alocasia Polly wants medium to high humidity through the growing season—yet misting arrowhead leaves in a stagnant bathroom corner or dim shelf is one of the fastest routes to fungal leaf spot. Water sits on glossy blades long enough for spores to germinate, especially when airflow is poor and leaves remain wet into the evening.
The fix is not to abandon humidity. Use a pebble tray, grouped plants, or a humidifier that raises room RH without soaking leaf surfaces. If you already mist, do it early in the day in a bright spot where blades dry within an hour—and route recurring yellow-haloed circles to spot-disease protocol, not more mist. For dry-edge damage without round spots, see low humidity on Alocasia Polly instead.
Corm firmness vs leaf-spot disease at the soil line
Polly grows from a corm at or just below the soil surface—not a woody trunk. When overwatering especially during winter dormancy rots roots, decay can climb into petiole bases and show as soft black tissue where arrowhead stalks meet the soil. That is corm failure, not a leaf-spot spray problem.
Brush soil from the base of the rosette and press the corm gently:
- Firm corm + spotted mature leaves, wet mix → pause watering; see overwatering before fungicide
- Firm corm + yellow-haloed circles after misting → leaf-spot culture; remove affected blades and improve airflow
- Soft, sunken, or foul-smelling corm → root rot rescue; leaf spots are secondary
This corm squeeze test is meaningless on trailing pothos or treelike fiddle leaf figs—which is why it belongs on a Polly-specific black-spots page.
Dormancy leaf shed vs spreading infection
In fall and winter, Polly often slows growth and may lose some foliage during dormancy—one lower arrowhead yellowing, browning, and developing a dry black tip before the petiole releases is normal. The crown may look sparse while the corm rests.
Infection looks different: new spots appearing weekly on multiple blades, wet-looking margins, or black smear across several leaves while mix stays damp. A single aging lowest leaf with a dry black edge and clean crown growth needs no fungicide—just normal dormancy watering reduction. If spots multiply on new unfurling blades during active spring growth, treat as disease or wet-root stress, not seasonal shed.
Why Alocasia Polly gets black spots
Fungal leaf spot on wet foliage
Fungal spores germinate on persistently wet leaves. On Polly’s arrowhead blades, overhead misting, showering the crown, or splash from careless watering leaves water on glossy surfaces long enough for small dark circles with yellow halos to multiply across several leaves.
Sooty mold from sap feeders
Honeydew from aphids, scale, and whiteflies grows black sooty mold on the surface below feeding sites. Owners search for “black spots” when the real problem is insects hiding along petiole bases and leaf undersides on the central rosette. The wipe test separates this from fixed lesions instantly.
Edema on pale new crown leaves
When watering is erratic or mix stays wet while Polly is actively unfurling new arrowheads, cells burst from excess water uptake and show as raised corky patches—on Polly, early edema looks like tiny reddish-brown freckles on pale new blades before they darken. Tighten the watering rhythm before assuming fungal disease.
Overwatering and wet-root necrosis
Calendar watering in a dim corner leaves mix saturated while the rosette keeps transpiring. Water displaces oxygen from pore spaces, roots fail, and stress shows as dark fixed patches on arrowhead blades—often with limp petioles on soil that still feels damp. Route to overwatering when lower leaves spot while the pot stays heavy.
Bacterial leaf spot
Warm wet conditions can favor water-soaked angular lesions that darken—bacteria spread easily when overhead watering splashes between leaves. Less common indoors than fungal spot on Polly, but suspect when spots look greasy and spread fast on several blades after wetting foliage.
Cold water and draft damage
RHS notes white or straw-coloured spots from cold water splashes and warns that low temperatures during transport can damage tropical alocasias. Fixed dark patches after a cold night near a window or chilled tap water on winter watering day are injury—not infection. Use room-temperature water and keep Polly above 16 °C (60 °F) in the growing season.
Pest stippling that later darkens
Spider mites and thrips cause stippled tissue that bronzes or blackens on stressed arrowhead blades. Check for fine webbing or silver scarring on dark glossy undersides before assuming leaf-spot disease.
How to confirm the cause
Work through these checks before repotting or spraying:
- Wipe test — Damp cloth on the spot. Smears = sooty mold; treat pests first. Fixed in the blade = necrosis or pathogen.
- Moisture and pot weight — Top inch wet for a week with heavy pot weight points to overwatering, not airborne pathogens.
- Halo presence — Yellow ring around a dark center fits fungal leaf spot per RHS guidance.
- Leaf age — Red-brown freckles on pale new crown growth = edema culture. Random spots on mature dark blades = infection or rot pathway.
- Corm squeeze — Soft black tissue at the soil line on wet mix = corm failure; see root rot.
- Stem and underside inspection — Tan bumps or sticky residue along petioles confirm sap feeders before fungicide.
- Spread rate — New spots weekly on multiple leaves = disease or pest. One mark stable for months = mechanical or senescence.
- Recent cold or misting — Fixed patches after a cold night or heavy misting session = culture fix, not emergency surgery.
The first fix to try
Wipe one spot with a damp cloth, then press your finger into the top inch of mix.
If the spot smears, isolate the plant and treat visible scale insects or aphids with alcohol swabs on every bump before washing leaves or applying horticultural oil. Fungicide on sooty mold alone wastes time while pests keep feeding.
If soil is wet and heavy with fixed dark lesions, stop watering immediately. Empty standing runoff from saucers or cachepots. Confirm bright indirect light is adequate for the pot to dry. Do not repot, fertilize, or prune half the rosette on day one—let the upper root zone begin drying while you monitor corm firmness.
If spots have yellow halos on several blades after misting, remove the worst affected arrowheads with sterile scissors at the petiole base (wear gloves—sap is an irritant), improve airflow, and switch to soil-level watering only. Hold fungicide unless new lesions keep appearing on clean unfurling growth after two weeks of dry foliage culture.
Step-by-step recovery
For fungal or bacterial leaf spot
- Isolate Polly from other humidity-loving aroids.
- Remove heavily spotted blades at the petiole base; bag and discard—do not compost.
- Water at soil level only; let blades stay dry.
- Increase spacing and gentle airflow without blasting heat vents directly on the rosette.
- If new halos appear on the next unfurling leaf after two weeks, consider a houseplant fungicide labeled for ornamental foliage—test one leaf first because glossy aroid blades can react to sprays.
For sooty mold from pests
- Identify and treat the sap feeder (scale, aphids, whiteflies).
- Wipe blades with a damp cloth to remove mold residue once insects are controlled.
- Re-check undersides weekly for two months—honeydew returns if pests do.
For wet-root necrosis
- Stop watering; confirm corm is still firm.
- If mix stays sour or multiple leaves collapse wet-wilt, unpot and inspect per the root rot guide.
- Trim only after you know root condition—pruning spotted leaves does not fix saturated corms.
Recovery timeline
Judge progress by clean new crown growth, not old lesions healing. During active spring and summer, the next arrowhead should unfurl without fresh spots within two to four weeks once watering, pests, or wet-foliage culture are corrected. In winter dormancy, growth may pause—hold expectations and avoid watering back into rot.
Badly spotted blades will not green up. Remove them after the plant stabilizes if they look unsightly. A firm corm with one clean new leaf is a better sign than a full rosette of spotted foliage.
Mistakes to avoid
- Misting more when yellow-haloed circles appeared after misting—adds moisture fungi need.
- Fungicide before the wipe test—sooty mold and scale waste your spray budget.
- Calendar watering through winter dormancy—overwatering while dormant rots roots and can show as spotting before corm collapse.
- Removing every spotted leaf on day one—Polly needs some foliage to photosynthesize; take the worst blades first.
- Fertilizing a stressed rosette before fixing water, pests, or airflow.
- Repotting into a much larger pot while mix is still wet—oversized pots stay soggy at the corm zone.
How to prevent black spots next time
- Water when the top inch of chunky aroid mix is dry—not on a calendar.
- Raise humidity with pebble trays or humidifiers instead of evening mist on arrowhead blades.
- Keep Polly in bright indirect light so mix cycles between drinks.
- Inspect petiole bases and undersides weekly during heating season.
- Quarantine new plants for two weeks before placing them near your rosette.
- Use room-temperature water; avoid cold splashes on winter watering days.
- Reduce watering in fall and winter when growth slows—see the Alocasia Polly overview for dormancy cues.
Related Alocasia Polly guides
- Alocasia Polly overview — baseline light, humidity, and dormancy rhythm
- Problems hub — full symptom index for this cultivar
- Watering — dry-down depth and winter reduction
- Root rot — when black tissue is at the corm, not on the blade
- Spider mites — stippling that bronzes on dark glossy foliage
Related tool
Use the Black Spots on Leaves Checker to narrow causes for black spots on this plant before changing multiple variables at once.