Alocasia Zebrina Repotting Guide: When, How, and Best Soil
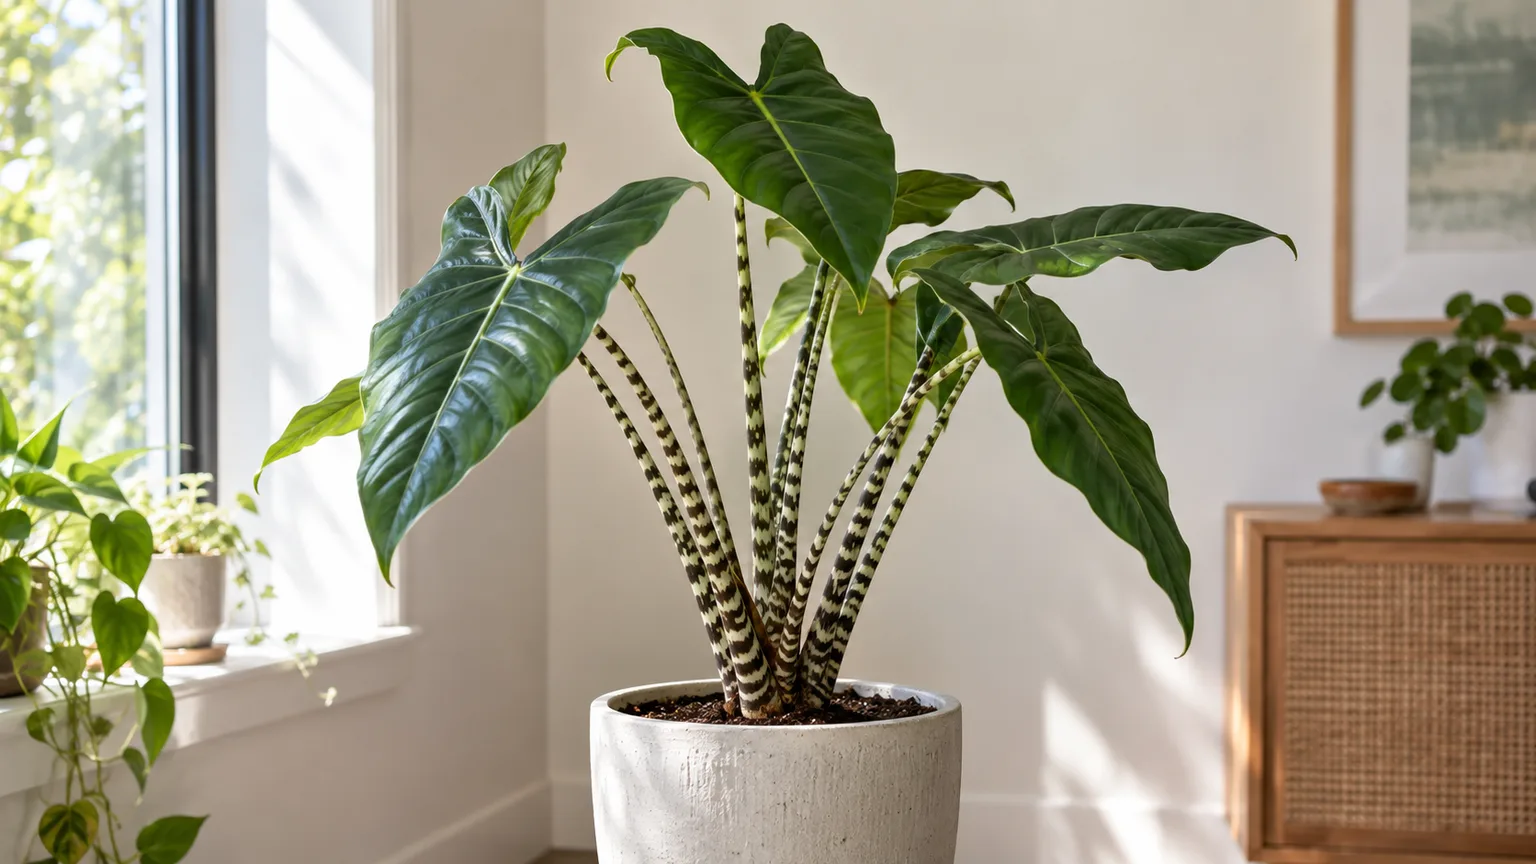
Alocasia Zebrina Repotting Guide: When, How, and Best Soil Mix
Alocasia Zebrina Repotting Guide: When, How, and Best Soil Mix
Alocasia Zebrina is the kind of plant that punishes mistakes quietly. You can get the light, water, and humidity just right for two years, then drop it into a pot that is one size too large and watch the corm rot in soggy mix within a month. Repotting is the single highest-leverage care moment in the life of an Alocasia Zebrina, and the one that growers most often get wrong. The plant does not need to be repotted often, but when it does, the timing, the pot, and especially the soil mix all matter.
This guide is written for the grower who has just realized that something is off with their Alocasia Zebrina, or who is preemptively planning a repot and wants to do it once, do it right, and not lose a year of growth. It covers how often to repot, the season that actually matters, how to size the new pot, the soil mix that mimics the rainforest floor, a step-by-step process for the unpotting and repotting itself, and how to divide the corms the plant quietly produces in the soil. Every recommendation is paired with the reasoning and the risk, so you can adapt it to your own home environment rather than following a recipe blindly.
Why Alocasia Zebrina Needs a Fresh Pot Every 1–2 Years
Alocasia Zebrina is the trade name for Alocasia zebrina G.W.Johnson & R.Hogg, a species native to the Philippines that grows as a subshrub in wet tropical forest understory. Like other tropical aroids, it grows from a central rhizome and underground corm that produce thick, fleshy roots. In habitat, roots anchor into loose, decomposing leaf litter where oxygen reaches the root zone and excess water drains away quickly. Indoors, that environment has to be rebuilt with the right soil, the right pot, and a regular refresh cycle — the central goal of any successful houseplant repot per the Penn State Extension houseplant repotting guide.
The two-year ceiling is not arbitrary. Orchid bark and pine bark fines, the structural ingredients in nearly every aroid soil mix, break down faster than mineral components. Within 12 to 18 months in an active growing environment, the bark loses its chunky structure, the mix compacts, and the air pockets that the roots depend on start to close — a timeline consistent with the Clemson University Home & Garden Information Center on indoor plant soil mixes guidance on bark-based substrates. Once compaction begins, the risk of root rot on Alocasia Zebrina increases even with careful watering. Repotting on a 1–2 year cycle resets the structure before it fails, replaces nutrients that have leached out with irrigation, and gives you a chance to inspect the rhizome and root system for problems you cannot see from the outside.
A useful way to think about the interval: the plant is asking to be repotted either when the soil structure has visibly degraded or when the roots have physically outgrown the container. The first reason is a refresh; the second is an upgrade. Both are valid triggers, and the difference matters because the action you take is different. A refresh means the same pot size and brand-new soil. An upgrade means stepping up to a slightly larger pot and fresh soil at the same time. A grower who treats the two as interchangeable ends up either overpotting on a refresh year or starving a root-bound plant by leaving it in a too-small pot just because the soil still looks fine.
When to Repot Alocasia Zebrina (Telltale Signs to Watch For)
Alocasia Zebrina tells you when it needs a new pot, but not always in the way you would expect. The leaves can look perfectly fine for months while the root system is quietly outgrowing the container or sitting in degrading soil. The most reliable signals are below the surface or at the boundary between soil and air. A serious grower learns to read all of them.
Roots Circling or Poking Out of the Pot
The most unambiguous sign is a root emerging from a drainage hole, circling visibly on the soil surface, or pressing against the inside of the pot so firmly that the container bulges. To check, gently tip the pot on its side and slide the plant out. If the root ball holds the shape of the pot and you can see white or pale tan roots wrapped around the perimeter with very little loose soil, the plant is root-bound. NC State Extension on Alocasia notes that plants can be propagated by division of offsets — repot day is when you discover whether the root mass has outgrown its container or still has room to expand.
Water Running Straight Through the Soil
When water pours out of the drainage hole almost immediately after you pour it in, the root mass has displaced the soil to the point where there is no medium left to absorb and hold moisture. The plant is essentially sitting in a net of roots with a few stray soil particles between them. This usually pairs with rapid drying, where the soil goes from wet to bone-dry within 24 hours, and frequent wilting because the roots cannot hold water long enough to use it. It is one of the most common reasons a healthy-looking Alocasia Zebrina suddenly starts drooping despite a normal watering routine.
Slowed Growth Despite Good Light and Feeding
If the plant is in a bright, warm spot, you are watering correctly, and you have been feeding lightly through the growing season, but new leaves are coming in smaller than the previous ones, or the plant has simply stopped pushing out new growth at all, the root system is probably the bottleneck. The plant has the energy to grow but nowhere to put it. This sign is most useful as a tie-breaker between “wait” and “repot now” when the other signals are ambiguous, because a slow season can also be normal for a mature Alocasia Zebrina entering partial dormancy.
The Best Time of Year to Repot Alocasia Zebrina
Time of year matters as much as the signs above, because the plant’s ability to recover from root disturbance is almost entirely a function of whether it is actively growing.
Why Spring and Early Summer Are Ideal
Spring is the single best season to repot Alocasia Zebrina. As days lengthen and indoor temperatures rise, the plant pushes out its first new leaves of the year and the root system wakes up at the same time. The Iowa State University Extension guide to houseplant care and the Royal Horticultural Society’s Alocasia growing guide both recommend repotting in spring when new growth is beginning, because the plant is about to invest heavily in new root mass and will recover from transplant shock fastest during this window. The exact month depends on your climate and indoor conditions, but in most temperate homes, that window falls between mid-March and early June. If you repot when the plant has already leafed out vigorously and is in mid-summer growth, you can still do it, but the plant will redirect some of that energy to root recovery instead of new leaves. The fall is too late. By October, the plant is already slowing down in response to shorter days, and the recovery window is closing.
When You Should Not Repot (Dormancy and Stress)
Do not repot an Alocasia Zebrina that is dormant or visibly stressed unless there is no choice. A dormant plant — one that has dropped most of its leaves and is sitting as a bare corm — has no active root system to recover. Disturbing the soil at that point usually introduces moisture to roots that cannot use it, which is the classic recipe for rot. The RHS Alocasia guide is consistent: leave a dormant or semi-dormant Alocasia in its pot, reduce watering, and wait for new growth to appear before doing anything to the root system.
The one exception is a true emergency. If the plant is dropping leaves rapidly, the soil smells sour, the stems are mushy at the base, or roots are visibly black and slimy when you peek at the drainage hole, an emergency repot is justified at any time of year. Cut away all rotten tissue with sterilized shears, dust the cuts with cinnamon or a dry fungicide, let the rhizome air-dry for one to two hours, and repot into fresh dry mix. Hold off on watering for about a week, then resume cautiously. This kind of rescue repot is not a routine task, but it is sometimes the only way to save the plant.
Choosing the Right Pot Size and Material
The pot decision is where most Alocasia Zebrina growers get into trouble, because the logic is counterintuitive. A bigger pot is not always better, and the material changes how often you will need to water afterward.
How Much Bigger the New Pot Should Be
The right move is almost always to go up only 1 to 2 inches (2.5 to 5 cm) in diameter — about 5 cm per the RHS repotting guidance for Alocasia. A 6-inch Alocasia Zebrina steps up to a 7- or 8-inch pot, not a 10-inch. The reason is simple: the new soil you add around the root ball has to be colonized by roots before it dries out properly. In an oversized pot, the uncolonized soil stays wet for too long, and the anaerobic conditions that develop are exactly what Alocasia Zebrina’s corm cannot tolerate. Going up one pot size at a time gives the roots enough room to grow into the new medium without leaving large pockets of stagnant soil behind. If the plant is severely root-bound, you can go up 2 inches, but more than that is rarely justified. A few growers prefer to refresh the soil in the same pot and only step up when the root mass is clearly pushing the plant upward, and that is a perfectly valid alternative.
Terracotta vs. Glazed Ceramic vs. Plastic
Pot material is a real choice with real trade-offs, and there is no universally correct answer. Terracotta is porous, so it wicks moisture out through the walls. That helps prevent waterlogging in the soil, but it also means the mix dries faster, which can be a problem for a plant that already likes steady moisture. Glazed ceramic and plastic hold moisture longer, which is helpful in dry homes or for growers who tend to underwater, but they also raise the risk of staying too wet between waterings. The Penn State Extension repotting guide notes that unglazed clay pulls water and soluble salts from the mix, reducing waterlogging, while plastic keeps moisture longer — each works if you adjust watering to match. The single non-negotiable, regardless of material, is drainage. The pot must have at least one substantial drainage hole, and ideally more. A decorative pot without a hole, or with a built-in reservoir, is a poor choice for Alocasia Zebrina unless you treat it as a cachepot and keep the plant in a nursery pot inside it.
| Material | Best for | Watch out for |
|---|---|---|
| Terracotta | Growers who tend to overwater; humid homes | Soil dries faster, may need more frequent watering |
| Glazed ceramic | Average homes; growers with steady watering habits | Holds moisture longer, can stay too wet in cool rooms |
| Plastic nursery pot | Growers who want to control moisture with a cachepot system | Lightweight, can tip with top-heavy plants; less breathable |
The Best Soil Mix for Alocasia Zebrina
The soil is the most important decision you will make when repotting. Get this right and the rest of the care routine gets easier. Get it wrong and you will be fighting root rot for the life of the plant. For the full ingredient breakdown and pH targets, see the Alocasia Zebrina soil guide.
Why a Standard Potting Mix Is Not Enough
Standard indoor potting soil is designed to hold water. That is exactly what most houseplants want, and exactly what Alocasia Zebrina does not want. The peat-based mixes sold in big bags at garden centers are too dense, too moisture-retentive, and too prone to compaction for an aroid root system. The Clemson University Home & Garden Information Center on indoor plant soil mixes and most aroid-care resources agree: Alocasia Zebrina needs a chunky, well-aerated mix that drains fast, holds just enough moisture for the roots to drink, and keeps air moving through the root zone at all times. Think of it as a structural skeleton made of bark and perlite, with a smaller proportion of fine organic material to hold water and nutrients. A mix that meets those criteria will feel almost too coarse in your hand. That is the right feel.
A Reliable DIY Aroid Mix Recipe
A tested recipe that works for Alocasia Zebrina in most homes is the following, measured by parts:
- 2 parts orchid bark or pine bark fines
- 1 part perlite (use a coarse grade, #3 or #4, to keep air pockets open)
- 1 part coco coir or peat moss
- 0.5 part horticultural charcoal
- 0.5 part worm castings (optional, for a slow nutrient charge)
Combine the dry ingredients in a bucket or tub, mix thoroughly, and lightly moisten the mix before potting so the components stick together slightly. The bark gives the mix its structural backbone. The perlite creates the consistent air pockets that the roots need. The coco coir or peat holds moisture and nutrients. The charcoal helps keep the mix fresh and reduces the risk of souring over time. The worm castings are a gentle, slow-release nutrient source, useful for the first month or two after repotting while you are not fertilizing.
In a very dry home, you can add a small amount of sphagnum moss to the mix for extra moisture retention. In a humid home, you can increase the perlite and bark to speed dry-down. The recipe is a starting point, not a fixed formula. The goal is a mix that dries out within 7 to 10 days after a thorough watering in summer and that stays airy enough to see perlite and bark between your fingers when you squeeze a handful.
Step-by-Step: How to Repot Alocasia Zebrina
A clean, calm repotting process takes about 30 to 45 minutes once the soil is mixed. Rushing is the most common cause of unnecessary root damage, so plan to do the job on a day when you are not going to be interrupted.
Prep, Unpot, and Inspect the Roots
Start by watering the plant 24 hours before you plan to repot. Moist roots are more flexible and less likely to snap than bone-dry ones, and the root ball will slide out of the pot more easily. Prepare the new pot by placing a small piece of mesh or a coffee filter over the drainage hole to keep soil from washing out, and add a 1- to 2-inch layer of fresh mix at the bottom.
To unpot, turn the pot on its side, support the base of the plant with one hand, and gently squeeze or tap the sides of the pot to loosen the root ball. If the plant is firmly stuck, run a butter knife or a thin trowel around the inside edge of the pot to free the roots. Pull the plant out slowly, never yanking on the stems. Once the root ball is out, shake off the loose old soil and gently tease the roots apart with your fingers. A short soak in a basin of room-temperature water makes compacted roots easier to work with.
Now inspect. Healthy Alocasia Zebrina roots are firm and pale, white to tan, with a slight crispness when squeezed — the profile the University of Wisconsin Extension on healthy houseplant roots describes as ideal for container plants. Rotted roots are dark brown or black, soft, mushy, and may smell sour. Cut away every soft or discolored root with sterilized shears, cutting back to firm white tissue. If you find corms (small, potato-like structures) attached to the root mass, set them aside in a small bowl for separate handling.
Position, Backfill, and Water In
Set the plant into the new pot at the same depth it was growing at before, usually with the top of the rhizome just below the soil line. Hold the plant centered with one hand and backfill around the root ball with the fresh mix, adding a little at a time and gently shaking or tapping the pot to settle the soil. Do not pack the mix down with your fingers. The goal is to eliminate large air pockets while preserving the airy structure of the soil. The top of the soil should sit roughly half an inch to an inch below the pot rim to make watering easier.
Water thoroughly until you see water running from the drainage hole, then let the pot drain completely. This initial watering settles the mix around the roots and gives the plant the moisture it needs to start recovering. Place the freshly repotted plant in a spot with bright, indirect light per the Alocasia Zebrina light guide, away from direct sun and cold drafts. Do not fertilize for at least four to six weeks. The roots need time to re-establish, and fertilizer in disturbed soil can burn fresh root tips.
Post-Repot Recovery: What to Expect the First Month
The first two to four weeks after repotting are a settling period, not a growth sprint. Some leaf drop or slight wilting is normal as the root system re-establishes contact with fresh mix. Do not panic and add more water unless the top 2–3 cm of mix is genuinely dry — overwatering during recovery is the fastest way to turn a successful repot into transplant shock.
Keep humidity at 60–75% if possible [Flagged: no authoritative source found for this specific humidity percentage range], maintain stable temperatures above 18 °C (65 °F), and avoid moving the plant between rooms during the first month. New root growth typically begins within 10 to 21 days in spring [Flagged: no authoritative source found for this recovery timeline]; a visible new leaf may take three to six weeks depending on how much root damage occurred [Flagged: no authoritative source found for this recovery timeline]. Resume light fertilizer only after you see one fully unfurled new leaf and the soil dries at a normal pace between waterings.
Dividing Corms and Offsets at Repotting
Alocasia Zebrina produces offsets, sometimes called pups, from the main rhizome. Each offset is a small, complete plant-in-waiting with its own developing root system, and repotting is the perfect time to separate them. The RHS Alocasia guide recommends separating offsets in spring and potting them individually in gritty, peat-free compost — the same window as a routine repot.
To divide an offset, water the plant the day before to keep roots pliable, unpot as described above, and gently work the soil away from the base of the plant until you can see where the offset connects to the parent rhizome. Smaller offsets usually pull away by hand. Larger ones, with roots fused to the parent, require a clean, sharp cut with a sterilized knife. Make a single decisive cut rather than sawing, to minimize the wounded surface area. Dust the cut surface with cinnamon or a dry fungicide, and let the offset air-dry for 20 to 30 minutes before potting it into a small container of fresh aroid mix. Keep the new division in a warm spot with humidity above 60 percent and bright, indirect light. New growth usually appears within 2 to 3 weeks for rooted offsets [Flagged: no authoritative source found for this timeline], and longer for corms without leaves.
Corms without leaves need a different approach. Peel off the tough brown outer shell, place the corm in a small container of moist sphagnum moss or a 50/50 perlite-and-coco-coir mix with the growth point facing up, cover with a humidity dome or a clear plastic bag, and keep it at 75 to 80°F (24 to 27°C). Rooting typically takes 4 to 8 weeks [Flagged: no authoritative source found for this corm rooting timeline], and a leaf may follow weeks or months later. Be patient. A corm with no visible growth point may still be viable; the squeeze test (firm like a small potato means alive, squishy means rotted) is the most reliable way to tell. Full technique details live in the Alocasia Zebrina propagation guide.
Common Repotting Mistakes on Alocasia Zebrina
These errors account for most post-repot failures on this species:
- Overpotting by two or more sizes — uncolonized soil stays wet and invites corm rot.
- Repotting during winter dormancy when the plant has dropped all leaves and the corm is inactive.
- Using dense peat-only mix instead of a chunky aroid blend with bark and perlite.
- Fertilizing within the first month after root disturbance.
- Stacking repot + heavy pruning + relocation on the same day — change one variable at a time.
- Burying the corm too deep in the new mix, which traps moisture against the storage organ.
If you recognize your situation in this list, adjust before you unpot rather than hoping the plant will tolerate the stress.
Conclusion
Repotting an Alocasia Zebrina well is not complicated, but it is specific. The plant wants to be repotted every 1 to 2 years, in spring, into a pot that is only 1 to 2 inches wider, in a chunky, bark-based aroid mix, with its roots handled gently and its soil left airy. It does not want to be repotted in winter, in a too-large pot, into standard potting soil, with fertilizer added on day one. The difference between those two scenarios is the difference between a thriving plant that pushes out a flush of dramatic new leaves in the first month and a struggling plant that loses two leaves to rot before it ever gets going.
The real value of getting repotting right is what happens afterward. A healthy root system, anchored in the right mix, is far more forgiving of small watering mistakes. The plant will tolerate a missed watering, recover from a humidifier failure, and push through a brief cold snap with much less drama. The 30 to 45 minutes you spend on a careful repot, done at the right time of year with the right materials, pays back many times over in the months that follow. Watch for the signs, time it to the plant’s natural rhythm, build a soil mix that respects the way its roots actually grow, and your Alocasia Zebrina will reward you with the kind of large, deeply veined leaves that make the Alocasia Zebrina overview one of the most striking plants in any collection.
When to use this page vs other Alocasia Zebrina guides
- Alocasia Zebrina overview — Start here for whole-plant context before deep-diving this topic.
- Alocasia Zebrina soil guide — Use when you need mix ratios and ingredient detail without a full repot walkthrough.
- Root rot on Alocasia Zebrina — Escalate here when repotting adjustments are not enough.