How to Water Alocasia Zebrina: Frequency, Amount & Signs
How to Water Alocasia Zebrina: Frequency, Amount & Signs
How to Water Alocasia Zebrina: Frequency, Amount & Signs
Alocasia Zebrina watering is not a calendar problem — it is a corm problem. The Philippine species Alocasia zebrina stores water and starch in a peanut-sized underground corm. That organ is why the plant can drop every leaf and still push a new shoot weeks later, and why it dies so fast when the root zone stays wet. The Missouri Botanical Garden describes the genus as preferring “consistently moist, organically rich, well-drained soils in high humidity locations” — moist, not saturated, in mix that drains fast enough for oxygen to reach fine roots.
This guide covers how often to water, how much each time, which water type protects leaf tips, how to tell overwatering on Alocasia Zebrina from underwatering on Alocasia Zebrina, winter dormancy adjustments, post-repot caution, and step-by-step recovery when the rhythm slips. For mix structure and drainage, pair this page with the Alocasia Zebrina soil guide; for dry-down speed by window, see the light guide.
Quick Answer: Water When the Top 2 Inches Dry
For most indoor Alocasia Zebrina plants in active growth, water when the top 1–2 inches (2.5–5 cm) of mix feel dry. The RHS Alocasia growing guide recommends watering from April to October once the top 5 cm (2 in) of compost has become dry, and reducing to a minimum in winter. In practice this works out to roughly every 7–10 days in summer and every 3–5 weeks in winter, but your light, pot size, room temperature, and soil mix all shift that interval. Always confirm dryness with a finger, chopstick, or weight test before adding water — the calendar is a reminder to check, not a command to water.
Why the Corm Controls Everything
Most houseplant watering advice treats leaves and stems as the control point. Alocasia Zebrina is a leaf-and-corm system. The corm anchors the plant, stores energy for the next leaf, and produces offsets. Fine roots move water upward; the corm holds reserves when those roots fail. Your job is to keep the root zone wet enough for uptake and dry enough for oxygen — a narrow band that shifts with light, pot, and season.
What Alocasia Zebrina Actually Is — and What It Is Not
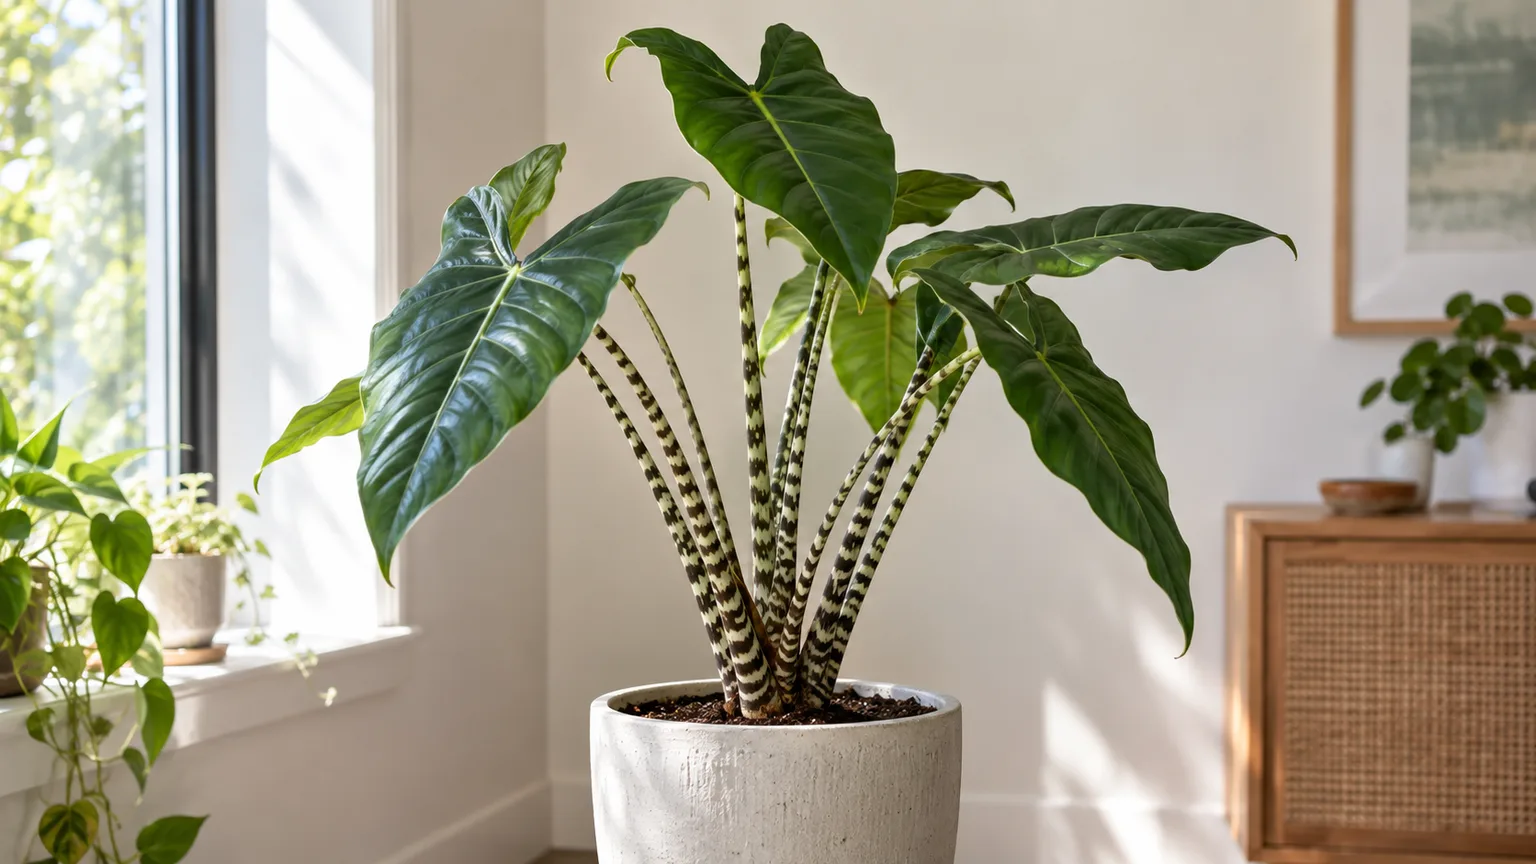
Alocasia zebrina is a true species from the Philippines (Luzon, Mindanao, Leyte), not a hybrid. The RHS plant profile describes it as a “rhizomatous perennial houseplant with dark green, glossy arrow-shaped foliage and a black and white striped stem.” It is the zebra-striped petioles (stems) that give this plant its common name — not silver veins on the leaves.
The compact silver-veined plant often sold alongside it as “African mask” is Alocasia × amazonica ‘Polly’ (or similar hybrids like A. ‘Sarian’), which the RHS Alocasia genus guide lists separately with “striking dark-green, silver-veined leaves.” True A. zebrina has plain green arrow leaves on striped stems — the stripes are on the petioles, not the leaf blades. This distinction matters for watering because the two plants have different leaf surface areas, growth rates, and dormancy patterns.
The NC State Extension notes that Alocasia are tuberous perennials in the Araceae family from tropical Asia, preferring shaded sites with slightly acidic, moist, well-drained, humus-rich soil. The RHS growing guide recommends keeping plants above 16 °C / 60 °F during the growing season and above 10 °C / 50 °F in winter. Translation for watering: warm rooms use water faster; cool winter rooms hold moisture longer and trigger partial dormancy.
Why Overwatering Kills Faster Than Underwatering
Underwatering is recoverable because the corm holds reserves. Overwatering is dangerous because waterlogged soil displaces oxygen from pore spaces, damaging fine roots and creating anaerobic conditions where Pythium and Phytophthora colonize weakened tissue. The University of Wisconsin–Madison Extension on houseplant root rots explains that these pathogens prefer wet soil and that reducing soil moisture is the first rescue step when rot is suspected.
A plant that wilts in wet soil is rarely thirsty — it is suffocating. Roots can no longer move water upward even though the mix is damp. Iowa State Extension warns that wilting on wet soil is commonly mistaken for drought, leading growers to add more water and accelerate collapse. The asymmetry matters: a firm corm with crispy leaves can bounce back in days; a soft corm in sour soil may not recover at all.
When to Water: The Real Variables
Four variables set your real interval: light, temperature, pot, and soil. Adjust the rhythm in proportion to how strongly each pulls moisture out of the container.
Light, Temperature, and Pot Material
Brighter indirect light drives faster photosynthesis and transpiration. A south- or west-facing window with bright filtered light can shorten the interval by a full day or two compared with a north room. Temperature works the same way: a plant at 75 °F / 24 °C dries faster than one at 65 °F / 18 °C with identical light.
Worked scenario: A 4-inch terracotta pot in a south window in July may need water every 5–6 days after the top 1–2 inches dry. The same plant in a 10-inch glazed ceramic pot in a north room in November may sit damp for three weeks before the chopstick reads dry at depth. Same species, opposite intervals — always confirm with a soil test, not a reminder app.
The RHS growing guide also warns against overpotting: choose a pot only about 5 cm (2 in) larger each time to avoid oversized containers that hold excess wet mix around the root ball.
Grow-Light Adjustment
If you use a grow light running 12–14 hours daily, your Alocasia Zebrina may not enter full winter dormancy and may keep drinking at near-summer rates. Under bright LEDs producing 200–400 µmol/m²/s at the leaf surface, the watering interval can shorten by 1–3 days even in winter. Check soil moisture more frequently during the first two weeks under a new light to calibrate the new rhythm. If you notice the mix staying wet longer than 7 days despite the light, reduce watering rather than adding more light — root rot does not pause for photons.
How to Test Before You Water
The UMD Extension advises against calendar watering and recommends testing soil to about two inches before adding water. Three methods cover nearly every home setup, plus a fourth technique unique to Alocasia.
Finger, Chopstick, and Meter Methods
The finger test is the default: push your finger 1–2 inches / 2.5–5 cm into the mix. Dry at that depth means water; damp means wait. The chopstick test upgrades reliability in deeper pots: insert a clean wooden skewer to the bottom, wait 30 seconds, and pull it out. Clinging soil means moisture remains at depth; a nearly clean stick means the root zone is dry enough to water. A moisture meter can help while you learn — calibrate it right after a thorough soak (should read wet) and again before your next watering (should read in the dry-to-moist range). Meters misread in very chunky mixes, so treat them as one signal among several.
The Weight Test
Lift the pot when you can. A freshly watered container is heavy; a dry one is noticeably light. Weight reflects moisture through the whole column, not just the surface. After a few dry-down cycles you will recognize the “ready” weight without touching the soil.
Corm Palpation — Check Without Unpotting
Gently probe around the stem base at soil level with a clean fingertip. A firm corm resists pressure; a soft one compresses. This technique lets you assess corm health without disturbing the root ball. If the corm feels firm but the soil is bone dry, water. If the corm feels soft or spongy even with dry-looking surface soil, hold off and inspect more closely — the roots may already be compromised even if the surface looks thirsty.
How Much Water Each Time
Water deeply, then let the soil dry to the right depth before the next round. Pour slowly over the entire surface until water runs freely from the drainage hole — even saturation, salt flush, and no channeling down dry cracks at the pot edge. A light sprinkle that only wets the top inch trains roots shallow and leaves minerals concentrated where they burn fine roots.
After watering, empty the saucer within 10–15 minutes. A pot sitting in pooled drainage water is a root-rot setup. If you use a decorative cache pot, lift the inner nursery pot out, let it drain freely, then return it — never let standing water linger between the pots.
Post-repot note: Fresh repotting disturbs roots and often packs new mix more loosely, so the first dry-down cycle can be unpredictable. Wait until the top inch is dry before the first soak — often 7–10 days after repot — then resume normal depth checks. Do not water on day one unless the root ball was bone dry going in.
Top vs Bottom Watering
Top watering is the default for Alocasia Zebrina. It wets the entire root ball and moves excess salts downward and out of the pot. UMD Extension on mineral salt deposits warns that salt buildup causes brown leaf tips, dropped lower leaves, and weakened roots — top flushing is the primary prevention.
Bottom watering keeps the surface drier, which discourages fungus gnats, and can rehydrate compacted mix. Set the pot in a basin of room-temperature water to about one-third pot height for 20–30 minutes until the surface feels cool and slightly damp. The catch: bottom watering does not flush salts. Every 3–4 bottom sessions, do a full top-water flush until water runs freely for 30–60 seconds.
Water Quality That Protects Leaf Tips
Alocasia Zebrina is sensitive to dissolved minerals, chlorine, and fluoride in tap water. UMD Extension flags these as common causes of leaf-tip burn and salt crust on pots. Practical hierarchy:
- Rainwater — soft, slightly acidic, no treatment chemicals; best when you can collect it cleanly.
- Filtered pitcher water — removes most chlorine and some minerals; easiest everyday upgrade.
- Distilled or reverse-osmosis water — mineral-free; pair with fertilizer since it carries no nutrients.
- 24-hour rested tap — chlorine may off-gas, but chloramine, fluoride, and hardness remain.
Regional Tap-Water Variation
Many watering guides recommend letting tap water sit for 24 hours. This works for homes on chlorine treatment, which off-gasses within a day. However, many municipal water systems now use chloramine (a chlorine-ammonia compound), which does not off-gas by sitting. If you see persistent brown leaf tips despite good watering rhythm and humidity, check your water utility’s annual quality report — if they use chloramine, a carbon filter or switching to distilled/rainwater is the fix, not resting the tap.
Use room-temperature water. Cold tap shocks roots, especially in winter.
Humidity vs Watering — Don’t Confuse Them
Alocasia Zebrina evolved in humid Philippine forest understory. The RHS Alocasia guide and NC State Extension both tie healthy foliage to high humidity and moist-but-drained soil — related needs, different levers. Higher humidity slows transpiration, so soil stays wet longer; winter heating at 25% RH speeds dry-down and browns leaf edges that look like underwatering.
The Alocasia Zebrina overview recommends 60–75% humidity — see that guide for humidifier and pebble-tray setup details.
Diagnostic split: crisp brown edges with moist soil point to low humidity, not thirst. Crisp edges with dry soil several inches down point to underwatering. Misting alone is too short-lived; a humidifier, pebble tray, or grouped plants raise ambient RH more reliably than extra water in the pot.
Overwatering: Early and Late Signs
Overwatering is the most common cause of Alocasia decline. Early signs are subtle; late signs arrive fast.
Early signs include soil staying wet more than 4–5 days after a normal watering, fungus gnats hovering at the surface, a faint sour smell, new leaves emerging smaller or paler, and edema — water-soaked blisters on leaf undersides when roots take up more water than leaves transpire.
Late signs include yellowing spreading beyond a single old leaf, mushy stems at the soil line, wilting despite wet soil, foul odor, brown slimy roots on unpotting, and a soft or discolored corm. One naturally shedding bottom leaf is normal; multiple yellow leaves plus wet soil and soft petioles are not. For advanced rot, open the dedicated root rot guide.
Brooklyn Botanic Garden and Oregon State Extension both tie fungus gnats to overwatered, persistently moist surface soil. Treat gnats as a moisture alarm first: let the top 1–2 inches dry, add a coarse sand or gravel top dressing if needed, use yellow sticky traps for adults, and consider a Bti soil drench (Mosquito Bits soaked per label directions) for larvae — but the plant will not stabilize until the wet cycle stops.
Underwatering: Signs and Confusion Traps
Underwatering is less common but not rare, and drooping leaves overlap with overwatering.
Early signs: leaves held slightly downward, subtle upward cupping of margins, smaller new leaves, soil pulling from pot sides. Late signs: dry crispy brown edges, limp dry leaves, a very light pot, compact hydrophobic soil, papery leaves before drop.
Texture is the tell: overwatered leaves are soft, limp, sometimes translucent; underwatered leaves are thin and crispy at margins. Soil is the second tell: wet and heavy versus dry through most of the pot. Severe drought can push semi-dormancy and leaf drop that mimics rot recovery — lift the pot. Heavy and damp means overwatering; light and bone-dry means underwatering.
Rescue: Overwatered Alocasia Zebrina Step by Step
This ladder assumes the corm is still firm. Wear gloves if sap irritates your skin — Alocasia tissue contains calcium oxalate crystals per NC State.
Step 1: Stop watering. Unpot gently and rinse old soil from roots and corm.
Step 2: Inspect. Healthy roots are pale tan to white and firm. Rotted roots are brown, slimy, and sour-smelling. The corm should be firm without soft spots.
Step 3: Trim all mushy roots with sterile scissors back to firm tissue. Carve small soft corm spots until you reach firm flesh. Dust cuts with a sulfur-based fungicide or commercial rooting hormone with fungicide. (Note: ground cinnamon is a common home remedy for dusting cuts, but extension sources have not validated it for root rot — if you use cinnamon, treat it as a drying agent, not a proven fungicide, and prioritize a sulfur-based product for serious infections.) Air-dry 12–24 hours on paper towels.
Step 4: Repot into fresh chunky aroid mix in a clean pot with drainage. Scrub reused pots with 1:10 bleach solution. Plant the corm shallowly — top at or just below the surface.
Step 5: Hold water 7–10 days so cut roots heal. Then one light watering when the top inch is dry.
Step 6: Provide warmth (70–75 °F / 21–24 °C) and humidity — dome or bag with air holes — in bright indirect light.
Step 7: Hold fertilizer until at least one new leaf fully unfurls.
Recovery timing varies: new roots often appear in 2–6 weeks; a full leaf may take 2–3 months. A soft, foul corm is unlikely to recover — salvage firm offsets per the propagation guide. For symptom photos and advanced pathology, see root rot on Alocasia Zebrina.
Rescue: Underwatered Alocasia Zebrina Step by Step
Underwatering is easier to fix; bounce-back often shows within a week.
Step 1: Bottom-soak 20–30 minutes in room-temperature water one-third up the pot height.
Step 2: Drain 15–20 minutes; empty the saucer.
Step 3: Brief leaf misting raises ambient humidity for a few hours — support, not a substitute for soil water.
Step 4: Check the corm. Firm tissue should push new growth in 2–4 weeks under good conditions. Shriveled corms recover slowly but are not always lost.
Step 5: Shorten the next interval by 2–3 days and review whether the pot is too small, the mix too coarse, or the room too warm and dry.
Step 6: Trim crispy edges with sterile scissors so the plant redirects energy.
Winter Dormancy Watering Protocol
Alocasia Zebrina often enters partial dormancy in shorter, cooler days — new growth slows, leaves may yellow and drop. That is a survival strategy, not failure. The RHS Alocasia guide warns that overwatering during dormancy can rot roots when the plant pulls little water and evaporation is low.
Winter protocol:
- Let the top 50–70% of soil dry — for a 6-inch pot, often dry at 3–4 inches down.
- Water every 3–5 weeks, sparingly — enough to slightly moisten the medium, not a full drench.
- Stop fertilizing. Keep above 55 °F / 13 °C, ideally 60–65 °F / 16–18 °C.
- Maintain 50–60% humidity to stress remaining leaves less.
- Avoid repotting or major moves during dormancy.
If all leaves drop, the corm is often still alive. Keep soil barely moist and warm; when spring light returns above 60 °F / 15 °C, water lightly when the top two inches dry. Resume full rhythm after the first full leaf unfurls.
| Season | Frequency | How much | Notes |
|---|---|---|---|
| Spring (active growth) | Every 7–10 days | Soak until drainage runs | Resume half-strength fertilizer |
| Summer (peak growth) | Every 5–7 days | Soak until drainage runs | Watch for gnats in hot humid weather |
| Early fall (slowing) | Every 10–14 days | Soak until drainage runs | Stop fertilizing as days shorten |
| Winter (dormant) | Every 3–5 weeks | Light moisture only | Keep above 55 °F; no fertilizer |
| Spring wake-up | Every 7–10 days | Light until first full leaf | Resume fertilizer gradually |
You can reduce or prevent dormancy with a grow light and warmth above 65 °F / 18 °C per the light guide, but expect higher water use and faster nutrient depletion. Most home growers benefit from a winter rest.
Common Watering Mistakes
Watering on a fixed weekly schedule without checking soil — replace the “water Tuesday” reminder with a “check soil” reminder.
Trusting wilt alone — limp plus wet soil signals overwatering; limp plus dry soil means thirst. Always feel the mix.
Keeping summer frequency through winter — the classic low-light saturation setup. Stretch intervals from October onward regardless of what the app says.
Using a pot without drainage — decorative cachepots without holes trap water at the root zone. Always use a nursery pot with drainage inside a cover pot.
Upsizing “to help it grow” — extra wet mix without roots to fill it extends dry-down unpredictably. The RHS recommends going only 2 inches (5 cm) larger.
Confusing humidity needs with watering needs — crisp brown edges on moist soil point to dry air, not thirst. Check humidity before reaching for the watering can.
Ignoring water quality — persistent brown tips despite good watering rhythm often mean chloramine, fluoride, or hardness in tap water. Switch to filtered or rainwater.
About This Guide
Written by sai-ananth, an indoor gardener with over eight years of experience growing aroids including Alocasia, Monstera, and Philodendron species, and reviewed by the LeafyPixels Review Board (reviewed July 2026). Recommendations are checked against botanical and extension references — including Missouri Botanical Garden, Royal Horticultural Society, University of Wisconsin–Madison Extension, University of Maryland Extension, NC State Extension, Oregon State Extension, Brooklyn Botanic Garden, and Iowa State Extension — plus LeafyPixels plant-care data and practical indoor growing constraints before publication.
Conclusion
After fixing your watering rhythm, the next step is to check whether your mix matches the soil guide. Alocasia Zebrina watering succeeds when you treat the corm as the control point: deep soak when the top 1–2 inches of chunky aroid mix are dry, full drainage, room-temperature low-mineral water, and a sharply reduced winter dial when growth stops. Test soil at depth — finger, chopstick, or weight — instead of obeying a calendar. Wilting on wet soil means inspect roots today, not another drink. Squeeze the corm gently at soil level every few weeks — firm means the rhythm is working, even when leaves look tired.
When to Use This Page vs Other Alocasia Zebrina Guides
- Alocasia Zebrina overview — Start here for whole-plant context before deep-diving this topic.
- Alocasia Zebrina problems hub — Jump to symptom-specific fix guides when this care topic does not resolve the issue.
- Overwatering on Alocasia Zebrina — Escalate here when watering adjustments alone are not enough.
- Underwatering on Alocasia Zebrina — Escalate here when watering adjustments alone are not enough.
- Root Rot on Alocasia Zebrina — Escalate here when watering adjustments alone are not enough.
Recommended Next Reads
- Alocasia Zebrina soil guide — If your mix holds moisture too long, no watering schedule will fix it. Start with the right aroid mix recipe.
- Alocasia Zebrina light guide — Light drives how fast the pot dries. If your intervals feel off, check your light levels first.
- Alocasia Zebrina propagation guide — If you are rescuing a plant with corm damage, knowing how to propagate from offsets is your safety net.
- Alocasia Zebrina repotting guide — Repotting resets the root environment. Time it with the growing season for the best recovery odds.