Epipremnum Pinnatum Propagation Guide
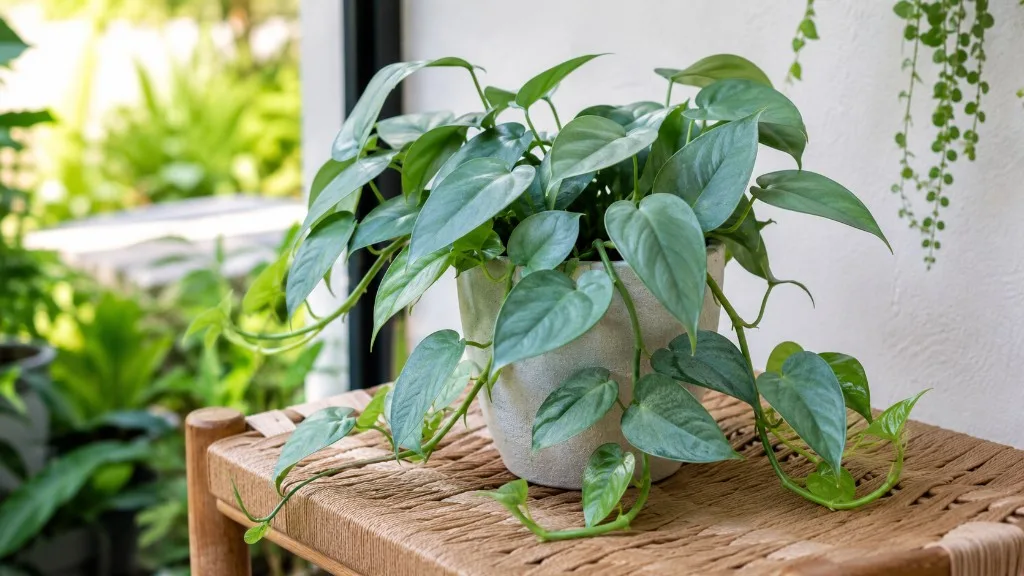
Epipremnum Pinnatum Propagation Guide
Epipremnum Pinnatum Propagation Guide
Epipremnum Pinnatum (Epipremnum pinnatum) propagates the same way most vining aroids do: you take a stem section that includes at least one node, give that node moisture and oxygen, and wait for adventitious roots to form. What trips people up is not the concept but the details — identifying the right bump on a blue-green or green vine, keeping water fresh enough for roots to breathe, and accepting that E. pinnatum often roots more slowly than the familiar Golden Pothos (Epipremnum aureum) on the kitchen windowsill. Get the node right and the environment stable, and propagation becomes a repeatable skill rather than a lottery.
This guide walks through stem cuttings from selection to potting, with emphasis on node care because that is where roots and new shoots originate. Whether you are multiplying a Dragon Tail vine, a Cebu Blue cultivar, or another E. pinnatum selection, the same biological rule applies: no node, no plant. A leaf floating in a jar may stay green for weeks, but it cannot produce the stem bud tissue required for a full climbing vine.
What Makes Epipremnum Pinnatum Different When Propagating
Epipremnum pinnatum is often sold under names like Dragon Tail Plant, Centipede Tongavine, or Cebu Blue, and the propagation mechanics overlap with Epipremnum aureum. Botanically, however, it is a distinct climbing tropical epiphyte in the arum family (Araceae), native from India through Southeast Asia to the Philippines, New Guinea, and Australia. In nature it attaches to tree trunks, sends roots from nodes, and shifts from small juvenile leaves to larger, deeply incised adult foliage as it climbs. That growth habit matters when you propagate because healthy, actively growing vines root faster than woody, leggy sections that have been trailing in low light for months.
The species sits behind several popular cultivars — including ‘Cebu Blue’, ‘Baltic Blue’, and ‘Albo-Variegata’ — that share stem-cutting propagation but differ in leaf color, variegation stability, and growth speed. NC State Extension notes that ‘Cebu Blue’ typically remains in the juvenile form unless allowed to climb a stake or moss pole, at which point leaves mature and fenestrate like the species. Propagation does not shortcut that timeline — a fresh cutting starts in the juvenile phase — but starting new plants from vigorous stems gives you material worth training upward later.
Juvenile Versus Mature Growth and What It Means for Cuttings
Indoors, most E. pinnatum plants remain in the juvenile phase: elongated, blue-green or green leaves without fenestrations. Mature foliage — larger, often thicker, with splits — appears when the plant climbs and receives strong Epipremnum Pinnatum light over time. Cuttings taken from juvenile vines are normal and expected; they will not show fenestrations immediately after rooting. If your parent plant already climbs a pole and produces split leaves, cuttings from that mature growth can carry the genetics for fenestration, but each new plant still needs appropriate light and a support to express it.
Do not choose propagation material based on leaf size alone. A small juvenile leaf attached to a firm green stem with a visible node roots more reliably than a large leaf on a woody, hollow vine. The stem’s condition and the node’s viability predict success better than foliage aesthetics.
Why Nodes Matter More Than Leaves
A node is the point on the stem where leaves, roots, and new shoots emerge. On E. pinnatum vines, nodes appear as slight ridges, rings, or small bumps — often brownish — where a leaf petiole meets the stem. Roots form from node tissue, and the next vine segment grows from a bud at or just above that same point. Aroid stem cuttings without a node and axillary bud cannot produce new growth and will ultimately rot — the cellular machinery for adventitious root formation lives at the node, not in the leaf blade.
You can propagate from a leaf with a short piece of stem that includes a node, but you cannot propagate from a detached leaf alone. Before cutting, trace the vine with your finger and locate at least one node below your planned cut. If you are unsure, include two nodes for margin. Sacrificing an extra inch of stem is cheaper than waiting a month on a nodeless piece.
Choosing the Best Propagation Method
Epipremnum pinnatum roots reliably by stem cuttings in water, sphagnum moss, or moist potting mix. The RHS also lists layering and stem-tip cuttings in summer as standard propagation routes for the species. All methods work when the node stays consistently moist but not suffocated, and when the cutting receives bright indirect light and stable warmth.
| Factor | Water | Sphagnum moss | Direct soil |
|---|---|---|---|
| Root visibility | Excellent | Moderate (clear pots help) | Poor |
| Oxygen at node | Good if water is refreshed | Good when moss is airy, not packed | Risky if mix stays saturated |
| Transition to pot | Requires acclimation | Usually smoother | No transition needed |
| Rot risk | Stagnant water, submerged leaves | Moss too wet or compacted | Overwatered dense mix |
| Best for | Beginners who check often | Growers avoiding water-to-soil shock | Patient growers with airy mix |
Water Propagation
Water propagation is the most popular method because you can see roots form and catch stem rot early. Use a clean glass or jar, room-temperature water, and submerge only the lowest node while keeping all leaves above the waterline. Change the water every five to seven days — or sooner if it clouds or smells — because roots need dissolved oxygen, and stale water becomes anaerobic. Clemson HGIC notes that overwatering and stagnant, oxygen-poor conditions are primary triggers for stem and root rot in houseplant propagation — not water itself, but water left unchanged too long.
E. pinnatum often roots in two to four weeks in favorable conditions, though some cuttings need longer if the stem is woody or the room is cool. Cool rooms, dim light, or woody cuttings extend the timeline. Patience combined with clean water beats daily handling.
Sphagnum Moss Propagation
Sphagnum moss propagation mimics the epiphytic conditions E. pinnatum prefers: high humidity around the node with plenty of air in the substrate. Soak long-fiber sphagnum briefly, squeeze out excess water so it feels like a wrung-out sponge, and nestle the cutting so the node is fully covered while leaves remain exposed. The RHS epipremnum growing guide recommends a chunky, free-draining mix for epiphytic aroids — the same principle applies when transitioning moss-rooted cuttings to permanent pot culture.
Moss dries faster than soil, so check moisture every few days and mist or water lightly before it becomes crispy. Soggy, compressed moss reduces oxygen and causes the same rot you see in stagnant water.
Direct Soil Rooting
Direct soil rooting skips the intermediate stage by inserting a fresh cutting into a small pot of airy, moist mix. This works when you use a well-draining blend — equal parts potting soil, perlite, and orchid bark is a practical starting point aligned with our Epipremnum Pinnatum soil guide — and when you resist the urge to keep the pot saturated. Make a narrow hole with a pencil, insert the cutting so at least one node sits below the surface, and firm the mix gently. Covering with a loose clear bag can raise humidity in dry homes, but vent daily to prevent mold.
Soil propagation hides root development, so success signals are firm stem tissue, resistance to a very gentle tug after several weeks, and eventually new leaf growth. If the stem softens or the surface stays wet for days, reduce watering and improve light rather than adding more water.
When to Propagate Epipremnum Pinnatum
Propagate during active growth, typically spring through early summer when daylight is longer and indoor temperatures sit in the comfortable range of 18–29°C (65–85°F). The RHS plant profile specifically recommends stem-tip cuttings in summer. Warmth accelerates cell division at the node, and a parent plant pushing fresh growth supplies the best cutting material. You can propagate in autumn or winter if your space stays warm and bright, but rooting slows and rot risk rises when cold windowsills combine with wet media.
Avoid propagating immediately after shipping, repotting trauma, pest treatment, or visible root rot on the parent. Stabilize the mother plant first, then take cuttings from recovered vines. Propagation is a backup plan for filling out a pot or sharing plants — not a rescue tactic for a dying specimen.
Tools, Safety, and Setup
Gather sharp bypass pruners or snips, 70% isopropyl alcohol for blade disinfection, a clean propagation vessel or small pots with drainage, labels, and your chosen rooting medium before you cut. A dull blade crushes stem tissue and invites infection; a clean single stroke heals faster. Disinfect the blade between plants if you suspect disease.
Wear gloves if you are sensitive to plant sap. Epipremnum pinnatum contains calcium oxalate crystals and is toxic if ingested. The ASPCA lists Golden Pothos as toxic to cats and dogs with chewing associated with oral irritation, drooling, and vomiting; E. pinnatum carries the same genus risk profile. Keep cuttings and trimmings away from pets and children, wash hands after handling, and avoid touching your face while working.
Prepare the workspace so cuttings go directly into water or medium within minutes. Letting fresh cuts dry on a counter for hours dehydrates tropical stem tissue unnecessarily. Have your jar filled or your moss pre-moistened before the first cut lands.
How to Take a Healthy Stem Cutting
Select a vine that is firm, green to blue-green, and free of black spots, mushiness, or pest damage. Identify a section with at least one healthy node and one or two leaves you are willing to keep above the water or medium line. Using sanitized pruners, cut one-quarter to one-half inch below the lowest node you want to root, at a slight angle to increase surface area without leaving a long dangling stub that can rot.
Remove any leaves that would sit below the water or bury in moss — typically the lowest one or two. Leaves submerged in water decay quickly and foul the container; leaves buried in wet moss without airflow do the same. Keep at least one leaf on the cutting when possible, because photosynthesis supports the stem while roots form, though very large leaves can be trimmed modestly if the cutting wilts badly.
Single-Node Versus Multi-Node Cuttings
A single-node cutting — one node with one leaf — is efficient when you want maximum plants from a long vine and when you are comfortable monitoring many small jars. Each piece has less stored energy, so stable warmth and consistent moisture matter more. A multi-node cutting of four to six inches with two or three nodes is forgiving for beginners: if one node fails, another may succeed, and the longer segment holds more reserves.
Avoid extremely long cuttings where only the tip contacts water — the upper tissue dehydrates while you wait for roots. For E. pinnatum, 4 to 6 inches (10–15 cm) with one to three nodes is the practical sweet spot. If you have a long vine to manage during pruning, divide it into multiple short cuttings rather than rooting one heroic piece.
E. pinnatum often produces aerial roots — thin, pale protrusions — along nodes, especially on mature or humidity-exposed vines. These are not required for propagation, but they are a positive sign: the node is already primed to root. Include an aerial root in your cutting when present; submerge it in water or nestle it into moss.
Step-by-Step Water Propagation
- Sanitize tools and fill a clean glass jar with room-temperature water.
- Take your cutting as described above, ensuring at least one node is present on the submerged portion.
- Place the cutting so the lowest node is fully underwater and all leaves remain above the surface.
- Position the jar in bright indirect light — near an east window or several feet from south or west glass. Direct sun heats the water and encourages algae.
- Refresh the water every five to seven days, rinsing the jar if a biofilm develops.
- Inspect weekly for firm stem tissue and white or tan root initials emerging from the node. Black, mushy stem tissue means trim back to clean wood or discard.
- Wait for roots at least 5 cm (2 inches) long with some branching before potting.
During water propagation, a little yellowing on an older leaf is common as the cutting reallocates energy. Rapid collapse of multiple leaves, foul odor, or stem softness means rot — act immediately by cutting back to healthy tissue or starting over with fresher material.
Step-by-Step Moss and Soil Propagation
For sphagnum moss: soak long-fiber moss for ten to fifteen minutes, drain, and squeeze until damp but not dripping. Fill a small clear cup or pot, insert the cutting with the node buried in moss and leaves exposed, and cover loosely with a clear lid or bag if ambient humidity is low. Keep moss evenly moist with misting or light watering; never let it dry completely or stay sodden. Roots typically appear in two to three weeks under warm, bright conditions. Pot when roots are several centimeters long.
For direct soil: fill a small pot with airy aroid mix, pre-moisten, and create a planting hole. Insert the cutting so one node sits below the surface, firm lightly, and water once to settle. Place in bright indirect light. Water when the top centimeter begins to dry. Avoid fertilizer until new growth indicates roots are functioning.
Building the Right Rooting Environment
Light drives the energy budget for rooting. Bright indirect light supports photosynthesis without overheating water or scorching leaves. Dim corners slow rooting and keep media wet longer, which increases rot. If your only bright spot receives an hour of direct morning sun, that is usually acceptable; harsh midday sun is not.
Temperature should stay consistently warm. Root initiation stalls below roughly 18°C (65°F) for extended periods — NC State Extension notes this species prefers warm temperatures and should avoid cold drafts. A heat mat set to low can help in cool rooms, but measure the vessel temperature — excessive bottom heat cooks cuttings in closed bags.
Humidity around 50–70% suits E. pinnatum — NC State Extension lists moderate humidity among its indoor preferences — and reduces leaf wilt on unrooted cuttings. Grouping jars or using a loose humidity tent helps in dry homes. Vent tents daily to prevent mold.
Airflow prevents fungal issues on leaves and moss. Stagnant, sealed environments produce condensation and mold even when roots are forming. A small fan in the room — not blowing directly on cuttings — improves overall air exchange.
Aftercare From Roots to Potting Up
When water roots reach 5–8 cm (2–3 inches) with branching, move the cutting to a small pot with drainage and a well-draining mix similar to what the mature plant uses: potting soil amended with 20% perlite or a blend with orchid bark for chunkier texture, as described in our soil guide. Hold the cutting at the correct depth, spread roots gently, backfill, and water thoroughly until excess drains.
Water-rooted cuttings need a gentler moisture rhythm for the first two weeks than established plants. Keep the mix evenly slightly moist while water-adapted roots adjust to less continuous wetness. Gradually shift toward the normal Epipremnum Pinnatum watering rhythm of watering when the top 3–5 cm of mix dries. Do not fertilize until you see active new growth; fresh roots and new mix supply enough nutrients initially.
If you propagated to create a fuller pot, you can plant several rooted cuttings together once each has a viable root system. Space them so stems do not overlap wetly, and use a pot only slightly larger than the combined root mass. Oversized pots stay wet too long and stall young roots.
For long-term display, install a moss pole when the new plant has settled — usually after one to two months in soil. E. pinnatum only develops large fenestrated leaves when climbing; propagation gives you juvenile plants by design, but early pole training sets the trajectory toward mature foliage over the next one to two years with strong light and consistent care.
Troubleshooting Failed Cuttings
Soft, black, or foul-smelling stem base indicates rot. Cut back to firm, pale tissue with a sanitized blade, refresh water or replace moss, and reduce moisture. If no sound node remains, discard the piece.
Firm cutting, no roots after six weeks may point to too-cool temperatures, insufficient light, a non-viable node, or a cutting taken from woody dormant growth. Move to warmer bright indirect light, confirm node submersion, and avoid daily removal from the medium. Replace extremely woody sections with greener growth from the parent.
Yellowing or wilting leaves on an otherwise firm stem can be normal early stress or a sign of dehydration. Increase humidity modestly, confirm the node is moist, and reduce direct sun. If the base stays firm, wait. If the base softens while leaves yellow, rot is advancing — trim or restart.
Algae in water is cosmetic unless it coats the stem. Move to a darker glass, reduce light intensity slightly, or change water more frequently.
Common Mistakes to Avoid
The most frequent failure is propagating without a node, often because a pretty leaf was snapped off without stem tissue. Second is leaving water unchanged until oxygen drops and the stem rots. Third is submerging leaves, which decay and bacterially contaminate the vessel. Fourth is using long, leafless vine sections with only the tip in water. Fifth is potting too early into dense, wet soil before roots can handle it.
Less obvious but common: propagating a sick parent and expecting healthy offspring, burying the node too deep in compacted moss, and checking roots daily by pulling cuttings out of moss or soil, breaking delicate initials each time. Label your cuttings with date and orientation if you take multiple pieces from one pruning session.
Conclusion
Propagating Epipremnum Pinnatum comes down to three decisions: take a firm stem cutting with at least one viable node, place that node in a moist, oxygen-rich environment (water, sphagnum moss, or airy soil), and give the cutting bright indirect light with stable warmth until roots are strong enough to pot. Water lets you watch progress; moss eases the move to soil; direct soil skips a stage but demands careful moisture control. E. pinnatum may root more slowly than Golden Pothos, so judge success by firm tissue and branching roots rather than a rigid calendar.
Once rooted, pot into a small well-draining container, acclimate water-grown roots gently, and consider a moss pole early if you want mature fenestrated foliage someday. Handle cuttings safely around pets, refresh stagnant water before rot sets in, and restart with greener material if a section turns mushy.
When to use this page vs other Epipremnum Pinnatum guides
- Epipremnum Pinnatum overview — Start here for whole-plant context, cultivar identity, and toxicity before multiplying vines.
- Epipremnum Pinnatum watering — Use after potting up rooted cuttings to learn the normal dry-down rhythm for established plants.
- Epipremnum Pinnatum light — Read when planning long-term fenestration; propagation alone does not produce split adult leaves.
- Epipremnum Pinnatum pruning — Pair with propagation when a long bare vine needs shortening and you want to root the trimmings.