Ginger Pruning Guide: Leaves, Spent Stems & Harvest Cutback
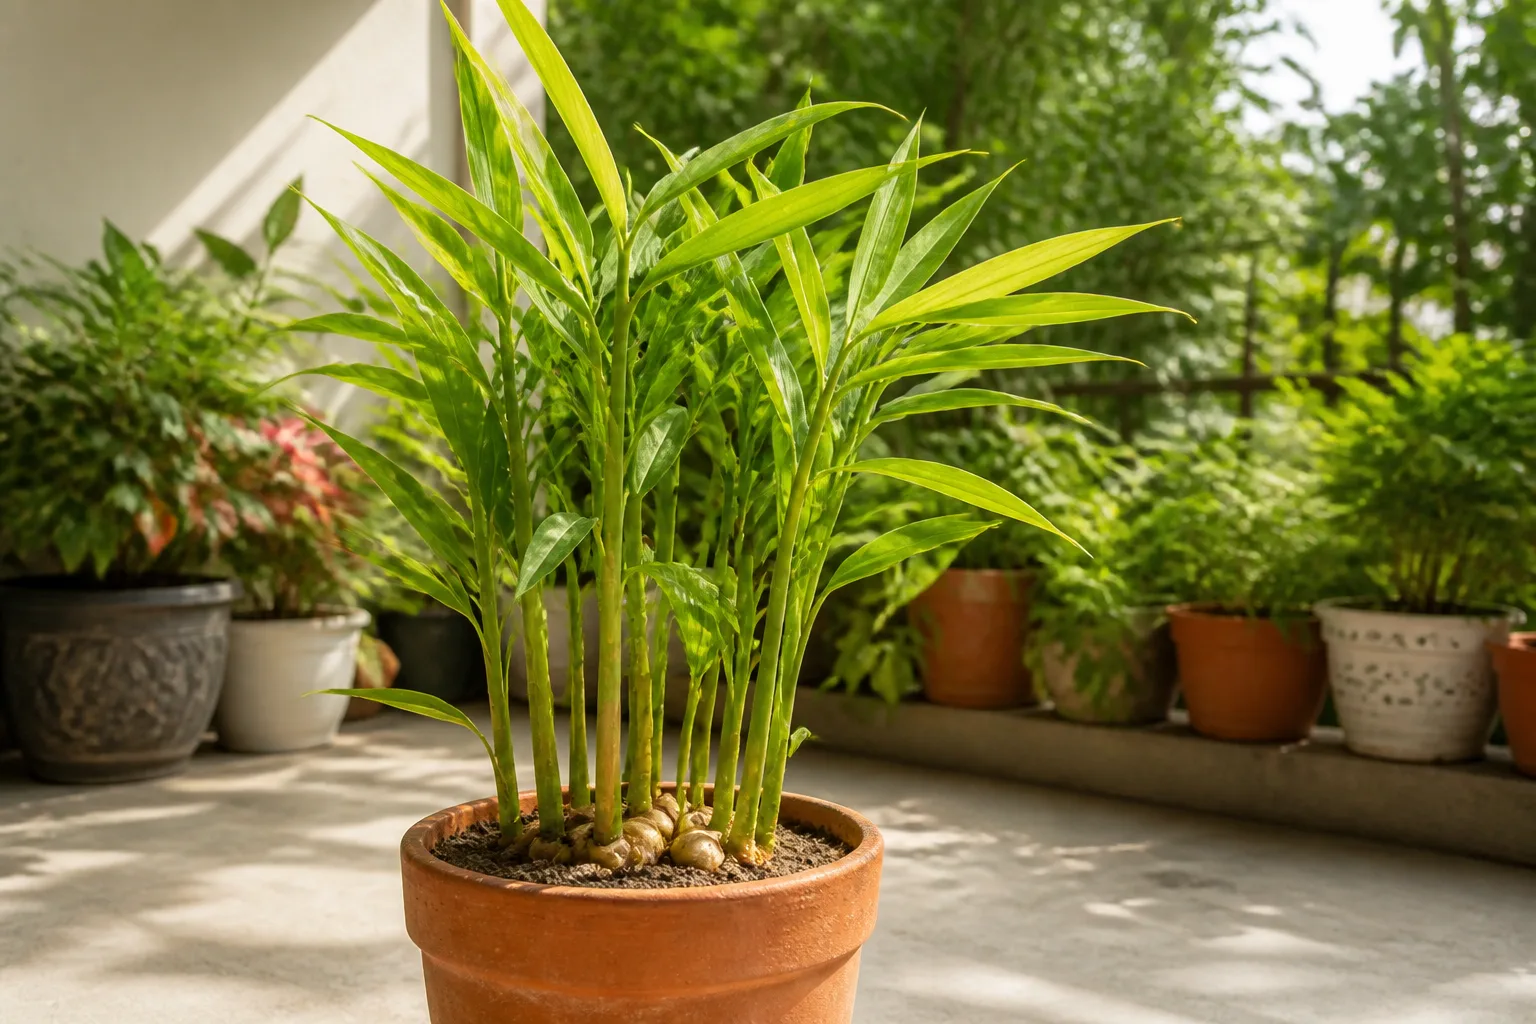
Ginger Pruning Guide: Leaves, Spent Stems, and Harvest Cutback
Ginger Pruning Guide: Leaves, Spent Stems, and Harvest Cutback
First action: Walk the clump and remove only fully dead, collapsed, or clearly diseased leaves—cut each leaf or spent pseudostem near the soil line with clean sharp scissors or bypass pruners before you touch healthy green foliage or dig for harvest. Ginger (Zingiber officinale) is a tropical rhizome crop, not a woody shrub, so “pruning” mostly means foliage cleanup and end-of-season cutback timed to dormancy.
For whole-plant context—warm humid growth, moist rich mix, and harvest timing—see the Ginger overview.
Reviewed by LeafyPixels Review Board · Author: sai-ananth
Quick answer
Prune Ginger to clear failed leaves and spent tops—not to tip-pinch it into a bushy houseplant. UF/IFAS describes edible ginger as a 2–3 ft plant with lush grassy foliage whose mature rhizomes are harvested in fall or when the tops have died back; Missouri Botanical Garden adds that shoots are upright pseudostems of tightly rolled leaf sheaths rising from shallow fleshy rhizomes.
During active growth, cut only dead or damaged leaves at the base. At harvest or winter rest, cut or pull the spent dry canopy after it yellows—Virginia Extension notes you remove all the foliage once a container plant goes fully dormant. Pruning cannot thicken rhizomes if the pot is too dim, too dry, or chronically cold and wet—fix light and watering first.
What pruning does for Ginger
Ginger grows as a foliage clump of narrow leaves on reed-like pseudostems that feed underground swell. UW–Madison Extension notes those shoots are sheaths wrapped tightly around one another, gradually spreading into a dense clump if you do not harvest. Owners reach for shears when leaves brown mid-season, sun scorches tips, a spent flower spike looks untidy, or the whole canopy collapses at season’s end.
Four jobs show up repeatedly:
- Cleanup removes fully yellow, brown, torn, or pest-coated leaves whenever they appear.
- Flower-stalk tidy-up cuts a spent spike after bloom if you grow ginger mainly for rhizomes or foliage.
- End-of-season cutback removes dry, wilted tops when harvest or dormancy arrives.
- Harvest prep trims stems off dug rhizomes so you can cure, store, or replant firm pieces.
Pruning cannot force bushier branching the way topping a rubber plant does. New leaves emerge from rhizome buds and shoot bases, not from mid-blade cuts. It also cannot fix tip burn from harsh sun, rhizome rot from cold wet pots, or stalled growth in deep shade—correct those conditions, then trim.
Cleanup vs harvest cutback
| Situation | Action | Timing | Expected outcome |
|---|---|---|---|
| Fully dead, yellow, or torn leaves | Cleanup at leaf/pseudostem base | Anytime | Cleaner clump; less debris on soil |
| Soft, collapsing shoots on wet cool mix | Cleanup after checking rhizomes | Anytime, but fix moisture first | Removes failed tissue; does not cure rot |
| Spent flower spike | Cut stalk near base | After bloom fades | Tidier look; energy stays with rhizomes |
| Whole canopy yellowing and dying back | Full cutback / harvest prep | Late season dormancy | Ready to dig, thin, or rest rhizomes |
If leaves look thin and stretched in a dark corner, improve placement before removing healthy green blades—cutting a shade-starved canopy only reduces the factory that fills rhizomes.
When to prune Ginger
Best window for full cutback
Save whole-plant cutback for late season, when leaves begin to yellow and tops die back. UF/IFAS advises harvesting mature ginger in the fall or when the tops have died back, after roughly eight to ten months for fully developed rhizomes. Texas A&M AgriLife likewise places the best harvest around 8–10 months of age. EDIS EP638 describes the same cue: as days shorten and temperatures cool, leaves turn yellow and plants naturally enter dormancy while rhizomes enlarge.
In frost-free Indian balconies and similar climates, this often lands after the main warm-season flush fades into cooler, drier weather. In cooler zones, UW–Madison notes plants lose all the stems with short winter days—cut spent tops after that dieback rather than forcing an early scalp.
What you can remove anytime
Fully dead leaves, clearly diseased blades, and broken leaf tips can come off year-round. That is maintenance, not “hard pruning.” Defer any large green-leaf removal if you just repotted, moved the pot, or the mix smells sour—stabilize roots and moisture first.
When not to prune
Do not shear a lush green ginger clump mid-season to reduce height. Those leaves are the photosynthate source for rhizome fill. Do not cut into firm rhizomes while “tidying” foliage. Do not strip nearly every green leaf after a short dry spell and call it dormancy—true dormancy shows progressive yellowing and dieback across the canopy, not a few crispy tips from missed watering or harsh sun.
What to check before cutting
Before the first cut, check four things:
- Leaf status: Is the blade fully yellow/brown and soft, or still mostly green with a dry tip? Remove whole failed leaves; leave functional green area when only the margin is scorched.
- Crown and soil: Gently part the base. Soft, sour, collapsing shoots on wet cool mix point to rhizome stress—cleanup helps visibility, but watering and drainage decide recovery. NC State flags root rot in cold wet soil and brown-tipped foliage in full sun.
- Growth stage: Expanding green leaves mean keep canopy. Widespread yellowing and dieback mean harvest or dormancy cutback is appropriate.
- Goal: Culinary rhizomes need maximum healthy leaf time; ornamental tidy-up still should spare green blades until natural senescence.
Tools: sharp bypass pruners or kitchen scissors for leaf sheaths, a clean knife only if dividing rhizomes later, and 70% isopropyl alcohol to wipe blades before you start and between plants.
The first cut to make
Remove one clearly failed leaf or pseudostem first. Choose tissue that is fully yellow, brown, collapsed, or heavily damaged. Follow the leaf sheath down to near the soil line and cut cleanly there. Do not tear living tissue off the crown, and do not nick neighboring green shoots or firm rhizomes.
That single cut shows you how the base feels, clears debris that can hold pests and moisture against the crown, and stops you from jumping straight into a mid-season hard cutback. After cleanup, decide whether anything else is needed—usually it is not until dormancy or harvest.
How to prune Ginger step by step
- Sanitize tools and set aside a bag for diseased tissue. Wipe blades with alcohol before the first cut.
- Clear failed leaves and spent shoots. Cut each spent leaf or dry pseudostem near the base. Healthy dry foliage can go to compost if your pile runs hot; bag soft, rotten, or moldy tissue.
- Optional flower cleanup. After the cone-like spike fades, cut the flower stalk near the base. NC State notes flowers grow on a separate leafless stem from the foliage, and container plants rarely bloom—so this step is uncommon indoors.
- Leave healthy green canopy. Do not tip-pinch leaf blades or cut mid-leaf to “shape” the plant. Mid-blade stubs do not branch into a denser plant.
- End-of-season cutback. When the clump yellows and dies back for harvest or rest, cut spent tops near the soil line, or remove them when you dig. Virginia Extension’s harvest method is to dig carefully, then cut the stems off the rhizomes; for overwintering pots, remove all foliage once the plant is fully dormant.
- Separate harvest from grooming. If you are digging for kitchen use or propagation, that is rhizome work—keep cut faces clean, let divisions callus a day or two before replanting, and save firm pieces with eyes. UF/IFAS prefers thinning rather than stripping the whole crop when you want sprouts again next warm season. EDIS notes stems and roots are trimmed off after harvest before curing.
How much you can safely remove
During active growth, remove only failed tissue—typically a small fraction of the canopy. Ginger needs those green blades for rhizome development; taking half the canopy green is a crop setback, not a style choice.
At true dormancy or harvest, removing the entire spent canopy is normal and expected. The plant is finished with those leaves. If you are overwintering the pot without digging, cut dry tops after they collapse, then stop watering while leafless—UW–Madison advises no water when dormant until new shoots appear.
Where to cut — and what not to cut
Cut:
- Fully yellow, brown, or mushy leaves at the leaf-sheath base near soil level
- Spent flower stalks near the crown after bloom
- Dry, wilted tops at season’s end
- Stems attached to dug rhizomes at harvest
Do not cut:
- Healthy green leaves just to shorten the plant
- Firm rhizomes while “pruning” foliage
- The newest emerging shoot tips unless they are clearly rotten
- More than a cleanup pass when the plant was recently moved or the mix is failing
Ginger does not respond to classic node-based heading cuts the way mint or ashwagandha does. Its architecture is rhizome-driven leaf shoots. Treat it like turmeric and other ginger-family senescence management, not shrub shaping.
Aftercare after pruning
Keep conditions steady after cleanup. Maintain the moist but draining mix while leaves are still green and expanding; do not fertilize as a reaction to cutting. After a full dormancy cutback, reduce water sharply and stop feeding until new shoots appear in warmth—EDIS notes plants are not actively taking up nutrients in winter dormancy.
Watch for tip burn if afternoon sun is harsh, and for soft collapse after cool wet weather—check rhizomes, not another round of green-leaf removal. Missouri Botanical Garden warns rhizomes rot in cold wet soil, so drainage and warmth matter more than extra cuts.
If you dug for harvest, cure or use firm rhizomes, and set aside healthy eye-bearing pieces for the next planting cycle via the propagation guide.
Recovery timeline and signs it worked
- Cleanup only: the clump looks clearer within a day; remaining green leaves should stay firm if moisture and warmth are right.
- Mid-season mistake (too much green removed): expect slower rhizome swell and a longer wait for replacement leaves; new shoots still come from the rhizome, not from cut stubs.
- After dormancy cutback / harvest: no leafy recovery until the next warm, moist cycle—often late spring where winters are cool, or with the next monsoon-style flush in tropical gardens.
- Success signs: firm remaining leaves, no spreading soft rot at the crown, and—when growth resumes—new shoots from soil level.
- Trouble signs: progressive mush at the base, sour soil smell, or spreading yellow wilt—fix care, not more pruning.
Mistakes to avoid
- Scalping green leaves mid-season to force a “compact” look
- Calling drought stress or sunburn dormancy and cutting a still-green plant to the ground
- Leaving wet, diseased leaf litter packed against the crown
- Stacking hard cutback, repotting, and fertilizer changes on the same day
- Expecting mid-leaf cuts to sprout side branches
- Watering heavily after a full dormancy cutback while the pot is leafless
Related Ginger guides
- Ginger overview — identity, habit, and season-long care
- Ginger light — partial shade, tip burn in harsh sun, and stretch in weak light
- Ginger watering — steady moisture in growth versus dry dormancy rest
- Ginger soil — rich, moist, draining mix for rhizomes
- Ginger propagation — dividing eye-bearing rhizome pieces after harvest
- Ginger repotting — when thick rhizomes press or crowd the pot