Ginger Propagation: Rhizome Division Guide
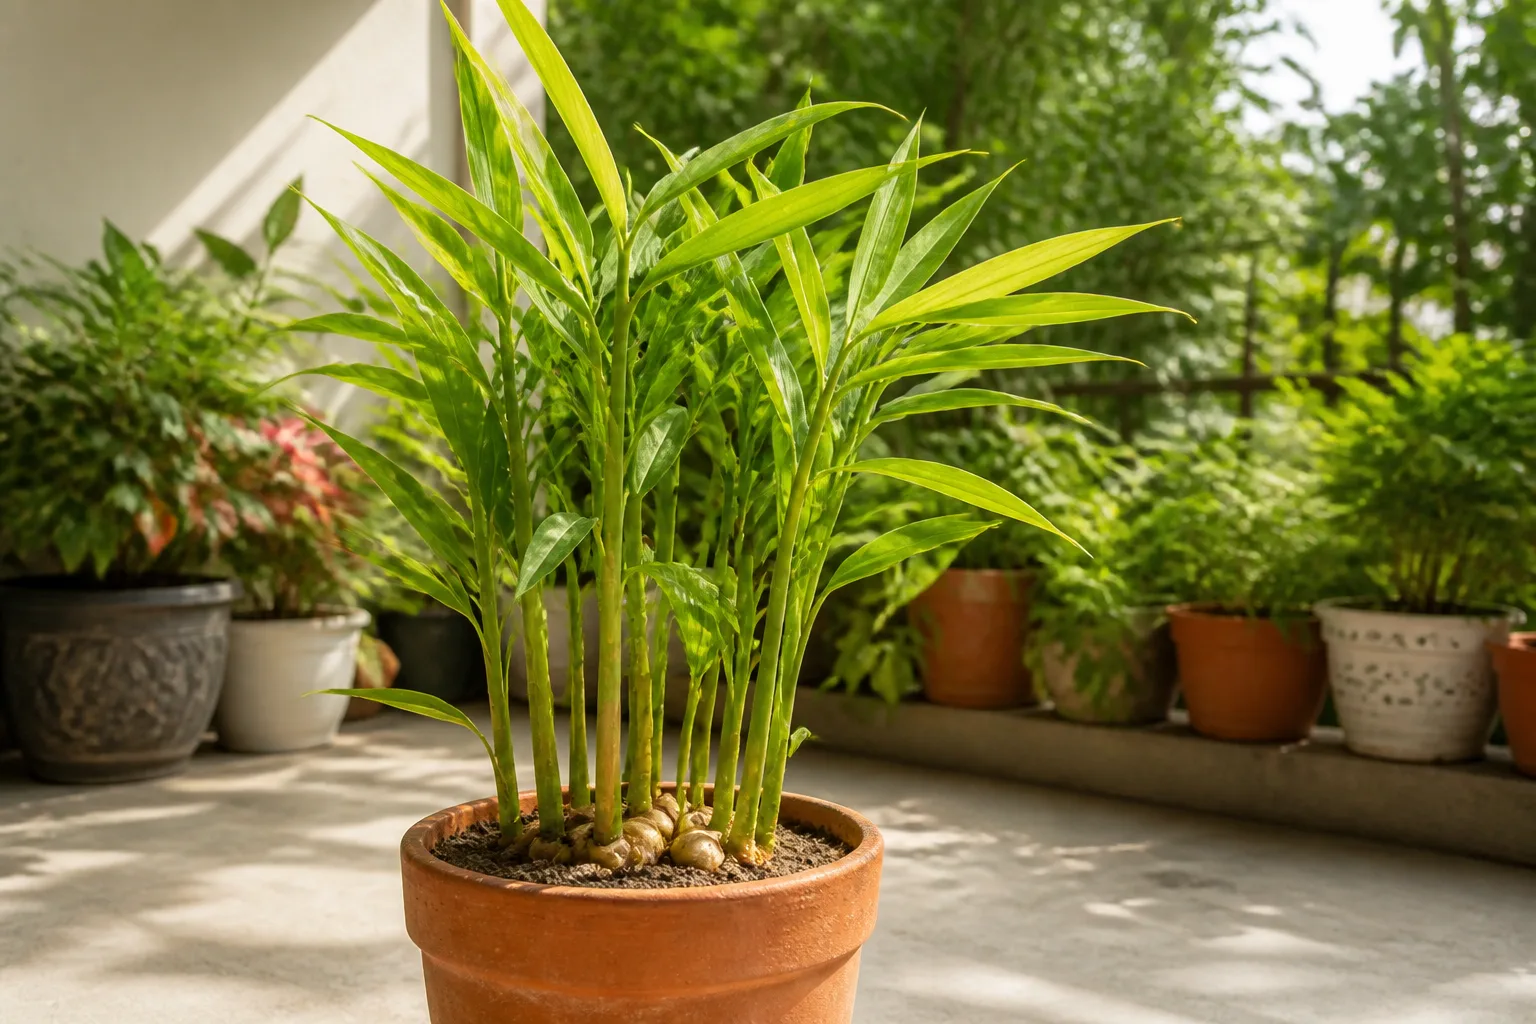
Ginger Propagation: Rhizome Division Guide
Ginger Propagation: Rhizome Division Guide
Ginger propagation is a rhizome job, not a stem-cutting project. Culinary ginger—Zingiber officinale, the Adrak you cook with—sends up leafy pseudostems from fat underground stems. New plants start when a piece of that rhizome carries at least one healthy growing bud (an “eye”) into warm, free-draining mix. University of Wisconsin–Madison Extension describes edible ginger as a tender herbaceous perennial from humid, partly shaded Southeast Asian forests, grown worldwide for those knobby rhizomes rather than for showy flowers (Wisconsin Horticulture).
If you want more plants for a balcony pot, kitchen garden, or next season’s seed stock, divide firm rhizomes, let fresh cuts dry, plant buds up in warm soil, and water lightly until shoots appear. Do not confuse this spice crop with wild ginger (Asarum), a different genus whose roots are not a culinary substitute (Wisconsin Horticulture). Pair this page with ginger soil, ginger watering, and ginger light once shoots emerge—propagation only works if the young clump can live in the same warm, partial-shade culture the parent needs.
Why ginger multiplies from rhizomes, not seed
Home and commercial growers almost always plant rhizome pieces, often called seed ginger or seed rhizomes. NC State Extension’s plant profile states that propagation is done by cutting fresh rhizomes into short pieces with several healthy buds, drying the cuts briefly, then planting just below the soil surface in partial shade (NC State Extension). UF/IFAS Gardening Solutions is blunt: Zingiber officinale is not grown from seed for home plantings; sellers stock rhizome “seed” pieces, and supermarket roots can work for small plantings (UF/IFAS Gardening Solutions).
Culinary ginger flowers are usually sterile and rarely set seed, which is why seed packets are not the practical route for named cooking ginger (Wisconsin Horticulture). Tissue-culture plantlets exist for clean nursery stock, but UF/IFAS production guidance notes that rhizome seed pieces generally give better first-year rhizome yield than tissue culture for ginger grown as a spice crop (UF/IFAS EP638). For a home pot, one sound rhizome piece with two buds is enough.
Choose plump rhizomes with live buds
Start with firm, heavy fingers—not shriveled, moldy, or soft pieces. Look for swollen buds at the tips of the “fingers.” Buds that have started to turn green are even more likely to grow (Wisconsin Horticulture). Reject rhizomes with water-soaked spots, sour smell, or collapsed tissue; UF/IFAS warns that imported food rhizomes and saved garden stock can carry pathogens, so inspect closely and discard anything suspect (UF/IFAS EP638).
Handle young rhizomes gently. The corky brown-to-golden skin is thin and abrades easily; damaged skin invites spoilage before the piece ever roots (Wisconsin Horticulture). If you are dividing a living pot of Adrak, dig when the clump is crowded or after a partial harvest, and keep only solid pale-yellow flesh on the cut faces.
Organic and untreated pieces sprout more reliably
Grocery-store ginger often works, but commercial rhizomes are sometimes treated with a growth inhibitor so they stay dormant on the shelf. Wisconsin Extension notes that treated pieces may fail to sprout, while organic pieces—especially those already showing swollen or green-tipped buds—are more reliable (Wisconsin Horticulture). Soaking plump pieces overnight in warm water before planting is optional but commonly used to wake slightly dry rhizomes (Wisconsin Horticulture).
If a supermarket piece stays inert for six weeks in warm mix, the problem is often dormancy chemistry or cold soil—not your watering schedule. Try a second piece with visible eyes rather than flooding the first pot.
Best timing for India and tropical balconies
Plant when soil is warm and nights are no longer cold. Ginger grows only when soil is above about 68°F (20°C) and performs best near 77°F (25°C); bring containers in before nights drop below about 50°F (10°C) to avoid rot in cold wet mix (Wisconsin Horticulture). UF/IFAS production guidance plants rhizomes when average soil temperature stays above about 70°F (21°C) and nights stay above 50°F, roughly March in warmer zones to May farther north (UF/IFAS EP638).
In most of India, that maps to late winter through early summer as beds and pots warm—often February to April in frost-free plains and coastal areas, later in cool hills. UF Gardening Solutions plants Florida ginger in spring before extreme heat: as early as February in warmer districts and from March farther north (UF/IFAS Gardening Solutions). Avoid planting into chilly monsoon-soaked beds where drainage fails; warm and moist beats cold and waterlogged every time.
How to cut and cure seed pieces
Use a clean, sharp, non-serrated knife. Cut along natural joints of a large rhizome rather than crushing through the center. UF/IFAS recommends sanitizing the knife and, for larger plantings, surface-sterilizing cut faces with a dilute sanitizer such as about 50 ppm chlorine from household bleach or a hydrogen peroxide product before curing (UF/IFAS EP638). Home growers dividing a healthy kitchen rhizome can skip commercial dips if tools and hands are clean—but never plant soft, moldy, or foul-smelling pieces.
Piece size, bud count, and drying time
Aim for pieces about 2–3 inches (5–8 cm) long and roughly 1–2 ounces (30–60 g), each with at least two buds that can form new shoots (UF/IFAS EP638). Wisconsin Extension likewise wants at least two eyes per section (Wisconsin Horticulture). UF Gardening Solutions uses slightly smaller 1–1.5 inch pieces for garden beds and spaces them about 15 inches apart because the underground clump expands through the season (UF/IFAS Gardening Solutions).
After cutting, dry (cure) the pieces for a few days in a warm, dry indoor spot so cut faces callus and resist rotting (UF/IFAS Gardening Solutions; Wisconsin Horticulture; UF/IFAS EP638). NC State suggests drying cuts for a day or two before planting (NC State Extension). Skipping this step is one of the fastest ways to turn a promising piece into mush in warm, wet mix.
Planting depth, orientation, and first moisture
Plant with growth buds pointing upward, about 1–2 inches (2.5–5 cm) deep. Wisconsin places rhizomes about an inch deep; UF Gardening Solutions plants about an inch below the soil line; UF/IFAS production guidance uses about a 2-inch planting depth for rhizomes (Wisconsin Horticulture; UF/IFAS Gardening Solutions; UF/IFAS EP638). Match your mix: denser outdoor beds can sit toward the shallow end; light soilless mixes can take the deeper end.
Water lightly until growth begins. Roots form before shoots show, and that wait often takes a few weeks (Wisconsin Horticulture). UF Gardening Solutions keeps soil moist for a few weeks until sprouts emerge (UF/IFAS Gardening Solutions). NC State stresses watering sparingly until growth starts, then watering and feeding regularly, specifically to avoid root rot (NC State Extension). Once leaves develop, shift to the evenly moist—not soggy—rhythm covered in the ginger watering guide.
Use a rich, organic, free-draining mix. UF Gardening Solutions likes well-drained soil amended with organic matter—an even sand-and-manure style blend outdoors—and notes ginger is excellent in containers with at least about 8 inches of mix depth because roots stay relatively shallow (UF/IFAS Gardening Solutions; UF/IFAS EP638). Details and DIY ratios live on the ginger soil page.
Pre-sprouting for a head start
If outdoor soil is still cool, pre-sprout seed pieces indoors. UF/IFAS describes holding pieces on humid potting mix under high humidity near about 82°F (28°C) soil temperature; sprouts often appear in 1–2 months, and temperatures above about 86°F (30°C) plus excess moisture raise rot risk (UF/IFAS EP638). Cover lightly to hold humidity, inspect weekly for gray mold, then pot sprouted pieces carefully without snapping the fragile new roots and shoots.
On an Indian balcony, a warm corner of the house in late winter works the same way: start pieces in small pots of clean mix, keep them barely moist and warm, then move outdoors once nights stay mild. Do not refrigerate rhizomes you intend to replant; cool dry storage for planting stock is a different protocol than kitchen refrigeration (Wisconsin Horticulture).
Pots vs beds for new ginger plants
Containers are the easiest way to control warmth, shade, and drainage. Wisconsin notes a 14-inch pot can hold about three average rhizomes and that ginger tolerates crowding (Wisconsin Horticulture). UF/IFAS container guidance often uses three seed rhizomes per large nursery pot or one rhizome per roughly 5-gallon container, with about 8 inches of mix depth sufficient (UF/IFAS EP638). Give new pots bright partial shade—a couple of hours of softer light—not harsh all-day afternoon sun that browns leaf tips (UF/IFAS Gardening Solutions; NC State Extension). Placement details belong on the ginger light guide.
In garden beds, amend for drainage and organic matter, space pieces so clumps can expand (about 15 inches in UF home guidance, or about 1.5 feet along rows in production beds), and mulch to hold moisture without creating a permanent mud layer (UF/IFAS Gardening Solutions; UF/IFAS EP638). When a pot becomes rhizome-packed, follow ginger repotting rather than forcing another division into exhausted mix.
Aftercare from planting to first shoots
Expect a quiet period. Rhizomes often need two to four weeks—sometimes longer in cooler weather—before green shoots break the surface because roots establish first (Wisconsin Horticulture). Keep the mix lightly moist, warm, and in partial shade. Do not fertilize hard until active leafy growth returns; newly planted pieces have no leaf canopy to use heavy feed. Resume feeding after shoots are growing, following the ginger fertilizer guide.
Ginger is a long-season crop. Fully developed rhizomes often take about eight to ten months; milder “baby ginger” can be harvested earlier, around four to five months in some systems (UF/IFAS Gardening Solutions; UF/IFAS EP638; Wisconsin Horticulture). When foliage yellows into dormancy, stop watering container plants that are leafless; resume when new shoots return (Wisconsin Horticulture).
Common reasons ginger propagation fails
No buds on the piece. A smooth scrap without eyes will not sprout. Cut again so each section has at least two buds.
Treated supermarket rhizomes. Growth inhibitors keep grocery pieces dormant; choose organic or already-sprouting stock (Wisconsin Horticulture).
Cold, wet soil. Rhizomes planted into chilly, saturated mix rot before they can root. Wait for warm soil and improve drainage (Wisconsin Horticulture; NC State Extension).
Cuts planted while still wet. Fresh wounds in soggy mix invite soft rot. Cure pieces for a few days first (UF/IFAS Gardening Solutions).
Overwatering before shoots appear. Constant saturation starves new roots of oxygen and favors Pythium, Phytophthora, Fusarium, and related problems UF/IFAS has documented on ginger rhizomes (UF/IFAS EP638). Keep moisture light until growth starts, then even—not swampy.
Contaminated starting material. Soft, discolored, or foul rhizomes spread disease; dispose of rotten plants and do not reuse that mix for the next crop (UF/IFAS EP638). Seedling-style damping-off pathogens thrive in cool, wet, poorly aerated media—another reason to use clean mix and avoid waterlogging while pieces establish (NC State Extension).
Thinning harvests so the clump continues
You do not have to dig the entire plant to multiply or cook. UF Gardening Solutions recommends thinning rather than stripping the whole crop so remaining rhizomes can sprout again when weather warms (UF/IFAS Gardening Solutions). Wisconsin growers dig all or part of the rhizomes every year or two from containers (Wisconsin Horticulture). NC State likewise advises carefully harvesting several rhizomes while leaving the rest to continue (NC State Extension).
Save the firmest pieces with clear buds as next year’s planting stock. Ideal storage for seed rhizomes in production systems is cool and moderately dry—about 55–60°F (13–16°C) at around 60% relative humidity—not a warm kitchen counter and not a fridge set for food ginger (UF/IFAS EP638). For day-to-day cooking, store kitchen rhizomes separately from your planting stock.
When to use this page vs other Ginger guides
Use this propagation page to select rhizomes, cut and cure pieces, plant them, and nurse them until shoots appear. Use ginger repotting when an established clump needs a larger pot or a soil refresh without creating many new plants. Use ginger watering and ginger soil once leafy growth is underway and moisture management matters more than bud selection. Use ginger light when tip burn or weak stretch points to placement, not to a failed division. Use the ginger overview when you need the full care picture before you buy rhizomes.
Related Ginger guides
- Ginger overview — habit, climate fit, and how the care cluster fits together
- Ginger light — partial shade, balcony placement, and tip-burn warnings
- Ginger watering — light moisture until sprouts, then even moisture in heat
- Ginger soil — rich, free-draining mixes for rhizomes
- Ginger fertilizer — feeding after shoots are active
- Ginger repotting — upsizing crowded containers and dividing established clumps
Conclusion
Successful ginger propagation comes down to live buds, warm free-draining mix, cured cut faces, and restrained watering until shoots appear. Choose plump Zingiber officinale rhizomes with at least two eyes, plant buds up about 1–2 inches deep when soil is warm, and give partial shade once leaves emerge. Thin harvests so the mother clump can return next season, and move established plants with the repotting and watering guides rather than drowning a silent rhizome on a calendar.