Anthurium Clarinervium Care: Light, Water, and Soil
Learn how to grow Anthurium clarinervium with bright indirect light, a breathable mix, thoughtful watering, practical humidity, and clear troubleshooting.
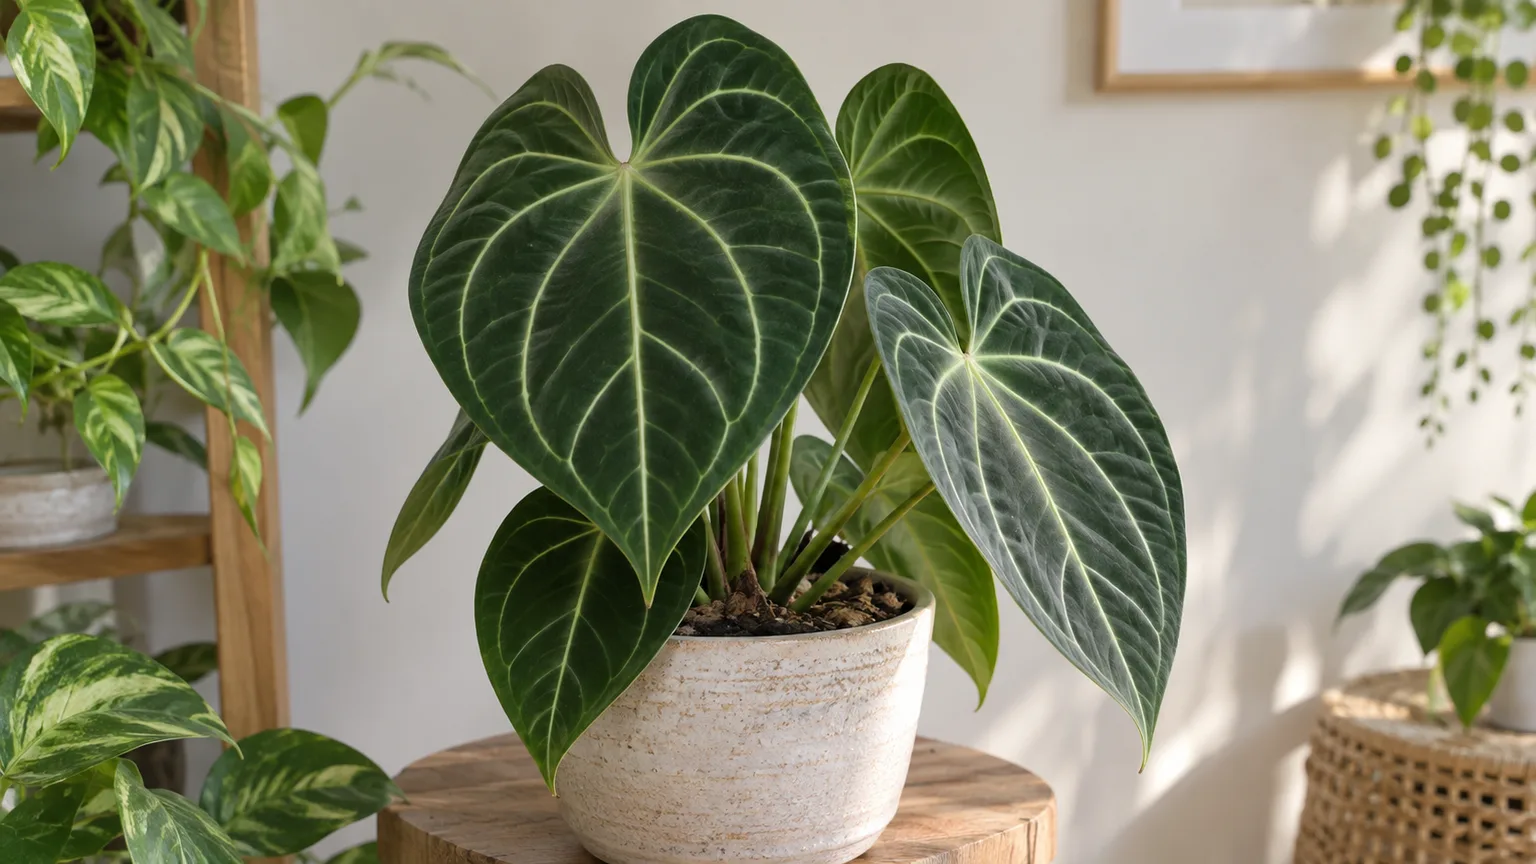
Anthurium clarinervium, often called velvet cardboard anthurium, is grown for thick, heart-shaped leaves with a dark velvety surface and pale veins. It can thrive indoors without a greenhouse if you give it bright filtered light, an airy root zone, and a watering routine based on how the pot dries. The most common mistake is to keep its mix constantly wet because it is tropical; its roots need moisture, but they also need air.
This is a slow-growing foliage plant, so judge success by healthy new leaves and firm roots, not by a quick burst of size or showy flowers. Start by placing it where the light is bright but indirect. Then learn how long your particular potting mix takes to dry before deciding when to water again.
Care at a glance: the setup that prevents most problems
Place Anthurium clarinervium near a bright window with filtered or reflected light, and protect its leaves from long stretches of direct midday sun. Use a chunky potting mix and a pot with open drainage holes; water thoroughly when the upper inch or two of mix has dried, then empty any water that collects in the saucer or outer pot. Keep the plant warm and aim for moderate to high room humidity with some air movement.
Feed lightly while it is actively growing, usually in spring and summer, and pause or reduce feeding as growth slows in winter. Repot when the roots fill the pot or the mix has broken down and is staying wet too long, not simply because a fixed number of months has passed. These basics are more reliable than rigid instructions such as watering every seven days or keeping the soil wet at all times, because windows, pot materials, room temperature, and mix all change the dry-down rate.
What makes Anthurium clarinervium different
The plant belongs to the aroid family, Araceae, and is native to Mexico. Its large, thick leaves have prominent pale veins that make it easy to distinguish from the glossy green foliage and colorful spathes of many florist anthuriums. Anthurium clarinervium can produce a small spathe and spadix, then berries after pollination, but most indoor growers value the foliage more than the blooms. North Carolina State Extension describes the species’ leaves as large, velvety, heart-shaped, and marked with light veins (NC State Extension Plant Toolbox).
Care sources do not use one consistent label for how this species grows in nature: some call it an epiphyte, while another species-specific guide describes it as a lithophyte associated with limestone outcrops. The difference is botanical, but the practical indoor care lesson is similar: roots should not sit in dense, airless, waterlogged soil. Ohio Tropics describes its own plant as epiphytic and recommends a bark-amended mix; Smart Garden Guide describes it as lithophytic and likewise emphasizes a loose, well-aerated root zone (Ohio Tropics’ Anthurium clarinervium guide; Smart Garden Guide).
Give it bright, indirect light
Aim for a bright spot where the plant receives plenty of daylight without prolonged direct sun falling on the leaves. An east-facing window often works well. Near a south- or west-facing window, move it back from the glass or diffuse the strongest rays with a sheer curtain. Light intensity drops quickly farther inside a room, so “not in direct sun” should not become “in the darkest corner.”
If the plant is not producing new growth for a long time during the growing season, check light along with root conditions and temperature. A plant stretching toward the window or making smaller, less vigorous leaves may need a brighter position. Pale, bleached, or scorched patches on the side facing the window suggest the light is too harsh. Change placement gradually and observe new growth over several weeks; old damaged areas will not turn green again.
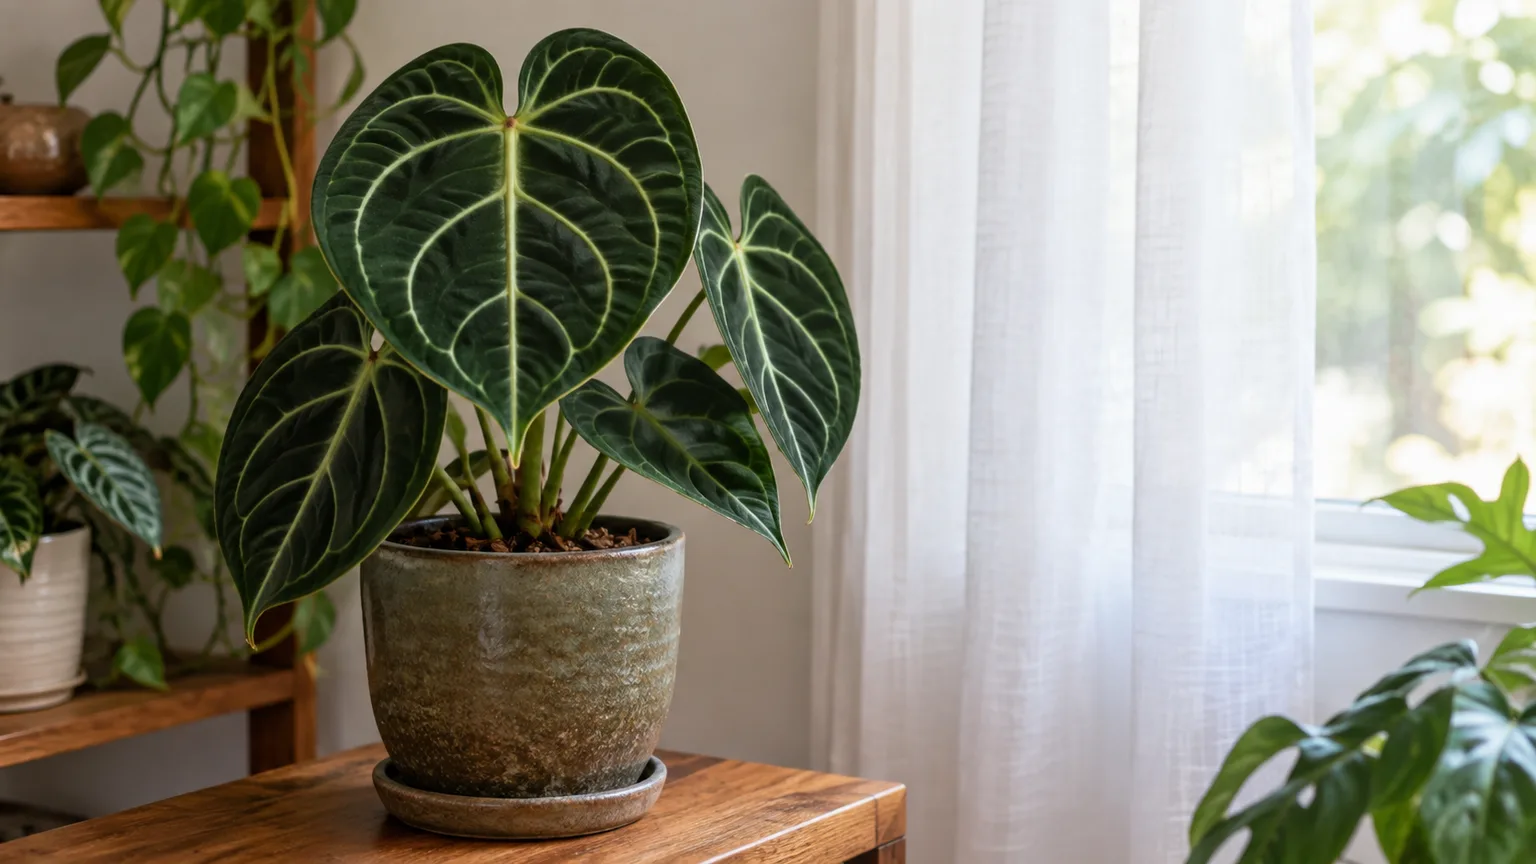
Turn the pot a little every few weeks if the plant leans toward the window, but avoid repeated dramatic moves. A stable position makes it easier to read the plant’s response. If you use a grow light, place it far enough away to provide bright ambient illumination rather than hot, concentrated light on the leaves, and follow the light’s own distance and timing instructions.
Water according to the mix’s dry-down
Do not follow a weekly watering schedule without checking the pot. Press a finger into the top inch or two of the mix, or lift the pot to learn how it feels when wet and when it is ready for water. When that upper layer has dried but the root zone is not bone dry, water slowly until excess runs from the drainage holes. Let the pot drain completely and empty the cachepot or saucer; roots should not sit in runoff.
The plant’s broad leaves can lose water quickly in warm, bright conditions, while the same pot may stay damp for much longer in winter or a dim room. An unglazed clay pot, small pot, coarse mix, and moving air generally dry faster than a large plastic pot filled with fine, peat-heavy soil. Those differences can turn “once a week” into twice a week in one home and every ten days or more in another. Use the soil and pot weight as the cue, not the calendar.
The target is an evenly hydrated root ball that has time to regain air between waterings—not a fully dry root ball and not permanently wet soil. If water races straight through a very coarse mix, make sure the root ball itself is wetted evenly; a slow soak can help hydrate bark and roots. If the mix remains wet several days after watering, inspect light, pot size, drainage, and particle size before deciding the plant simply needs less water. Ohio Tropics recommends allowing the upper couple of inches to dry while the lower mix remains lightly moist; Smart Garden Guide likewise cautions against both complete drying and soggy roots.
Use a chunky, oxygen-rich potting mix
Anthurium clarinervium does best in a mix that holds some moisture but contains enough large particles for air and excess water to move through. Dense, compacted houseplant soil can stay wet around the roots long after the surface looks dry. A mix that is almost all bark can dry too rapidly in a warm room and may demand very frequent watering. The right balance depends on your conditions, so choose an airy starter mix and adjust only after watching how it performs.
A simple starter recipe
Try equal parts by volume of quality houseplant potting mix or coco coir, medium orchid bark, and perlite or pumice. The potting base holds water and nutrients; bark creates open spaces and gives roots a rough surface to grip; perlite or pumice adds drainage and keeps the mix from packing tightly. Ohio Tropics uses orchid bark with a peat-based mix, while Smart Garden Guide also describes bark or orchid media and perlite as components of a loose aroid mix.
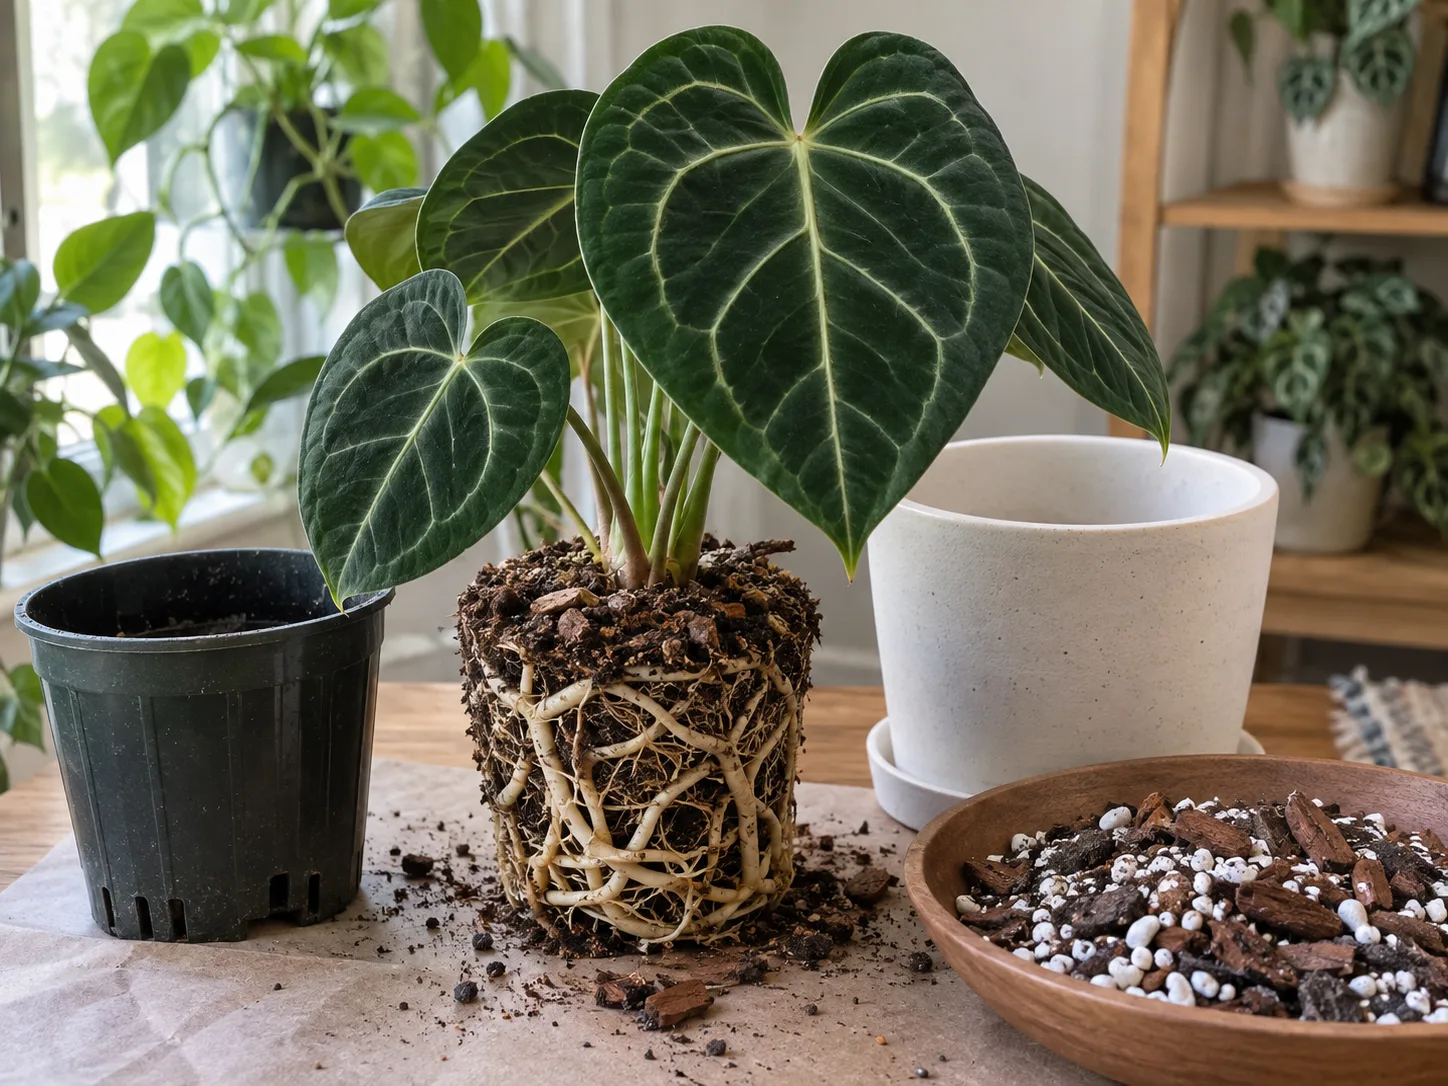
Use ingredients that are clean and suitable for houseplants, and avoid burying the plant’s crown under a heavy layer of wet mix. If your home is cool or your pot stays damp, increase the proportion of coarse bark and reduce water-retaining fine material. If the mix dries in a day or two and roots remain dry, add a little more moisture-retentive base or water more thoroughly. Do not add gravel only at the bottom of a pot as a substitute for drainage; an open drainage hole and a consistently porous mix matter more.
Aim for steady humidity and airflow
Anthurium clarinervium appreciates more humidity than the driest heated room provides, but a home greenhouse is not required. A practical indoor target is roughly 50–60% relative humidity if you can maintain it comfortably. Ohio Tropics notes that its plants can grow indoors around 40% or higher and do better near 50–60%; Smart Garden Guide recommends at least about 50%, with more generally helpful. These are grower targets rather than a single proven threshold for every plant or room.
Use a small hygrometer near the leaves to learn the actual conditions before buying equipment. If the room sits below the range and new leaves repeatedly develop dry edges, a room humidifier can lift humidity more consistently than occasional misting. Species-care pages sometimes set a higher humidity target, including Leafy Place’s guide, which is another reason to treat percentages as growing guidance rather than an on-off threshold. Do not trap the plant in a sealed container without ventilation: stagnant air and persistently wet leaves can encourage spotting and mold. Grouping plants may create a slightly more humid pocket, but the effect is limited and depends on room airflow.
Brown tips do not prove that humidity is the only issue. Check the mix, watering, direct sun, root health, and any buildup of fertilizer salts first. Raising humidity while the pot stays waterlogged will not fix root stress, and misting the velvety leaf surface is a short-lived measure, not a substitute for adjusting the room. Keep gentle air circulation around the plant, but avoid a cold draft or a fan pointed directly at the leaves.
Keep temperatures warm and stable
Normal comfortable indoor temperatures usually suit this tropical plant. A steady range around 65–80°F (18–27°C) is a reasonable target; growth may slow when the room is cooler in winter. Avoid leaving the pot against cold glass, near a frequently opened exterior door, or directly in the path of an air-conditioning vent. Also keep it away from heaters that make the leaves and mix cycle between hot, dry air and cooler conditions.
Care sources vary slightly on the preferred temperature range. NC State Extension describes the genus as thriving around 65–85°F, while Smart Garden Guide and Ohio Tropics give species-specific guidance centered on warmer room conditions and advise avoiding prolonged cold. Treat a lower limit as a caution, not as a precise switch that guarantees injury at one temperature. If the plant has been outside in warm weather, bring it in before chilly nights and acclimate it gradually when moving it back outdoors in the warm season.
Feed lightly during active growth
Feed only when the plant is actively growing and the roots are healthy. Use a balanced, water-soluble houseplant fertilizer at a conservative dilution, following its label, perhaps every four to six weeks during spring and summer. Some growers feed more lightly and more often; others feed about every two months. A cautious routine is preferable for a slow-growing foliage plant in a pot because excess fertilizer can accumulate as salts and damage roots or leaf edges.
Do not fertilize a stressed plant to force it to grow. If the mix is still soggy, leaves are yellowing, or roots may be damaged, solve that condition first. Pause feeding in winter when growth slows, and flush the mix with plain water occasionally if drainage is good and you suspect salt buildup. NC State Extension notes that fertilizer can support Anthurium growth and flowering at the genus level, but clarinervium is primarily grown for its leaves indoors; extra phosphorus is not a shortcut to showier blooms.
Repot when roots or potting mix call for it
Repot in spring or early summer when active growth can help the plant recover. Useful signals include roots densely circling the pot, roots emerging through drainage holes, water running through unusually fast because the root ball has filled the container, or old mix that has collapsed and stays wet much longer than before. A plant does not need a bigger pot just because you brought it home; let it acclimate first unless the nursery mix is failing, the pot has no drainage, or you find active pests or rot.
Choose a container only modestly wider than the existing root ball—often about one or two inches larger in diameter—with drainage holes. A pot that is much too large holds more damp mix around a relatively small root system and can make overwatering harder to detect. Ease the plant out, inspect roots for firm and healthy tissue, remove loose broken material, and move it into fresh airy mix at about the same height. Do not bury the base of the stems or pack the mix down tightly.
Water once to settle the fresh mix, let it drain, and return the plant to bright indirect light. Avoid immediately combining a new pot, a new window, a heavy fertilizer dose, and a different humidity setup. If the plant pauses briefly after repotting, keep conditions steady and watch for new growth rather than unpotting it again at the first sign of stress.
Propagate by dividing rooted offsets
The simplest home method is to divide the plant when it has developed separate stems or offsets with their own roots. Spring or early summer gives new divisions time to resume growth. Before starting, prepare small pots with drainage and fresh airy mix, water the parent lightly if the root ball is dry, and use a clean sharp knife or pruners. Anthuriums contain calcium oxalate crystals, so avoid chewing or tasting plant material; wear gloves if you have sensitive skin and wash tools and hands after handling.
Slide the plant from its pot and look for a natural separation where a side growth has its own roots and at least one viable growing point. Gently tease roots apart; cut only where necessary to separate the clump, keeping as many roots as possible on each piece. Pot the divisions at their previous depth, firm the medium lightly for support, then water and drain. Keep them warm in bright indirect light while they settle, and do not keep the mix saturated in an attempt to force new roots.
A leaf without a stem section or growing point will not reliably make a new plant. A small offset may take time to establish, and division can temporarily slow the parent, so avoid separating a weak plant just to make more pots. Seed propagation is possible but takes pollination, berries, and more time; it is rarely the practical option for someone seeking a quick second houseplant.
Prune gently and keep leaves clean
Pruning is usually limited to leaves that are fully yellow, brown, damaged, or diseased. Use clean snips to cut the petiole close to its base without nicking neighboring stems or new growth. One older leaf eventually aging out is normal; removing several healthy leaves to make the plant look smaller will reduce its ability to grow. If you want a compact appearance, adjust light and rotate the pot gently rather than cutting healthy foliage.
Dust on the broad leaves can obscure their veining and interfere with light reaching the surface. Wipe each leaf with a soft, damp cloth while supporting it from beneath; avoid abrasive cloths, oils, and aggressive rubbing that can mark the velvety finish. Keep leaves dry afterward and inspect their undersides while cleaning. This simple check can catch pests before they spread to nearby plants.
Diagnose yellowing, curling, and brown tips
Leaf symptoms have overlapping causes, so use a short diagnostic sequence: note whether one leaf or several are affected, feel the mix below the surface, review recent light or temperature changes, and inspect the roots if the pot remains wet. A single old lower leaf changing color gradually can be part of normal growth. Several leaves yellowing at once, a limp crown, or rapid decline calls for a closer look at roots and conditions.
Separate normal leaf aging from a care problem
If one of the oldest leaves yellows slowly while the newest leaves remain firm and healthy, wait until it is mostly yellow before removing it. If multiple leaves yellow after repeated watering while the mix remains damp, suspect poor drainage, a pot that is too large, low light, or root stress. If the mix is bone dry and the leaves are curling or drooping, water thoroughly and check whether the root ball has become difficult to rewet.
Brown tips and curled edges can result from dry air, inconsistent watering, strong direct sun, cold air, or salts in the root zone. Compare the symptom’s location and timing with your care history: sun-exposed patches suggest light stress; crisp edges after dry spells point toward moisture or humidity stress; damage that follows cold nights suggests temperature. Do not change fertilizer, light, pot, and watering all at once, because that obscures which adjustment helped.
Check roots and pests before changing everything
Persistent wet soil, yellow leaves, and a sour smell call for a root inspection. Slide the plant out gently and look for roots that are firm versus mushy, dark, or collapsing. If several roots are rotten, trim only the damaged portions with clean tools, discard the sodden medium, and repot in a clean pot and fresh airy mix. A plant with substantial root loss may recover slowly or not at all; do not promise a quick fix, and keep it isolated while you monitor new growth.
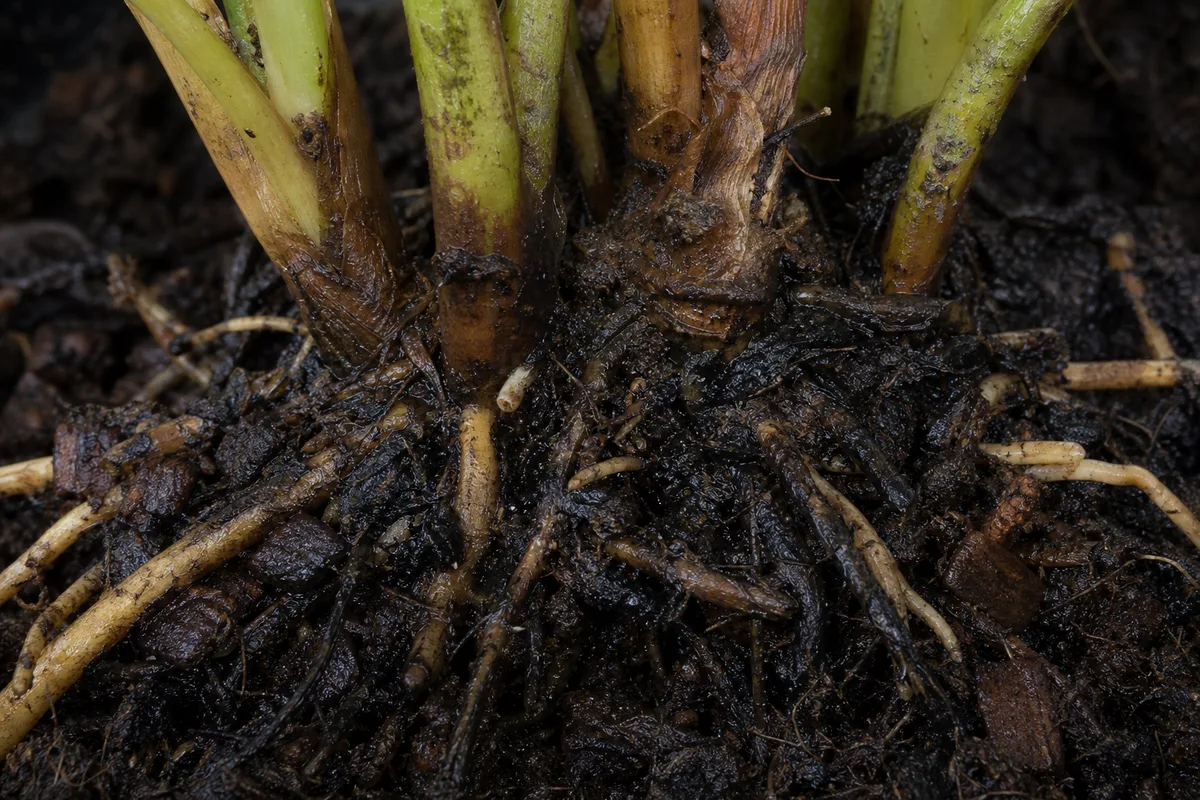
Also check for mealybugs, scale, spider mites, aphids, and thrips, which NC State Extension lists among problems affecting Anthurium. Look along petioles, leaf undersides, and the crown for cottony clusters, small attached bumps, fine webbing, or silvery scarring. Isolate an infested plant, remove visible pests with a gentle water rinse or damp cloth if practical, and repeat inspections. If using a labeled pest-control product, follow its directions and test on a small area first, especially on velvet-textured leaves.
Understand its flowers, berries, and slow growth
Anthurium clarinervium is not a failed plant because it does not produce large red flowers. The flower structure is an inflorescence: a small spadix bears tiny flowers and sits beside a spathe. On this species the display is usually modest, while the broad veined leaves are the main attraction. In a suitable environment it can produce berries after flowering and pollination, but that is not a routine indoor-care milestone.
New leaves may arrive slowly, particularly after a move, during cooler months, or while the plant settles after repotting. If growth has stalled, check that the plant receives enough indirect light, that the root zone is not compacted or wet, and that temperatures are warm enough. Feeding more heavily is rarely the first fix. Keep a simple note of when a leaf opens and whether the pot dries normally; that record can help you distinguish a seasonal pause from a worsening root problem.
Keep the plant out of reach of pets and children
Anthurium tissue contains calcium oxalate crystals and can cause oral irritation if chewed or swallowed. NC State Extension lists Anthurium as toxic to humans and a problem for cats and dogs; its genus-level information describes drooling, oral pain, swelling, and difficulty swallowing after ingestion, as well as possible skin or eye irritation from sap (NC State Extension Plant Toolbox). Keep leaves, cuttings, and berries away from curious pets and young children, and wash hands after pruning. If someone or an animal chews the plant, contact a medical professional, veterinarian, or poison-control service for advice rather than trying home treatment.
Conclusion
Anthurium clarinervium is manageable indoors when you keep its root zone airy, give it bright indirect light, and water according to how the mix dries. A bark-based potting mix, a pot with drainage, warm stable temperatures, and moderate humidity support healthy growth without forcing the room into greenhouse conditions.
Watch the plant’s pattern instead of reacting to a single leaf: one aging leaf is different from widespread yellowing, and brown tips can reflect several conditions. Check light, mix, moisture, and roots in a steady order, make one change at a time, and give the plant time to show you whether the adjustment worked.



