15 Brick Edging Ideas for Flower Beds
Use reclaimed or new bricks to frame flower beds affordably. Compare 15 layouts, choose the right base, and avoid shifting, drainage, and tree-root mistakes.
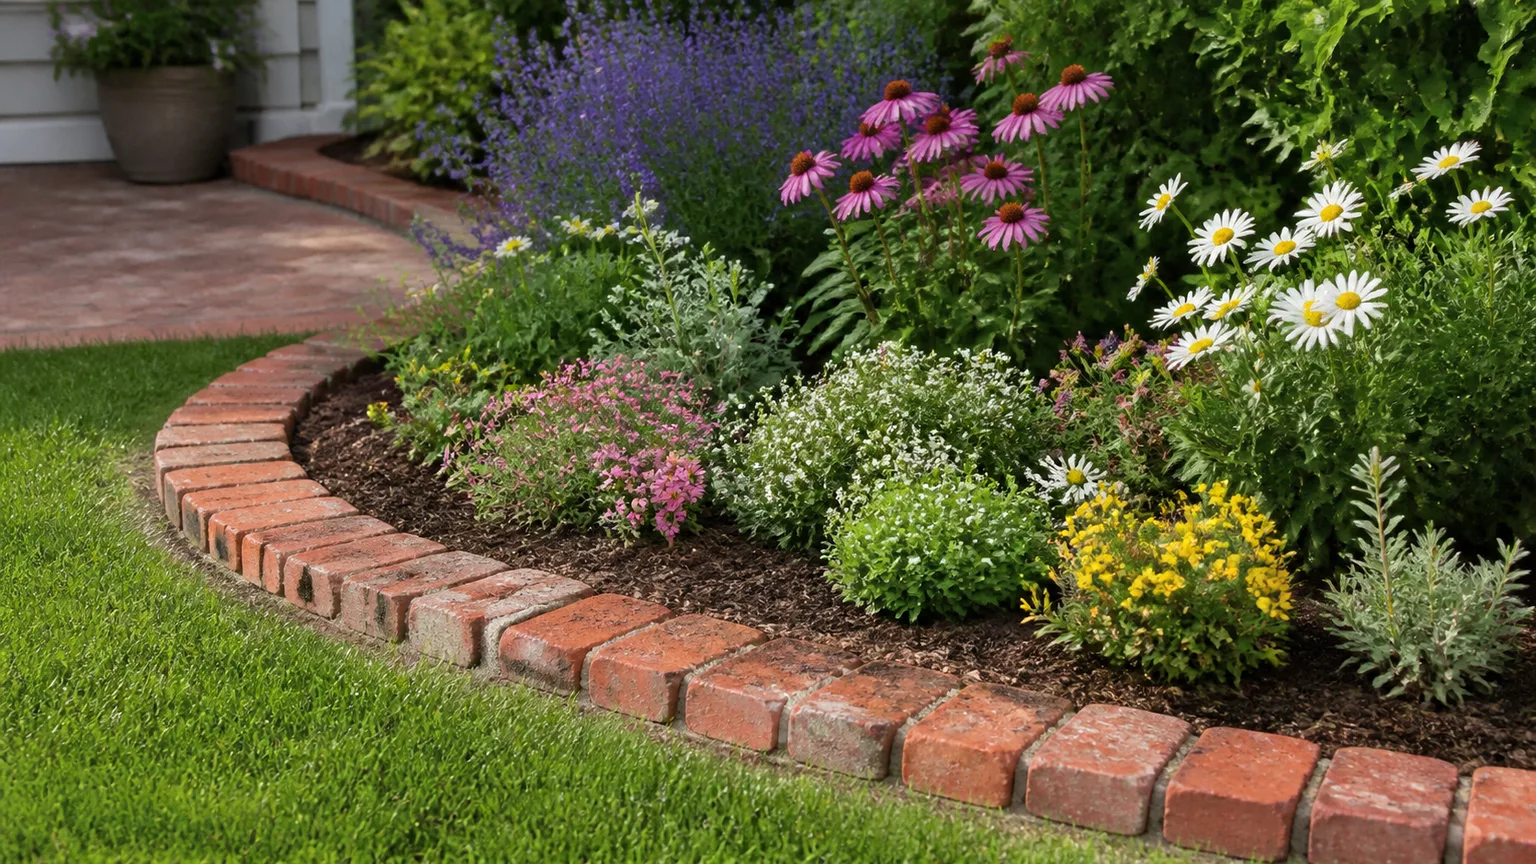
Brick edging is a small hardscape project with an outsized effect: it draws a clean line around flowers, keeps mulch from drifting into the lawn, and gives a bed a visual relationship to a patio, path, or brick house. The best design is not necessarily the tallest or most elaborate one. It is the one that matches the job, the soil, the mower, and the amount of seasonal maintenance you are willing to do.
For the lowest-cost version, use sound reclaimed bricks in a single dry-laid row on a compacted base. That works beautifully for a low flower-bed border, but it will not act like a retaining wall on a steep slope. If the edge needs to hold back substantial soil, carry foot traffic, or survive serious frost heave, plan a deeper base or a properly engineered masonry wall rather than relying on a pretty row of loose bricks.
The quick answer: choose brick edging by the job it must do
Brick garden edging performs three different jobs, and confusing them is the quickest way to build a border that disappoints. It can be a visual frame, a mowing strip, or a low retaining edge. Those jobs overlap, but they need different heights, bases, and expectations.
A visual frame can be narrow and decorative. A mowing strip should sit nearly flush with the turf so a mower wheel can travel beside it without scalping grass or striking a raised lip. A retaining edge needs enough mass and foundation to resist the sideways pressure of wet soil; a dry-laid single row is not a substitute for a retaining-wall design.
The Royal Horticultural Society’s lawn-edge guide recommends broad, sweeping curves over intricate shapes because they are easier to maintain, and it notes that a defined drop from lawn to bed helps keep mulch in place. That is a useful design rule even when the finished edge is brick: make the geometry simple enough to mow, weed, and repair.
Decide what your border must do before choosing a pattern
Walk the proposed edge after rain and while mowing, not just when the garden is dry and freshly tidied. Notice where water travels, where the mower wheel needs to pass, where roots are near the surface, and whether soil is already washing out of the bed. These observations will narrow the design more effectively than choosing a pattern from a photo alone.
Use a low, mowable edge for lawn-side beds
If the border touches lawn, keep the brickwork low enough that the mower can approach it safely. A flat row creates the cleanest mowing strip, while an upright soldier course makes a stronger visual line but may leave a raised obstacle that still requires a trimmer. If you want to eliminate string-trimming, the top of the brick, the lawn, and the surrounding grade need to meet in a deliberate, nearly flush plane.
| Layout | Best for | Main trade-off |
|---|---|---|
| Bricks laid flat | Mowing strips and path edges | Uses more ground width and needs careful leveling |
| Bricks set upright | Strong line around a bed | More visible height but greater risk of leaning or heaving |
| Two flat rows | Broad formal border and mulch control | More bricks, excavation, and leveling |
| Low stacked course | Small rise in a bed or terrace | Needs a stronger base and may need mortar |
Utah State University Extension describes bricks and other hard materials as long-lasting options but also warns that bricks can be mobile. That is the important nuance: the brick itself may last for years while the soil beneath it settles, freezes, expands, or gets washed away.
Use height and structure for mulch, soil, and slopes
A raised border can hold a thin layer of mulch or make a flower bed feel more substantial, but height increases the force acting on the edge. If the bed is only slightly higher than the lawn, a second row with staggered joints may be enough. If the edge is holding back a deep bank, redirects runoff, or sits above a walkway, treat it as a retaining structure and get local advice on drainage, footing depth, setbacks, and frost conditions.
The RHS border guide also makes the wider point that planning and preparation matter before planting. Finish the grade and edging first, then amend the bed and position plants. Otherwise, you risk burying bricks, damaging new roots, or discovering that the mature flowers need more room than the border leaves them.
15 brick edging ideas for flower beds
Use the ideas below as a menu of layouts, not a ranking. Reclaimed bricks add history and save money when they are sound, frost-resistant, and reasonably consistent in size. New pavers give you more predictable dimensions. Before buying, measure the actual brick face that will repeat along the edge; nominal sizes vary, and curves consume more material than a straight line.
Low-profile layouts for lawns and paths
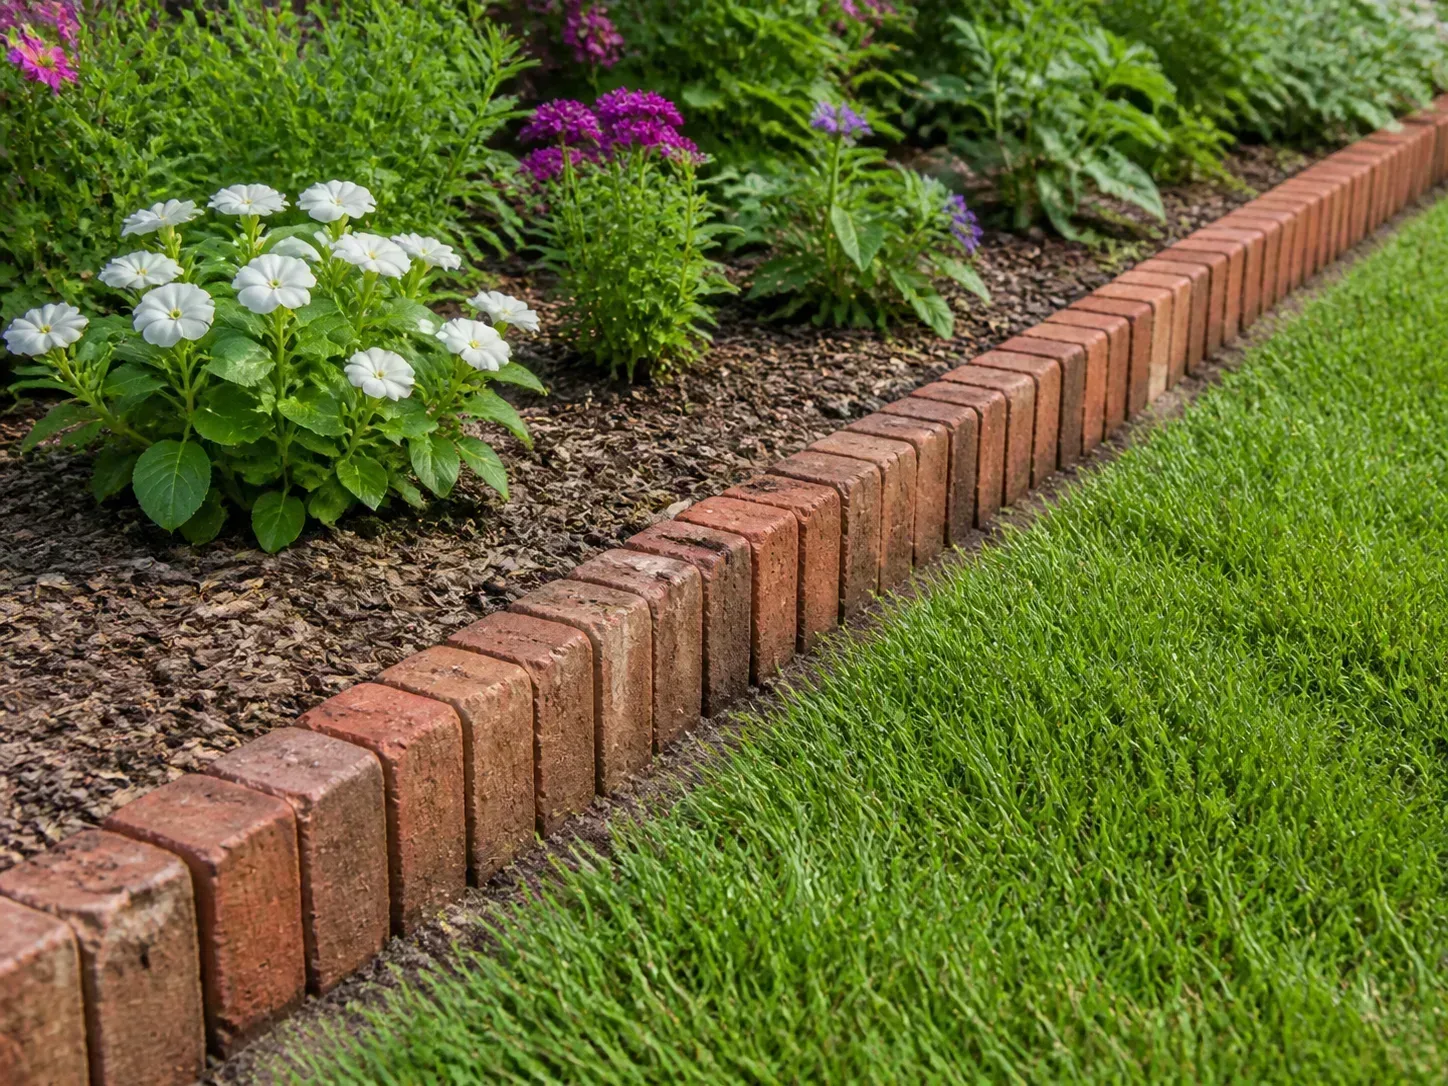
1. Flat soldier-course mowing strip. Lay bricks flat in a single row with their long edges following the bed. This is the classic choice when you want the flowers and foliage to remain the focus, and it creates a broad, stable line that can sit nearly level with the lawn. The cost is modest, but the base must be even or the top will show every dip.
2. Flush brick edge beside a pathway. Repeat the brick of an existing walkway at the border of the bed so the path and planting read as one composition. Set the edge flush with the walking surface and keep soil or mulch below the path grade so rain does not wash material onto the paving. This is especially effective in narrow side yards where a second hardscape material would feel busy.
3. Double-row running bond. Place two flat rows with the joints offset, like a small brick apron. The wider band gives a formal bed more presence and offers a useful transition between lawn and mulch. It costs roughly twice as much in brick and needs more excavation, but the staggered joints visually hide small variations in reclaimed brick.
4. Herringbone accent band. Turn bricks into a shallow herringbone strip between the lawn and the planting bed. The angled pattern catches light differently from a straight wall and can echo a herringbone patio. Use it where the edge is mainly decorative; the many joints and angled cuts make it slower to install and less forgiving if the base moves.
5. Narrow brick ribbon between gravel and flowers. Lay a single row between a gravel path and a planted border to stop loose stone from migrating into the soil. The brick gives the gravel a crisp termination without needing a tall barrier. Leave the gravel slightly below the brick’s upper surface and sweep it back after heavy rain.
Curves, circles, and focal points
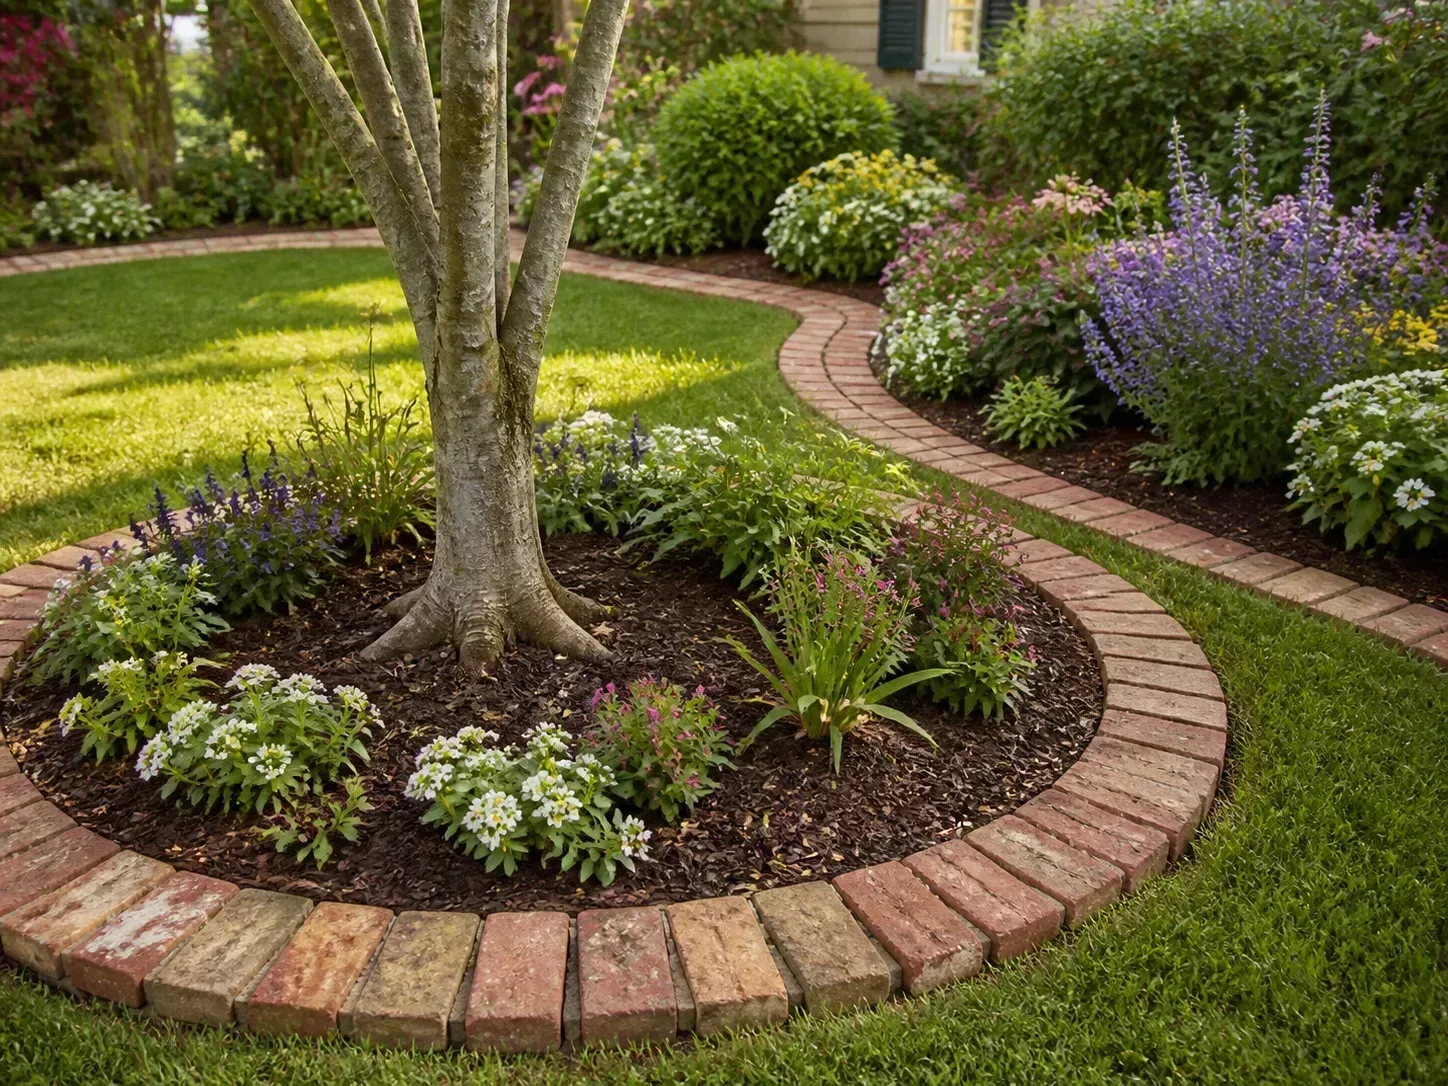
6. Broad curved crescent. Use a hose to sketch a generous arc around a bed, then set bricks flat along the line. Broad curves look relaxed and use mostly whole bricks, while tight curves create wedge-shaped gaps or require cuts. This layout softens a rectangular yard without turning mowing into a geometry exercise.
7. Circular tree island. Ring a lawn tree with a circular brick edge and fill the bed with a shallow layer of mulch and shade-tolerant plants. The circle gives a solitary tree a clear role in the yard, but do not pile soil or bricks against the trunk flare. Leave a generous open area around the trunk and let the finished grade slope away from it.
8. Brick rotunda around a focal point. Build a larger circular or semicircular frame around a birdbath, urn, bench, or small fountain. Use a second curve to connect it to a main bed or path so the feature feels placed rather than stranded. The pattern works best when the focal object remains visually lighter than the brick; too many layers of masonry can make a small yard feel crowded.
9. S-curved garden-room edge. An S curve can divide a lawn into two planting zones or guide the eye toward a gate. Keep the bends long and gentle, and repeat the same brick color elsewhere in the yard for cohesion. Avoid making the narrow waist so tight that the mower cannot turn or the bed becomes difficult to weed.
10. Small pocket bed with a partial arc. In a compact yard, a half-moon of brick can frame a mailbox, porch corner, or downspout planting without consuming a full ring of lawn. Choose a low row and a simple plant palette so the border feels like a purposeful accent instead of a small wall competing with the house.
Raised, rustic, and mixed-material layouts
11. Low raised bed with staggered joints. Stack two modest courses with the vertical joints offset to create a short flower-bed wall. This gives the bed a clearer silhouette and adds a little planting height, but it also increases the need for a compacted base and careful backfill. Do not use this pattern to hold back a deep slope unless the structure has been designed for that load.
12. Reclaimed-brick cottage border. Mix weathered red, salmon, and buff bricks in a loosely coordinated row rather than forcing every face to match. The irregular color looks at home beside roses, herbs, cottage perennials, or a wildlife-friendly border. Sort out cracked bricks before laying; a little variation is charming, while broken faces and crumbling edges create unstable contact points.
13. Upright soldier course with a contrasting cap. Set bricks on edge to create a narrow, rhythmic vertical border, then use a different but compatible brick or paver flat on top when you need a finished cap. This is a strong choice against a pale wall or dark mulch. It is less mower-friendly than a flush strip, so reserve it for the bed side of a path or for edges maintained with a trimmer.
14. Brick-and-gravel drainage edge. Pair a low brick border with a band of gravel inside or outside the bed. The gravel visually separates the flowers from a wall, fence, or path and provides a clean place for rain to land without splashing soil everywhere. Keep the gravel from becoming a hidden bridge for weeds by maintaining the bed edge and removing seedlings before roots establish.
15. Brick path that doubles as the border. Instead of treating edging as a thin line, widen the brickwork into a one- or two-brick walking strip beside the flowers. It makes harvesting, deadheading, and inspection easier while clearly separating lawn from bed. The strip needs a walking-surface base and a grade that sheds water; do not improvise a path on the same shallow base used for a decorative row.
If you want the look of brick around a very tight curve but cannot justify cutting masonry, flexible brick-look recycled edging is another option. A 2025 BBC Gardeners’ World Magazine roundup includes recycled-rubber edging made to resemble red brick and notes that flexible products can follow curved beds. It is a visual alternative, not a brick wall: it will not provide the same weight, thermal mass, or soil-holding capacity.
How to install brick edging that stays put
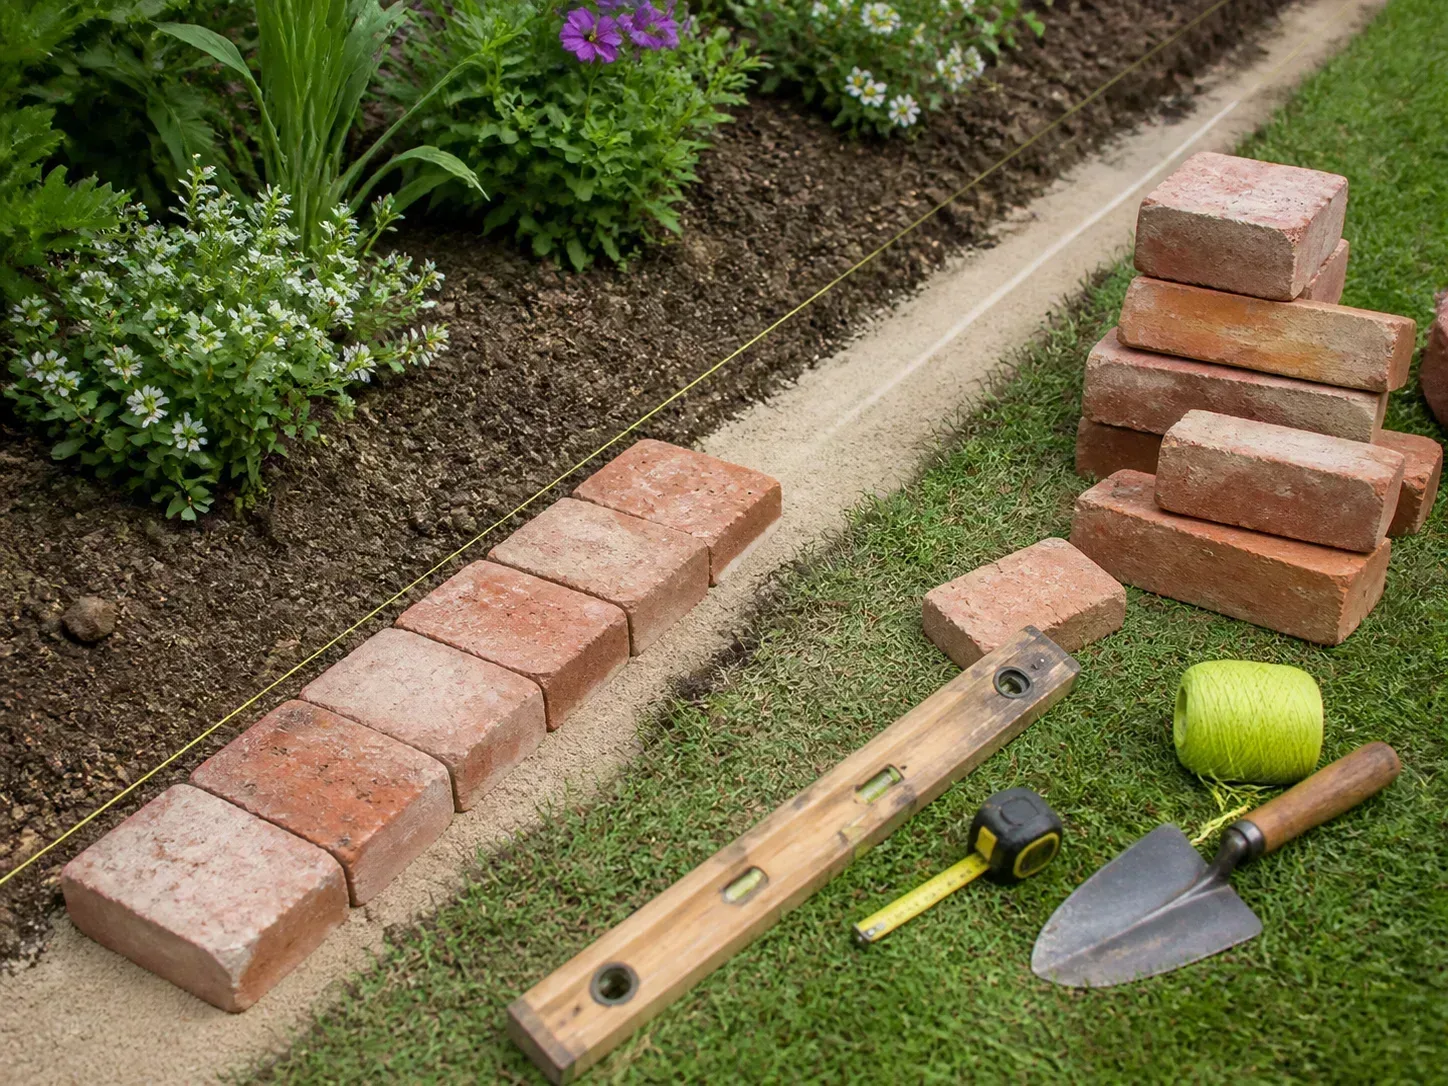
The durable part of a brick edge is mostly underground. A careful line, a firm base, and well-packed shoulders matter more than using mortar on a border that is only one brick high. Work when the soil is workable, not saturated; the RHS advises avoiding lawn-edge work when the ground is frozen or very wet.
Mark and cut the line before you dig
For a straight bed, drive stakes at the ends and stretch a taut string at ground level. For a curve, lay a garden hose or rope on the lawn and view it from several angles, including from farther back or an upper window if possible. The RHS lawn-edge sequence recommends adjusting the shape before cutting, because a line that looks graceful close up can look lumpy across the whole yard.
Cut the turf along the line with a half-moon edger or a flat-backed spade. A three-inch cut is a useful starting line for a simple lawn edge, but the final excavation must also allow for the brick orientation and base. Lift narrow strips of sod and shake soil back into the bed; keep perennial weeds out of the new border rather than burying them under brick.
Build a base that matches the layout
Excavate wide enough to hold the brick, the base, and working room on both sides. For a simple flat decorative row, a few inches of compactable crushed stone topped with a thin bedding layer may be enough in stable soil. For a path edge, upright bricks, clay soil, or a site that heaves in winter, use a deeper aggregate base and compact it in lifts rather than trying to stabilize everything with loose sand.
Set the base slightly below the surrounding grade so the brick can finish flush or at the height you planned. The base should be firm but still allow minor water movement; do not create a bathtub that traps runoff against a house foundation or sends water into a neighbor’s yard. On a slope, plan where water will go before you close the trench.
Savvy Gardening’s landscape-border guidance recommends digging a trench a few inches wider than the edging and saving the excavated soil for backfilling. That extra working space gives you room to adjust the line and then lock the bricks from both sides instead of leaving a loose seam beside the lawn.
Set the bricks, check grade, and backfill
Place the first brick at a visible endpoint and use a level to check both its top and its face. Add or remove bedding material rather than pounding a brick deep into an uneven base. Continue one brick at a time, checking the overall line every few feet; small corrections are easy early and frustrating after the whole border is down.
Keep joints consistent where the pattern calls for a formal look, but do not force identical gaps in handmade or reclaimed brick. Replace bricks with badly damaged corners, and turn attractive weathered faces outward only after confirming that the underside sits solidly. For a curve, use smaller bricks or a pattern that tolerates joints rather than forcing long rectangular units around a tight radius.
Backfill both sides in thin layers and tamp the soil firmly. On the lawn side, finish the turf slightly below the brick if you want mowing access; on the bed side, keep mulch and loose soil below the top so they do not spill over after the first storm. Water the backfill gently, let it settle, and inspect the line after the next heavy rain before adding final mulch.
Mortar versus dry-laid brick: choose by movement and permanence
Dry-laid edging is usually the better value for a low border because it is easy to adjust, repair, or move when the bed changes. It also gives small amounts of water and soil movement somewhere to go. The limitation is predictable: loose brick can shift when the base settles, roots lift the edge, frost heaves the soil, or a mower wheel repeatedly clips the border.
Mortared edging creates a more fixed visual line and can make sense beside a patio, on a low stable wall, or where repeated contact would disturb dry-laid bricks. It does not solve a poor foundation. If the substrate moves, the mortar joints can crack, the courses can lean, and repairs become more involved than resetting a dry-laid row. Use exterior-rated masonry materials and follow local conditions rather than treating mortar as waterproof glue.
Choose dry-laid construction when the edge is low, the grade is stable, and future bed changes are likely. Consider masonry help when the border retains meaningful soil, sits on a slope, supports a path, crosses a drainage route, or must meet a building or other structural hardscape. The cheapest installation is the one that fits the load; rebuilding a failed wall costs more than using the right base the first time.
Brick edging around trees, slopes, and wet spots
These are the locations where a good-looking idea can create a plant-health or drainage problem. A circular brick ring around a tree should frame the planting area, not become an excuse to bury the trunk flare. A raised wall at the bottom of a slope should manage water, not simply trap it against the bed.
Protect trunks, roots, and drainage paths
Keep bricks and added soil away from the trunk flare, where the trunk widens into the structural roots. Do not cut large roots just to make a perfect circle. If surface roots prevent a shallow trench, make the circle larger, shift the edge outward, or choose a surface treatment that can follow the existing grade without excavation.
On a slope, watch the first storm. Brown water crossing the brick line means the edge is receiving runoff it was not designed to handle. Add a safe outlet, a planted swale, or a different grade where appropriate; do not seal the low side with mortar and hope the water disappears. Around downspouts and wet corners, leave a drainage path and keep the bed soil from sitting against siding, paving joints, or the house foundation.
Keep a brick border neat through the seasons
The easiest maintenance is a quick walk around the border several times a year. Pull weeds while they are small, sweep gravel back into place, and use a hand trowel to restore mulch that has washed over the brick. If one brick rocks under your foot, reset it before the movement spreads to its neighbors.
In spring, check for frost heave, cracked bricks, open joints, and low spots that hold water. In summer, trim grass runners before they root into the bed. After autumn leaves fall, clear damp debris from tight joints so seedlings and moss do not get a head start. In climates with hard freeze-thaw cycles, expect that a dry-laid border may need occasional lifting and re-leveling; that adjustability is one of its advantages, not evidence that the design failed.
Refresh the shape before adding more mulch. The RHS border guidance recommends planning for mature plant size and notes that borders change as plants spread and self-seed. Brick edging should serve that living border, so move a few bricks outward when a vigorous perennial repeatedly pushes into the line instead of forcing the plant into a permanently cramped space.
Common mistakes that make brick edging fail
Laying bricks directly on loose soil is the most common shortcut. It may look perfect on installation day, then show dips after watering or the first wet season. A compacted base is less glamorous than the brick pattern, but it does most of the work.
Making every curve too tight creates awkward joints, cuts, and mower traps. Use broad arcs, smaller units, or a different flexible edging material when the site demands a tight radius.
Building a retaining wall out of a decorative row is unsafe design logic. If the bed needs to hold back a deep bank, stop and treat it as a retaining-wall project with drainage and structural requirements.
Burying the trunk flare can stress a tree even when the ring looks tidy. Make the circle larger, keep the grade low, and do not use the brick edge to justify piling soil against bark.
Ignoring the mower path turns a low-maintenance border into a trimming chore. Decide whether a wheel can ride beside the edge before you choose an upright or stacked pattern.
Using damaged reclaimed brick everywhere trades purchase cost for repair work. Keep sound weathered units for the visible edge, discard crumbling pieces, and accept a mixed-color pattern rather than mixing structurally weak bricks into a load-bearing course.
Sealing a wet corner without a water plan can move the problem toward the plants, path, foundation, or neighboring property. Watch runoff during rain and leave an intentional route for water before finishing the bed.
Conclusion
The most affordable brick edging idea is usually a low, dry-laid row of sound reclaimed bricks on a properly compacted base. From that starting point, you can change the character with orientation, color, width, curves, a gravel transition, or a short raised course. Let the garden’s job decide the pattern: flat and flush for mowing, broad and stable for mulch, curved for softness, and structurally designed when soil height or slope enters the picture.
Sketch the line with a hose, test how it looks from the house, build the base before perfecting the pattern, and check the edge after rain. That modest discipline is what turns brick from a decorative border into a useful frame for the flowers.