15 Smart Cinder Block Garden Ideas for Your Backyard
Make cinder block garden ideas work in your backyard with 15 projects, plant choices, drainage tips, safer material guidance, and simple styling advice.
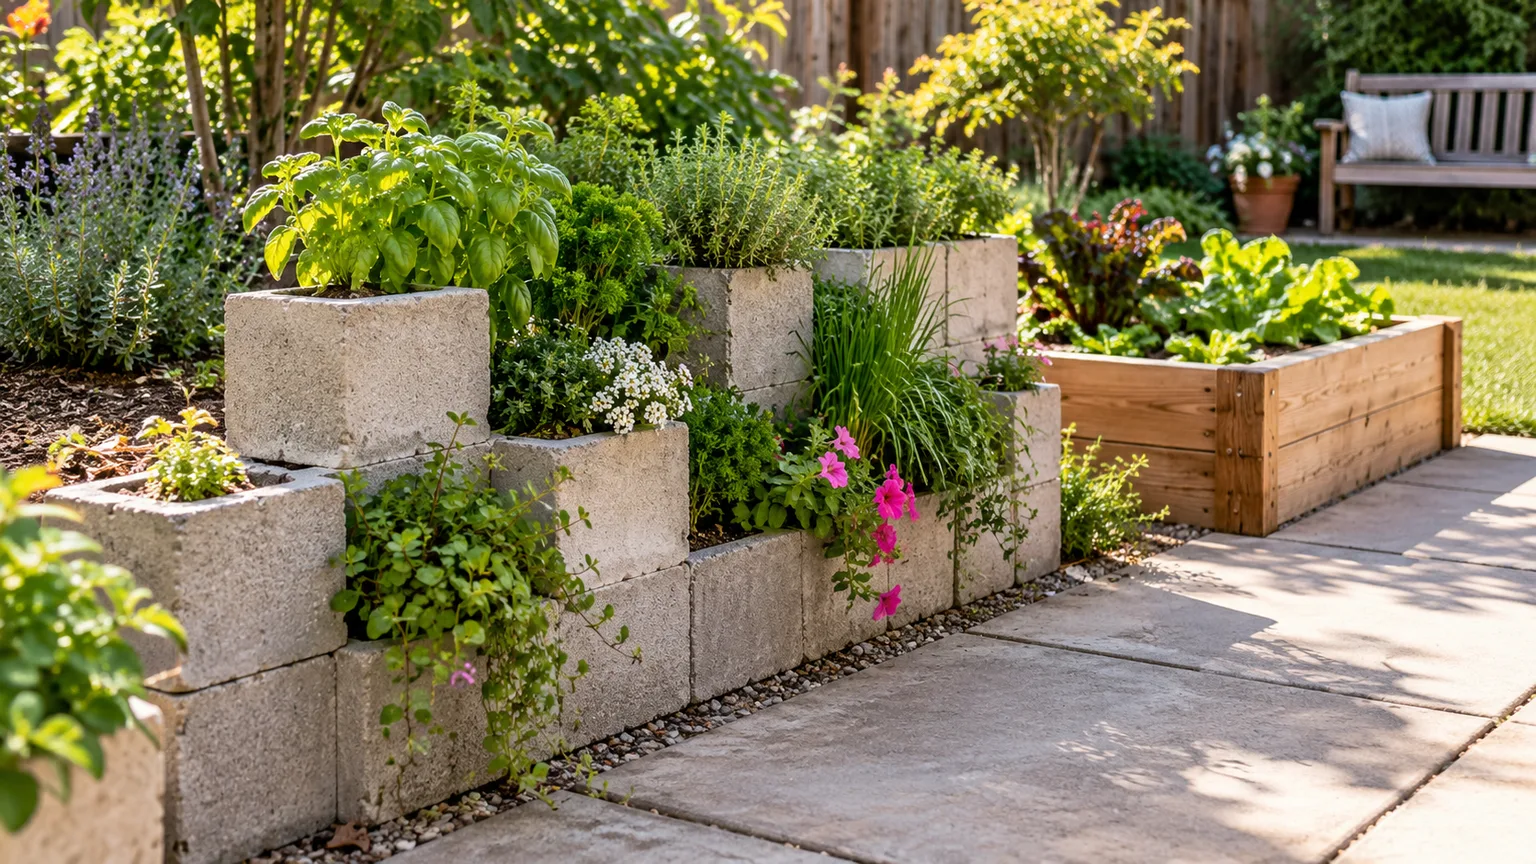
Cinder blocks can do more in a backyard than make a rough raised bed. Their hollow cores can hold small plants, solid faces can become a canvas, and a low stack can support a work surface or seat. The best project depends on whether you want growing space, a place to work, or a visual boundary—and on whether your site can handle the weight.
Before buying blocks, sketch the footprint and arrange a dry sample on the ground. These units are heavy, difficult to move once filled, and not all made or shaped exactly alike; check the faces, dimensions, and fit before committing. For long walls, raised structures, gates, or anything that holds back soil, use a design intended for that load instead of assuming a dry stack is a retaining wall.
Before you start: choose the block, base, and planting method
Use “cinder block” as a familiar name, but check what you are actually buying: many products are concrete masonry units, and their aggregates can differ. University of Maryland Extension notes that some cement blocks may include fly ash, labels do not identify every aggregate, and research on blocks used in vegetable beds is limited. Cornell Small Farms also advises evaluating salvaged building materials before bringing them into food-growing areas. If that uncertainty bothers you, choose another material for an edible bed; avoid blocks with an unknown history, chemical residue, or old paint, and do not assume an arbitrary coating is food-safe. (University of Maryland Extension’s raised-bed materials guidance; Cornell Small Farms’ raised-bed guide)
For a planter, decide how water will escape before filling anything. A hollow core open at the bottom can drain into soil, but loose mix may fall through; place a breathable piece of landscape fabric or a nursery pot in the opening, and keep any container’s drainage holes clear. A sealed metal or plastic bottom without drain holes turns a planting pocket into a water trap. Use potting mix in the small cores, not dense garden soil, and plan to check them more often than a ground bed because the narrow exposed pockets can dry quickly. A step-by-step concrete-block planter build from Get Busy Gardening emphasizes dry-fitting the layout, leveling the first course, and accounting for the extra weight of soil.
Prepare a flat, firm base for stacks and tables; a thin layer of compactable paver base can help a simple ground-level planter sit evenly. Keep the first version low and broad, stagger seams when stacking, and fill hidden lower cores with inexpensive clean fill only after the arrangement is final. On a deck, balcony, roof, or retaining slope, do not guess at load capacity or drainage: a saturated planter is much heavier than an empty block. Choose plants for the actual light and heat at each pocket—succulents and thyme suit sunny, fast-drying spots, while many annual flowers need more regular water and room for roots.
15 smart uses for cinder blocks in a garden
1. Build a low, tiered planter
Arrange blocks in two or three short levels to create a stepped display without buying a tall planter. Set the lowest row on a level base, stagger the joints, and leave a few cores accessible as planting pockets; the remaining openings can stay empty or hold pots. A gentle step lets short plants remain visible behind a front row of spillers, while the separate pockets make it easy to group plants with similar light needs.
Choose compact varieties rather than forcing a deep-rooted shrub into a narrow core. In a bright, hot spot, use sedum, thyme, or another plant suited to quick drainage; in part shade, try compact foliage or flowers that tolerate the local conditions. Leave space to reach the back for watering and deadheading, and do not build a narrow tower where a bump or soft base could tip it.
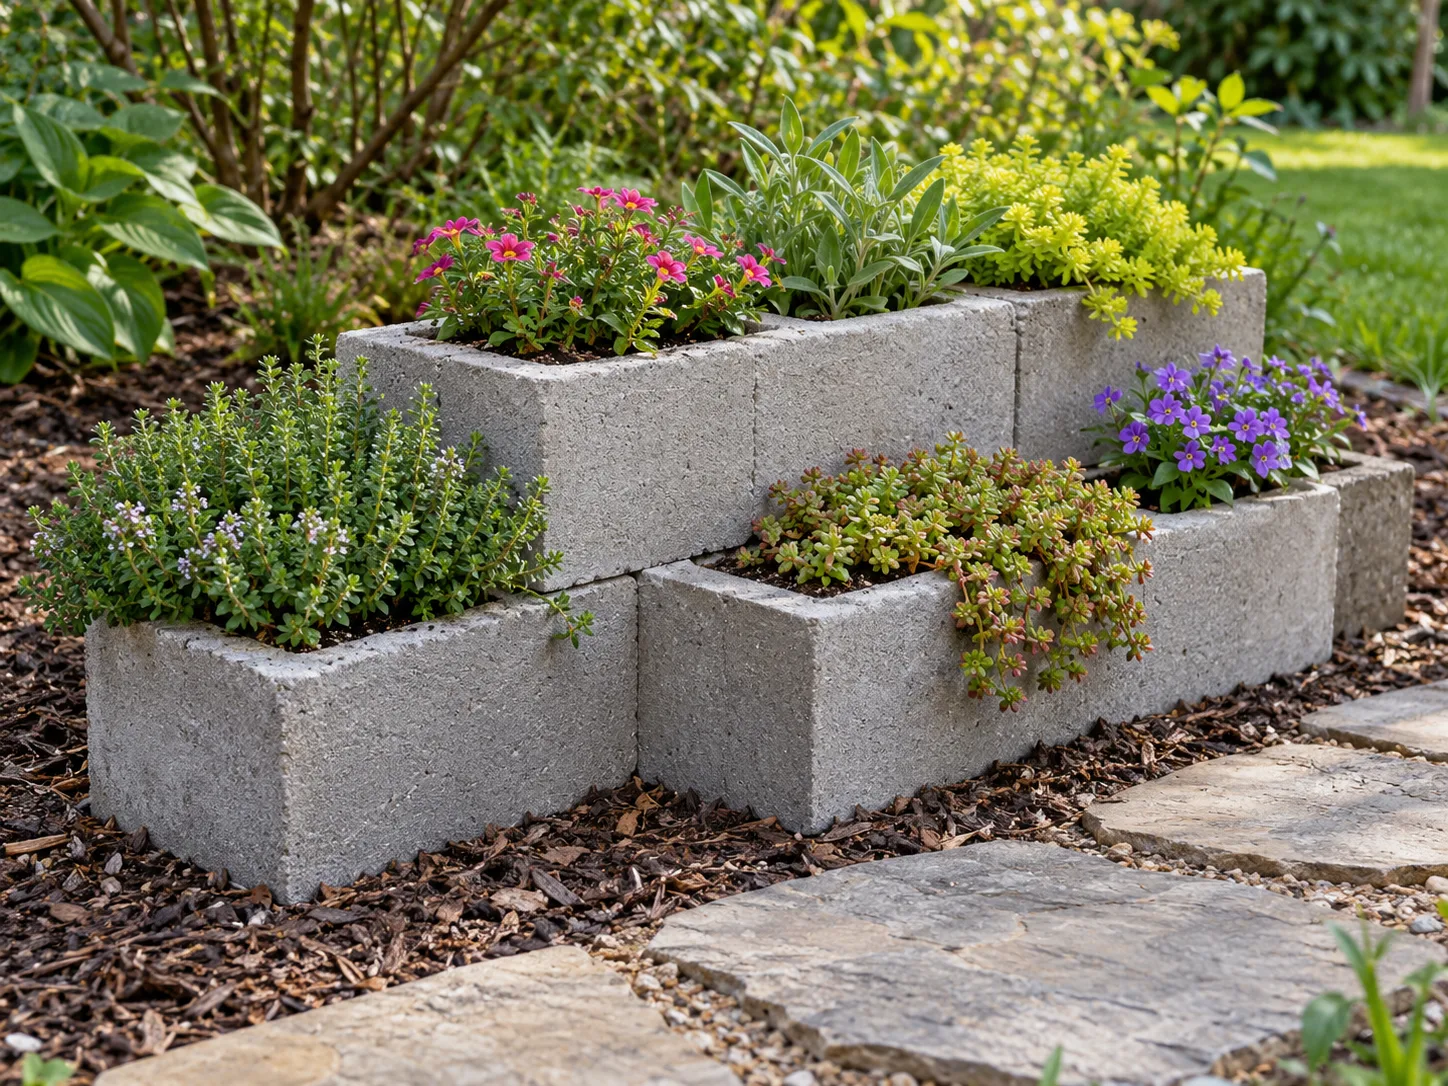
2. Turn a wood-backed wall into a succulent shelf
If you already have a sound garden wall, use a timber board supported by blocks to create a shallow display shelf for small succulents. The blocks provide weight and texture; the board gives you a level surface and keeps pots from sitting directly on masonry. Set the shelf where it will not obstruct a path, and use outdoor-rated fasteners if the board needs to be secured against sliding. Leave room for each pot to drain into a tray or gravel strip rather than letting runoff stain a wall or collect beside a foundation.
Do not lean a tall, heavy arrangement against a fence and treat it as attached construction. A fence may not be designed to carry that load, and a shelf exposed to wind needs a stable base. A vertical cinder block planter build illustrates why you should map the block order and decide how to contain each planting core before stacking. This idea is easiest to maintain when each plant stays in its own pot, so you can lift it out to water and let it drain before returning it to the shelf.
3. Edge a raised bed with planted pockets
Outline a modest vegetable or flower bed with one course of blocks and turn some cores outward to hold herbs or flowers. The bed becomes a tidy frame, and the planted openings can soften the hard edge with thyme, alyssum, or compact annuals. Keep the main bed open to the native soil below when that is appropriate for your site; raised beds can also be placed over paved surfaces, but then they need a suitable bottom and drainage plan.
For food crops, make the material choice before filling the bed. Use new blocks from a known supplier if you choose this approach, avoid salvaged units with uncertain exposure, and keep potting soil or planting mix from spilling into unknown openings. If you would rather eliminate the composition question, use blocks only as an outer decorative edge around a separate, known-material planter. A small bed is also a more manageable first project: calculate its interior volume before ordering soil, since fill often costs and weighs more than expected. Do not fill the narrow cores with the same soil mix as the whole bed unless you intend to plant them; otherwise you are paying for premium mix in places with little root space. If a crop is sensitive to pH, test the growing soil rather than assuming the blocks have raised or lowered it.
4. Make a mosaic feature planter
A mosaic can turn one plain face into a focal point without covering every block in the yard. Choose smooth tile pieces with rounded or finished edges, lay the pattern out on a board first, then attach them with a mortar or exterior tile system labeled for outdoor use. A restrained band of color on a planter front is easier to repair than a full wrap, especially where rain, frost, and soil moisture reach the surface.
Skip broken plate shards with sharp edges if children or pets use the garden. Keep decorative material out of the soil and planting core, and follow the product directions for surface preparation, cure time, and grout. The point is to decorate the outside face; the planting area still needs a clear drainage route. In freeze-thaw climates, check that the tile and setting materials are rated for exterior exposure, and avoid a design that traps water along the top edge of the block.
5. Set up a cinder block potting table
Two sturdy block piers and a broad, weather-resistant board make a simple potting table for mixing soil, sorting tools, or setting down trays. Dry-fit the supports so the top spans them evenly, then check that the surface does not rock before adding weight. A lower board can hold empty pots, while the open sides make it easy to sweep spilled mix back into a tub.
Keep the worktop separate from a true structural wall and do not use a loose stack as a ladder or step. If you are building over a hard patio, add a non-slip surface under the feet and keep the top far enough from a fence or door to work comfortably. The same design can serve as a propagation station: place trays on the board and store potting mix in a lidded container underneath to keep it dry.
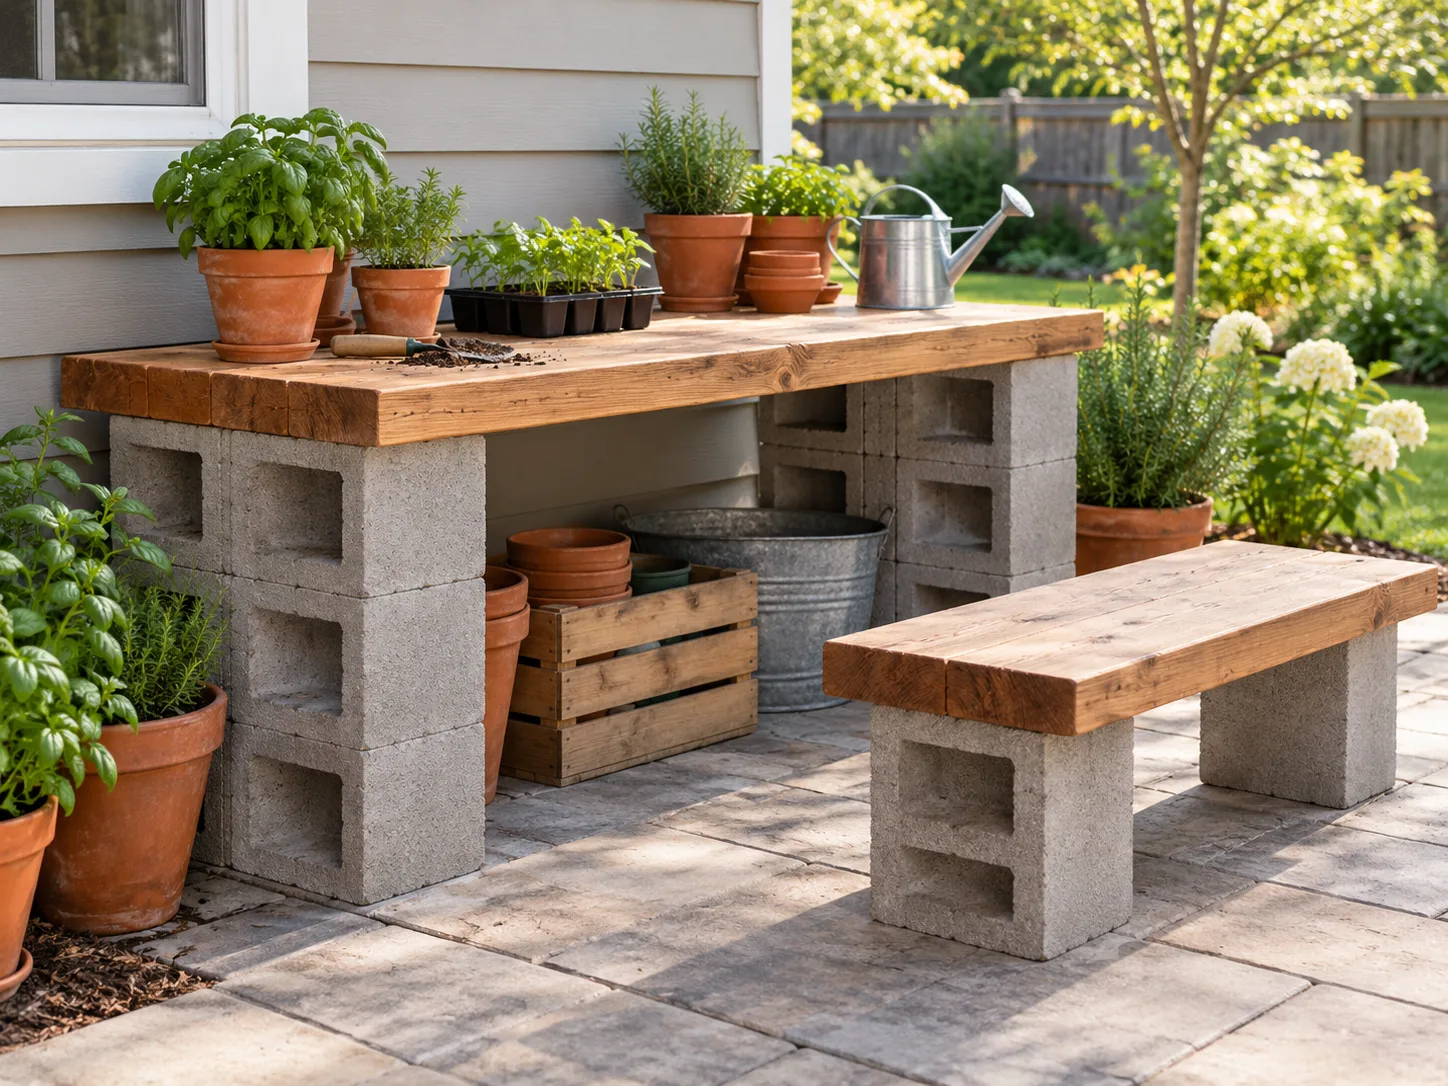
6. Add a simple garden bench
For a quick seat, set a wide, solid plank across two low block supports. The blocks create a sturdy visual base and can be painted to coordinate with pots or cushions, while the wood gives the seat a warmer touch. Place it on a firm, level surface and test it before use; if it rocks, reset the base instead of trying to compensate with a loose shim.
Use a board designed for outdoor exposure, sand sharp edges, and make sure the supports are spaced so the plank cannot roll or slide. A cushion adds comfort but should be brought in during wet weather so it does not stay damp. If the seat will be used by children, older adults, or guests who need dependable support, anchor or build it to a standard appropriate for seating rather than relying on a decorative stack. You can test the fit before adding cushions by sitting carefully near the center and checking whether either support shifts; if it does, reset the base on firmer ground or choose a bench made for the expected use.
7. Create geometric painted planters
Mask off triangles, broad stripes, or a single color block on the outside faces to make a collection of ordinary units feel deliberate. First brush away dust and let damp masonry dry; then use an exterior product labeled for concrete or masonry and follow its temperature and curing instructions. Tape crisp shapes only on the surfaces you can reach, and keep the color scheme to two or three tones so the plants remain the focus.
Treat paint as a finish, not as a fix for questionable material or a substitute for drainage. If the block will hold edible plants, avoid painting the interior soil-contact surfaces and consult the product label before using any coating near growing media. A painted planter may also need touch-ups as it weathers, so a small test block is a sensible way to see how the color looks after drying.
8. Arrange a blue-and-white collection
Use a shared blue-and-white palette to connect several separate blocks across a patio or garden corner. Instead of painting every unit with a different pattern, repeat one motif—such as a simple border, alternating bands, or a single stencil—on a few faces and leave the rest natural. The repeated color makes varied planter sizes look like a set and pairs well with green foliage and white flowers.
Place the collection where the pattern can be seen from a doorway or seating area, rather than scattering it through the yard. Keep the planting mix calm too: one leafy plant, one upright accent, and one spiller is often enough for a compact pocket. If the blocks get strong afternoon sun, use plants that tolerate the heat around the concrete and check the cores during dry spells.
9. Add planted pockets along a low wall
On an existing, sound low wall, set a few blocks with their openings facing up or outward and use the cores as small planting pockets. Spacing the blocks rather than covering the whole wall preserves negative space and avoids making the wall feel heavier. Trailing plants can soften the edges, while upright foliage adds texture where there is little room for a conventional border.
Treat this as a planting treatment for an already stable wall, not a way to repair a leaning one. Secure any added block or shelf so it cannot shift, and do not block weep holes or drainage paths in a retaining structure. Since these pockets hold little mix, choose small plants with modest root systems and make watering convenient; a tiny opening mounted high out of reach can become a chore rather than a feature.
10. Use a rusty red accent cluster
Paint a small group of blocks in an earthy red or terracotta color to bring warmth to a gravel path, courtyard, or neutral fence line. The shade sits comfortably beside wood, stone, and foliage, and it can echo the color of pots without copying a whole theme. Use the color on a few faces or on one low planter instead of painting every block in sight.
Pair red masonry with plants that create contrast rather than competing color: silver foliage, deep green herbs, white blooms, or simple grasses all work. Keep the design grounded with one continuous bed or mulch edge, and use the planting pockets for plants that share sun and watering needs. If you prefer a low-maintenance finish, leave some units unpainted and let the contrast come from pots or flowers instead.
11. Mark an entry with low planter piers
Two short block planters can frame a garden gate or the beginning of a path and make an entrance easier to notice. Fill the openings with compact evergreen foliage or seasonal flowers, and repeat the same plant on both sides so the pair reads as intentional. A small plaque or house number can be attached to a separate board or post where local rules and the structure allow it.
Keep the units low and broad if they are not engineered gate posts. A tall, narrow stack beside a gate can be knocked by the gate leaf, wind, or a visitor carrying bags; a real gate pier needs a foundation and connection designed for its load. Also leave the latch and swing path clear, and choose plants that will not spill onto the walkway.
12. Make a fire-bowl gathering spot safer
Build the seating area around a purpose-made fire bowl or a fire pit kit rated for outdoor use, and let the cinder blocks serve as planters or low visual edging set outside the required clearance. Do not line an active fire with ordinary hollow blocks: an Ask Extension response says cinder blocks generally do not tolerate exposure to fire well, while firebrick or steel are better choices for the hot interior. (Ask Extension’s fire-pit material guidance)
This gives you the welcoming look of a defined fire corner without asking an unknown block to withstand direct flame. Follow the appliance instructions, local fire rules, and clearance requirements for the specific site, and keep cushions, dry leaves, and overhanging branches away from the heat. Leave a clear route to and around the seating, and do not set a fire bowl where smoke drifts toward a neighbor’s window or an overhanging structure. If you do not want a fire feature, use the same low block edging to frame a lantern-lit sitting area instead.
13. Define a garden edge with a low block fence
For a visual boundary between lawn and a planting area, use a single low course of blocks as a border, or place blocks at intervals beneath a light, separately supported panel. The line can guide foot traffic and give a mulch bed a clear edge without closing off the view. Plant a low groundcover or seasonal flowers beside it to soften the hard horizontal line.
Do not rely on stacked hollow blocks as a tall privacy or security fence. Wind, uneven ground, and people leaning on it create loads that a casual dry stack is not designed to resist. If the boundary must retain soil, keep animals out, support a gate, or meet a particular height, choose a purpose-built fence or retaining-wall system and check local requirements.
14. Divide backyard zones with an open screen
Separate a grilling area from a tool corner or dining table by using a low block divider with gaps, planted openings, or a slatted panel above a properly supported base. The screen marks where one activity ends and another begins while allowing light and air to pass through. Adding one or two planting pockets can connect the divider to nearby beds without turning it into a solid wall.
Keep the divider proportionate to the space: a low, open structure can define a small patio, while a tall opaque wall may shade plants and make a narrow yard feel tighter. Do not stack it against loose soil or use it to hold back a slope unless it is designed as a retaining wall. For a simple temporary zone break, a row of spaced blocks with potted plants is easier to move than a mortared divider. Think about what the divider should hide before you build it: a half-height screen can conceal bins while leaving the garden visible, but a slatted panel may be a better choice if you want airflow and light without creating a heavy masonry feature.
15. Build a compact outdoor seating nook
Combine a block-supported bench, one raised planter, and a clear patch of paving or gravel to make a small destination in the backyard. The planter gives the seat a green backdrop; the open path keeps it easy to reach after rain. Keep the palette consistent—natural gray blocks with one painted accent, for example—and repeat the same foliage near the seat so the nook feels connected to the rest of the garden.
Measure the space before placing the blocks, including room to pull a chair out or walk past the bench. Use cushions that can be stored, keep the planting low enough to preserve sightlines, and leave a gap between masonry and wood where water needs to drain. The most useful seating nook is one you can maintain without moving heavy pieces every time you mow or clean the patio. For a rented backyard or a layout you may change, keep the blocks and bench top separate instead of mortaring the pieces together; the design can still read as built-in while remaining possible to rearrange.
Conclusion
Start with the job you need done: grow more herbs, add a work surface, define a path, or create a place to sit. Then match the block layout to the site—low and level for a planter, wide and stable for a seat, and professionally designed when it needs to retain soil, hold a gate, or support a permanent wall.
For planting pockets, decide how they drain and how often you can water before adding soil. For edible beds, choose blocks whose history and composition you are comfortable with; for fire, keep ordinary blocks away from direct flame. Sketch the arrangement, dry-fit it, and build one small section first. That simple trial shows whether the color, height, plant mix, and maintenance demands suit your backyard before the project becomes difficult to move.