26 DIY Backyard Fire Pit Ideas for Every Budget
From $50 paver stacks to steel upcycles—26 DIY fire pit ideas with safety distances, permit tips, materials that survive heat, and a beginner build guide.
A backyard fire pit turns a flat lawn into the room everyone migrates to after sunset—but the wrong material, the wrong spot, or a windy dry evening can turn that cozy feature into a insurance claim. DIY fire pits usually run $50–$450 in materials, compared with $1,200–$3,000+ installed, which is why inspiration lists flood search results. The gap most of them leave open is the part that actually matters: where your jurisdiction allows fire, how far from the house it must sit, and which of those pretty Pinterest stacks will crumble after ten fires.
This guide groups 26 proven DIY fire pit ideas by style and budget, then walks you through placement rules, liner choices, a beginner block build, and the maintenance habits that keep a pit safe for years.
The Quick Answer: Match Style, Budget, and Local Codes First
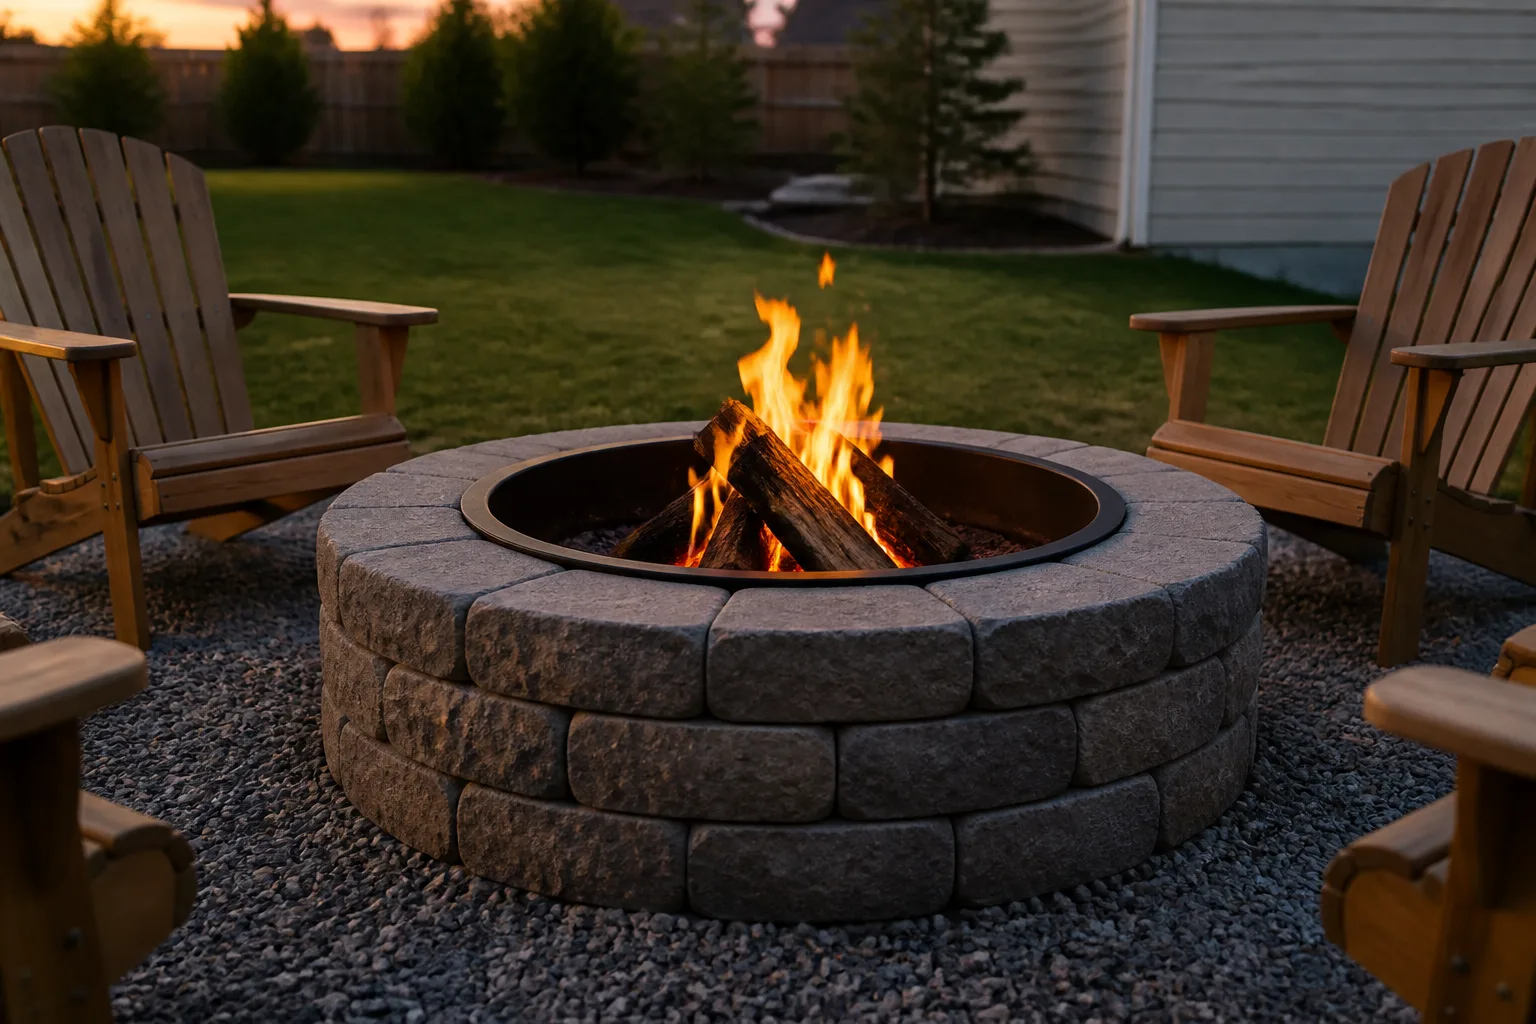
Pick your fuel and footprint before you fall in love with a photo. Most homeowners do best with an above-ground 36–44 inch round pit on compact gravel, 10 feet minimum from anything combustible (more in dry climates or under stricter local codes), and a steel fire ring or fire brick liner inside masonry walls. Budget builds stack retaining wall blocks or concrete tree rings ($50–$200). Mid-range projects use salvaged brick, paver patios, or store-bought block kits with caps ($200–$450). Compact yards lean on metal rings, washing-machine drums, or tabletop gel bowls. Call your local fire department or building office about permits and burn bans before you dig—NFPA 1 jurisdictions often require permits for open burning, and many towns ban outdoor fire entirely in dense areas (NFPA).
Fire Pit Safety, Permits, and Placement Rules You Cannot Skip
Outdoor fire is regulated locally. NFPA guidance and the U.S. Fire Administration agree on the behavioral basics: supervise constantly, keep extinguishing tools within reach, and never burn on windy, dry days when embers can travel (USFA). Skip accelerants entirely—gasoline on coals causes explosions (NFPA). Burn only clean, dry, seasoned hardwood in wood pits; never plastics, treated lumber, tires, or household chemical containers (NFPA).
Place pits on non-combustible, level bases—patio blocks, brick, or concrete—not bare dry grass up against siding. Remove trip hazards, keep a spark screen on wood fires when children or windy evenings are involved, and store cooled ashes in a metal container with a tight lid away from combustibles (NFPA). Gel-fuel bowls and fire pots count as open flame too: refill only when cold, outdoors, and 10 feet from burnables (NFPA).
How Far From Your House Should a Fire Pit Be?
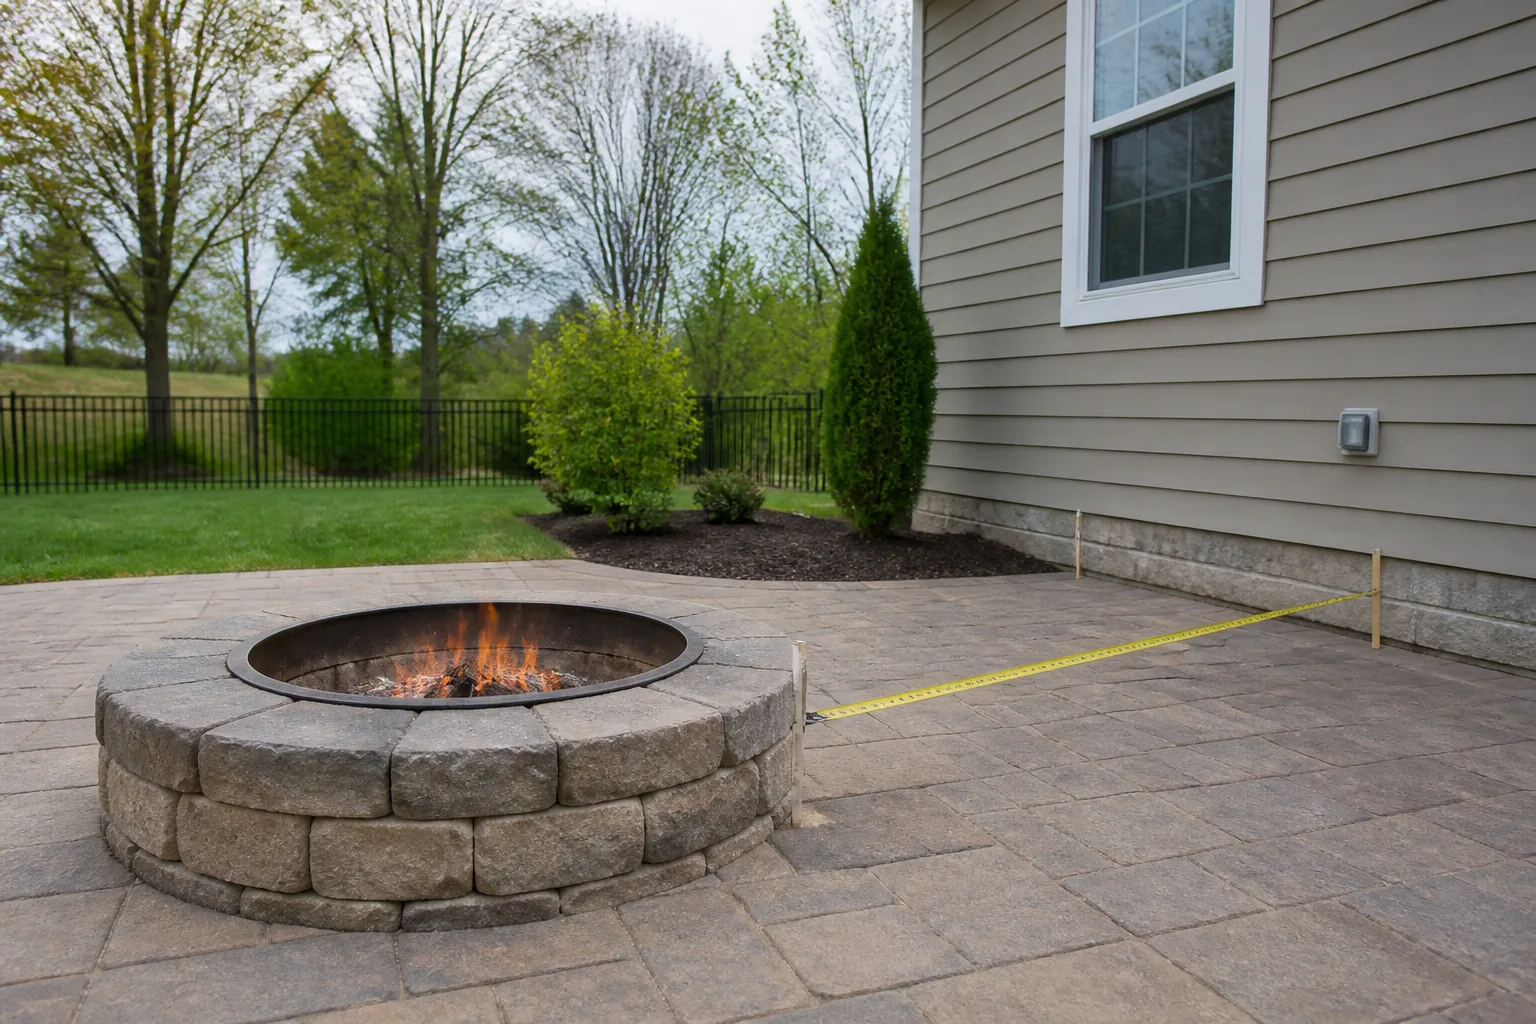
Plan on at least 10 feet (3 meters) from your house, deck railings, fences, sheds, overhanging eaves, and tree branches for a typical backyard fire pit (NFPA). The U.S. Fire Administration recommends chimneys, outdoor fireplaces, and fire pits at least 10 feet from the home (USFA). Larger bonfires or open burns—not small contained pits—may fall under NFPA 1’s 50-foot structure setback where that code is enforced; your authority having jurisdiction can increase distances when embers or radiant heat risk is higher (NFPA).
Radiant heat scales with flame size. A 44-inch pit with tall flames needs more airspace than a 24-inch tabletop bowl. Also clear leaves, mulch, and firewood stacks within 5 feet of exterior walls—embers from your own pit can ignite them during dry spells (NFPA).
What Goes in the Bottom of a DIY Fire Pit
The floor of the pit needs heat-resistant drainage, not bare dirt alone. Standard choices:
- Compacted gravel or paver base beneath the entire structure (outside the burn zone) for stability
- 2–4 inches of sand inside the bowl for leveling and ash containment
- Fire brick or lava rock directly under the wood pile to protect masonry and improve airflow
- A steel fire ring dropped inside block walls so flames never lick the block faces directly
Aim for 6–12 inches of depth for in-ground pits and 12–14 inches of bowl depth for above-ground designs—deep enough to contain logs without flames riding over the lip. Ventilation gaps in brick stacks (small spaces between units) help air feed the fire; fully mortared garden walls without a liner usually fail within a season.
Choose Your Build Type Before You Buy Materials
Above-Ground vs In-Ground Fire Pits
Above-ground block, brick, or metal-ring pits are easier for beginners, drain better on clay soil, and sit visibly above lawn level so mowing and trip hazards are manageable. In-ground pits—salvaged brick rings flush with turf or pond conversions—look minimal and rustic but require deeper excavation, better drainage planning, and clearer edge marking so nobody walks into them at night. Converting an old koi pond works only when the liner is stone or concrete, never PVC or rubber pond membrane.
Wood-Burning vs Propane and Gel Fuel
Wood-burning pits deliver real heat and campfire smell but produce sparks, smoke, and ash—check EPA Burnwise guidance and local smoke ordinances before assuming every evening is legal (EPA). Propane inserts cost more upfront but suit patios near seating and HOAs sensitive to smoke. Gel-fuel tabletop bowls are the smallest footprint and lowest smoke, yet fuel refills demand strict protocol. Never place an open wood fire on a wood deck; use a non-combustible pad and a gas unit rated for deck use if that is your only outdoor surface.
Budget Block-and-Paver Fire Pits ($50–$200)
These six beginner-friendly builds dominate DIY search traffic because they need no mortar and finish in an afternoon.
1. Retaining-wall block circle (~$50–$180). Stack trapezoidal landscape blocks—often 44 units for a ~4-foot ring—on a sand bed. Add a store metal fire ring inside for longevity. Same blocks as an existing retaining wall in your yard create a cohesive look.
2. Four-step landscaping-stone pit. Concrete landscape stones plus a prefabricated fire ring produce a clean modern cylinder; adhesive between courses optional on frost-free sites.
3. Easy paver-on-sand pit (~$50). Retaining wall blocks, sand, and pavers without grout—ideal first masonry project.
4. Concrete tree rings (~$50). Stack scalloped or plain tree rings two to four high. Line with fire brick or a steel ring; plain concrete spalls under direct flame.
5. Square cement wall-block pit (<$100). Low-profile square silhouette suits modern yards; build in a leveled sand bed like rectangular patio pavers.
6. Store kit + block hybrid. Pair a ready-made fire bowl insert from a home center with a DIY stone collar—beginner-friendly with a polished metal bowl center.
| Outside diameter | Approx. blocks | Best for |
|---|---|---|
| 36 in | ~66 | Small patios, 2–4 people |
| 40 in | ~80 | Typical backyard, 4–6 people |
| 44 in | ~96 | Large gatherings, 6–8 people |
Brick, Stone, and Concrete Ring Builds
7. Salvaged brick in-ground ring. Leftover fireplace brick laid in a shallow excavated circle with a secondary outer ring for visual depth—cheapest brick source is your own surplus, not reclaimed yard-sale brick priced for aesthetics.
8. Simple gap-vented brick circle. Lay fire-safe brick with deliberate small gaps for airflow; cap with flat stone if you want a seating ledge.
9. Leftover fireplace brick large round pit. Multiple courses without mortar, refreshed seasonally if frost heaves joints.
10. Whitewashed paver rustic pit (~$400). Stacked pavers, gravel edging, and light wash on faces for coastal-rustic color—budget higher when edging and fill stone enter the cart.
11. Asymmetrical stacked stone or brick. Raise one side into a windbreak—functional in breezy yards and more interesting than perfect symmetry.
12. Pond-to-pit conversion. Drain, verify non-combustible walls, add drainage gravel and a ring; abandon the idea if the pond used flexible liner.
Repurposed and Upcycled Fire Pit Vessels
Upcycling saves money when the vessel is actually fireproof.
13. Secondhand metal dye vat or cast-iron bowl. Verify no plastic coatings, lead paint, or thin galvanized sheet that off-gasses. Add high-temp exterior paint where bare metal would rust through.
14. Washing-machine stainless drum. Holes supply airflow; steel survives heat. Weld or bolt to a non-combustible base—never set directly on dry grass without a stone pad.
15. Old metal wheelbarrow. Remove wood handles, rubber tires, and plastic trays; set on brick or stone; charming for farmhouse yards when rust is stable not structural.
16. Concrete flower-pot cast mini pit. Cast or use a large planter as a form for a tabletop-scale bowl; keep proportions small so heat stays manageable.
17. Koi pond or garden pond basin. Only with stone/concrete shell; fill bottom with sand and fire brick before first burn.
Metal Fire Rings, Steel, and Industrial DIY Options
18. Drop-in galvanized or corten fire ring. Clear level ground, sand or pea gravel base, ring centered—fastest “pit” when codes allow portable rings.
19. Decorative laser-cut steel ring. Same install as above with ornamental cutouts; monitor ember escape through large openings in dry climates.
20. Dual tire-rim tower. Weld or bolt two matching steel rims; angle-grinder work required; industrial aesthetic for shop yards.
21. Bent steel checker-plate geometric pit. Advanced metalwork: cut, fold, and seam a compact plate into a faceted bowl—small-yard sculpture that holds charcoal or small wood splits.
22. Modern metal-and-glass personal pit (~$25 parts). Metal planter or sturdy bowl, grate, and tempered glass panels as wind screens—verify glass is rated for heat exposure; swap terracotta for metal whenever open flame is involved.
Small-Space and Tabletop Fire Features
23. Mini urn or bowl cast pit. Concrete formed in a large urn mold—portable for small patios; elevate on non-combustible feet.
24. Tiny tabletop gel or canister bowl. Sand, decorative rock, and a commercial fire canister inside a stone-finished bowl—best when wood smoke is banned or balconies need low profile. Refuel only when cold (NFPA).
25. Car-rim or drum “solo” pit. Single small rim for 2-person seating; keep 3 feet clearance for kids and pets around any open flame (NFPA).
26. Cinder-block cap square (~$30–$80). Cap blocks in a square with a liner—see materials section before skipping the ring.
Fire Pit Seating, Patio Zones, and Complete Backyard Setups
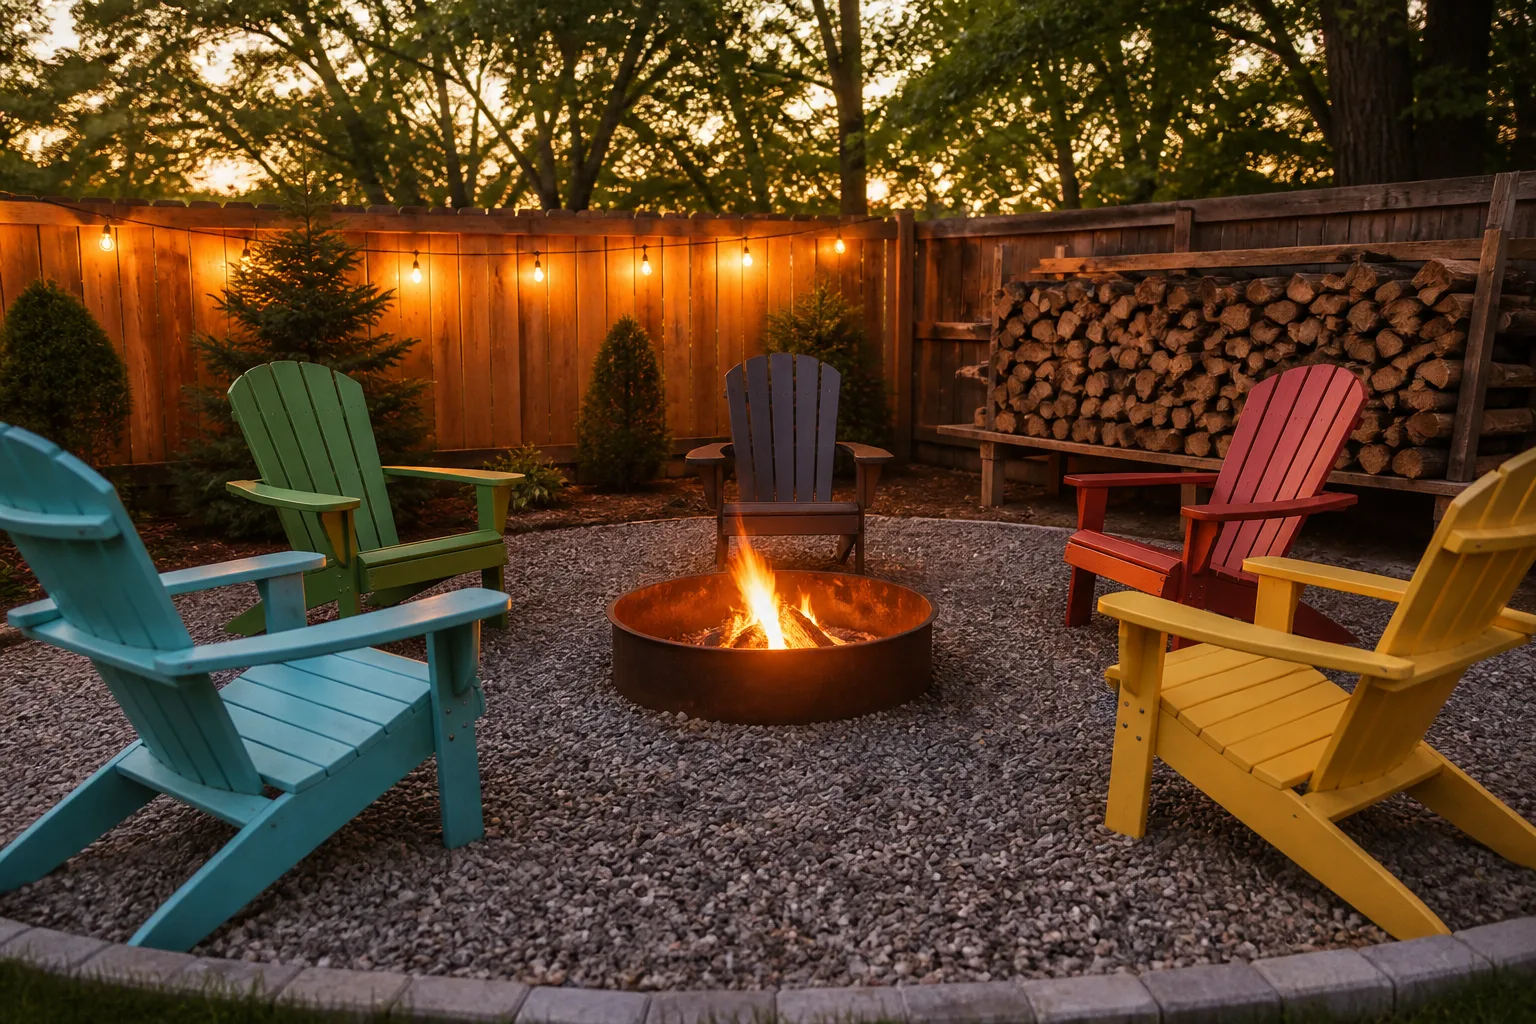
A pit without a zone feels like a bonfire in the lawn; a zone without clearance feels like a hazard.
Curved bench build. A low curved seat mirroring a round pit tucks into corners—keep bench materials non-combustible or far enough back that radiant heat does not char wood repeatedly.
Mulch or gravel pad with metal ring. Purple or bright Adirondack chairs on crushed gravel define the space and keep embers off lawn. Gravel also drains ash runoff better than bare turf.
DIY brick patio corner. Lay a small brick or paver patio in a yard corner, add a store bowl or DIY ring, and store firewood on a raised rack away from the pit lip—a full “outdoor room” weekend project.
Painted makeover on existing ring. Refresh chairs and surrounding mulch color without rebuilding the pit—cheap upgrade when structure is already code-compliant.
Materials That Look Good but Fail in Real Heat
Cinder blocks and standard concrete are fire-resistant, not fireproof. Prolonged direct flame causes spalling and crumble—always use a fire ring or fire brick liner (NFPA). Plain concrete tree rings need the same liner. Terracotta planters crack under thermal shock—metal substitutes perform better for open flame. Flexible pond liners, plastic bowls, and ** painted unknown metals** belong nowhere near fire. Reclaimed brick may contain embedded mortar salts that pop under heat—test a few bricks outside the pit first.
If a design skips the liner to save $40, budget $200 in block replacement within two seasons.
How to Build a Simple Four-Step Block Fire Pit
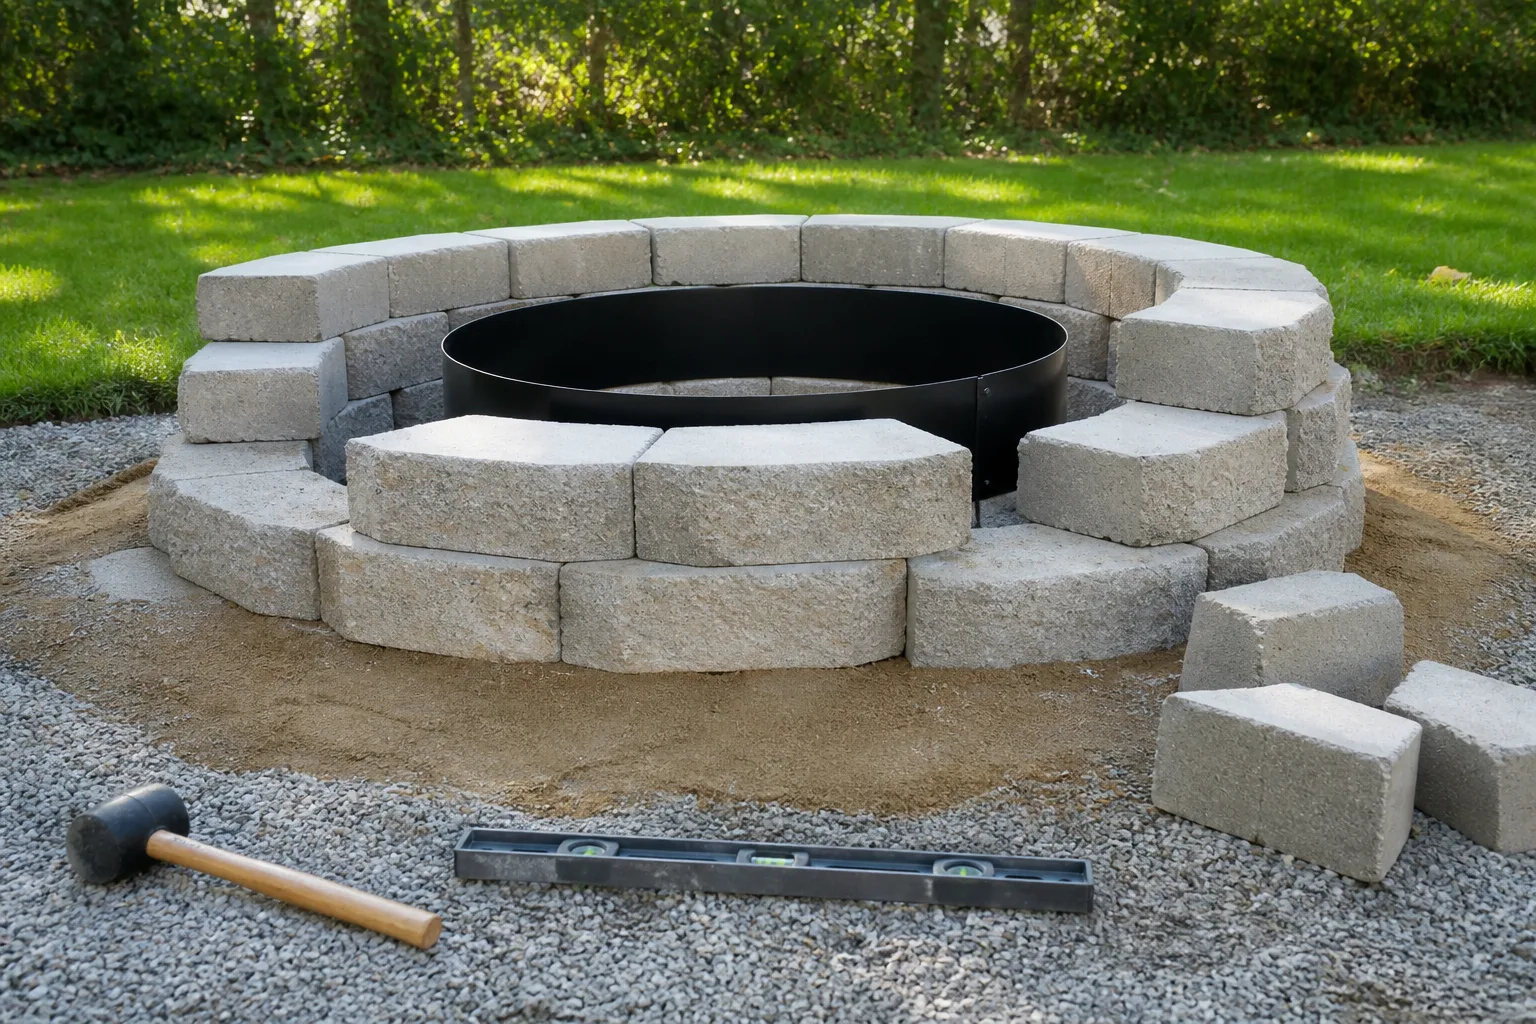
This sequence matches the most common 40-inch retaining-wall block pit with a steel ring—doable in one weekend plus a 24-hour adhesive cure before the first fire.
Step 1 — Mark and dig. Drive a center stake, tie a 20-inch string for a 40-inch diameter, spray-paint the circle. Excavate 8–12 inches deep; keep the bottom flat.
Step 2 — Base and sand. Add 4–6 inches of compacted paver base in lifts, level, then screed coarse sand. This prevents frost heave and tipping.
Step 3 — Stack blocks. Lay the first course perfectly level—every block checked individually. Stack three to four offset courses; optional heat-rated adhesive between courses on windy sites.
Step 4 — Set the ring and cap. Drop the 24-inch steel liner centered; backfill the gap with sand. Cap stones glued on top finish the ledge. Cure, then start with small kindling fires before full logs.
Keep a hose, bucket, or shovel of sand within reach for every burn (NFPA).
Extinguishing, Maintenance, and Seasonal Storage
To extinguish: Stop adding fuel, spread coals with a poker, apply water or dirt until no hiss remains, and stir ash until cold to the back of your hand. Never leave until out (NFPA). Store ashes in metal with a lid; embers can reignite in plastic bins days later.
After each use: Shovel ash once cold; inspect block faces for cracks. Annually: Re-level caps, refresh adhesive, replace a rusted ring, and re-check clearances after new plantings or deck additions. Covers with vents reduce water in block cores and extend life. Seasonal bans: Many jurisdictions prohibit all outdoor burning during red-flag weather—portable pits still need storing away from combustibles when not in use.
Conclusion
The best DIY fire pit is not the cleverest upcycle photo—it is the one your town allows, sited 10+ feet from anything that burns, built with a liner or fire brick where masonry touches flame, and matched to how you actually entertain (wood smoke vs gel vs gas). Use the 26 ideas above as a menu grouped by budget and skill, run the four-step block build when you want a permanent centerpiece, and treat permits, wind, and ash disposal as part of the design—not afterthoughts. Do that, and your pit becomes the feature people gather around for years instead of the project you tear out after one dry summer.