How to Make an Affordable DIY Sprinkler System
Build an affordable DIY sprinkler system with a hose, timer, and matched heads. Plan coverage, test water output, calculate runtime, and fix dry spots without trenching.
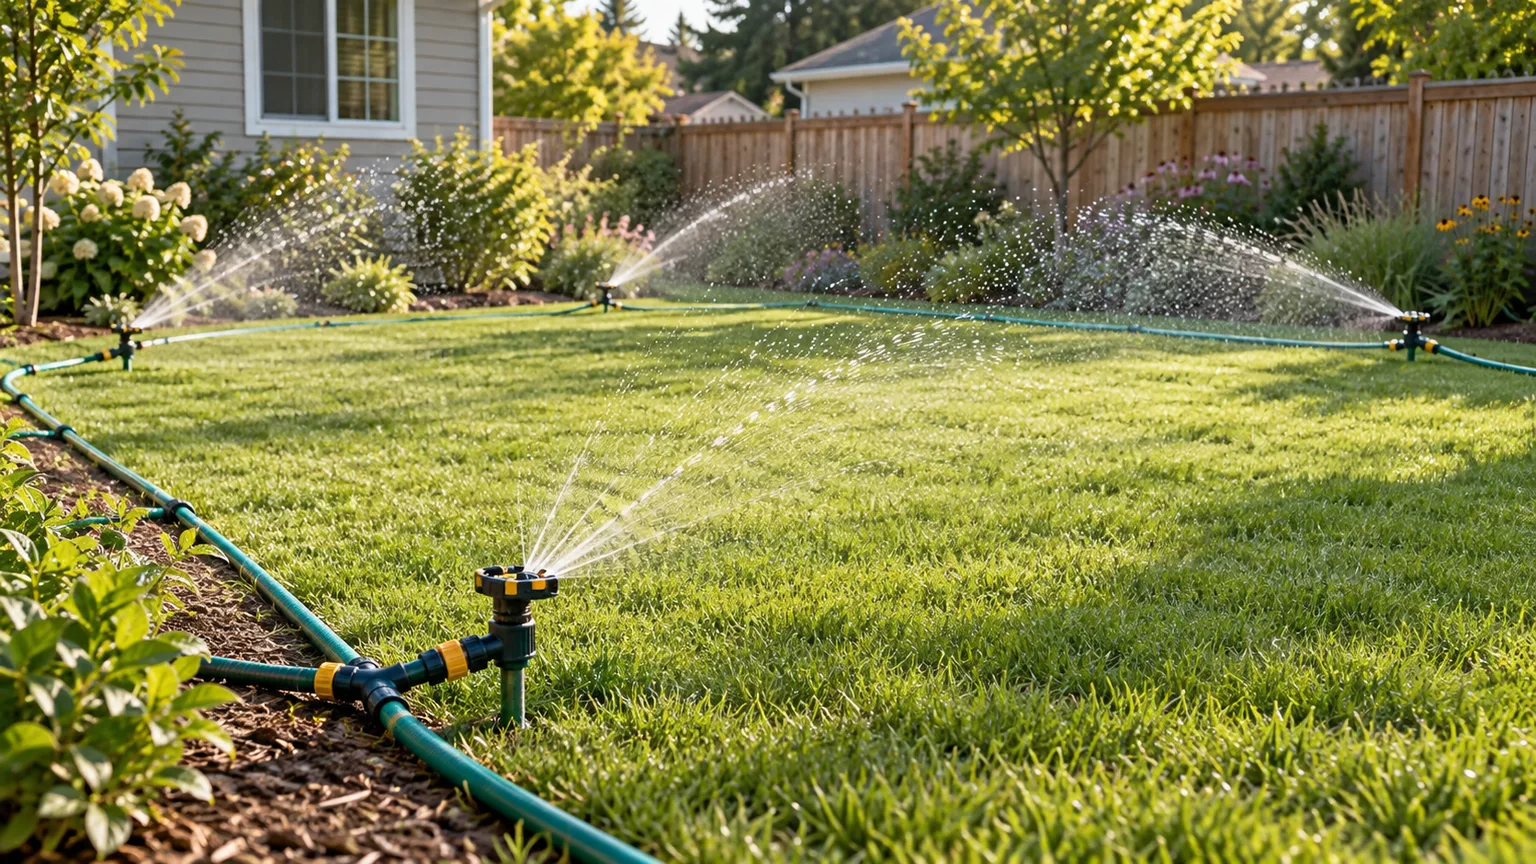
A hose-fed sprinkler network can water a lawn on a timer without trenches, valves buried in the yard, or a permanent irrigation installation. The useful version is a small, modular system: an outdoor faucet supplies a timer, a garden hose carries water to adjustable sprinkler heads, and the heads are placed so their spray patterns overlap enough to avoid dry strips. You can move or expand the parts as the lawn changes.
The main mistake is buying a head count from a generic diagram and assuming it will work on your property. Faucet flow, hose length, nozzle demand, wind, lawn shape, and soil all affect what happens. Start with a map and a quick supply check, assemble only what the water source can support, then use catch cans to correct the layout and set the timer from measured output.
Choose the right no-dig system for your yard
There are three practical levels of DIY lawn watering. The least expensive is one portable hose-end sprinkler that you move by hand; it suits a small lawn or a yard where you do not mind repositioning the sprinkler. A hose-fed network adds a timer and several connected heads, so it can cover the yard in one cycle without dragging a sprinkler back and forth. A buried system costs more and takes more work, but it keeps hoses out of the way and can be designed for several independently controlled zones.
A semi-permanent above-ground system makes sense when the lawn is fairly simple, the faucet is nearby, and seasonal setup and storage are acceptable. It is also a sensible trial before investing in permanent irrigation: you can learn where the lawn actually needs water and whether the faucet has enough capacity. It is not a good fit if hoses would cross a busy walkway, mower route, driveway, or play area, or if the property has steep slopes and several distinct watering needs.
An above-ground line can use flexible garden hose or rigid PVC with appropriate adapters. Hose is easier to rearrange and winterize, but it can kink and lose pressure on long runs. PVC can look neater along a fixed route, but you need compatible fittings, cutting and cementing tools, and a plan for seasonal movement or freezing. Neither material turns a low-flow faucet into a high-capacity irrigation source.
Map the lawn before buying sprinkler heads
Measure the lawn’s length and width, but also draw its actual shape. Mark beds, fences, patios, slopes, narrow passages, shaded corners, and anything that blocks a spray. Note the outdoor faucet and trace the route the hose would take. A simple sketch on graph paper is enough; the goal is to see where a sprinkler can sit, where water must reach, and where overspray would land on pavement or a neighbor’s property.
Divide the lawn into areas that can be watered together. A sunny rectangle and a shaded strip under trees may not dry at the same rate; a steep side yard may need shorter watering cycles than level turf. If all areas can be supplied together, you may use one network. If one area needs different runtime or has a separate water route, plan it as a second manual branch or a separate timer zone rather than forcing every head to operate identically.
For each candidate head, use its stated spray radius as a starting point only. Product ratings are normally measured under specified flow and pressure, so the radius may shrink when several heads run from a long hose. Mark the likely coverage circles or arcs on your sketch and place each sprinkler so the next pattern reaches it. Overlap is the point: an apparent edge-to-edge arrangement often leaves dry wedges when wind or lower pressure shortens the spray. You will fine-tune the spacing with a live test rather than treating the drawing as proof.
Check faucet flow and operating pressure
Before buying multiple heads, measure what the faucet can provide. A five-gallon bucket and a stopwatch give a rough flow rate: open the faucet fully, time how many seconds it takes to fill the bucket, then calculate gallons per minute as 5 × 60 ÷ seconds. If it fills in 30 seconds, the faucet’s measured flow is about 10 gallons per minute at that outlet under those conditions. This is a baseline, not a guarantee that the same flow will reach every nozzle after a timer, splitter, long hose, and several fittings are added.
Pressure and flow are related but not interchangeable. A pressure gauge screwed onto the faucet can show static pressure when the faucet is closed; that number may fall when water is flowing. If a sprinkler manufacturer provides operating-pressure and flow charts, compare against the pressure while the system is running, not just a no-flow reading. A simple gauge with a tee or inline port can help, but the catch-can test later is the reality check for how the assembled system performs across the lawn.
If the flow is modest, do not try to solve it by attaching more heads and hoping the timer will compensate. Use one or two heads at a time, select lower-demand models, shorten the route, or separate the lawn into independently run sections. The University of Utah Extension’s Do Your Own Water Check uses catch cups to help homeowners measure their existing irrigation performance and build a schedule from that evidence. The same principle applies to a hose-fed system: measure it as installed.
Match sprinkler heads to the lawn’s shape
Choose a sprinkler pattern that fits the area instead of asking one head to cover every shape. Family Handyman’s lawn-watering guide recommends matching sprinkler type and size to the lawn; its examples distinguish rectangular coverage from circular areas and emphasize adjusting the sprinkler to the site. The table below is a practical first pass, not a promise about a particular model’s throw distance.
| Sprinkler style | Often useful for | Main trade-off |
|---|---|---|
| Oscillating | Rectangular or long, narrow lawn sections | Easy to place, but wind can distort the fan and the ends may receive a different amount |
| Impact | Open areas where arc and distance need adjustment | Durable and adjustable, though the clicking mechanism and high arc can be noisy or wind-sensitive |
| Rotary or gear-driven | Circular or irregular coverage that needs a controlled arc | Often gives a lower, steadier pattern, but must be adjusted and checked for blockage |
| Stationary multi-pattern | Small patches, corners, or temporary watering | Simple and cheap, but broad spray can be inefficient and usually needs repositioning |
If you are connecting several hose-fed heads, use compatible models with similar flow needs and pressure ranges on the same line. Mixing a high-output impact head with small stationary nozzles can create uneven pressure and different application rates. Also check the inlet and outlet connection: many spike bases have a flow-through path, but some portable sprinklers are end-of-hose devices and cannot pass water onward to another head. Verify the product’s actual connection diagram before buying adapters.
Buy only the parts your layout needs
A basic modular layout usually needs an outdoor faucet timer, a backflow device if required for your connection, garden hose in lengths that match the route, hose washers, one sprinkler base and head for each planned position, any matching connectors or caps, and a spare washer. A dual-outlet splitter can be useful if you want to feed two separate runs or connect a hose for hand watering, but it does not automatically make two independently scheduled zones. For that, use a timer designed to control separate outlets or operate the branches at different times.
Count the components from your sketch. Measure the distance from the faucet to the first head and from each head to the next; buy fewer, longer, well-routed hose sections if they reduce unnecessary joins. Every coupling is another place to leak or restrict flow. If the whole circuit is longer than the available hose, join lengths only where you can see and inspect the couplers.
Do not buy by assuming a universal per-head cost or a fixed number of heads per faucet. Prices, hose quality, timer features, and sprinkler flow vary. A modest layout that waters evenly is more useful than a larger set of heads that loses pressure. A timer with a rain delay or manual override can be convenient, but basic runtime control is more important than app features. Keep the receipt until you have tested the system under real operating conditions.
Plan a safe, serviceable hose route
Keep hoses at the lawn edge when possible and route them where people and equipment will not catch them. Avoid a path across steps, gates, driveways, or the main mowing route. If you cannot route around a walkway, disconnect and move the hose after watering or use a different sprinkler arrangement; a trip hazard that must be crossed several times a day is not a good permanent setup.
Spike bases may penetrate more than turf. Before driving stakes into the soil, check for known utility routes, low-voltage lighting, invisible pet fences, shallow irrigation tubing, and other buried lines. Contact your local 811 service or utility locator to ask whether shallow lawn stakes are covered by local marking procedures. If you cannot verify the path, use a weighted base or set the sprinkler at the edge rather than puncturing unknown ground. Keep spray off electrical equipment, slippery hardscape, and neighboring property.
Protect the potable-water connection according to local plumbing rules. Depending on the setup and jurisdiction, an outdoor faucet may require a backflow-prevention device; do not remove an existing device to improve flow. A hose-thread timer and splitter should be rated for outdoor use, and all female hose connections should contain intact washers. A leak at a connection usually points to a missing, worn, or poorly seated washer—not a need to force the coupling tighter.
Assemble the sprinkler line step by step
Lay all components out before connecting them. Make sure hose threads, pipe threads, riser threads, and adapters match. A garden-hose connection seals against a flat washer; tapered pipe threads seal differently. PTFE thread tape belongs only on compatible tapered pipe threads where the fitting manufacturer calls for it, not as a substitute for the washer inside a garden-hose coupling.
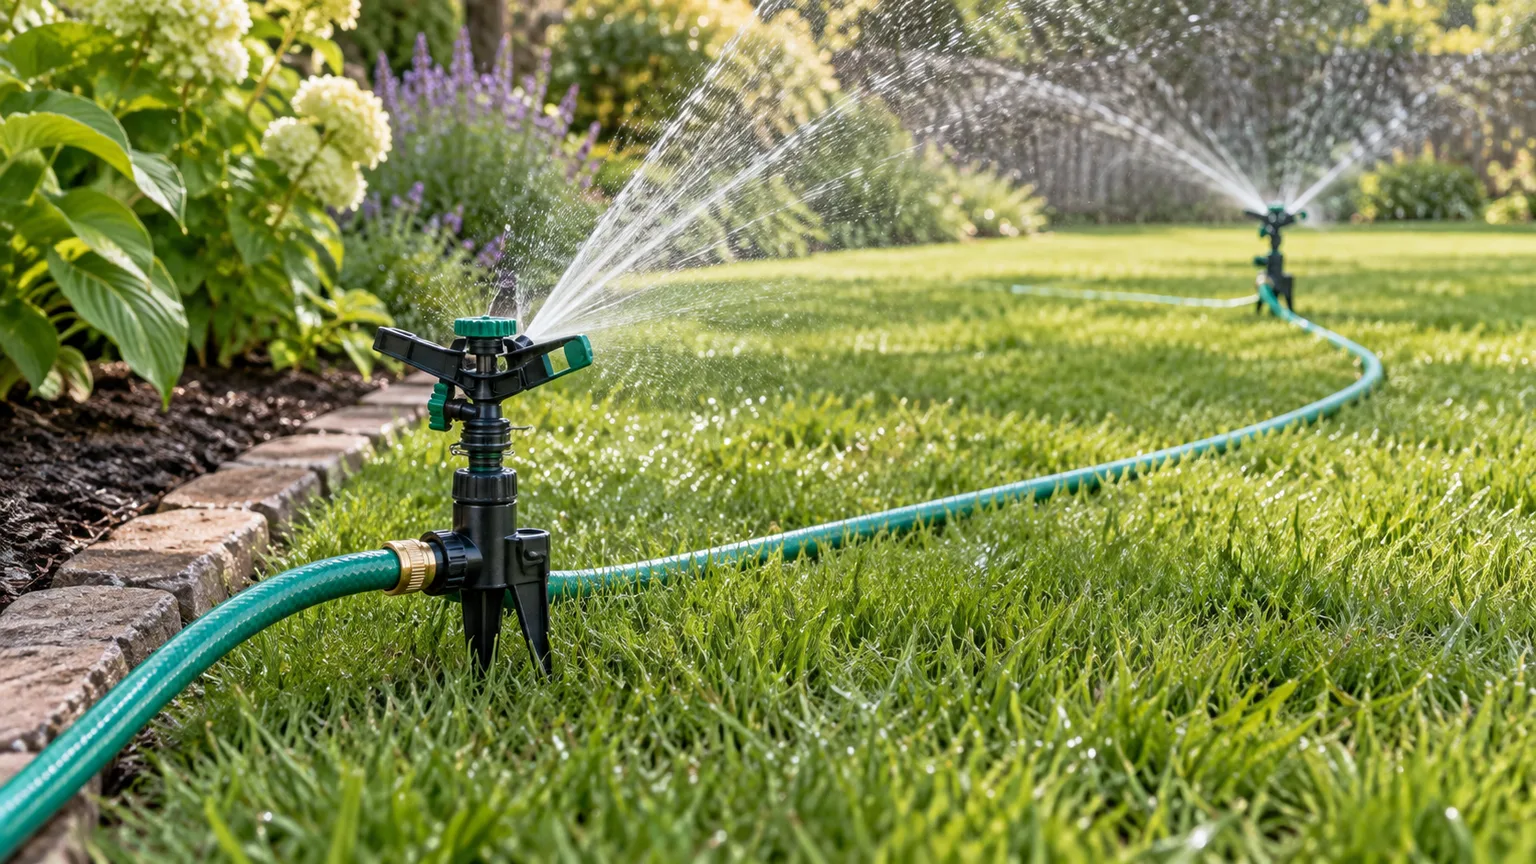
Keep the hose route visible and place the spike base where it can be inspected and adjusted.
Use this order for a single network:
- Close the faucet and remove any old hose washer or debris from the faucet outlet.
- Attach the required backflow device, if your faucet or local code calls for one, then connect the battery timer according to its inlet and outlet markings.
- Connect the hose or splitter to the timer outlet. If using a splitter, keep its valves closed until each branch is ready.
- At each planned sprinkler position, connect the hose to the inlet of a flow-through base. Add a riser and head only if the model is designed for those parts.
- Continue the hose from each base’s outlet to the next head, following the route on your map. Keep the hose relaxed rather than stretched tight around corners.
- Fit the manufacturer-matched end cap to the final outlet so the circuit is closed.
- Turn the faucet on slowly, inspect every joint, and run the line before setting a timer schedule.
Hand-tighten plastic connections. If you need pliers to stop a leak, shut off the water and inspect the washer and thread compatibility first; over-tightening can crack plastic or distort the gasket. A small drip at the faucet may also indicate a worn hose washer or a damaged faucet thread. Fix those leaks now: a timer can make a small leak persist for an entire cycle.
Set spray arcs and check the pattern
Run the system during daylight the first time so you can see what each sprinkler is doing. Walk the perimeter and look for a head that is tilted, blocked by a plant, pointed at a fence, or spraying a sidewalk. Adjust the arc, radius, or position using the sprinkler’s own instructions. At corners, use a partial arc where possible; along an edge, keep the water on the lawn rather than rotating into pavement.
Do not try to eliminate every visible gap by turning every nozzle to maximum. The “maximum” setting can throw water beyond the lawn, and more distance may mean less water where you need it. Move heads closer if the patterns fail to overlap, or substitute a model designed for the shape. A long narrow lawn may be better served by an oscillating sprinkler placed across the short dimension than by several circular heads; a compact patch may need just one well-positioned rotary head.
Notice whether the spray weakens as you add heads or reaches the last station. If the first sprinkler performs well alone but the entire line becomes weak, the network is asking for more flow than the faucet and hoses can sustain. Close the faucet, remove one head or split the layout into smaller runs, and test again. Do not compensate for a weak last head by moving it farther away or increasing the timer duration; the coverage problem will remain.
Measure sprinkler output with catch cans
A catch-can test measures two useful things: how quickly the system applies water and whether it distributes that water evenly. Place identical straight-sided cups or small cans across the lawn, a few feet from sprinkler heads rather than directly beneath a nozzle. Run one zone for a timed period, such as 15 or 20 minutes, then measure the depth collected in each cup with a ruler. Test each branch separately if the timer or splitter creates separate runs.
The UC ANR sprinkler-output test demonstrates the same approach: spread at least six straight-sided containers, run the sprinkler for a known time, measure each catch, and average the depths. Colorado State University Extension recommends using identical level containers, sampling both healthy and problem areas, and watching for heads that are crooked, plugged, blocked, or pointed incorrectly during a 15- to 20-minute informal audit. See its lawn irrigation audit tutorial.
Calculate the average depth by adding all cup measurements and dividing by the number of cups. To convert that depth into an hourly application rate, multiply by 60 and divide by the test duration in minutes. For example, if cups average 0.2 inch after a 15-minute test, the system applies about 0.8 inch per hour on average. This average alone does not prove good coverage: compare the individual cups. If one side collects much more than another, adjust head placement, pattern, or the number of operating heads before setting the timer.
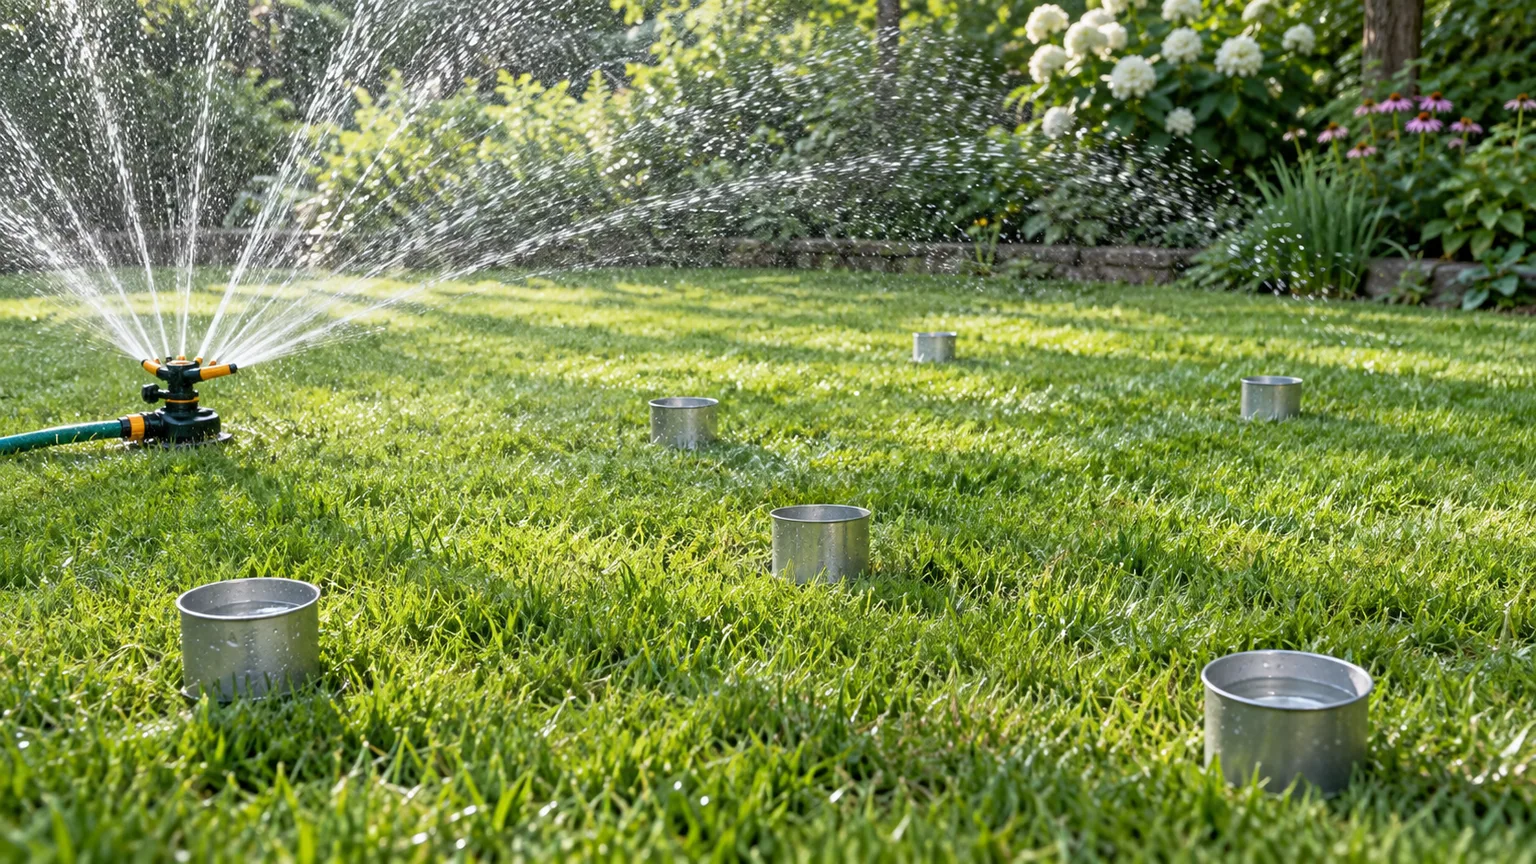
Straight-sided catch cups reveal how water is distributed beyond the area immediately around each sprinkler.
The City of Cocoa catch-can guide suggests testing zones individually and looking for large differences among containers; its example flags a cup with at least a half-inch of water when others are nearly empty as a sign that the system needs inspection. Use the precise threshold as a prompt to investigate, not a universal pass/fail standard for every sprinkler or lawn. Any obvious dry band, overspray, or wide spread between cups is worth correcting.
Calculate a starting timer duration
A timer setting should follow measured output and the amount of water your lawn needs—not a generic “20 minutes” instruction. First use local extension guidance, your grass type, weather, soil, recent rain, and any watering restrictions to choose a reasonable target depth for one session. Established lawns and newly seeded areas have different needs; sandy and clay soils also absorb water differently. For a newly seeded lawn, the objective may be to keep the surface consistently damp rather than deliver a deep established-lawn cycle.
Then divide the target depth by the measured application rate. If your catch-can average is 0.8 inch per hour and the locally appropriate target for a session is 0.4 inch, the starting runtime is 0.4 ÷ 0.8 × 60, or 30 minutes. The target in that example is illustrative, not a universal recommendation. Recheck the lawn and catch cups after the first cycle, because wind, pressure changes, and head movement can change what reaches the grass.
The City of Cocoa test instructions likewise convert measured depth into runtime rather than relying on minutes alone. If you divide a weekly target into several sessions, divide the depth among those sessions and recalculate from the same measured rate. Rainfall counts toward the water the lawn receives; pause the timer after significant rain and follow any local watering schedule.
Water early in the day when practical, and avoid spraying in strong wind. The RHS watering guidance notes that morning watering reduces evaporation, while the Family Handyman lawn-watering guide emphasizes adjusting watering to weather, soil, grass type, and recent rain instead of following a rigid schedule. Use those principles as context, then let your own catch-can readings and local advice set the actual run time.
Prevent runoff on slopes and tight soil
If water begins running onto pavement or pooling before the soil absorbs it, one long cycle is too much for that part of the yard. Use cycle-and-soak watering: run the system for a shorter block, pause long enough for water to infiltrate, and run another block. The right block length depends on slope, soil texture, compaction, and sprinkler output, so watch the ground and adjust rather than copying a fixed schedule from another yard.
Test a sloped strip separately if it behaves differently from level turf. A slope may need a dedicated timer zone or a manually controlled branch because it cannot absorb the same continuous flow as flat ground. If the system waters a large area at once, reduce the number of heads running simultaneously. More starts and pauses may take longer on the clock, but they can keep water where roots can use it rather than sending it into a storm drain.
Do not mistake standing water for successful deep watering. The City of Cocoa’s catch-can guidance notes that irrigation can apply water faster than soil absorbs it. Check how far moisture has moved into the soil after watering and shorten the run if water is moving off the lawn. Aeration or soil improvement may help chronic compaction, but avoid adding soil amendments blindly; identify the cause first.
Fix leaks, weak spray, and dry patches
A few quick checks solve many problems. If the timer does not open, confirm that its battery is fresh, its manual control is open, and its inlet and outlet are connected in the correct direction. If the faucet runs but the first head sputters, inspect the washer, hose kink, nozzle screen, and any filter the manufacturer specifies. If the first head works but the final one is weak, try fewer heads, a shorter hose run, or a separate branch.
Dry spots can result from blocked or misdirected spray, heads set too far apart, wind, low pressure, or a change in slope. Put catch cups in both dry and green areas during the same cycle; compare their depths before changing the runtime. If all cups are low, the whole system may need longer to reach the target depth. If some cups are low while nearby cups are high, increase overlap or adjust the layout. Running longer may overwater the wet areas without fixing the dry ones.
Leaks can occur at faucet threads, splitters, timer connections, hose couplers, or cracked plastic bases. Shut off the water before taking apart a connection. Replace damaged washers and cracked fittings instead of tightening harder, and check that hose-thread parts are not being forced onto pipe-thread adapters. When pressure suddenly changes, look for a hose kink, a partially closed splitter valve, another household fixture using water, or a timer that is not fully open.
Maintain and winterize the setup
At the start of each watering season, flush the hose and check the timer, washers, splitter valves, bases, and nozzles. Run the system once while watching for leaks and blocked sprays. Reposition heads if edging, mowing, new plants, or moved patio furniture has changed the pattern. Repeat the catch-can test after a head change or whenever dry stripes appear; a timer setting is only as good as the layout it was measured on.
Keep hoses out of mowing paths and inspect them for cuts, sun damage, bulges, or crushed sections. Drain or unhook the line before a hard freeze, remove batteries from the timer if it will be stored, and bring plastic timers, nozzles, and spike bases into a shed or garage. Water left in fittings can freeze, expand, and split plastic. Coil hoses loosely and avoid leaving a timer under direct exposure if its manufacturer calls for indoor storage.
If you use above-ground PVC, follow the fitting and cement manufacturer’s instructions and drain the line before freezing weather. Rigid layouts are less convenient to move and can be damaged by mower wheels, foot traffic, or shifting soil. Recheck every connection when bringing the system back online; a split fitting can leak for a full scheduled cycle before you notice it.
Know when to choose a different system
Choose a portable hose-end sprinkler instead if the lawn is small enough to water in a few moves and you want the lowest-cost, easiest-to-store option. Choose a hose-fed network if the shape is simple, the faucet has adequate capacity, and hoses can be routed safely. Consider a professionally designed or permitted buried system if the lawn is large, divided into several hydrozones, on a steep slope, or needs independent watering schedules that are awkward to achieve with a single hose connection.
A professional is also appropriate when water pressure is very low or highly variable, the faucet or plumbing needs repair, backflow requirements are unclear, or you want to connect irrigation directly to a potable-water line. Local rules can affect backflow protection, permits, and watering schedules. Ask the local water utility or building department before changing plumbing or installing a permanent system.
An above-ground system can be reliable for seasonal watering, but it is not invisible or maintenance-free. Hoses can leak, timers can lose power, sprinklers can shift, and weather can make a saved schedule unsuitable. A quick visual check and occasional catch-can audit usually take less effort than letting a poorly adjusted system waste water or leave one half of the lawn dry.
Conclusion
An affordable DIY sprinkler system starts with the yard and faucet you have, not a universal parts list. Map the lawn, test the water supply, match the sprinkler pattern to the space, and install a modular hose network that you can inspect and adjust. Leave room for overlap, protect the hose route, and use compatible fittings rather than forcing connections.
The most valuable upgrade is measurement. A catch-can test shows whether the system distributes water evenly, and its average depth gives you a practical starting point for timer runtime. Correct dry spots by changing the layout or reducing simultaneous demand, then retest. Once the watering is even and the hoses are safely routed, a small timer can make a no-trench setup convenient without turning a budget project into a permanent irrigation job.