26 Fairy Garden Ideas That Make a Yard Feel Enchanted
Fairy garden ideas for a yard or patio: 26 designs, miniature plant choices, paths, container tips, wildlife-friendly details, and a simple build sequence.
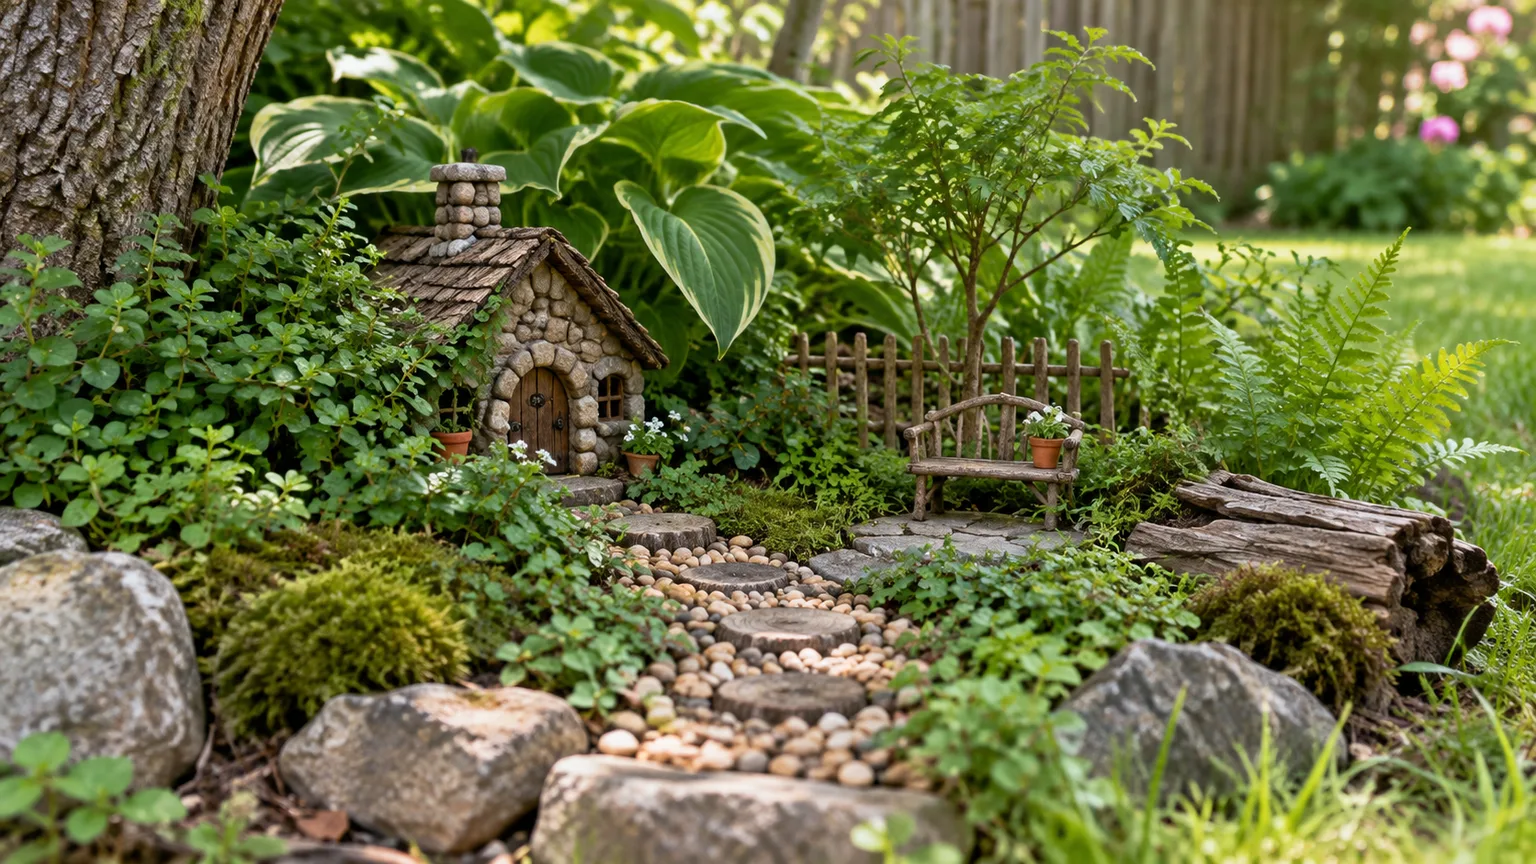
A fairy garden is a planted scene with miniature scale cues: a tiny doorway, a path that disappears between leaves, or a sheltered nook that looks as though someone could live there. It can occupy one corner of a border, sit in a broad pot on a patio, or become a small destination along a real garden path. The most convincing versions feel like part of the yard instead of a collection of figurines set on bare soil.
You do not need a pond, an old tree, or a large lawn to get the effect. Start with a place you can reach to water and weed, then build a scene around its light, drainage, and existing plants; the ideas below work best when the garden still functions as a garden.
Plan a fairy garden around the place you actually have
Choose one small stage and one focal point
Pick a small area that already has a useful boundary: the inside curve of a flower bed, the sheltered side of a shrub, the foot of a fence, a low retaining wall, or a wide outdoor container. A clear edge keeps tiny accessories from looking scattered, and it gives the eye a frame before you add anything.
Choose one focal point first, such as a cottage, a tree-root doorway, a broken-pot terrace, or a miniature bridge. Keep it low enough to see from the seat or path where you will enjoy the garden, and make sure it will not block a gate, mower route, drainage channel, or access to the plants behind it.
Survey light, drainage, and the view before adding decor
Watch the site at different times of day before buying plants. A spot that gets hot afternoon sun needs different foliage and more frequent moisture checks than a cool north-facing corner; shade under a tree can also be dry because roots compete for water.
Look at the scene from the height where it will be viewed. A ground-level fairy garden can disappear behind tall border plants, while a tabletop-size container may need just one upright plant to create a backdrop; move a sample pot or stone into place before committing to a layout.
26 fairy garden ideas for a yard that feels lived in
Use these ideas as building blocks, not a shopping list. Two or three repeated materials and a clear path usually create more cohesion than adding a new ornament at every turn.
Build an entrance and a sense of shelter
-
Set a small door at the foot of a fence or sturdy stump. Let leaves partially screen it so it feels discovered, not displayed. If you use a living tree, keep screws, nails, glue, and tight wire out of its bark; mount a removable door on a stake or nearby stone instead.
-
Tuck a cottage behind a low shrub. Place it far enough back that the foreground remains open for a path or planting, then use a few stones as a low “wall.” The cottage becomes a focal point when the space around it is quieter.
-
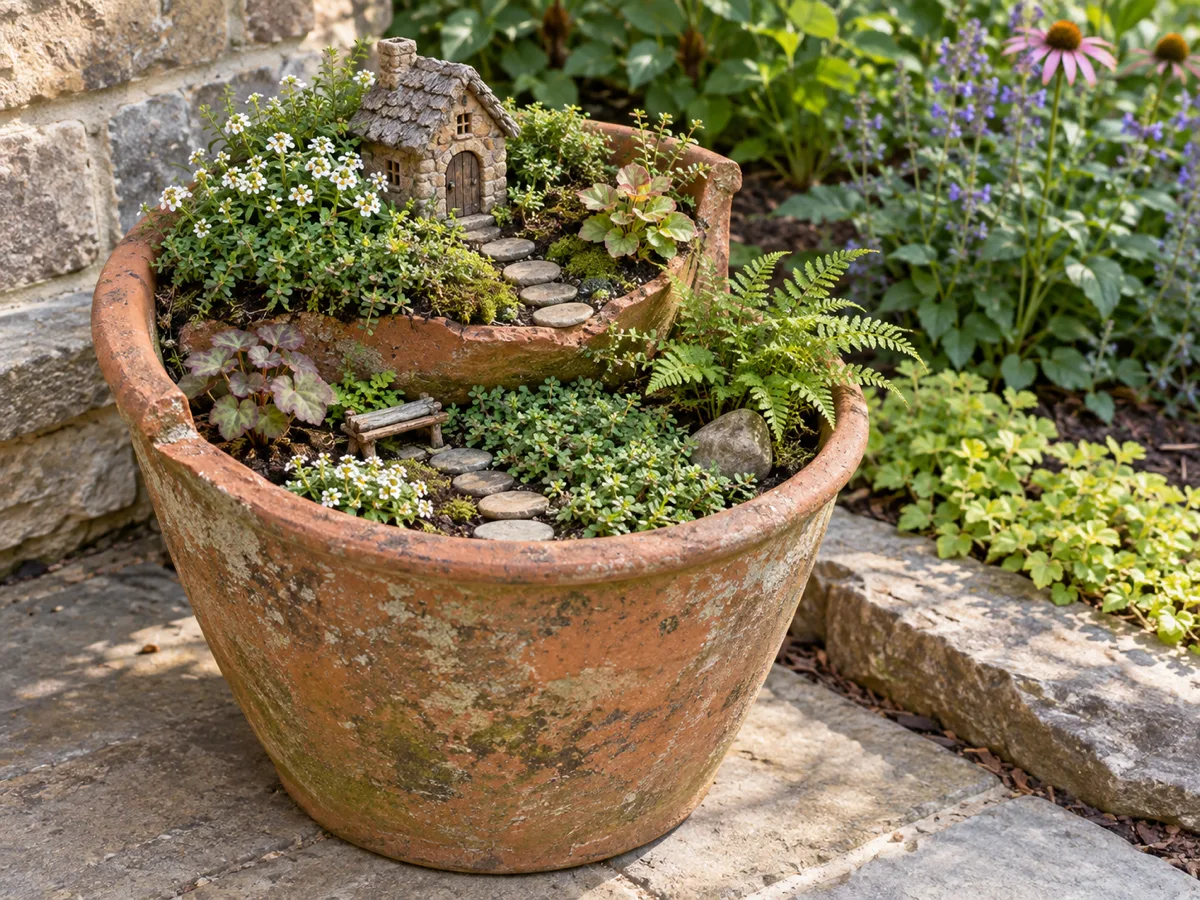
Turn a broken terracotta pot into a stepped hillside. Set the largest intact piece securely, add fresh potting mix to create a shallow upper terrace, and use the broken edge as a miniature retaining wall. Smooth or cover sharp edges and keep the pot stable where children or pets cannot knock it over.
-
Give an old wheelbarrow a second life as a portable village. Check that it drains, fill it with a light potting mix, and use the handle end as a natural backdrop for a tiny house or trellis. Its mobility is useful in cold climates, where tender plants or fragile figures can be moved under shelter.
-
Hang a small garden scene where floor space is scarce. A sturdy hanging basket can hold a trailing plant, a tiny house, and a short path along its rim. Keep the load balanced, use a bracket rated for the filled weight, and water slowly enough that the container drains rather than spilling over a walkway.
Lay paths and change the ground plane
-
Wind a narrow path toward the focal point. A gentle curve makes a tiny garden feel larger and gives the eye a reason to travel through it. Use one material consistently—flat pebbles, bark chips, or small stepping stones—and keep the path wide enough to brush away debris.
-
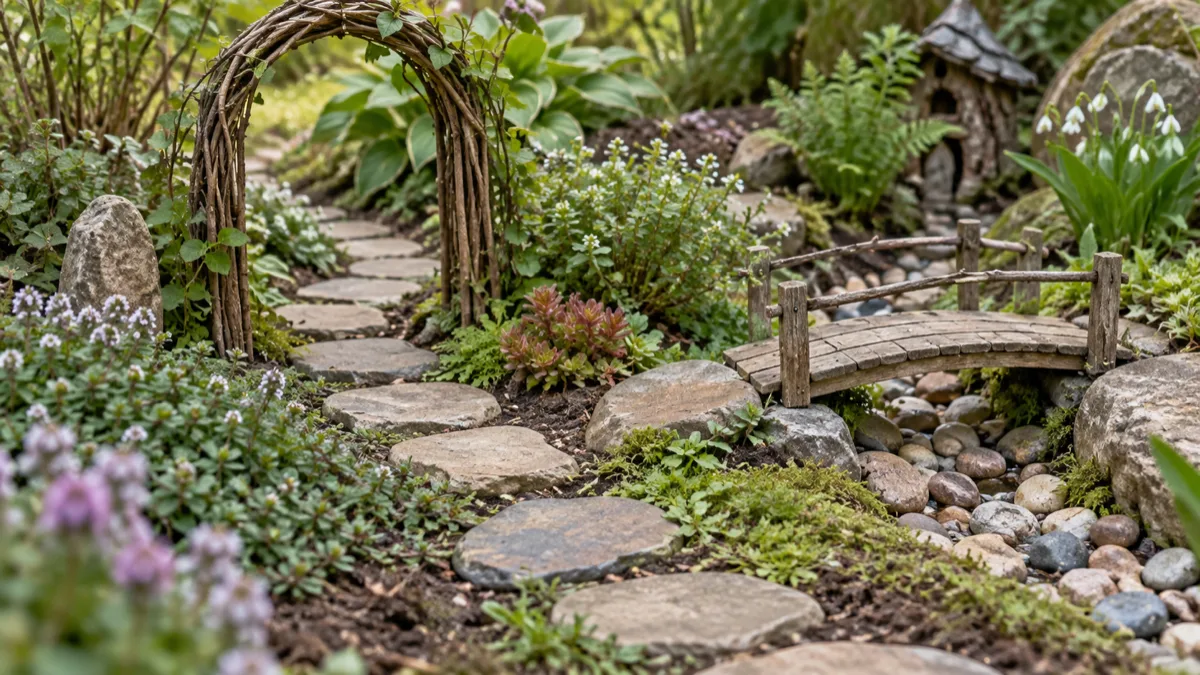
Make a stepping-stone route across groundcover. Set stones nearly level with the soil so they read as a walkable path rather than a pile of rocks. Leave room between stones for plants that tolerate light foot traffic, but keep the route clear if you need access for watering or weeding.
-
Shape a dry pebble stream through the planting. A shallow ribbon of rounded stones can suggest water without a pump, standing water, or electrical cord. Let it widen at one point like a pool and narrow again near a bridge; avoid glass chips that can cut feet, paws, or hands.
-
Add a tiny arch as a threshold. Bend a short willow or wire-free twig into an arch over a path, then train a compact climber nearby rather than wrapping a plant tightly around the structure. In a windy spot, anchor the arch in soil or a heavy pot instead of relying on a light ornament.
-
Bridge a dry “ravine” with a miniature footbridge. The bridge needs something to cross—a pebble channel, a gap between stepping stones, or a shallow change in height. Set it on firm ground and skip water beneath it unless you are ready to maintain a real water feature.
-
Use a curved bed to suggest a fairy ring. A crescent or loose circle of flowers creates a gathering place while leaving a practical opening for a path. Keep the border wide enough for your chosen plants to mature; a ring of tightly packed seedlings can become a tangled mass by midsummer.
Reuse containers and garden vertically
-
Build a fairy garden in a wide, shallow pot. A broad container gives you space for a path and a focal point without making the scene hard to reach. Choose a frost-resistant pot if it will stay outdoors in winter, or use a lighter planter you can move when temperatures drop.
-
Stack two sturdy planters to create a miniature hillside. Set the upper container slightly behind the lower one so both remain visible and water from the top does not pour onto a doorway or seating area. Use compatible plants in each level rather than forcing shade-loving moss and sun-loving succulents into one pot.
-
Turn a low shelf or stair-step plant stand into a vertical village. Put the largest scene at eye level and repeat one detail—matching stone paths or small wooden houses—across the tiers. Protect the shelf from rot and secure containers so a gust or accidental bump cannot send them down.
-
Make a miniature trellis the garden’s backdrop. A simple twig fan or short lattice gives height without using a full-size arbor. Choose a compact or slow-growing climber suited to the site, and leave enough space to prune it before it covers the house and path.
-
Plant around a stump or log instead of hollowing it out. A weathered stump supplies texture and a natural “stage,” while the planting around its base softens the edges. Do not cut into a living tree or pile wet soil against its trunk; keep the root flare visible and the tree’s bark dry.
Add tiny gathering places and tactile details
-
Create a miniature patio with flat stones. Lay a small square or irregular terrace beside the cottage, then leave the surrounding soil planted. A defined hard surface gives a scene a believable destination and keeps furniture from sinking into damp mulch.
-
Give the fairies a bench under a plant canopy. Put a tiny seat where low branches or fern fronds make shade, and point it toward an interesting view rather than the back of a fence. Anchor the bench lightly so it stays put when rain loosens the soil.
-
Use one sculptural mushroom or carved stone as a punctuation mark. One handmade accent can be easier to live with than a scatter of plastic ornaments. Choose a material that can handle rain and sun, and keep any painted surface intact so flakes do not end up in the soil.
-
Add a tiny table for a tea-party vignette. Set it near the path, not in the middle of it, and pair it with only one or two cups or stools. Bring delicate ceramic pieces indoors before freezing weather, or replace them with sturdy stones and wood.
Bring in light, sound, plants, and wildlife
-
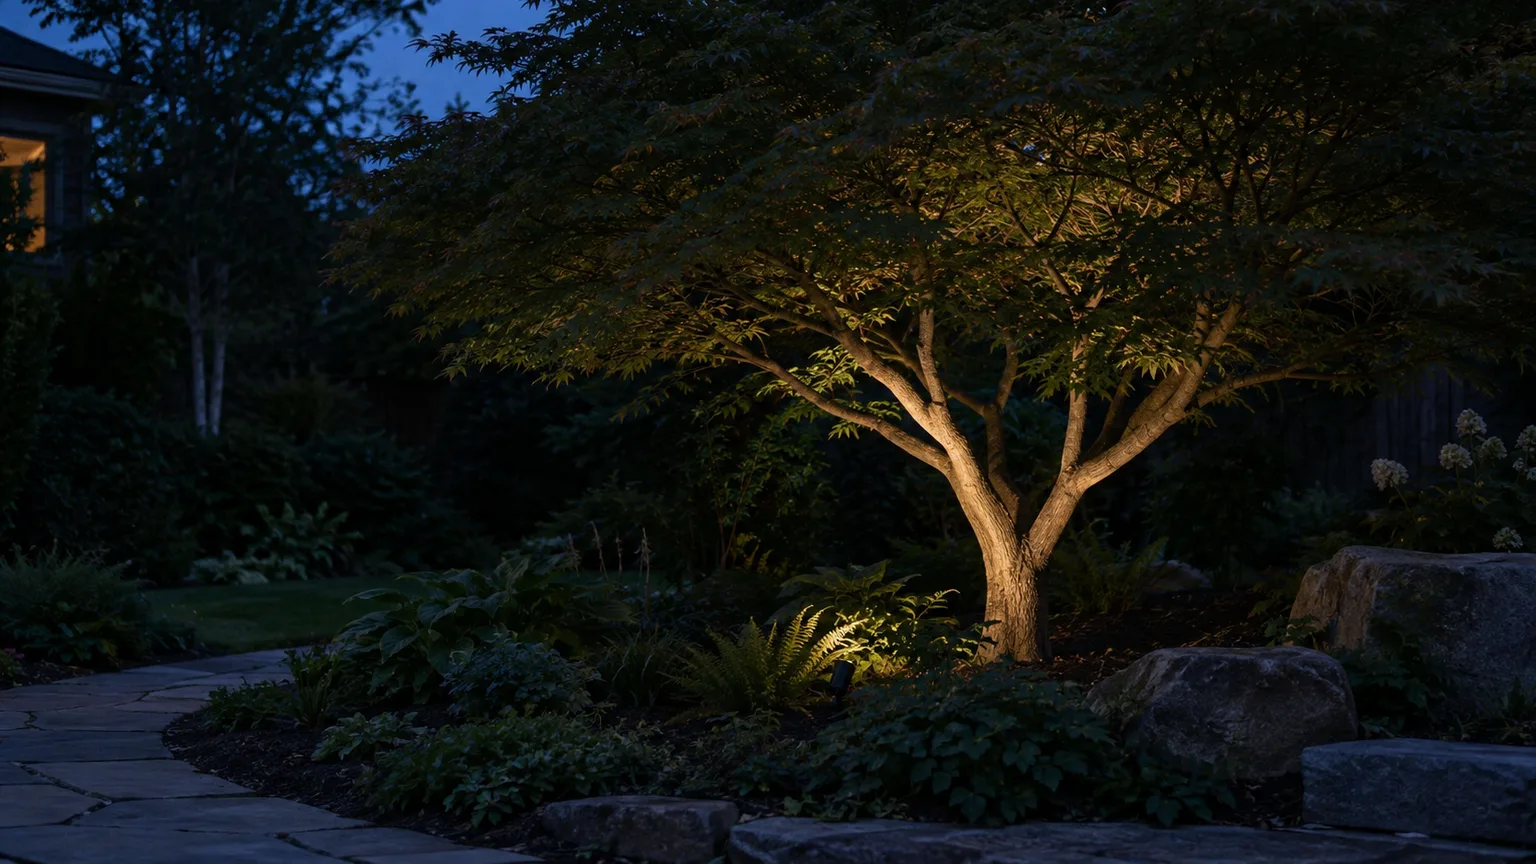
Outline one branch or path with low-voltage or solar lights. A small number of warm lights can reveal the route after dusk without turning the entire yard into a display. Use outdoor-rated fixtures, keep cords out of footpaths, and avoid shining bright beams into neighboring windows or wildlife cover.
-
Hang a quiet chime where it can move freely. Choose a soft sound and a secure branch or hook; a loud chime beside a bedroom window may be charming for a day and irritating every night. If birds use the area, avoid long loose strings or fishing line that could tangle wildlife.
-
Use a mirror only as a framed garden detail, not a hidden “portal” on a bird flight path. A small reflective panel behind foliage can bounce light into a dark corner, but mirrors in open garden positions may confuse birds. If you cannot keep the reflection visually broken up by nearby leaves, choose a painted panel instead.
-
Plant a small native flowering patch beside the miniature scene. Native plants chosen for your region can make the larger garden useful to insects and birds while the tiny cottage supplies the storybook scale. The National Wildlife Federation notes that native plants can provide wildlife with food, cover, and places to raise young; its small-space wildlife gardening guide also suggests containers and vertical space when ground is limited.
-
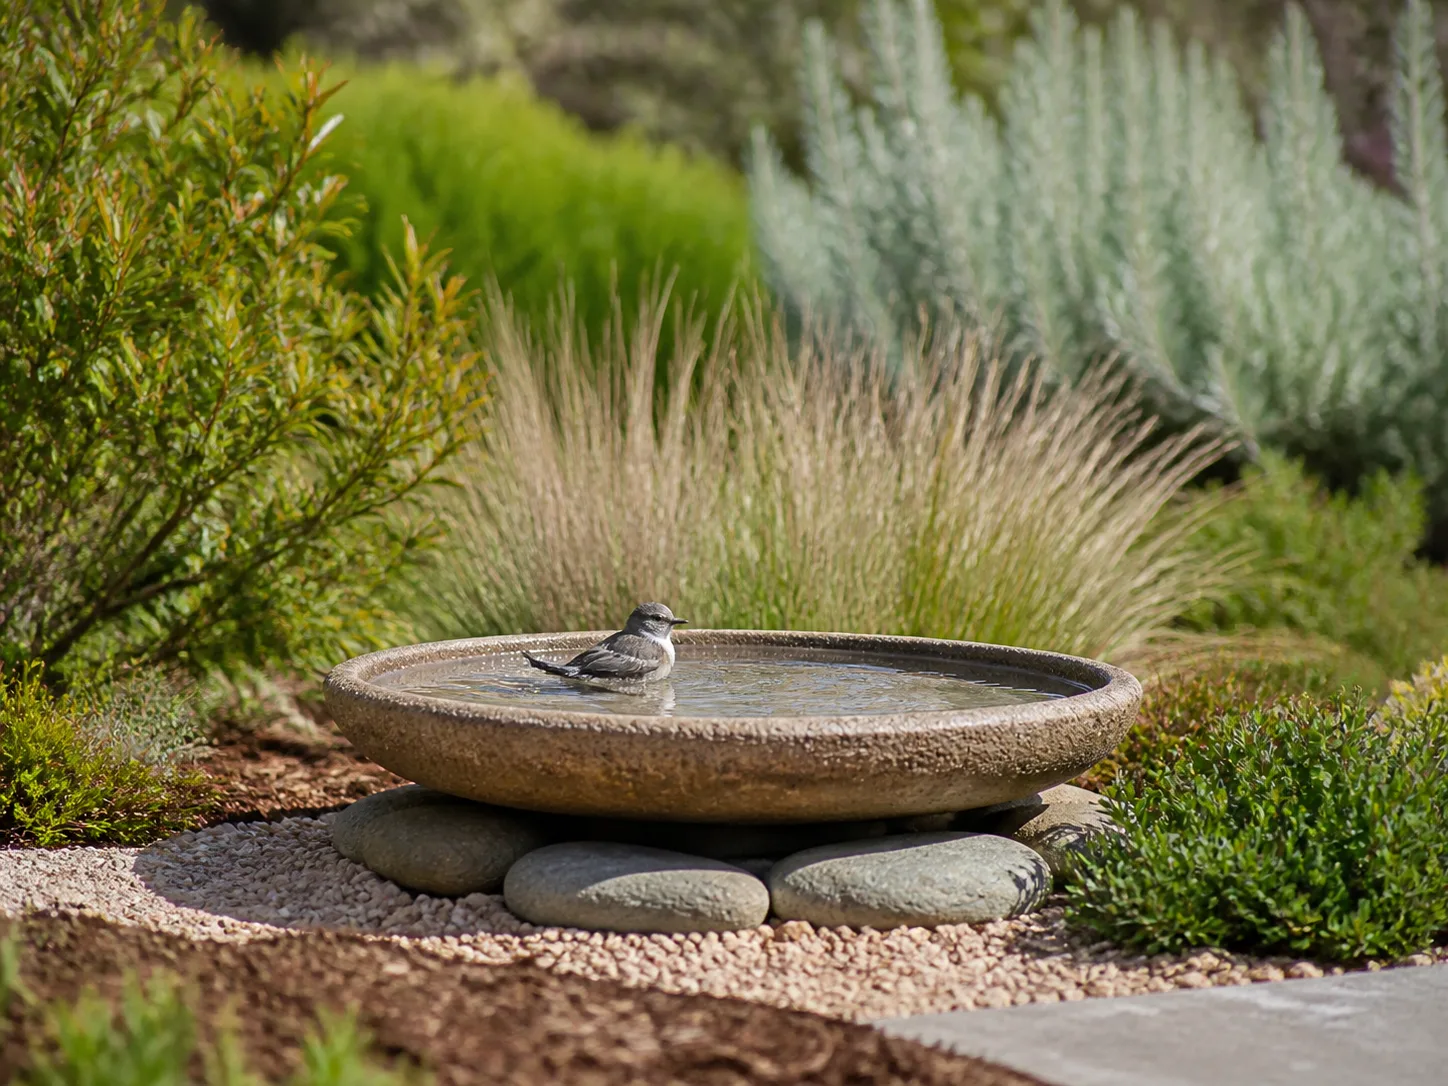
Set a shallow birdbath or butterfly puddling dish nearby. Put it where you can refresh and clean it, not where it becomes a forgotten decorative bowl. The National Wildlife Federation says even a small outdoor space can include a water source, and it stresses that human-made habitat features need regular care to remain clean and beneficial.
-
Leave a little seasonal structure in the surrounding bed. Seedheads, evergreen foliage, and some standing stems extend the garden’s texture after flowers fade and can provide cover or food. Keep the miniature house and path clear, but do not strip every nearby plant bare just to make the scene look tidy in winter.
Choose plants that stay in scale
A convincing miniature garden depends more on plant habit than on the label “miniature.” A slow-growing groundcover, compact sedge, dwarf fern, or small-leaved shrub gives a cottage a sense of scale; a fast-growing plant can swallow a door in a month even if it looked tiny in its nursery pot.
Better Homes & Gardens’ horticulturist-authored list of miniature landscaping plants includes examples such as dwarf mondo grass and miniature ferns, but it also shows why one universal shopping list will not work: the plants differ in sun, moisture, and hardiness. Check the mature height and spread, local invasive status, and your region’s winter conditions before buying; “dwarf” does not mean it will stay miniature without pruning.
Match plant habit to light, moisture, and climate
Use this quick filter before you shop:
| Site condition | Plant direction | What to check |
|---|---|---|
| Bright sun, drying quickly | Compact sedums, small grasses, or locally suitable thyme | Drainage, heat tolerance, spread, and winter hardiness |
| Part shade with regular moisture | Dwarf ferns, small sedges, or compact native groundcovers | Mature width and whether the site stays evenly moist |
| Dry shade beneath a tree | Small, drought-tolerant shade plants or a mostly stone-and-wood scene | Tree-root competition; do not assume shade means moist soil |
| Container with mixed exposure | Group plants with similar light and water needs | Each plant’s mature size and the pot’s drainage |
Treat the table as a starting point, not a plant prescription. Creeping thyme, bugleweed, and other spreading groundcovers may suit some settings and become a nuisance in others, so check regional guidance and keep vigorous plants in pots or behind a firm edge.
For wildlife value, favor native plants adapted to your local ecoregion rather than choosing a species just because it is small. The National Wildlife Federation’s native-plant guide explains how native plants support the food webs and habitat needs of local wildlife; its small-space guide offers a native plant finder and ideas for container and vertical planting.
Build the garden in a reliable order
-
Mark the footprint. Use a hose, string, or spare stones to outline the scene, then leave enough space to reach every plant without stepping on the border.
-
Set the biggest element first. Put the cottage, stump, pot, or bridge in place and view it from the main approach. If the focal point looks too large or disappears behind foliage, adjust its location before planting.
-
Place the route and hard details next. Dry-fit the path, patio, and bridge, keeping the route open and stable. A handful of repeated stones reads as a path more clearly than a mixed pile of shells, beads, and glass.
-
Plant the structural greenery. Add the slowest-growing or tallest plants at the back or side, then fill the foreground with lower groundcover. Keep nursery labels until the layout is established so you can check each plant’s identity and mature size.
-
Add small accessories last. Leave breathing room around the cottage and path; not every open patch needs a figurine. After watering, check that no ornament has tilted, the path is still visible, and water drains away from the house foundation or paving.
Use a container recipe that drains
For a container fairy garden, choose a pot wide enough to fit the scene and plant roots, with unblocked drainage holes at the bottom. Penn State Extension’s container-growing guidance explains that excess water must escape because waterlogged container mix limits oxygen available to roots; it recommends a lightweight soilless potting medium rather than dense garden soil.
Arrange plants while they are still in their nursery pots, then fill around them with the potting medium and press gently so root balls sit at their original depth. Keep the soil surface below the rim so you can water without overflow, and do not seal drainage holes to keep a miniature pond inside the planter.
Check moisture with a finger at the root zone instead of watering by the calendar. Lovely Greens’ practical container advice likewise uses the moisture test and adjusts watering to the weather; small pots exposed to sun and wind can need attention far more often than an in-ground bed, while cool shade can slow drying. Water until excess drains, then empty a saucer if water remains under the pot.
Keep an outdoor fairy garden alive through the seasons
A fairy garden is not maintenance-free just because the plants are small. In a pot, inspect the soil every day or two during hot, breezy weather until you learn how quickly it dries; in a bed, check the soil beneath the surface and water the root zone when it is actually dry rather than giving the foliage a quick sprinkle.
Trim groundcovers before they cover the path, remove dead leaves before they hide pests, and replace a plant that repeatedly outgrows the scene instead of shearing it into an unnatural shape every week. If the main plant becomes too large, move it to a larger bed and replant the miniature scene with a slower-growing alternative.
Treat the hardscape as outdoor equipment. Tighten a leaning trellis, pick up chipped pottery, remove lights with cracked wiring, and bring ceramic accessories indoors before a freeze if they can absorb water; moisture inside porous ceramic can expand as it freezes and damage the piece.
In cold-winter regions, choose hardy plants for the local USDA zone or plan to move tender container plantings to shelter. In hot, dry regions, place a shallow container where afternoon shade reduces heat stress, use a larger volume of mix, and check moisture more often; climate and container material change how quickly the scene needs attention.
Make the oasis family- and wildlife-aware
Keep the miniature garden’s most delicate details out of play areas where a ball, mower, or curious pet can knock them into a path. For young children, avoid small loose pieces that could be swallowed, sharp broken ceramic, exposed wire, or glass; use smooth stones and securely fixed, weather-safe objects instead.
If pets or children may chew leaves or berries, identify plants by their botanical names and check reliable poison-control or veterinary guidance before planting. Do not assume that a plant is safe because it is sold as an ornamental, and avoid letting children taste unknown berries, leaves, or flowers.
A birdbath, bee house, trellis, or nesting box creates ongoing work as well as habitat. The National Wildlife Federation cautions that human-made garden structures need human care to stay clean, safe, and useful, so choose only features you can inspect and maintain; keep water fresh and shallow, and follow local guidance for cleaning wildlife water stations.
A fairy garden can be imaginative and ecologically considerate at the same time. Use local native plants around the decorative scene, avoid introducing invasive species, leave undisturbed cover where it is safe to do so, and keep accessories from blocking the habitat the plants are meant to provide.
Conclusion
The best fairy garden is a small, coherent scene that fits your yard’s light, soil, and maintenance routine. Start with one focal point, make a path toward it, use plants that stay in scale, and add only the details you can keep stable and cared for outdoors.
Whether the garden sits in a broken pot or at the edge of a border, the practical choices do most of the work: drainage, mature plant size, a clear route, and seasonal checks. Build those in first, and the whimsical details will feel like part of the landscape rather than clutter.