How to Use Grow Lights for Seed Starting
Set up grow lights for seed starting with practical advice on fixture types, height, daily hours, seed germination, and troubleshooting stretched seedlings.
The reliable setup: enough light, close coverage, and a timer
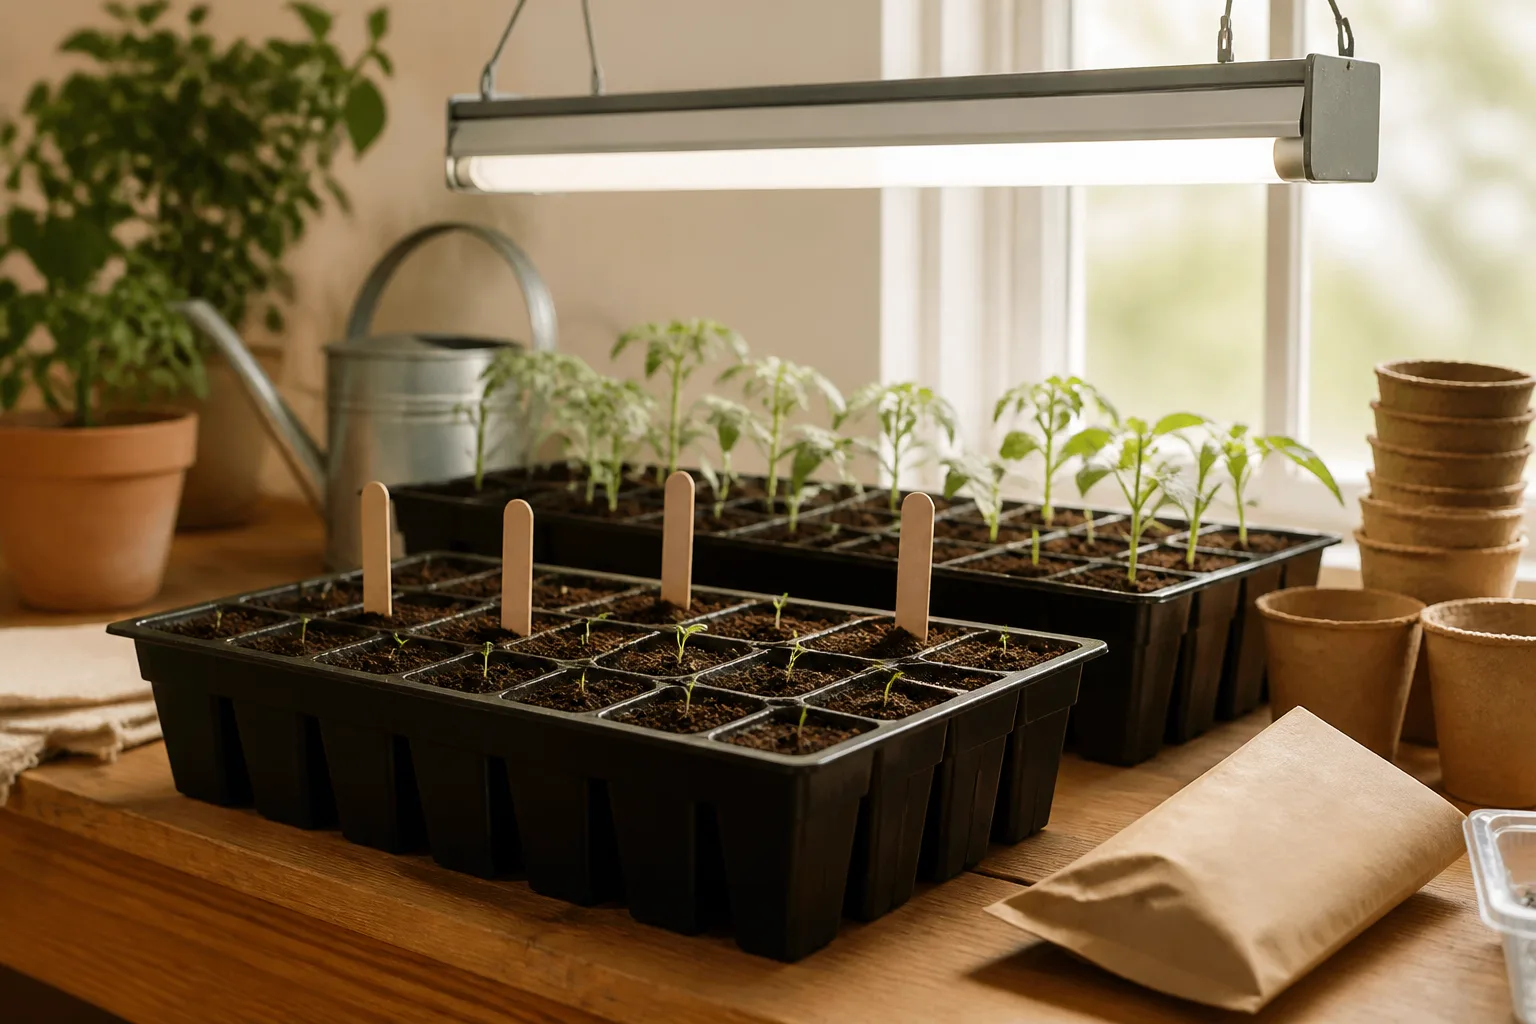
For most home seed-starting shelves, a practical baseline is a broad LED or fluorescent fixture hung close enough to illuminate the entire tray, run on a timer for about 14 to 16 hours a day, and raised as the leaves grow. A full-spectrum label can be convenient, but the fixture’s usable output at the seedlings and the area it covers matter more than the word “grow” on the package.
Use the light as soon as a seedling emerges, unless the seed packet says a seed needs light to germinate—in that case, give it light while it is uncovered at the soil surface. Most seeds do not need a lamp to sprout. They do need good light quickly after emergence, when the new stem and seed leaves begin growing above the mix.
The main setup mistake is to judge a lamp by its brightness to your eyes, wattage, or a generic height recommendation. Those clues do not tell you how much plant-usable light reaches the leaves, or whether the corners of a flat receive as much as its center. Start with the manufacturer’s mounting guidance, keep the fixture adjustable, then judge new growth across the tray rather than trusting a single number.
Choose a fixture that fits the tray
Pick the fixture after measuring the shelf or bench and the growing area, not before. A standard 10-by-20-inch tray needs light across its full width and length; a single narrow bulb can make the middle look bright while seedlings along the long edges lean inward. If you plan to raise several trays, compare the shelf footprint with the light’s stated coverage at the height you can actually mount it.
For one or two flats, a simple LED shop light or a purpose-built seedling bar can be enough. For several tiers or longer indoor growing, a wider bar or panel may make coverage easier, but a large high-output panel can be unnecessarily powerful for a small tray. More expensive is not automatically better: the right buy is the least complicated fixture that distributes enough light across the area at a workable height.
LED bars and shop lights
LED bars are popular because they use relatively little electricity for the light produced, have a long service life, and usually run cooler than older fluorescent fixtures. That makes them convenient above plastic trays and in compact rooms. Their weakness is that output varies widely between products, and a low-power decorative bar may be too dim or too narrow to raise transplants well even if its packaging says “full spectrum.”
Many ordinary white LED shop lights can work for seedlings. University of New Hampshire Extension says lamp intensity and duration are more likely to determine success than whether a fixture is marketed specifically as a grow light; University of Maryland Extension likewise includes LED fixtures among suitable transplant lights. A neutral or cool white fixture is also easier to live with than purple light when you are checking leaf color and disease symptoms.
Look for real electrical wattage, coverage dimensions, a recommended mounting height, and—if the manufacturer supplies it—a PPFD map or light-output chart. A PPFD map is especially helpful because it shows whether readings are strong in the middle and weak at the edges. Wattage describes electricity consumed, not the amount or distribution of light delivered to your crop.
Fluorescent tubes and specialty grow lights
Fluorescent fixtures are still capable of producing sturdy seedlings when they are kept close to the canopy and run long enough. They may cost less upfront if you already own a fixture, although tubes lose intensity with age and the fixture can produce more heat than a modern LED. Follow the ballast and lamp instructions, avoid placing leaves against hot components, and replace tubes when output has visibly deteriorated or the manufacturer’s service guidance calls for it.
Dedicated horticultural fixtures can be useful when a conventional shop light cannot deliver enough light at the mounting distance available, when you need to cover many trays, or when you will grow plants indoors beyond the transplant stage. Their product descriptions sometimes include useful PPFD charts, dimming, or adjustable spectrum. Those extras matter only if they help you manage the real growing area; an app, color modes, or a “full-spectrum” badge cannot make an undersized fixture cover a wide shelf.
For a practical comparison of fixture shapes, keep the job in view: bars spread light along a shelf, a panel covers a broader square or rectangle, and a screw-in grow bulb is usually easiest for a small isolated group. The Epic Gardening seed-starting light guide makes the same useful point about matching the fixture’s footprint to the tray. If only one corner of the tray fits below a bulb, either reduce the planted area or add another suitable light.
Read the useful specifications, not just the label
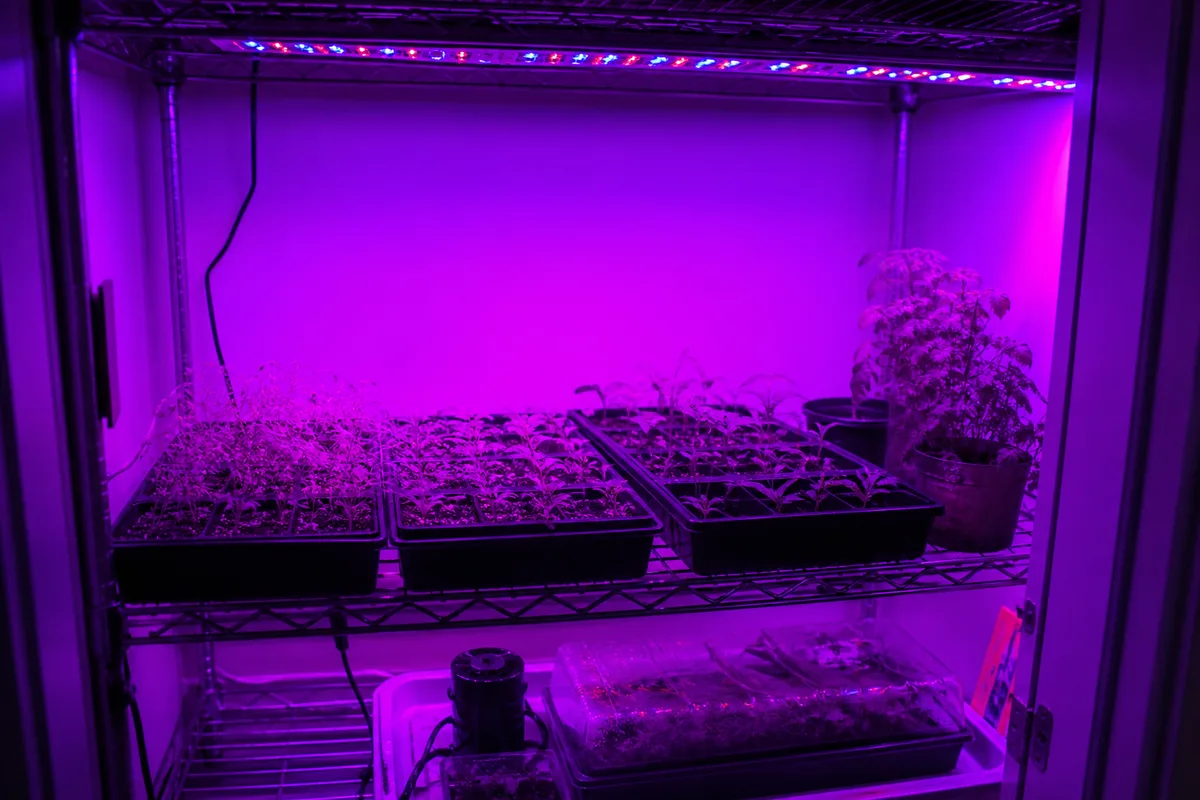
“Full spectrum” usually means a lamp emits a broad mix of visible wavelengths that looks more like white daylight than a red-blue purple fixture, but the label alone does not guarantee a particular output. Blue and red wavelengths are important in photosynthesis and plant development, but plants also use green light: a Michigan State University Extension floriculture specialist explains that green photons can penetrate deeper into leaves and be used for photosynthesis. It is inaccurate to treat green as useless or to assume that red-and-blue LEDs are automatically stronger. A white lamp may be comfortable to work under, while a purple lamp may produce suitable light too. Color alone does not tell you whether the dose at leaf level is adequate.
Color temperature, shown in kelvins (K), describes whether white light looks warmer or cooler to people. It is not a measurement of plant output. Lumens are also weighted to human vision, which is most sensitive to green-yellow light, so a high lumen number cannot be compared directly with a horticultural light reading. Watts are the power the fixture draws. Each spec answers a different question; none by itself says how well the tray will grow. Johnny’s Selected Seeds’ grow-light guide explains these consumer-facing terms and their limits.
For a more technical check, look for PPFD at the canopy—the number of photosynthetic photons arriving at a square meter each second—and DLI, the total amount delivered during the full day. DLI includes both intensity and the time the light runs. The simple conversion is: DLI = PPFD × hours × 0.0036. For example, if a fixture provides 200 micromoles per square meter per second at the leaves for 16 hours, the daily total is 11.52 moles per square meter. That is an illustration of the calculation, not a universal prescription for every crop or fixture.
University of New Hampshire Extension uses a DLI around 12 moles per square meter per day as a reference for transplant seedlings in its seedlings-under-lights fact sheet, while extension recommendations for ordinary home setups commonly express the advice as a 12-to-16-hour timer schedule. These measures are related, but not interchangeable: a bright fixture can reach a useful daily total in fewer hours than a weak one. The UNH guide shows why height changes the dose too: one tested LED bar needed twice as many operating hours when moved from 8 inches to 20 inches above the crop. Use manufacturer data or a horticultural meter when available; if not, treat plant growth as feedback, not as a precise meter.
Set the height by the fixture and the canopy
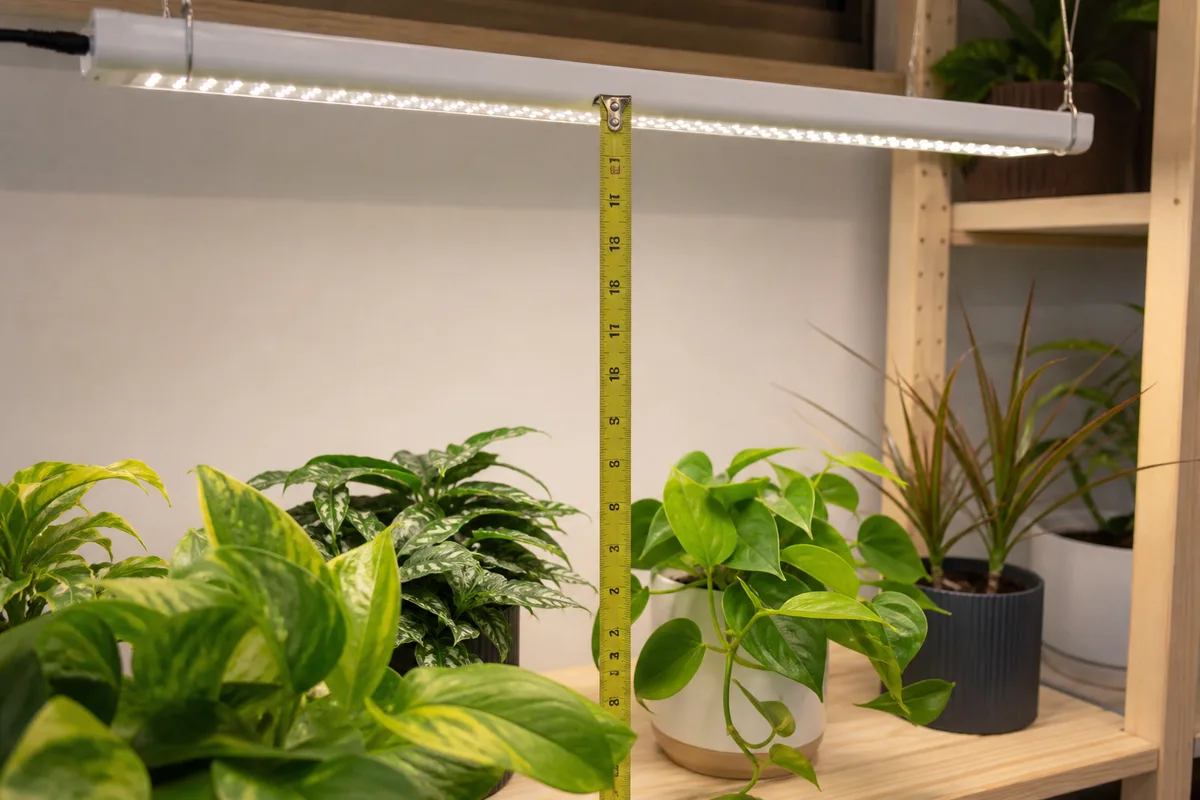
There is no single correct distance for every grow light. A low-output shop light may need to sit just a few inches above seedlings, while a more powerful panel can deliver excessive intensity at that same height. Begin with the fixture maker’s seedling or propagation guidance. If it provides a PPFD chart, use the chart’s readings at the canopy height and dimmer setting you will actually use.
When a lamp has no usable output chart, extension recommendations for common LED or fluorescent seedling fixtures often start in the neighborhood of 2 to 6 inches above the leaves. That is a starting range for modest fixtures, not permission to ignore the manual. Utah State University Extension suggests 2–3 inches for the shop-light setups it describes, while University of Maryland Extension gives 2–6 inches and advises adjusting the height to keep plants stocky. Higher-output fixtures may need to be farther away or dimmed. Keep leaves from touching the fixture and watch for heat, bleaching, or curling after any adjustment.
Measure from the top of the tallest leaves, not from the potting mix or tray rim. The gap changes as plants grow and as some cells emerge faster than others, so check it every day or two during a fast growth flush. Adjustable chains make this easy; if the fixture is fixed, raise the tray on a stable, dry platform. Avoid unstable stacks around water and electricity.
Measure at leaf level and check the edges
If you have a horticultural PAR meter, take readings at several spots across the canopy, including tray corners. The average alone can hide a dim edge or a bright hotspot. A phone light-meter app is not a substitute for a calibrated PAR meter, but a consistent relative reading can help compare locations or fixture heights; use it to find unevenness rather than to claim an exact PPFD.
Without a meter, inspect the seedlings and the fixture together. The lamp should hang level and cover the entire growing area, with enough overlap between two bars that there is not a dark stripe between them. Keep trays centered under the light. Rotating a tray can reduce one-sided leaning, especially near a window, but rotation will not correct weak intensity or poor coverage. If edge plants stretch toward the center, add a bar, narrow the growing area, or use a fixture with a wider, more even pattern.

Set a consistent light schedule
For most vegetable and flower seedlings, set an outlet timer for roughly 14 to 16 hours of light, followed by a dark period. This falls within common extension guidance for indoor starts: University of Maryland Extension recommends 14–16 hours, while University of Minnesota Extension advises 12–16 hours and cautions against continuous lighting. If a crop’s packet or a credible crop-specific guide gives different instructions, follow those instead.
A timer makes the schedule reliable and frees you from remembering the switch each morning. For a 16-hour day, for example, run the fixture from 6 a.m. to 10 p.m. The exact clock times are less important than a consistent cycle that fits your household. Leave a normal period of darkness rather than running seedlings under light around the clock; longer exposure cannot always make up for weak intensity, and the daily total depends on both factors.
Do not extend the day automatically when seedlings look stretched. First check that the fixture is close enough, strong enough, and covering the whole tray. A weak lamp run for longer can still leave plants reaching; a strong lamp run for the same long day may be excessive. Adjust one variable at a time—height, dimming, coverage, or hours—then observe new growth for several days.
Decide when to turn lights on
Seed germination and seedling growth are separate phases. Many seeds germinate in warm, moist mix without light, so you can use a heat mat or warm location before any shoots appear. Keep the seed packet’s depth and light instructions in charge: tiny seeds such as some lettuce varieties may be sown at the surface and need light to germinate, while other seeds are covered and may germinate in darkness.
If seeds need light while germinating, place the uncovered container under a lamp as soon as it is sown and keep the surface from drying out. For covered seeds that do not require light, you can wait until the first shoot emerges—but check trays at least daily and switch the light on as soon as green appears. Staggered emergence is common. Once the first seedlings in a flat are above the soil, it is safer to put the flat under its light than to leave the early sprouts waiting for every seed to catch up.
Remove a humidity dome when most seeds in the tray have emerged, and turn off bottom heat unless the crop or temperature requires it. Utah State University Extension’s seedling guide recommends removing a dome after roughly half the covered seeds have germinated and moving seedlings into light after emergence. Excess heat after sprouting can speed stem extension, and a sealed, humid cover can encourage disease. Light, air circulation, sensible temperatures, and moisture now work together; the lamp cannot compensate for a soggy, overheated tray.
Set up and run the seed-starting station
Build around a stable shelf or bench that can hold the full tray without wobbling. Suspend the light from adjustable chains, a stand, or the underside of a shelf, and keep its power connection away from drips and standing water. Plug the fixture into a timer rated for the light’s electrical load, and route cords where they will not be snagged while watering. Follow the fixture maker’s safety and ventilation instructions, especially for older fluorescent lamps or enclosed racks.
Before sowing, test the whole setup: switch on the lamp, confirm it lights across the intended footprint, set the timer, and check that the shelf has room for taller transplants. Put labels in the tray so crops with different germination instructions stay identifiable. If you are using a heat mat, control it separately from the light timer; it serves a different purpose and should not automatically turn on and off with the lamp.
After sowing, keep mix moist but not waterlogged. Use a cover only during germination when appropriate, then uncover promptly and provide gentle air movement. Bottom watering can reduce disturbance to tiny seeds, but empty standing water after the mix has wicked up what it needs. Position equipment so splashes cannot reach plugs or switches. These mundane details prevent a common failure pattern: seedlings appear, the lamp works, but a hot, wet, stagnant tray weakens them anyway.
For a small tray, a single adjustable bar may be simplest. For multiple trays, mount one or more fixtures over each shelf and check the outer cells. A low-cost rack can be improved gradually: start with one shelf and one crop, see whether seedlings stay compact across the full footprint, then add a second bar if edges are weak. This avoids buying a large panel before you know the area and schedule your garden actually needs.
Troubleshoot seedlings under lights
Use the newest growth to judge a change. Damaged or stretched tissue does not revert to its original form, so look for shorter, sturdier stems and properly colored new leaves after you improve conditions. Also check temperature, crowding, and moisture: warmth can accelerate weak extension, crowded plants shade each other, and saturated mix can cause drooping that looks like a lighting problem.
Stretched, leaning, or pale seedlings
Long gaps between leaves, thin stems, and seedlings leaning toward a window or toward the center of a fixture usually point to insufficient light at the canopy. Lower a modest-output lamp within its safe range, dim less if appropriate, extend the schedule only when the light dose is still low, or add a fixture so the entire flat is covered. Move plants away from a one-sided window if the grow light can provide a more even top-down source.
Also reduce unnecessary warmth once seeds have germinated. A warm room is useful for sprouting many crops, but a seedling held too warm under weak light may elongate quickly. Remove the dome, thin crowded cells, and give stems gentle airflow. University of New Hampshire Extension notes that existing stretch does not shrink when light improves; the goal is to prevent further elongation and raise healthier new growth. If a stem is already floppy or broken, do not expect a stronger lamp to repair it—replace the seedling when needed, or use crop-specific transplanting methods if the stem can be planted deeper safely.
Bleached, curled, or scorched leaves
Pale patches on the most exposed leaves, upward curling, dry crispy areas, or rapid stress immediately after lowering a lamp may mean the light is too intense or hot. Raise the fixture or reduce its dimmer setting, and check leaf temperature and air movement. A fluorescent ballast or a high-output light can create localized heat even when the room feels cool; LED fixtures usually run cooler but can still overwhelm tender seedlings at close range.
Change one condition and watch new growth. Do not swing from a very bright fixture to a dark window for several days, because the seedlings still need light. If the issue is only at the center directly below the lamp, the fixture may have a hotspot; distribute the light more evenly instead of increasing distance so much that the edges become too dim. Wilt can also come from dry mix or damaged roots, so check moisture before diagnosing light stress from leaves alone.
Uneven growth across the tray
If plants on one side are taller or leaning, first confirm the fixture is level and the tray is centered. A narrow bar, bulb, or panel can create a bright center and weak margins. Rotate the tray once a day as a temporary correction, then change the geometry: overlap bars, add a second fixture, or use fewer cells beneath the light.
Compare the outermost plants with the center after several days. When only the edge seedlings stretch, moving the whole light much closer may burn the center; a wider fixture or better overlap is the cleaner fix. If the whole flat is weak, improve total output at the leaves. If the center alone shows bleaching while the edges stretch, the light pattern is uneven and needs a coverage adjustment, not simply more total hours.
Keep plants under lights through hardening off
Keep seedlings under their normal indoor light schedule until they are ready to begin hardening off and move outside. A seedling raised indoors has not yet adjusted to direct sun, wind, or outdoor temperature swings. Over roughly one to two weeks, begin with a few hours in a sheltered bright-shade location, then gradually lengthen time outdoors and introduce more direct sun. Bring tender plants back in during cold, windy, or stormy weather, and follow the crop’s safe planting temperature rather than using the last-frost date alone.
The University of Minnesota Extension recommends starting this transition in shade and increasing outdoor time and sun exposure gradually over two weeks. During bad-weather days, return seedlings to the light stand rather than leaving them in a dim room. Once transplanting conditions are safe and plants are acclimated, the indoor fixture can be used for another sowing or stored until the next season.
Conclusion
Successful seedling lighting is a matching problem: choose a fixture suited to the tray, deliver enough light at leaf height, spread it evenly, and keep the daily schedule consistent. For many home growers, an adjustable white LED or fluorescent bar on a 14-to-16-hour timer is a workable starting setup, but its output and distance determine whether that schedule is enough.
Start with the manufacturer’s guidance, check the whole canopy, and watch new growth. Stretched seedlings need more usable light or a cooler, less crowded setup; bleaching and curling call for less intensity or more distance. With a stable shelf, a timer, and small adjustments based on what the plants show, you can raise compact transplants without buying more equipment than your garden needs.



