Why Are My Plant's Leaves Turning Brown? Start Here
Brown plant leaves can signal dry soil, damaged roots, low humidity, salt buildup, sun scorch, pests, or normal aging. Use this guide to choose a safe fix.
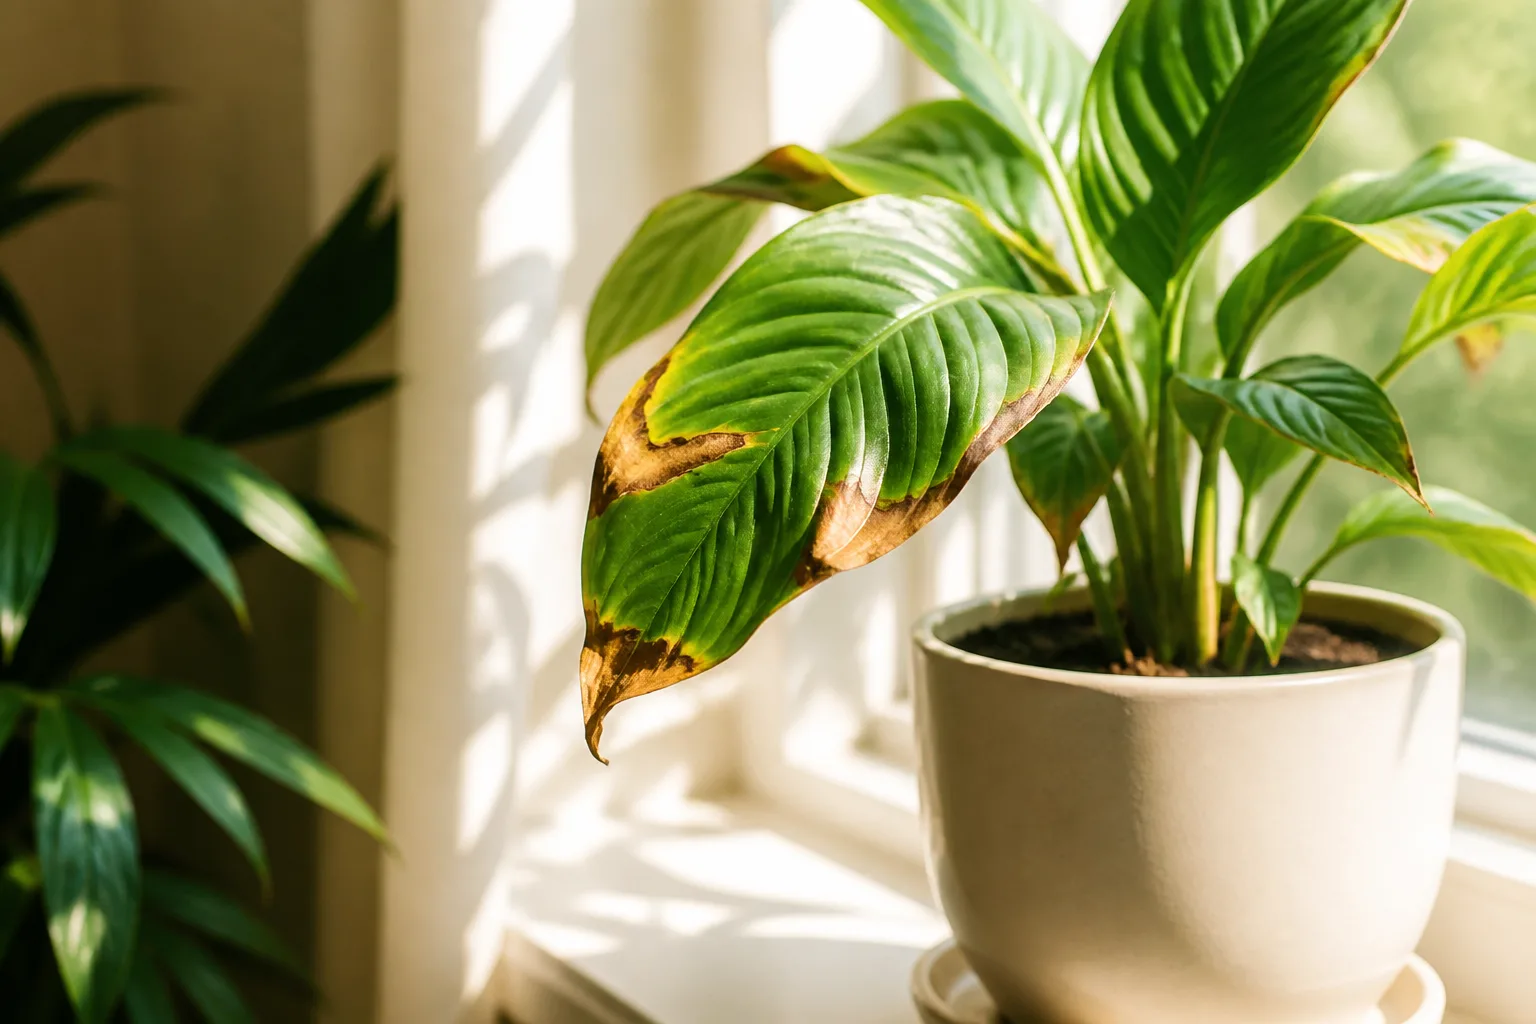
Brown leaves are a sign that some leaf tissue has died; they are not a diagnosis by themselves. A dry, papery tip can come from repeated drying, low humidity, or salts in the potting mix, while a soft brown patch on a plant sitting in wet soil points you toward a different set of checks. If you respond to every brown leaf by watering more, you can turn a minor dry-air problem into damaged roots.
Start with the shape and location of the damage, then compare it with the soil, roots, placement, and care changes. That sequence will not identify every problem with certainty, but it helps you rule out the common causes before you prune, repot, fertilize, or spray anything. The goal is to stop new damage; a leaf that has already turned brown will not become green again.
Read the pattern before choosing a fix
Take a close look at several affected leaves, not just the worst one. Note whether the brown tissue begins at the tip, traces the edges, forms separate spots, or covers a whole leaf; then check whether the same pattern appears on one side of the plant or across the entire canopy. A pattern is a clue to test against the plant’s conditions, not a shortcut to a certain answer.
| Browning pattern | Clues that help narrow it down | First check |
|---|---|---|
| A few dry tips; the rest of each leaf is firm | Dry air, uneven watering, or salt buildup can all fit | Pot moisture, recent feeding, and water source |
| A crisp margin on many leaves | Repeated drying, salts, heat, or low humidity | Soil moisture below the surface and any white crust |
| A bleached or crispy patch on the window-facing side | A recent move or stronger direct sun may be involved | Light exposure at the time the damage appeared |
| Separate spots, especially if they enlarge or have a halo | Pest feeding or a leaf-spot problem deserves a closer look | Leaf undersides, spread, wetness, and nearby plants |
| Whole leaves turning brown while the soil stays wet | Root trouble, poor drainage, or cold stress is possible | Drainage, pot weight, smell, and root condition if decline continues |
| One oldest lower leaf fading while new growth looks normal | Routine aging may explain an isolated leaf | Whether the pattern is limited to one old leaf |
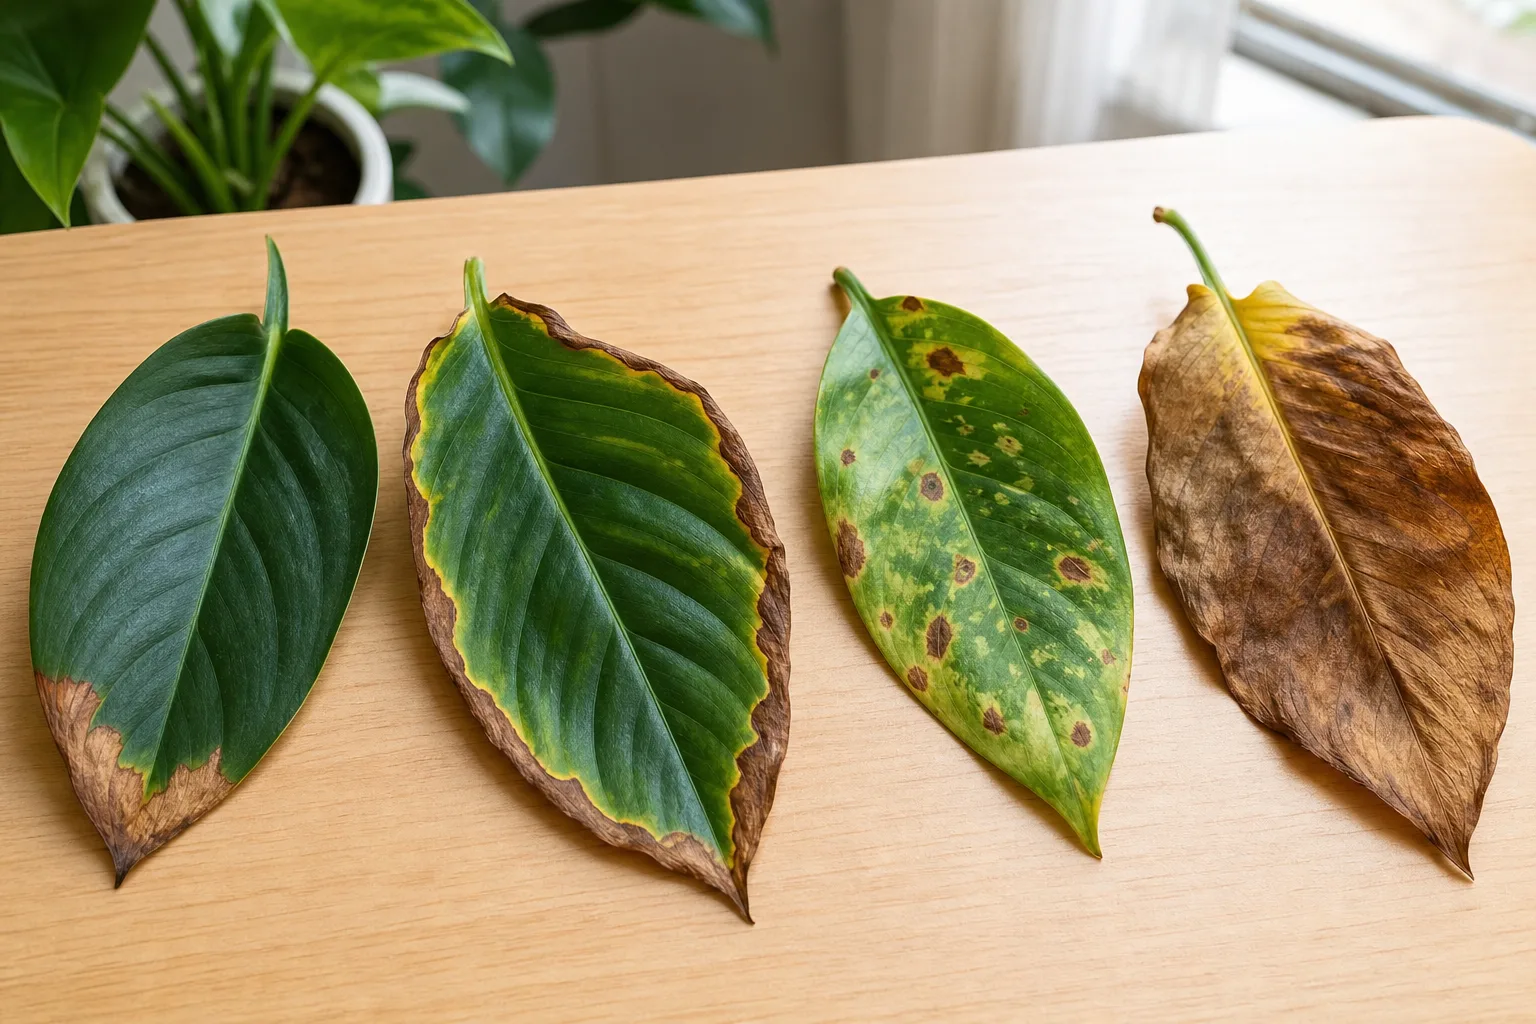
The pattern matters because the same “brown” color can mean different things. The Royal Horticultural Society notes that older leaves on healthy houseplants can brown and die back naturally, while widespread changes suggest a cultural problem; it also cautions that accurate diagnosis depends on the other signs present. RHS guidance on leaf damage to houseplants is a useful reminder to look at the whole plant and its conditions rather than treating color alone.
Tips, edges, spots, or an entire leaf?
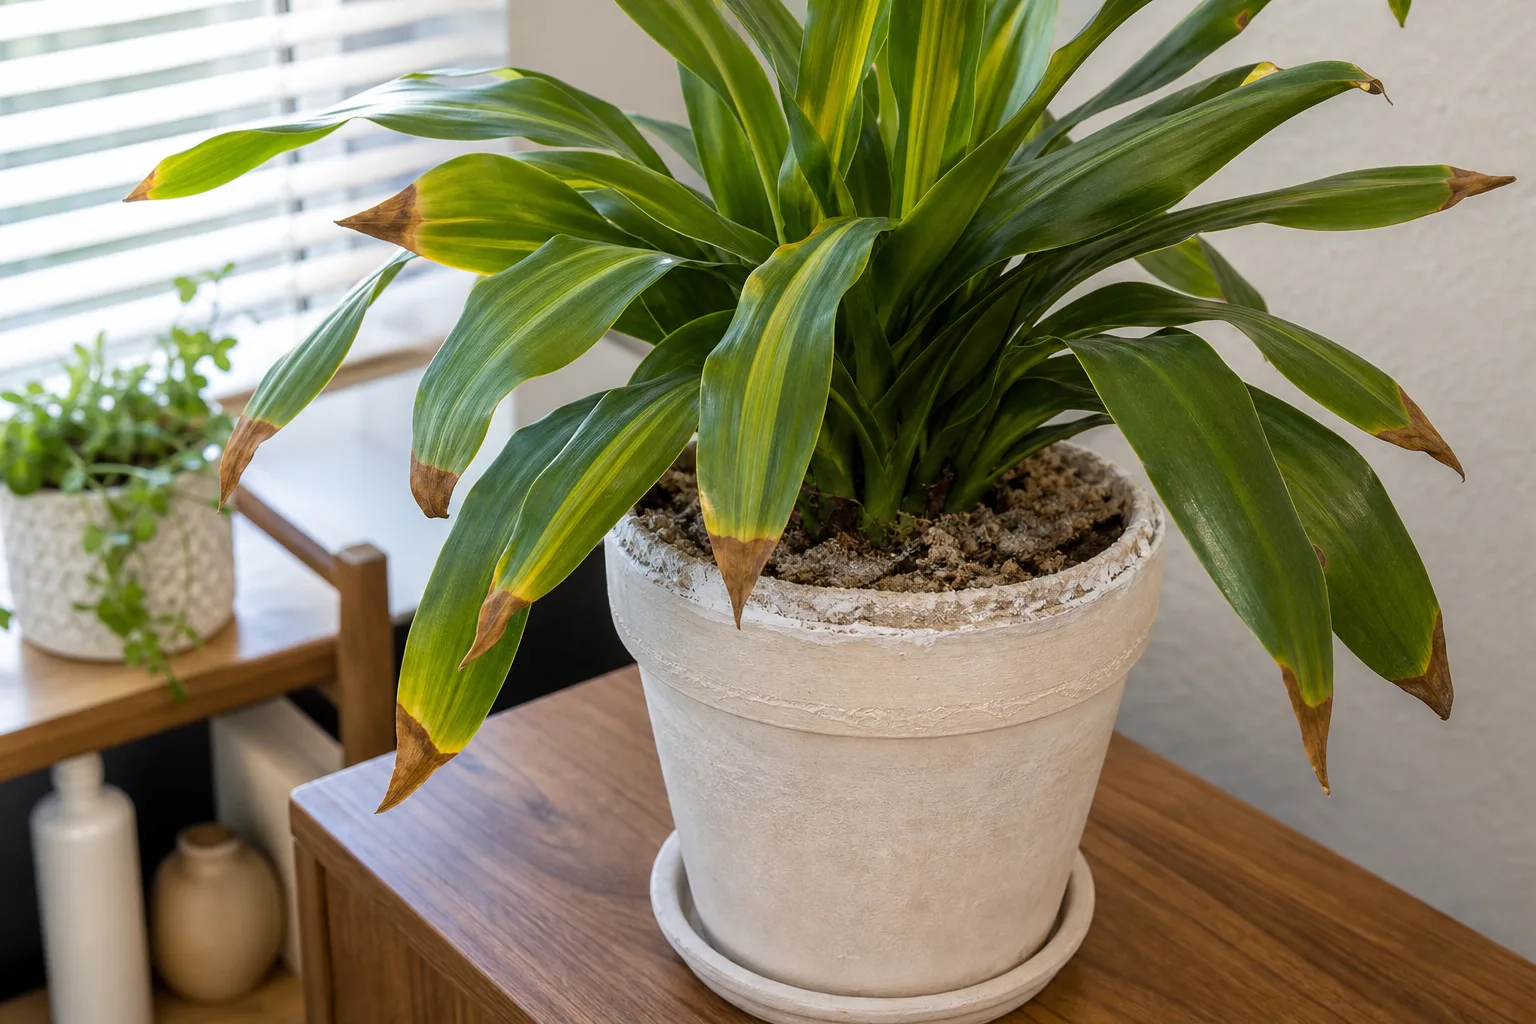
Brown tips are the narrowest pattern. They often show up on long, strappy leaves because the far end of the blade is where stress becomes visible, but the symptom does not prove that the air is dry or that the plant needs more water. Iowa State University Extension identifies low humidity, inconsistent watering, excess fertilizer salts, and water quality as possible causes, including on sensitive plants such as spider plants, dracaenas, prayer plants, and calatheas. Iowa State’s brown-tip guidance supports checking several causes before settling on one.
Brown edges that extend along much of the blade may indicate a broader moisture or salt issue, especially if many leaves show similar damage. Patches in the middle of a leaf need a different look: are they pale and dry on the side facing a sunny window, or are they dark, soft, water-soaked, and expanding? Spot shape, texture, and progression help separate scorch from a possible pest or disease problem.
When the entire leaf turns brown, consider both the leaf’s age and the root zone. One old leaf at the base may simply be reaching the end of its life; several leaves browning at once, especially while the soil is wet or the plant is wilting, deserves prompt investigation. Do not use “crispy means thirsty” as a rule: a plant with rotted roots can wilt and dry at the edges even when its pot is soaked.
Which leaves are affected, and how fast?
The age and position of affected leaves add another layer. A few lower leaves that fade one at a time while the crown continues growing are less concerning than multiple new leaves emerging brown, small, distorted, or spotted. If only the side facing a window is affected, record the time of day when direct sun reaches it; if browning is concentrated beside a heater or air-conditioning vent, air movement and temperature deserve attention.
Timing can be more informative than the damage itself. Think back to the weeks before the first mark appeared: Did you move the plant, repot it, increase fertilizer, switch water, let it dry unusually long, leave it in standing water, or bring it indoors from outside? A change immediately before a symptom is not proof of cause, but it gives you a sensible hypothesis to test.
Run a quick diagnosis in the right order
Before changing care, take a photo in good light and write down the date. Check the pot and placement while the evidence is still intact; if you water, flush, move, and repot all at once, you may improve the plant but lose the chance to learn which change mattered. The fastest reliable diagnosis is usually a few quiet observations, not an emergency makeover.
Check the mix, pot, and drainage
Feel the potting mix below the dry surface. Push a finger or a clean wooden skewer a few inches into the root zone, then lift the pot to gauge its weight. A lightweight pot with dry mix and leaves that curl or feel papery supports underwatering; a heavy pot with damp mix several days after watering raises concern about excess moisture, slow drainage, or a pot that is too large for the root system.
There is no watering interval that works for every houseplant. Light, temperature, humidity, plant size, pot size, and potting mix all affect how quickly a container dries. Utah State University Extension recommends monitoring moisture in the medium and watering thoroughly until water drains, then emptying the catch basin; it also notes that plants close to heat or stronger sun dry faster. Use that kind of moisture check rather than treating “once a week” as a diagnosis or a prescription. Utah State’s houseplant guidance explains why the pot and growing conditions matter.
Check whether the container has drainage holes and whether the nursery pot is trapped inside a decorative cachepot full of runoff. A drainage hole does not help if the pot sits in water after every watering. Conversely, water can run around a very dry, shrunken root ball and leave its center dry; if the mix has pulled away from the sides, water slowly in several passes and confirm that the soil actually becomes evenly moist.
Inspect roots only when the evidence supports it
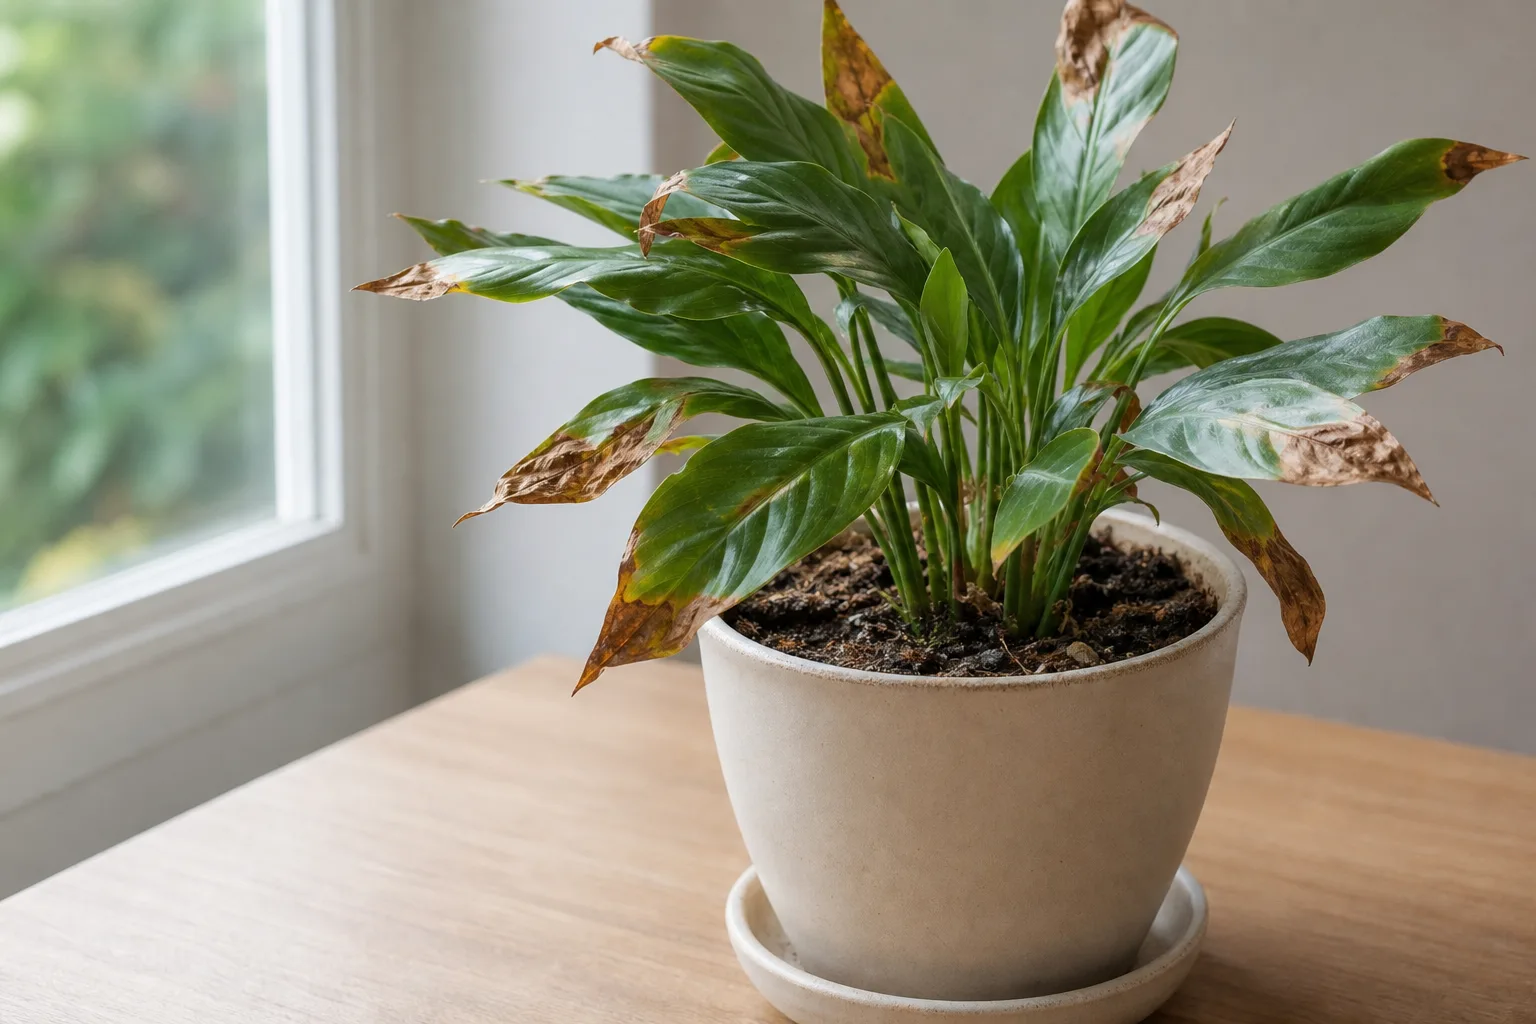
Do not unpot a plant because one leaf has a brown tip. Root inspection is more useful when several leaves are declining, the mix stays wet for an unusually long time, the plant wilts while the soil is damp, drainage is poor, or the pot smells sour. If you do slide the plant out, look for roots that are firm and pale or tan versus roots that are soft, dark, and decaying; a brown root alone is not enough to diagnose rot because some healthy roots are naturally darker.
UC Integrated Pest Management describes brown leaf tips and margins as symptoms with several possible causes, including excessive fertilizer or soluble salts, very dry or wet soil, low humidity, excess sun or heat, and drafts. It also recommends examining roots when plants wilt because root decay can make a plant appear thirsty even when it has been overwatered. UC IPM’s houseplant problem guide is especially useful when symptoms overlap.
If most roots are firm and the mix drains freely, put the plant back and continue checking above the soil. If many roots are mushy and the potting mix remains saturated, correct the drainage and root problem rather than giving another watering because the foliage is limp. Avoid stripping away every bit of mix or cutting healthy roots; remove only clearly rotten material with clean tools, and repot only when the root or soil condition makes it necessary.
Match the clues to the most likely cause
One factor often starts the problem, but a second factor can make the damage worse. Low light slows water use, so a watering routine that worked beside a bright window can keep the same plant wet in winter. Dry indoor air can make a plant less tolerant of a root ball that repeatedly dries out. Treat the cause that has the strongest independent evidence first.
Too little, too much, or uneven watering
Underwatering usually leaves a plant with a light pot, dry mix well below the surface, and leaves that feel thin, curled, or crisp. If the root ball has dried dramatically, the first pour may run straight down the gap between soil and pot. Water gradually over the whole surface, pause, then water again until the root zone is moistened and excess has drained; empty the saucer afterward.
Overwatering is about roots staying oxygen-starved, not simply about giving a plant a generous drink once. A heavy pot, persistently wet mix, yellowing or soft lower leaves, slow growth, and mushy roots together make excess moisture more plausible. Stop watering until the mix has reached the plant’s normal check-first threshold, improve light if it is safe for that species, and address a blocked or absent drainage path.
The third pattern is inconsistent watering: a plant swings between very dry and saturated. Iowa State Extension specifically calls out allowing a plant to dry too long between waterings as a contributor to brown tips and edges. A simple record of when the pot becomes light and what the top few inches feel like can help you find a repeatable trigger that matches the plant, without converting it into a rigid calendar.
Dry air, drafts, and heat
Low humidity is most plausible when tips and margins become dry and crispy across several leaves, particularly on humidity-sensitive tropical plants in a heated or air-conditioned room. It is less convincing as the sole explanation when the pot is constantly wet, the entire plant is collapsing, or only one isolated leaf has a soft spot. Check humidity near the foliage with a small hygrometer, and look for direct airflow from a heater, vent, fan, or frequently opened cold window.
If the room is consistently too dry for the plant, a nearby humidifier with a clean tank is a more measurable intervention than occasional misting. Penn State Extension notes that the humidity bump from misting lasts only until the droplets evaporate; it also questions whether small pebble trays meaningfully raise humidity across a room. The RHS still includes humidity support among possible controls, so the practical takeaway is to measure and observe rather than assume a tray or spray bottle has changed the plant’s environment. Penn State Extension’s humidity discussion explains these limits.
Heat and cold can produce similar dry-looking damage. Leaves close to a hot pane, radiator, or heater may scorch or dry faster than leaves elsewhere; cold drafts and sudden temperature drops can injure foliage or cause leaf drop. Move the plant away from the direct stream of hot or cold air, but do not place a tropical plant in a dark corner just to avoid a draft.
Direct sun and sudden changes in light
Sun scorch often begins as bleached, tan, or crisp patches on the exposed side of leaves after a plant is moved into stronger direct light. The effect can appear after a move outdoors, a change of window, or a seasonal shift in the sun’s angle. Move it back to bright indirect light or filter the strongest hours with a sheer curtain, then acclimate gradually if brighter exposure is part of the plant’s needs.
Too little light is a less direct cause of brown tissue, but it changes how the plant uses water and can contribute to weak growth and root stress. If the mix stays wet because the plant is in a dim spot, do not “fix” the problem by adding extra water or fertilizer. Improve the light in a gradual way appropriate to the species, and keep checking the soil before you water.
Fertilizer salts and water quality
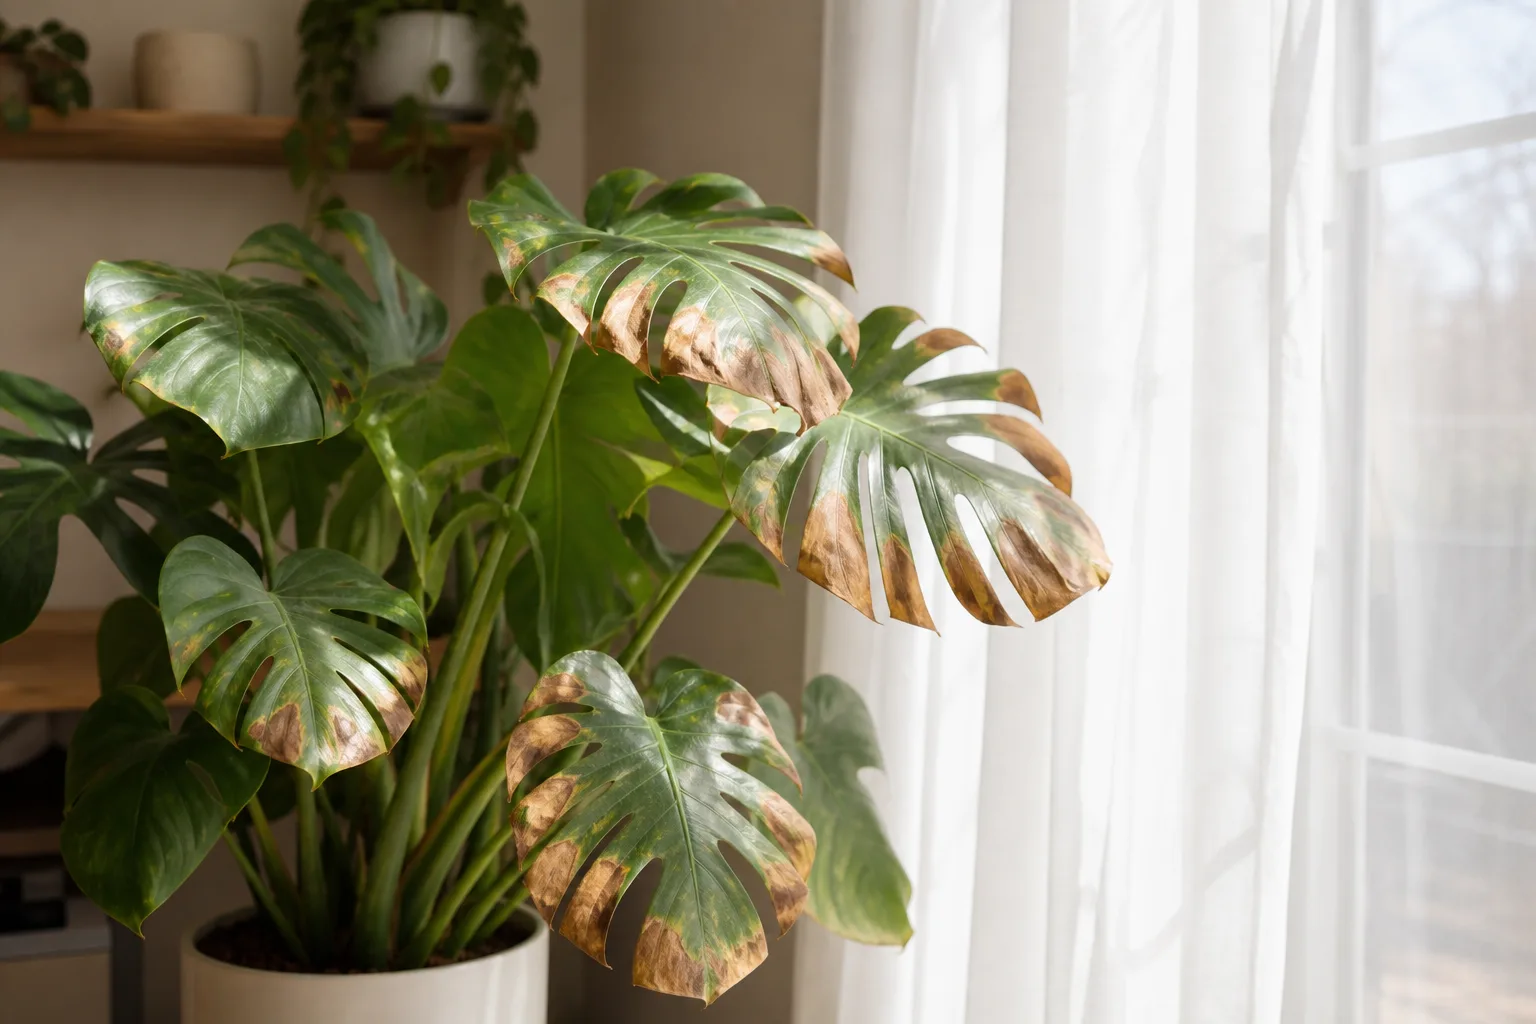
Too much fertilizer can leave soluble salts in a container, especially when fertilizer is applied to dry soil, used more often than the label directs, or not carried out of the pot by thorough watering. Brown tips or margins that worsen after feeding, plus a white crust on the soil surface or pot rim, make salt accumulation worth checking. Stop feeding while the plant is stressed; more fertilizer is not a treatment for brown leaves unless a specific deficiency is supported by other signs.
If drainage is good and the plant is not already waterlogged, you can flush a salt-affected pot by slowly running plain water through the medium and letting it drain completely. Do not try this on a container with no drain holes or a mix that is already saturated, because more water may create a root problem. Utah State Extension cautions that softened water is unsuitable for houseplants because soluble salts can build up; it notes that a surface crust may indicate high salt levels. Its houseplant advice recommends a deep rinse with non-softened water when needed.
Tap water is not automatically harmful to every houseplant. Iowa State Extension names chlorine, fluoride, and other water chemicals as possible contributors to brown tips on sensitive species, but Utah State notes that ordinary tap or well water is generally satisfactory for many houseplants while softened water is a concern. If a sensitive plant continues to develop new brown tips despite appropriate watering, try rainwater, reverse-osmosis, or distilled water for that plant for several weeks and compare the next leaves; do not overhaul the water source for an entire collection based on one old tip.
Species-specific advice is useful as a starting point, not a verdict. Gardening Know How’s peace lily guidance discusses water and fertilizer stress while also listing humidity, light, and temperature as other possibilities; that is a good reason to compare a plant’s needs with its actual growing conditions instead of treating any single species tip as a universal diagnosis. Gardening Know How on peace lilies with brown tips
Pests, leaf spots, and disease
Look for evidence before treating. Spider mites can leave fine stippling or a bronze cast, with delicate webbing near leaf joints; thrips can leave silvery scarring and tiny dark specks; scale or mealybugs may be visible along stems, veins, or leaf joints. University of Minnesota Extension advises checking both leaf surfaces and isolating a plant when pests are found; honeydew, webbing, insects, eggs, or shed skins are stronger clues than brown color alone. UMN Extension’s indoor plant pest guide includes practical inspection advice.
Separate, expanding lesions are different from crisp tips. Dark or water-soaked spots, yellow borders, or several lesions spreading from leaf to leaf can indicate a leaf-spot disease, though chemical spray damage and other environmental injury can resemble infection. UC IPM notes that many foliar diseases need prolonged leaf wetness, while houseplant disease is not the most common explanation for ordinary tip browning. Isolate the plant if spots are spreading, keep its foliage dry, remove badly affected leaves with sanitized scissors, and seek a plant clinic or extension diagnosis if the pattern continues.
Do not reach for an insecticide or fungicide just because a leaf is brown. A treatment that is not labeled for the plant and pest can damage foliage or expose people and pets unnecessarily. If a pest is confirmed and nonchemical removal is not enough, select a product labeled for indoor use on that plant and target pest, and follow its directions exactly.
Normal aging, handling, and adjustment
Plants replace leaves as they grow. One oldest lower leaf gradually yellowing, then browning and dropping while the rest of the plant stays firm and new growth looks healthy is often normal senescence. That pattern does not need a humidity treatment, a fertilizer dose, or a repot.
Handling damage, a crease, a bumped leaf, or pressure from a pet can leave one sharply localized brown mark. If a plant was recently moved, repotted, or brought indoors, it may also respond to the change in light, temperature, humidity, or airflow. BBC Gardeners’ World’s weeping-fig guide notes that sudden changes in placement and temperature can trigger leaf drop in ficus; the example illustrates why a recent move belongs in your diagnosis, while not proving that every plant reacts the same way. Gardeners’ World on weeping fig problems
When a plant is adjusting, keep its conditions steady while you check moisture and watch new growth. A recent move is a reason to avoid adding more changes, not a reason to tolerate clearly soggy soil, blocked drainage, or an active pest infestation.
Repair the plant without adding new stress
Once one cause has the strongest evidence, make a targeted correction and give the plant time to respond. Existing brown areas are dead tissue, so they may remain visible even after the underlying stress has stopped. Improvement means the browning is no longer spreading and the next leaves emerge with healthier color and texture.
Correct the strongest cause and track new growth
Pick the most likely cause from the evidence, not the most dramatic explanation. If the pot is bone-dry, rehydrate it properly; if it is wet and heavy, stop watering and check drainage; if new damage follows direct sun, filter the exposure; if fertilizer salts are visible, hold feeding and consider a safe flush; if pests are present, isolate and identify them. Do not change all five conditions on the same afternoon unless there is an immediate danger such as active rot or a spreading infestation.
Mark the correction date and take another photo after the plant has had time to produce or reveal new growth. Existing leaves are a poor progress meter because damaged tissue cannot repair itself, and some plant species grow slowly. If fresh browning continues, return to the pattern: did it appear on the same leaf age, in the same location, and with the same texture? Then test the next likely cause instead of repeating the first adjustment.
For persistent decline, evaluate the plant’s growing conditions as a system. A pot that is too large may stay wet; compacted mix may not drain; weak light can slow drying; a heater can raise water demand; and repeated fertilizing can add salts. Fix the limiting condition rather than layering extra inputs onto a plant whose roots may already be struggling.
Trim dead tissue without removing useful leaves
You can leave brown areas alone; trimming is cosmetic, not a cure. If a tip bothers you, use clean, sharp scissors and follow the leaf’s natural outline, leaving a hairline of brown rather than cutting into healthy green tissue. Cutting into live tissue creates a fresh wound and may leave another brown edge.
Remove an entire leaf when it is fully brown, detached, mushy, or badly diseased, not merely because it has a dry corner. A partly green leaf still contributes energy to the plant, so removing every imperfect leaf can reduce the resources available for recovery. Wipe or disinfect cutting tools between plants when disease is possible, and bag infected tissue rather than leaving it on the soil surface.
Prevent the same browning from returning
Learn the plant’s normal pattern before changing its routine. Keep its identification and basic care needs with the pot or in a note: light exposure, the point at which its mix is ready for water, whether it reacts to mineral-heavy water, and any seasonal changes in the room. A simple record of pot weight and watering dates will show you whether the plant dries faster in summer or slower in winter.
Water thoroughly when the plant’s moisture cue says it is ready, then let excess drain. Empty the saucer or cachepot instead of letting roots sit in runoff. Feed only when the plant is actively growing and at the rate recommended for the product and species; do not use fertilizer to compensate for low light, damaged roots, or a plant that has just been moved.
Keep foliage clear enough to inspect, and look beneath leaves when you water. A weekly glance can catch early webbing, sticky residue, or an expanding lesion before a single cosmetic blemish becomes a collection-wide problem. If your home’s humidity is low, measure it near the plant and use an appropriately sized humidifier for sensitive species rather than relying on occasional misting.
Finally, choose plants that fit the conditions you can consistently provide. Some tropical plants tolerate an average room; others show tip burn when humidity, water quality, or temperature fluctuates. A brown leaf is useful feedback when you connect it to the plant’s actual environment and adjust one factor with care.
Conclusion
If your plant’s leaves are turning brown, start by asking where the damage begins, which leaves are affected, and whether the tissue is dry or soft. Check the soil and drainage before watering, look for a recent change in light or temperature, and inspect for salts, pests, or spreading spots when those clues are present. That short sequence is safer than treating brown leaves as a single problem.
Correct the most likely cause, keep the rest of the plant’s conditions steady, and judge the result by the next healthy growth. Brown tissue will stay brown, but timely diagnosis can keep the damage from spreading and help the plant put its energy into new leaves.



