How to Build a Freestanding Garden Trellis
Build a freestanding garden trellis with a practical cut list, utility-marking steps, post-setting options, and tips for supporting vines without a wall.
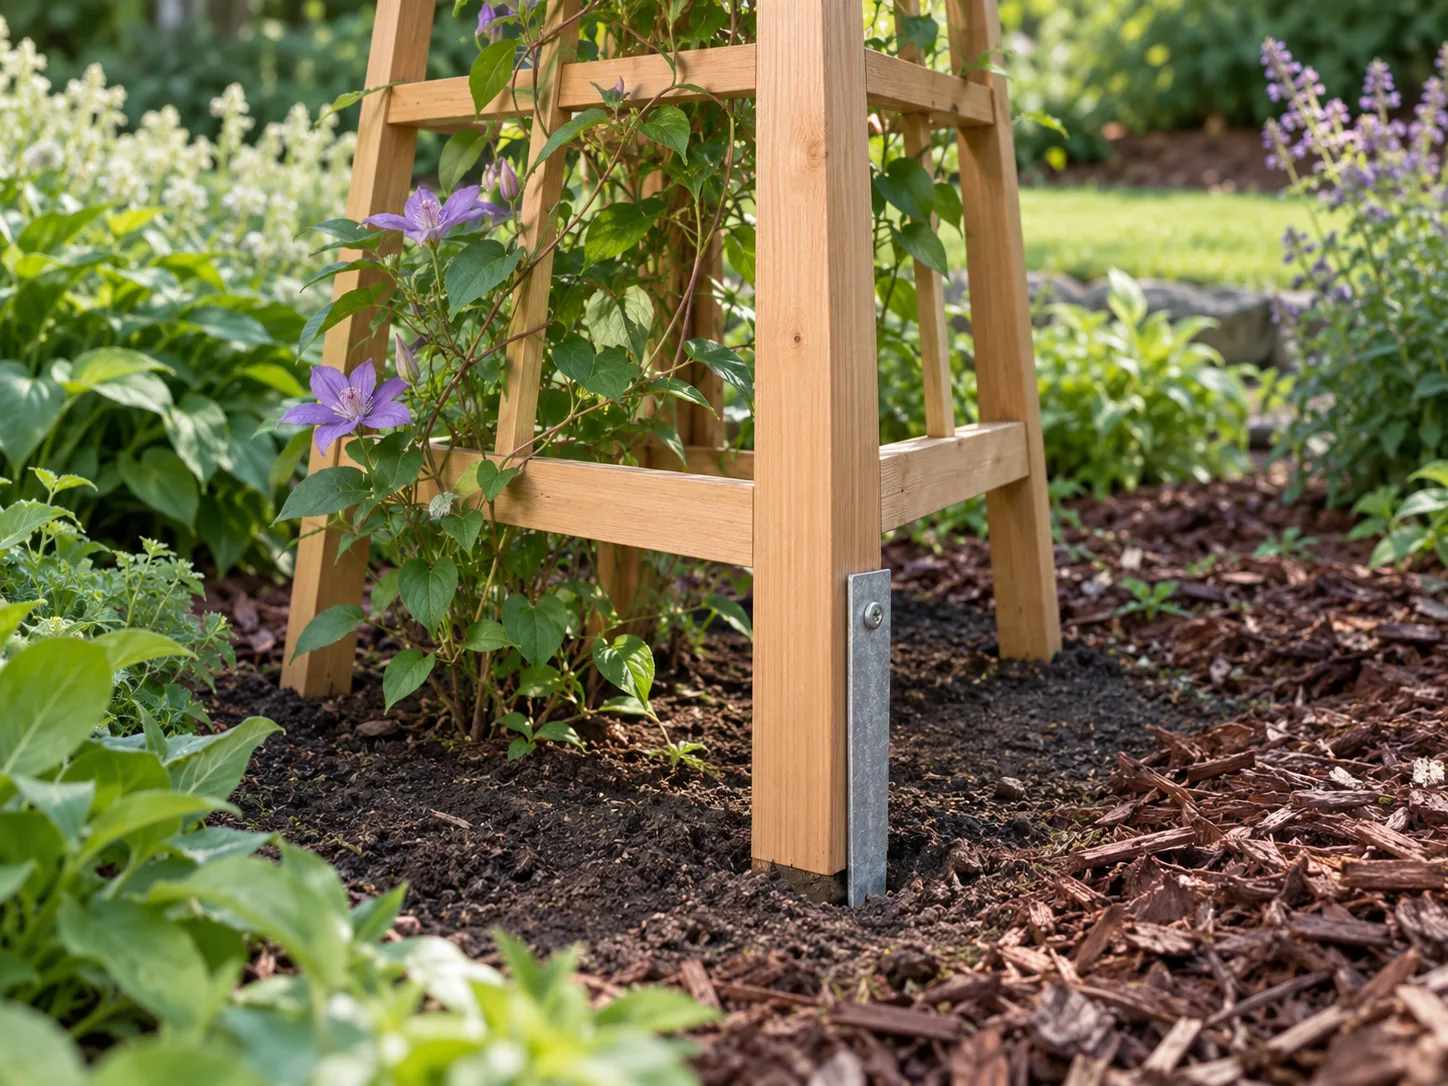
A freestanding garden trellis gives climbing plants a place to grow without attaching anything to a house, shed, or fence. The useful design is an open, braced panel held by two posts, with a climbing surface sized for the plant and site. For a modest garden bed, this guide uses a roughly 4-foot-wide, 5-foot-tall panel between two posts, with the top of the frame about 5½ feet above grade. That is a practical starting point, not a wind-rated privacy screen or a universal footing plan.
Before buying lumber, decide whether the trellis will be buried in a bed or anchored to a hard surface. Then check local digging and permit rules, measure the finished height, and identify what will climb it. A lightweight annual vine on an open grid creates a different job from a dense wall of mature wisteria or a screen intended to block wind and sightlines.
Decide whether a freestanding panel fits your garden
A freestanding trellis is a support structure that stands independently rather than relying on a wall or fence. That makes it useful along a path, in the middle of a vegetable bed, or as a garden divider. It also means the posts and base must resist the whole structure’s movement. A panel fixed to a building can transfer forces into that building; an independent panel cannot borrow that support.
Choose a location where the plants get the light they need and where you can reach both sides for pruning, harvesting, and repairs. Leave enough clearance for the trellis to sway slightly without striking windows, siding, a walkway, or nearby plants. Avoid placing a tall frame where it blocks sightlines at a driveway or creates a hidden corner beside a path.
Think about the mature plant, not just the empty frame. Leaves, stems, rain, and fruit add weight, while a dense mass of foliage catches more wind than bare mesh. An open trellis is less of a sail than a solid panel, but it is not windproof. If you need a tall privacy wall, live in an exposed or high-wind location, or plan to support a heavy woody vine, reduce the size or have the structure and footing designed for that use.
Choose a layout that stays stable
For the example panel, set two posts about 4 feet apart on center. Put a top and bottom rail between them, then fit a roughly 5-foot-high climbing panel inside the frame. Keep the lower edge several inches above soil so that splashback, mulch, and standing water do not sit against the wood. The exact opening can be adjusted for available mesh or slats, but keep the span modest if you are using ordinary garden lumber.
A rectangular panel is a good all-purpose shape for peas, beans, cucumbers, annual flowers, and many clematis. If portability matters more than a permanent bed installation, use a broad A-frame or a freestanding obelisk with feet that spread outward. Those shapes can stand on the ground without deep posts, but they have different capacities: a narrow decorative obelisk is not automatically a substitute for a large screen, and a lightweight A-frame can still shift in soft ground or strong gusts.
Use buried posts for a permanent bed
For a fixed panel in soil, two ground-contact-rated posts give the frame a direct connection to the ground. In average conditions, a common starting example is 8-foot 4-by-4 posts with about 30 inches embedded, leaving roughly 5½ feet above grade. That depth is not a universal rule: local frost depth, soil that stays wet or loose, slope, wind exposure, and local code can all require a different footing or longer posts. If the post must go below the local frost depth, buy longer material rather than shortening the above-ground design by guesswork.
This example assumes a small, open garden trellis. It is not appropriate for a six-foot solid privacy screen, a pergola, a gate, or any structure people will climb or lean on. Taller and more solid structures put more leverage on their posts. When the intended use changes from supporting vines to acting as a fence or screen, check permit requirements and ask a qualified local builder what footing and post size are suitable.
Use a rated base for a patio or portable screen
On a patio, do not bury wood in a planter and assume the soil weight will hold it. A purpose-built freestanding A-frame with a wide footprint can be moved and braced on a level surface. For a vertical panel, use post bases and anchors rated for the lateral load and compatible with the concrete or masonry surface. A thin paver, raised-bed board, or small planter is not a structural anchor.
Anchor manufacturers specify the concrete thickness, edge distance, fastener, and installation method for their products; those details matter. If you cannot verify that the slab and anchors can take the force, choose a lighter, lower structure or get local advice. Do not drill into a patio until you know its thickness and confirm there are no embedded electrical, irrigation, or other lines beneath it.
Gather materials and tools
For one modest buried-post panel, gather two ground-contact 4-by-4 posts (8 feet long for the example), two 2-by-4 rails long enough to span between the posts, and one outdoor climbing surface that fits inside the frame. The climbing surface can be a galvanized welded-wire panel or a wooden slat grid. For wire, choose an outdoor-rated panel with openings the plant can grip and fruit can pass through; for slats, use durable outdoor lumber and leave enough space for hands and stems.
Use exterior structural screws or bolts for post-to-rail joints, corrosion-resistant screws and washers for the mesh, and a compatible metal fastener for each connector. The American Wood Council advises using corrosion-resistant fasteners and connectors with preservative-treated wood; in its guidance, hot-dip-galvanized products or stainless steel are more appropriate than ordinary indoor zinc-plated hardware (American Wood Council fastener-corrosion guidance). Check the lumber treatment label and fastener manufacturer’s compatibility notes rather than assuming any galvanized screw is suitable.
You will also need a tape measure, pencil, framing square, level, post-hole digger or auger, shovel, tamper, drill/driver, saw, clamps, and a pair of bolt cutters if trimming wire. Wear eye protection and gloves when cutting metal; freshly cut wire ends are sharp. If you use concrete, buy the quantity and type needed for the hole dimensions and follow that product’s mixing, bracing, and cure instructions.
Choose outdoor wood and compatible fasteners
The portion of a post below grade needs wood labeled for ground contact. “Pressure treated” alone does not tell you whether a board is rated for direct soil contact; confirm the use category on the tag or ask the lumber desk. Cedar or another naturally durable species can suit the frame above grade, but a naturally durable board is not a reason to bury untreated lumber where the label does not recommend it. Every piece exposed to rain and sun still needs regular inspection.
Select screws and bolts designed for exterior structural use, not drywall screws. Drywall screws are brittle and their coating is meant for indoor use; a joint that loosens outdoors can rack the entire frame. Treated lumber preservatives can accelerate corrosion of some metals, so use hardware specifically labeled as compatible. The American Wood Council’s fastener guidance explains that preservative chemistry matters and cautions against mixing dissimilar metals in one connection; use one compatible hardware system throughout each joint.
If you want a painted or stained trellis, use a coating intended for the wood and exterior exposure, and follow its label about whether the lumber must dry first. Do not coat a post that the product says must remain unsealed below grade. The structural job comes first: decorative paint does not make a weak or undersized footing stronger.
Mark the site and check for utilities
Lay out both post centers with stakes and string. Measure the distance twice, check that the line sits where you want the panel, and look at the space from both sides. A trellis that is a few inches off the bed edge can be difficult to weed or harvest around once vines cover the mesh.
In the United States, contact 811 or the local one-call utility locator before digging and wait for the required marks and response time in your state. The 811 service routes homeowners to state-specific instructions; the process and timing are not identical everywhere (811 In Your State). Public utility marking may not locate private irrigation, landscape lighting, a buried gas line after the meter, or other owner-installed services, so arrange a separate private locate when needed. Never probe an unknown line with a post-hole digger.
Check city or county rules if the trellis is close to a property line, tall enough to count as a fence, or located in a regulated easement. Also check the planting plan: a post should not land where it will sever a mature root, block drainage, or make it impossible to remove a plant. If the site slopes, keep the top rail level only if you can preserve a safe, even relationship between the footing, panel, and grade; do not hide a large change in elevation by leaving one post shallow.
Dig and set the posts
For the example, mark a hole at each post center, approximately 10 to 12 inches wide and 36 inches deep, leaving about 30 inches of post below grade after adding a 6-inch compacted gravel base. The two 8-foot posts then finish close to 5½ feet above the surrounding soil. Treat those dimensions as a starting point for a small panel in suitable soil. If your local frost depth is deeper, the ground is loose or saturated, or the site is windy, adjust the design before digging; do not copy a hole depth that conflicts with local requirements.
Dig the holes after the utility marks are complete. Keep the holes vertical and the bottoms at the same elevation if the site is level. Add a few inches of gravel and tamp it firmly to create a draining, compact base. Gravel does not compensate for a hole that is too shallow or soil that cannot support the post.
Set the first post in its hole and brace it temporarily in two directions. Check it with a level on two adjacent faces. Add concrete or backfill using the method appropriate to the site and product: where concrete is chosen, use a mix intended for post setting, place it as directed, and keep the post plumb while it cures. Shape the finished surface so water drains away from the post rather than forming a bowl around it. Do not rely on the word “quick-set” as permission to load the post immediately; follow the bag’s cure and handling instructions.
Repeat for the second post, checking that its face lines up with the first and that the spacing leaves room for the rails and panel. Brace both posts until the footing is stable. If one post is out of plumb, correct it while the mix or backfill can still be adjusted. Waiting until the frame is attached makes a small alignment error harder to fix.
Assemble a square, braced frame
Once the posts are stable enough to work, measure the clear distance between their inside faces and cut the top and bottom 2-by-4 rails to fit. Place the top rail at the planned height and the bottom rail several inches above soil. Use a framing square or diagonal measurements to confirm the frame is square: the two corner-to-corner measurements should match. Clamp the rails in place before driving fasteners.
Attach each rail into the posts with exterior-rated structural screws or bolts sized for the connection. Follow the connector instructions for pilot holes, edge spacing, and number of fasteners; avoid driving screws too close to the end of a board where the wood can split. Keep the rail faces flush and check level before tightening fully. A neat-looking joint is not necessarily a strong joint, so rely on rated hardware and the manufacturer’s installation pattern.
Add short diagonal knee braces at the upper corners if the open frame needs extra stiffness. Fit a 2-by-4 brace from each post toward the nearby top rail, then fasten through both ends with compatible exterior structural hardware. These braces reduce racking within the frame, but they do not replace adequate post embedment or a footing sized for the site. If the panel is expected to function as a privacy screen, pause and get the whole structure reviewed rather than assuming extra screws solve the load problem.
Add an open climbing surface
Measure the opening inside the frame only after the rails are installed. Cut the welded-wire panel a little smaller than the opening so it fits without bowing. If you use wire, keep the smooth factory edge at the top where possible and fold or cap the cut ends so they cannot snag sleeves or skin. Position the mesh near the front face of the frame, then secure it at the posts and along both rails with corrosion-compatible screws and washers or approved fencing clips. Fasten often enough that the panel cannot drum or pull away in gusts, but do not crush or distort the wire.
A wood grid gives the garden a softer, more traditional look. Attach narrow horizontal and vertical slats to the frame with exterior screws, predrilling near board ends. Keep spacing consistent enough for tendrils to find the next rung, but large enough to reach through and harvest. A grid with openings of roughly 6 to 8 inches works for many peas and small tendrils; cucumbers, beans, and flowering vines can use broader or narrower spacing depending on stem thickness and how you plan to tie them.
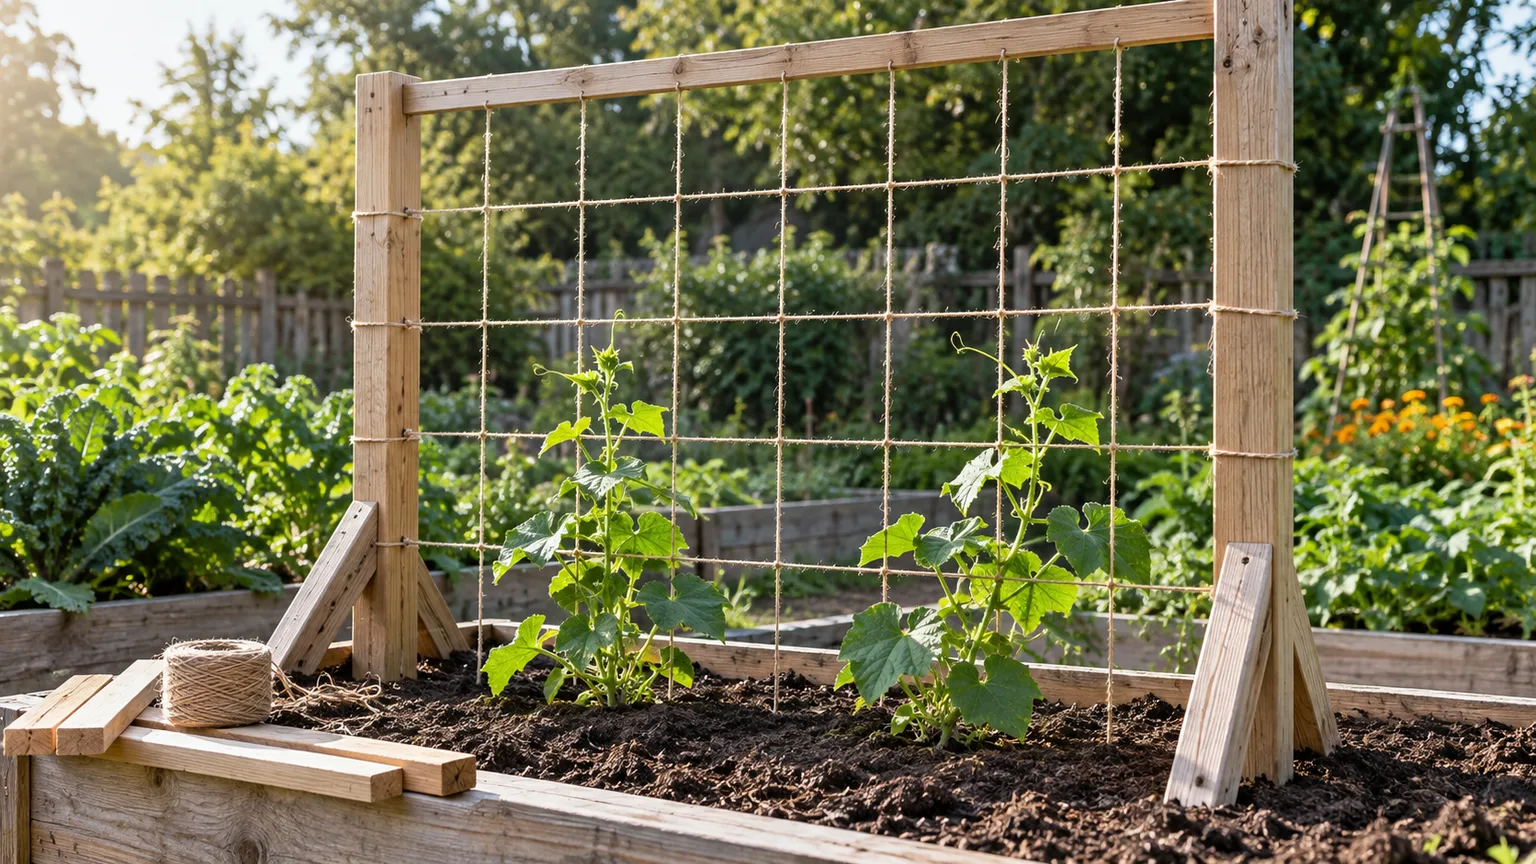
Do not stretch plastic netting tightly across a frame and leave it there for years without checking it. UV exposure can make some netting brittle, and old netting can entangle wildlife or become difficult to remove from dense vines. If you prefer lightweight netting for annual crops, fasten it so it can be taken down after harvest and discard it when it begins to fray. A permanent galvanized panel or replaceable twine grid is easier to inspect.
Brace the frame for wind and plant weight
A trellis should feel firm before you plant against it. Push gently at the top in both directions; the posts should not shift at grade, the joints should not click, and the mesh should not pull out. This is a basic check, not a load test. Stop and reinforce or redesign the structure if it moves noticeably, especially before the plants fill in.
Open infill reduces the solid area facing the wind. That is one reason a wire grid or spaced slats are better for a vine support than plywood or closely packed boards. Do not fasten a solid panel later to create more privacy without rethinking the posts and footings. A leafy screen can become much less open during the growing season, and a wet, mature canopy can pull on the support in several directions.
Put the stronger, heavier plants on the posts and lower rails, not on a fine decorative lattice. Use this style for annual vegetables and moderate climbers. Large, woody vines can thicken and become heavy over time; they may need a larger support designed for them, more robust posts, and space for pruning. A trellis is not a ladder, handrail, hammock support, or climbing structure for children.
Match the trellis to the climbing plant
Not every plant climbs the same way. Peas and many cucurbits use tendrils that need something narrow to curl around, while pole beans and some flowering vines twine around a support. Clematis and climbing roses usually need young stems guided and tied in; they do not attach to every broad, smooth surface by themselves. The RHS recommends putting suitable supports in place before the stems need them and checking ties regularly so they do not become too tight as growth thickens (RHS guide to tying in climbers).
Match the opening to the plant’s grip. Fine netting or thin horizontal strings can work for peas; beans can wrap around thicker upright strings or poles; cucumbers benefit from a mesh they can cling to, with sturdy ties or slings for heavy fruit if needed. For a rose or clematis, a grid that leaves room to position stems and tie them in is more useful than a very small, rigid mesh opening. BBC Gardeners’ World’s obelisk project uses regularly spaced rings as climbing points, a practical reminder that the plant needs repeated contact points as it grows (BBC Gardeners’ World guide to making a metal garden obelisk).
Use soft ties with a little slack. A figure-eight tie leaves a buffer between the stem and its support and reduces rubbing; never cinch wire directly around a growing stem. Check vigorous new shoots during the growing season, redirecting them before they weave tightly through the grid. Tie a long, heavy stem at more than one point instead of asking one tie to hold all its weight.
Finish the wood and protect nearby plants
Sand rough edges where people will reach, especially around the top rail and any cut slats. Add a cap or bevel to exposed post tops so rain does not sit on a flat end grain surface. If you paint or stain, use a product rated for exterior wood and follow its drying instructions. Do not paint over hardware labels or apply a coating that is unsuitable for garden use around edible crops.
Clear construction debris, wire offcuts, fasteners, and concrete residue from the bed before planting. Keep the finished post surface slightly above grade and avoid piling mulch against the wood. If you add concrete, soil, or gravel near an existing perennial, keep material away from its crown and roots. Install the support before planting where possible; otherwise, dig carefully and keep the root ball intact rather than forcing a post through established roots.
Common building mistakes to avoid
The most expensive mistake is choosing the dimensions from the appearance of an empty frame. A wide, solid panel might look restrained on the day it is built, then behave like a sail when vines cover it. Start with an open design and a realistic plant load. If the site is wind-exposed, reduce the panel height or width, place it where wind can pass around it, or choose a structure with a broader base.
Another common mistake is treating post depth as a fixed rule. Frost, soil strength, groundwater, wind, and local rules vary. A shallow footing may heave or lean; an unnecessarily deep hole can hit a utility or make the build more difficult. Call the locator first and adapt the post length to local conditions rather than digging blindly.
Do not use untreated indoor screws, fence staples that are too short, or a few tiny ties to hold a large wire panel. A loose panel rattles and can work its fasteners free. Similarly, do not rely on a single small planter, patio paver, or decorative spike to anchor a tall vertical screen. Portable designs need a footprint and ballast designed for their height and exposure; fixed designs need appropriate embedded posts or rated anchors.
Finally, avoid planting an aggressive woody vine just because it looks small at the nursery. Research the mature size and pruning needs, then make sure the trellis can support the plant long term. If the plant needs a wall-height framework or a heavy arbor, build that structure for the mature load from the beginning.
Troubleshoot a leaning or loose trellis
If the top moves but the posts remain firm, check rail joints, knee braces, and mesh fasteners. Tighten or replace loose compatible hardware, add a brace where the frame racks, and replace split wood rather than driving a larger screw into the same damaged hole. A panel that bows between rails may need closer attachment points or a more rigid climbing surface.
If a post moves at ground level, do not try to hide the lean with an extra board nailed to the face. Remove the vine load if you can do so safely, then inspect for a loose footing, rot at the soil line, or a post that was set too shallow. For a small, lightweight structure, resetting the post may be feasible; if the footing has failed or the trellis is tall, heavily planted, or near a public path, rebuild or consult a qualified contractor. A cracked post should be replaced, not cosmetically patched while still carrying the load.
If a metal panel pulls out, check whether the fasteners are corrosion-resistant and whether the frame has split. Replace damaged fasteners and use washers or rated clips that spread the load over the wire. Smooth every exposed cut end. If wind repeatedly shakes the mesh, reduce the leafy area or change to a more open support rather than simply adding more fragile ties.
Maintain the structure through the seasons
Inspect the trellis early each spring, before new growth hides the joints. Look for leaning posts, soft or cracked wood near grade, rusted fasteners, loose mesh, split rails, and ties that have begun to constrict stems. Recheck it after severe storms and after the vine reaches its full leaf canopy. Small repairs are easier while you can still see the frame.
At the end of the growing season, remove annual vines and disposable netting instead of leaving tangled material to catch wind or degrade. Keep perennial stems that should remain, but prune them according to the plant’s needs and make sure they are not forcing their way between the support and an adjacent wall. The RHS recommends regular checks and loosening ties when they become tight; that simple task prevents a support from damaging the very plant it is meant to hold.
Expect a wooden trellis to need care. Reapply exterior coating only when the surface and product instructions call for it, replace corroded hardware with compatible parts, and keep soil and mulch from building up against the posts. If the structure shifts every year, address the footing or redesign the base rather than repeatedly straightening it after each storm.
Conclusion
A successful freestanding garden trellis is sized for its plants and site, anchored for the ground or surface it stands on, and left open enough to let wind pass through. A modest two-post panel with a braced frame and a replaceable mesh or slat grid is a practical starting design for many vegetable and flowering vines.
Before digging, check local requirements and call the utility locator. Set the posts for local soil and frost conditions, use outdoor-rated wood and compatible fasteners, and inspect the frame after installation and as foliage fills it. If the goal is a tall privacy screen or a support for a heavy woody vine, choose a design intended for that load rather than scaling up a light garden trellis by eye.