Build a Self-Sustaining Terrarium That Stays Balanced
Build a self-sustaining terrarium with humidity-loving plants, an airy soil base, careful first watering, and clear ways to correct fog, mold, and excess moisture.
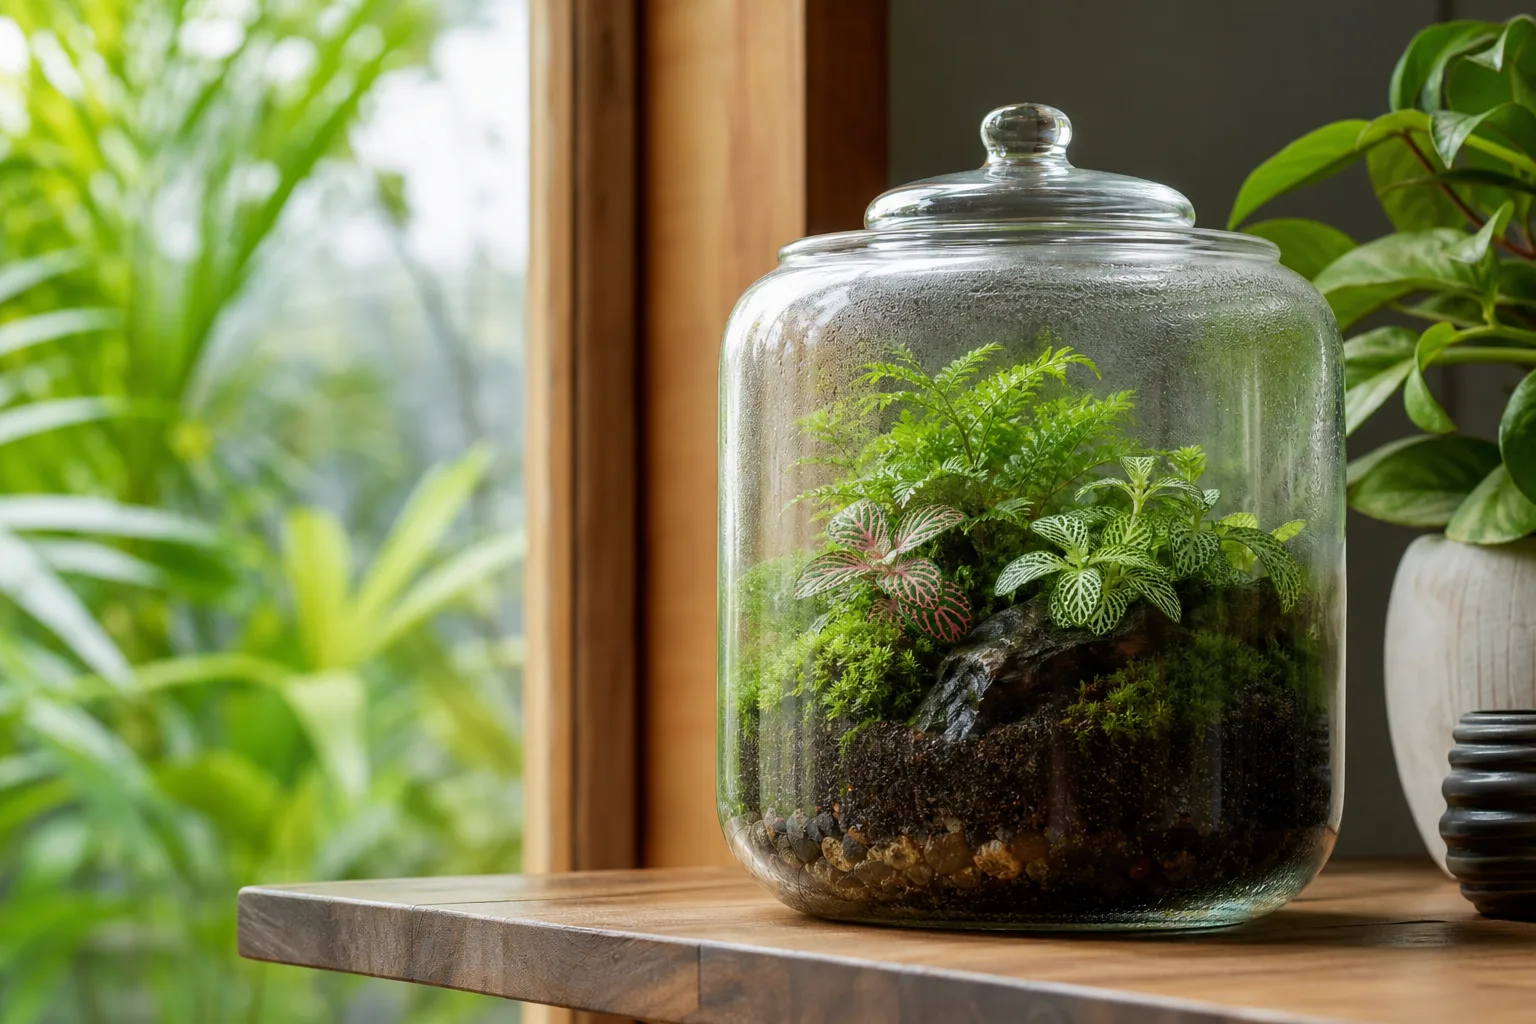
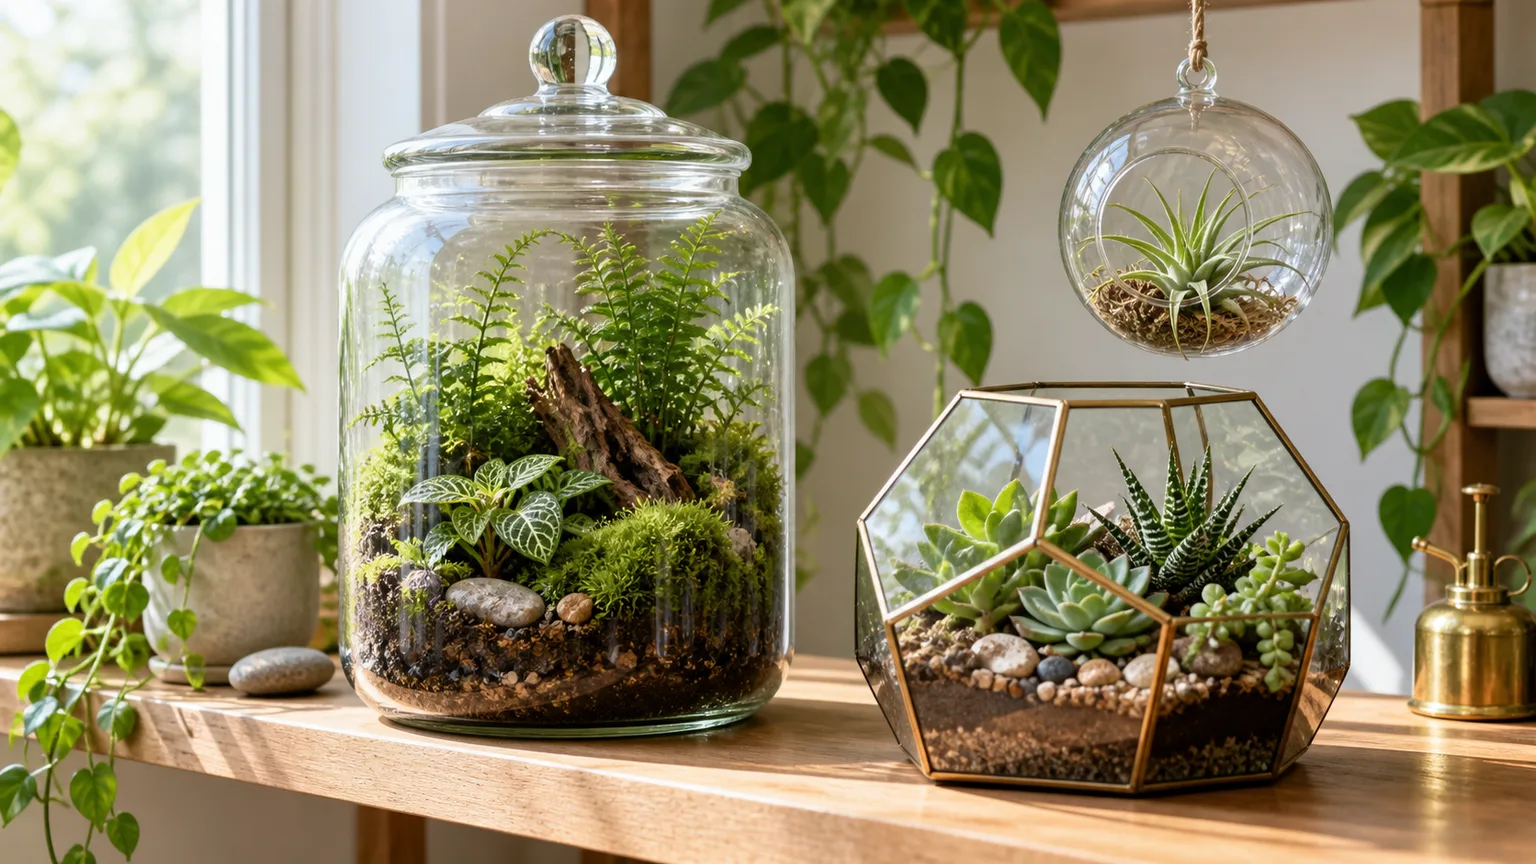
A closed terrarium can recycle much of its water, but “self-sustaining” does not mean immortal or completely hands-off. The reliable version is a clear, lidded container with compatible plants, a loose but moisture-holding growing mix, restrained initial watering, and enough indirect light to support steady growth. Once the jar is closed, the glass becomes a diagnostic tool: a light, temporary haze can be normal; constant heavy condensation tells you to change something.
This guide focuses on closed terrariums designed to need little watering. If you want a dry succulent bowl or a broader comparison of open and closed projects, our DIY terrarium guide covers those alternatives. For a closed jar, use the steps below to build a stable water cycle without relying on a rigid layer recipe or a calendar.
What “Self-Sustaining” Really Means
In a closed terrarium, moisture evaporates from the growing mix and transpires from leaves, condenses on the cooler glass, and returns to the substrate as droplets. Light powers photosynthesis, which lets plants use water and carbon dioxide to make sugars; it does not cause plants to manufacture the mineral nutrients they need. Those nutrients remain limited to what entered with the soil, plants, and small additions of organic matter.
That distinction matters. A jar can be low-input because water stays inside, while still needing pruning, cleanup, occasional venting, and sometimes fresh soil or replacement plants. Penn State Extension describes a closed terrarium as a miniature landscape with its own rain cycle and notes that its plant palette is more limited than an open dish garden. It also flags the humid environment as a place where disease can establish, especially if pests, damaged leaves, or contaminated tools are introduced. The goal is a balanced small garden, not a sealed ecosystem that needs no attention forever.
Choose a Closed Terrarium (and Know When Not To)
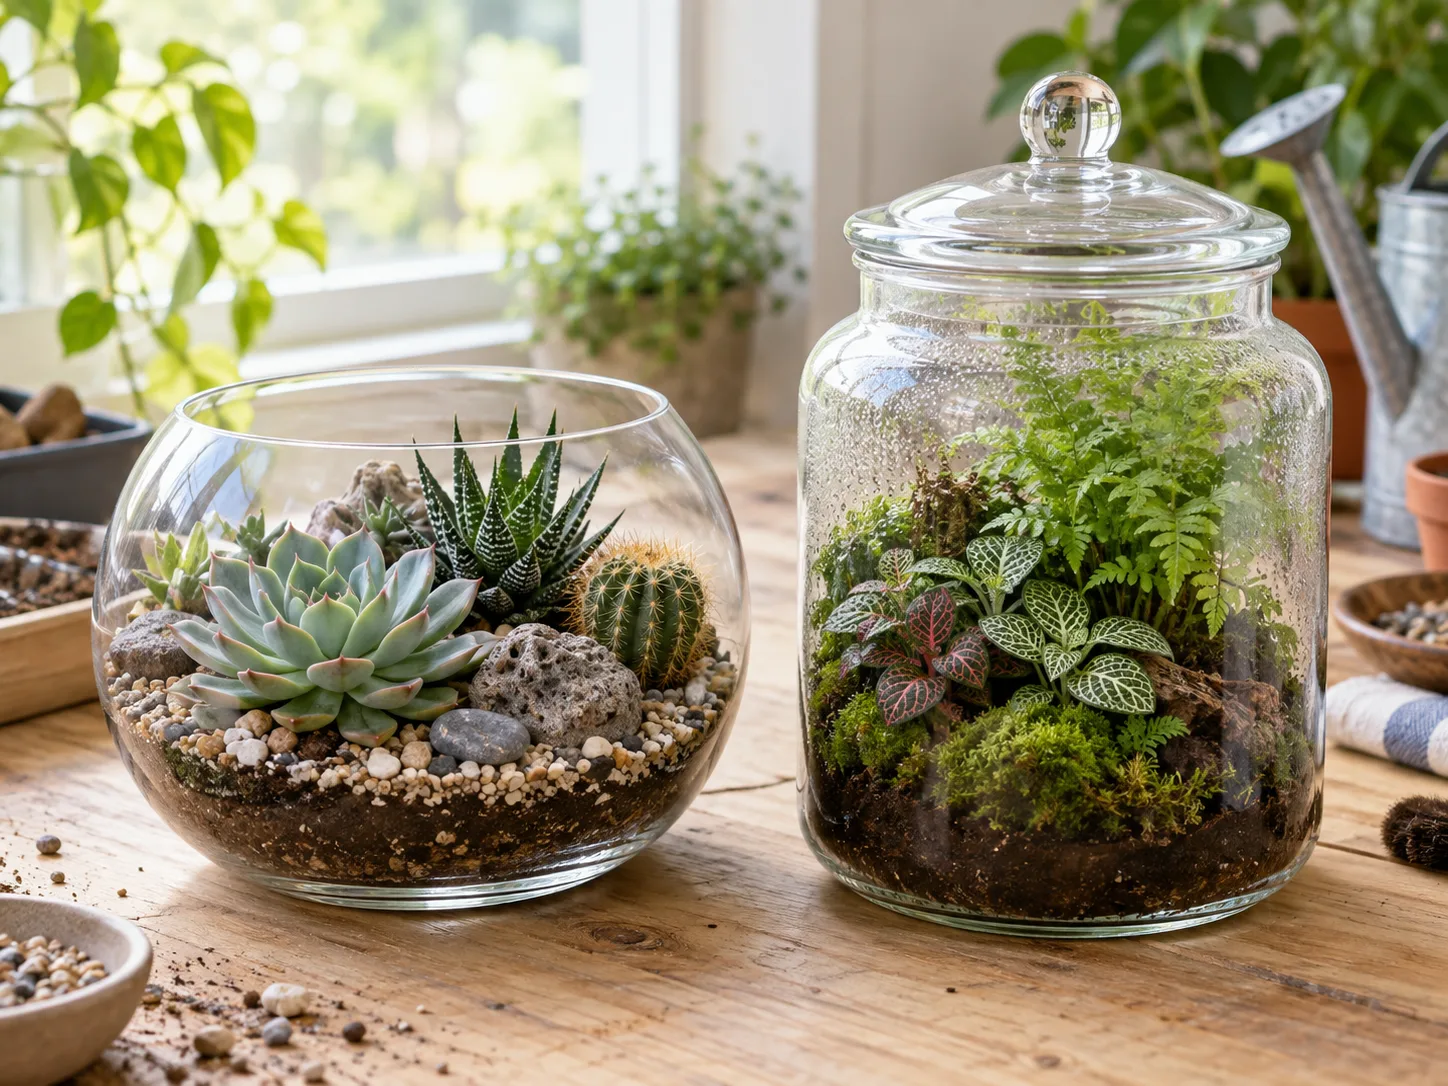
Choose a closed design when you want a humid environment for small tropical or woodland plants and can give the jar bright, indirect light. A fitted lid slows moisture loss and keeps humidity high. It also reduces airflow, so the setup is less forgiving of wet soil, decaying leaves, or plants that prefer to dry between waterings.
Skip the closed jar if your preferred plants are cacti or most succulents, if you cannot keep the container out of direct sun, or if you want to grow a plant that will quickly outgrow a small vessel. Those plants are usually happier in an open arrangement or ordinary pot. A wide opening also makes a first project easier to assemble and repair; it can still be closed with a lid after planting. BBC Gardeners’ World distinguishes open, drier arrangements from closed, humidity-loving ones in its terrarium-building guide. Decide which environment you want before buying plants rather than trying to force one jar to suit both.
Pick a Jar That Is Easy to Plant and Clean
Use clear, uncolored glass with a stable base and a lid that sits securely. A repurposed cookie jar, wide-mouth canning jar, glass tank, or purpose-made vessel can work. The opening matters more than an unusual shape: you should be able to reach the bottom with a spoon, brush, chopstick, or long tweezers. A narrow-neck bottle is possible, but it turns planting, removing dead leaves, and wiping the glass into a precision job.
Choose a container with enough height above the mature plants to leave breathing room and enough width to separate foliage. A jar that looks full on planting day is likely to become crowded after several months. Avoid cloudy or strongly tinted glass that blocks light, vessels with cracks or sharp chips, and heavy containers that could tip from a shelf. Wash the jar with soap and water, rinse it well, and let it dry. If it was cleaned with a strongly scented or solvent-based product, leave it open until no cleaner odor remains.
Select Plants That Share a Microclimate
Good closed-terrarium plants are small or slow-growing, tolerate high humidity, and can share the light level you have. Fittonia (nerve plant), compact peperomias, small ferns, Pilea involucrata, Selaginella, and live moss are common starting points. Use one or two species in a small jar rather than squeezing in a miniature collection. Each added plant brings a different growth rate, water demand, and chance of pests.
Do not choose plants by label alone. “Miniature” may describe a young nursery plant, not its mature size; check the species’ eventual habit and pruneability. Pair plants that like similar moisture and light, and leave room between leaves so you can inspect them. Gardener’s Supply contributor Ann Whitman recommends looking for compact or slow-growing plants and checking them for pests before planting; that selection logic is especially useful in a humid container where a small pest population can spread quickly. Avoid cacti and most succulents in a sealed jar, and do not mix them with moss or ferns. If a plant needs the soil to dry thoroughly between waterings, it is a poor match for this water cycle.
Gather the Materials and Keep the Build Simple
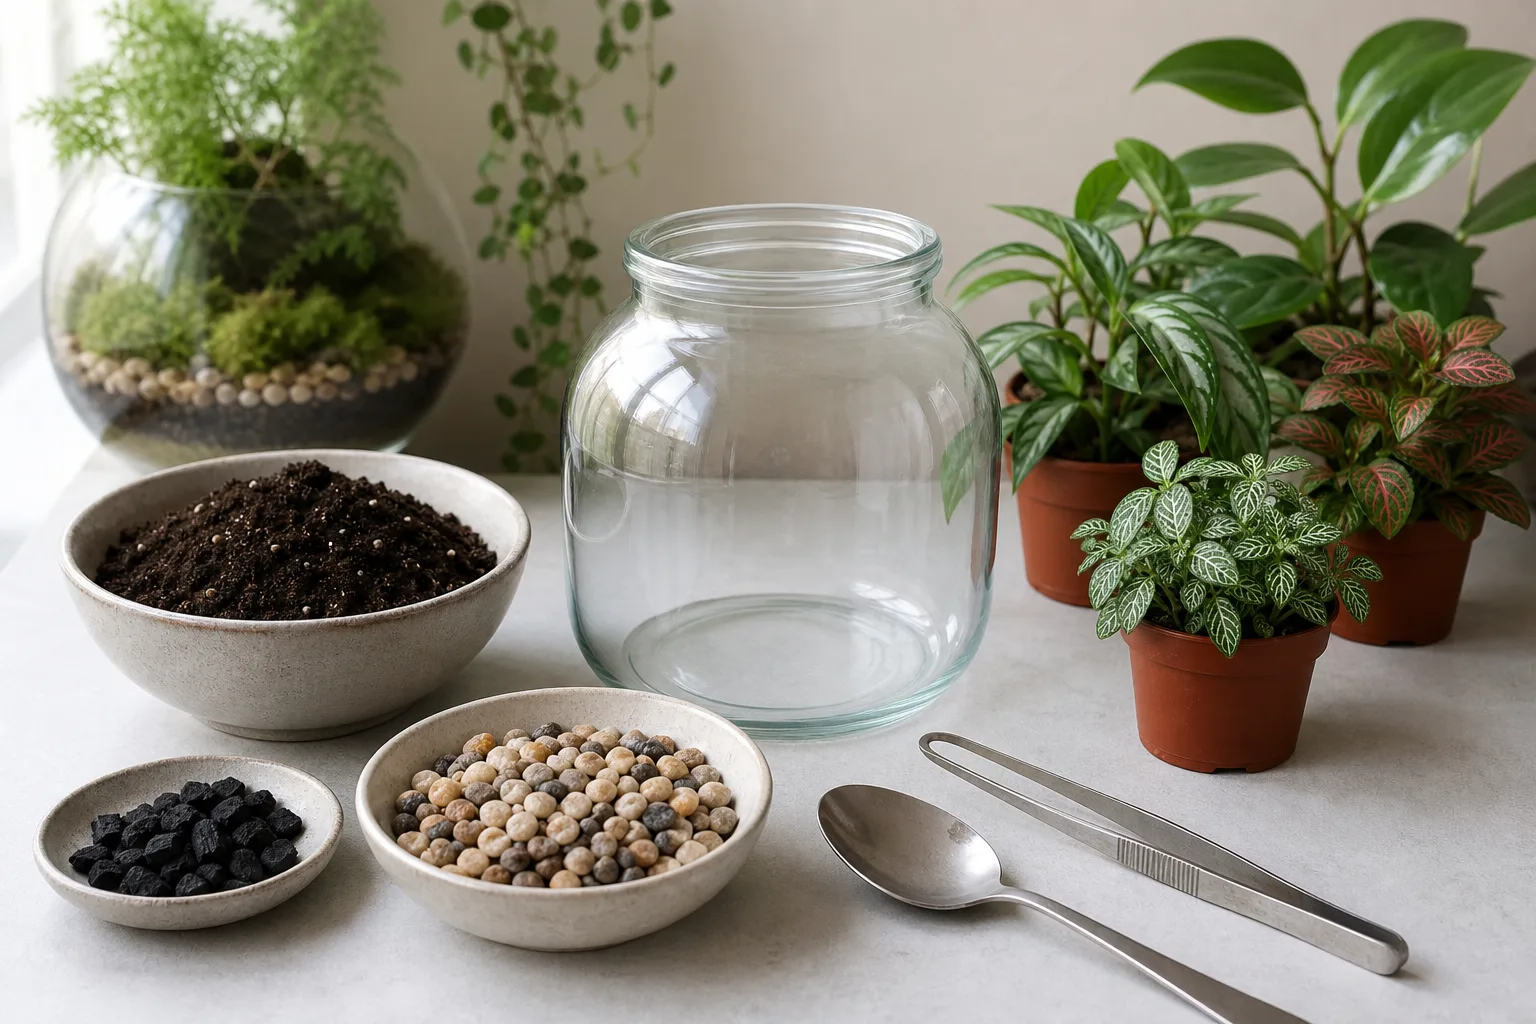
You need a clear lidded vessel, a clean low-fertility potting mix that stays open rather than compacting, a few compatible plants, and basic tools. A long spoon, chopstick, clean paintbrush, narrow funnel, and aquarium tweezers make a narrow container easier to work in. Decorative stone or a small piece of clean, non-rotting hardscape is optional; keep decoration sparse enough that you can still see the soil and plant bases.
| Material | Practical choice | What to avoid |
|---|---|---|
| Container | Clear glass, stable base, workable opening, close-fitting lid | Tinted glass, cracks, a jar too small for mature plants |
| Growing mix | Light, moisture-holding but airy houseplant or soilless mix | Dense garden soil, waterlogged mix, heavily fertilized soil |
| Plants | Pest-free, compact humidity lovers with similar needs | Succulents, cacti, fast growers, visibly stressed plants |
| Tools | Clean spoon, brush, chopstick, funnel, tweezers | Dirty tools or sharp items used carelessly in glass |
| Optional charcoal | A small amount of horticultural-grade material if desired | Treating charcoal as a cure for excess water or decay |
Published recipes differ on whether charcoal belongs in a layer or mixed into the substrate, and some omit it. Penn State Extension describes mixing a small amount into soilless mix; Gardeners’ World uses crushed charcoal in its example build; Naples Botanical Garden does not make charcoal essential in its supply list. Treat it as optional, not as a sterilizer or substitute for removing dead leaves. Good hygiene and water control matter more.
Clean the Vessel and Prepare the Plants
Inspect every plant before it enters the jar. Look under leaves and around stems for scale, mealybugs, aphids, fungus-gnat larvae, webbing, and soft or yellowing growth. Remove dead leaves and any visibly damaged parts with clean scissors. If you find a pest, keep that plant out of the terrarium until it has been dealt with separately; a closed humid jar is a poor place to discover an infestation.
Ease each root ball out of its nursery pot and remove loose, excess potting mix without tearing healthy roots. You do not need to bare-root every plant, but avoid packing a wet nursery plug into the jar, where it may remain saturated. If the roots are tightly circling, loosen them gently. Water a dry plant before the build if needed, then let excess water drain from its nursery pot. This gives the foliage time to dry and makes it easier to judge how much additional moisture the terrarium needs.
Set the plants and decorations on a table in the arrangement you plan to use. A quick mock-up helps you check height, leaf color, and the view from the front before your hands are working through a narrow opening. Clean any stone or hardscape and let it dry. Naples Botanical Garden also stresses cleaning introduced materials and leaving room for plants to fill in; do not collect moss or other plants from a yard unless you know the site is safe and you have permission to remove them.
Build the Soil Base Without Relying on “Drainage Rocks”
A sealed glass jar has no drain hole, so a bottom layer of gravel cannot drain water out of the container. It can hold a small amount of water below the soil or create a decorative boundary, but it also uses space that could hold root-friendly mix. Penn State Extension notes that a rock layer is no longer considered an improvement to drainage in a terrarium. This differs from older and still-common recipes, including some gardening demonstrations that call the stones a drainage layer. The practical takeaway is not that stones are forbidden; it is that they do not rescue overwatering.
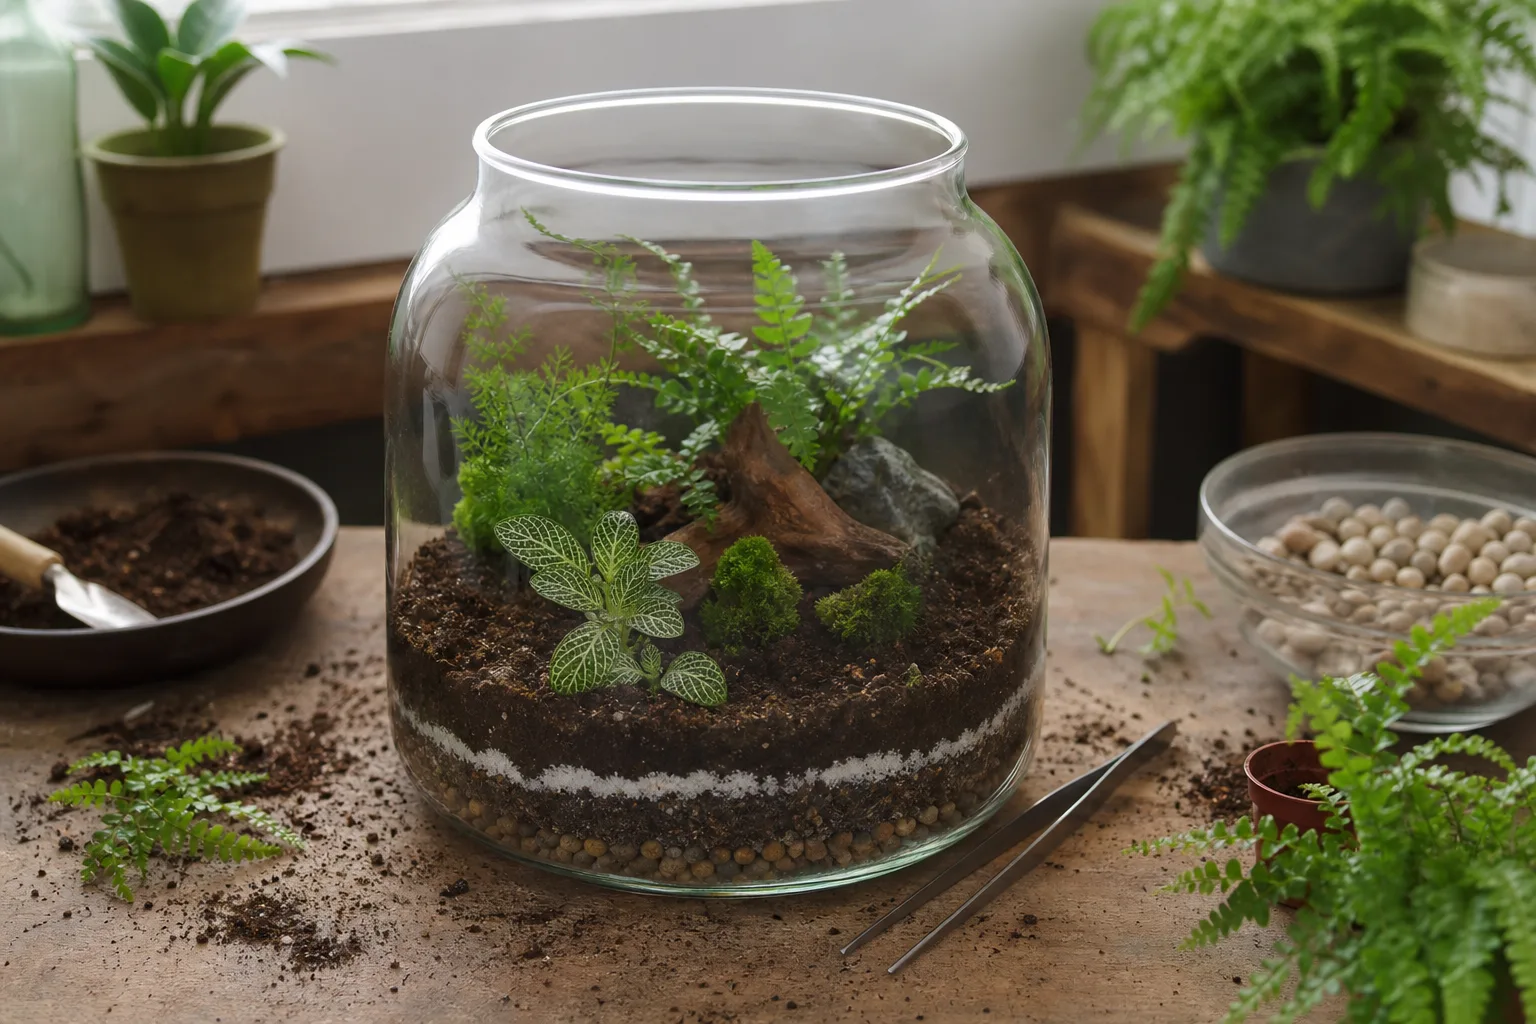
For a simple first build, start with a modest depth of airy mix—enough to bury each root ball and support the plants upright. If you want a visible gravel band, keep it shallow and treat it as a visual feature, not a drain. Do not add a thick charcoal layer and a thick rock layer at the expense of soil depth. Lightly firm the mix so plants stand, but do not pack it hard. The finished surface should be damp and springy, not muddy or glossy with standing water.
Arrange Plants for Light, Access, and Future Growth
Put the tallest plant toward the back if the jar will sit against a wall, or near the center if people will see it from every side. Use lower plants and moss near the front, but keep foliage from pressing against the glass. Leaves that stay wet against the wall are hard to inspect and can become damaged as the plant grows. Leave a small clear zone near the rim so you can wipe condensation and reach in with a tool.
Think about the finished arrangement at twice its planting-day size, not just the first photograph. Keep each crown above the soil line, spread the roots gently, and leave enough room to remove one plant without uprooting everything else. If a plant needs repeated bending to fit through the opening, choose a smaller specimen or a wider vessel. A terrarium that is simple to maintain is more likely to stay healthy than one that is crammed with detail.
Water in Small Increments
Start with mix that is evenly damp, not saturated. After planting, use a dropper, teaspoon, mister, or narrow-spout bottle to add water directly to the soil in small amounts. Avoid soaking leaves and pouring blindly down the glass; the container has nowhere to send extra water. If you can see a pool forming at the bottom, stop. You can always add a little more later, while removing water from a planted jar is awkward and may disturb roots.
There is no universal tablespoon measurement because jar volume, plant size, starting moisture, substrate, and room temperature vary. A practical starting test is to close the lid and watch the container for a day before adding more. If the soil remains visibly damp and a light haze appears on part of the glass, wait. If the soil looks dry throughout, leaves begin to lose firmness, and no condensation appears across the day, add a teaspoon or two, then reassess the next day. The point is to change one thing at a time so you can tell whether your adjustment helped.
Balance the Terrarium During Its First Week
Treat the first week as a calibration period rather than following a fixed “open for 24 hours, close for 24 hours” schedule. Put the lid on after the planting is complete and observe how much condensation forms. If the entire jar turns opaque with large droplets that keep running down the glass, crack or remove the lid for several hours, then check again. If there is no moisture visible and the substrate is drying, add a small amount of water. A clock-based routine cannot account for a warm room, a cool windowsill, or a jar that began with wet soil.
Check once in the morning and later in the day for several days. A light mist on part of the glass that clears as the room warms is a useful sign that moisture is moving through the container; persistent dripping is a reason to vent, not to wipe and immediately reseal. Also look at the plants: leaves should remain firm, crowns should not be submerged, and no sour odor should develop. The process is intentionally gradual. Avoid changing the water, light, and lid position all at once, because then you will not know what corrected the imbalance.
Find Bright, Indirect Light
Place the jar in a bright room, out of direct sun. Sunlight passing through glass can heat the enclosed air and foliage quickly, even when the surrounding room feels comfortable. A bright position near a window is often better than a sunny sill; a few feet back from a strong window may give enough light without the heat spike. Move the container if the glass becomes hot to the touch or condensation suddenly becomes heavy after sun reaches it.
Low light creates a different problem: slow, weak growth and plants leaning toward the brightest side. Turn the jar a quarter turn every week or two if the plants are leaning, and check that a curtain or nearby object is not blocking most of the available light. Do not compensate for a dark location with constant artificial light. Plants still benefit from a normal day-and-night cycle. If the room is genuinely dim, choose a brighter site before planting rather than expecting a sealed jar to solve a light shortage.
Read Condensation Instead of Using a Watering Calendar
Condensation is information, not a scorecard. A small amount of haze on one wall or a morning fog that clears later can be compatible with a balanced terrarium. Uniform, heavy fog for most of the day, beads that keep streaming downward, or standing water around the roots suggest that the substrate is too wet, the jar is too warm, or both. Vent the lid and move the container away from heat before reaching for more water.
No visible condensation does not automatically mean the terrarium is dry. Glass temperature, room humidity, and where the jar sits can change what you see. Check the soil surface and plant condition too. If the mix is still moist and leaves are firm, leave it alone. If the mix is dry and plants droop, add a small amount of water and wait a day. A fixed weekly or monthly schedule is less useful than a repeatable observation: glass pattern, substrate feel, and plant response together.
Prune, Clean, and Reopen the Jar When Needed
Look over the terrarium weekly, especially during its first month. Remove yellow or decaying leaves promptly with clean tweezers, because rotting material feeds mold and can sour the enclosed space. Pinch or trim stems before they crowd the glass or shade smaller plants. Wipe the inside wall with a clean cloth or paper towel on a stick if algae, soil, or mineral marks block your view; keep cleaning products away from the inside of the jar.
Reopening the jar is normal maintenance, not a sign that the system failed. Vent it when condensation stays heavy, when you need to remove a damaged plant, or when the interior needs pruning and cleaning. Close it again only after you have corrected the cause—such as too much water, a crowded plant, or a warm location. If you repeatedly need to leave it open, the container may be better treated as a partially open terrarium, or the plant mix may not suit a closed environment.
Troubleshoot Mold, Algae, Odor, and Wilting
Persistent fog or droplets: Stop adding water, open the lid for a few hours, and move the jar to cooler indirect light. If water is pooled under the soil, do not pour in more. Check whether the container is crowded and whether the mix is dense; remove a plant if there is no space for air and access.
White fuzzy growth: First check whether it is mold on a dead leaf or decaying wood, rather than a healthy root. Remove the affected organic material and wipe nearby glass. Vent the jar and let the surface lose some excess moisture. If growth returns repeatedly, inspect the root zone for a rotting plant and consider removing the affected plant and a small amount of contaminated mix. Do not spray a household fungicide into a closed vessel.
Green film or algae: Wipe it off and review both light and excess moisture. Do not move the jar into deep shade to hide algae; plants need light. Instead, reduce direct sun and heat, avoid overwatering, and remove excess organic debris.
Wilting or yellowing: Do not assume every limp leaf means thirst. In a wet jar, wilting can come from oxygen-starved roots or decay. Check soil moisture and smell the container. If the mix is wet or sour, vent it and inspect roots; if it is dry and the plant firms after a small water addition, continue with restrained moisture. Remove any badly damaged leaf or plant rather than leaving it to rot in place.
Fungus gnats or other pests: Remove the affected plant and treat it outside the terrarium according to a reliable plant-care method. Sticky traps inside the jar do not fix a wet substrate and can clutter the display. Rebuild only after the source plant and container are clean.
Reset or Replant When the Miniature Landscape Outgrows It
Even a well-balanced jar changes as plants grow. Refresh it when stems press against the lid, one species shades out the others, roots occupy nearly all the available soil, or repeated pruning leaves an awkward shape. Take out the fastest-growing plant first and replant it in a normal pot; you may be able to keep the remaining compact plants in the jar. If the soil has become sour, compacted, or persistently waterlogged, empty and clean the vessel before starting over with fresh mix.
Do not fertilize routinely to make the terrarium “self-sustaining.” Fertilizer can push soft growth that quickly fills the limited space, and a closed jar has little room for salts to disperse. If plants decline, diagnose light, moisture, roots, and pests before assuming they need food. A reset after a year—or several years—can be part of successful care, not evidence that the original build was a failure.
Conclusion
Build a closed terrarium around compatible plants, clear glass, an airy growing mix, and a small initial amount of water. Keep it in bright indirect light, use condensation and plant condition to decide when to vent or add moisture, and remove dead growth before it decays. Stones and charcoal can be optional design or substrate choices, but neither compensates for a soggy jar. A terrarium stays low-maintenance when you observe it early, make modest corrections, and refresh it when the plants outgrow their miniature landscape.