Build a DIY Succulent Terrarium That Stays Healthy
Build a DIY succulent terrarium that suits your plants: choose an open bowl, use a fast-draining mix, plant with room, and water by soil condition safely.
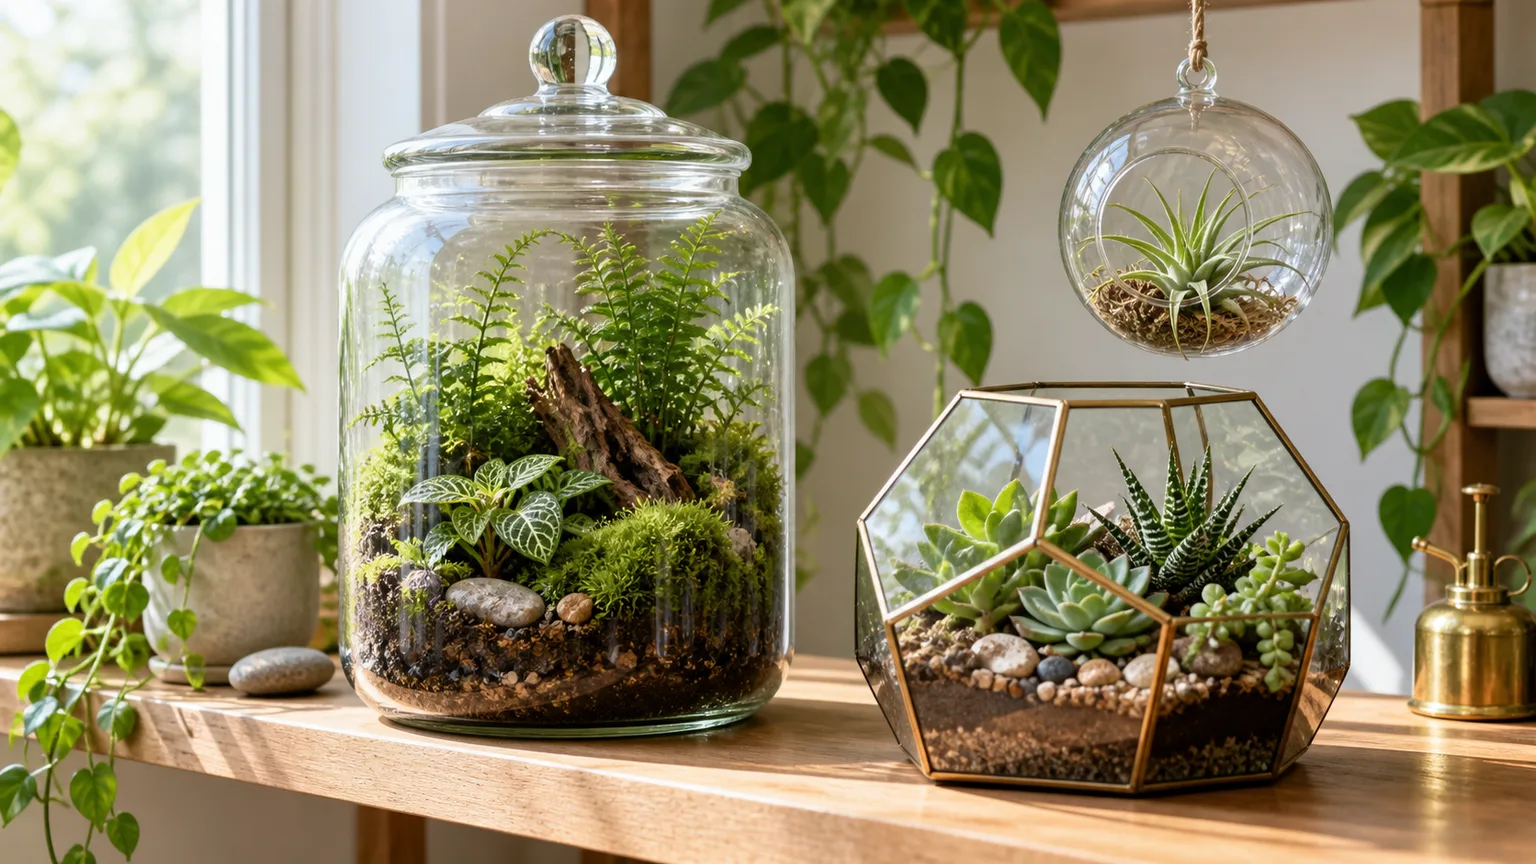
A succulent terrarium can be beautiful and still be a poor home for its plants. Succulents store water in their leaves and stems, so a closed jar that traps humidity or a bowl with permanently wet soil can turn a quick craft into a slow root-rot problem.
The reliable version is an open, easy-to-reach arrangement built with a fast-draining mix and plants that want similar light. A bowl with a drainage hole is easiest to maintain; if you use a glass vessel without one, treat it as a display planter that needs careful watering and occasional rescue—not as a self-watering ecosystem.
Can succulents live in a terrarium?
Yes, if “terrarium” means an open glass bowl or a wide-mouthed vessel that lets warm, damp air escape. Succulents generally need the root zone to dry between waterings, while closed terrariums are designed to hold moisture for plants such as mosses and many ferns. In a sealed container, condensation can keep the air and soil too damp for most familiar rosette succulents.
The container also changes how forgiving the arrangement is. In an ordinary pot with a drainage hole, extra water can leave the root zone; in an unperforated glass bowl, excess water has nowhere to go unless you pour or remove it. West Virginia University Extension recommends well-drained growing medium and notes that containers with holes are better suited to succulents; Montana State University Extension likewise advises watering only when the medium is dry and favors containers with drainage holes.
Think of this project as a decorative planting, not a miniature closed ecosystem. If your only vessel has a lid or a narrow neck, use a small nursery pot inside it and lift the pot out to water, or choose a different project for that vessel. An open dish of succulents is more likely to thrive than a sealed display that looks attractive for a week.
Choose an open vessel before you choose plants
Pick a shallow, stable container with a wide opening. You should be able to reach the soil with a spoon, inspect the plant crowns, and remove a succulent without breaking the glass or crushing its neighbors. A low bowl also makes it easier to keep plants at the surface instead of burying their leaves in a deep column of wet mix.
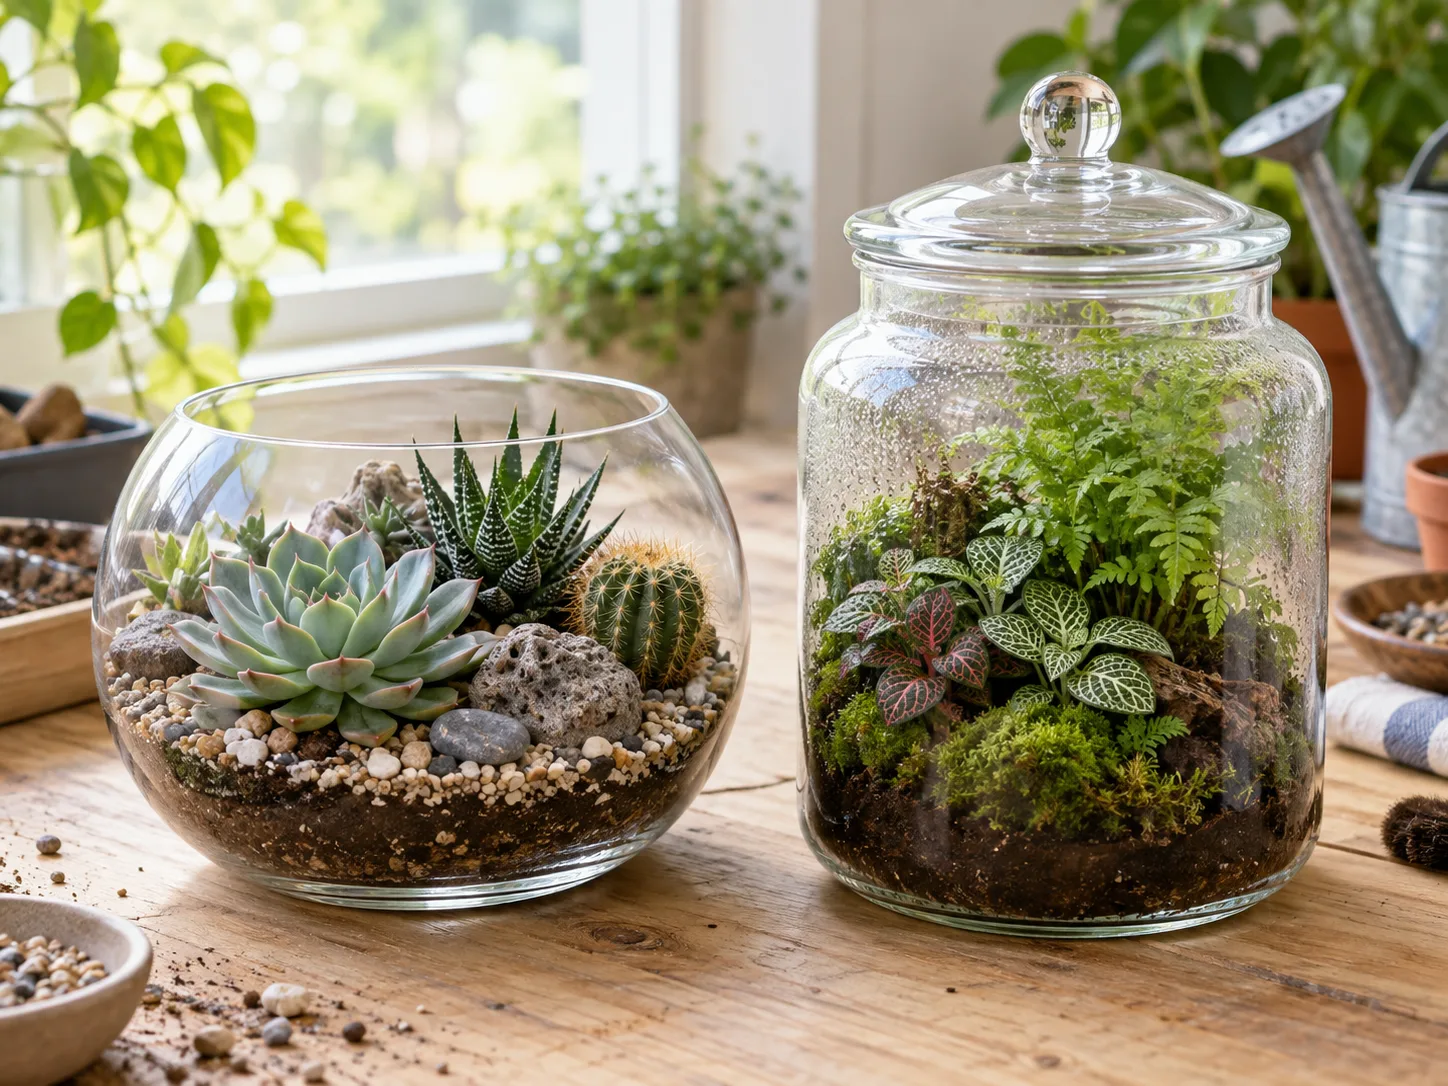
A bowl with a drainage hole is the lowest-risk option. Set it on a saucer, water until the mix is evenly moist, then empty the saucer after it drains. If you want the clear-glass look, you can set a small draining nursery pot inside a decorative glass bowl, or group several nursery pots inside a wider glass container and cover the gaps with clean pebbles. That arrangement is easier to inspect and rearrange than planting directly into glass.
A glass bowl with no hole can still work as an open display, but it has less margin for watering mistakes. Keep the soil layer modest, apply water in measured amounts around the root zone, and check for water collecting beneath the mix. Skip lidded jars, bottle necks, and containers that trap warm air. Also keep the bowl out of strong direct sun: glass can heat the root zone quickly, especially on a hot sill or beside a south- or west-facing window.
Pick plants that share light and growth needs
Choose compact plants with similar care needs rather than filling the bowl with every tiny succulent at the nursery. Echeveria makes a clear focal rosette for a bright location; Haworthia and Gasteria stay relatively compact and may tolerate somewhat less direct sun, though they still need bright light. Small Sedum varieties can add a trailing edge if there is space for their stems to grow without sitting against wet soil.
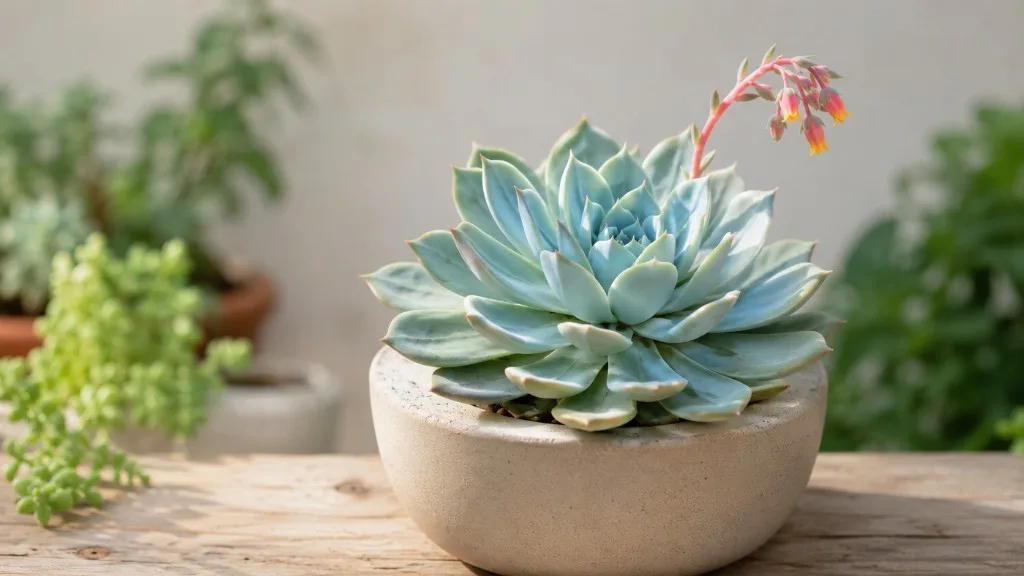
Use the plant label as a starting point, then group by the light level each species actually needs. A sun-loving Echeveria and a shade-tolerant Haworthia can share a bright room, but a window that keeps the Haworthia comfortable may leave the Echeveria stretched; a harsh midday sun spot can scorch either plant behind glass. If you want a mixed display, choose plants with overlapping needs and be prepared to move one out if it starts stretching or scorching.
Cacti are not automatically incompatible with succulents: most need the same open, bright, dry conditions. Their spines make them a poor choice for a project handled by young children or placed where people brush past, and a large cactus can quickly dominate a small bowl. Avoid pairing succulents with moisture-loving ferns, fittonia, or moss just because they are sold as terrarium plants; they need a different humidity and watering regime. Leave room for mature leaves and offsets, not only for the size of the plants on planting day.
Gather tools and the right succulent mix
Set out the vessel, a tray or newspaper, a small spoon or narrow trowel, long tweezers or chopsticks, a soft brush, and a squeeze bottle or small watering can with a narrow spout. Tweezers help place plants in a bowl without pressing on the leaves. If you handle spiny cacti, wear sturdy gloves and use folded paper or tongs to protect your fingers; do not grab a cactus by its stem.
For the growing medium, start with a commercial cactus and succulent mix and loosen it with pumice, perlite, or horticultural grit. A practical starting blend is about one part bagged mix to one part mineral amendment by volume. Products vary: if the bagged mix already feels gritty and dries quickly, use less amendment; if it clumps into a dense, damp plug, add more. The goal is a stable mix that holds the roots in place but does not stay soggy.
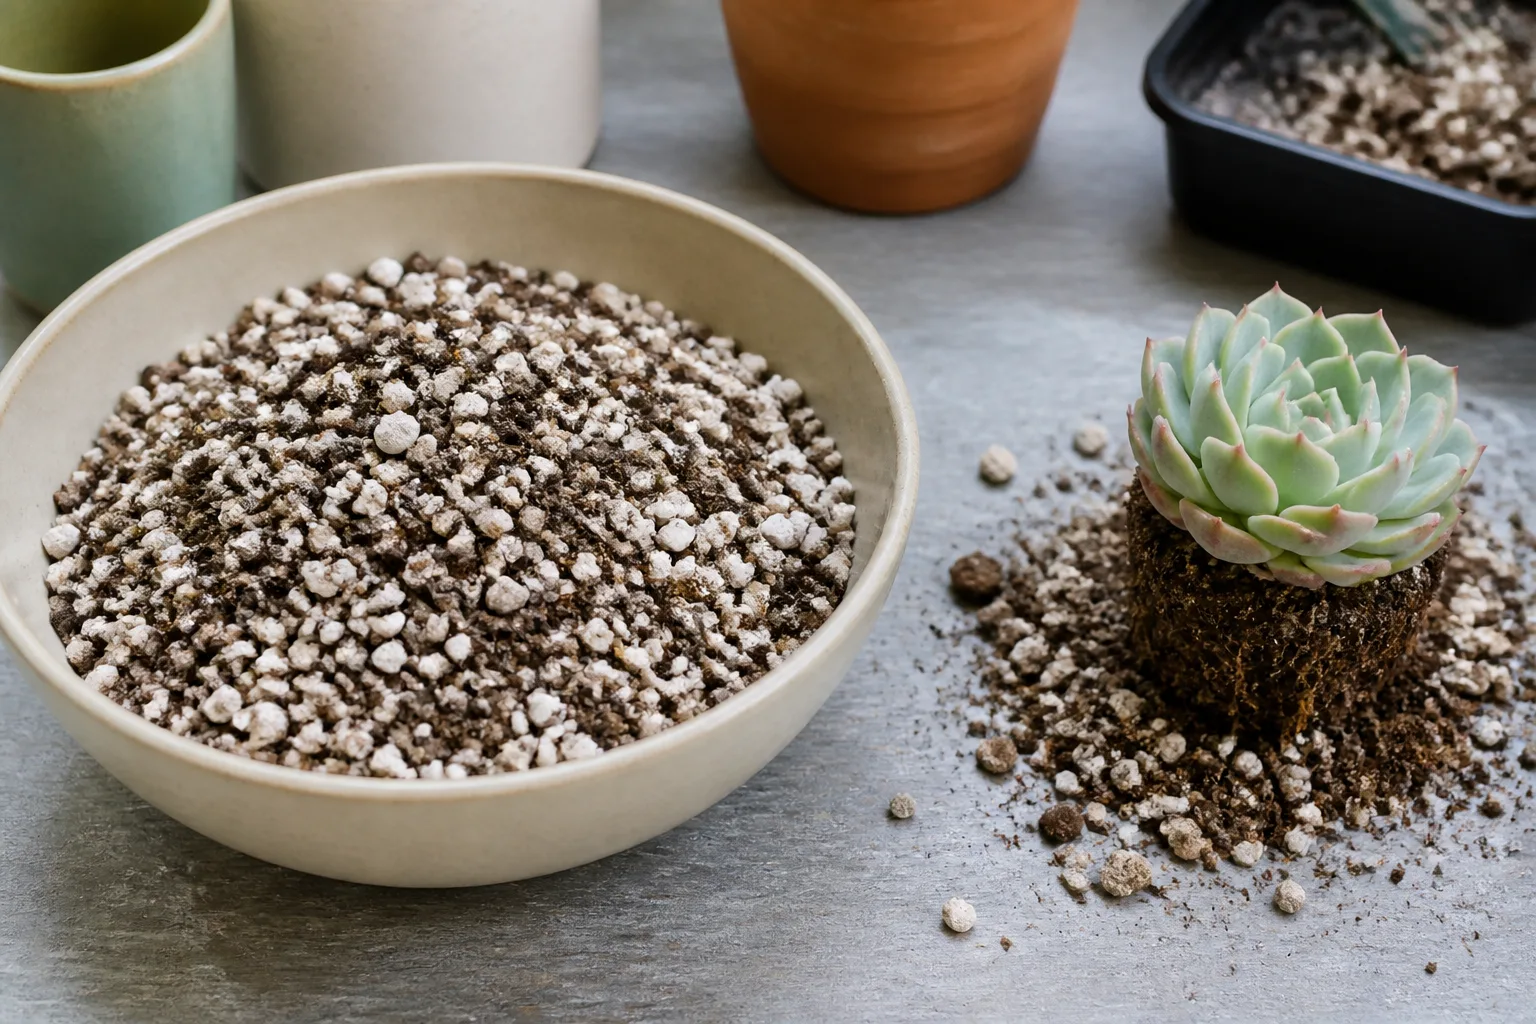
Do not substitute garden soil, dense all-purpose potting soil, or fine beach sand. Garden soil can compact in a small vessel, and very fine particles can fill air spaces instead of helping water move through. You do not need activated charcoal, sphagnum moss, or a complicated stack of layers to make a succulent bowl work. Decorative gravel belongs on the surface if you like its appearance; it does not replace a drainage hole or a well-aerated mix.
Prepare the vessel and loosen the root balls
Wash the container with soap and water, rinse it well, and let it dry before adding plants. This removes dust, residues, and loose debris that would cloud the glass. Check the vessel for cracks or a sharp rim, and place it on a stable surface where excess water will not damage furniture.
Before removing the plants from their nursery pots, arrange them on the table and test a few layouts. Put the tallest or widest plant toward the back or center and smaller plants around it, leaving the front open so you can see the surface. A photo of the dry layout can help you remember the spacing after you start moving soil.
Slide each plant from its nursery pot by supporting the root ball rather than pulling the leaves. Gently loosen only the soil that falls away easily; do not strip the roots bare just to make them fit. If the root ball is wet, give it time to dry before planting. Brush off loose soil and remove dead leaves that would otherwise sit under the surface, but leave healthy roots intact. If a root breaks, let the damaged area dry before you water again; freshly injured roots are more vulnerable in a wet, enclosed spot.
Step 1: Make a planting zone, not a deep drainage layer
If your container has a drainage hole, cover the opening loosely with a small piece of mesh or a curved pot shard so mix stays in while water can still escape. Do not seal the hole with a coffee filter, compacted moss, or a solid layer of plastic. The cover should keep particles from falling out without turning the base into a plug.
If the glass vessel has no hole, resist the urge to fill its bottom with an inch or two of pebbles and call that “drainage.” Water can move through the soil into the coarse layer, but it cannot leave the vessel; it may collect there and later remain available to the soil above. A clear false bottom can look tidy, but it does not make the container drain. Deep Green Permaculture’s container-drainage explanation describes why a coarse layer under potting mix does not lower the amount of water retained in a pot; changing the mix or providing an outlet matters more.
A thin decorative layer is optional if you want a visible base through the glass, but it costs you root depth and cannot compensate for overwatering. The simplest build is to put the growing mix directly in the vessel and keep the water dose small. If you want more room for error, use the nursery-pot insert method so each plant can drain separately.
Step 2: Add and test a gritty substrate
Spoon in enough mix to support the roots without raising the leaves above the rim. The right depth depends on the vessel and root balls, but a few inches is more useful than a thin film: roots need actual growing space, not just a decorative cap. Shape the surface into a low mound toward the back if you want the plants to show at different heights.
Before planting, test a handful of the mix. Squeeze it gently, then open your hand: a suitable mix should crumble apart instead of staying in a dense wet ball. If it is bone dry and dusty, dampen it very lightly in a separate tray so it settles around roots without blowing around. If it feels heavy or smears on your fingers, add more pumice, perlite, or grit rather than layering gravel underneath it.
West Virginia University Extension describes the need for good drainage and a suitable succulent medium, and BBC Gardeners’ World Magazine’s desert-terrarium guide also uses a fast-draining cactus compost in an open container. Use those as the direction of travel, not a recipe that fits every product or species. If you have a draining vessel, you can use a slightly deeper mix; in glass without a hole, less water and a loose, airy substrate become even more important.
Step 3: Plant the largest succulent first and leave room
Start with the plant that will define the arrangement. Make a hole just wide enough for its roots, lower the root ball in, and bring the soil back around the roots with a spoon or chopstick. Hold the rosette above the surface as you firm the mix lightly; burying the crown or trapping lower leaves against damp soil invites rot.
Add the smaller plants one at a time, working from the back of the bowl toward the front. Use a chopstick to guide roots down and a soft brush to remove soil from the leaves. Many rosette succulents have a powdery coating called farina; it is part of their natural surface and can rub off if you handle the leaves. Hold plants by their root balls or lower stems instead.
Do not pack the bowl tightly to create an instant full look. Keep leaves from touching the glass where possible, and leave visible gaps between rosettes so air can circulate and you can remove a plant later. A single focal plant with two small companions often looks more composed—and is easier to water—than five plants crowded into the same footprint. If you cannot reach the soil between plants with a narrow spout, the arrangement is already too dense.
Step 4: Top-dress without burying the plants
A thin top-dressing of small stones, aquarium gravel, or horticultural grit can hide bare soil and give the arrangement a finished look. Apply it lightly around the stems, keeping the plant crowns and lowest leaves clear. If the surface stones make it difficult to see the soil, leave a small inspection gap near the side of the bowl.
Choose decor that stays dry and does not shade or press on the leaves. Driftwood, a few smooth stones, or a small unpainted ornament can work; avoid items that shed dye, glitter, or residue into the soil. A miniature figure can be part of the display, but it should not take up the space the plants need to grow. Remove decorative objects when you inspect the base or adjust a plant.
A top-dressing is not a watering indicator. Stones can hide wet soil and make the surface appear dry before the root zone is ready for more water. Keep the mix visible somewhere or use a wooden skewer to check below the surface. If any layer begins to stay damp, remove it temporarily so the substrate can dry more evenly.
Step 5: Give the arrangement a careful first watering
Do not mist the finished display just to settle it. Misting wets the leaves and the glass while doing little to wet the full root zone, and droplets can linger where leaves touch. If the mix was pre-moistened and roots were disturbed, wait until it has dried before adding water. When the roots are intact and the mix is dry, apply water at soil level with a squeeze bottle or narrow-spout can.
In a bowl without drainage, begin with a small amount around each root ball, not a pour across the entire surface. Pause and inspect the lowest part of the glass; stop before water pools under the soil. If you accidentally add too much, tilt the bowl carefully over a sink or remove the standing water with a turkey baster. Do not leave a puddle under the roots while waiting for it to evaporate.
For a bowl with a drainage hole, water the whole root zone until some water exits, then empty the saucer. This is easier to measure because the extra water has an exit. For plants with broken roots, wait several days or follow the plant’s specific repotting guidance before watering. Mommypotamus’ terrarium how-to also recommends an open vessel for succulents and warns that a narrow opening can trap more heat and moisture; that is useful practical advice, but its fixed two-to-three-week watering interval should not be treated as universal.
Set light and temperature so the glass stays safe
Place the terrarium where it receives bright light suited to the plants you chose. Echeveria usually needs a brighter position than Haworthia, but the glass vessel adds a heat risk that a regular pot does not. A sunny window may be appropriate for a potted succulent yet too hot for a closed or shallow glass bowl exposed to afternoon sun.
Start with bright, filtered light and watch the plants for a week or two before increasing exposure. If the leaves bleach, scorch, or become hot to the touch through the glass, move the bowl farther from the window. If the stems stretch toward the light and the rosettes loosen, increase brightness gradually or use a suitable grow light at the recommended distance. Montana State University Extension notes that light needs differ by succulent, with some needing substantially more light than others, so a single “six hours for every plant” rule is not reliable.
Rotate the bowl a quarter-turn every week or two if one side consistently faces the window. Rotation can even out growth, but it does not make a dim location bright enough. Avoid placing the arrangement above a radiator, beside a heat vent, or in a cold draft; sudden temperature swings can stress plants and cause leaves to drop. In humid rooms, keeping the vessel open and providing gentle airflow is especially important.
Water by soil condition, not by calendar
There is no dependable “every two weeks” schedule for every succulent terrarium. The interval changes with plant species, potting mix, container depth, season, room temperature, airflow, and the amount of light the bowl receives. A sunny, warm arrangement in a porous mix can dry much faster than a shaded arrangement in dense soil.
Check below the surface before watering. Push a clean wooden skewer into the root zone for a few minutes; if it comes out dark, cool, or with damp mix attached, wait. If the skewer is dry and the mix has pulled away slightly from the glass, watering may be due. You can also feel the substrate with a clean finger if the opening is wide enough, but judging only by the top layer is misleading because stones and airflow can dry the surface first.
When a draining vessel is ready, water thoroughly and let it drain. When a no-hole vessel is ready, add water slowly around the roots and stop before a pool forms. Then leave the bowl alone until the root zone dries again. Do not spray the leaves daily, and do not add a little water every time the surface looks dusty. The Fine Gardening guide to indoor succulents also emphasizes checking the medium rather than overwatering by habit; adjust your interval as daylight and indoor temperatures change.
Troubleshoot rot, stretching, mold, and leaf loss
A succulent that looks unhealthy does not always need more water. Read the plant and the mix together: touch the leaves, check the soil depth, inspect for standing water, and compare the symptoms on the lower and newer growth. One change at a time makes it easier to tell whether the fix worked.
| What you see | Likely cause to check first | First action |
|---|---|---|
| Soft, translucent, or mushy leaves; dark stem base | Soil stays wet too long or water is pooling | Remove standing water; lift the plant and inspect roots if the stem is soft |
| Long, leaning stems and widely spaced leaves | Not enough light | Move gradually to a brighter position; do not compensate by watering less alone |
| Wrinkled leaves with very dry mix | The root zone may be too dry, or damaged roots may not take up water | Check roots and soil depth; water only if the root ball is dry |
| Fuzzy mold or a sour smell at the surface | Persistently damp soil, dead leaves, poor airflow | Remove debris, expose the soil, and let it dry; reduce watering and improve airflow |
| Lower leaves drop after planting | Transplant stress, root injury, or a sudden light change | Keep the plant stable, check for rot, and avoid watering until the mix is dry |
For suspected rot, take the plant out of the bowl rather than trying to fix it with more pebbles. Remove wet soil, trim black or mushy roots with clean scissors, and let any cuts dry before replanting in fresh, dry mix. A pot with a drainage hole is a safer recovery container while roots regrow. If only one plant is affected, remove it so it does not keep the entire display too damp; healthy neighboring plants can remain if the mix around them is dry and odor-free.
Refresh the arrangement as plants grow
A small terrarium is not a permanent home for plants that continue to spread. When leaves overlap, the soil stays wet longer, or roots crowd the edge of the bowl, lift out the fastest-growing plant and repot it separately. A tidy arrangement with fewer plants usually needs less pruning and is easier to inspect than one kept full by constant cutting.
You can use offsets or healthy cuttings to make a replacement display, but let damaged cuts dry before they touch moist mix. Do not keep trimming an etiolated plant into a dim arrangement; first improve the light, then decide whether to remove and propagate the stretched top. A compact plant that remains healthy can stay in the bowl, while a plant with different water needs belongs in its own container.
If glass care becomes frustrating, transfer the plants into individual nursery pots and use the glass bowl as a cachepot or decorative cover. The plants keep their more useful drainage and can be lifted out for watering, while the overall look remains grouped. That is a better long-term adjustment than trying to force a sealed vessel to behave like a desert habitat.
Conclusion
The best DIY succulent terrarium starts with a container that lets you reach the plants, a mix that dries readily, and a small group of succulents with compatible light and watering needs. Choose an open bowl, leave room around the leaves, and do not mistake a gravel layer for a drainage hole.
After planting, give the arrangement bright but temperature-safe light and water only when the root zone has dried. If you see pooled water, mushy leaves, mold, or stretched growth, correct the vessel, moisture, or light before adding more plants. A glass display can be lovely, but healthy succulents come first; if the bowl stops being easy to manage, move them into draining pots.