How to Build and Use a Trash Can Composter
Build a trash can composter that drains, breathes, and resists pests. Learn hole layout, brown-to-green balance, moisture fixes, harvest timing, and safe uses.
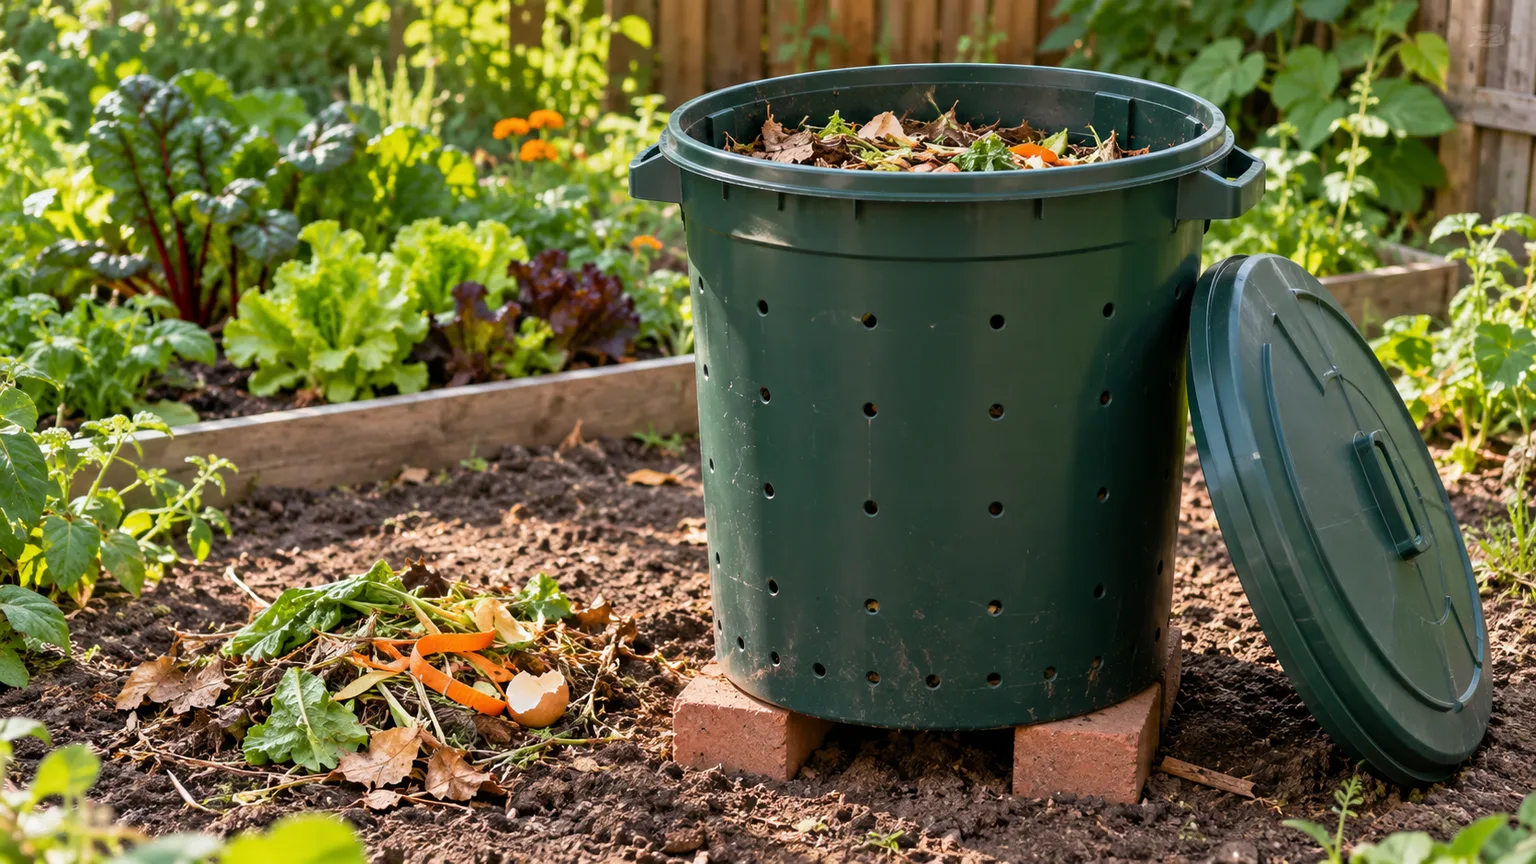
A lidded outdoor trash can can become a simple compost bin with a drill, a sensible pattern of air holes, and a steady supply of dry leaves or other brown material. The important part is not the container itself: decomposition depends on balancing moisture, oxygen, particle size, and nitrogen-rich scraps. A small can is useful for a patio, rental yard, or household that produces a modest amount of garden waste, but it should be treated as a manageable, usually cool compost system—not a guaranteed three-week hot composter.
This design uses ventilation holes in the sides and drainage holes near the base, with a lid to shed rain and a screen to make openings less inviting to rodents. You can build it in an afternoon, then run it with a short weekly check: smell it, squeeze a handful, add browns if it is wet, add water if it is dry, and loosen compacted material when air is lacking.
Is a trash can composter right for your space?
Choose this style if you have a clean outdoor can, a small but steady supply of fruit and vegetable scraps, and a dry carbon source such as autumn leaves or shredded cardboard. It takes up less room than an open heap, keeps material contained, and can be moved when empty. A can with wheels is convenient, but avoid rolling a loaded bin unless its shape and weight make that safe; a full container can be awkward and can crack when dragged over rough ground.
A trash can is less suitable if you generate large volumes of grass clippings, want reliable high-temperature composting, or need to process meat, dairy, pet waste, or diseased plants. Small containers lose heat quickly and have less room to mix ingredients thoroughly. University of Georgia Cooperative Extension’s composting guide distinguishes barrel systems from larger piles and notes that managed piles need the right mix, moisture, and oxygen; its barrel guidance uses a larger drum and frequent turning for a faster process. That is a different operating target from a small static can.
If you want something that tumbles easily, buy or build a purpose-made compost tumbler. If your main goal is to hide food scraps and you do not mind a slow, closed process, use a method designed for anaerobic composting rather than drilling a few random holes and sealing the can. For ordinary yard composting, the ventilated can described here is easier to diagnose and less likely to develop persistent anaerobic odors.
Materials and tools
Start with a sturdy, lidded outdoor trash can in roughly the 30- to 40-gallon range. A common household-size can is easier to place and lift than a large drum, though a larger volume holds moisture and heat more steadily. Better Homes & Gardens’ trash-can bin guide describes a conversion using a 30- to 40-gallon lidded can; choose one with walls that do not flex excessively and a lid that stays on in wind. A used can is fine if it previously held ordinary household waste and can be cleaned.
Do not repurpose a container that held pesticides, fuel, solvents, or unknown chemicals.
Gather a drill, a 1/4- to 3/8-inch bit suited to the can material, safety glasses, a marker, and a small piece of 1/4-inch galvanized hardware cloth if rodent pressure is a concern. Use washers and short exterior-rated screws to secure the cloth from inside, or another durable fastener that cannot fall into the compost. Wear gloves when handling cut mesh because wire ends are sharp.
Two concrete pavers or bricks can lift the base enough for drainage and airflow; do not make the can top-heavy or unstable.
You will also need carbon-rich browns to start the pile: dry leaves, shredded uncoated cardboard, torn brown paper, or straw. Keep a lidded tote or paper sack of dry browns beside the can. The browns are not an optional finishing touch.
They absorb excess liquid, open up dense scraps, and give you an immediate way to correct a pile that is too wet.
Choose and prepare a can that will last
A thick outdoor plastic can is easy to drill and will not rust, but direct summer sun can make low-quality plastic brittle over time. A metal can can work if it is clean and structurally sound, although scratched coatings and rusted edges deserve attention. Avoid thin kitchen bins: they are often too small, may lack a weather-resistant lid, and can split when drilled or when the contents are turned.
Wash the can with water and a mild household detergent, rinse it well, and let it dry. Remove the wheels only if they obstruct drilling or make the base unstable. Check the lid fit before drilling.
A tight-fitting lid helps keep rain out and discourages animals, but it should not turn the system airtight; air should enter through the side holes and move through the pile.
Set the empty can upright and mark rows of small holes around the sides, leaving a few inches of solid plastic below the rim and above the base so the structure stays strong. This simple layout makes the openings easy to inspect and screen. There is no need to cut several large openings with a hole saw: modest holes reduce the chance of compost spilling out, keep larger pests from reaching scraps, and are easier to cover with mesh.
Drill small ventilation and drainage holes
Drill 1/4- to 3/8-inch holes every 4 to 6 inches around the sides, including several rows in the lower third and another row near the upper third. Space the holes evenly rather than making one large ventilated panel. For a plastic can, start slowly and stop if the material flexes or cracks.
Drill a few drainage holes through the base, then elevate the bin slightly on two stable pavers so liquid can escape instead of pooling underneath.
If the can will sit on a deck or paved surface, place a shallow, removable tray below it and empty the tray when needed. A large amount of liquid draining out is a signal to fix moisture and ingredients, not a useful harvest. Compost leachate is water that has passed through decomposing material; it is not automatically a balanced or safe liquid fertilizer. Compost Magazine’s DIY bin account also flags leachate as a practical design issue, which is why a stable drainage path and a dry-brown reserve matter.
Where rodents are common, fasten hardware cloth over the inside of the lower and side openings. Fold or cover sharp edges so they cannot snag hands during turning. A mesh patch should not be so fine or clogged that it blocks airflow; inspect it during routine checks.
If fruit flies become a nuisance, focus first on burying fresh scraps beneath a thick brown cover and keeping the lid closed, rather than sealing every vent.
Set the bin in a workable, pest-aware location
Place the can on firm, level ground where you can reach it with a fork or compost aerator and where rainwater will not collect. Bare soil underneath is convenient for drainage and lets soil organisms reach the base, but it is not required for decomposition. If you have rats or other burrowing pests, use a sturdy wire-mesh apron under the can or place it on a hard surface with a removable drainage tray; follow local rules for rodent-resistant composting.
A part-shaded spot is usually easier to manage than a baking-hot corner. Sun warms the contents in cool weather, but strong summer sun can dry a small bin quickly. Keep the can near the kitchen door or garden path so you actually use it, yet far enough from windows and seating that any temporary odor is not annoying.
Do not place it over a storm drain or where leachate can flow into a creek or street.
Keep the lid secured with its built-in latch or a simple strap if wind or animals can lift it. Each time you add scraps, open the can briefly, add the material, cover it with browns, and close the lid. This routine is more effective than relying on a lock alone: food exposed near the surface draws flies and wildlife even when the container looks tidy from the outside.
Fill the can in layers, not with scraps alone
Put a few inches of dry, coarse browns in the bottom to keep the first layer from sitting in drainage water. Add a thin layer of chopped plant scraps, then cover them with roughly twice as much loose, dry brown material by volume. Continue adding layers as ingredients accumulate.
If you only have a handful of kitchen scraps, mix them into the center of the pile and cover them completely rather than waiting to create a large batch.
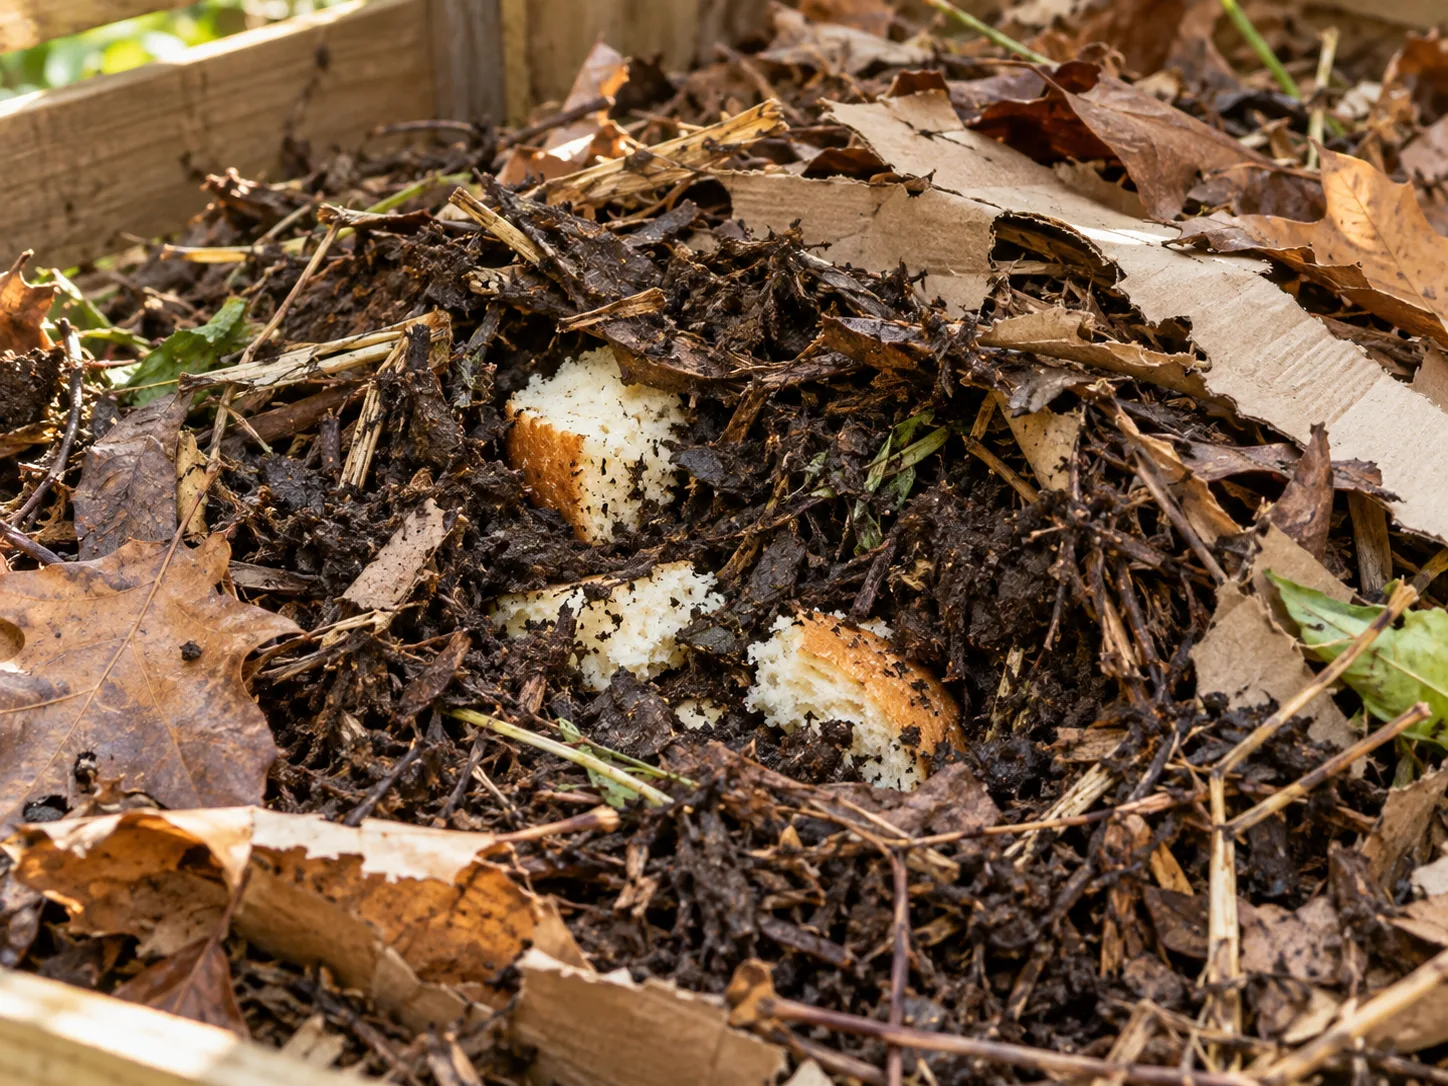
Cut bulky scraps and stems into pieces about an inch or two across. Smaller pieces expose more surface area to decomposers and fit better in a small can, but there is no need to puree them. Tear cardboard and paper so pieces do not mat together.
Mix wet, nitrogen-rich material with dry leaves as you add it instead of dumping a whole bowl of scraps in one spot.
Use brown and green materials as a flexible balance
“Greens” are relatively nitrogen-rich, moist ingredients such as fruit and vegetable scraps, fresh garden trimmings, coffee grounds, and small amounts of grass clippings. “Browns” are drier, carbon-rich ingredients such as dry leaves, shredded plain cardboard, straw, and untreated small wood pieces. Microbes need both nutrients, and the ideal carbon-to-nitrogen balance is commonly described as about 30 parts carbon to 1 part nitrogen by weight.
You do not need to weigh household scraps: materials vary in water and density, so the familiar volume ratio is only a rough starting point.
Begin with about two parts loose browns for each part of fresh greens by volume, then let the pile tell you what to change. If it feels slimy or smells sour, use more dry leaves or torn cardboard. If it remains dry and leafy after several weeks, add a modest amount of moist green material and water. University of Georgia Cooperative Extension explains that nitrogen-rich material, moisture, oxygen, and particle size all affect decomposition; a fixed “brown-to-green” recipe cannot compensate for a pile that is waterlogged or compacted.
Keep a cover layer of dry browns on top after each addition. This reduces flies, absorbs surface moisture, and makes the bin less attractive to animals. Avoid thick layers of fresh grass clippings because they can mat together and exclude oxygen; mix small amounts with leaves or shredded cardboard instead.
Keep high-risk materials out of a small bin
For a backyard trash-can composter, stick mostly to plant-based kitchen scraps and garden trimmings. Avoid meat, fish, bones, dairy, oily foods, grease, pet waste, and human waste. These can attract animals, create strong odors, or introduce pathogens, and a small household can is unlikely to heat every part of its contents enough to sanitize them.
Leave out diseased plant material and weeds with mature seeds unless you can manage a verified hot compost process. A pile may warm in the center while cooler material near the sides survives. University of Georgia Extension’s guidance notes that seeds and disease organisms may remain when the whole pile is not mixed through the hot center. Also exclude chemically contaminated plant matter and any material from a container with an unknown chemical history.
Eggshells and tea bags can be added if the bags are plastic-free; crush shells so they break down more quickly. Plain paper and cardboard are useful in moderation, but glossy, coated, or heavily printed stock is a poor choice for a small garden bin. When in doubt, use the curbside organics program’s accepted-material list or leave the item out.
Manage air and moisture with a weekly check
Once a week, lift the lid and check three things: smell, moisture, and texture. A healthy pile should smell earthy or like damp leaves, not like sewage, vinegar, or rotting food. Take a handful from the middle and squeeze it.
It should feel evenly damp, similar to a wrung-out sponge; water should not stream from it, and it should not crumble into dust.
Aerate every week or two if you add scraps regularly, or at least monthly if the pile is mostly leaves and you are not trying to speed it up. Use a compost aerator, a narrow fork, or a sturdy rod to lift and loosen material from several points. If the can is small and only partly full, you can roll it gently on its side after securing the lid, but do not strain your back or risk cracking a heavy bin.
The goal is to restore air pathways, not to churn every fragment into a uniform mix.
The University of Georgia’s guidance says oxygen is necessary for efficient aerobic decomposition and that excess water can drive the pile toward anaerobic conditions and foul odors. In practical terms, drainage holes do not replace air holes, and a can with many air holes can still become oxygen-poor if wet scraps pack into a dense mass. Keep some coarse browns in the mix and loosen clumps when you turn it.
Correct a wet or smelly composter
A sour, rotten, or sewage-like smell usually points to too much water, too many wet greens, or too little air. First stop adding wet scraps. Pull apart compacted clumps, mix in a generous armful of dry leaves or torn cardboard, and leave the lid ajar only briefly while you work.
Then close it again and make sure the base drains freely. Do not add lime or fragrance to mask the smell; fix the conditions that caused it.
If liquid is pooling under the can, move it onto stable pavers and clear any blocked drainage holes. If a tray is catching runoff, empty it promptly and return some dry browns to the pile. A properly damp compost mass should not produce a stream of liquid.
Heavy rain can overwhelm a small bin, so check the lid and move the can under a roof edge or partial cover if water is entering through the top.
A temporary earthy or mushroom-like smell is normal. Persistent sharp odor after adding browns and opening air channels suggests the pile is still too wet or packed. If it remains foul, empty enough material to loosen the contents, remove any slimy food clump, and rebuild the batch with a dry, coarse base layer.
Correct dry compost or slow breakdown
A pile that is dusty, brittle, and unchanged is probably too dry. Add water slowly while turning, stopping when a squeezed handful feels damp but does not drip. A hose spray is easier to control than pouring in a bucket.
If much of the material is woody or paper-heavy, add a modest amount of fresh greens, such as vegetable scraps or fresh non-diseased trimmings, and mix them through the browns.
Slow decomposition does not always mean something is wrong. Cold weather, a low nitrogen content, large pieces, and infrequent turning all slow microbial activity. Chop tough stems, tear cardboard, and mix material to redistribute moisture.
Do not add a handful of synthetic fertilizer or a commercial starter automatically: microbes are already present on plant material, and a starter cannot correct dryness, poor airflow, or an unbalanced feedstock.
If the pile has an earthy smell and is gradually shrinking, give it time. A small trash-can system often behaves more like a cool, low-maintenance pile than a fast hot-composting drum. Raising the temperature is not the only sign of progress; volume loss, softened material, and a steady change in texture are useful signs too.
How long does a trash can composter take?
Use a range rather than a promised date. A warm, well-mixed, adequately sized composting drum may finish in a few months, while a small can with mixed additions, cool weather, or little turning can take six months to a year or longer. Better Homes & Gardens gives a three- to five-month estimate for a managed DIY bin, while University of Georgia Extension describes two to four months for a well-managed barrel system and longer for less active methods. Those figures assume different can sizes and handling, so they are not a guarantee for your setup.
A practical way to shorten the wait is to feed one batch at a time. When the can is about two-thirds full, stop adding fresh scraps and let the batch finish. Starting a second can for new material keeps new peelings from being mixed into compost that is almost ready.
Shred bulky ingredients, keep the pile damp, and aerate it; do not chase heat by adding too much green material, which can make the can soggy and smelly.
In winter, the contents may pause or slow as the can cools. You can continue adding scraps if you keep them covered with browns, but expect the batch to finish later. In a cold climate, insulate the outside only if the can still has open ventilation and can be accessed for turning; do not wrap it airtight or block drainage.
Tell when compost is finished
Look for several signs together: the material is dark and crumbly, the original scraps are mostly unrecognizable, the pile has shrunk, and it smells earthy. After turning, finished compost should not heat up again in a sustained way. A few intact leaf stems or small wood fragments are not a problem; screen them out and return them to the next batch.
Do not use warmth alone as a maturity test. A small bin may never become hot, while a large pile can heat during active decomposition and then cool before it is fully stable. If you can still identify recognizable food scraps, fresh grass, or glossy wet clumps, give it more time and aerate it.
If the material is only partly decomposed, it can continue breaking down after it is spread and may compete with plants for nitrogen.
Compost from a home can is not sterilized soil. Because a small bin may not expose every piece to high temperatures, avoid using uncertain material around seedlings or edible plant parts if it includes manure, pet waste, diseased plants, or persistent weed seeds. The safer choice is to keep those materials out from the start.
Harvest and use the finished compost well
When the batch is mature, remove the lid and scoop compost from the top or tip the can carefully onto a tarp. Screen out sticks and unfinished pieces with a coarse garden sieve, then return those pieces to the next batch. If the bin is heavy, remove material in smaller portions rather than trying to lift or flip the whole can.
Wear gloves and avoid inhaling dust from dry, finished compost.
Use finished compost as a soil amendment or a thin surface dressing around established plants. Mix it through a garden bed before planting rather than concentrating a large amount in one planting hole. Oregon DEQ’s compost guidance describes incorporating compost into garden soil and using it as a mulch; the right amount depends on soil condition and the plants being grown. Compost improves soil structure and water handling, but it is not a complete fertilizer and should not replace a soil test or crop-specific feeding plan when nutrient needs matter.
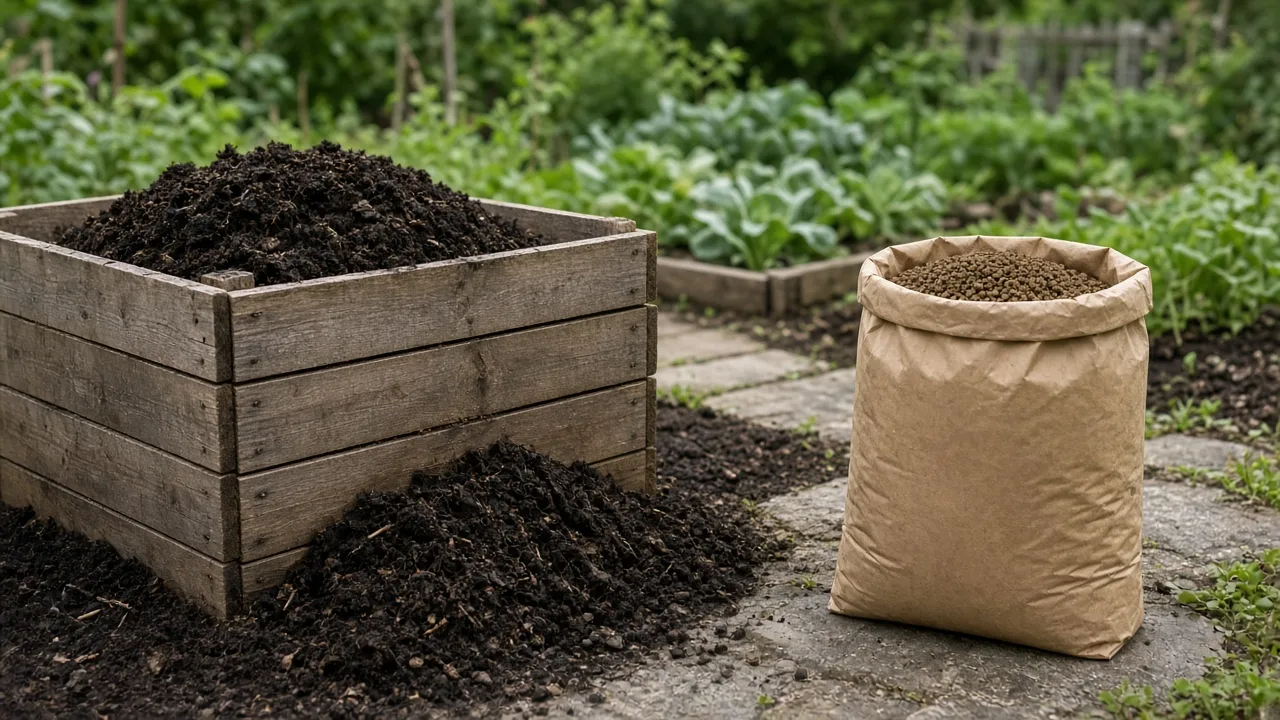
Avoid using unfinished compost as a seed-starting medium or filling pots entirely with it. It can be too coarse, variable, or still active for roots in a container. A balanced commercial potting mix is more predictable for containers; mature compost can be a modest component where the crop and mix can tolerate it.
Keep a batch running through the seasons
A single can works best when its job is clear: either it is accepting new material or it is finishing a closed batch. If you keep adding kitchen scraps every day, the newest pieces will not be ready when the oldest ones are. Two inexpensive cans solve this problem: one receives new scraps while the other rests and cures.
Mark the start month on a small tag or keep a note on your phone so you can track the batch without guessing.
During wet seasons, add more dry browns and inspect the lid after storms. During hot, dry weather, check moisture more often and move the can into partial shade if it dries out rapidly. When freezing weather arrives, decomposition slows; keep adding material only if you can layer in browns, and do not worry if the pile remains unchanged until temperatures rise.
The microbial work resumes when conditions improve.
At the start of a new batch, save a few shovelfuls of mature compost or soil to seed the pile if you have them, but do not buy a “starter” just to make the bin work. UGA Extension notes that composting does not require a prepared inoculant; the materials carry microorganisms already. The bigger gains come from steady moisture, mixed particle sizes, adequate carbon and nitrogen, and air.
Compare a trash can with other small-space options
A trash can is inexpensive and enclosed, but it is not the easiest system to turn. A tumbler is simpler to rotate and may keep out some pests, though it can be more expensive and still needs a balanced mix. A wire or slatted bin has better access for turning and can handle larger volumes, but it takes more space and may need extra protection from animals.
A sealed anaerobic container is a different process and should be chosen only if you are prepared to manage its method and odor trade-offs.
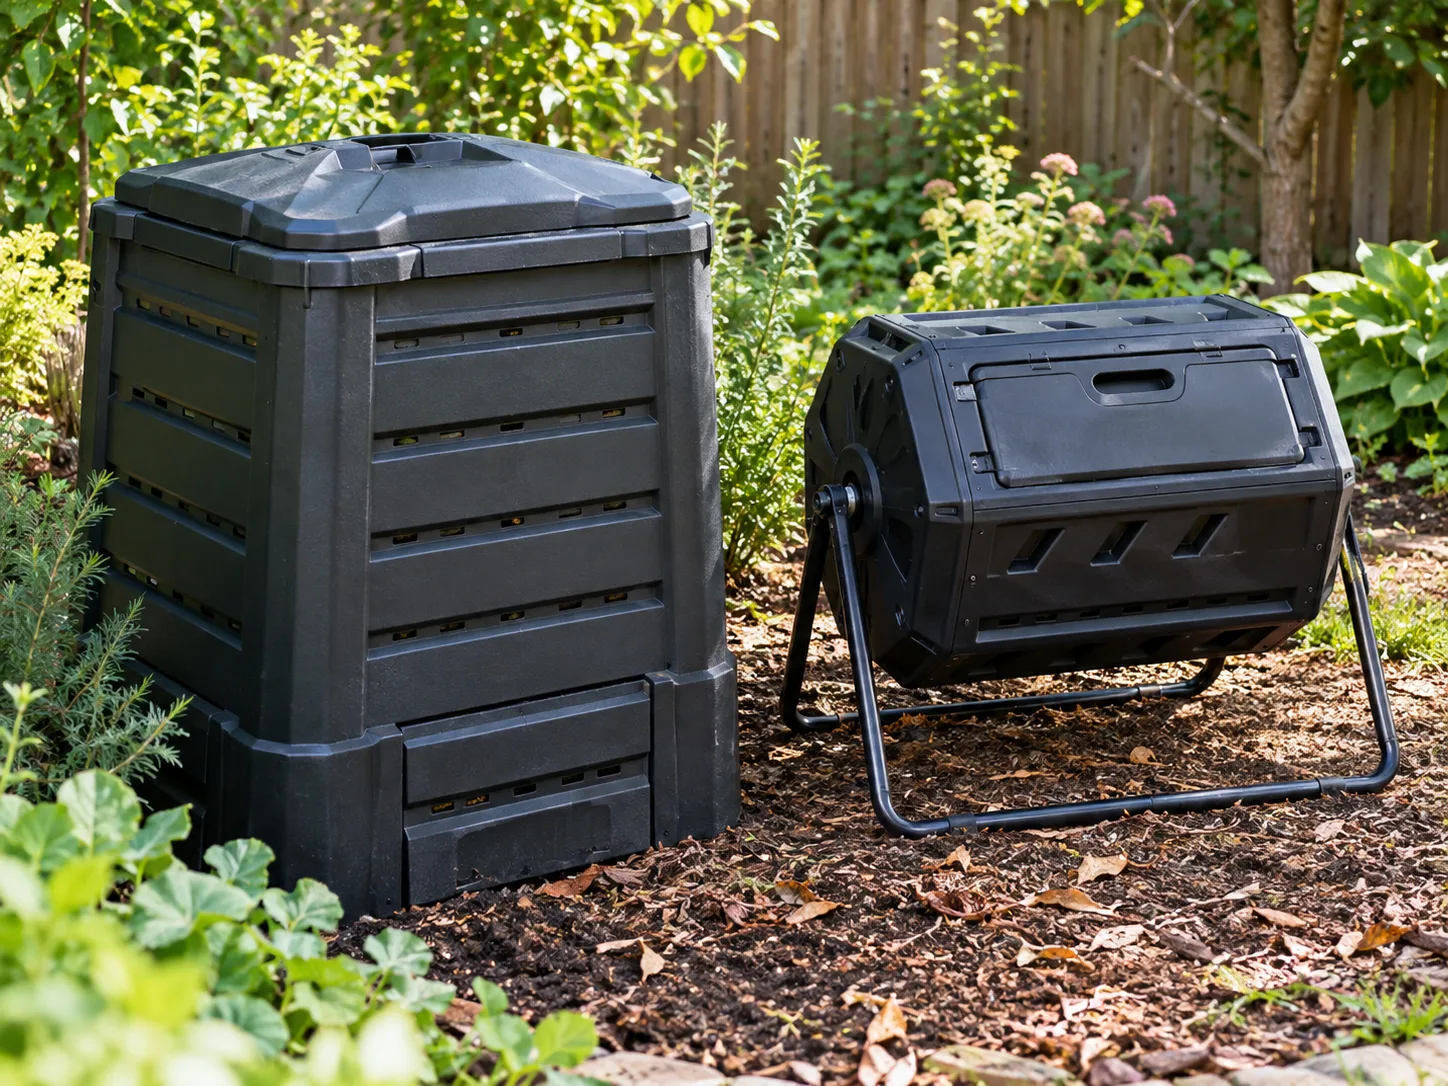
If you have almost no outdoor space, consider a municipal food-scrap collection program or a worm bin designed for indoors rather than keeping a large, wet kitchen-scrap can on a balcony. If you mainly want to compost leaves, a simple open leaf pile or wire enclosure may be easier than drilling and screening a trash can. Choose the container around the material you actually generate, not the one that looks most like a finished product.
Conclusion
A trash can composter works when the can is ventilated, drains freely, stays covered from heavy rain, and receives enough dry browns to balance fresh scraps. Drill small, evenly spaced holes, secure mesh where pests are a concern, keep the lid on, and use moisture and smell as early warning signs. These small maintenance steps matter more than a particular brand of bin or a compost starter.
Treat the can as a modest batch system and let the material—not a calendar—tell you when it is ready. Keep meat, dairy, pet waste, diseased plants, and seeded weeds out; give finished compost time to cool and crumble; then use it to improve garden soil rather than as a complete fertilizer. If you want faster turnover or need to handle more material, a larger tumbler or open bin may be a better fit.



