How to Propagate Pilea Peperomioides
Learn how to propagate Pilea peperomioides from pups, stem cuttings, or a leaf with stem tissue, plus when to separate, pot up, and troubleshoot rooting.
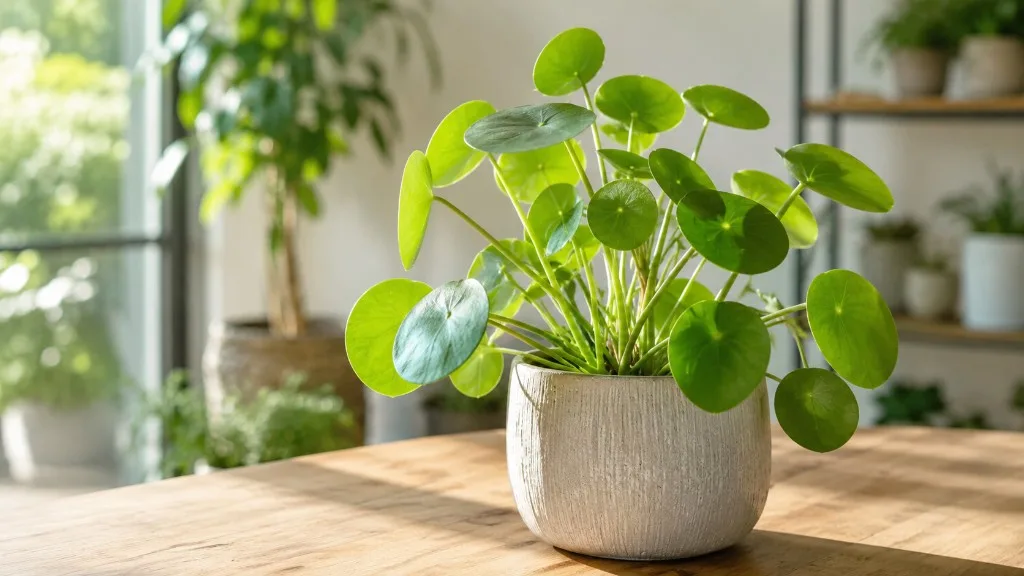
A healthy Pilea peperomioides often makes the next plant for you: small pups appear around the base or along the stem, then can be separated and rooted. If your plant has no pups, a stem cutting is another option. A leaf cutting can also work when it includes a small piece of stem tissue, but a bare leaf stalk is a much less dependable starting point.
That difference matters because each cutting needs the right living tissue to produce both roots and a new shoot. For most growers, the simplest route is to pot a rooted pup directly into a small container; water is useful for a stem-born pup or cutting when it has no roots yet and you want to watch development. Below, identify what your plant has, choose a method, and give the new start conditions that support establishment without keeping it waterlogged.
Choose the right propagation method for your Pilea
Start by looking at where the baby growth emerges. A small plant rising from the potting mix near the mother plant is usually a basal pup or offset. If you can expose its base and find roots of its own, divide it and plant it directly in soil. This is generally the most reliable choice because the pup already has a growing point and at least part of the root system it needs.
A pup growing from the main stem is different: it may have leaves but no independent roots. You can root its base in water, or set it into a lightly moist propagation mix if it is large and sturdy enough to stay upright. A longer stem section with a node can also be rooted, which is useful if the mature plant has become bare or top-heavy.
A single leaf is the most conditional option. The round blade and its petiole—the stalk joining the blade to the trunk—are not always enough to make a complete new plant. For the best chance, the cutting needs a small heel of the trunk where the petiole attaches. The RHS lists leaf cuttings among ways to propagate Pilea peperomioides, while practical methods described by Epic Gardening and Gardener’s Path emphasize retaining a little stem tissue. Think of it as an experiment, not the first method to choose when a healthy pup is available.
| What you have | Best starting method | Why it fits |
|---|---|---|
| Basal pup with roots | Separate and pot directly in soil | It already has roots and a growing point |
| Stem-born pup without roots | Root in water or a small, moist mix | The base can develop roots before or after potting |
| Bare stem section with a node | Root as a stem cutting | A node gives the cutting a point from which new growth may develop |
| Leaf with a small stem heel | Try water or moist mix | The extra stem tissue improves the chance of a new shoot |
| Leaf blade or petiole alone | Do not rely on it | It may root without producing a new plant |
North Carolina State Extension identifies offsets and stem cuttings as propagation routes and recommends doing the work during active growth in spring or early summer. The N.C. State Extension plant profile also describes Pilea’s clumping habit, which explains why dividing a rooted basal pup is often the least complicated method.
When to propagate a Chinese money plant
Spring and early summer are the easiest seasons because the plant is actively growing and days are lengthening. New roots and leaves can develop while the parent plant has warmth and light to support recovery. North Carolina State Extension recommends spring or early summer for Pilea propagation; the Royal Horticultural Society’s Pilea growing guide likewise places propagation and division in the growing season.
You can still propagate indoors outside that window if the plant is healthy and the room stays warm and bright. Expect slower rooting when light levels fall or the plant’s growth pauses. Avoid taking a cutting from a Pilea that is already severely dehydrated, losing leaves from a care problem, or recovering from a recent move or repot. Stabilize the parent first; propagation adds another demand at a time when it may not have spare energy.
Do not wait for a particular month if a pup is damaging the parent or has become crowded against the pot. Instead, use the plant’s condition: choose a firm, leafy pup with a visible base, and avoid removing every offset at once. Leaving some pups in place keeps the mother plant full and reduces the amount of tissue disturbed during one session.
What you need before making a cutting
Gather a clean, sharp knife or small pruning snips, a small pot with drainage holes, and a loose houseplant potting mix. A standard indoor mix can work; blend in perlite if the mix stays wet for too long or feels dense. The goal is a medium that holds a little moisture around new roots while letting excess water drain and air reach the root zone.
For a water-rooting method, use a clean glass or narrow vessel that supports the cutting without submerging its leaves. For a soil method, pre-moisten the mix so it is evenly damp rather than muddy. Keep a clean surface nearby, and do not leave a freshly cut pup drying out for hours while you collect supplies.
Clean the blade before cutting, especially if it has been used on another plant. A sharp edge makes a smaller, cleaner wound than crushing or twisting the tissue. Avoid pulling a rooted pup hard from the pot: loosen soil and make a controlled cut where it joins the parent if it does not separate with gentle pressure.
Propagate a Pilea from a rooted, soil-level pup
A basal pup is a miniature plant growing from the roots or lower stem near the soil line. It should have several leaves and enough substance to stand upright once separated. Size alone is not a guarantee, but a very tiny nub with one delicate leaf and no visible roots is safer to leave attached until it grows.
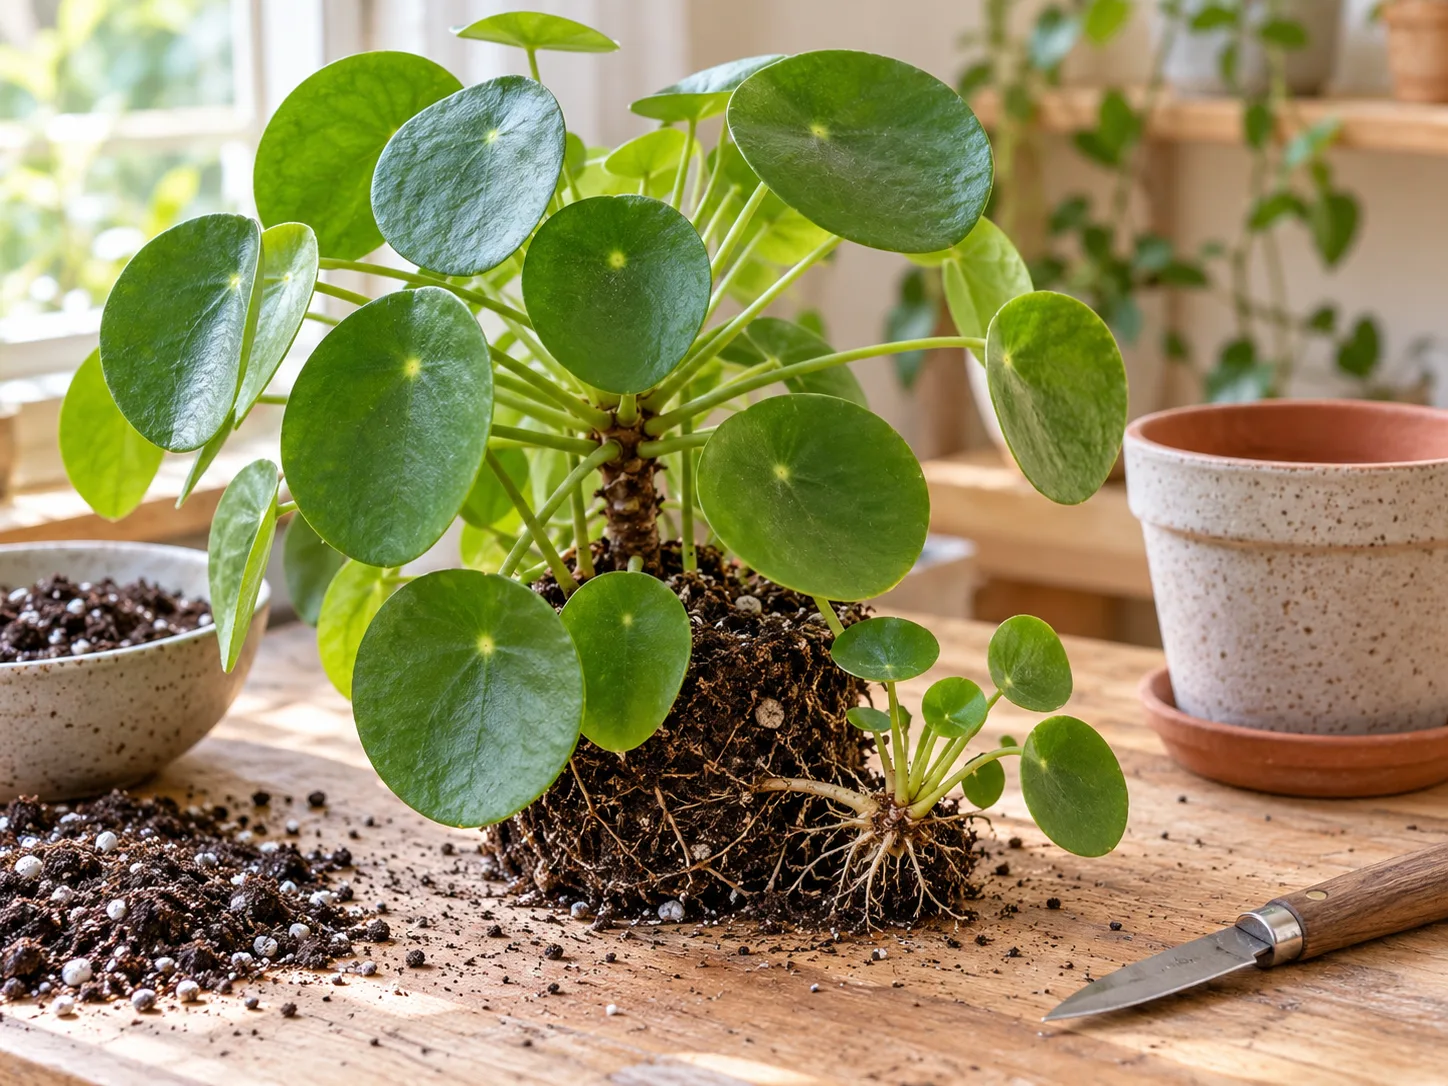
Find the pup’s attachment and preserve its roots
Water the mother plant a day before dividing if the mix is very dry; slightly hydrated roots are less brittle and easier to see. Slide the plant from its pot only if needed. Often you can move a little soil away from the pup’s base while the parent remains planted, which makes the dividing point visible without disturbing the entire root ball.
Trace the pup down to where it connects to the parent. Look for fine roots emerging from the pup or a short connecting root that can be divided. Use your fingers to tease apart loose mix, then cut the connection with the clean blade if it is firm. Keep as many of the pup’s roots as you reasonably can, while avoiding a deep cut into the mother plant’s main stem or crown.
If the pup pulls free with no roots, do not bury it deeply and hope for the best. Check whether it has a solid base and intact stem tissue; if so, treat it like an unrooted stem pup and root it in water or a small propagation pot. If the base is crushed, hollow, or mushy, it is unlikely to establish and is better discarded than planted beside healthy starts.
Pot the offset at the right depth
Choose a small pot only slightly wider than the pup’s roots. A large pot holds more wet mix than a tiny new root system can use, so it can stay damp for too long. Fill the container with pre-moistened mix, make a hole, and settle the roots down without bending them sharply.
Keep the base and roots covered, but leave the leaf stalks and central growing point above the mix. Firm the soil gently so the pup stands, then water enough to settle the mix and let the excess drain fully. Put the pot in bright, indirect light and check moisture by touch rather than watering on a fixed weekly schedule.
Root a stem-born Pilea pup
Stem pups grow from the trunk above the soil and are attached directly to the mother plant. They often come away without a root system, so the first goal is to help the cut base form roots while keeping the leaves dry. Hold the pup near its base rather than pulling on its leaves, and use a clean blade to make a neat cut at the attachment point. If a small heel of trunk tissue comes away with it, leave that tissue intact.
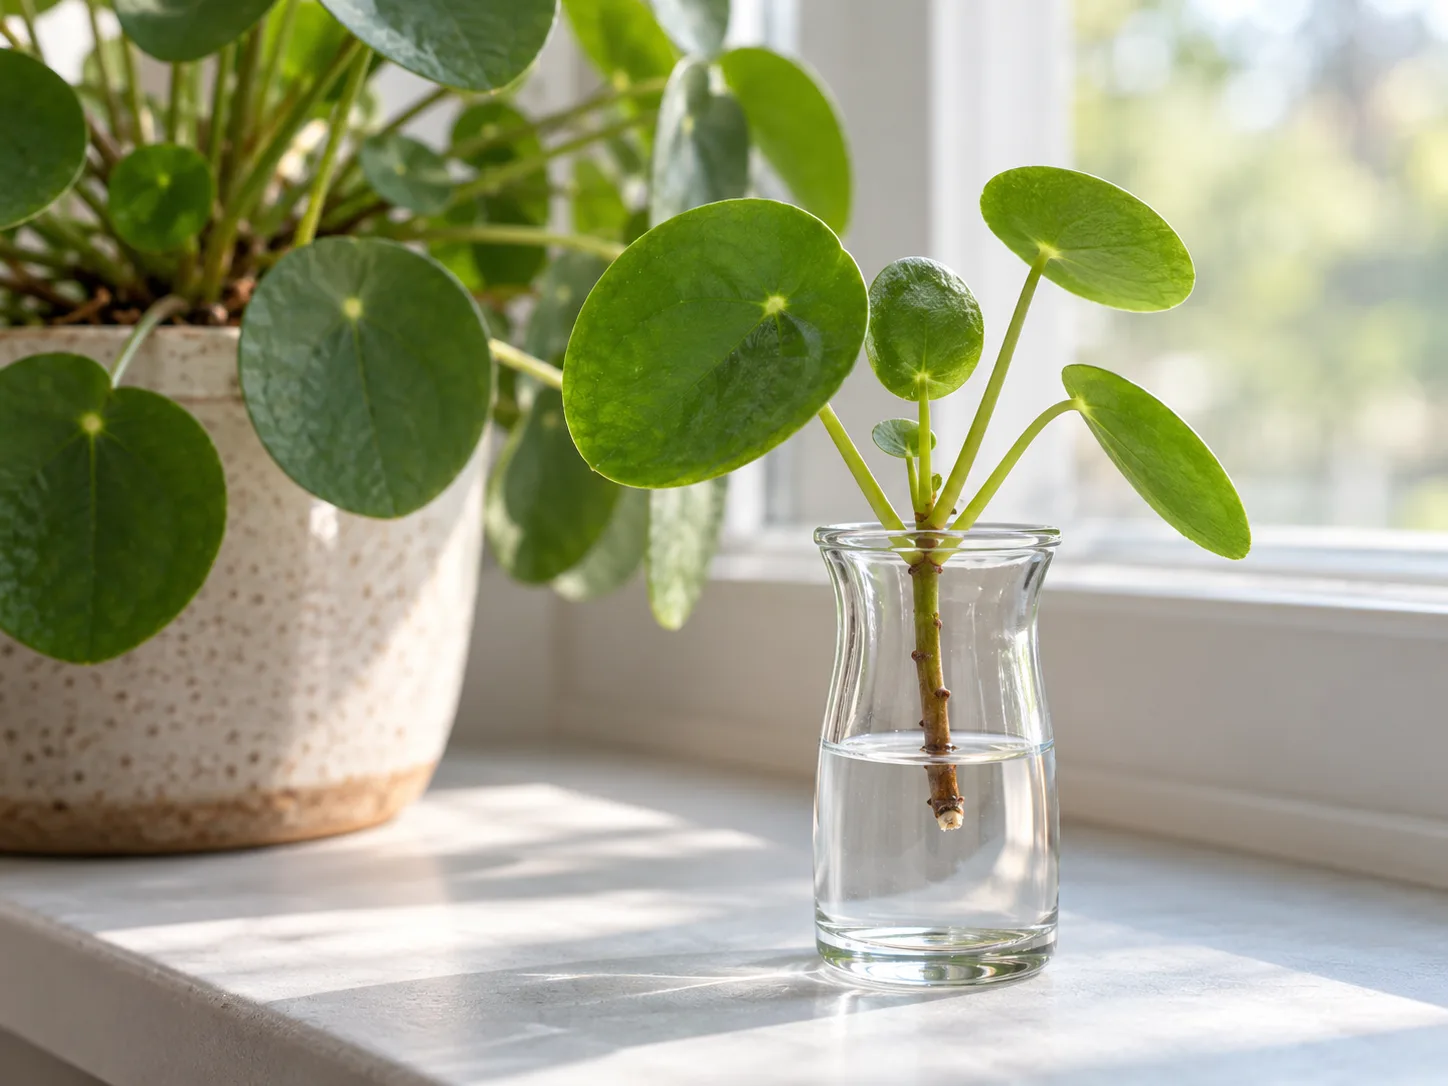
Set only the bottom of the pup in water. Keep all leaves above the waterline, since submerged foliage decays and can foul the vessel. Put the glass in warm, bright, indirect light; replace cloudy water and rinse the vessel if it develops film or odor. A weekly water change is a practical routine, but topping up and cleanliness matter more than changing clear water every day.
You can also place a sturdy, leafy pup directly into a small pot of moist, airy mix. This avoids a later water-to-soil transition, but it is harder to see whether roots have formed. Keep the mix lightly moist while the pup is anchoring, not constantly saturated. If the pup is so small that it tips over or dries before it can root, water rooting may make it easier to support.
Choose water or soil for an unrooted pup
Water is useful when the base is rootless, the pup is large enough to rest securely in a narrow vessel, or you want to monitor root growth. It is not automatically faster or better: water-rooted roots are accustomed to a different environment and can be more delicate during potting. Soil is convenient when the pup already has a few roots or can be held steadily at the correct depth in a small pot.
Choose one method and keep conditions stable instead of repeatedly lifting the pup to inspect it. Roots may take days or several weeks to appear depending on warmth, light, and the condition of the cutting. A few new roots are a reason to continue; a tiny root alone does not mean the pup is ready for a large pot.
Make a stem cutting from a leggy Pilea
A tall Pilea with a bare lower trunk and a leafy crown can be restarted from the top. This is a more disruptive choice than taking a pup: you are removing the growing top from the mother plant. Use it when the stem is firm and the crown is healthy, or when you prefer a shorter plant over its current shape. Do not make a hard cut on a plant that is already weak or rotting.
With a clean knife, cut below the leafy crown through firm stem tissue. The cutting needs a section of stem with at least one node or leaf attachment point; a handful of detached leaves will not serve as a stem cutting. Remove lower leaves only if they would sit underwater or under the soil. Keep the upper leaves on the cutting so it can continue supporting itself while roots form.
Root the stem base in water or place it into a small pot of evenly damp propagation mix. In water, submerge the bare stem but not the leaves. In soil, bury enough stem to hold the cutting upright while keeping the foliage and growing point clear. The cut stump left in the mother pot may produce new growth, but regrowth is not guaranteed, so make the cut only if you are comfortable with the parent’s new shape.
Can a single Pilea leaf grow into a new plant?
A leaf cutting is not the same thing as a leaf blade dropped into water. The cutting must retain the base of the petiole and, ideally, a small sliver of the trunk where that petiole joined the main stem. This is the “heel” tissue described in practical propagation guidance. A detached round leaf with only its green stalk may form roots or remain alive for a while, yet still fail to produce a new shoot.
Choose a healthy, mature leaf from a vigorous parent, preferably one that is not the newest unfurling leaf or an old leaf already fading. With a sharp clean blade, remove the petiole at its base and take only a very small piece of trunk tissue with it. Keep the wound on the mother plant shallow; do not carve out a large section just to make a leaf cutting.
Root the base in water or insert it into moist, free-draining mix, keeping the leaf blade above the surface. Bright indirect light and steady warmth support the cutting; direct hot sun can overheat a small vessel and stress the leaf. Be patient and judge success by new growth emerging from the base, not by roots alone. If no pup appears after a long period and the leaf begins to deteriorate, the attempt has likely failed. When you have a choice, use a pup or stem cutting instead of removing several leaves to test this method.
Move a water-rooted cutting into soil
Transfer a cutting when it has several visible roots and the base is stable, rather than waiting for a huge tangle that will be harder to arrange in a small pot. Roots around an inch or two long are easy to handle, but root health and active growth matter more than a precise measurement. If the cutting is a leaf with heel tissue, look for a small pup developing at the base; roots without a new shoot do not yet confirm that it has become an independent plant.
Use a small pot with drainage and fresh, lightly damp mix. Make a hole deep enough to lower the roots without folding them back on themselves. Hold the cutting in place and backfill gently. The roots need contact with mix, but packing the soil hard removes air and can bruise fragile new growth.
Water until the mix is evenly settled, then empty the saucer. For the next week or two, check the pot more often than you would an established Pilea because a small root system can dry quickly in a warm room. Still, do not keep it soggy. If the plant wilts briefly after potting, give it stable light and warmth and wait before adding more water; overwatering a stressed cutting compounds the problem.
Care for new Pilea plants after propagation
Keep new starts in bright, indirect light. A spot near a bright window with filtered light is usually better than a dark shelf, while strong direct afternoon sun can scorch leaves or heat a glass of water. The North Carolina State Extension profile recommends bright, indirect light and moist, well-drained potting mix for this species, conditions that also suit newly rooted starts.
Water according to the mix and pot, not the calendar. Let the upper layer begin to dry before watering again, and do not leave a newly potted Pilea standing in a saucer of water. A small pot in a warm bright room may dry faster than a larger pot in a cool, dim corner. Check with a finger or lift the pot to learn how quickly it loses moisture.
Skip fertilizer while a pup or cutting is focused on forming roots. Fresh potting mix generally supplies enough for initial establishment, and fertilizer cannot replace missing roots, light, or drainage. Once the plant is producing new leaves and has settled into the pot, resume a modest houseplant feeding routine according to the product label and season.
Avoid moving a new start between water, soil, and different windows every few days. A brief pause after potting is normal as roots adjust, and changing several conditions at once makes it harder to identify the real issue. If the cutting is firm and the base is not black or mushy, maintain a stable environment and allow time for new growth.
Troubleshoot slow roots, rot, and stalled growth
If no roots appear, first check whether the cutting has the correct tissue. A basal pup without roots may need time and warmth; a bare leaf petiole may never produce a shoot; and a stem cutting without a node or healthy stem base is a poor candidate. Also check for low light, cold drafts, an oversized pot, and mix that remains wet for days. Correct one clear issue and give the cutting a stable period before trying another intervention.
If the base turns dark, soft, or smells sour, rot is more likely than normal rooting. Remove the cutting from stagnant water or wet mix, cut away any soft tissue with a clean blade, and restart only if firm healthy tissue remains. Wash the vessel and use fresh water, or replace soggy mix with a clean, airy medium. If rot has reached the growing point or the entire base is collapsing, discard it to avoid spreading decay to other plants.
A cutting that wilts in water may have too much stem submerged, a damaged base, or leaves losing moisture faster than the cutting can replace it. Raise the waterline only enough to cover the base and keep the foliage dry. In soil, check whether the mix is actually dry before watering; drooping can come from roots sitting in saturated mix as well as from thirst.
Roots without leaves or a pup are not the same as a completed propagation. If a leaf cutting roots but never makes a new shoot, the missing heel tissue may be the reason. If a stem pup has roots but no visible new leaf, preserve its existing growing point and give it time. Remove only clearly dead or rotting material; avoid scraping, tugging, or repeatedly unpotting a living cutting to “check” it.
Protect the mother plant and its shape
The parent Pilea usually tolerates the removal of one healthy pup or a careful cutting, but avoid stripping it bare. Leave enough mature foliage to support growth, and remove no more than a few offsets at a time from a small or recently stressed plant. A clean cut reduces the amount of damaged tissue, while pulling hard can tear the stem or disturb roots beyond the pup you intended to take.
If you want a fuller pot, leave some basal pups attached. They can grow alongside the main plant and create a naturally clustered look. If the pot is crowded or you want individual gift plants, separate the largest rooted offsets first and leave the smallest ones to grow for another round. The best time to divide is often when you are already repotting, because the root connections are easier to see and manage.
After taking a top cutting from a leggy plant, keep the original pot in bright indirect light and water only when its mix begins to dry. New shoots may emerge lower on the trunk, but the plant may also remain shorter or produce growth unevenly. If the lower trunk is unhealthy, rooting the crown does not fix the underlying issue; inspect roots and growing conditions before deciding whether to keep the old base.
Conclusion
For the best odds, start with a healthy Pilea pup growing at soil level and keep its roots attached when you separate it. Root a stem-born pup in water or a small pot if it has no roots, and use a leaf cutting only when you can take a little heel of stem tissue with the petiole. Spring and early summer are ideal, but a warm, bright indoor setup can support propagation in other seasons.
Use a small draining pot, airy mix, bright indirect light, and careful watering while roots establish. Look for a firm base and new growth rather than relying on a fixed number of days. Matching the method to the plant part you have—and leaving the mother plant enough healthy foliage—turns propagation from guesswork into a repeatable way to grow another Chinese money plant.



