How to Prune a Peace Lily: What to Cut and When
See which peace lily leaves and flower stalks to remove, where to cut, how to clean your tools, and when an overgrown clump needs division instead.
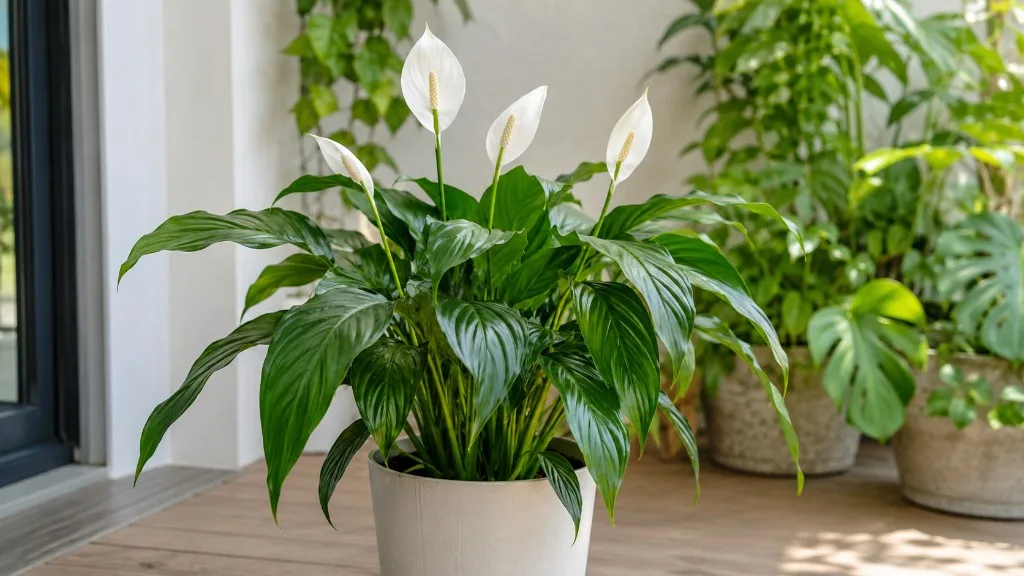
A peace lily usually needs grooming, not a major haircut. Remove a flower stalk after its spathe fades, cut a fully yellow or dead leaf at its base, and trim only the brown part of a leaf that is otherwise healthy. Leave firm green leaves in place: pruning will not make them branch, shorten them, or reliably trigger another bloom.
The key is to follow each stalk down to where it rises from the plant, then make one clean cut without nicking the crown or nearby growth. If several leaves are turning yellow, pause before removing them all; repeated discoloration is a reason to check watering, drainage, light, or temperature, not simply a larger pruning job.
What pruning can—and cannot—do for a peace lily
Peace lilies grow differently from plants that can be shortened above a branch or leaf node. Their leaves form a basal rosette: each leaf blade sits on its own petiole, and the plant has no obvious woody stem above the soil.
The flower stalk is a separate structure that also rises from the base. NC State Extension describes the leaves as basal rosettes and the stems as having no visible above-ground structure, which explains why the safest routine cuts are made low, at the crown or soil line rather than halfway up a supposed stem. (NC State Extension Plant Toolbox)
That growth pattern sets a useful limit. If you cut across the middle of a green leaf stalk, the removed leaf will not sprout a new blade from the cut end; if you shorten the leaf itself, the trimmed edge stays trimmed and may brown. New leaves can emerge separately from the crown as the plant grows, but that is not the same as the pruned leaf growing back.
Pruning is therefore a selective cleanup. It removes tissue that is finished, damaged, or visually distracting, and it can reveal the base so you can check for debris or pests.
It does not fix root problems, correct poor light, or make a tall cultivar compact by itself. In particular, taking off healthy leaves to make the plant shorter removes functioning foliage without changing where new leaves emerge.
When to prune a peace lily
There is no need to schedule a full pruning every six months. Inspect the plant when a bloom fades, when you notice a leaf that is completely yellow or damaged, or during ordinary watering and leaf cleaning.
A single unwanted leaf can be removed whenever you spot it; a small indoor grooming cut is not tied to outdoor dormancy or a narrow seasonal window. The Royal Horticultural Society recommends removing fading leaves and spent flowers at the base, and its growing guide notes that peace-lily spathes can last for months before fading to green. (RHS peace lily growing guide)
If you want to do optional, selective thinning of a healthy crowded clump, choose a period when it is actively growing—often spring in a home with seasonal light—and keep the session modest. Avoid combining a large haircut with repotting, a recent move, cold exposure, or recovery from severe wilting. Each is already a change the plant must adjust to; there is no benefit in making several major interventions at once just to get a tidier silhouette.
How to recognize a spent bloom
The showy part of a peace lily bloom is a leaflike bract called a spathe, wrapped around a central spike called a spadix. A fresh spathe is usually white or cream; as it ages, it often turns green, then may yellow, brown, or droop.
That gradual color change is normal aging, not by itself evidence that the whole plant is unhealthy. The flower stalk can still be green after the spathe has faded, so follow the stalk to its base rather than cutting only the discolored hood.
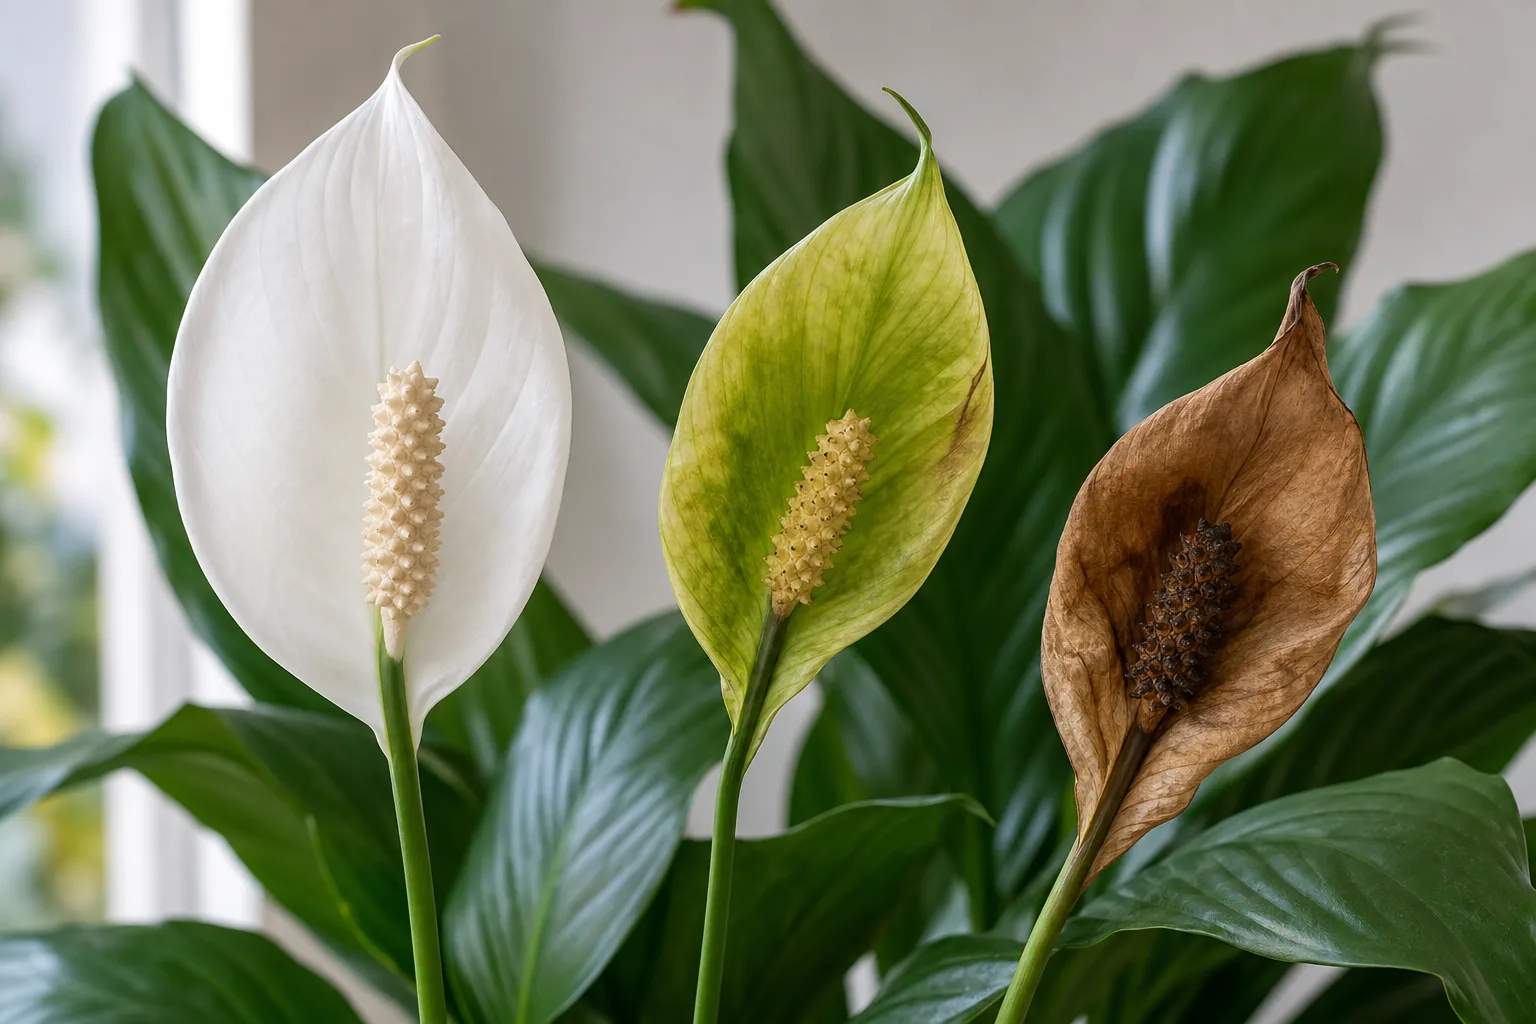
You may remove the stalk when the spathe is clearly past its display stage—green and fading, limp, or browned. Waiting until it is completely dry is unnecessary, but removing a still-fresh flower because you expect pruning to create more flowers is also unnecessary.
The cut tidies the plant; it is not a reliable bloom switch. Gardener’s Path similarly recommends following the flower stalk down and removing the spent stalk, even if the stalk itself remains green. (Gardener’s Path: When and How to Prune Peace Lilies)
Which leaves to remove, trim, or leave alone
A useful cut-or-keep check is to look at both the color and the pattern. One older lower leaf that has yellowed evenly while the rest of the plant is firm and green is often ready to remove. Many yellow leaves appearing close together, yellowing near the center, or leaves that yellow while the plant wilts call for a care check before you assume normal aging.
| What you see | Best action | Why |
|---|---|---|
| A flower spathe that has faded green, drooped, or browned | Remove the entire flower stalk at its base | The stalk has finished its display; trimming only the spathe leaves a bare stalk behind. |
| One fully yellow, brown, collapsed, or badly torn leaf | Remove its petiole low at the base | That leaf will not become green again, and a complete cut avoids an awkward half-leaf. |
| A mostly green leaf with a small crisp brown tip | Trim only the dead tip if you want | The green blade is still useful; removing the whole leaf is usually excessive. |
| Several leaves yellowing or browning in a short period | Diagnose conditions first; remove only tissue that is fully dead | A cluster of symptoms can signal a care issue, and pruning alone will not address it. |
| A firm, healthy green leaf that is merely tall or wide | Leave it | Height and leaf size are not reasons to remove useful foliage. |
Tools and safe preparation
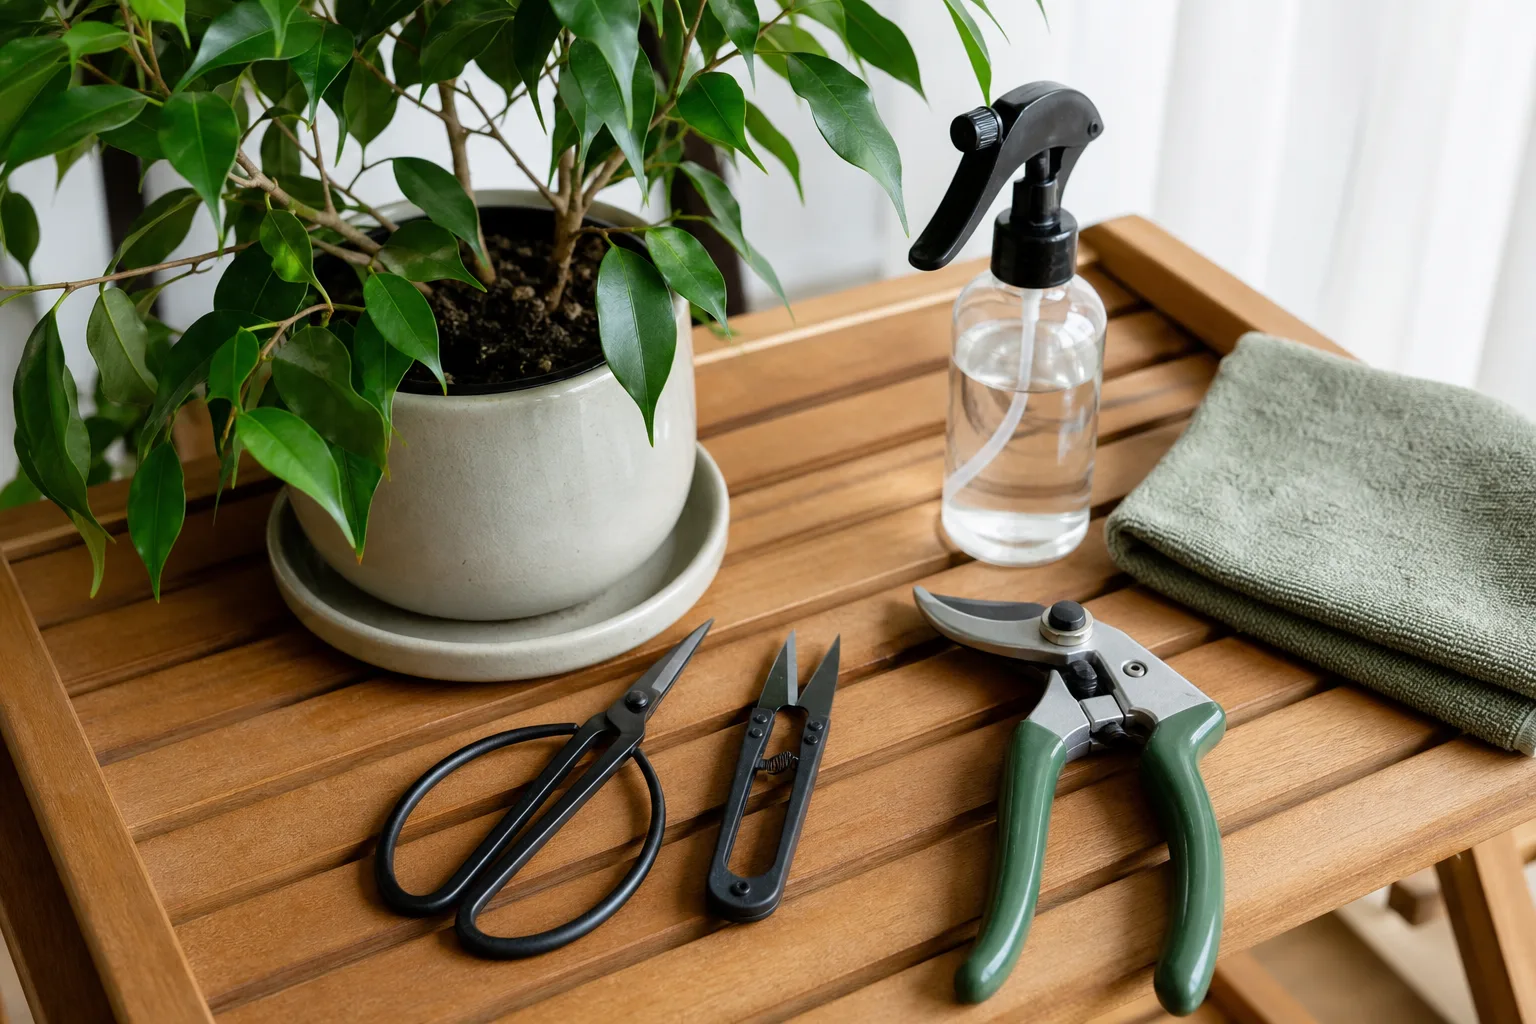
For a small plant, sharp household scissors may be enough. For thick or crowded petioles, use small bypass snips that can reach the base without crushing the stalks beside it. You do not need a large pair of loppers or a pruning saw for routine peace-lily care; control and a clean cut matter more than tool size.
Before you begin, wipe soil and plant residue off the blades. If the plant is healthy and you are making a few housekeeping cuts, clean, sharp scissors are usually adequate; if you see suspect spots, rot, or another possible disease—or you are moving between plants—disinfect the cleaned blade.
University of Minnesota Extension explains that soil and plant debris can carry pathogens, recommends cleaning visible debris first, and gives 70% isopropyl alcohol as an option for small hand tools. Follow the product label, let the blade dry, and do not leave a flammable alcohol-soaked tool near heat or flame. (University of Minnesota Extension: Clean and disinfect gardening tools)
Wear gloves if you are sensitive to plant sap, and avoid rubbing your eyes while working. The RHS advises gloves because peace-lily sap can irritate skin. Keep cut material and tools away from children and pets, then wash your hands after handling the plant. (RHS peace lily growing guide)
How to prune a peace lily step by step
Work from the outside of the plant toward its center, moving leaves aside gently so you can see where each stalk begins. Decide what you intend to remove before you cut; that small pause prevents an attractive, healthy leaf from being mistaken for old debris hidden behind it. If the plant has a lot of dead material, remove it in stages and reassess the shape instead of stripping the crown in one pass.
Remove a spent flower stalk
Find the base of the flower stalk by tracing it down through the foliage with your fingers or eyes. A bloom stalk is often narrower and more upright than a leaf petiole, and it leads to a single spathe and spadix. Move a neighboring leaf gently aside so you can see the cut point; do not pull on the stalk, because a tug can tear tissue at the crown.
Use a sharp blade to cut the stalk as low as you can reach without gouging the crown or slicing the petioles around it. A flush cut is not worth injuring the living base: leave a tiny, unobtrusive remnant if the base is packed too tightly to reach safely. Remove the cut stalk from the pot rather than leaving it tucked among the leaves, where it can look like a new problem later.
Repeat for other faded stalks, but pause between cuts to identify each one. On a dense plant, separate stalks by moving leaves aside instead of snipping blindly at the middle. If a flower is fresh and unblemished, keep it; a pruning session is about removing spent growth, not stripping the plant of every bloom.
Remove a dead, yellow, or badly damaged leaf
First confirm that the leaf itself is finished. A completely yellow, crispy, or collapsed leaf will not turn green again. If only a section is torn or brown, compare the amount of living blade that would be lost: remove the whole leaf when most of it is damaged or when a break has left it hanging; keep a mostly green leaf if the injury is small.
Follow the petiole all the way down to the base. Slide the blade between neighboring leaves and make one decisive cut close to the soil line or crown while keeping the cutting edge pointed away from the plant.
Do not saw through the stalk or leave a long, ragged stub if you can safely reach lower. The RHS gives the same core instruction for fading leaves: snip them at the base.
If a completely dry leaf loosens with a very gentle touch, it may come away easily, but do not yank a leaf that resists. Pulling can lift or tear the crown, which is the growing point you want to protect. A clean cut is more controlled and leaves less chance of disturbing the plant.
Trim a brown tip without sacrificing the leaf
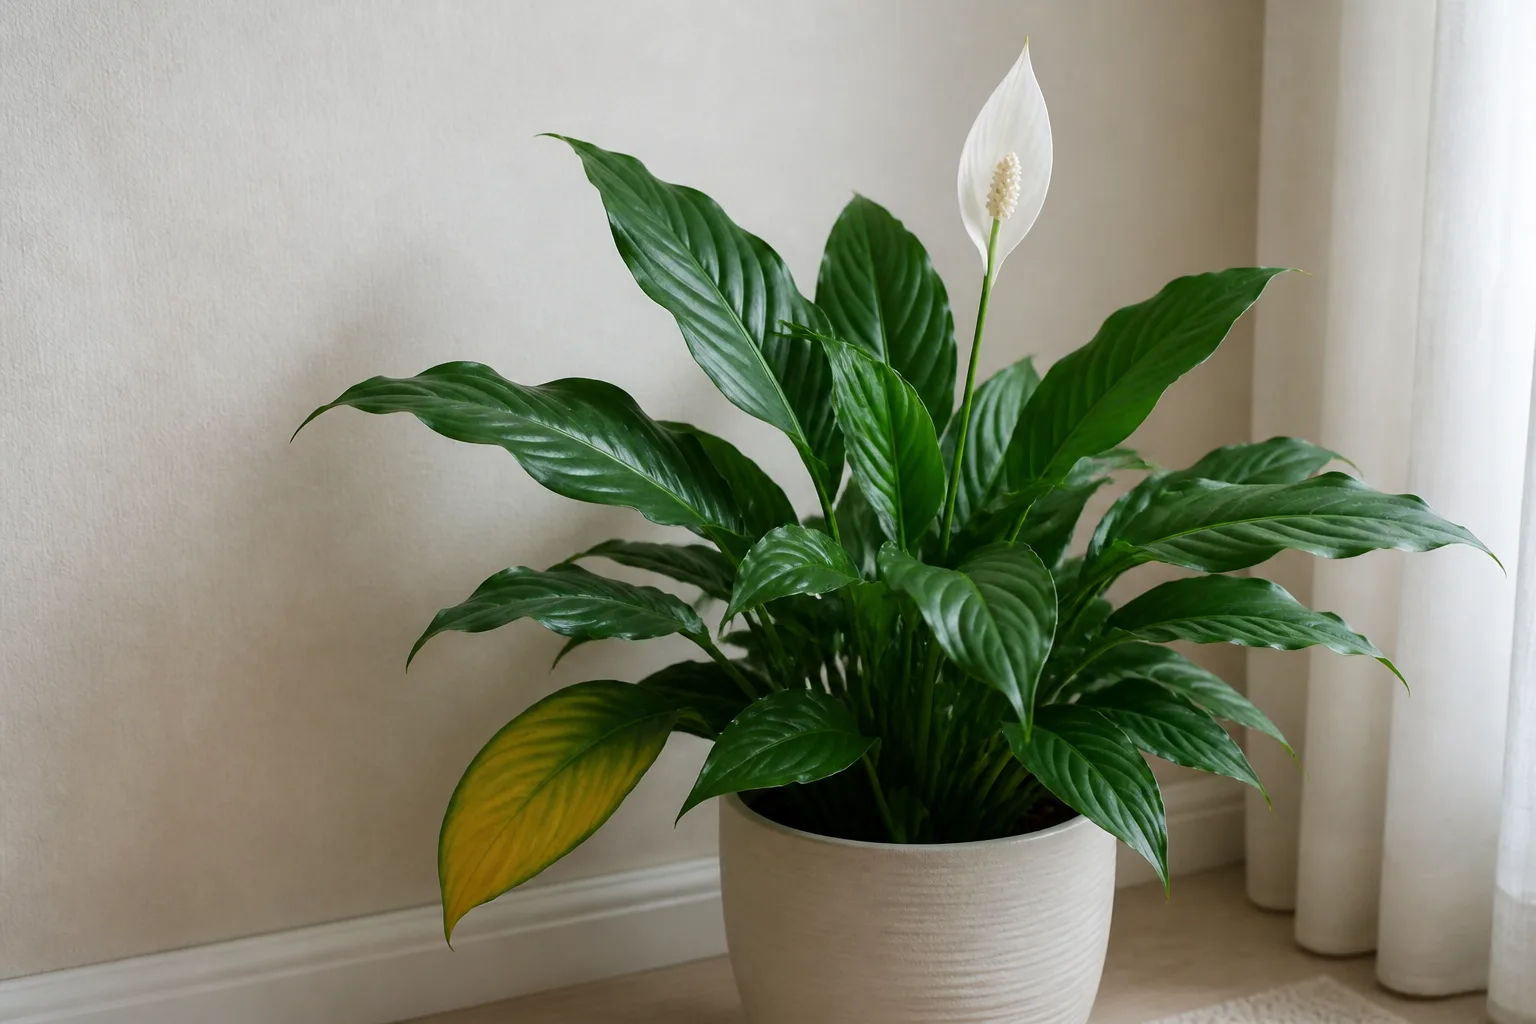
A small brown tip is a cosmetic cut, not a reason to remove an otherwise firm green leaf. Use clean, sharp scissors and follow the outline of the leaf, leaving a very narrow brown margin rather than cutting deeply into healthy tissue. A slight angled taper keeps the natural pointed shape; a blunt crosscut can look more obvious, though either is acceptable if appearance is not your concern.
Brown tissue will not turn green again after trimming. If the brown edge keeps advancing or appears on several leaves, deal with the underlying cause as well: uneven watering, overly dry air, strong direct sun, or fertilizer and water-quality issues can all contribute to tip damage. Gardener’s Path notes that brown tips are irreversible and can reflect several different growing conditions, so do not treat trimming as a cure. (Gardener’s Path: When and How to Prune Peace Lilies)
If you are unsure whether a leaf is mostly green or mostly damaged, leave it for now and observe it through the next watering cycle. There is little downside to waiting on a partly green leaf, while an unnecessary cut removes the entire leaf’s remaining contribution. A tip trim is optional grooming; correcting the condition that caused recurring browning is the useful care step.
Can pruning make a peace lily smaller or bushier?
Not in the way it can reshape a hedge, pothos vine, or woody houseplant. A peace lily does not have branching stems with nodes along which you can top it and expect side shoots; its foliage rises from the crown. Removing selected outer leaves can make a crowded plant look more open, but every healthy leaf removed reduces the green surface available to support growth.
If you choose to thin a healthy plant for appearance, take only a few leaves that are badly placed or crossing, and stop to reassess. A horticulturist quoted in Martha Stewart’s pruning guidance advises avoiding removal of more than about a quarter of a peace lily’s green leaf mass at once. Treat that as a conservative practical ceiling rather than a precise biological threshold; a small or stressed plant may warrant less, and routine pruning usually requires far less. (Martha Stewart: How to Prune a Peace Lily)
If the plant looks one-sided, correct the conditions that created the shape before cutting healthy leaves. Peace lilies grow toward light, so rotating the pot periodically and providing bright, indirect light can help future growth develop more evenly; the RHS says deeper shade can slow growth and reduce flowering. Cutting the tall side does not alter that light pattern, so new growth may repeat the same imbalance. (RHS peace lily growing guide)
What to do when the clump has outgrown its pot
A wide, crowded peace lily is not always a pruning problem. If roots are densely packed, the plant is drying unusually quickly after watering, or several crowns are filling the pot, inspect the root ball and consider repotting or division. The RHS recommends checking roots and repotting when they are densely packed; NC State lists division as the recommended propagation strategy for Spathiphyllum. (RHS peace lily growing guide; NC State Extension Plant Toolbox)
For size reduction, spring is a sensible time to divide a vigorous established clump because the plant can resume growth as conditions improve. Each separated section needs a healthy crown and a useful set of roots; a leaf and its petiole alone are not a new plant.
Use clean tools, keep each division at a manageable size, and pot it into a container only modestly larger than its root ball. This is a different job from trimming a spent flower, so do not pull the plant from its pot every time you tidy a leaf.
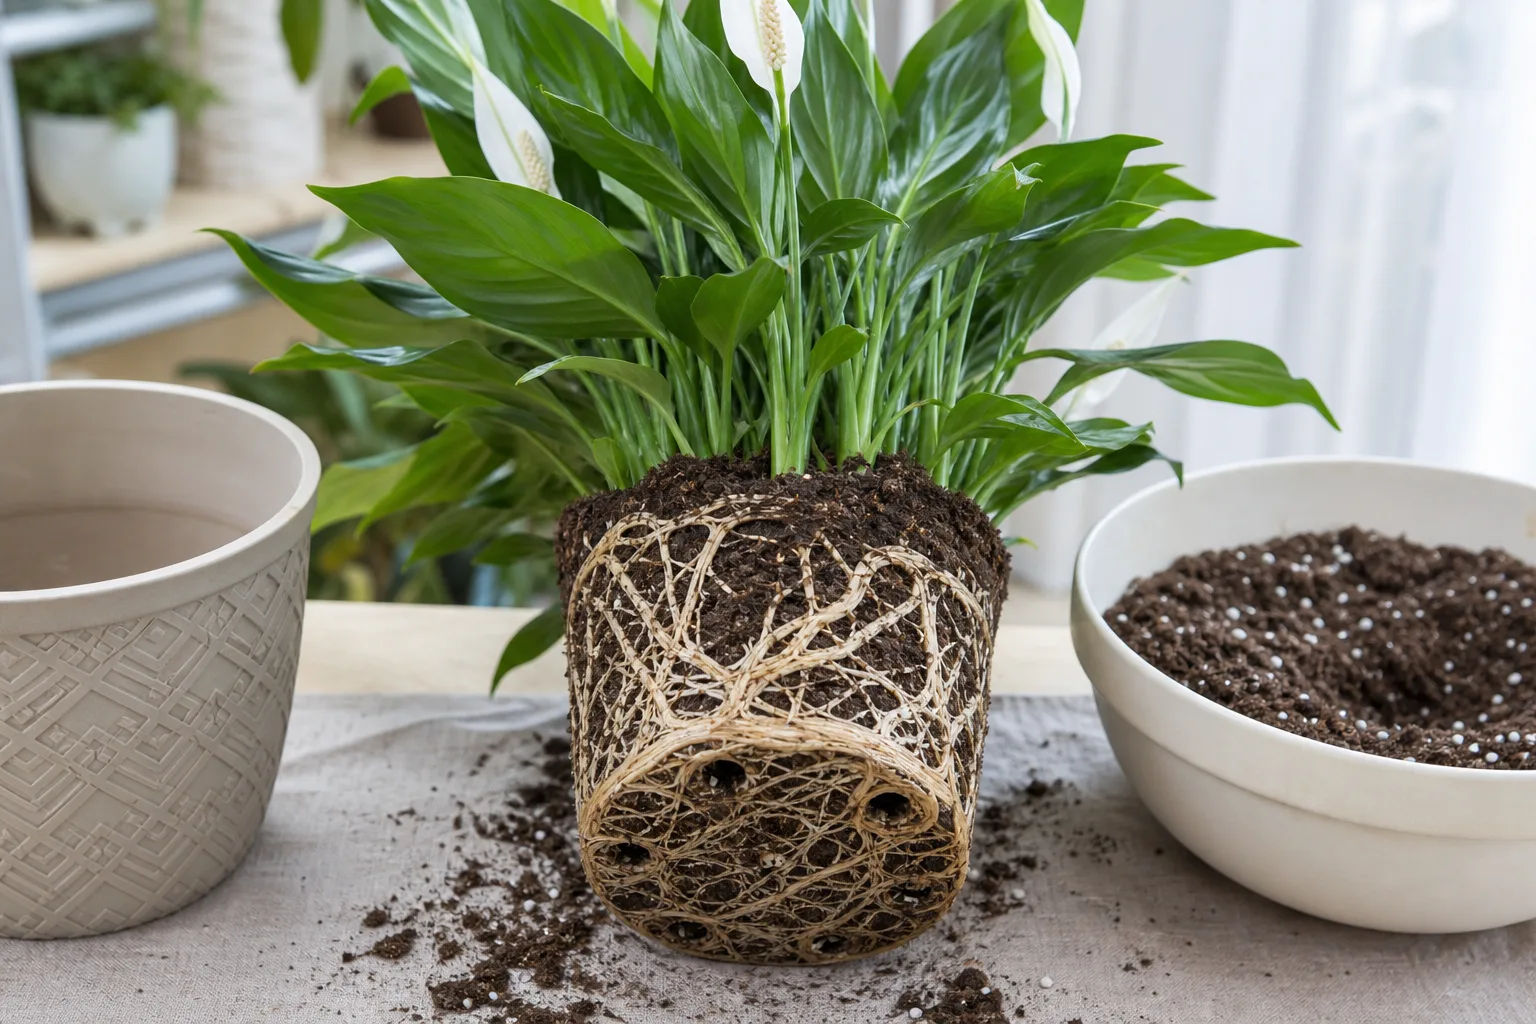
When the clump is simply full but the roots are not crowded, let it be full or remove only dead and damaged growth. Cutting the canopy to fit a decorative pot can leave the same root mass in the same tight container while taking away the foliage it uses to recover. If space is the issue, a smaller cultivar or a properly divided clump is a more lasting solution than repeated leaf removal.
Diagnose recurring yellowing before you keep cutting
One aging lower leaf is different from a whole plant changing color. Before removing several leaves, check whether the pot drains freely, whether the mix stays wet for long periods, whether the top layer has become very dry, and whether the plant sits in direct sun or a cold draft.
The RHS links persistently wet compost with root rot, says lack of water can cause drooping, and notes that direct summer sun and cold draughts should be avoided. Those clues help you decide whether the yellow tissue is ordinary turnover or a sign the environment needs attention. (RHS peace lily growing guide)
Use the pattern as a guide, not a diagnosis by itself. A plant with one old yellow leaf and healthy new growth may need nothing beyond removing that leaf. A plant with multiple yellowing leaves, soft or collapsing petioles, persistent wilting despite moist soil, or a sour-smelling mix deserves a closer root and watering check; cutting symptoms away will not restore damaged roots.
Brown edges need a similar distinction. Dry air, inconsistent watering, excessive light, or salts and fluoride can mark leaf tips, but different causes call for different changes. The RHS notes that tap-water fluoride can damage foliage and recommends rainwater or filtered water where possible; do not assume every brown tip means the plant needs more water. (RHS peace lily growing guide)
Aftercare and what to expect
Once you finish, remove cut leaves and flower stalks from the pot and check that no fragments are wedged in the crown. Return the peace lily to its usual stable spot with bright, indirect light. Water according to the potting mix’s condition rather than giving extra water simply because you pruned; the cut itself does not create a special watering requirement.
Do not fertilize heavily or repot just to “help” a routine grooming cut heal. If you corrected a real problem—such as prolonged sogginess, poor drainage, or insufficient light—make that change carefully and let the plant settle.
Existing yellow or brown tissue will not recover, but new leaves can emerge from the crown over time when roots and growing conditions are healthy. There is no guaranteed timetable for a new leaf or flower, and pruning by itself does not promise rebloom.
Peace lily pruning mistakes to avoid
The most common mistake is removing green leaves because they look too tall or because a plant-care schedule says to prune. A healthy leaf is not waste; keeping it supports the plant.
For ordinary upkeep, a couple of spent blooms and genuinely finished leaves may be all that needs to go. Stop once the unwanted tissue is gone rather than trying to make every leaf match.
Avoid leaving long stubs when you can reach the base safely, but do not trade a neat cut for a cut into the crown. Do not use dull scissors that crush the stalk, and do not move from a visibly diseased plant to another houseplant without cleaning and disinfecting the blade. Minnesota Extension cautions that plant debris can carry pathogens and that visible debris should be removed before disinfection; it also notes that bleach can corrode metal tools, so follow appropriate product guidance rather than soaking good shears in an improvised mixture. (University of Minnesota Extension: Clean and disinfect gardening tools)
Finally, do not use a severe haircut to solve a problem it cannot fix. Pruning will not make a peace lily shorter in a lasting way, replace a missing branch, cure overwatering, or guarantee flowers. Identify the goal first: remove what is spent, trim a small dead edge if you want, correct a cause that is harming foliage, or divide a crowded root-bound clump when the pot is truly too small.
Conclusion
For a peace lily, the right pruning is usually small and specific: cut faded flower stalks and fully spent leaves close to where they emerge, and trim only the brown portion of a leaf you otherwise want to keep. Use clean, sharp scissors, protect your hands from sap, and leave healthy green foliage alone.
If yellowing or browning is widespread, pause and inspect the plant’s care before making more cuts. If the issue is size, check the roots and consider division rather than repeatedly shortening leaves. That approach keeps cleanup separate from diagnosis and gives the plant the foliage and growing conditions it needs for its next flush of growth.



