How to Plant Bare-Root Strawberries Step by Step
Learn how to plant bare-root strawberries, from cool storage and optional soaking to setting crowns level, fanning roots, and caring for new plants.
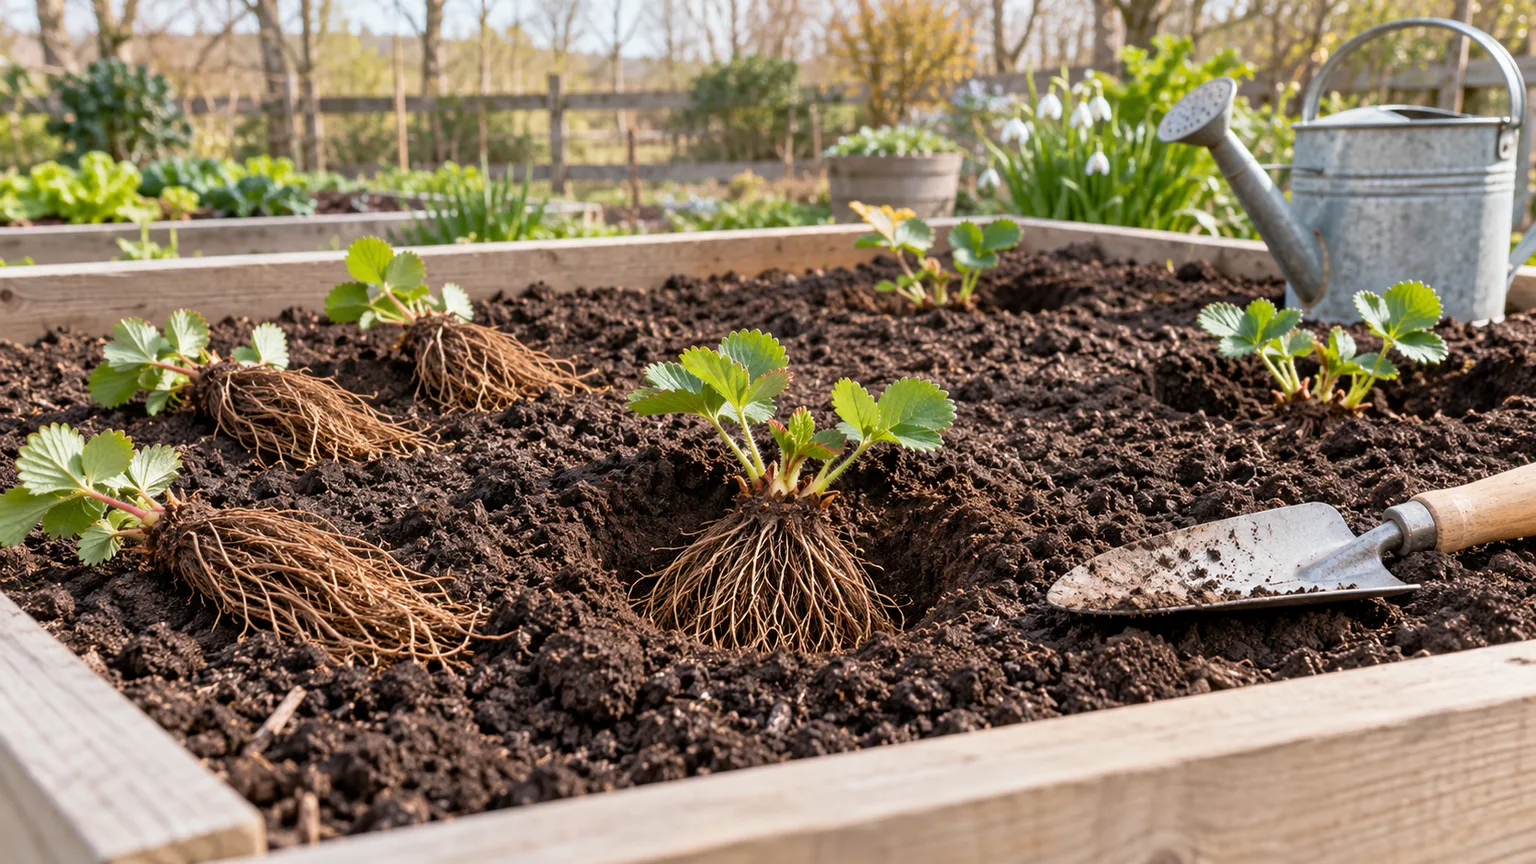
A bundle of bare-root strawberries can look more like a handful of dry roots than a future berry patch. That is normal: the plants are dormant, and each one is built around a short stem called a crown, with roots below and leaf buds at its top. The task is to keep those roots moist, plant them without bending them, and leave the crown at exactly the right height.
The safest rule is simple: spread the roots downward, bury the roots, and set the crown’s midpoint at the soil surface. The growing point must stay uncovered, while the uppermost roots should not be left exposed. The steps below adapt that rule to beds, rows, and containers, then explain what to do while new plants establish.
Before you plant: read the crown, not the bundle
A bare-root strawberry is a dormant plant sold without a pot or soil around its roots. The crown is the compact, thickened stem between the roots and leaf stalks.
Its top carries the growing point; its sides can develop leaves, flower clusters, and additional branch crowns as the plant matures. Roots emerge from the crown’s lower portion and take up water and nutrients.
The plant’s appearance on arrival is not a reliable health test by itself. Dormant crowns may have dry-looking tan leaves or very little green tissue, but viable roots are generally firm and light-colored rather than black, slimy, or brittle. The University of Connecticut Home Garden Education Center likewise advises choosing crowns and roots without mold and checking that roots are straw-colored, not black.
A crown that is firm and intact is more promising than one that feels mushy or smells rotten. Keep each plant labeled if you ordered more than one cultivar; fruiting type and local hardiness affect what you do after planting.
Choose a site that can support fruit, not just leaves
Strawberries need direct sun to produce a good crop. Six hours is a practical minimum in many home-garden recommendations; more sun generally supports stronger flowering and fruiting, provided the bed does not bake dry.
Pick a place you can water consistently and reach easily for weeding and harvesting. A site beside a large tree often disappoints because tree roots compete for water while the canopy steals light.
Drainage is just as important as sunlight. Strawberries have shallow roots and do poorly in soil that stays saturated after rain; a raised bed or a container can help where native soil drains slowly.
Good airflow around foliage helps leaves and fruit dry sooner. A slight slope or raised planting can also reduce cold-air pooling, though avoid an exposed spot that dries out quickly in wind. University of Minnesota Extension and Oregon State University Extension both emphasize full sun, drainage, and careful planting depth for home strawberry beds.
Sun, drainage, and crop rotation
Before planting into an old vegetable bed, check what grew there. If possible, avoid ground that recently held tomatoes, potatoes, peppers, eggplants, or raspberries.
Some of these crops can share soilborne disease problems with strawberries, including Verticillium wilt. University of Minnesota Extension’s planting guidance recommends a three-year break after potatoes, tomatoes, peppers, or raspberries in field production; in a small garden, use the longest practical rotation and start with healthy nursery stock.
A soil test is more useful than guessing with a bag of fertilizer. Strawberries prefer fertile, slightly acidic, well-drained soil, but exact pH and nutrient recommendations vary with local soil.
Work in mature compost when it improves structure, and correct pH or nutrient deficiencies according to the test. Do not put concentrated fertilizer, fresh manure, or a strong fertilizer solution directly against bare roots; young roots can be injured by excess salts.
Choose rows, beds, or a container
Your layout depends on how the cultivar grows. June-bearing strawberries often send out many runners, so gardeners commonly use a matted row: set mother plants roughly 18 to 24 inches apart, with rows about 3 to 4 feet apart, then let selected daughter plants fill the row.
This gives runners room and leaves access for weeding and picking. Keep the row from spreading into an unmanageable mat by guiding or cutting runners that grow into paths.
Day-neutral and everbearing plants are often kept as individual plants in a hill or raised-bed system, with runners removed. In that setup, closer spacing can work; local guidance commonly uses about 12 to 15 inches between plants, depending on cultivar and bed design.
The USU Extension home garden guide describes matted rows for June-bearing types and a runner-removal hill system for everbearing and day-neutral types. Do not blend the two layouts without a plan: close-set plants that are also allowed to make abundant runners become crowded quickly.
Plant when dormant roots can establish
In regions with cold winters, plant dormant crowns in early spring as soon as the soil is workable and not waterlogged. You do not need to wait for every frost to pass before setting dormant roots outside; the crown can tolerate cool conditions better than open flowers can, as Minnesota Extension’s home guide notes for dormant transplants.
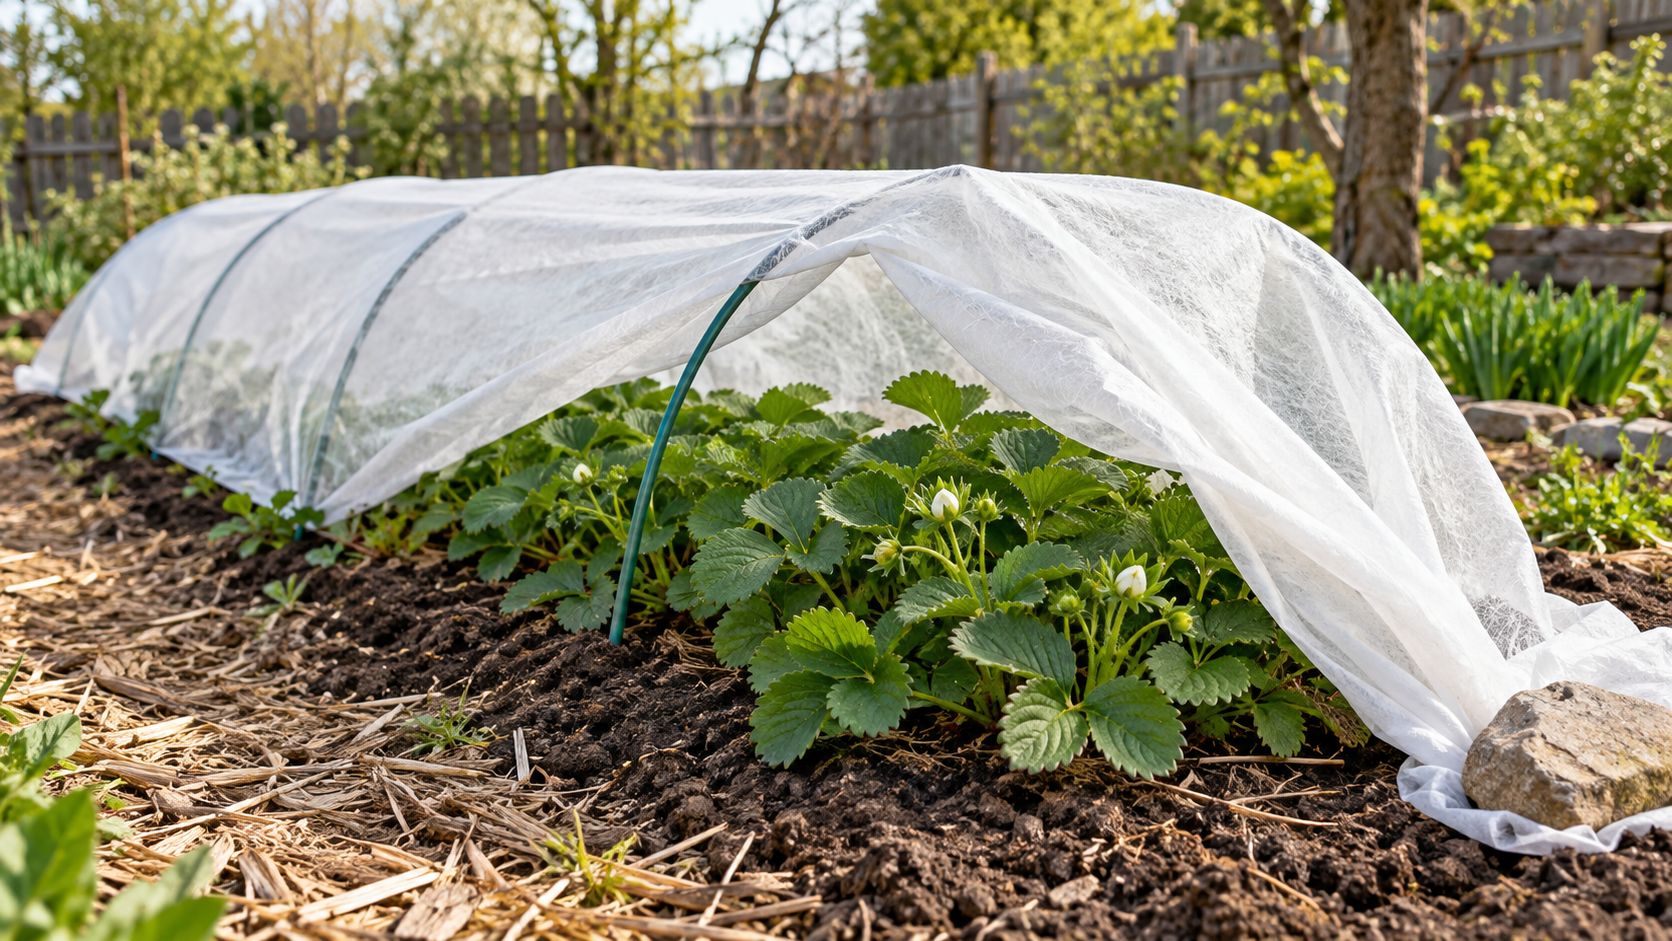
Once growth starts, however, a late freeze can damage blossoms and reduce an early crop. Keep frost cloth available if buds open before the local frost risk has passed.
Planting time changes in mild-winter climates. Florida gardeners, for example, plant strawberries in fall because their growing and fruiting season runs through the cooler months; University of Florida IFAS gives a late-September-to-early-November planting window for Florida home gardens.
In other regions, spring is the standard bare-root window, while locally adapted systems may use late summer or autumn. Follow the shipping window and cultivar advice for your area rather than importing a calendar from a different climate.
Prepare soil before the roots arrive
Prepare the bed before opening the bundle so the roots spend as little time exposed as possible. Remove perennial weeds first; strawberry crowns and their shallow roots are difficult to weed around later.
Loosen the soil enough to let roots enter without hitting a hard pan, and blend in compost if the soil needs organic matter. Avoid creating a rich pocket of potting mix surrounded by compacted soil, because water can collect at that boundary and roots may not spread beyond it.
Have a trowel, clean pruners, a bucket of cool water if you plan to soak, a watering can or hose, and temporary labels ready. Lay out the plants at the intended spacing before digging all the holes.
This quick dry run catches a layout mistake before you have crowns sitting in open air. Water the bed lightly if the soil is dusty; it should be moist and crumbly, not sticky or saturated.
Keep bare-root plants cool while you wait
Plant the crowns soon after delivery whenever possible. Until then, keep them in their original packaging in a cool, shaded place and follow the nursery’s storage directions. The roots should remain slightly moist but not wet.
A sealed, soggy bag encourages rot; roots left on a warm counter or in sun can dry quickly. If your planting day is delayed, a refrigerator can help keep dormant roots cool for a short period, but do not freeze them. If the package is already sprouting or drying, ask the supplier for its specific advice rather than assuming the plants are dead.
If you must wait more than a short interval, potting the crowns temporarily or heeling them into moist soil may be safer than leaving bare roots exposed. Keep the crown at the surface and the roots covered, then transplant carefully when the bed is ready. Dormant plants can look unchanged for a while after planting, especially in cold soil; a new leaf is a better sign of establishment than an immediate increase in size.
Should you soak strawberry roots?
A brief soak is optional and most useful when the roots feel dry from shipping. Recommendations vary: one Ask Extension response advises 10 to 20 minutes, the University of Saskatchewan suggests about an hour, and Minnesota Extension’s commercial planting notes allow a few hours. Treat soaking as rehydration, not storage.
Keep the crown and any leaves out of the water where practical, use cool or room-temperature water, and plant the roots promptly afterward. There is no advantage to leaving a crown submerged overnight.
If roots arrive pliable and moist, you can skip the bucket and keep them wrapped in damp material while you work. The key is preventing the fine roots from drying, not hitting a magic soak time. University of Saskatchewan’s gardening guidance describes soaking and spreading the roots before planting; the practical point shared across these recommendations is to keep roots hydrated and then get them into prepared soil without delay.
Plant bare-root strawberries in four passes
Work one plant at a time so you can control depth. The University of Minnesota and Oregon State Extension guides use the crown midpoint as the soil-line reference: roots below the surface, crown centered at the surface, and the growing point visible above it.
This is the part to slow down for. A hole that is too shallow leaves roots exposed to drying; one that is too deep buries the crown and can smother or rot the growing point.
Sort and trim roots only as needed
Untangle neighboring plants gently. Separate roots with your fingers rather than pulling the crown apart. Remove dead, papery leaf remnants and any broken or blackened root pieces with clean pruners, but keep healthy roots.
Long roots are not a reason to shear every plant to the same length. If a root mass will not fit in the hole without folding, trim only enough to let the remaining roots hang naturally; a straight, intact root system is better than a short bundle curled into a tight knot.
Some guides trim roots to around 4 to 6 inches, but that is a fitting aid, not a required measurement for every crown. The Royal Horticultural Society’s planting guide suggests trimming to about 4 inches if necessary, while the practical Savvy Gardening guide suggests about 6 inches when long roots will not fit.
Extension guidance emphasizes accommodating roots without bending. Use the hole, not an arbitrary ruler, to decide whether trimming is needed.
Open a hole wide enough to keep roots straight
Make a hole or narrow trench deep enough that the roots can descend without turning upward at the ends. For one plant, you can scoop a broad hole, form a small cone of soil in the middle, and drape the roots around it.
For a row, a trench lets you set multiple plants at even spacing. The hole should not be a tiny spike that forces the roots into a J shape; bent roots may remain near the surface instead of establishing throughout the soil.
If the roots are unusually long, widen the hole or use a deeper planting spade before trimming. Set the crown above the hole and check that the roots can hang downward freely.
Avoid pulling them taut, which can tear fine rootlets. If you are planting through landscape fabric or plastic mulch, prepare each planting opening in advance and make sure the roots can pass through without being pinched.
Set the crown at the soil surface
Hold the plant so its roots point down and its leaves or buds point up. Spread the roots like spokes, then position the crown so its midpoint aligns with the finished soil surface.
The crown’s lower half and all roots should be covered; the top growth point should remain open to light and air. A helpful visual check is to place a straight stick across the hole: the crown midpoint should meet the stick’s level, with roots extending below.
Do not bury the crown just because the roots look untidy, and do not lift it so high that the upper roots show. If the bed later settles, check depth again after the first thorough watering.
A crown that is too low can be rescued early by brushing soil away from the center; if roots become exposed, tuck loose soil around them without piling it over the growing point. Correcting depth while the plant is newly set is easier than trying to fix it after runners and leaves spread.
Backfill, firm, and water
Backfill with the same prepared garden soil, working it between the roots so there are no large air pockets. Press gently with your fingertips around the root zone; do not stomp or pack it into a hard crust.
Water slowly until the soil settles around the roots. Then inspect the crown again, because watering can reveal a plant that floated upward or settled too deep.
The first watering is about full root contact, not feeding. Unless a soil test recommends otherwise, skip fish emulsion or a strong starter fertilizer in the planting water.
Fertilizer cannot compensate for a crown placed incorrectly, and concentrated nutrients can stress fresh roots. Once the bed is watered in, mark the variety and date so you can compare establishment and fruiting later.
What changes in a pot or planter?
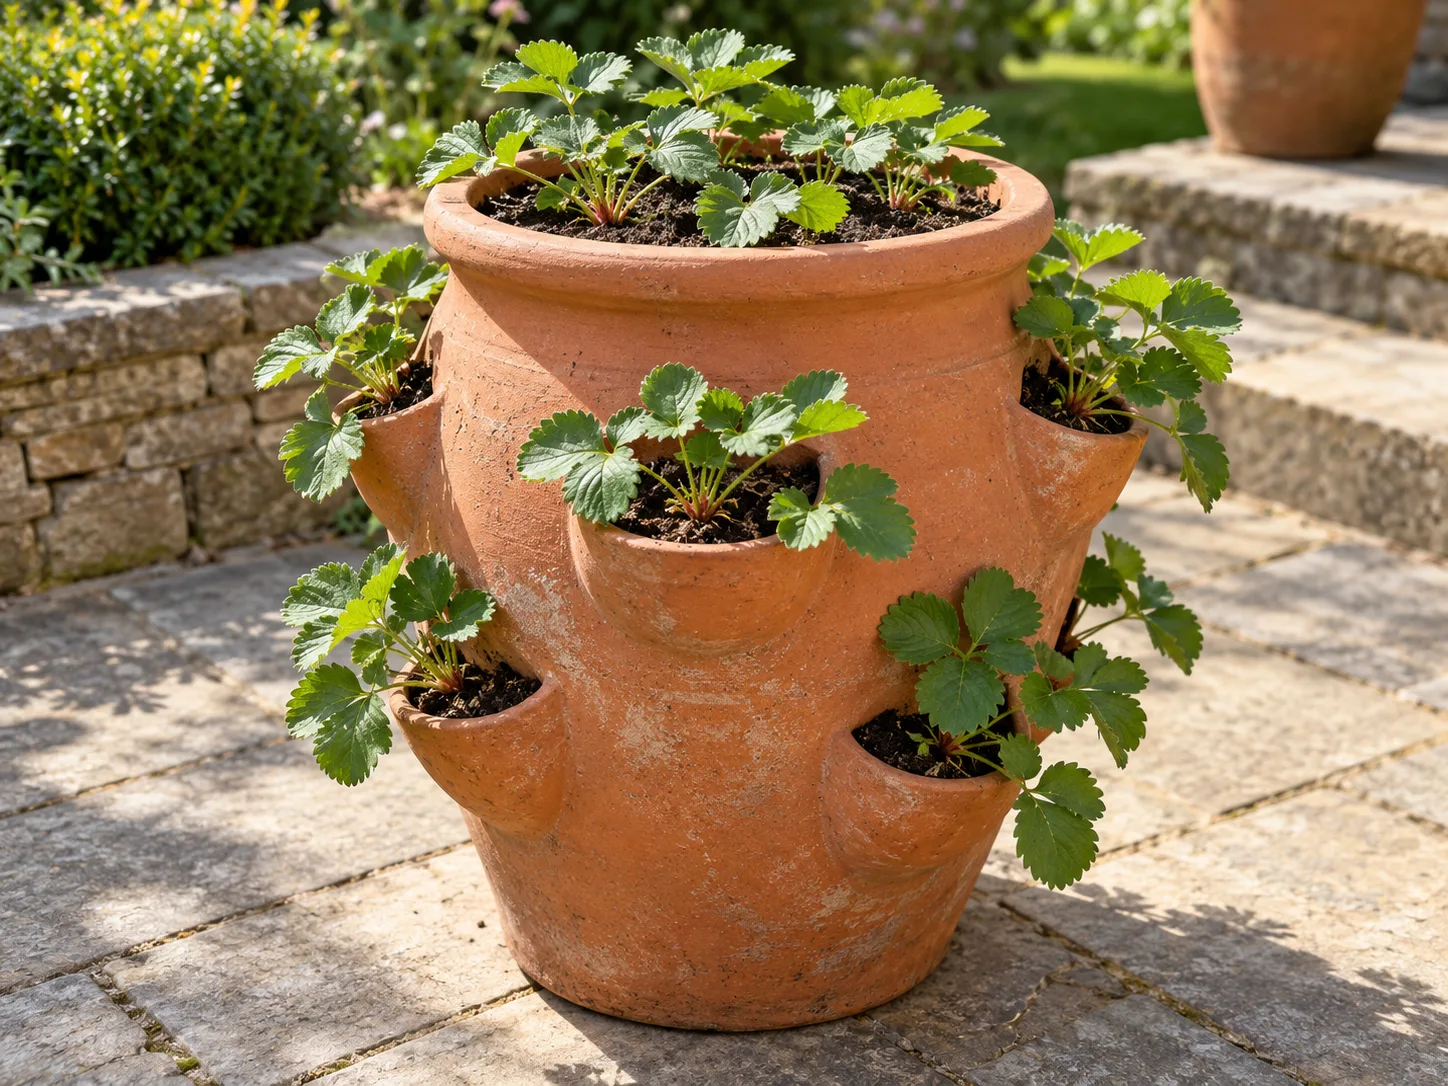
Bare-root strawberries can grow in containers if the pot has drainage holes, enough soil volume, and a sunny position. A broad trough or pot is usually easier to water evenly than a narrow pocket planter. Fill it with a fresh, free-draining container mix rather than dense garden soil.
In a small pot, plan for one crown; in a wider trough, leave enough room for leaves and air movement, with about 8 to 12 inches between plants as a practical starting range. Let the cultivar and mature spread guide the final layout.
Plant each crown at the same midpoint level as in a garden bed and fan the roots downward through the mix. Do not cram several root bundles into one pocket or bury their crowns under extra potting mix. Water until excess drains from the base, then empty any standing water from a saucer.
Containers dry faster than in-ground beds, especially in wind and warm weather, so check moisture more often. The RHS container guidance also recommends keeping crowns level with the compost surface and notes that traditional strawberry pots can be harder to maintain evenly.
First-month aftercare: moisture, flowers, and runners
During the first few weeks, keep the root zone evenly moist while new roots form. Check the soil below the surface rather than watering whenever the top looks pale. If the soil feels dry an inch or two down, water slowly; if it is cool and damp, wait.
Newly planted crowns have a limited root system and can dry out faster than an established strawberry patch. Once they leaf out, a rough seasonal guide is around an inch of water per week from rain and irrigation, adjusted upward for sandy soil, heat, wind, or containers. Oregon State Extension notes that new plants may need more frequent irrigation while their roots develop, while established plants’ needs vary with soil and weather.
Flower removal depends on the plant type, planting system, and your goal. A June-bearing strawberry in a matted row generally produces little in its planting year; removing blooms can encourage runners and daughter plants to build next year’s bed. For day-neutral and everbearing crowns planted in spring, removing the first flower cluster gives the roots and crown time to establish, after which later flowers may be allowed to fruit.
Guidance differs by cultivar and nursery stock: some growers let vigorous June-bearing plants keep a few early flowers, while others remove them to prioritize establishment. The Oregon State home garden guide distinguishes June-bearing from day-neutral/everbearing establishment, and the University of Vermont Extension similarly advises adjusting flower removal by type.
| Strawberry type or system | First-season approach | Why |
|---|---|---|
| June-bearing, matted row | Usually prioritize crowns and daughter plants; remove flowers if you want the bed established for the next spring crop | Runners fill the row, and the first harvest is generally limited |
| Day-neutral or everbearing, spring planted | Remove the first flower cluster or early flush, then reassess plant vigor | Early fruit can compete with root and crown establishment; later flushes may still provide a crop |
| Vigorous stock sold for a quick crop | Follow the nursery’s cultivar-specific directions | Cold-stored or specially prepared plants may be managed for earlier fruit |
Runners need a plan as well. In a matted row, guide a few daughter plants into gaps and remove those that cross the path or crowd the row.
In an individual-plant system, snip runners regularly if the goal is fruit from compact plants. A strawberry plant can send out many runners, so ignoring them may solve this month’s planting job and create next year’s weeding problem.
Mulch and protect the planting
A light layer of clean straw or another loose organic mulch can reduce splashing, weeds, and moisture loss, but keep it away from the crown. Do not bury the newly planted growing point under a thick blanket.
Once fruit forms, straw beneath the berries keeps them off wet soil and helps them stay cleaner. Avoid mulch that mats tightly against crowns or stays soggy; poor airflow and persistent wetness increase the risk of rot.
Winter protection is a separate use of mulch. In cold-winter regions, wait until plants have acclimated and the weather has cooled before applying a deeper insulating layer, then pull it back from active growth in spring. Exact depth and timing vary by region and winter conditions; local extension recommendations are more reliable than one universal amount.
A frost cloth can protect open flowers during a late freeze, but remove it when pollinators need access and temperatures rise. Florida’s winter production schedule differs substantially from northern perennial beds, another reason not to copy a single calendar.
Troubleshoot slow growth and failed crowns
A dormant strawberry does not need to produce leaves the day after planting. If the crown remains firm and the soil is cool, give it time and keep the root zone moist but not saturated.
Check for a visible new leaf at the center rather than tugging the plant to test whether it has rooted. When one plant fails, compare it with nearby crowns: differences in planting depth, drainage, or exposure often explain the pattern.
- The crown is buried and the center stays wet: gently scrape soil away until the crown midpoint is at the surface. If the crown is soft or dark, it may already be rotting; replace it rather than covering it more deeply.
- Roots or the lower crown are exposed: add loose soil around the roots, leaving the growth point uncovered, then water to settle it.
- Leaves wilt in the afternoon: check soil moisture at root depth. Dry soil calls for a slow soak; wet, sour-smelling soil calls for better drainage, not more water.
- A plant lifts after watering: press soil gently around the roots and recheck crown height. It may have been perched on top of the soil or left with air pockets.
- One crown never breaks dormancy: inspect for firm tissue and living roots. If it is black, hollow, or mushy, remove it promptly and plant a healthy replacement before the bed fills in.
Weeds can also make new plants look weak because strawberry roots occupy the upper soil layer and compete poorly. Pull weeds by hand while small, and cultivate shallowly between rows rather than chopping close to crowns.
A thick fertilizer application is not the first fix for stalled growth; confirm crown depth, water, drainage, and light before adding nutrients. If several plants decline in the same wet section, improve drainage or relocate the next planting rather than replacing crowns into the same problem spot.
Conclusion: preserve the crown, protect the roots
Bare-root strawberries establish best when you prepare the bed before opening the bundle, keep the roots moist, and plant each crown at the soil surface with roots fanned downward. Choose spacing for the cultivar and whether runners will fill a matted row or be removed from individual plants.
After planting, water by soil condition, protect the crown from mulch, and make flower decisions based on strawberry type and the harvest you want. If a plant struggles, check depth and drainage before changing fertilizer or giving up on the whole bed.



